Garden office self build: Garden room self build option — Oakwood garden rooms
Self Build Garden Office » How to Build your Own!
DIY Garden Office – Cheapest way to build your own
If you are looking for information on how to build a garden office or garden room from scratch this post will detail my DIY process from a clear piece of land at the bottom of my garden to an insulated garden office with electrics. The room is actually going to be a garden studio for my daughter but the construction methods and end result are exactly the same if you are building an office for yourself.
How to build a garden room on a budget
This is a DIY garden office build with recycled materials.
The project has started with the acquisition of some double glazed windows and french doors from a conservatory that was being dismantled near me. I don’t have any garden office plans, just a vision in my head which I hope to bring to life over the next few weeks. Where possible all the materials will be sourced as cheaply as possible to keep the cost down but without affecting the quality of the build.
I must clarify that I am not a builder or have any experience in the construction of garden buildings. Everything I am learning is from research of garden office designs and building methods, youtube and a just do it attitude.
Hi, my name is Roger Perkin. I am actually a Network & Security Consultant, I am CCIE #50038 and if you want to read about Network Automation check out my pages on Network Automation
This build started on 31st March 2017
Garden Office Construction – Day 1
Here you can see the piece of land I have at the bottom of my garden. A few of the windows can be seen against the fence. The building will be 12ft x 8ft. The first job is to dig some holes to put in the footings. Building a garden office by yourself is a big task, but the summer is coming and I am looking forward to some long evenings working in the garden. The spec of this building will be that of a professionally built building like one of these but at a fraction of the cost. I am not a builder just a keen DIYer – I have no plans at the moment just a size and some windows!
If you want to know how to build a garden room on a budget keep reading.
Day 2 – Outside frame completed
I have now completed the frame showing the full size of the office, I have put down four concrete blocks sat on concrete foot plates to support the frame, I still need to add another five and then fill in the joists inside the frame.
The frame is constructed from 6×2 tanalised timber held together with 4″ screws. The concrete foot plates are 6″ deep and made from a 5:1 mix of ballast and cement. The concrete blocks sit just proud of the lawn allowing a few inches under the building to allow for good air flow.
Day 3 – Base nearly complete
I have made some good progress today and am 3/4 of the way to finishing the base. I have sunk 4 more concrete blocks in the ground and now have all the supporting points covered. I have also put a central 6×2 running the full length of the base, and am hanging all the joists from it. This will give the base more strength. I have also acquired some 100m Celotex insulation from a skip at my daughters school this is going to be put in the base.
Day 4 – I got some reclaimed wood for the walls.
The wall construction is going to be made with 3×1 softwood. Pricing this up it was coming in at around £3 per length of 2.4m – I am going to need about 60 lengths for the walls a total of £180. Onto my favourite site Gumtree and found a local builder not 5 miles from my house who was clearing some 3×1 timber! I picked up 60 various lengths all over 2.4M plus some 4×2 tanalised timber for roof joists (more on that in a few weeks) for a grand total of £70. The roof joists were going to cost me nearly £80 so today I have saved myself £190! Building a garden room is turning out to be more fun than I thought – saving money as well is also a bonus!
I am now on the hunt for some more insulation.
All the wood was dry and straight so a real bargain!
I took no time in constructing the first wall. Very simply I worked out the height of the building at the back needed to be 6′ 7″ so I made a square frame and then cut 5 more pieces to make the uprights. I screwed in 3 of these and then located the first window in the frame and added the remaining uprights to either side of the window giving it some strength. A simple cross beam with some supports underneath the window and one wall is finished.
The next task is to finish the base, get some more insulation in there and lay a floor. So I am now looking for some celotex insulation and 18mm OSB3 boards.
So back onto Gumtree and I have found 12 sheets of 25mm Celotex for £5 a sheet – which is a bargain so I bought the lot. I had to chop it in half to fit into my car!
I finished insulating the floor and used 2 sheets putting 50mm under the floor which I used 18mm OSB for. Then got straight into the walls. I am using some reclaimed 3×1/2″ timber and framing each wall. For the back I constructed 3 sections and clad it with 11mm OSB before screwing them into the floor. Started progress on the roof using 4×2 tanalised timber and also enlisted some help to paint the OSB boards before the were installed facing the fence, never to be seen again!
My daughter is painting the second back wall section and we soon had all the back walls up.
The next step is to finish the front. I had acquired another window from ebay as I was looking for a window that spanned the full width of the space. I found a mis-measure window on ebay that was exactly the right size for me. This was a brand new window that had never been installed and using K Glass. This window is better than what I have in my house!
So I now have the window installed as well, the next step is to finish the roof (or at least get a covering of OSB up there) and then get the doors on.
For the roof I have 4×2 tanalised timber at 16″ spacing this will be covered with 18mm OSB and then finally an EPDM roof.
With the roof on I can install the doors – this was very simple as the frame simply screws into the wood frame of the building. The two doors were lifted into place and the hinges screwed into the frame. The building is now semi-water tight and could withstand a light shower.
Build your own Garden Room – Phase #1 complete
It is starting to look the buildings in the brochures! Can’t believe it has come this far. The next step is to get an EPDM roof on and then I am going to be working on the insulation on the inside and starting the first fit on the electrics for lights and sockets.
Check out my Perfect Laptop Desk Setup
Self Build Garden Room Cost
Total cost of the build so far is £547 which I don’t think is bad for a completely bespoke 12×8 garden office fully insulated and double glazed.
I will say that the Ryobi Drill is the best drill I have ever owned, and for only £129 it’s very good value. It has now helped me build 2 garden offices and is still going strong.
Shopping List
1 x UPVC French door plus 4 windows – (dismantled conservatory) £100
6×2 Floor Joists £99
Bullet Screws – £18
https://www. travisperkins.co.uk/Bullet-Gold-Wood-Screws-Pack-of-200—5-0-x-100mm/p/107803
Insulation – £50 (Gumtree)
Concrete Blocks, Cement, Ballast and some sharp sand – £18
60 lengths of 3×1 and 9 lengths of 4×2 tanalised roof joists (reclaimed from local builder) £70
The only tools I used to build this garden office
18mm OSB for Floor and Roof plus 11mm OSB for walls – £192
How much does it cost to build a garden office UK?
This depends on how much of the work you want to do yourself and how much DIY skills you have. You can, like I did build a fully insulated garden office with electrics, garden office for under £2000 or you can pay a company to come and do it for your from anything upwards of £20,000
Can you build an office in you garden?
As long as you keep to current building restrictions which are: an eaves height of 2.5m, an overall height of 3m (or 2.5m if within 2m of a boundary) then you can build any building in your garden for use as an office or for any other use.
Page Contents
- DIY Garden Office – Cheapest way to build your own
- How to build a garden room on a budget
- Garden Office Construction – Day 1
- Day 2 – Outside frame completed
- Day 3 – Base nearly complete
- Day 4 – I got some reclaimed wood for the walls.
- Build your own Garden Room – Phase #1 complete
- Self Build Garden Room Cost
- Shopping List
- The only tools I used to build this garden office
- How much does it cost to build a garden office UK?
- Can you build an office in you garden?
The garden home office DIY self-build guided tour
The full self-build DIY insulated garden office write-up for remote, nomad, home working, music or writing studio, home trading setup on a budget (doubling as garden room, home cinema)
EDIT: This is a re-post from an old site where Amazon affiliate links justified posting the whole write-up. They are still included as it was originally, just so you know.
It’s a lot of work for very little gain to remove them! It was originally written in 2017. The office hasn’t failed me since!
 It’s a lot of work for very little gain to remove them! It was originally written in 2017. The office hasn’t failed me since!
What’s all this about then
This post details how this DIY beginner built a garden office that’s warm and comfortable, and hopefully productive, all year round. To be used for work from home and of course for entertainment. All on a budget. Including the plastering.
If you’re one of the estimated millions of home-working professionals, with 2.5m estimated to run businesses from home in the UK alone, IMHO you should consider getting the time and money together to build yourself an office to get out of the house and have a fixed, dedicated ‘work area’. It also doubles as a cinema and garden room as a bonus.
The office described in this post is in a long garden (ex-council property, with 40x8m garden designed for post-war veggie growing!) and takes up the final 10m of length. DIY is still probably the cheapest way to get a large, warm space of this kind at present. It has stood through 2 gales (thanks for the testing, 2017 Atlantic storms!) and is fully watertight. It has also been worked in in sub-zero temperatures on oil-filled heaters, fully testing out the insulation also in its first few weeks of life.
The only thing I wouldn’t advise you to take on is of course the electrics. Leave that to a professional and be sure to cover that section to think about the project schedule and placement of sockets and cables etc. Likewise for any running water.
The guide should save you decent amounts time, money and stress by preparing you for the things that became all too obvious to me – only after I experienced them. It’ll also save you many hours researching and digesting loads of information, because I’ve already done a lot of it for you.
You can use it to draw up a design of your own, based on the basics I’ll set out, reducing (or enlarging) the size and scope of the project to fit your budget or local regulations. For instance, you can leave out the plasterboards, insulation, vapour barriers, electrics and just opt for a solar-powered (or not) garden room, saving some ~£2000 for 6×5, or saving even more by halving the size.
I’ll include every tool required for completeness, in case you’re missing anything in your collection.
This guide was going to be a book, and may still be in the future, but for now I’m posting it here to polish it up using reader feedback. Let me know if there’s anything you want to see added or amended through the contact form in the sidebar.
EDIT, March 2021: You can now get a complete guide, including photos and 3D plans, as well as a cutting and parts list, including a cost breakdown for each list item. These are available in Model 1 (6x5m), Model 1A (5x3m) and custom versions at: Model 1/1A guide and parts lists
Loading…
These are improved models over what is set out below. A joiner with 25+ years of experience has further reinforced the design and I’ve fixed some of the minor issues I had with my build (edges for plasterboards!), as well as ensuring it stays under 3m in height, regardless of how your garden falls.
Also available is a higher spec model, still under £10k, the Model 2. It includes a built-in side shed, bi-fold doors, a picture window with window-seat and much more. That’s available here: Model 2/2A guide and parts lists.
Loading…
Why build your own?
Does it make sense to make a dedicated workspace away from your house?
It all depends on your situation. If you already work from home, say as a freelancer or consultant, and/or you plan to do so for the next few years, you’re probably considering this more seriously than someone who’d like to work from home one day in the future, maybe. Or if you’re a digital nomad, travelling the world with your work, you’re less likely to need one right now, but maybe when you return home you might like a dedicated space.
My situation involves working from home full-time, as I have been since 2004. I also wanted a space for entertainment, relaxation and socialising, that was away from house. The end of the garden contained rarely seen flowerbeds and was a wide open space that was pretty much going to waste. OK, the insects, birds and small mammals appreciated it, but we’re building other spaces for them around the garden. The space we had was calling out for it.
Some backstory…
We had a child in 2014 and I managed to continue to work in the spare room for the first year, then an office 30 minutes away in the second year as things started to get noisier at home. Don’t get me wrong, I want to maximise the amount of time I spend with the little one, but work enables that, so the separation helps to draw the lines and make sure I can do my best work.
The office I leased was a newly renovated EU-funded former Rolls-Royce building cost around £150 a month. Very cheap for the comfort level and services offered. It just wasn’t ever ‘my space’. I’ve come to learn that I need my own space to be most comfortable and productive. It was also just 3x3m, which doesn’t give a lot of room for movement once the furniture is in. Located on a noisy estate with dirtbikes ripping around most days, by the time the lease was up for the first year I had decided it would be more cost-effective if I finally built a decent workspace at home. It’d help to avoid that hour’s drive in traffic every day too.
Other reasons people might build an outdoor home office, or an insulated garden building, include wanting a space to write, draw, produce music, be creative or socialise. Somewhere they can disconnect from their usual habits and routines in the house, somewhere to come and read and relax and get away from it all. Without going too far.
I ended up building a home office with very little in the way of plans. This post will help you to do the same, just with more planning and more realistic expectations than I had in terms of price, time and materials required. You are free to alter the setup at any time to suit your building and space, just be wary of each subsequent step and how it will fit into your new plan.
Mindset and perspective
Be prepared for a lot of effort. Your mindset has to remain positive because it’s very easy to be disheartened half-way through the build. Take small steps. Don’t let yourself get overwhelmed. Call on experienced people for support. Even if it doesn’t feel like it’s going forward, it is. It’s just hard to see it when you’re doing the building. It’s a very rewarding process, but you just have to power through to get to that rewarding part.
Then some sections of the project make it look like you’ve made a massive leap forward and give morale a real boost. But don’t get ahead of yourself or you can get easily disheartened when you find another weekend’s work to do. Then another, etc.
Remember why you’re doing it. Don’t let either the praise or the criticism get to you. Both ‘well done’ and ‘I would have done it this way…’ can be equally as damaging to morale. Stick to the plan. Fit for purpose is the goal. Anything else is a bonus. As a side benefit, you will most likely lose weight and build muscle if you do this over a short period of a few months. Keep up your food and drink! Take breaks. Bend at the knees. I could go on… but basically look after yourself and keep a level head.
The timescale for me was weekends for 3 months, essentially. Feel free to do more or less depending on your skill and energy levels. My skill levels are low, but energy high, so I powered through most of the days spent on it.
There are a few drawbacks to building your own office/garden room. Namely lost family time, and a requirement for a lot of physical effort. As something that will stand for years, however, offering lots of enjoyment, these short-term sacrifices can be weighed up against the long-term gain.
Benefits are the huge cost savings over buying a pre-made design, additional space, increased comfort, understanding of how to fix and repair and even a house price increase that has a much higher return than pre-made. More on that below.
Regulations
What legal constraints are their on your office building project?
As far as I have understood from my reading (and re-reading) of the regulations around garden buildings, in the UK you are allowed to build a structure of up to 30m² (with caveats – 15m2 without), at a height of 2.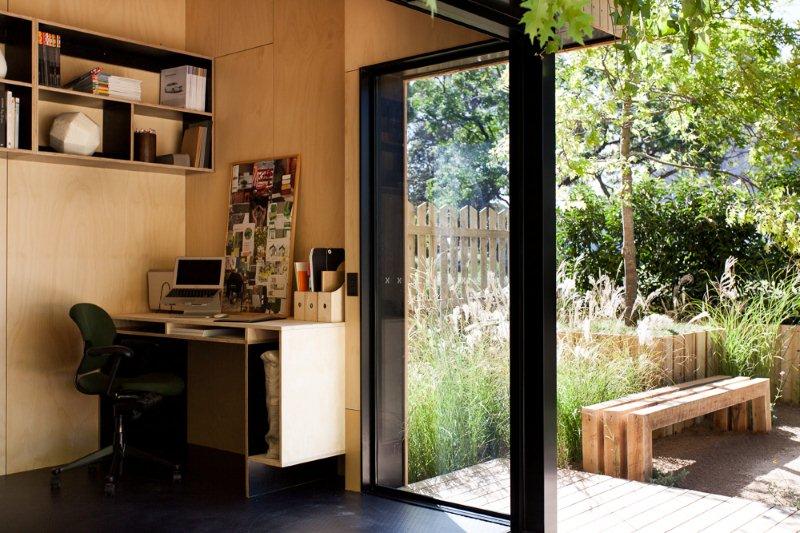 5m at the eaves and 4m to the apex of an A-frame, or 3m for a single pitch roof. All provided that you leave 1m from the boundary and the building is more than 10m away from your house and doesn’t take up 50% of the garden.
UK Garden Office or Building Regulations
Planning portal page
“If the floor area of the building is between 15 square metres and 30 square metres, you will not normally be required to apply for building regulations approval providing that the building contains NO sleeping accommodation and is either at least one metre from any boundary or it is constructed of substantially non-combustible materials.”
Outbuildings are considered to be permitted development, not needing planning permission, subject to the following limits and conditions:
- No outbuilding on land forward of a wall forming the principal elevation.
- Outbuildings and garages to be single storey with maximum eaves height of 2. 5 metres and maximum overall height of four metres with a dual pitched roof or three metres for any other roof.
- Maximum height of 2.5 metres in the case of a building, enclosure or container within two metres of a boundary of the curtilage of the dwellinghouse.
- No verandas, balconies or raised platforms.
- No more than half the area of land around the “original house”* would be covered by additions or other buildings.

For buildings closer than that, the structure is limited to 15m². No sleeping is allowed in the structure. This is for reasons similar to the distance regulations, all to do with fire safety. Anything over these sizes, or supplied with mains water or drainage, or built in front of your house, require planning. Costs for planning can exceed £1000.
For those based in any other country, the zoning or planning regulations are up to you to research for now, but you can scale up or down this build depending on what they demand. It’s a simple timber frame that can be cut to size.
Another aspect I considered important is to talk to the neighbours. It will impact on them, so explain your plans and let them comment. My neighbours on all 3 sides were amicable and supportive after a few explanations.
What does it cost to build a garden office?
How much money does it make sense to spend on the build?
As of 2017⁄18, similar spec (30m2 footprint) pre-made garden offices cost from £12,000 to £20,000 and beyond. Small rented office space can cost from £1000 pa, plus rates, to £5k and beyond.
So spending £1-3k will ensure your home office pays for itself in just a few years, compared to a rented office, with benefits to your cashflow and house price. This can be between 5 and 15% according to some estimates (source: gardenrooms.co.uk) or more conservatively, 5% according to Move with Us director Simon King, which is the same as a new kitchen or cinema room. A new bedroom could bring around 10% for comparison (source: shedworking.co.uk). That equates to a 10k increase on a 200k house, or 15k on a 300k house. Keep your spend under that amount and you’ll be up as long as house prices continue to rise or stay stable.
With a cost of £700-1000/m2 for loft conversions or £1200-1600/m2 for additional rooms (RICS data), it means your ROI is at least 5x better with a garden building like the one described here, at £125/m2 for the 6x4m internal space or £100 for the full 6x5m footprint, if it boosts your property price by 5% compared to 10% for the former.
You can of course add to and increase the spec of your office in years to come, all at DIY prices, making it a space that can grow with you.
The budget in my case: £3k, for a 4x6m internal space, with a 1x6m deck. Estimate half to 2/3rds of this cost for a 15m2 office. You are also free to replace cladding, fittings and surfaces etc. to suit your style and needs to reduce or add to the budget.
Complete cost breakdowns for the office are available at the Guides, Cutting and Parts Lists page here. Most went on new materials such as timber, cladding, fixings etc. with a good chunk on plasterboard, plaster and flooring.
The electrics cost was reduced to very little because I’d done a kind of labour exchange with the electrician when he was building his extension. He gave up a fair few days to help me, for which I’ll always be grateful. Likewise my nephew and his friend came to help set up the footings, my father-in-law to put up the walls, and a friend of the family to help for a day too. Otherwise I was mostly on my own but the help was invaluable.
Eco aspects of building a garden office
All the timber was sustainably sourced, second hand items were used where possible and no concrete was poured. The doors/windows are double glazed, with only enough for adequate light to reduce heat transfer in or out, depending on the season. Heat is retained by the thermal/vapour barrier as well as the fibreglass insulation on the floor, walls and ceiling. Ongoing energy use should be low. The structure can be removed with little disruption to the land around it.
Further eco considerations:
https://en.wikipedia.org/wiki/Environmental_impact_of_concrete
https://en.wikipedia.org/wiki/Certified_wood
When is the best time to start building?
Ideally you would start your build in the spring and have it done for the height of summer to take advantage of the weather. Failing that any time when the weather is warm will let you work outdoors in peace while you get the shell together. Unless working in the cold and wet doesn’t bother you! It’s easier to get friends out in the sunshine though…
If possible try to dedicate at least one or two weeks to the build to get it watertight. This will let you work on the inside in your own time. Bear in mind that dragging it out over weekends can be slower and cost more family time, but if that’s your only option then it’s certainly doable. I did a mix of both, starting in July, then having taken a week off work to focus on the office in August, then working back on weekends, then taking a month off the build (more or less) to work in September, then back on weekends in October.
Recap
The building I put together is 6x4m with a 1m decking at the front. It cost around £3000 and is a comfortable room that can be used all year round. Yours doesn’t have to be that size, of course and can be even half that size for quicker heating/cooling and a more cost-effective build.
Foundation options
Levelling
The space after a few days spent weeding and clearing
And from the other side, you can see a concrete garden path
What challenges are there on your land for a solid and level foundation?
A solid, dry and level foundation will ensure that your office stays standing for as long as it needs to and in any weather conditions. Taking any chances here risks ruining your hard work several months or years down the line. Even without planning permission, you still have obligations for a responsible build.
We need to think about spreading the weight, offering a solid base, drainage and footing options.
My case
I estimated that I moved around 5 tonnes of soil to bring the back of the garden down before I realised that I could have moved the front of the plot up for much less effort. Still, given the height of the front of the office it was probably a good idea to sink the whole area by 30cm so that it didn’t stand out quite so much.
Around 5 tonnes of soil
Once the land was level I then started digging out the footings. Having borrowed a laser level, I set about trying to make sure that at least my base was going to be level. I managed to use the free classifieds to find enough gravel and hard-core to fill the base of each footing. I also managed to find around 40 concrete blocks to use as the pads. I did consider using garden slabs underneath the concrete blocks but for the amount needed I figured hard-core would be the easiest solution and would avoid more frozen ground movement if partially buried below the frost line.
The blocks only cost £1 each, however, so spending time looking for free ones wasn’t totally necessary, even if it did save £50.
Rough first layout of blocks
There is a concrete garden path that runs like an L-shape across the plot so I used that as the lowest point to fit a row of footings on. From these I took the laser level and with the help of its owner, the electrician who helped so much on this build, I used a measuring tape to ensure the laser line always fell at 5 cm above the block. This is the height of the laser itself when sitting on the block. I used a tape measure off the top of the block to make sure the laser was at 5cm over the block each time. For fine adjustment, and again using an idea from the electrician, two concrete blocks were used per footing with a layer of mortar between. This mortar layer could be adjusted as required to get them level, just needing a few taps of the hammer to level, or more mortar if too low.
My 11 year old nephew and his friend helped me to mix plenty of mortar when preparing the base. We used approximately 1⁄2 a bag of cement that we had left over from work on the house several years before.
I ended up setting out the footings at 1.2m spacings left to right, and differing spacings from front to back. I figured front to back mattered less in terms of support because the flooring joists were the main supports and spread the load over them. With the thickness of joist I was using these would have even supported the floor if I’d have just had one footing at each end, as in some houses where first floor joists span wall to wall with no middle supports. So I thought 1.2m spacings would be plenty strong enough. But that didn’t take floor flex into account.
The one regret I do have is not spacing the floor joists at 600mm to make the floor more rigid and avoid the OSB layering that I ended up doing to compensate.
So I would recommend you set out at 600mm centres because it just makes more sense, and is the standard for a reason, even if it costs more in timber. It’s a better floor and might save layering OSB on top for stiffness, which can cost as much.
You also have the option of using angle brackets to secure the frame to the footings. This will depend on the weight of the materials, but in my case was not necessary. The office has stood through 3 x 50 mph+ storms (Irma etc.) and has not shifted an inch. By the time all the materials are in place it weighs a lot. But so does concrete, so attach it if you want extra peace of mind.
Alternative footing options
Piles / anchors
I did consider using PVC tubes filled with concrete/cement as piles to rest the building on but opted for the simpler pad footings. I didn’t want any timber to come into contact with the ground so the pile idea would have worked out in that way, but also involved lots of concrete, which I was trying to avoid. You might consider this if suitable for your land or building. Much easier to get the heights and levels right with your tubes before filling them than with the concrete blocks.
Concrete slab/raft
Not selected for cost, environmental and damp reasons. Concrete costs hundreds per square metre, and I have a lot of square metres to cover, takes weeks to go off, makes it hard to reuse the land and requires a course of bricks, further increasing complexity and cost. If you are certain that concrete is the right solution for you, it is the most stable and reliable base once in place. You will have to modify the plan to suit the timbers on top of your brick course and don’t forget your damp course membrane to stop water rising up from the concrete.
It may also be warmer than the footings/piles method, given that no cold air will blow underneath. But we have taken measures to counteract that using insulation and vapour barriers. It will be in contact with the ground, forming a thermal bridge, but it would depend on your circumstances as to which was warmer. In either case insulated floor will mitigate much of the risk.
If you opt for concrete, consider the water run-off situation, and incorporate a sensible drainage plan where appropriate.
Tools
To beg, buy or borrow (Amazon links):
Makita cordless circ-saw
Makita Drill and Impact Driver set
Spear & Jackson Predator hand saw
Stanley knife
Carpenter’s pencil
Stanley self-levelling laser level
Short spirit level – for electric sockets, quick checks
Long spirit level – for joists and longer spans
Long shovel – protect your back!
Wheel barrow
~90mm galvanised steel screws (from Screwfix in UK, got £3 for hundreds)
Base framing + decking
First frame joists laid
Starting to add the pre-cut noggings
Refer to the image. The dimensions are 6x5m total with 1.2m centres. Supported at several points by the concrete pads.
EDIT: This, like many parts of the original design, has been improved in the new “Model 1”. The frame, roof and openings were all checked over by a joiner of 25 years’ experience and enhancements for durability were made at very little extra cost. All further info for that design is here: Model 1/1A guide and parts lists
Don’t skimp on your joists, use 6x2in (sorry to mix metric, imperial – welcome to UK 2017!) timbers that are strong enough to support plenty of weight.
Get the timber merchant to pre-cut as MUCH as possible. Longer lengths have higher per-metre cost. It was anything over 5 or 6m in my case. I didn’t factor this in and paid the price. Definitely avoidable.
Also non-obvious – prices are non-VAT (sales tax) for nearly everything. Except items in their shop. Get timber delivery person to help bring it round the back.
Pre-drill timbers at 3 or 4mm (4mm drill bits snap less… I went through 5 or so 3mm drill bits on angle work) before screwing. This makes sure that your timbers stay flush together with the best possible fixing.
Look for galvanised or stainless screws. You will get through more than you thought. In the UK screwfix do a good deal on stainless 90/100mm wood screws but they aren’t always available and need pre-ordering in many cases.
I had help getting square and level, as well as assembling but only took a few hours with an experienced person on hand. Good measurements, timber merchant pre-cutting, pre-drilling screw holes, these all help ensure a solid and robust frame.
Membrane under base to keep wind out and insulation in
I put membrane under the frame (pinned using staplegun) and filled with insulation – I got fibre glass in my throat, eyes… everywhere. No links to cancer found in my quick search for studies online, but if you want to spend more on insulation, rockwool or foil-backed foam are good options. They cost 2-4x more, however, and because I was using a lot, it didn’t fit into the budget. More on insulation below.
Starting to insulate the floor
Would be great if someone could message me if they know how to improve this flooring insulation setup – I was worried the foil vapour-barrier would make the insulation below pointless as no air or cold could get in anyway, but without the membrane and fibreglass below it would probably be colder and find a way to blow in… Belts and braces I thought. Also water gathering on the vapour barrier was a concern, so the edges of the barrier are folded back inwards and sealed to the inside of the building, under 3 layers of 9mm OSB.
Base frame insulated – OSB next
Wall raising
Needed help for this, made poles with reverse angled screws (think snake’s teeth) on them to hold them in place while we fixed them to OSB base and to each other.
Wall frames made in a day
Walls UP
Decking done
Needed to build front into gap – most complicated wall involved 2x1m window and 1x2m door. Built all 3 side walls in one day, but it took a whole day to build the front one on its own.
Roof laying
18mm OSB roof sheathing
Left overhang of 40-50cm at back. More at front to cover deck. Eaves – think about how much room you have to overhang.
Also had help getting roof rafters up – went back to get more rafters based on strong advice about 600mm centres, as should have done with the floor. A solid roof is somewhat important!
Had help on this day from a family friend, passing up remaining sheets, giving tips on overhang etc.
Had OSB covered with membrane for a few weeks before bought steel sheets for roofing – it just about survived with being stapled down and resting bricks on it. Had a few quite serious hurricanes and it all survived that first test. I did have visions of it ripping off and floating away, but it seems tough enough!
Shell UP!
Alternatives
3mm thick rubber pond lining I’ve heard some people use.
Wrapping and waterproofing
Staplegunned a donated no-brand membrane all around. Big thanks to Alan at https://www.space4work.com/ on that donation. The wrap will stop any water that gets through the steel from wetting the OSB sheathing below.
Tools
Tacwise Staplegun
House wrap membrane
Windows and doors
Front wall framing took a day on its own, was fiddly
I decided to put doors and windows only on one side (the front) because a) we have neighbours gardens on both sides and B) I wanted to retain as much heat as I could, being in the U.K.’s climate. I also don’t mind a bit of darkness and still wanted the cinema effect.
The doors I bought second-hand from a place in Matlock from an online ad at a cost of £35. We sanded and painted them grey to match the window. They need a new lock.
The window I got from builder in Coventry who used the unit on his own house but decided they weren’t right for his kitchen, so they were only installed for six months. It was clean and in good shape and I got it for £50. It need new locks or I can just leave them because they’re quite secure when clicked closed.
Want more windows? More money and time. Consider focus on lighting instead.
I forgot to include the window sill, a separate piece, in the window opening measurement. Needed to take out a sliver of frame for that. Also mismeasured doorway and needed to sand it back quite a lot. Took many wasted hours. Measure way more than twice. And with the door attached. Don’t be cavalier about this bit. Lay them out on the ground, together, and measure carefully. Consider leaving a 5mm gap for hinges and space to move. Draught excluder can take care of minor gaps.
Window and doors in, finally, membrane tacked on
Back of window and doors
Garden office cladding options
Cladding went on quite quickly, over battens into OSB
Went for weatherboard for a cheap frontage. Time consuming to apply but neat and low-cost from the timber merchant. I attached 3m battens into the OSBvertically, then used small copper nails to tack the weatherboard on at regular intervals. I had the nails from previous work on the house – here’s hoping they don’t go green and mark the front!
Alternatives cost up to £18 per sqm, which would have cost twice the cost of the entire build to clad all round. This can be done at a later date, funds and time permitting.
Weatherboard nearly done, had to go get more as under-ordered after cuts
The decking step went on at this stage too, had to buy a few more 6m lengths when topping up on cladding
Electrics and internet
Trench for soak-away and cabling
45m roll of armoured cable used from house, aforementioned work exchange called in for wiring. This would usually cost around £500 to be done by a contractor.
Electrics and cabling went in the trench, along with land drainage which our garden needed (wrapped in geotextile so it doesn’t get clogged) so that’s just a separate additional cost of ~£60 that most folks won’t need. Our garden is at a low-point in relation to neighbours on all sides, so gets boggy in winter and holds water in storms. This should help direct and contain the water away from the lawn.
For the internet I’ve bought some fibre gear, while most people would be happy on wifi, I’m 30m away from the house. It’s still line of sight, but signal will be affected with uploads/downloads being ~1/5th of cabled speed. Ideally I want the fastest upload/dl speeds for business and trading, so dropped fibre cable (£20 – ebay) into the trench, along with CAT6 as a backup, that goes into a switch at this end and has a fibre to ethernet converter at house end.
Electricity brought through roof joists
Wiring for the electrics went through the joists, high enough up to avoid plasterboard screws later. Noggings of wood to left of the above image are for the breaker box. Wires for an LED strip 2/3rds up the front wall and the room pendant light in the centre.
Socket locations were a double in each back corner, two at each front. One next to door to be used for outdoor things, one under window for radiators, on a separate spur.
Original plan to have wall-mounted TV saw us hide a conduit for the HDMI cable behind the wall and a socket midway up the wall
Opted against outdoor sockets, as we have extension cables and a socket by the door for those rare occasions. I did an extra wall piercing for my radio antenna to be added later.
3 light connections were also put in place, for deck lighting.
Get certificate for house sale and valid insurance
Wifi/Fibre/Ubiquiti etc.
Roofing / siding
For the remaining 3 sides and roof, after using weatherboard on the front, I found box profile steel sheets for £10 a piece. ~30 of those and some edge pieces (flashing/drip edge) later – ones with rolled edges, for strength, were on offer – and hundreds of steel screws with rubber washers on later and we had a solid and waterproof roof.
Breathable membrane
I was worried it would ping and ting in the rain, but with the insulation and other layers being all directly attached, no gaps between, any little noise there is is dampened to near silence.
Starting at the bottom, overlapping at the top by 60cm, with a silicon bead or two between and along side edges
See that overlap – no rain creeping back up there!
It was in roofing and siding that I first got to meet the steel grinder, and get a feel for the different sizes of discs and pressure to apply when grinding. Cheap ones from Screwfix were great and whipped through the steel in no time. Thicker ones took a bit more ‘pushing’ and created more mess.
Needless to say, be careful on the roof. I managed to get the sheets up myself, but a work buddy would be useful here. Also don’t sit on the edges and overlaps. Easy to forget once covered…
Siding where the elec and internet arrive
A little more siding
Insulation
Filling in the walls
Wider angle
And the other way…
And the outside. Looking more complete than it is… That’s where it can get demoralising – stick with it!
After reviewing the many insulation options I came to the conclusion that fibreglass would be the most cost-effective, with equivalent R values to the more expensive foam board insulation (Celotex) or Rockwool.
It is very hard to find a good deal on large amounts of more expensive insulation, but it is very easy to find a good deal on fibreglass. One of my concerns was acoustic insulation, wanting to watch films and listen to music at high volumes without disturbing neighbours, and fibreglass also fits the bill here, deadening deep low sounds with ease. More so than foam insulation.
The major downside with fibreglass is that it is an absolute pain to work with. While easy to cut and position into place, the fibres get absolutely everywhere, covering your clothes and body and leaving you feeling like you’ve fallen through a stinging nettle patch backwards a hundred times.
I did look into whether there was a link to cancer after having a decent cough after working with it, but any studies I found showed no link. And this is studying people who’d worked with it on a regular basis. But do wear a mask because it really does stop the coughing. Or spend more of your budget on the foam or Rockwool type insulation.
For the roof insulation, when it wasn’t quite pressure-fitting into place, I used long screws set at angles to keep it in place. It wasn’t perfect, but it worked. Also consider wrapping wire around screws or using netting.
Tools
Celotex
Rockwool
Fibre glass – From timber merchant
Netting
Vapour barrier
Space foil time
In my efforts to science the heck out of the build, I also looked into cost-effective methods to reflect heat back into the building. The question of vapour barriers can get quite involved, depending on your local climate and use case for the office.
If you are in a climate that is humid or wet outside, the goal is to keep the humidity out side of the building, but still let any internal humidity leave. Once you put a solid hundred percent humidity proof barrier in place, the risk is that you can create problems with condensation forming on the warm side of the barrier. This can lead to mould and damage.
The benefit is that no cold air can blow in and all of your nice warm air stays in. It’s just a question of where to position the barrier to avoid condensation issues and maximise heat retention.
Tools
Foil vapour barrier
Foil tape for joints
Alternatives
If you have opted for foil-backed foam insulation then your vapour barrier is built-in. If you are thinking of using rockwool or fibreglass then your options are either to buy rolls of vapour barrier or to use foil backed plasterboard. Both come at a cost, and I think the vapour barrier rolls are more effective but slightly more fiddly.
Rolls of vapour barrier come in different quality levels. Having been sent the wrong size from a local supplier, I was forced to buy another roll and went to look for the most cost-effective on eBay. The one I ended up buying was £30 for 50m but was only single sided and was very thin compared to the higher quality one I had first bought, which was reinforced double sided and very thick.
The original supplier ended up sending out a full roll of the correct size at no cost, but it took them too long and I ended up using the cheaper roll.
Tips
Leave long enough flaps of vapour barrier over the base edge. I thought I had, but by the time I’d folded them back under the wall frames there was not enough for a consistent seal. Fortunately the frame sits tight, with plasterboard/plaster/skirting in front, but I’d have preferred to have been able to tape over that too for completeness.
Plasterboarding or drywall
Walls were no trouble for one person, ceiling needs two
If you can get a plasterboard lift/hoist, do that. It’s so hard to get the boards lined up by hand with all the cutting and slight mis-measurements on a build like this. Use the lighter ceiling boards, don’t try to cut the big 12mm ones like I did. They weigh 22kg each and when they start to slide out of place from your hands or back… bad times. Go for lighter boards and use a platform or lift of some kind and your next job, plastering, will thank you. Going over gaps is a PITA. More tips in the plastering section below.
Got there in the end, then jointed the gaps
Missed a trick with studs on edges, caused problems with plasterboarding and potentially going through electrics as I fired nails in at angles into timber. Fortunately electrician put cables high enough to be clear. All tested on an RCD and individually.
See the makeshift supports on the far wall? Make sure you have a joist for your boards to go into… oops
Screws through electrics – real risk. Electrician had put double circuits on each, just for that. Didn’t end up needing it. I thought we might though with the trouble I had with the plasterboards.
Plastering
The original plan was to call on a plasterer to get the job done in two or three days once I had boarded the inside. The plasterer I spoke to quoted for at least three days labour plus costs and wasn’t available until after Christmas, which was three months away. Everyone was trying to get their plastering done before Christmas, he said.
So I went back to my Plan B which I’d seen at the DIY store Wickes; tubs of premixed plaster. I did a little research online and ended up on a plasterer’s forum where several reports of its use were very positive and many of the forum members thinking it best to keep quiet about the product! Views on the Wickes site were also positive, with everyone saying how easy it was to apply. So I dropped by and picked up five tubs of Knauf Pro-Roll.
Result of 3-4 days of plastering. You can see the thicker areas still drying. Took a few days to go off everywhere.
I used the Lite version, in the red tubs. It cost £25 per tub. In the end I needed three more to add to this, given the size of the room, so ended up spending £200 on plaster. I was impressed with the finish and while some of the edges need neatening up and trim applying, the job was more than satisfactory.
The other side…
We have more trowell marks on walls in our home done by a professional plasterer in plenty of places. Weird thing is, I recognise the types of marks – edge of trowel, jittery row of lines… all stuff I tried to iron out that our pro in our home didn’t!
I still need to fill and sand certain areas, but I’ve been working in the office for over a month now and have been focusing on furnishings and fittings ever since. I might let some of the blemishes stay where they are for now. As it dries to a brilliant white, there has been no need to paint it either, so that was a saving in time over hiring a plasterer.
The downside of doing my own plastering was a lot of time and effort spent away from the family. It was probably 3 to 4 days to cover the whole inside. It was also the most tiring part of the build, especially when finishing on the ceiling. But I definitely felt more trim after putting the effort out. Smaller buildings will require less work on this front, of course.
A few tips for the plastering job
Make sure your plasterboarding work is neat and you have minimal gaps because these take a long time to smooth over, use a lot of plaster and can just about still be seen even after four or five passes. Even with scrim being used.
Pay close attention to the spacing between your roof rafters, as you can soon start to drift over longer distances when plasterboarding and end up with the board that doesn’t have a final rafter to fix into.
Make sure that every corner in the walls and ceiling offer a joist to the plasterboard. It’s very frustrating to have to use nails at 45° that have no guarantee of holding the 22 kg in place, and often just go right through it. I could rely on the fact that the edge boards had two joists to grab at least, with a so-so third at angles.
Hire a plasterboard lift if possible or call on more than one extra person. My friend Pete helped me to raise the ceiling boards using two ladders and a T-bar we made up. We struggled at times. Also consider the smaller thinner plasterboards for the ceiling, they will save you much heavy lifting and holding.
If you opt to use the Pro-roll then use a roller to apply an even and thick coat one board at a time and then trowel left-to-right until nearly smooth. Then let it go off for 15 or 20 minutes and come back to give a final finish. This will save some of the chasing of trowel marks that is so easy to get sucked into when the product is still wet. You can always sand off any remaining marks later, which is quite effective.
Flooring
The floor went down quickly, with no glue needed on this kind
It added stiffness and insulation, as well as looking neater
Got a deal on a reasonably attractive laminate at £8/sqm. Laid the opposite way to OSB floor, trying to get some stiffness and for the least cuts. Something like 20 rows of 4 boards, came in packs of 9. 6×4 area cost £180 to cover, plus £15 basic white foam underlay (plus another I was given). Lay in a day, no glue required. You cut the end piece and use the cut-off to start the next row, giving you a stepped pattern so all the joins don’t end up lined up.
The decoration team soon moved in
Dropped skirting on top of that. £1 a metre, pre painted MDF.
There is a tiny bit of give in some areas of the room where my spacings were wide, but you don’t really feel it with the laminate on it.
After dumping all the office furniture in…
Aaaand we’re in, start of November, in time for Christmas. After starting in July! The images I took are all timestamped, so I can see it was mostly weekends for those months, with one month ‘off’ to work, so 3 months of weekends you could say it took. A few full weeks of work with 2 people would be the equivalent.
The projector is now ceiling mounted, but this was test mode
That projector actually fills a whole wall if used from the other side, but at 3m away it fills a 100in screen. It’s only a cheap, entry level one, but sufficient for my needs. When 4k projectors become affordable, I’ll look at picking one up, but until then this looks very good and still gives that cinema experience. For £65 – currently on offer for £55. I used a 10m HDMI cable which needed rods and a few hours help from the electrician/wizard friend who helped with that and the power to it.
Tools
Laminate flooring – just an example
Flooring install kit
Foam underlay
Vapour tape
Alternatives
Resin covered OSB (tough to keep clean while building though). Tiles. Carpet. Engineered hardwood… Your call!
Lighting
I used an LED strip, 5m, offering 100s of colours. Red for stargazing (retain night vision) and orangey-red for warm backlight in the winter evenings.
I built a little platform for it to sit on, mounted on the wall. Nothing special but spreads the light out nicely.
There is a pendant light, but it gives a harsh and ugly central light. Then there are lamps in the corners that are much warmer.
Tools
LED 5m strip
Heating
Some options:
- Oil-filled radiator
- Infrared
- Stove or wood burner
I’ve ended up opting for oil-filled radiators after testing an infrared heater for a few days. Oil-filled does the job of heating the room up much better.
I would have liked to have built in a stove, but I just couldn’t bring myself to introduce fire into a timber building that children will most likely be playing in a fair bit in the future. Fumes, fire risk… I’ll pass for now, unless I find a portable burner or stove unit that can vent out the window.
Below are some examples of the insulation and radiator in action, on a snow-day for some extreme measurements. By our standards anyway – it doesn’t snow too often in this part of the world!
Snow day notes
Snow day 1: Around 0C outside, was 5C in the office with the small 500W heater having been on for 30 mins, so only just kicking in. The temp rose to 17C by 2pm with 1.5kw of oil filled. Should have just put the larger radiator on timer from 7am to speed that up.
End of snow day, 10C in the office at 11pm (11th Nov) and I’m leaving on the small heater now for the morning. So it loses heat at 1 or 2 degs an hour in this sub zero temp. Not too shabby!
Snow day 2: It was 8.6C in the office the following snow day morning after leaving the smaller 750w heater on from 11pm-9am. Might have helped to keep the worst of the cold out, but not too useful. Was -5C and beyond in the night though.
Back to 10C after 30 mins of 1.5kw also. Gives around 1.5 deg per 30 mins, or 3C per hour in these 0-5C outdoor temps. Speeds up as day goes on. Should be 16C in by 12pm. At 12.15pm it was 16.3 C. Another hour and we’re at room temp 🙂 Seems the 1.5kw heater makes the difference. 2.10pm and 19.4C…
Snow day 3: next day (13th Nov) starts at 10C in here at 9am, small one on only since 7.30am, should be up to room temp much quicker. 5C outside.
Now 12:30 pm and the office is 17.3, just the big one on for last 2 hours.
Cold day 4: Next day (14th Nov) 11C at 9.30am after only small one on. 3C outside.
Warmer 10C day, up to 22C by 12pm from 9.30am 1.5kw heater siwtch-on.
Warmer day (21 Dec) at 11C outside, office was 13. 9 at 9.30am after 2 hours of 500W heater.
Tools
500W oil-filled radiator
2KW oil-filled radiator
2.5KW oil-filled radiator
We bought a blind from IKEA, tupplur, for £24. This is a blackout blind just over 2 m wide and it means I can use the projector during the daytime as well as provide a bit of privacy or sun blocking as required.
We did want the grey version of that blind, but it was sold out the day we went, or rather one was left but somewhere in the store. Didn’t realise I could buy it from Amazon at the time!
Rebecca made a curtain from old suit fabric that we hang on a curtain rail that we already had for a bit more insulation around the doors.
Projector – the entry-level Elephas we got works very nicely, and cost £65. Now it’s currently £55 so I’m hoping the top of the line models will come down soon.
Tools
Ikea Tupplur blackout blind
Elephas LED projector
Air conditioning
Consider a portable unit for summer.
Tools
Air conditioner
Solar
Not done yet, but will set out how in another post if interest. Especially if you’re just using a shed or workshop. Or you could power a greenhouse heater if growing any plants in it.
Alternatives
Building your own from scratch can take months, so if you have the savings already and want to get working quicker, consider the following:
Buy one
Budget (£3-5k) ex-display from any of these companies (will be small)
Mid-range (£5-10k) – DIY kits
Top end (£10k+) – High end, high price!
Consider classified sites also for second hand sheds if you have good access to your garden to move it in in pieces. Ebay, preloved, etc.
Non-offices
Caravans in reasonable condition can be insulated and lined. No planning permission required. Much less work, much less money. Not the most attractive things, but functional.
Structured Insulated Panels, or SIPs, might be an idea for future builds – look into these as they become more accessible. Cheap, light and well insulated, you could have your build done in no time.
The end
Thanks for reading! Now grab some tools and get building 🙂
You can also now buy the complete guide and parts/cutting list for the building at the Gumroad page, if that saves you time! There are 3D plans, cost lists, walk-throughs and all you’ll need there.
Let me know via the email link below if you have any suggestions or questions. I
’ll add anything that’s asked a few times or seems important to the post.
PS – This post was featured over at shedworking.co.uk, where you’ll find many other examples of similar buildings!
PPS – The post had a little wave of press coverage in March 2021, with Country Living, The Express, Real Homes and a few smaller sites picking it up. Hopefully that’ll lead to a few more visits here, with more self-builds going up!
Thanks for reading. I do translation from French and Swedish to English, so if that’s useful to you, feel free to connect and message me on LinkedIn or Twitter.
Next: 75+ of the best translation, language and linguistics blogs to follow
Previous: Document Translation from French to English (professional quality)
Inspirational garden office ideas – Grand Designs magazine : Grand Designs Magazine
Buildings
Considering a garden office? These self-build projects are inspirational
By Caroline Rodrigues | 30 June 2021
Working from home in a busy household? Then a bespoke garden office may sound pretty attractive right now. Check out these garden office ideas to inspire you to take the plunge with a self-build project…
Working from home is a concept under the microscope right now. While many businesses have been moving towards flexible and remote working options for some time, enforced time spent doing so due to the coronavirus pandemic is sure to raise a wider conversation as more workers and businesses experience it first hand.
If it’s something you’re seriously considering post-social distancing, finding room for an office in your home if you don’t have one already may be top of your agenda, and self-building a garden office is an attractive solution, helping to maintain a separation between your work and home life.
For inspiration as to just how a garden office might work for you, take a look at these 10 garden office ideas…
1. Pink plywood box office
This garden office was built as part of the remodelling of a London flat. Pink plywood forms the walls, ceiling, desk and storage units, while a large corner window above the desk provides views of the garden and towards the main house. The studio cost £36,000, not including the consultant fees, from RISE Design Studio.
Photo: RISE Design Studio
Photo: RISE Design Studio
2. Cork-clad studio
Spanning almost the entire width of this north London garden, architects Surman Weston created a shared work and studio space with a pocket door that opens up the space to the outside. The exterior of the block has been clad in textured cork sheets, while a wild flower planted roof also houses a large rooflight to fill the space with natural light.
Birch plywood lines the interior walls and floors of this garden office. Bespoke furniture has been crafted from the same material and cantilevered from the walls. It cost £45,000 to design and build.
Photo: Wai Ming Ng
Photo: Wai Ming Ng
3. The feathered edge timber structure
This bespoke garden office studio by Mustard Architects is in the corner of a north London garden and was designed to wrap around a silver birch. It is clad in western red cedar, which will grey over time, and the top has a feathered edge to avoid a hard line. Split windows offer views across the garden, as well as plenty of natural light – a must for the owner, who uses this space to paint. It cost £75,000.
Photo: Tim Crocker
Photo: Tim Crocker
4. The garage conversion
Architect Neil Cooke converted his garage into a garden office at his home in Bessacarr, Doncaster, extending the building to form the porch and installing a new roof. Once new framing was fitted with marine ply, a wrap of EPDM rubber roofing was applied, and well-seasoned white oak laths were added, spanning right across the glazing. The 19 sqm office cost £48,000. Full planning permission was required as the structure is 3m high externally to create more head height (only 2.5m is allowed under permitted development).
Photo: Andrew Kelly
Photo: Andrew Kelly
Image: Photo: Alan Williams Photography
5. The Shoffice
A sculptural design by Platform 5 Architects shows just how far the limits of garden buildings can be stretched. The 7 sqm Shoffice (where shed meets office) is formed with two steel ring beams, timber ribs and a stressed plywood skin. We just love this garden office idea. It cost £67,845 and is located in St John’s Wood, London.
The Shoffice garden office in St John’s Wood, London, by Platform 5. Photo: Alan Williams Photography
6. The Light Shed
Architect Richard John Andrews set himself a brief to design a cost-effective 16 sqm garden studio for his practice in east London, self-building it with his assistant in 21 days using a timber-frame modular system with sheets of plywood. The garden office is clad in lightweight corrugated fibreglass panels and topped by a polycarbonate roof. The project cost £12,500.
Photo: Chris Snook
7. The customisable timber-frame
Crane Garden Buildings has a number of pre-designed garden offices to choose from, all of which are fully customisable. The Holt Studio is fully insulated, lined and double-glazed. This W3.6m x D3m x h3m version with ivory matchboard walls and ceiling and an electric pack with a heater for year-round use costs £19,620, including delivery and installation. There are also options for flooring, roofing and Farrow & Ball paint colours to customise the cabin further.
Photo: The Holt Studio by Crane Garden Buildings
8. The eco-friendly shepherd’s hut
Created using low-carbon materials and processes, Out of the Valley’s eco-friendly cabins put the environment first. They are built using wooden panels and plant-based insulation, and completed in larch with a natural silver or black finish. The 9.88 sqm Nomad Studio comes on a mobile chassis with wheels – perfect if you want to shift your office for maximum sun in winter and shade in summer – or a more static skid chassis and costs from £39,000.
Photo: Out of the Valley
9. The Victoria glasshouse
Inspiration for this Edinburgh studio came from the dilapidated Victorian glass house it replaced. WT Architecture maintained the same footprint, building new Douglas fir timber frame ribs that extend beyond the original brick walls, allowing for a deeper desk pushing out into the garden. Overlapping glass to glass details were used in the eaves inspired by the traditional fish-scale lapped panes. This style of garden office is perfect for cooler climes.
Photo: Gillian Hayes
Photo: Gillian Hayes
10. The modular studio
Field Studio Architects set up Mökki modular studios using off-site fabrication techniques and CNC cutting technology for speedy manufacture with almost zero wastage. Based on three basic shapes, the studios can be configured in various ways. The structural panels and windows are in precision-cut spruce plywood, and the external cladding is an open rainscreen made from Siberian larch. A 6.3 sqm Mökki costs £13,200 including foundations and installation.
Photo: Mokki modular studios
Have you got some great garden office ideas? Let us know by tweeting us @granddesigns or posting a comment on our Facebook page
How to find extra space for a home office
4 desk design ideas for working from home
5 clever ways to gain an extra bedroom
More in Buildings …
SCROLL FOR MORE LIKE THIS
Stunning DIY Garden Room Kits
Create Stunning Additional Space with an Efficient, Insulated Garden Room; Designed by Us, Installed by You
What is a DIY Garden Room Kit?
We offer a range of self-build garden room kits for the DIY enthusiast or competent installer, which we designed to meet the needs of homeowners who aren’t in a position to wait for an installed garden room, office or studio.
Our DIY garden room kits utilise a forward-thinking fabric first and modular approach and are manufactured at our purpose-built facility in Gloucestershire.
Panel size and weight have been carefully designed to make manual handling and assembly easy, even in areas of tight access, which in turn helps reduce on-site labour requirements. The prefabricated panels are manufactured using high quality grey EPS insulation and FSC certified and graded timber, to exacting standards.
The result is a building with high levels of thermal performance and air tightness, minimal site assembly time, reduced waste and a high quality contemporary finish that will continue to perform year after year. DIY garden room kits can be selected from our ‘off the shelf’ set size range or by using our ‘made to measure’ service for individual projects requirements. A full set of instructions is supplied with each room. All sizes are internal dimensions to the SIP panel.
Our DIY Garden Room Kits
Case Studies
Our Group Products
Information & Guidance
We have a range of technical data, installation guides and useful information on building with SIPs, to help guide clients, architects and builders.
Find out more
If you would like to find out more, discuss a project you’re planning or request a quote, please call us on 01452 840284 or email us at [email protected].
Alternatively, please complete the form to the right and we’ll be in touch.
If you’d like to visit us, our showroom in Gloucestershire is open from 10:00am until 4:00pm Monday to Friday and by appointment on Saturday, where we are on hand to discuss your plans for creating the additional space you’re looking for.
Reviews
Really, really pleased with it
Really pleased with it all and enjoy sitting and taking in the view, glass of wine in hand of course! We did new decking immediately outside of it, in order to open the bi fold doors fully as an extension to the room. All in all, really, really pleased with it.
Such excellent service!
My wife and I just wanted to thank Richard, yourself and the rest of the team for all the support, ad hoc technical tips and advice that we got whilst building our Garden Room. I know that I visited the show room 2 or 3 times and Richard and the team, even though quite busy, showed us every courtesy and help. Such excellent service! I have finally completed the build of our 3 x 5m Garden Room, and we are very pleased with it.
The kit was fantastic!
Here are some pictures of my project I completed about 2 months ago, the kit was fantastic!
It’s such a good design!
We love the room and it was so easy to build. It’s such a good design!
It’s perfect and we love it!
We use it as a gym and use it most days, it’s perfect and we love it!
Great customer service and I’ll definitely be using you guys again.
Just wanted to email to thank you and your team. Great customer service and I’ll definitely be using you guys again.
The driver was a really nice guy and very helpful. The build went really well and the customer was very happy.
I am very pleased with everything
I have completed the build of my DIY room that I purchased from you and I am very pleased with everything, looks really good.
Data Sheets and Guides
Garden Room Installation Guide
View
Garden Room Kit Data Sheet
View
Outbuildings Summary
View
We need your consent before you can continue on our website. If you are under 16 and wish to give consent to optional services, you must ask your legal guardians for permission. We use cookies and other technologies on our website. Some of them are essential, while others help us to improve this website and your experience. Personal data may be processed (e.g. IP addresses), for example for personalized ads and content or ad and content measurement. You can find more information about the use of your data in our privacy policy. You can revoke or adjust your selection at any time under Settings.
How to Build a Garden Home
Log In
Share article:
Login/register to save Article for later
Home Design Advice
Whether you want a quiet home office away from any distractions, a pool house or a fully fledged annexe, a garden room might be the answer, says Jane Crittenden
by Jane Crittenden
4th November 2020
Garden rooms are an affordable and effective way to create extra space if you don’t have a spare room, or if extending or moving isn’t an option.
You can use a garden building to create a home office, studio, workshop, games room, gym, teenage den, swimming pool cover or even provide extra accommodation.
Garden room trends
The push towards maximising every space is making homeowners view their gardens in a different light.
“Previously, people would see their outdoor zones as areas that could only be enjoyed if the sun was shining. Now there’s a trend for creating complete living spaces without the hassle of getting obtrusive building work done to the main house,” says George Bannister from Blackdown Shepherd Huts.
Read more: How To Create a Home Office in Your Garden
Craig Riley, from Green Studios, has seen growth in this area, too, where people want to create year-round accommodation rather than something for occasional use.
Constructed with thermally efficient glass, this bright and airy garden room, created by IQ Glass, blurs the distinction between inside and out
“The garden room works well for those with elderly parents who want to give them independence but also be on hand to help and support them,” says Craig. “It can also be used by children coming back from university who can’t afford to make the first step onto the property ladder.”
Manufacturer Pod Space says that garden rooms are growing – it’s been asked to design much larger buildings this year (upwards of 60m2).
Meanwhile oak frame expert The Oak Designs Company notes that a covered terrace with an open kitchen-dining area is becoming a popular option, allowing outdoor entertaining to continue into the cooler months.
Structural options
Garden rooms can be simple wooden summerhouses or sophisticated mini eco-homes – complete with insulated walls, energy-efficient windows, plumbing, electrics, underfloor heating and energy generation through an air source heat pump.
They come in all styles and sizes and can be built in masonry, timber, structural insulated panels (SIPs), oak, steel frame and glass.
|
Designed by Arboreta, this green oak building is clad in weatherboard for a durable garden getaway. Inside, a kitchen, living area and bathroom sit beneath an impressive vaulted ceiling. The structure also has the flexibility of becoming a self-contained annexe in the future. More about Arboreta |
 Full-height glazing ensures the space makes the most of the plot’s natural light.
A prefabricated modular timber system allows most of the building work to be done off site, as with the rooms made by Pod Space.
Its structures are clad in Siberian larch or Western Red cedar, which respond well to our changing climate. The buildings are highly insulated, with double-glazed windows from Scandinavia.
There’s the option to have a green roof, too, so that your structure can really blend in with the rest of the garden.
The smallest Micro Pod is 2.5m x 2m (costing around £13,188) but as they’re custom made to order they can be supplied in any size. The pods can also be joined together with a steel and glass link.
A SIPs build offers high levels of thermal insulation and air tightness, with companies like Green Studios aiming to build the thinnest possible walls to maximise the internal space available.
The walls come plaster-skimmed and painted as standard, with LED lighting and patio doors that are A-rated for energy efficiency.
Rooms are generally finished in sustainable cedar but the firm also offers a rendered finish, brick slips, Scottish larch cladding and cedar shingles.
The Studio model is 3.6m x 2.4m and costs around £15,995. The company recently built a two-bedroom live-work space in its 12m x 6m Lodge design for just under £100,000.
The garden rooms undertaken by architectural glazing firm IQ Glass are bespoke; glass panels can be made up to 6m x 3m to create a large garden room (£1,000 per m2 for slim-framed sliding glass doors).
|
Ceramic artist Dorienne Carmel and her husband Alan breathed new life into a Victorian gatekeeper’s lodge and created a sculptured garden to showcase her work. Towards the end of the year-long project, the couple negotiated a private sale of landlocked grounds with their neighbour to build Dorienne’s art studio and an adjoining garage to use for storage. A pond was created in the corner that looks like it’s always been there; the shell was another clever find from a reclamation yard. read the full story |

Highly thermally efficient double glazing, with a low-E coating (which reflects radiant heat back inside) and solar control layers that can be applied to the face, mean that there’s no need for your room to feel like a greenhouse in summer.
Designing a garden room
In terms of design, you can either use the bespoke services of the in-house architectural specialist or choose an off-the-shelf product. In both cases you should consider size, the orientation of the glass, access, number of window openings, heat and – most importantly – how you’re going to use it.
For example, you may be best off with a bespoke design if you need a reinforced floor for a workshop or tall ceilings if you’re creating a gym.
Also think about how you’re going to use the room in the future. Do you need a TV or internet connection? Will you add a bathroom later on? “To make the most of the room, you should ensure that you can use it all year round,” says Opinder Liddar from Lapd Architects.
Off-the-shelf designs can be equally flexible. Garden rooms come in a whole range of specifications (including plumbing and electrics), styles, finishes and sizes, starting as small as 2.5m x 2m and reaching as large as 11m wide.
In most cases garden rooms come under permitted development and therefore no planning permission is required.
However you will need to do your own checks. Make sure the height, location and size of the garden room is allowed in relation to the size of your home and plot. For more advice, see www.planningportal.gov.uk.
Planning & Building Regs
Planning will apply if the garden room is in the grounds of a listed building, national park or conservation area. Typically, shepherd’s huts don’t need planning because their wheels classify them as non-permanent structures.
Garden rooms of up to 30m² are usually exempt from Building Regulations (although many companies still build to these standards) – unless it is to be used as a dwelling or sleeping accommodation.
Read more: Applying for a Lawful Development Certificate
Building your garden room
Garden rooms are often custom made to order, so allow at least 10-12 weeks from manufacture to installation.
Once the foundations have been laid, the structure can be supplied in a number of ways depending on how much you want to spend and how involved you want to get with the building side.
Fully fabricated structures arrive ready to crane into place; prefabricated modules are assembled in your garden; or the whole room may be built from scratch on site.
Firms are often flexible, offering a fully installed package so you don’t have to do anything; delivery of the framework only; or a complete self build kit, making it possible for you to have a go at building something yourself.
It’s also worth noting that if you move house, some garden rooms can be dismantled, so they can come with you.
Photo (top): This shepherd’s hut from Blackdown Shepherd Huts has been designed as living space, with a fully fitted kitchen and bathroom
Photography
/
Published
4th November 2020
You may be interested in
Garden rooms – Build an affordable garden room from a ready-to-build kit
Free shipping over 99 GBP (excl.
 N.Ire)
Fast delivery
Questions? Call: 01625 682250
Weekdays 9am-5pm
Contact us
About Polhus
To checkout
/ Garden rooms
Are you thinking of buying a garden room? In our wide range, you’ll find both knot-timber garden rooms as well as garden rooms in kits that you can easily build yourself. Polhus has buildings that make excellent guest houses, teenage homes, hobby cottages or a small garden house. Our garden ro
Read more
FILTER BY SUBCATEGORY
Garden room, functionalist style
Garden room 15 m² (161 ft²)
Garden room 10 m² (108 ft²)
Special offer!
Valid only up to and including 30/09
Garden Office Hjalmar
13. 46 m²
46 m²
£6,592
£8,789
Read more and order
Special offer!
Valid only up to and including 30/09
Garden Office Selma
9 m²
£4,694
£6,259
Read more and order
Garden Office Linus
9.9 sq m (106.6 sq ft)
£4,990
Read more and order
Garden room Caspar
9.93 sqm
£3,690
Read more and order
Garden office August
9.6 m², fully assembled
£17,879
Read more and order
Special offer!
Valid only up to and including 30/09
Garden Office Magnus
8. 6 m²
6 m²
£2,762
£3,069
Read more and order
Special offer!
Valid only up to and including 30/09
Garden Office Sara
9.9 sq m (106.6 sq ft)
£4,130
£4,589
Read more and order
Special offer!
Valid only up to and including 30/09
Garden Office Julian
10.95 m²
£3,861
£4,290
Read more and order
Special offer!
Valid only up to and including 30/09
Garden Room Hedvig
9.2 m²
£3,510
£4,129
Read more and order
Special offer!
Valid only up to and including 30/09
Garden Room Christel
10.![]() 95 m²
95 m²
£3,655
£4,569
Read more and order
Garden Room Rosa
13.8 m² construction
£5,119
Read more and order
Garden Room Vaxholm
14.7 m²
£3,649
Read more and order
Garden Room Julia
13.76 m²
£4,719
Read more and order
Garden Room Anton
6 m² (timber thickness 28 mm)
£2,299
Read more and order
Garden Room Greta
9.7 m² (Timber thickness 28 mm)
£3,289
Read more and order
Special offer!
Valid only up to and including 30/09
Garden Shed/Guest Room Amanda
11. 8 m² (timber thickness 28 mm)
£3,689
£4,099
Read more and order
Special offer!
Valid only up to and including 30/09
Garden Room Björkö
8.37 m²
£2,983
£3,729
Read more and order
Special offer!
Valid only up to and including 30/09
Garden Room/Store Möja
13.4 m² construction
£4,007
£5,009
Read more and order
Special offer!
Valid only up to and including 30/09
Garden Room Majvi
9.74 m²
£2,366
£2,629
Read more and order
Special offer!
Valid only up to and including 30/09
Garden Room Resö
8. 37 m² construction
£3,215
£4,019
Read more and order
Special offer!
Valid only up to and including 30/09
Garden Room Linnea
13.7 m² (timber thickness 44 mm)
£4,741
£4,990
Read more and order
Special offer!
Valid only up to and including 30/09
Garden Room Wrexham
13.8 m² (wall thickness 44 mm)
£4,567
£5,709
Read more and order
Special offer!
Valid only up to and including 30/09
Garden Room Solveig
13.6 m²
£5,508
£7,869
Read more and order
Special offer!
Valid only up to and including 30/09
Garden Room Katarina
13. 8 m² construction
£2,895
£3,619
Read more and order
Special offer!
Valid only up to and including 30/09
Garden Room Utö
8.37 m² construction
£2,949
£3,469
Read more and order
Special offer!
Valid only up to and including 30/09
Garden Room Idö
8.37 m² construction
£2,639
£3,299
Read more and order
Special offer!
Valid only up to and including 30/09
Garden Room Frida
13.8 m² construction
£4,139
£4,869
Read more and order
Special offer!
Valid only up to and including 30/09
Garden Room Johanna
14. 1 m²
1 m²
£5,237
£5,819
Read more and order
Garden Room Stella
14.7 m² (timber thickness 34 mm)
£3,569
Read more and order
Special offer!
Valid only up to and including 30/09
Garden Room Blidö
14.8 m²
£4,544
£5,049
Read more and order
Special offer!
Valid only up to and including 30/09
Garden Room Edit
138 m² building element
£4,247
£4,719
Read more and order
Special offer!
Valid only up to and including 30/09
Garden Room Sofi
14. 8 m² (timber thickness 28 mm)
£3,455
£3,839
Read more and order
Special offer!
Valid only up to and including 30/09
Garden Room Victoria
13.8 m² construction
£3,950
£4,389
Read more and order
Garden Room Kalle
14.5 m²
£4,589
Read more and order
Special offer!
Valid only up to and including 30/09
Garden Room Djurö
14.7 m² (timber thickness 34 mm)
£3,601
£3,790
Read more and order
Garden Room Sissi
14. 8 m² (timber thickness 28 mm)
£3,399
Read more and order
Special offer!
Valid only up to and including 30/09
Garden room Fribo 44 mm
14.53 m² (Timber thickness 44 mm)
£4,634
£5,149
Read more and order
Special offer!
Valid only up to and including 30/09
Garden Room Yxlan
13.76 sq m (148 sq ft) (timber thickness 70 mm (2.76 inches))
£4,911
£5,169
Read more and order
Special offer!
Valid only up to and including 30/09
Garden Room Svante
13. 8 m² construction
£4,293
£4,519
Read more and order
Special offer!
Valid only up to and including 30/09
Garden Room Sylvia
13.8 m² construction
£4,385
£5,159
Read more and order
Sauna
- Sauna cabins / Sauna houses
- Sauna Accessories
- Sauna Rooms
- Barrel Saunas
Garden Houses
- Garden Houses 25 m²
- Garden Houses 30 m²
Garden rooms
Gazebos
Greenhouses
Garden sheds
Garages
- Carports
Hot Tubs
Log Cabins
Outhouses
Playhouses
Contact
01625 682250 (9am-5pm)
info@polhus. co.uk
co.uk
Polhus Aktiebolag
31 Djäknegatan
Malmö 211 35
GB420120766
Information
How to place an order
General Terms and Conditions
Transport and delivery
Tips, Advice and Assembly Guides
About Polhus
Customer reviews
Reference images from our customers
Assembly instruction videos
Claims and returns
Copyright © 2002 – 2021 Polhus AB
-
About Polhus -
Contact
Organize an office in the garden – “Design and improvement” :: read on the site LePlants.ru
What is a garden office? Who will benefit from this fashionable innovation? What are the benefits of organizing an office in the garden? What about technical equipment, what design to choose?
What is a garden office? Who will benefit from this fashionable innovation? What are the benefits of organizing an office in the garden? What about technical equipment, what design to choose?
June 6, 2014 / Editorial LePlants. ru / Rating:
Content
- 1. The main advantages of the “green” office
- 2. A little history
- 3. The advantages of the office in the garden
- 4. Technical component
- 5. Features of the design
9002
somewhat years ago, the UK, and then the whole of Europe, was swept by a new trend: your own mini-office in the garden. What’s this? And will this idea be useful to us?
Key benefits of a green office
- To work on foot – this is the dream of every resident of the metropolis, who at least once had time to stand in a traffic jam;
- Your own autonomous office, where your family does not look – many creative people, scientists and businessmen dream about it;
- A workplace away from kids, kitchens and other cute little things in the home is the next step in a freelance career.
Let’s count. Today, the number of remote workers in the world is striving to exceed 80 million. These are people whose specific profession allows them to work remotely, from home. More than half of them have already experienced the difficulties of organizing work at home. It is not easy to separate working time, to convince household members not to interfere, to move away from everyday problems and responsibilities. But at the same time, “home” work also brings significant savings: you do not have to spend time and money on moving around the city, dining in cafes and other “little things” that eat up part of the family budget.
The solution to the problem came from Europe. The designers came up with an original idea: an office in the garden. A small building, connected to all the necessary engineering networks, is located on the territory of its own site. Building permits are usually not required: the size allows you to do without bureaucracy. IN THE PHOTO: A small office can be placed even on a small plot
A bit of history
“I leave the house and leave all the family problems in it. I walk fifteen steps and get to work. Close and far at the same time” — this is how the English writer and interior designer Sarah Stewart-Smith describes her feelings. By the way, she was one of the first in the 60s of the XX century who discovered the amazing possibilities of a garden office. Although, if you look into history, there are many examples in past centuries. Take, for example, the poet William Cooper. His poems, now recognized as a model of English classics, he wrote in an office arranged in a separate house in the garden. Yes, and Russian writers and artists sought to break free, into nature, where it is much easier to breathe and create.
Benefits of a garden office
Why has the garden office trend gained such momentum in developed Europe, where there is a clear lack of space? There are several reasons, but the main one is the ability to organize an office in the immediate vicinity of the house, but still outside it. This approach allows you to get the long-awaited silence, when nothing interferes with the thought and creative processes. The garden office creates a working atmosphere. If we take into account that outside the windows there is a nice view of the flower beds and greenery, we can talk about inspiration. However, the fantasies of European homeowners are not limited to the office. Garden gyms, recording studios and art workshops are already common. IN THE PHOTO: Panoramic windows allow you to enjoy the view of greenery during your daily workouts on the simulators
Inspires and more. According to Western realtors, the presence of a home office in the garden increases the value of a residential property by about 5-7%. The prestige of housing is also rising. Agree, being in trend is nice and profitable.
Technical component
According to Russian traditions, an office in the garden can be built independently, or you can buy a ready-made block. At the same time, one must understand that a small architectural form – namely, garden offices belong to this category – must be in harmony with the general style of the site design and the architecture of the house. However, among the finished projects, the choice is so wide that it allows you to find an option for every taste.
Technically, the process is as follows: the finished building is placed on the selected site. Electric cables are laid from the house, if necessary – water and sewer pipes. Heating is provided by electricity, but the office itself is sufficiently insulated to ensure the possibility of year-round work.
Design features
Let’s start the review of possible designs with the simplest one, which can be easily reproduced on your own. So, a small house measuring 2.5 x 2.5 m with a sloping, semicircular roof. Glazed doors and windows provide enough light even in winter. A small paved area ensures hygiene – less street dust gets inside. IN THE PHOTO: You can build such an office in two weeks yourself
The second option requires engineering and architectural knowledge. This design is suitable for installation next to a log house – a fabulous building will emphasize the commitment of the owners to the country style and will surely attract the attention of others. IN THE PHOTO: Fans of The Hobbit and other works of Peter Jackson will especially like this house for working from home. The abundance of glass and flowing shapes give the project something cosmic. This option will be of interest to creative people. IN THE PHOTO: “Space” object in the backyard
These types of structures are only a small part of what the modern industry offers. However, being carried away by technology, one should not forget the second component, in fact, the garden.
Roof greening will be an original solution. With a flat roof, there are practically no problems. A pitched roof can be greened if the angle of inclination does not exceed 30º. It must be understood that landscaping requires strengthening of roof structures – the “flower bed” has its own weight and the load falls on the beams and walls.
To create a green area, it is necessary to lay several layers on the roof: waterproofing, geogrid, root protection film, plant mat and special substrate. Plants are planted in the substrate. In most cases, different types of Stonecrop are used. The plant is unpretentious, grows rapidly, is not afraid of frost. You can use other herbs, but when choosing types of odds, you must take into account their need for care. Agree, doing garden work, albeit on a low, but, nevertheless, roof, is not a pleasure for everyone. IN THE PHOTO: Green roof: from above it looks like a real flower bed
A few last tips:
- A small, but still detached office will help you organize your working time better.
- When choosing an office project, pay attention to its compliance with the stylistic decisions of the house and the site.
- The better the office is insulated, the less money you will have to spend on heating.
- Green roof will give color to the building. Use ground cover plants that do not require frequent watering and pruning.
Do-it-yourself green office | Rusbase
Archive rb. ru
ru
June 26, 2008
Archive rb.ru
June 26, 2008
At the entrance to the office of the investment company “Aton” on Pokrovka there is a summer garden: among the greenery there is a mini-pond, a fountain and figurines of swans.
Employees claim that the garden, as well as the plants in the offices of Aton, are the work of the wife of one of the top managers of the company. “It’s just beautiful and sets in a positive way,” explained Office Life in the company.
Feng Shui Studio consultant Irina Anfinogenova has her own explanation of why we need greenery in the office. She is sure that all the plants and water in the room “attract money.” Watching how a tree grows subconsciously gives impetus to development, she believes. And he advises to start fountains and plants with fleshy round leaves resembling coins in offices.
Already green
Green offices are gradually becoming fashionable. In the publishing house Independent Media, for example, they even took care of those plants that live on the tables of employees. A florist-employee of a cleaning company comes to the company every day to take care of the flowers. “Unless, of course, the owner of the flower does not mind,” says an employee of the administrative department of the publishing house. “After all, many people want to take care of the plants themselves.”
There are many plants in the office of PricewaterhouseCoopers Russia, trees stand in the meeting rooms of BDO Unicon. The office of one of the leaders of the Greenhouse Technologies construction company looks more like a botanical garden. Some employees even bring their “sick” home plants to this office – they say that they recover in a month in this green office.
Of course, working in such a green office is not always comfortable. For example, when one of the companies owned by Vladimir Gusinsky moved to a new office, a couple of computers were temporarily placed in the summer garden. A beautiful view, the shade of trees and ferns… Only one thing disturbed the blissful picture: automatic watering was turned on several times a day.
How to grow a garden
Of course, you can limit yourself to a couple of potted flowers next to your monitor. But if you are a fan of big solutions, you can grow an entire garden right on the wall of your office.
Liana Tsanava, a specialist in the vertical gardening department at Greenhouse Technologies, told Office Life that this can be done quite simply: by installing a rack and filling it with flower pots. But to make a really beautiful “green wall”, you need to call a specialist who will develop a project adapted specifically for your premises. Such specialists take into account the degree of illumination of the walls, the average temperature in the room and make a drawing of a mini-rack (which can be metal, wood or plastic).
Whatever option you decide on: buying shelves and flowers in pots or installing a “flowering wall”, you should, of course, remember that plants that are afraid of drafts, as well as flowers that love light, should not be taken to the office.
- office life
- Aten
- plants
Found a typo? Select the text and press Ctrl + Enter
Related materials
-
one
Overcoming fears honestly: how leaders and employees survive a company reorganization
-
2
Why you should not postpone your vacation and how to return to working days after it
-
3
“Don’t send such an employee on vacation”: 5 tips for managers on how to work with a depressed person
-
four
Freelance or office: what should a designer choose to improve skills and not burn out
-
5
“Time for magic appears”: the experience of a business owner who switched to a 20-hour work week
CAPABILITIES
September 22, 2022
Export accelerator
September 23, 2022
[NOT] Accelerator
September 23, 2022
“Road trip in Russia”
All possibilities
News
Fifty banks will leave the Russian market in the next year and a half
News
Belarus banned the export of cars and smartphones
News
Russian business began preparations for mobilization – some hope to get reservations for employees
Speakers
How to transfer money to Europe from Russia in 2022?
News
On the Russian stock exchange there was a powerful collapse of shares
8 DIY home office items
1 Cardholder
Or simply a card holder. If you can’t force yourself to put things in order in the plastic cards of stores, business cards, or use cards from several banks, such a cardholder will be a lifesaver. And it’s easy to do it yourself.
To do this, you will need a piece of wood of a suitable shape and a hacksaw to cut holes for the cards. Ready!
themerrythought.com
themerrythought.com
-
Workplace
Cork wall, window sill and 8 more ideas to organize your workplace
2 Hanging Pen & Pencil Holder
Simply punch holes in the beautiful glasses and hang them with ropes. A stylish accessory is ready, which can really be done in 10 minutes.
Life hack: if you can’t find the right rope, paint it – white always looks good.

passionshake.com
passionshake.com
passionshake.com
-
Storage systems
15 ingenious storage ideas
3 Improved nightstand
A simple white IKEA vanity on wheels can be transformed with stickers and paint. Choose a suitable stencil, stick it on the front or countertop – as you like – and paint the drawer. Then remove the sticker.
This idea will appeal to creative people, as well as children and teenagers who want to diversify a boring workplace.
studiodiy.com
studiodiy.com
studiodiy.com
-
Workplace
How to set up a home office if you have never worked from home: a 5-step checklist
4 Garden mesh pinboard
Remaining mesh after the fence in the country house? Although even if not left, it is not difficult to buy it in any building supermarket. And make a stylish pinboard where you can attach notes that are important in your work.
burkatron.com
burkatron.com
5 Handmade calendar
If you have a suitable wooden box, make some hooks and paper notes in it. You will also need to make sheets with the corresponding numbers (from 0 to 92 times) and the same sheets with the names of the months. Attach them to the hooks and set the calendar on the table. See how stylish it looks, it will definitely diversify the interior of your workplace.
homemadebycarmona.com
homemadebycarmona.com
homemadebycarmona.com
homemadebycarmona.com
6 Converted Newspaper Holder
If you have an old paper holder, you can convert it. First paint, and then use self-adhesive film. Or thus use the remnants of old wallpaper. Get a stylish accessory that will cost you mere pennies.
makeandtell.com
makeandtell.com
makeandtell.com
makeandtell.com
makeandtell.com
7 Plywood organizer
To do this, you will need another material to make pockets: fabric or leather. Even a beginner can sew pockets – you need to draw a few lines on the sides, bottom and in the middle. Then you will need to glue the pockets on the glue, make holes for the rope in the plywood and hang it over the table.
thelovelydrawer.com
thelovelydrawer.com
thelovelydrawer.com
thelovelydrawer.com
8 Shelf
Ladder Shelf is one of the trendiest shelving options. And its great advantage is that you can do it yourself. If you are a beginner, ask a friend to accompany you – it will be easier to assemble a shelf from bars. But in general, anyone who has ever dealt with assembling furniture (even from IKEA) will be able to cope. Then the shelf can be painted in any color and used to store important little things, books and documents.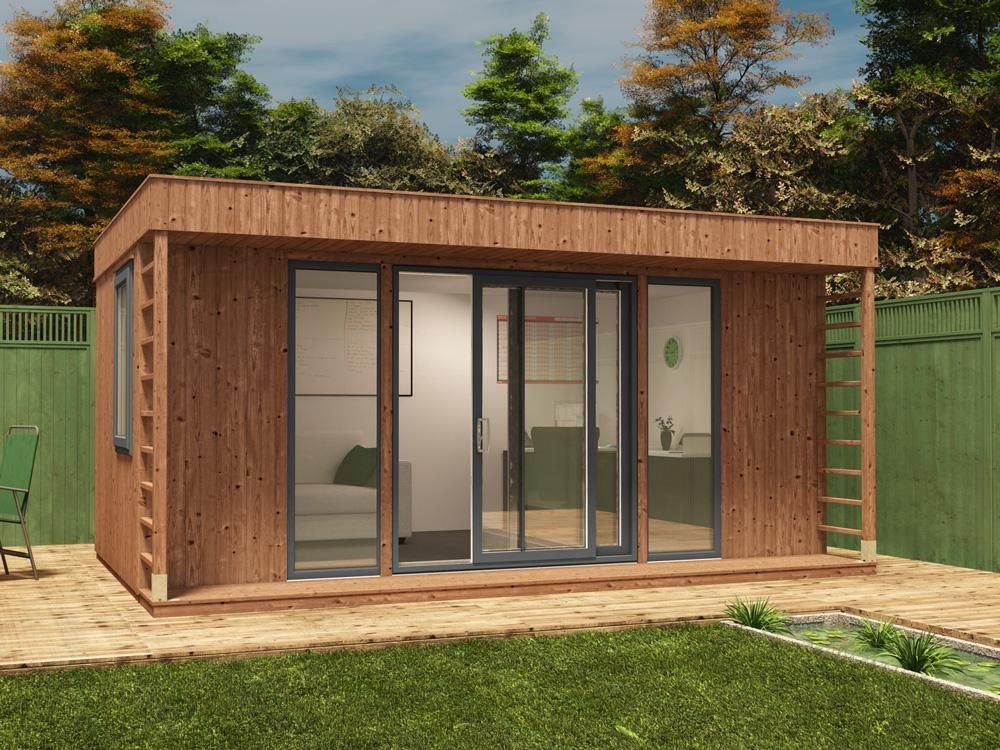
burkatron.com
burkatron.com
burkatron.com
-
Storage systems
How to replace a rack in an apartment: 20 beautiful and compact options
Material prepared by
Anastasia Dubrovina
Home office: 75 photos – design of a workplace in an apartment, ideas on how to organize a work area
In a typical apartment, there is not always enough space for an ordinary standard-sized table – let alone a respectable office. We have to be content with the “mini” option. Creating a tiny work area (as in the photo) where you can sit in maximum comfort is not so easy. We are in a hurry to share decor ideas and unexpected solutions with you.
For the most hypnotic effect of viewing this article, we advise you to click on the first photo and go to full screen mode. And then – flip through large pictures and enjoy our selection of interesting and spectacular work corners. On some photos you will find green labels that contain additional information about the items used in this interior. Under the photos you can find information about the project and the techniques and materials used.
Vera Tarlovskaya Interiors
1. Sunny accents
A monochromatic workplace won’t look boring and featureless if you complement it with a few juicy accents. For this purpose, choose rich yellow shades that will not only fill the room with a sunny mood, but also improve your concentration.
Studio Revolution
2. Scandinavian restraint
If you are used to the fact that creative chaos always reigns in the workplace of an apartment, learn from the Scandinavians the ability to find their place for each thing. The less chaos and mess there is on the surface of the table and shelves, the visually more spacious the room will look.
Carolyn Reyes
3. Oriental flavor
The owner of this apartment didn’t want the workplace to look too formal and office-like. A vintage hand-embroidered leather chair, a large exotic lamp, Turkish textiles, a colorful board for inspiration – and as a result, a small table has turned into a cozy corner where inspiration always hovers.
Dayka Robinson Designs
4. Versatility
For a small bedroom, a two-in-one option is perfect, when the workplace also doubles as a bedside cabinet.
5. Almost no legs
LAGO’s transparent glass top shows the ability to float in the air. Undoubtedly, such an optical illusion will benefit any small space.
Yurieva Galina | Interior Design and Decorating |
6. Rational substitution
When there is very little space on the table surface and nowhere to stick a table lamp, you can always allocate a piece of space for a slender floor lamp next to the workspace. It is best that it be articulated and fixed in different positions.
Kayla Pearson
7. In a black and black room
It’s hard to believe, but the workplace in the apartment in the photo does not belong to the character of a gloomy detective, but to a young illustrator. Although, why not? After all, black walls will definitely not distract from work.
8. Mission Possible
As you can see, squeezing a countertop between two cabinets is a very doable task. Well, you can beat an empty wall the way the designers from the Duggan studio did it – with charming wallpaper with graceful flamingos.
Nanette Wong
9. Always on top
A regular shelf attached at just the right height paired with a bar stool is a great workstation for a mom with a small child.
Maria Killam
10. Not for claustrophobes
It is quite possible to arrange a chamber work area under the stairs, the main thing is to think over not only the design of the office, but also ergonomics, so as not to beat your head or hands on anything.
Olga Ashby Interiors
11. Right under the roof
It is sometimes difficult to find suitable furniture for the attic floor, but a small table with a chair will fit under the slope of the roof. In the case of this workplace, designer Olga Kulikovskaya decided to choose an unusual table with curly mirror inserts, which undoubtedly became the main highlight of the whole image and created an interesting visual effect.
ComfyDwelling.com
12. Looking for inspiration
To keep your muse in your creative process, organize a small moodboard in front of you. An ordinary metal mesh from the nearest hardware or hardware store is perfect as a base. She certainly will not take away useful centimeters of the working area, but she will always tune in the right way.
Moon DESIGN
13. Instead of a window sill
A tiny narrow room with a wide work surface near the window turned out to be even more functional and comfortable due to the fact that it immediately flows into a shelf. This home office design is also good because everything you need is always at hand.
Kim Pearson Pty Ltd
14. One piece
A light and springy playful home office is quite organically integrated into the surrounding interior of this Australian apartment. It seems as if a snow-white writing desk with drawers grew right out of the wall and became its integral part.
Karinsky Arseniy Architectural Studio
15. American Classic
Restrained colors, classic ornate forms, natural wood, intricate patterns… with their own affairs.
Shirley Meisels
16. Instead of a board for inspiration
Some people need to always have a mood board in front of their eyes for inspiration, but some people hang a big picture above their table. Choosing an image with a perspective is a good trick for small apartments: it will visually expand the available space.
Colleen Brett
17. A gift with a story
The owner of this house in Pennsylvania is very tall, which is why a friend made a nice gift for him – a narrow antique table of non-standard height. And against the background of dark wallpaper by William Morris, the work area began to look even more expressive.
Sasha Lanka
18. In a niche
An inconvenient niche can always be improved with a floating table top, thereby turning it into a useful workspace.
Found Associates
19. In the power of white
This workspace feels incredibly light and airy. And all thanks to the complete dominance of white and transparent acrylic furniture, which visually does not encroach on valuable square meters.
Erika Bierman Photography
20. For a Princess
A tidy little secretary paired with a vintage chair takes up very little space in a secluded corner of this Los Angeles bedroom. Flowers are everywhere here: on the wallpaper, in a vase, which indicate that this is a women’s territory. Even the picture makes it clear that the work area belongs to a true princess.
Nina Frolova
21. DIY
When the owner of the apartment is the owner of a carpentry workshop, there is nothing surprising in the fact that a retro table is adjacent to former wooden window sills instead of shelves and a lamp made of solid oak root.
Insight Design
22. An indispensable assistant
Instead of sticking reminder stickers in different places every time, get a large clear glass magnetic whiteboard.
Going Home To Roost
23. Breath of spring
Even if it doesn’t smell like spring outside, let it into your house right now! Just a few pastel splashes, yellow accents, fresh or watercolor flowers – and the workplace will immediately sparkle with spring colors, and you will have a second wind.
LUX Design | Interior Design Build
24. Feminine and delicate
Do you have some window space in your bedroom? Then put a neat laconic table there, a seat without a back and bet on a win-win white color. Well, fresh flowers, a couple of metallic accents and a fur cape will help soften the whole look and make it more tender and feminine.
VVDesign
25. An aristocrat’s dream
This project in the photo of the VVDesign design bureau received the telling name “Aristocrat’s Dream” and, apparently, fully corresponds to it. A plain white table and a chair on wheels fit organically into the rather colorful interior of the bedroom.
CO Interiors
26. In the closet
This pull-out workspace in a one-room apartment is convenient due to the fact that there is a lot of free legroom below.
John Bentley
27. An interesting specimen
The glass worktop, which is an extension of the nightstand, does an excellent job of saving space without sacrificing functionality.
SEE ALSO…
More than 300 ideas for a computer desk in the photo from designer projects
Becki Peckham
for a family from the Canadian province. Teapots and cookbooks flaunt here for a reason – the work area in the apartment is located between the kitchen and the living room.
Going Home To Roost
29. Who’s there?
A workplace at the front door is also quite an acceptable option for residents of private houses. But in the apartment it is better to look for a lighter and less cramped space for these purposes.
The Works
30. By the window
Window cabinets are quite common in small apartments, and so that the space between them does not remain empty, fix the wooden table top with brackets.
Bailey London Interior Design & Build
31. Modern secretary
This is how a modern interpretation of the classic secretary looks like when you need a compact workplace.
SxS Design & Build Ltd
32. Spectacular union
Deep dark paint + lots of natural wood = a win-win combination.
Twelve Chairs Interiors
33. For the most unpretentious
A hinged wooden table top, several shelves, a comfortable chair — and an empty opening instantly acquires the status of “the best mini-office”.
Sealy Design Inc.
34. Transformer for the bedroom
Here’s a transformer with a pull-out top and folding door helps the owners of this apartment in Toronto, when you need to take care of working moments.
Brendan Wong Design
35. Full-Wall Mirror
An alcove workstation will be more comfortable and bright when complemented with a large full-wall mirror. Well, as an added bonus, visually expand the space.
Louise de Miranda
36. For a needlewoman
Needlewoman Mariet Van Der Koy lives in this Scandinavian apartment with her boyfriend. Due to the lack of capacious storage systems, a large craft package settled next to the workplace, which contained all the necessary materials for needlework.
Tim Barber Architects
37. Masking principle
A work surface that matches the walls, even without legs, almost completely merges with the room and does not burden it with its presence. In such a situation, it is better to abandon a chair or armchair in favor of a neutral, inconspicuous stool.
SchappacherWhite Architecture D.P.C.
38. Architectural sophistication
Any irrational protrusions can always be beaten with custom-made furniture. In the case of this tiny home office, a metal rod from the ceiling keeps the floating shelves from losing height.
Kelly Deck Design
39. Paired with White
To capture the autumnal sea vibe of this Vancouver home pictured, the design is complemented with a few splashes of cool blue-greens and grays on a white surface.
The Cross Interior Design
40. Silence in the library!
Dreams of a home library run counter to the available square meters in the apartment? Go for the trick with fake wallpapers from Cole&Son or Mr Perswall. A slate wall perfectly complements the overall picture.
41. Space-saving lamps
In order not to take away useful centimeters of the desktop surface, you can replace the table lamp with a pendant lamp or sconce.
Common Bond Design
42. Nautical inspiration
The wood of dark shades, the combination of deep blue and yellow accents involuntarily evoke associations with the sun’s rays flickering on the endless expanses of the sea.
Pause Designs
43. In a bay window
A small bay window can also be put to good use if you place a built-in countertop in the ledge at a height of 75-80 centimeters from the floor.
Yama Architecture
44. Thoughtful details
Another home office option that can be quickly removed from sight if needed. And so that the open doors do not interfere during work, make them call in.
Katy Sullivan Designs
45. More light!
No matter how compact the workplace in a small apartment is, one should not forget about its proper lighting, especially when the desk is located away from the window. To prevent your eyes from getting tired quickly, combine the overhead light with a table lamp of approximately the same saturation.
A.S.D. Interiors – Shirry Dolgin, Owner
46. In Contrast
White open shelves look incredibly stylish against the backdrop of spectacular dark blue damask wallpaper. And besides, they draw all the attention to themselves, leaving the workplace almost invisible, which is very useful in a small room.
Sarah Greenman
47. Industrial Romance
A compact, slightly worn cobalt-coloured metal table playfully echoes the Venetian gondolas in the painting.
Bruce Bierman Design
48. De-cluttering the space
When all the furniture and finishes are done in a single white color, it doesn’t let a small space look cluttered. The workplace of the apartment in New York quite imperceptibly merged into the surroundings, especially since all the attention was diverted by a signboard of a fiery red hue.
Margot Hartford Photography
49. Mini replacement
It’s not often you see an interior with this kind of home office seat, but why not? An armchair and a chair take up too much space – unlike a pouffe, which can also serve as an additional storage system.
Clifton Leung Design Workshop – CLDW.com.hk
50. Every inch helps
To make the most of the available space, Hong Kong architect Clifton Leung decided to set up his workplace in a small bay window. The built-in plywood countertop with drawers does a great job.
Ute Günther wachgeküsst INNENARCHITEKTUR+DESIGN
51. Out of nowhere
Built-in bench seat and pull-out table – how do you like this idea for a mini-office in the kitchen? And in order not to spoil your eyesight, get a mobile floor lamp on a slender leg, preferably with adjustable height.
SFGIRLBYBAY
52. A bit of brightness
As you know, the white color contributes to better concentration. But why not liven up your home office with bright details and fun motivational posters?
stephane chamard
53. Retro office
A compact 60’s-style desk that’s a good option for a cramped room.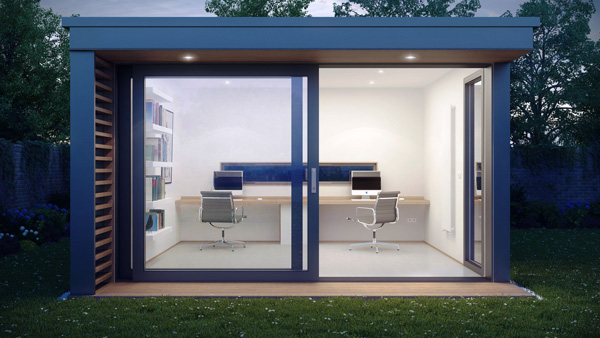 But it can be supplemented with a table lamp on a height-adjustable leg, in order to illuminate only the keyboard if necessary.
54. Friendship with the invisible
In order not to overload an already small space, opt for a transparent chair that will completely dissolve in the surroundings. How about elegant “invisibles” from Philippe Starck?
Lucy Johnson Interior Design
55. With one hand
Pull out the top drawer and get a comfortable work surface with its own electrical outlet.
Matheny Goldmon Architects
56. Authentic rustic
The all-wood finishes, the oddly shaped white cedar worktop and the cut wood stool capture the beauty of the natural surroundings and captivate with their rustic character.
Hannah Brown
This London home office might have looked too ordinary and sterile, but interesting tie-dye Roman blinds saved the day.
Margot Hartford Photography
58. There can’t be too many drawers
How do you like this vintage table with lots of drawers not only under the tabletop, but also above it?
Kariouk Associates
59. Doors to Narnia
We open the doors, and there is a real workstation, where under the tabletop there was even a place for a pull-out shelf with a synthesizer.
60. Kitchen office
Another clear proof of how harmoniously and functionally you can arrange your home office in the kitchen. The main thing is to use all the vertical space up to the ceiling using shelves.
ComfyDwelling.com
61. More freshness
Living plants fit perfectly into the design of the home office, which, by their presence, not only adds freshness, but also enlivens the workplace. Even in a limited area, you can create a whole garden. In addition to cacti and miniature succulents, use plants in hanging pots, because they will not steal usable space.
ComfyDwelling.com
62. Two levels
In the case of this workstation, storage systems are not located under the tabletop, but on it. Thus, a two-level desk is obtained.
Brian Dittmar Design, Inc.
63. Immortal classic
Do you want to feel like a real aristocrat? Then feel free to purchase a secretary! This classic attribute will perfectly fit into the space of a small room, acting as several items at once: a chest of drawers, a desk and a bookcase.
Natalie Fuglestveit Interior Design
64. Unique charm
Despite all its deliberate roughness, this workplace has a rustic charm and industrial touch.
65. Everything you need — wall
When there is not enough storage near the workplace, be smarter – use the vertical space. The perforated metal sheet will become the abode of all the necessary tools and materials.
Jo Alcorn
66. Mobile office in the kitchen
Do not be discouraged if, due to lack of space, it is not possible to place even a small table or secretary in one of the rooms. Take a look around your kitchen, perhaps there is a nook for quick work.
The Window Film Company UK Ltd
67. Such a width…
This table is not too small, but it will fit even in a small area, because it takes up very little space in width.
Manna from Heaven
68. One brick, two bricks
You can make a full-wall cabinet, or you can leave room for a home office. Well, the brick finish will be a great backdrop, adding depth and visual interest to the entire space.
69. Matching the walls
A work wooden table matching the walls creates a special chamber atmosphere, and the presence of white objects and inserts prevents the space from turning into a single dark spot.
Atelier 616 Interiors, LLC
70. By the Window
Having your mini home office right next to a window is a big plus, as you get plenty of natural light. But in this case, the most correct and logical decision would be to use Roman blinds or roller blinds.
iheartorganizing
71. Masking drapery
An empty niche from a former pantry or closet can be transformed into a cozy home office with a lot of necessary shelves and rails. And once the job is done, curtain your workplace and forget it exists.
TQ Construction
72. Wardrobe with a secret
The hallway in this Canadian house actually hides not only wardrobes, but also a hidden workplace with a retractable worktop.
Niosi Design
73. Next to the stairs
If you live in your own house and have a similar staircase leading to the second floor, do not miss the opportunity to use the existing corner for a workplace instead of just decorating it with a floor vase of flowers.
Tim Barber Architects
74. Out of sight
The shelving unit’s wide hinged door turns into a workstation that can always be hidden from prying eyes with a flick of the wrist.
Pizzigati Designs- eco chic interiors
75. In bright colors
This New York mini-office wins with a yellow accent wall, interesting IKEA storage systems and an incredibly cozy adjustable chair with a sheepskin cover.
180 Photo Ideas How to Decorate the Office with Your Hands for the New Year 2020
An elegant workplace that reflects the spirit of the holiday motivates you to work in the pre-New Year period. How to decorate the office for the New Year? About everything in more detail later in the article.
Contents:
- General Rules for Combining Office Decorations
- Recommendations for Placement of Decor in a Room
- Features of Decorating Different Rooms in an Office
- Conclusion
- do-it-yourself birthday of a child (boy, girl) + 140 PHOTOS of bright ideas
General rules for combining decorations for the office
Christmas trees made of balls near the reception
The end of the year is a time of hard work in any enterprise, so offices are richly decorated for the upcoming holiday.
Miniature garlands, Christmas decorations placed in niches or on shelves create a festive atmosphere without taking up extra space. The selection of decorations is limited by the tastes of workers; for a harmonious arrangement, it is enough to follow simple rules. Bright New Year’s compositions by designers
Traditional discreet garlands, Christmas decorations, located on the desktops of employees and the reception desk, give way to bright compositions of designers. Significant financial investments in the decor of the premises are made by employees of the sales department, work with clients. It is advisable to brightly decorate the office of managers, reception, conference rooms.
Styling of decorations
Office decoration for the New Year is carried out in three main styles:
Corporate style
This option is common in large companies: Christmas tree decorations are ordered in advance, using the corporate colors of the company.
They emphasize corporate symbols, the traditional “Christmas spirit” fades into the background. Company colors are used for corporate style
Traditional style
Artificial Christmas tree with bright balls, fluffy shiny garlands, figurines with the symbol of the year – a standard option for offices and meeting rooms. Style is in demand in most small companies with a modest budget.
Traditional style – an artificial Christmas tree with bright balls, fluffy shiny garlands
Creative style
Decor from improvised materials – an original solution for creative employees. Christmas trees made of cardboard, plastic bottles, balls of yarn, homemade paper garlands, plastic “snowflakes” create a homely atmosphere in offices.
Decor from improvised materials – an original solution for creative employees
Christmas candles, Christmas trees, LED strips or balls reflect the company’s corporate culture.
For example, discreet garlands, miniature artificial Christmas trees are adopted in law firms. On the contrary, the offices of holiday organizing agencies attract the attention of guests to the upcoming New Year with the help of bright handmade decorations. Features
It is recommended to wipe smooth surfaces from dust before installing the decor
Despite the variety of shapes, high-quality Christmas trees, garlands, balls, candles are distinguished by important parameters:
1 Light weight. Balls, garlands, tinsel are often attached to walls, ceilings or light stands with adhesive tape, paper clips, thread or paper clips. Light objects are easier to carry, assemble, install at high altitudes.
2 Modular designs. Prefabricated Christmas trees, “folding” paper garlands or Christmas toys made of felt are put away in boxes until the next year in a couple of minutes, do not require much storage space.
3 Smooth surfaces.
Before installation, it is recommended to wipe the decor from dust, often artificial Christmas trees or balls are additionally covered with sparkles. Smooth glossy surfaces are easier to handle and clean up faster. 4 Self powered. Battery-powered toys, candlesticks, figurines look original and festive without overloading the electrical network of the office center.
Modular structures are easily stored until the next year
Color range
The general atmosphere of the room is created by the color range of Christmas decorations, balls, garlands.
Office decoration is often done with the dominance of one color. For example, Christmas decorations and tinsel in a corporate shade, green and red are also popular. Decorations look catchy, they are often complemented by lighting.
Flashy and bright decorations
The combination of bright colors creates a “holiday spirit”
The combination of blue and beige looks bright without overloading the interior
Well-decorated walls, floor, ceiling and office windows create a positive impression of the room as a whole
Well-decorated walls, floor, ceiling, office windows create a positive impression of the room as a whole.
Regardless of the field of activity of the company, there are general recommendations for the placement of elements in the office space. Ceiling decor
Light decorations will not damage employees or equipment if dropped
It is recommended to fix tinsel and garlands placed on the ceiling of the office on smoke detectors, metal elements of lamps or air conditioners. Preference is given to light decorations that will not damage employees or equipment if dropped.
Large Christmas decorations or voluminous garlands are best placed in the corners of the room. For example, large balls, garlands, paper hanging figures. Tinsel, balls of small diameter and LED garlands are placed over the entire surface of the ceiling.
Large Christmas decorations or voluminous garlands are best placed in the corners of the room.
The color scheme of the ceiling decor can be combined with the main colors of the room. Dark colors and volumetric textures are best avoided without overloading the room.
Wall decor
Walls decorated with stars
The walls of study rooms in offices are made of different materials. For example, if a company provides employees with open space with glass partitions, paper “snowflakes”, LED strips, collages and whiteboard marker drawings look appropriate. Traditional plastered or wallpapered walls are combined with voluminous contrasting garlands, tinsel and decorative stickers.
Winter-themed glass partitions
Placement of decor depends on the location of work desks and doorways: New Year’s paraphernalia should be visible from all places, but at the same time not interfere with the passage of employees. Usually a free wall (or part of it) is chosen, on which a New Year’s collage is created from tinsel, stickers, drawings. The remaining surfaces are moderately decorated or left without decor.
Write New Year’s greetings on a chalkboard
Floor decor
Artificial or “live” tree – traditionally the centerpiece of the New Year’s office
Artificial or “live” tree – traditionally the centerpiece of the New Year’s office.
The dimensions of the tree depend on the area of the office, the height of the ceilings and the number of jobs. Personal offices and spacious offices can be decorated with a Christmas tree up to the ceiling. A compact open space with small partitions will be complemented by an artificial Christmas tree up to 150 centimeters high. Plastic or ceramic figures of Santa Claus, Snow Maiden, the symbol of the year complement the New Year’s atmosphere, while their size also depends on the area of the office.
The dimensions of the tree depend on the area of the office, the height of the ceilings and the number of workplaces.
The floor decor is placed in several ways:
- In the center of the room. A traditional option that draws the attention of employees or visitors to New Year’s paraphernalia.
- In the recreation area. A coffee table in the corner of an office, a filing cabinet, a flower stand or a wide window sill will accommodate a small floor decor, saving floor space.
- In the door opening/closing area. This option is suitable for small offices equipped with many work desks. The space behind the door leaf remains free, so it can easily accommodate floor decor, just install a stopper.
New Year’s composition can be used to decorate the shelves of a rack
Window openings and worktop surfaces
Window sills, worktables, shelving, niches – a place to place figurines, ceramic figures, garlands and tinsel
Personal space in the office is decorated according to the tastes of each employee. Window sills, work tables, shelving, niches – a place to place figurines, ceramic figures, garlands and tinsel. The number of decorations, the way they are placed is limited only by the imagination of the owner.
New Year’s decor takes up no more than a third of the free space of the desktop
New Year’s decor takes up no more than a third of the free space of the desktop or window sill. This will allow you to comfortably lay out personal belongings and work documents, without damaging the jewelry in the process.
The traditional New Year’s attribute of the desktop is a symbol of the coming year, located near the monitor. See also: Do-it-yourself Christmas toys for the New Year 2018 – Year of the Dog (245+ Photos)
Features of decorating various rooms in the office
Decorating each room in the office has its own characteristics
The offices of most organizations are represented by common and separate rooms, persistent information (reception), reception for visitors, meeting rooms. The decoration of each room has its own characteristics.
General offices (open space)
Such premises are designed for long-term stay of many employees, workplaces are separated by partitions or free space.
Private offices
The style of decorating a private office is limited only by the taste of its owner
Workspaces for one person create a private atmosphere, such rooms are spacious and suitable for decorating with bright accessories.
The style of decorating a personal account is limited only by the taste of its owner.
Large artificial Christmas trees, glass balls, an abundance of tinsel or homemade toys will look appropriate in such a room. Executive offices are often decorated in a corporate style, muted colors are used. Visitor’s Reception and Information Desk
Reception decoration combines traditional and corporate style
The first place that catches the eye of visitors is traditionally complemented with catchy massive decor, combining traditional and corporate style. Souvenirs for visitors, clients and employees, an abundance of bright electric garlands or collages look appropriate on the information desk.
Reception for office guests is decorated with restraint
Reception for office guests is decorated with more restraint, most often a miniature artificial Christmas tree, several LED garlands are used. Communication with visitors can be lengthy, and catchy decor can tire guests, distract them from the topic of conversation.
Meeting rooms
Meeting rooms are decorated to a minimum so that the New Year’s decor does not distract employees
Meeting rooms are decorated to a minimum so that the New Year’s decor does not distract employees during negotiations.
Such rooms are not equipped with workplaces, are spacious, they are used from time to time, and are decorated with artificial Christmas trees, paper garlands and “snowflakes” on window panes. Christmas tree from the ceiling – the original solution
Each room in the office is decorated in its own way, depending on its purpose. Reception rooms are lavishly decorated to create a positive impression. Workrooms are complemented with garlands, balls and tinsel in a more restrained way, without distracting employees from everyday duties. Rooms that are used from time to time get by with minimal decor.
See also: How to beautifully decorate a room, apartment or house on a child’s birthday with your own hands + 180 PHOTOS of Family holidays
Conclusion
High-quality decor is easy to store, it is quickly cleaned, and retains its “presentation” for a long time
New Year decorations for the office reflect the corporate culture of the enterprise, therefore their color scheme and style are coordinated with the manager.
High-quality decor is easy to store, it is quickly cleaned, and retains its “presentation” for a long time. When placing decorations in rooms, you need to pay attention to the color scheme of each room, the number of jobs, and the total area. Massive floor decor and bright wall decorations are suitable for spacious rooms for receiving company guests. Offices are decorated with restraint. Decorations for the office in 2020 Rats
Make sure that this cute animal in New Year’s tinsel flaunts on the screensavers of the monitor.
Decorate your Christmas tree with themed toys. You can make them with your colleagues with your own hands.
Think of all the cartoon and fairy-tale characters. It could be the Mouse King or Ratatouille.
Prepare symbolic gifts featuring rodents. Take fridge magnets, for example.
The bravest can get a new pet in the office.
VIDEO: How to decorate an office for the New Year
 com/embed/83CaLVVNKIA?rel=0&enablejsapi=1″ frameborder=”0″ ebkitallowfullscreen=”” mozallowfullscreen=”” allowfullscreen=””>
 How to decorate an office for the New Year. Designer’s tips
How to decorate the office for the New Year. Designer’s Tips
See also: DIY crafts from natural materials for kindergarten and school (+180 Photos). Beautiful and creative ideas for children
PHOTO GALLERY (more than 180 photos)
Do-it-yourself office renovation: is it possible to do it
Office premises are actively exploited, so over time they need to be repaired. It can be carried out with the involvement of a specialized company or on its own. The second option is cheaper, but is it worth it?
What can an office renovation look like
Office renovation can be current (cosmetic) or capital. The current one is associated with the wear of finishing materials and is performed to restore the aesthetic appearance of the premises.
At the same time, they change wallpaper, tiles, paint and varnish and floor materials, sockets, switches, taps and carry out other minor work. Some of them can actually be done on your own. The standard frequency of office renovation and finishing in this case is 2-3 years.
With the help of major repairs, you can completely transform the room. For example, reschedule. The scope of work in this case is much greater. It includes the replacement of facing coatings, electrical wiring, lighting fixtures, plumbing, heating, water supply, ventilation and air conditioning systems, windows, doors, low-voltage systems, and more. Such a large-scale renovation of the office on their own will not work. The standard frequency of such work is once every 10 years.
Office repairs may differ in the scope and type of work performed.
Things to consider when renovating an office
The main differences between offices and residential premises are the presence of a large number of office or household appliances and high traffic.
Accordingly, engineering systems and finishing materials are subjected to high loads. This must be taken into account when carrying out repairs and the use of materials and building structures with a certain margin of safety.
In addition, it is important to take into account the following points:
- specialization of the company and features of the work process;
- average number of visitors;
- location and features of workplaces, including their illumination;
- number of office workers;
- number and power of electrical appliances used.
In addition to calculating the list and volume of necessary materials, when designing repairs, as a rule, several more documents are developed:
- diagram of the heating system indicating the location of heating devices;
- a diagram of water supply and sanitation systems indicating the installation locations of water fittings and plumbing fixtures;
- wiring diagram indicating the locations of switches, sockets and lighting fixtures;
- diagram of ventilation and air conditioning systems with indication of ventilation outlets;
- layout of walls and partitions, summing up communications.
It is difficult to develop such documents on your own, so it is more logical to involve a contractor to repair the office.
The preparatory stage with calculations is no less important than the repair itself.
What should be the finishing materials for office renovation
Finishing materials used in the renovation of the office must meet three basic requirements: to be wear-resistant, durable and safe. There are also specific selection criteria.
Floor coverings can be hard or soft. The final choice largely depends on the purpose of the room. So, for a meeting room, it is convenient to use noise-absorbing carpet or carpet tiles; for the reception or accounting department – laminate, linoleum or vinyl covering; for executive offices – parquet board; for sanitary facilities – ceramic tiles; for other office premises – laminate.
For office walls, a good option is structural plaster. It is strong, durable and paintable.
At the same time, it is preferable to take industrial building mixtures, which have the best indicators of service life. Washable non-woven wallpaper can be used instead of plaster.
For the ceiling, a good choice is drywall or Armstrong panels, behind which it is convenient to hide electrical wiring. These materials can be replaced with a stretch ceiling. Its main advantages are a perfectly flat surface, long service life and no need for maintenance.
What should be the engineering systems of the office
The office uses several engineering systems and each of them requires separate calculations. A number of measures make their operation more economical.
For example, to reduce the cost of operating air conditioning and heating systems, it is logical to use modern technologies for thermal insulation of premises during repairs.
And in order to reduce lighting costs, you need to use natural light as much as possible: consider the size of windows, their location and placement of workplaces in the premises.
After the repair is completed, the engineering systems will need to be maintained. A convenient tool to ensure their trouble-free service is a comprehensive office service.
What could be the layout of the office
There are three main office layout options:
- In practice, the classic cabinet layout is most often used. In this case, each employee or groups of employees performing similar tasks work in separate rooms isolated from each other.
- More and more open offices can be found. They are optimal for companies where active communication of employees is necessary.
- The third group includes offices that combine the characteristics of office and open offices.
This is what a modern office looks like
Conclusion
In our opinion, do-it-yourself office renovation is not the best solution. When performing such work, it is necessary to take into account many features, ranging from the selection of the necessary building materials and ending with knowledge of the requirements of regulatory documents for the repair of office premises.
 Miniature garlands, Christmas decorations placed in niches or on shelves create a festive atmosphere without taking up extra space. The selection of decorations is limited by the tastes of workers; for a harmonious arrangement, it is enough to follow simple rules.
  They emphasize corporate symbols, the traditional “Christmas spirit” fades into the background.
  For example, discreet garlands, miniature artificial Christmas trees are adopted in law firms. On the contrary, the offices of holiday organizing agencies attract the attention of guests to the upcoming New Year with the help of bright handmade decorations.
 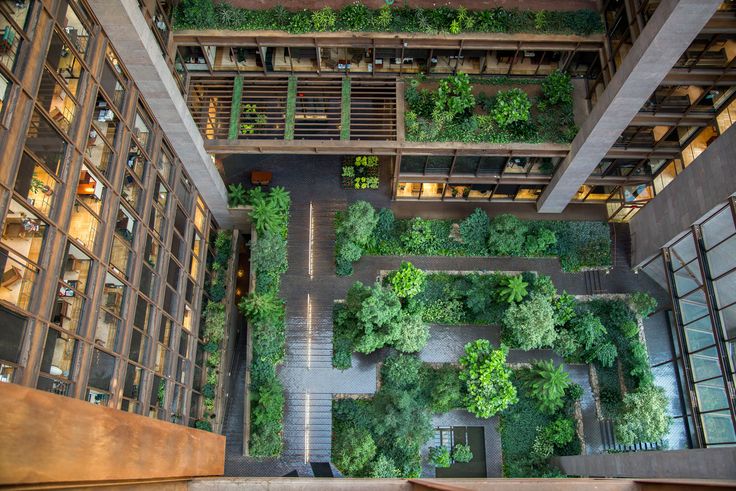 Before installation, it is recommended to wipe the decor from dust, often artificial Christmas trees or balls are additionally covered with sparkles. Smooth glossy surfaces are easier to handle and clean up faster.
  Regardless of the field of activity of the company, there are general recommendations for the placement of elements in the office space.
 The dimensions of the tree depend on the area of the office, the height of the ceilings and the number of jobs. Personal offices and spacious offices can be decorated with a Christmas tree up to the ceiling.
 The traditional New Year’s attribute of the desktop is a symbol of the coming year, located near the monitor.
  Large artificial Christmas trees, glass balls, an abundance of tinsel or homemade toys will look appropriate in such a room. Executive offices are often decorated in a corporate style, muted colors are used.
  Such rooms are not equipped with workplaces, are spacious, they are used from time to time, and are decorated with artificial Christmas trees, paper garlands and “snowflakes” on window panes.
  High-quality decor is easy to store, it is quickly cleaned, and retains its “presentation” for a long time. When placing decorations in rooms, you need to pay attention to the color scheme of each room, the number of jobs, and the total area. Massive floor decor and bright wall decorations are suitable for spacious rooms for receiving company guests. Offices are decorated with restraint.
  At the same time, they change wallpaper, tiles, paint and varnish and floor materials, sockets, switches, taps and carry out other minor work. Some of them can actually be done on your own. The standard frequency of office renovation and finishing in this case is 2-3 years.
 Accordingly, engineering systems and finishing materials are subjected to high loads. This must be taken into account when carrying out repairs and the use of materials and building structures with a certain margin of safety.

 At the same time, it is preferable to take industrial building mixtures, which have the best indicators of service life. Washable non-woven wallpaper can be used instead of plaster.

