Corroded batteries: How to Clean Corroded Battery Terminals
How to Get Rid of Battery Corrosion
We independently review everything we recommend. When you buy through our links, we may earn a commission. Learn more›
- Electronics
- Cleaning
Photo: Sarah Witman
If you’ve owned an electronic device that has replaceable batteries—such as a remote control, a flashlight, a lantern, a wireless mouse, an electric pepper mill, or a child’s toy—you’ve probably had the misfortune of flipping open the battery compartment to find a whitish, crusty mess waiting for you.
Even the best household batteries are prone to rusting, corroding, and leaking chemicals, especially when they’re exposed to moisture or heat. Fortunately, there’s a simple way to clean up battery discharge, and chances are good you already have everything you need at home.
What you need
Photo: Sarah Witman
- Protective gloves: The chemicals inside batteries can burn skin.
- Safety goggles or other eye protection: Ditto.
- Cotton swabs: Finally, there’s a use for these that doesn’t risk damaging your eardrums.
- White vinegar or lemon juice: Most household batteries contain bases, so acids will neutralize their discharge.
- Rubbing alcohol: Isopropyl alcohol is a safe and effective way to clean electronics without leaving behind moisture and other residue.
- Pencil eraser, microfiber cloth, and/or compressed gas: These help clean up any fibers shed by the cotton swabs.
- Plastic bag or other disposable container: To get rid of the evidence.
How long will this take to clean?
Plan to spend about 10 minutes removing battery corrosion from your electronics.
Protect yourself from chemical burns
Photo: Sarah Witman
Not only is battery discharge messy—it’s also caustic. You don’t want to get it on your skin or in your eyes because it can cause permanent damage. During the cleaning process, glasses or goggles will protect your eyes from flying flecks of dried battery discharge, and protective gloves made of cloth or synthetic rubber will keep it from getting on your hands. As an added precaution, you might also want to wear long-sleeved clothing.
Neutralize the discharge with an acid
Most household batteries contain base chemicals, whether they’re single-use (alkaline) or rechargeable (nickel-based) batteries, so acids will neutralize them. After making sure the device is powered off, use a cotton swab to apply a few drops of lemon juice or vinegar to the affected area. The whitish, crusty discharge should start to fizz and disintegrate.
Note: Most cars run on lead-acid batteries, so you’ll need a different set of supplies to clean up car battery corrosion. And since these batteries are much bigger and more complicated to work with, you may want to consult a mechanic before tackling this job yourself.
Apply isopropyl alcohol
Photo: Sarah Witman
Isopropyl alcohol provides a one-two punch for cleaning electronics. It removes residue from other cleaning agents (in this case, lemon juice or white vinegar) that can gum up your electronics, without leaving behind any additional moisture.
It’s safe and effective, and it dries quickly. You’ll want to use the purest form of isopropyl alcohol you can find, so check the label on your rubbing alcohol or antiseptic wipes. The wipes that come with first-aid kits often contain just 70% isopropyl alcohol, which will work for external plastic or metal, but for internal stuff, 90% to 99% is preferable.
Wipe (or blow) it dry
Photo: Sarah Witman
Once you’ve cleaned the entire affected area, wipe it down with a microfiber cloth. You can also polish smaller sections with a pencil eraser. Finish up with a canister of compressed gas, designed specifically for cleaning electronics, to get rid of any pesky fibers left behind by the cotton swabs.
Let the device—especially internal components, like the battery compartment—dry completely before replacing the batteries and turning on the device.
Recycle your used batteries
When household batteries are tossed in the trash and end up in a landfill, the chemicals inside them leach into the soil and water systems, which is harmful to the environment. Fortunately, most single-use and rechargeable batteries—including AA, AAA, C, D, and 9 V—can be recycled.
To recycle corroded batteries, collect them in a plastic bag or other container to keep them from contaminating clean batteries. Look up drop-off locations near you, or find a mail-in program on sites like Earth911 and Call2Recycle.
About your guide
Sarah Witman
Sarah Witman has researched, tested, and reviewed all manner of products—from massage chairs and mousetraps to pencils and power banks—since joining Wirecutter in 2017. Before that, she worked as a science writer and fact checker for numerous publications, and she studied journalism at the University of Wisconsin. In her spare time, she eats as much cheese as her body will tolerate.
Further reading
-
The Best Gear to Organize Closets
by Christine Cyr Clisset
Here’s what we recommend for organizing clothing, linens, and all the other stuff you want to easily find and access.
-
How to Get Rid of Fleas
by Kaitlyn Wells
The best way to prevent a flea infestation is to give your pet a flea preventative. But if the pests have already arrived, here’s how to get rid of them.
-
How to Get Rid of Bedbugs
by Courtney Schley
Bedbugs can get the best of us, but there are steps you can take to beat them.

-
How to Get Rid of Lice
by Shannon Palus
Depending on which removal method you choose, you can save time or money—but not both—when treating a case of head lice.

Wirecutter is the product recommendation service from The New York Times. Our journalists combine independent research with (occasionally) over-the-top testing to save people time, energy and money when making buying decisions. Whether it’s finding great products or discovering helpful advice, we’ll help you get it right (the first time). Subscribe now for unlimited access.
- About Wirecutter
- Our team
- Staff demographics
- Jobs at Wirecutter
- Contact us
- How to pitch
- Deals
- Lists
- Blog
- Subscribe to our daily newsletter
Dismiss
How to Clean Battery Corrosion Safely & Naturally
How to Clean Battery Corrosion Safely & Naturally
Written by Grove Collaborative
Last Updated: November 18, 2021
Battery corrosion can be dangerous to you and your favorite gadgets. Learn how to actually clean up battery corrosion safely and naturally.
Ever opened the battery compartment of a device — the TV remote, the kids’ talking toys, the smoke alarm — only to find everything covered in crusty battery acid? No fun — but no need to panic!
Battery corrosion and leakage are quite common, and you don’t have to toss out your gadgets that get slimed with it — yet. Here’s how to clean battery corrosion safely — and without equally gross chemicals.
While you’re at it … learn about other safe and effective green cleaning methods to keep your home spic ‘n span the nontoxic way.
But first, what is battery acid?
Battery acid is a highly corrosive substance that can ruin whatever device it leaks into. It also contaminates soil, burns your skin, and harms your eyes.
Leaky alkaline batteries emit a fluid that turns into a white, powdery crust.
Lithium-ion batteries might just suddenly quit working or, in rare cases, catch on fire or explode (yikes)!
Is battery corrosion dangerous?
Battery acid — and the corrosion that occurs when it leaks — is highly toxic and caustic. Alkaline batteries leak potassium hydroxide, a substance that can cause serious eye damage and respiratory and skin irritation.
So, how do you clean off battery acid safely? Well, the most important safety precaution to take when you’re dealing with battery corrosion is to wear gloves, a face mask, and eye protection. Keep scrolling for more specific tips on how to clean it up from various types of products.
What you need to safely clean battery erosion
Wondering what type of cleaning product will work? Will baking soda and vinegar clean battery corrosion? Yes, in fact, this power couple is one of the best ways to banish battery corrosion for good.
Baking soda neutralizes the battery acid, and a little vinegar (or lemon juice) reacts with the baking soda to break it down.
Here’s everything you’ll need to remove corrosion in the battery compartment:
- White vinegar or lemon juice
- Baking soda
- Gloves
- Eye goggles
- Cotton swabs or a toothbrush
Shop for natural products you need from Grove.

Become a Grove member
Wondering who Grove is, what types of products we offer, and how to get a free gift set when you sign up? Learn more about flexible monthly shipments, customizing your shipment, and joining millions of happy households — no monthly fees or commitments required.
Learn more
3 steps to safely clean up battery corrosion
1. Protect yourself
Wear safety glasses, a face mask, and gloves while you’re mucking around with battery corrosion, which is highly caustic.
Protect your work surface with an old rag or a sheet of scrap cardboard.
2. Remove and dispose of the old battery
Remove the corroded battery from the device, and place it in sand or kitty litter in a sealable plastic bag (use a separate bag for each battery).
Call your city’s household hazardous waste office to find out how to dispose of it. Never throw corroded batteries in the garbage, since they’re a hazard in the landfill — and extra-hazardous to the environment.
3. Neutralize the battery acid
Sprinkle some baking soda over the corrosion to neutralize the battery acid.
Dip an old toothbrush or cotton swab in vinegar or lemon juice so it’s soaking wet, and dab it on over the baking soda. Let it fizz for a couple of minutes, then scrub the corrosion away and rinse with clean, water-soaked cotton swabs.
Let the compartment dry completely before you put new batteries in.
Grove Tip
Baking soda and vinegar: The dynamic duo
There’s not much baking soda and/or vinegar can’t clean, and they both do it 100 percent naturally. Intrigued?
Read up on how it went when Grove writer Phoenix tried cleaning vinegar on her pots and pans, windows, and shower door — and see what happened when Grove writer Kristen tried baking soda on some pretty hardcore household messes!
Shop for natural vinegar & baking soda products from Grove.
How to clean battery corrosion in toys
Battery acid in your kids’ favorite toys is no laughing matter. But before you send ‘em to the Island of Misfit Toys, watch below to see just how easy it is to clean battery corrosion in toys.
4 tips for preventing battery acid leakage
The best way to avoid having to clean up battery corrosion is to follow a few simple tips and tricks to prevent them from leaking in the first place.
1. Install batteries properly
Improper installation can damage the batteries, leading to acid leakage.
2. Remove the batteries if you aren’t going to use the device for a long time
If you’re donating items, take the batteries out first.
3. Never mix old and new batteries in the same device
When the device dies, replace all of the batteries with new ones.
4. Don’t store batteries in the freezer or refrigerator
Just keep ‘em in a cool, dry location away from direct sunlight.
Browse Grove bestsellers before you go.
Follow Emma Roberts’ lead — Go plastic-free with natural products from Grove
Learn more about Grove
Read more from Grove
Join thousands of happy customers creating a healthier home. Get started to select your free welcome set!
Claim My Offer
How to Remove Battery Corrosion in 6 Simple Steps
Car battery corrosion is one of the main causes of decreased battery life and performance. Not only can built up battery corrosion prevent your vehicle from starting—which would be a hassle in the morning when you’re heading to work—but it can lead to a number of other issues, including damage to the vehicle’s air conditioning and electrical wiring.
Luckily, car battery corrosion is easy to spot. Very often, and especially with older batteries, you will start to notice a white, green or blue-tinged covering around your vehicle’s battery terminals, battery posts, or battery cables. This build-up of chemical garbage reduces the conduciveness of the battery, and leads to a transient current flow, which is a fancy way of saying that it can result in a malfunctioning battery due to electrical resistance.
Keeping your vehicle battery clear of corrosion promotes an extended battery life and battery performance. But fear not! The process of cleaning battery corrosion is straightforward and simple, and can be done by anyone.
Yes, even you.
Follow these simple 6 easy steps to remove car battery corrosion.
Step 1
Disconnect Your Battery Cables
To avoid being struck with electricity and being severely burnt, make sure to disconnect the negative battery cable BEFORE the positive battery cable.
You can identify negative and positive cables by checking what they’re marked by: the negative sign (-), the abbreviation ‘NEG’, and/or the colour black; and the positive sign (+), the abbreviation ‘POS’, and the colour red.
Red signifies the positive (+) cable, black signifies the negative (-) cable.
Step 2
Check the Battery Cables for Damage
Damaged and worn battery cables are a common culprit for non-starting engines. If you notice that the cables’ insulation is showing signs of corrosion, or are frayed, splintered, peeled, dried, or cracked in any way, then that should serve as an indication that you should have them replaced straight away.
Step 3
Remove the Corrosion from the Battery and Battery Terminals
Once the cables have been removed, you can focus your energy on the removal and neutralization of the battery corrosion. There are a few different methods to accomplish this step, so we’ll briefly delve into the best of them.
- Where there is corrosion on the battery and battery cables, apply a battery cleaning agent. Your best bet would be to opt for commercial grade battery cleaners. These will not only clear the corrosion from the battery, but will also neutralize the battery acid. If you don’t have access to any commercial grade cleaners, there exists some common household items you could use instead, such as baking soda and Coca-Cola. However, while some people swear by Coca-Cola as an effective and cost-efficient method, we suggest you exercise some caution, as the beverage contains synthetic sugars and phosphoric acid that can be damaging to your engine.
- The baking soda method, for its part, is tried and true as well as simple to perform. All you need is a glass of water and a teaspoon of baking soda to prepare the solution. Then use an old toothbrush or bristled brush to scrub said solution on the corroded areas. Cover the battery terminals and other corroded areas with a coat of baking soda. Then pour a small amount of water on each terminal. You’ll notice the two ingredients react with each other when they start bubbling. This neutralizes the acidic corrosion and makes it safe to handle. If you need to, repeat the same process on the battery cable ends.
 If you don’t have access to any commercial grade cleaners, there exists some common household items you could use instead, such as baking soda and Coca-Cola. However, while some people swear by Coca-Cola as an effective and cost-efficient method, we suggest you exercise some caution, as the beverage contains synthetic sugars and phosphoric acid that can be damaging to your engine.
A simple baking soda and water mixture can get rid of that corrosion quickly.
Step 4
Rinse and Dry
After that, you’ll want to use your tooth-brush or bristled brush to scrub the corrosion off.
Be careful not to let the solution nor the corrosive elements fall on the other engine components to keep your car protected from the damage these could potentially cause. We advise you to take the battery out completely, if possible.
Also, be warned: if you use professional-grade supplies, don’t let the battery-cleaning agent come in contact with your vehicle’s paint job, as some cleaning-agents can permanently stain your vehicle.
Once you’ve scrubbed away all the corrosion, rinse the battery and cable ends completely with clean water and let it all dry.
If you can, use an air compressor to speed things up.
Step 5
Take Some Corrosion-Preventative Steps
Apply anti-corrosion pads once everything dries. Also known as battery terminal protectors, these little guys help protect to your battery posts. Use pads coated in a battery-corrosion preventative compound.
Alternatively, apply a thin coat of petroleum jelly on the battery terminals once everything is dried off. This will serve to improve electricity conduciveness between the terminal and the cable-end. It will also help protect the battery terminals from future corrosion. Be generous in the amount that you use.
Use anti-corrosion pads (also known as battery terminal protectors) around your battery posts.
Step 6
Reconnect Your Battery to Your Vehicle
Once you clear the corrosion (step 3), let everything dry completely (step 4), and apply some preventative substances to your battery parts (step 5), you’re ready to reconnect your battery to your vehicle.
Do this in REVERSE order to avoid injury. Start with connecting the positive battery terminal first, followed by the negative one.
At this point, if you want to apply extra battery-corrosion preventative compounds, go ahead!
Want to Skip Steps 1 to 6?
Car battery corrosion removal is a must-know maintenance task. Keeping your battery clean will add years to its lifespan and help maintain its performance levels.
You’re now equipped with the knowledge to get the job done yourself, but if you prefer, you can always bring your vehicle in to your trusted neighbourhood Go Auto location for your battery maintenance needs.
- Further Reading: The Newbie’s Guide to Car Battery Maintenance
How to Clean Battery Corrosion
By
Mary Marlowe Leverette
Mary Marlowe Leverette
Mary Marlowe Leverette is one of the industry’s most highly-regarded housekeeping and fabric care experts, sharing her knowledge on efficient housekeeping, laundry, and textile conservation. She is also a Master Gardener with over 40 years’ experience; writing for over 20 years.
Learn more about The Spruce’s
Editorial Process
Updated on 07/25/22
Reviewed by
Melissa Homer
Reviewed by
Melissa Homer
Melissa Homer is a member of The Spruce’s Cleaning Review board. She is a trained cleaning professional, consultant, and educator with a two-decade career spanning commercial and professional residential cleaning. Melissa specializes in premium surface care, cleaning safety, cleaning procedure efficiency, cleaning training documentation, and cleaning damage repair.
Learn more about The Spruce’s
Review Board
Fact checked by
Sarah Scott
Fact checked by
Sarah Scott
Sarah Scott is a fact-checker and researcher who has worked in the custom home building industry in sales, marketing, and design.
Learn more about The Spruce’s
Editorial Process
The Spruce / Sarah Lee
In This Article
-
How Often to Clean Battery Corrosion
-
Before You Begin
-
How to Clean Alkaline Battery Corrosion
-
How to Clean Nickel Cadmium Battery Corrosion
-
How to Clean Lithium Battery Corrosion
-
Tips to Prevent Battery Corrosion
Project Overview
Little is more frustrating than grabbing a battery-powered tool, flashlight, or kid’s toy and finding that it doesn’t work except opening up the battery case to find a corroded mess. That corrosion must be cleaned away from the contact posts to give the item any chance of working again even with fresh batteries.
If the problem is caught early, with just a few items from your pantry, there is hope that you can clean away the corrosion and get things powered back up.
How Often to Clean Battery Corrosion
Battery corrosion should be cleaned as soon as you notice that the batteries are leaking in the battery case. We tend to use a battery operated item until the battery konks out, and it doesn’t work anymore. You should periodically check the battery case and battery in these types of items to ensure there is no issue with leakage or corrosion.
Before You Begin
While this is a project that doesn’t take long to complete, it is imperative that you protect your skin and eyes from any substances and wear gloves and eyewear protection. Prepare a surface with newspaper, disposable cloths, or paper towels to place the battery on after removing it from the battery compartment.
4 Most Durable, Comfortable Rubber Gloves for All Your Household Tasks
Warning
Chemicals such as sulfuric acid that are exposed during battery leakage are caustic and corrosive and can damage eyes and burn skin. Protective eyewear and gloves should be worn when handling leaking batteries or attempting to remove corrosion from battery compartments.
Do not attempt to clean leaking batteries. They should be removed from the device, placed in a plastic bag, and disposed of properly following waste guidelines in your community.
Equipment / Tools
- Old toothbrush or small bottle brush
- Small bowl
- Pencil eraser
- Safety glasses
- Nitrile or latex gloves
- Paper towels
- Newspaper or disposable cloths
- Cotton swabs
Materials
- Distilled white vinegar
- Fresh lemon juice
- Baking soda
The Spruce / Sarah Lee
How to Clean Alkaline Battery Corrosion
Alkaline batteries—AAA, AA, C, D—are the most commonly used non-rechargeable batteries in toys, household gadgets, and flashlights.
Tip
Before removing the corroded batteries or attempting to clean the device, always put on safety glasses and gloves. Protect work surfaces with newspaper or disposable cloths and work in a well-ventilated space.
-
Remove the Batteries
Wearing gloves, remove the batteries from the device.
Do not attempt to clean the batteries and dispose of all of the batteries and even those that don’t look corroded. Since batteries can cause soil contamination, place them in a plastic bag and dispose of them following the waste guidelines in your community.
The Spruce / Sarah Lee
-
Neutralize the Battery Corrosion
Pour about one tablespoon of distilled white vinegar or fresh lemon juice in a small bowl. Dip a cotton swab or old toothbrush into the solution and saturate the corroded areas of the battery case.
The Spruce / Sarah Lee
-
Scrub Away the Corrosion
Depending on the level of corrosion, use a cotton swab or small brush to scrub away corrosion residue from the corners and contact points in the battery case.
The Spruce / Sarah Lee
-
Dry the Battery Case
Use a paper towel to thoroughly dry the battery case and contact points.
The Spruce / Sarah Lee
-
Polish the Contact Points
If any corrosion remains on the battery contact points of the device, mix a tablespoon of baking soda and a few drops of water, lemon juice or vinegar in a small bowl.
Dip a cotton swab in the mixture and rub the contact points. Move to a new cotton tip as any rusty residue is transferred. When no more residue is transferred, carefully wipe the contact points with a clean cloth to remove any traces of the baking soda.
The contact points can also be polished with a pencil eraser to remove traces of corrosion residue.
The Spruce / Sarah Lee
-
Insert New Batteries
Once you are certain that the battery case is completely dry, insert new batteries. Do not mix old and new batteries.
The Spruce / Sarah Lee
 Do not attempt to clean the batteries and dispose of all of the batteries and even those that don’t look corroded. Since batteries can cause soil contamination, place them in a plastic bag and dispose of them following the waste guidelines in your community.
 Dip a cotton swab in the mixture and rub the contact points. Move to a new cotton tip as any rusty residue is transferred. When no more residue is transferred, carefully wipe the contact points with a clean cloth to remove any traces of the baking soda.
How to Clean Nickel Cadmium Battery Corrosion
Nickel Cadmium (NiCad or Ni-Cd) batteries like those from EBL are rechargeable. While less prone to leakage than alkaline batteries, they are more corrosive and the clean-up is handled differently.
-
Remove and Dispose of Batteries
Remove the batteries and dispose of them following waste guidelines in your community.
Do not attempt to recharge batteries that have leaked.
The Spruce / Sarah Lee
-
Clean the Battery Case and Contact Terminals
Sprinkle the inside of the battery case with dry baking soda to neutralize the potassium hydroxide in the corrosion. Empty the powder into a trash can for disposal.
The Spruce / Sarah Lee
-
Make a Baking Soda Paste
To remove any remaining corrosion on the battery contact points of the device, mix a tablespoon of baking soda and a few drops of water, lemon juice or vinegar in a small bowl. Dip a cotton swab in the mixture and rub the contact points. When no more residue is transferred, carefully dry the contact points with a paper towel.
The Spruce / Sarah Lee
-
Insert New Batteries
Insert new batteries into the device and charge, if necessary.
The Spruce / Sarah Lee
 Do not attempt to recharge batteries that have leaked.
How to Clean Lithium Battery Corrosion
It is very unusual for lithium batteries used in cell phones and laptop computers to leak. But when it happens, it is very dangerous and highly combustible. Do not attempt to clean lithium battery corrosion. Consult a hazardous waste professional for the proper disposal of lithium batteries.
Tips to Prevent Battery Corrosion
- Store batteries in a cool, dry place.
- Do not attempt to use expired batteries, and do not mix old and new batteries in devices.
- Remove batteries from devices that will not be used regularly.
- For items you know you use rarely, take the battery out and tape it to the outside of the device with painter’s tape. If a battery is not in the device, it is not being constantly strained, and it will be easy to pop it back in when need be.
The Spruce / Sarah Lee
Learn How to Recycle Everything in Your Home
Article Sources
The Spruce uses only high-quality sources, including peer-reviewed studies, to support the facts within our articles. Read our editorial process to learn more about how we fact-check and keep our content accurate, reliable, and trustworthy.
-
Sulfuric Acid Poisoning Information. Icahn School of Medicine at Mount Sinai.
-
Pervasive health threats of unregulated battery recycling. Stanford University.
-
Used Household Batteries. United States Environmental Protection Agency.
Why batteries leak and what do to when it happens
– Better Battery Co.
Everyone has to deal with a leaky battery at some point. You open the battery compartment for a remote or other device you haven’t used in months only to find a crusty, chalky substance encrusted on the batteries and the surrounding area.
A leaky battery can cause skin irritation, so it needs careful handling. But why do batteries leak anyway? Can you recycle corroded batteries, and how can you clean battery corrosion when you find it?
Why do batteries leak?
Let’s get the most obvious question out of the way first: why do batteries leak? Alkaline batteries generate power through chemical reactions within the battery cell. These reactions create hydrogen gas, which is usually not a problem. If too much gas develops, the battery cell ruptures, releasing the white sticky substance we call battery acid.
Under regular use, an alkaline battery will not leak. Manufacturing defects can cause leakage, but by far, the most common reason for leaky batteries is a lack of use. When batteries sit in unused devices for long periods, hydrogen can build up in the battery cell until the pressure causes the battery’s insulating seals to breach. The gas is harmlessly released, but the rupture also provides an exit point for the battery cell’s chemical components.
What is Battery Acid?
Alkaline battery leakage is potassium hydroxide, and it’s an alkaline, not an acid. So why call it battery acid? The term comes from the sulphuric acid used in lead car batteries, which is much more toxic.
While you need to handle potassium hydroxide with care, the chemical is easy to neutralize, after which you can clean battery corrosion from your devices safely.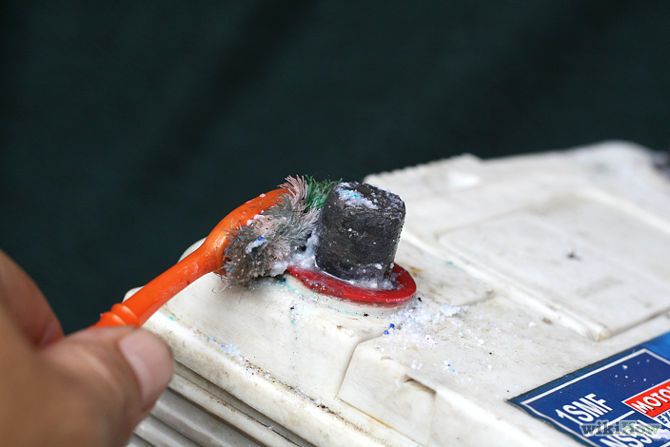
How to Avoid Leaky Batteries
Proper storage is the best way to prevent battery leakage. When batteries are stored loose they can come into contact with other batteries and metal items, causing power generation within the battery cell that leads to hydrogen build-up. The best way to store batteries is to keep them organized in a box like the Better Battery Company’s subscription box, where each battery is isolated in its own cozy compartment. You can also take the following steps to reduce the risk of battery leakage:
-
Alway use the same type and brand of battery for devices requiring multiple batteries. Mixing alkaline, recyclable, and lithium batteries — or even the same kind of battery from different brands — results in whichever battery is strongest discharging faster, increasing the possibility of battery leakage.
-
Remove batteries from any device you don’t use often.
-
Remove batteries from devices with AC adapters when the adapter is plugged in.
-
Avoid storing your batteries in areas of extreme heat and cold. Storing batteries in the refrigerator will not make them last longer. Instead, the cold reduces battery lifespan and increases the risk of leakage.
-
Do not put old batteries and new ones in the same device.

How to Dispose of Batteries that are Leaking
Leaking batteries are not safe to use, but you don’t want to throw them out. Too many batteries end up in landfills, where they leak their contents into the environment. Instead, put the leaky batteries in a plastic bag and drop them off at a recycling facility. For batteries greater than nine volts, you should put clear tape over the battery terminals to prevent the battery from generating heat, leading to fires.
Can you recycle corroded batteries?
Corroded, leaky batteries require special attention but can be recycled. The U.S. The Department of Transportation requires special packaging and handling requirements for corroded, leaky batteries. Call2Recycle, our recycling partner, offers a service for the safe transportation of leaky batteries.
Defective and recalled batteries also require special handling and shipping requirements. Better Battery Company provides shipping services for batteries identified by the Consumer Product Safety Commission as defective and will replace such batteries at no cost.
How to Clean Battery Corrosion in Toys and Remotes
Knowing how to clean battery corrosion in remote controls, toys, and other devices helps you salvage electronics before battery leakage ruins them. To clean battery corrosion safely, you’ll need the following:
Choose a well-ventilated area for cleaning. Put on gloves and eye protection to prevent irritation caused by contact with potassium hydroxide and take these steps:
-
Remove batteries and recycle them properly.
-
Dip cotton swabs or the toothbrush in vinegar or lemon juice.
-
Scrub the corrosion with the swab or toothbrush to remove as much as possible.
-
For remaining corrosion, mix a small amount of water with baking soda. Put this mixture on your swab or toothbrush and scrub again.
-
Use a damp cotton swab to wipe away residual baking soda.
-
Let the device dry completely before inserting new batteries.

If some of the battery leakage does make contact with your skin, flush the affected area with water.
Fortunately, most batteries never leak, especially if they’re packaged and stored correctly. If one should leak, though, now you know how to handle it!
Let’s power your world with positivity! Subscribe now.
Share this with your family + friends.
Corroded Battery – Bilder und Stockfotos
1.295Bilder
- Bilder
- Fotos
- Grafiken
- Vektoren
- Videos
AlleEssentials
Niedrigster Preis
Signature
Beste Qualität
Durchstöbern Sie 1.
 295 corroded battery Stock-Fotografie und Bilder. Oder starten Sie eine neue Suche, um noch mehr Stock-Fotografie und Bilder zu entdecken.
coroded-auto-batterie – corroded battery stock-fotos und bilder
Coroded-Auto-Batterie
verwendete korrodierte aa-batterien isoliert auf weiß – corroded battery stock-fotos und bilder
Verwendete korrodierte AA-Batterien isoliert auf weiß
autobatterieklemme mit korrosion am bleipfosten – corroded battery stock-fotos und bilder
Autobatterieklemme mit Korrosion am Bleipfosten
nahaufnahme batterieklemmen korrodieren schmutzige beschädigte problem, alte batteriekorrosion verschlechtert sich undicht mit blauem säurepulver. servicearbeit durch professionelle techniker konzept. – corroded battery stock-fotos und bilder
Nahaufnahme Batterieklemmen korrodieren schmutzige beschädigte…
alte undichte batterien – corroded battery stock-fotos und bilder
Alte undichte Batterien
korrodierte aa-batterien – corroded battery stock-fotos und bilder
Korrodierte AA-Batterien
oxidierte und schmutzige autobatterie-terminal. batterieklemmen korrodieren schmutzige beschädigte problem. alte batteriekorrosion verschlechtern leckage mit säurepulver. – corroded battery stock-fotos und bilder
Oxidierte und schmutzige Autobatterie-Terminal. Batterieklemmen…
autobatterieklemme mit oxid bedeckt. autoreparatur. batteriewechsel. – corroded battery stock-fotos und bilder
Autobatterieklemme mit Oxid bedeckt. Autoreparatur….
doppelte ein alkalisch batterie mit korrodierten – corroded battery stock-fotos und bilder
Doppelte ein Alkalisch Batterie mit korrodierten
doppelte ein alkalisch batterie – corroded battery stock-fotos und bilder
Doppelte ein Alkalisch Batterie
batterie terminal mit rost auf sie – corroded battery stock-fotos und bilder
Batterie terminal mit Rost auf Sie
alte batterien – corroded battery stock-fotos und bilder
Alte Batterien
batterie-papierkorb – corroded battery stock-fotos und bilder
Batterie-Papierkorb
mechaniker prüft auto batterieanschluss in einer garage .
alte batteriekorrosion verschlechtert sich mit blauem säurepulver.
batterieklemmen korrodieren schmutzige beschädigte probleme. – corroded battery stock-fotos und bilder
Mechaniker prüft Auto Batterieanschluss in einer Garage .
Alte…
rost – corroded battery stock-fotos und bilderhaufen alter batterien. – corroded battery stock-fotos und bilder
Haufen alter Batterien.
die erfüllten batterien unterschiedlicher größe mit korrosion bedeckt. das recycling. – corroded battery stock-fotos und bilder
Die erfüllten Batterien unterschiedlicher Größe mit Korrosion…
reinigung der autobatterieklemme von schmutz und oxidation. – corroded battery stock-fotos und bilder
Reinigung der Autobatterieklemme von Schmutz und Oxidation.
motor – corroded battery stock-fotos und bilderrost – corroded battery stock-fotos und bilderblasen, die sich bei der elektrolyse-rostentfernung auf der oberfläche bilden – corroded battery stock-fotos und bilder
Blasen, die sich bei der Elektrolyse-Rostentfernung auf der. ..
..
schnur der alten batterie mit korrodierungsklemmen – corroded battery stock-fotos und bilder
Schnur der alten Batterie mit Korrodierungsklemmen
autobatterieklemme mit korrosion am bleipfosten – corroded battery stock-fotos und bilder
Autobatterieklemme mit Korrosion am Bleipfosten
zwei alte akkus isoliert auf weißem hintergrund. – corroded battery stock-fotos und bilder
Zwei alte Akkus isoliert auf weißem Hintergrund.
rost und bodensatz hängen und damege akku – corroded battery stock-fotos und bilder
Rost und Bodensatz hängen und Damege Akku
entsorgt batterien umweltgerecht – corroded battery stock-fotos und bilder
Entsorgt Batterien umweltgerecht
alte aa-batterie. oxidierte aa-batterie. batterie auf weißem hintergrund – corroded battery stock-fotos und bilder
Alte AA-Batterie. Oxidierte AA-Batterie. Batterie auf weißem…
oxidkorrosion im batteriefach eines elektronischen geräts, das auf weißem hintergrund isoliert ist – corroded battery stock-fotos und bilder
Oxidkorrosion im Batteriefach eines elektronischen Geräts, das. ..
..
eine alte rostige gusseiserne batterie hob die fenster am eingang eines mehrstöckigen gebäudes in der ukraine an und heizte das haus, die batterie im haus ist alt – corroded battery stock-fotos und bilder
eine alte rostige gusseiserne Batterie hob die Fenster am…
entsorgt batterien umweltgerecht – corroded battery stock-fotos und bilder
Entsorgt Batterien umweltgerecht
schmutzige alte batterieklemme korrosion grunge mit grüner blauer asche zeug salzpulver an pfosten kontakt von säureleck. – corroded battery stock-fotos und bilder
schmutzige alte Batterieklemme Korrosion Grunge mit grüner…
weißer alter kühler mit gusseisernen profilen – corroded battery stock-fotos und bilder
weißer alter Kühler mit gusseisernen Profilen
alte autobatterien recycling hintergrund – corroded battery stock-fotos und bilder
Alte Autobatterien Recycling Hintergrund
farbverlaufsvektorsymbol der batterie-recyclingstation für dunkles design – corroded battery stock-grafiken, -clipart, -cartoons und -symbole
Farbverlaufsvektorsymbol der Batterie-Recyclingstation für. ..
..
zerstörte und verlassene elektroautos – corroded battery stock-fotos und bilder
Zerstörte und verlassene Elektroautos
batterie mit koksöfen und kokereien in einer ehemaligen großen kokerei zur raffination von kohle. – corroded battery stock-fotos und bilder
Batterie mit Koksöfen und Kokereien in einer ehemaligen Großen…
alte rostige ärmel und eine kugel – corroded battery stock-fotos und bilder
Alte rostige Ärmel und eine Kugel
lithium-ionen-akku. – corroded battery stock-grafiken, -clipart, -cartoons und -symbole
Lithium-Ionen-Akku.
ausfall der autobatterie – corroded battery stock-fotos und bilder
Ausfall der Autobatterie
schmelzen batterie – corroded battery stock-fotos und bilder
Schmelzen Batterie
nahaufnahme einer großen packung verrosteter batterien mit weichem fokus. umweltschutzkonzept. falsche entsorgung von batterien. 3d-render-illustration – corroded battery stock-fotos und bilder
Nahaufnahme einer großen Packung verrosteter Batterien mit. ..
..
leckende aa-batterien und korrosion – corroded battery stock-fotos und bilder
Leckende AA-Batterien und Korrosion
elektrofahrrad elektrische lithium-batterie-stromversorgung – corroded battery stock-fotos und bilder
Elektrofahrrad elektrische Lithium-Batterie-Stromversorgung
tote auto rostige batterie. recycling. – corroded battery stock-fotos und bilder
Tote Auto rostige Batterie. Recycling.
weibchen wirft tote korrodierte batterien in einen mülleimer – corroded battery stock-fotos und bilder
Weibchen wirft tote korrodierte Batterien in einen Mülleimer
worker installiert eine fensterbank. – corroded battery stock-fotos und bilder
Worker installiert eine Fensterbank.
automobile batteriewechsel – corroded battery stock-fotos und bilder
Automobile Batteriewechsel
korrodierte batterie mit leckage oder batteriesäure, die haut verbrennen und boden kontaminieren können. green planet, recycling-konzept. – corroded battery stock-fotos und bilder
Korrodierte Batterie mit Leckage oder Batteriesäure, die Haut. ..
draufsicht auf viele gebrauchte autobatterien für das recycling – corroded battery stock-fotos und bilder
Draufsicht auf viele gebrauchte Autobatterien für das Recycling
klasse 8 korrosives symbolzeichen, vektorillustration, isolieren auf weißem hintergrundetikett . eps10 – corroded battery stock-grafiken, -clipart, -cartoons und -symbole
Klasse 8 Korrosives Symbolzeichen, Vektorillustration, Isolieren…
autobatterie isoliert auf weißem hintergrund (clipping path) – corroded battery stock-fotos und bilder
Autobatterie isoliert auf weißem Hintergrund (Clipping Path)
batteriekontakte korrodieren – corroded battery stock-fotos und bilder
Batteriekontakte korrodieren
korrodierte gebrauchtbatterien. unter ihnen ist ein grüner spross. auf kiefernbrettern. entsorgung gefährlicher abfälle. – corroded battery stock-fotos und bilder
Korrodierte Gebrauchtbatterien. Unter ihnen ist ein grüner Spross.
oldtimer-service zinn schilder und plakate – corroded battery stock-grafiken, -clipart, -cartoons und -symbole
Oldtimer-Service Zinn Schilder und Plakate
symbol “leistung und energie” – corroded battery stock-fotos und bilder
Symbol “Leistung und Energie”
heizkörper. lackierte gusseisenbatterie. – corroded battery stock-fotos und bilder
Heizkörper. Lackierte Gusseisenbatterie.
eine rostige gusseiserne batterie in einem ausgebrannten haus – corroded battery stock-fotos und bilder
Eine rostige gusseiserne Batterie in einem ausgebrannten Haus
diy – do-it-yourself-arbeitsplatz mit lötkolben, werkzeugen und elektronischen bauteilen konzepthintergrund – corroded battery stock-fotos und bilder
DIY – Do-it-yourself-Arbeitsplatz mit Lötkolben, Werkzeugen und…
longues-sur-mer batterie – frankreich atlantik wall – corroded battery stock-fotos und bilder
Longues-sur-Mer Batterie – frankreich Atlantik Wall
kupferdrähte lampe und schraubendreher für elektrische arbeit – corroded battery stock-fotos und bilder
Kupferdrähte Lampe und Schraubendreher für elektrische Arbeit
von 22
What and how to paint a heating radiator, what paint to paint a radiator with
Heating radiators, in addition to their main purpose to create warmth and comfort in the house, also perform a purely decorative function, since in most cases they are in plain sight. If you have already installed new radiators, then this article is not very relevant to you yet, but if you have been using them for five to seven years, it may be time to paint them. In this review, we will tell you how and what is the best way to do it. [contents]
Contents
- Why batteries are painted
- Preparation for painting
- What color to paint
- Choosing paint
- Painting technology
situation may require painting and what preliminary steps will need to be taken to prepare the surface of the battery.
Radiators may need to be painted if:
- you have bought a new heating appliance. As you know, a fairly large number of cast-iron radiators are sold unpainted;
- you have decided to make repairs and want to give the whole interior a new look;
- over time, the surface of pipes and batteries has lost its original freshness, the paint has turned yellow and peeled off, I want everything to be beautiful.
Quite often this happens when there are old cast-iron “accordions” installed in the house in the last century.
Regardless of the condition of the surface, before applying the decorating composition, it is necessary to carry out some preparation so that the paint lies evenly and the heat transfer of the radiator is not reduced.
Preparation for painting
You can clean the radiator like this …
We note right away that any battery, even a new one, requires preliminary cleaning. It always has bumps, dirty or rusty areas. All this must be thoroughly cleaned and degreased. As for the pipes through which the coolant is fed and taken back, they will in any case have to be repainted, unless, of course, they are plastic.
If your radiator has been standing for a long time, then its condition may be different:
- The old paint lies flat, without any peeling or chipping. This is rare, but it happens. This means that you are lucky, you can immediately start painting;
... but it’s more convenient and faster anyway.
- If there are a small number of cracks on the surface of pipes or batteries and places where the previous coating has peeled off or partially come off, then such areas should be sanded until a smooth base is obtained and then painted;
- If almost all of the old paint has come off, and the work surface in many places is open metal, then more work will have to be done here. All residues of the coating must be removed with an iron bristle brush or special washing compounds.
If rust appears on the surface, it is removed with various converters or destroyers, which are commercially available in a variety of designs.
After all procedures, it is necessary to finally clean all parts of pipes and radiators prepared for painting from dust and dirt, wash them and treat them with some kind of degreasing liquid, for example, acetone or white spirit.
What color to paint
Most modern radiators, both cast iron and steel and aluminum, are painted white. From the point of view of aesthetics and design, this is understandable, such batteries look good and fit easily into any modern interior.
The most common and typical battery color
However, from the point of view of heat transfer, everything is exactly the opposite. The darker the surface of the heating device, the more efficiently it heats the room.
Therefore, when choosing what color to paint your heating communications, think about a reasonable compromise if possible. Of course, a compromise is needed here, because black is unlikely to brighten most rooms, but dark shades of brown, green or blue could be a reasonable way out.
Paint selection
The choice of paint materials is currently quite diverse, so there is a certain scope for deciding which paint to cover the battery. It is only necessary to observe a number of simple restrictions:
Various types of enamels are commonly used, which comply with the above restrictions. For example, water-based acrylic enamels do not leave a strong odor, dry well and provide an even, shiny finish. If you choose a solvent-based enamel, then no primer is required when painting cast iron surfaces. But alkyd enamels, when dried, retain a heavy smell for some time, and then may turn yellow.
Painting technique
After the surface has been treated, it must first be primed. This is done in order to ensure better adhesion (adhesion) of the paint layer that you will apply later.
The correct primer is very important, as the thickness of the decorative layer greatly affects the heat transfer. This is especially important for cast iron batteries and pipes, since their efficiency is not the highest anyway.
No primer is required under solvent-based enamels, although it certainly will not be superfluous. If you use a primer, be sure to pay attention that it has anti-corrosion properties – this will help to further protect the metal surface.
![]()
Battery painting has the following features:
-
Brushes are the most convenient tool for painting
Hot batteries are best not to paint – there is a high risk of cracking and unevenness. In addition, in such conditions, the unpleasant smell of the dye increases. Therefore, if you have a valve that will shut off the coolant supply, it must be closed. If not, then it is better to wait until the end of the heating season.
- Painting must start from the top , otherwise drops of the decorative composition will fall on the already processed places.
- Likewise, it’s best to paint the inside first and then the outside, so there’s less chance of getting your hands dirty.
- Work better with a brush . The surface of the radiator and heating pipes is usually not so large, so it is difficult to achieve serious time savings when using an airbrush. But you can treat all hard-to-reach places with a neat even layer.
- It is better to apply two thin coats of one after the other. This will be much more efficient both in terms of appearance and heat dissipation. The second layer is painted after the first has completely dried. Re-treatment intervals are usually indicated on the paint product packaging.
- If you are repairing the entire room, then it is better to paint the batteries after pasting the walls with wallpaper. The surface of the walls can be covered with masking tape or pieces of cardboard.
Don’t forget to lay something on the floor as well – drops will fall down during the painting process.
See the video for more information about battery painting:
That, perhaps, is all about how to paint radiators. There is nothing complicated in this process, the main thing is to carefully clean everything from the old paint and apply even thin layers without staining the nearby surfaces of the walls and floor. Subject to the correct choice of dye material and compliance with all recommendations, your battery will again become an interior decoration and will look great for many years.
What to do if a heating battery is leaking: how to fix a leak in a heating radiator
Any engineering communications, including heating systems, gradually wear out and fail. Malfunctions are of a different nature, but when the heating battery flows, this leads to unpleasant consequences. The sooner the leak of a cast-iron, steel or bimetallic radiator is fixed, the less likely it is to flood your apartment and flood your neighbors.
- Why radiators leak
- Heating radiator leaking: what to do
- How to fix a weld leak
- Fixing a leak between battery sections
- How to fix a leak in a heating battery: repair methods
Why the radiator is leaking
Before figuring out how to fix a radiator leak between sections or elsewhere, you need to understand the causes of the problems:
- Cast iron radiators are heavy and mounted on strong hooks.
With a minimum error, the radiators sag under their own weight, and a misalignment of a few millimeters causes the formation of air pockets. Corrosion begins in these places – the cast iron becomes thinner and a fistula forms after a while. There is a slight leak, which is desirable to quickly eliminate.
- In houses with a centralized heating system, water hammer often occurs, due to which heating radiators sometimes leak at the joints (this is especially true for bimetallic radiators).
- Cast iron radiators are rough inside, so all kinds of debris and foreign inclusions linger on the surface: pieces of metal, rusty sediment, etc. Gradually, the channels begin to clog, and the deterioration of the coolant circulation leads to the risk of a breakthrough or a leak. This is another reason why batteries leak, both cast iron and steel.
- Gaskets and nipple threads are weak points of heating radiators, so leaks can form in these places.
Practice shows that the leak of aluminum, steel and other radiators does not appear suddenly. First, characteristic signs appear: the air temperature in the room decreases, plaque forms on the radiator, corrosion spots form on the surface.
Don’t be idle when you see these signs, but decide what to do – the battery is already leaking. If you ignore the situation, an accident may occur. Also, you may soon find a puddle of water under the radiator, and the humidity level in the room will increase noticeably. You can repair the leak in the heating radiator yourself or turn to the masters. An experienced plumber of our company will quickly eliminate the leakage of any radiator: aluminum, steel, bimetallic, cast iron.
Many are concerned about the question, if the battery is leaking, who should I call? If you live in an apartment with central heating, contact the management company or contact us. In other cases, you can do without a managing organization – it will not help you.
How to eliminate a leak in a heating radiator
What to do when the radiator starts to ooze at the joints, between adjacent sections or a tap leaks? Many people, discovering a leak, are lost and do not understand what to do. First of all, you need to shut off the coolant supply and substitute something under the place where water drips or flows. In a private house, this will not be a problem, and apartment residents may have to go to the basement to shut off the supply valves on the entire riser (if the apartment does not have taps on the radiators).
We must warn you right away: if you do not have a set of tools and spare parts, do not even think about how to fix a leak in an apartment or house on your own. Otherwise, you can only make things worse. It is better to call the master by calling our company. If you decide to act on your own, try to follow the instructions for each specific situation.
What to do if the weld is leaking
The radiator often leaks in a weak spot. it may appear if, when installing the battery, an unstable weld was made at the junction with the pipe. a leak can provoke a pressure surge (the so-called water hammer) or an increase in the temperature of the coolant.
What to do with such a leak? Use a metal clamp with a rubber pad over the hole (a bike tube will do). Wrap the pipe with the leak with a rubber strip and put the clamp on top. It needs to be tightened well, and the leak will disappear. If there is no clamp, use a simple wire, tightening with pliers.
How to fix a leak between radiator sections
Breakage of a radiator plate made of thin material is not ruled out. Corrosion will eventually corrode the battery from the inside (especially for steel radiators), a fistula with a leak will appear – you will immediately see how water oozes out.
In this case, you need to act quickly. If the radiator is bimetallic, replace one of the sections that is leaking. As an emergency measure, cold welding is suitable, which needs to close up the place of leakage, having previously blocked the water. You are unlikely to be able to disassemble a bimetallic or cast-iron radiator to replace individual sections, so it’s better to call the wizard.
Troubleshooting
Now let’s look at what and how you can fix the leak if the above cases do not fit or do not help for any reason. The main ways to solve the problem if the battery is leaking are as follows:
- Cold welding
- Application of plaster-cement dressing
- Use of table salt
- Thermal and moisture resistant adhesives
Cold welding
High strength and easy to use 2-component epoxy adhesives are available. A certain variation of cold welding has been created for each metal, but there are also universal options. For example, you can buy a repair rod for sealing cracks, sealing holes and eliminating leaks in cast iron, steel and bimetallic radiators.
Dry and degrease the surface before covering the leak. If necessary, remove corrosion with a brush or sandpaper. After that, apply cold welding according to the instructions on the package.
Cement and gypsum filling
If there is no cold welding, and a cast-iron or other battery has leaked heavily – what to do in this case? Use a cement-gypsum bandage. You will need a bandage, plaster or cement. Dilute the dry mixture to a creamy consistency, soak a bandage with it and wrap it around the place where the cold or hot battery flows. Make several layers to form a strong bandage. If it is not possible to drain the coolant, replace the cement with alabaster or gypsum. From above it is recommended to apply 1-2 layers of a bandage impregnated with a cement mixture.
Table salt
The easiest way to fix a radiator leak at home without the help of a master is to use table salt. The tool is suitable for leaking threaded connections. Soak a medical bandage in water and roll in salt, and then wrap it around the leaking area. When the salt dries, the hole will be securely closed. From above, for reliability, a cement bandage is applied.
Adhesives
When leakage is small, heat and moisture resistant adhesives can be used. They are applied to gauze or bandage, and then wound on a leaky place (for example, a joint between two sections). When the glue dries, the leak will be sealed. Such repairs do not last long, so after the end of the heating season and draining the water from the system, it is better to repair the radiator in a more reliable and durable way.
If you can’t fix the problem yourself, it’s best to contact a professional to avoid trouble. Masters of the San Remo company will eliminate the cause of the leak inexpensively and in a short time. And if necessary, they will qualitatively install a heating radiator.
Why are batteries dangerous? A few decades ago, batteries were used much less frequently in everyday life, which was due to their rather high cost, due to the complexity of production and simply low consumer demand. In recent years, not only has the process of industrial production of autonomous power sources become much cheaper, but their demand has also increased. Consumer electronics has become widely available, many devices (TVs, air conditioners, audio centers) are equipped with remote controls that require batteries to function.
The huge army of children’s electronic toys also requires the use of autonomous power sources. Many portable household appliances have appeared (watches, players, toothbrushes), which also require batteries to operate.
Previously, used batteries were thrown away with household waste without much thought, and since the volume of this waste class was quite small, this did not present an acute problem.
Without thinking, or having insufficient information about the danger posed by an expired battery, many still send it to an ordinary trash can, as a result, more than 15 million batteries accumulate in Moscow’s landfills alone per year.
According to statistics, a Moscow family annually throws away up to 500 grams of used batteries. In total, 2-3 thousand tons of discarded batteries are collected in the capital a year. In the US, Americans buy almost three billion different batteries every year, and about 180,000 tons of these batteries end up in landfills across the country.
It is estimated that on average, batteries make up about 0.25% of the total waste collected in megacities.
What do we call a battery?
Battery is a galvanic cell or accumulator designed for autonomous (independent) power supply of various devices. A battery is essentially a power source. Inside the sealed shell is a circuit consisting of an anode and a cathode immersed in an electrolyte. When immersed, between the anode and cathode (poles), as a result of chemical reactions between heavy metals (mercury, magnesium, manganese, cadmium, nickel, lead) and alkalis, a potential difference arises – voltage.
The first steps towards the appearance of the battery were taken in 1791, when Luigi Galvani, in his Treatise on the Forces of Electricity in Muscular Movement, described his discovery of an electrochemical circuit, which he accidentally built while studying the properties of dissected frog legs. Much later, based on his observations, Gaston Plante created a battery, which was, in fact, the first battery that used a lead plate immersed in a weak solution of sulfuric acid.
What are the types of batteries?
- carbon-zinc
These are the most common batteries that are used primarily in various household devices (remote controls, children’s toys, and many others).
- alkaline or alkaline, alkali-manganese.
These batteries last longer and are more commonly used for cameras.
- l lithium
Used for mobile phones.
Batteries can be disposable or reusable (batteries).
Modern batteries are light in weight, work well at high and low temperatures and are an autonomous source of direct electric current.
Which batteries are the most dangerous – disposable or rechargeable?
Both disposable and rechargeable batteries are widely used in everyday life.
Batteries are more often used in mobile devices, laptops, computers, digital video cameras, cameras. It is rechargeable batteries that contain environmentally hazardous nickel and cadmium compounds, nickel hydride and lithium.
Disposable batteries are used in numerous children’s toys, calculators, remote controls, flashlights, they do not contain heavy metals mercury and cadmium, they contain zinc and manganese, which do not have such catastrophic effects on the body and the environment.
It can be said that disposable batteries are less harmful in terms of their potential polluting effect, however, the frequency of use and the amount of waste generated are much higher. In addition, being thrown out not completely discharged, they cause fires in landfills.
What is the problem?
A battery that has reached its end of life is not dangerous, provided that its case is not damaged and it is stored at room temperature and minimal humidity. Getting along with household waste to a landfill, and being exposed to a variety of atmospheric factors, the battery begins to rust and collapse under the influence of corrosion. Its body loses its tightness, the contents gain access to the external environment, poisoning it and its inhabitants.
What happens to a battery in a landfill?
Alkali and heavy metals from a broken battery are hazardous to the environment. Entering the soil first, toxic substances reach groundwater, from where they enter water bodies, including those from which tap water is taken. Lands and plants growing on them, including numerous food crops, are exposed to chemical pollution; the meat and milk of farm animals grazing on contaminated pastures also become dangerous. It’s not just passive corrosion that causes batteries to contaminate soil and water; landfills are often exposed
spontaneous combustion, and the batteries in the garbage, when heated, release dioxins into the atmosphere, contaminating the air as well. Dioxins are tens of thousands of times more toxic than cyanide and are the cause of cancer and diseases of the reproductive system.
What is the danger of the contents of the battery?
The most dangerous heavy metals contained in batteries, especially mercury.
Mercury – the strongest poison belonging to the first class of danger. Accumulating in the tissues of all organs, it causes nervous disorders and disorders of the locomotor apparatus, diseases of the respiratory system, impairs vision and hearing, leads to damage to the brain and the nervous system as a whole, and has a destructive effect on the kidneys and liver. Especially dangerous for children. In fairness, it should be noted that the technology for the production of modern batteries does not involve the use of mercury, however, it was widely used until 2001.
Other heavy metals pose no less of a threat: cadmium, lead.
Lead – accumulates in the kidneys and causes severe disorders of the nervous system and brain diseases.
Cadmium – accumulates in the kidneys, liver, bones and thyroid gland. Leads to cancer. At present, nickel-cadmium batteries, which are still quite common and are gradually being replaced all over the world, are being gradually replaced by more advanced and environmentally friendly nickel-metal hydride and lithium-ion batteries. They have more electrical capacity and the number of charge-discharge cycles. But sooner or later they also fail and require disposal.
The toxic effect of heavy metals on the body does not manifest itself at once, microdoses of a poisonous substance received with water and food accumulate in the body over many years, exerting a destructive effect.
What can be done to prevent the danger?
-
Reduce the frequency of battery use in favor of devices that do not require them;
-
Use rechargeable batteries instead of disposable batteries. In the long term, both economic and environmental benefits are obvious: batteries withstand can be recharged more than a thousand times, and last for many years;
-
Buy batteries labeled “mercury-free”;
- Do not dispose of used batteries and accumulators with other waste. On the case of each battery, the manufacturer places a special sign (the image of a crossed-out trash can), indicating the inadmissibility of disposal together with household waste.
So where do you throw away the battery?
In the last 5-10 years in large cities, finding a collection point for used batteries has not been a problem. Containers for collecting batteries are installed in many shopping centers, electronics and household appliances stores. Numerous volunteer organizations organize mobile collection points.
Collected batteries are sent to special recycling facilities. In Russia, industrial recycling is in its infancy, and only one battery recycling line is actively operating, located in Chelyabinsk. Part of the collected batteries is sent to enterprises located in Europe. Now, with the growing spread of ethical, conscious consumption, we simply cannot turn a blind eye to the problem of battery disposal.
Remember that maintaining the health of the planet and future generations is the responsibility of each of us.
Do not ignore the importance of proper disposal of batteries, take a personal part in preserving the world around you and your own health.
what to do and how to fix the leak?
If a cast-iron radiator has leaked, do not put off fixing the leak indefinitely. In such a situation, the main thing is to take immediate action. Otherwise, everything will end with repairs and lawsuits from neighbors.
Contents of the article
- Why cast iron batteries leak
- What battery leaks are
- How to fix a leak in a cast iron battery
- Who should repair the damaged battery
- How to fix a crack or fistula in a section
- How to fix a leak between sections of a cast iron battery
- How to fix a leak from a lock nut 9007 9008 Leaks associated with valves
- Preventive maintenance of cast iron radiators
Why leaks occur in cast iron batteries
Although cast iron radiators are strong and durable, they also leak. Violation of tightness is caused by various reasons:
- Natural wear – the cast-iron body is constantly in contact with water, therefore it gradually oxidizes and collapses.
Although cast iron has a high corrosion resistance of only 0.25 mm / year, batteries from it rarely last more than 25-35 years.
- High pressure – its sharp jumps are especially dangerous – water hammer. Cast iron can withstand up to 11-12 atmospheres, but strong pressure drops, especially those that are constantly repeated, lead to its destruction.
- High temperature. For heaters, overheating that occurs in the heating networks of apartment buildings due to incorrect operation of heat points is detrimental. Normally, the coolant should be cooled to 80-90 degrees and only then fed into the pipes. But water often comes in too hot or even boils in the heating plant. This damages all heat communications, including radiators.
- Incorrect installation. Cast iron batteries are very heavy, the mass of one section with water reaches 7 kg. If installed incorrectly, the radiators warp. In places of distortions, metal fatigue occurs, leading to its destruction.
Cracks and fistulas appear.
- Wear and deformation of seals – sanitary flax, fum tape, gaskets and seals. Because of this, the joints of batteries with pipes, intersections and taps flow.
- Freezing of the coolant – occurs when the heating is turned off. The water in the pipes, when turned into ice, increases in volume and breaks the cast iron. Huge holes appear on the walls, pipes and valves deteriorate. Damaged items are almost impossible to repair.
- Low quality of the coolant – the quality of water in the heat supply systems of MKD is regulated by document RD 24.031.120-91, approved by the Ministry of Heavy Machinery. It clearly specifies the parameters of the water entering the heating systems. Unfortunately, the coolant in apartment buildings very often does not comply with regulatory data, which leads to damage to radiators.
What battery leaks are
There are several typical radiator leaks, each of which is caused by certain causes:
- Cracks and fistulas on the surface of the section appear due to corrosion.
- Cast iron ruptures are formed when water inside the system freezes and pressure surges.
- Leaks between sections occur due to the destruction of cast iron and wear of intersection gaskets.
- Leaks from under the nut at the joints with the inlet and outlet pipes are formed due to oxidation of the cast iron, destruction and deformation of the seals.
- Violation of the tightness of taps and other valves – in addition to natural wear and tear, provoked by water hammer, dirt accumulation, improper operation.
Meet the radiators Teplopribor
Watch video
Benefits of radiators TEPLOPRIBOR
Reliable and durable
– operate at a pressure of 16–20 atm. and withstand surges up to 30 atm. Their service life is from 25 years.
Have a long warranty
– 10 years for aluminum models,
and 15 years for bimetal models.
Composed of 90% Russian materials
– We work with raw materials obtained directly from leading Russian smelters and domestic components.
Suitable for various heating systems
– can be installed in one-pipe, two-pipe, independent heating systems with top and bottom connections.
Light and compact
– the company produces
radiators with a mass of one section from 1.06 to 1.94 kg. Their size ranges from 400x80x90 to 567x80x90 mm.
Powerful
– heat dissipation of 500mm products is 185W – 191W,
and 350mm products are 134-138W. According to this indicator, they are not inferior to world brands.
All leaks, regardless of their cause and location, must be repaired as soon as possible. Even a small leak can quickly turn into a hot flood.
How to fix a leak in a cast iron battery
First of all, you need to collect the flowing coolant. To do this, substitute a basin, bucket or other container. When splashing water, cover the battery with a blanket, lower the ends of which into a basin or bucket.
Shut off the water supply at the same time. If there is a stopcock on the pipe next to the battery, simply turn it.
If the shut-off valve is installed on the stairs or in the basement, call the management company’s dispatch department. Emergency phone numbers are on the stands in each entrance, and if they are not, look for information on the Internet on the UK website. The call will be recorded in the emergency log, and an employee will leave at the specified address to block the supply line. Owners of private houses cover the heating lines on their own.
Who should repair the damaged battery
According to Decree of the Government of the Russian Federation of August 13, 2006 No. 491, as amended on June 29, 2020, this should be done by the management company. Talking that the management company repairs batteries only if a stopcock is not installed between them and the common house system is contrary to the law.
According to paragraph 6 of article 1 of Decree No. 491, risers, radiators, valves, and other equipment located on collective networks belong to common house property and must be serviced by a management company. The presence of a shut-off valve is not specified there. The Ministry of Regional Development of Russia and the Supreme Court adhere to the same position.
Owners of private households organize repairs on their own or with the involvement of third-party specialists, even if the house is connected to the district heating line.
If during the repair the tap in the basement or entrance was closed, immediately after the repair is completed, call the master again who will open it. A long shutdown of the heating line can damage the batteries in the entire riser.
Most methods of self-correction of defects in radiators give a temporary effect. Without a qualified repair, such a heater will constantly leak. Therefore, after the end of the heating period, you need to invite a specialist who examines the affected battery and welds the damaged cast iron. It is better to replace thermal appliances installed 25-30 years ago, since it is likely that the situation will repeat itself due to metal wear.
How to patch a crack or hole in a section
The method by which the defect can be repaired depends on the size of the damage. It is enough to plug a small hole with a wooden peg, and close linear defects with cold welding. It is useless to repair major damage on cast iron – it is better not to waste time and buy a new radiator.
1. Using a wooden peg.
To plug the hole, it is necessary to slightly ream the resulting fistula and stick a prepared piece of wood into it. Dense but brittle cast iron is difficult to drill. For work, you will need a powerful high-speed drill and drill bits. During drilling, be sure to take breaks and do not allow the metal to overheat. Otherwise, the cast iron will collapse even more, and the drill will break. After drilling, seal the edges of the hole with sealant, which will slow down corrosion and secure the peg inside the case.
2. Cold welding.
When buying a product, make sure that the product you choose is suitable for cast iron. Before use, clean the area of leakage from paint, rust and dry with a hair dryer. Mix the components of cold welding according to the instructions, and apply the mixture to the damaged area.
Heating can only be reconnected after the composite has completely cured. The method is only suitable for small defects – large damage cannot be repaired in this way.
How to fix a leak between sections of a cast iron battery
Damage in this area occurs due to corrosion of the body metal, destruction of nipples and gaskets installed between the sections. To eliminate leaks, you need to eliminate the malfunctions that have arisen.
There are several ways to fix the problem:
- Repair the rusted area with a patch of bandage and heat-resistant metal glue. Moisten a bandage or piece of cloth with adhesive and tightly wrap the leak. The radiator can only be used after the materials have completely dried.
- Apply plaster-cement dressing.
Take equally gypsum and cement, dilute the mixture with water to get a composition that resembles thick sour cream. Moisten a bandage or strip of cotton with this mixture and wrap the damaged area.
- Use powder sealant. The most convenient grades are designed for gluing wet surfaces. Prepare the sealant according to the instructions and apply it to the damaged joint. You can use liquid sealant, which simply fill the damaged area. Do not turn on the water until the product is completely dry.
Those who have the skills of a home handyman, locksmith tools and handle keys can replace the internal nipples and gaskets with them. It is more convenient to work with heavy cast iron if you have an assistant.
Before repairing, remove the radiator from its brackets and place it on a solid surface. Disassemble the case to get to the damaged joint. To do this, you need two radiator keys. Insert them inside the sections on the left and right to unscrew the nipples at the leak. Can be unscrewed with one key, alternately inserting it from each side.
When working, unscrew the two nipples at the same time and move the sections without distortion relative to each other. It is quite difficult to disassemble an old cast-iron heater, so you will have to use force. It is not necessary to remove each section, it is enough to dismantle the entire fragment of the battery to the place where it flows.
After disassembly, replace the damaged gasket or corroded nipple and reassemble the battery with the same wrenches. Place the radiator back on the brackets and turn on the water. The leak should be gone.
Replacing intersection nipples and gaskets is a complex procedure. In the absence of self-confidence, it is better not to try to fix the breakdown yourself, but to call a specialist. Without the right skills, you can damage the battery, ruin the pipes, and even get injured.
How to stop leakage from the lock nut
The reason why fluid drips from under the lock nut is the pipe moving away from the radiator. This situation is caused by several reasons:
- Failure of the seal at the junction.
- Corrosion – the radiator at the joint, the pipe or the locknut itself can rust.
- Mechanical impact – if someone accidentally steps on the pipe leading to the battery, or puts something heavy on it, water will flow from under the locknut.
The way to eliminate the defect depends on its cause, so you first need to find out why the joint leaked. Unscrew the locknut with a gas wrench, remove the old grease and winding. Look at the leak. Pay attention to the integrity of the metal, the presence of rust or cracks:
- If the leak is intact, wrap a new linen sealant lubricated with sealant or fum tape. Screw the locknut into place. Open the water supply. The leak must stop.
- If the leak is caused by a broken washer-sleeve located inside the body or locknut, replace them with new ones.
- For leaks caused by corroded pipe, move the locknut, cut off the defective area, and drive in a few new threads with a die.
To facilitate the work, lubricate this place with technical oil. Then wrap a new seal around the pipe and screw everything back.
Learn more about repairs in the article on leaks in other types of radiators.
Valve Leaks
Most old cast iron radiators have stopcocks to shut off water after a leak and bleed air. They mostly leak due to worn gaskets.
It is unprofitable to repair locking ball devices – it is difficult to find accessories for them, and it is likely that leakage will increase after repair. Therefore, it is better to immediately buy a new crane – especially since its cost is low.
Cast iron radiators are often fitted with control valves. They are placed on the supply line to adjust the temperature or behind the battery to eliminate air pockets.
The reasons for their failure are wear of gaskets, seals or axle boxes. In case of malfunctions, it is necessary to determine the cause of leakage:
- If the tap not only flows, but also does not regulate the water supply, the gaskets in it are worn out.
It is necessary to unscrew the valve by turning it counterclockwise, remove the worn gasket and replace it with a new one. Then wind the seal under the sealing lip and assemble the valve back.
- Water leakage between the nut and the valve stem indicates wear on the packing gland. In such cases, it is enough to tighten the head housing so that the leak disappears. If this does not help, you will need to change the oil seal or axle box.
More information about the repair of these devices can be found in the article about tap leaks on heating appliances.
The best solution is to install a modern air vent on the upper part of the body instead of a worn-out adjusting valve, which automatically eliminates the resulting air pockets.
Preventive maintenance of cast iron radiators
To keep cast iron radiators from leaking in cold weather, it is necessary to take care of them in the summer. Outside of the heating season, be sure to inspect the batteries. If you find cracks, rusted areas, traces of leaks and problems with shut-off and control valves, invite a specialist who will weld cast iron and replace taps. It is often more correct to replace old rusted radiators with new, more modern ones.
Batteries that are 25-30 years old should be replaced even if they are not leaking. These products have served their time, and at any time they can cause trouble. It is advisable to replace rusty pipes. Then you can not be afraid of leaks in the cold season.
Video about heating radiators
You will be interested
We remove rust quickly and efficiently.
Rust can now be observed not only from a tap or on the hood of an old car, but also on clothes. It’s annoying, but not fatal.) There are a whole bunch of ways to remove rust of any “age” from different types of clothes, shoes or furniture upholstery. And they are all collected here. Choose, try, win!
The author of the article: Hostess.
My name is Natalia and I have been a professional housekeeper for over 15 years. I save my favorite things of my big family; I protect our house from fleas, midges, bloodsuckers and other rodents; I find faithful electronic assistants in household chores. And I am happy to pass on all this experience to you)
Do you also want to become a Hostess on our blog? Enough space for everyone! Just write to us via the “contact” form)
In this article
- Rust – origin, prevention, tips.
- A few more important notes.
- How to remove rust from delicate materials: wool, silk, suede.
- How to remove rust stains from colored and dark clothes.
- How to remove a rust stain from jeans with store and folk remedies?
- Ways to remove rust from white and light-colored clothes.
- How do I remove rust from a sofa, armchair or carpet?
- Rust remover for dark carpet or upholstery.
- Good video on how to remove rust. Practical experience.
It is important not only to be able to skillfully get rid of stains, but also to understand where they came from and what needs to be changed so that such troubles do not happen again.
Rust – origin, prevention, tips.
My most bewildered look belongs to rusty stains – I scratch my head for a long time, trying to understand where could they come from? And then I remember…
… a half-broken park bench and those baby swings that were missing a few wooden bars. So, my butt, imperceptibly from me, was sitting on rusty piece of iron .
Conclusion: Watch where parts of my body secretly want to lean against me.
… In vain I was tempted by this blouse. All those zippers, rivets, eyelets. Yes, she was cool … before the first wash. It wasn’t stainless steel, though. It’s good that nasty stains appeared after washing only on the sweater itself, and not on all the linen that hung out with her in the washer.
Conclusion: In our century, clothing manufacturers are doing their best to reduce production costs, including, sadly, due to cheap metal fittings made from low-quality materials.
It is necessary to make a choice – to buy such products only from already proven companies, or try not to buy things richly seasoned with “iron” at all. Well, or at least wash them in splendid isolation – apart from my favorite things without-which-I-could-not-live-if-with-them-something-happens. And 9 more0088 Do not store these items in damp rooms.
… my grandmother often hit me on the head with her fist (loving, of course!) for inattention, while saying “stupidity!”. Now I really don’t have enough, because if rusty spots appeared after washing , this means that I once again washed my pants with pushpins, pins, paper clips and carnations (hello, beloved husband!) . .. All this is good and gave rust. Why not give? Water – the sea, rust – I do not want (
Conclusion: Check all pockets in clothes before washing, stupidity!
… and our batteries are old, not painted for a long time. I dried it quickly, but on the fabric now there are rusty spots from the “leaky” battery .
Conclusion: Look after your radiators and watch where you hang your clothes to dry.
⚠️ Do not use batteries of any diameter for drying without first examining them, and do not forget that from the central metal part of some clothespins, red dots and stains of amazing beauty can also remain.
Yes, some manufacturers also save a lot on clothespins, unfortunately. It is generally better to use clothespins entirely made of plastic or wood. Like this:
. .. decided to stroke for once. And from the holes of the iron , together with steam and stagnant water – it is darling (
Conclusion: before you start ironing, first check that everything is in order with it – sprinkle on an unnecessary light-colored fabric or gauze folded several times. But if, nevertheless, trouble happened – below you will learn how to remove rust stains from an iron.
It’s all lyrics. And now – on boarding!
A few more important notes.
- To remove stubborn old rust stains, we, as always, will use “heavy artillery” – rather aggressive means.
- Before working on stain – , place a clean, natural cloth in light color under it so that the rust from the stain does not pass to other surfaces.
Use cotton pads, swabs or cotton rags for processing.
- After treating the garment with acids, rinse the garments in a weak solution of ammonia or baking soda to neutralize the acid.
- Remember to test the product on an inconspicuous area of clothing or similar fabric and use low concentrations at first, gradually increasing them so as not to damage the fibers of the fabric.
⚠️ When heated, acids emit corrosive fumes, so be sure to wear a household respirator and gloves. Open windows, treat on the balcony or outdoors if possible.
How to get rid of rust from delicate materials: wool, silk, suede.
👉 Oxygen stain remover labeled “for delicate fabrics”. They have very good reviews. Follow the instructions. You can also use Antipyatin or special fabric rust removers, e.g. Dr. Beckmann
👉 Gasoline or kerosene with starch.
Mix refined gasoline with potato starch until a slurry forms and apply it to the rust stain. Wait until starch is completely dry and remove it.
👉 Glycerin.
Warm up some glycerin in a water bath, add starch and some water to make a starchy “sour cream”. Apply the mass on the spots for 8-12 hours. After cleaning off the remnants of rust powder, and wash the thing.
By the way, for dark clothes instead of starch, you can use crushed activated carbon .
Mix glycerine and dishwashing liquid. Apply the resulting paste to the rust for a few hours.
You can use gruel of grated soap, glycerine and water in approximately equal proportions. The actions are the same – apply and leave for a day.
Methods are very good and for removing old rust stains .
👉 Ammonia. The method is particularly suitable for removing stains from suede, but is not recommended for others, such as silk or wool.
Dilute a table 🥄 of ammonia in 5 🥄 of warm water. Moisten a swab made of natural fabric and blot, lightly rubbing, delicate suede with this solution until all the stain is “soaked out”. Then dry the stain with a dry cotton cloth. For a stronger effect, you can use weak vinegar solution, but not on light suede to avoid yellow streaks.
👉 A bag of black tea for dark things (only for dark ones!), green tea for those that are lighter.
Tea also contains acids that can remove rust.
Take a tea bag, soak it in hot water for 3-5 minutes to soften the tea leaves. Squeeze out the sachet and place on the stain and leave for 30 minutes. If there are no ready-made bags at hand, wrap the tea leaves in gauze.
👉 Sour apple, white pulp radish or fresh potato.
Leather, velor, suede or wool must not be soaked or rubbed with aggressive concentrated acids, so we use the acid in its low, natural saturation.
Useful article on the topic: Cleaning suede and eco-suede is easy!
Grate a fresh apple, radish or potato and place the puree on the stain for 20 minutes. The stain will go away without ruining a single fiber)
How to remove rust stains from colored and dark clothes.
All the methods described above for delicate fabrics can be safely applied to ordinary, not so capricious ones. For them, we will add a few more very effective methods to the piggy bank.
💚 Soaking in a hot acid solution (oxalic, tartaric or acetic).
Oxalic acid can be bought at a hardware store, beekeeping store or flower shop.
It is with the help of acid that you can quickly and most effectively remove rust stains at home even from white thin fabrics , because it corrodes rust well without leaving marks.
Various recipe options available:
- take 5 grams of any acids in a glass of water
- or 2 tablespoons 🥄 vinegar (70%) per 200 ml.
water
- Sometimes 🥄 ammonia is added to acids to enhance the effect.
Heat the resulting mixture strongly in enamelware without chips or cracks . Do not bring water to a boil (no more than 90°C). Place the damaged area in a container and leave it there for 5-10 minutes. After washing in the same water and rinsing. This method is perhaps the most effective, with its help you can get rid of rust in just 5 minutes.
You can do without heating and just soak clothes in acidic warm water (5 table 🥄 acid per 7 liters of warm water) overnight. After soaking, simply wash the clothes.
Or dissolve a few crystals of oxalic acid in tea 🥄 warm water. Dampen a cotton pad and wipe the stain with this solution until it disappears.
Wine and champagne also contain tartaric acids. Try them as a rust remover.
Vegetables and fruits.
💚 Tomatoes. Any. On the Internet, someone advises – green, someone – ripe. There is acid here and there. Moreover, one can use tomato juice and even ketchup )
Rub the stain with fresh tomatoes, saturate the stain with the juice (you can soak the damaged part of the clothes in it), and simply apply the ketchup (can be diluted with water). Leave the whole thing for half an hour, then rinse everything off and wash the clothes as usual.
💚 Cherries, oranges, tangerines, celery, grapes, cranberries, ginger, kiwi are full of acids. The only thing I would use them with an eye to the color of the fabric. It is desirable that they match, so that later you do not have to wash stains of berries or fruits from a yellow shirt.
⚠️ On the Internet, I often advise using hydrochloric acid to remove old rust stains. And all would be fine – she’s out, splashing in our stomach. However, improper handling of acid of sufficiently high concentration can lead to chemical burns. So I wouldn’t use this product, since we have a lot of safer methods of dealing with rust.
How to remove a rusty stain from jeans with store and folk remedies?
Of all clothing, jeans are probably the most likely to suffer from rust stains, because they are the most “riveted”.
💜 Jeans are not afraid of almost anything, so with them and with other dense natural fabrics, you can use this non-traditional method – cleaners for cleaning sinks and toilets from plaque and rust. They contain oxalic acid, which is what we need. Sanox is especially praised.
Pour the product onto the stain, rub it into a lather and leave it on for 10 minutes. Then rinse in several waters.
💜 Salt and vinegar will help remove rust from jeans.
Make a thick paste of salt and vinegar (9%) and leave it for half an hour. After the jeans, all that remains is to wash.
💜 Descaler.
These products are also acid-based, so they work in the same way.
Wet a cloth, dip it in the anti-scale powder and rub the stain, rinsing it occasionally. Do this until the stain is gone.
Ways to remove rust from white and light-colored things.
👉 As for chlorine bleach , opinions differ on the forums. Some advise using it, others argue that removing rust stains, for example, with whiteness, only aggravates the situation, it becomes brown and it becomes even more difficult to remove it.
Therefore, as for delicate fabrics – it is better to use oxygen stain removers and products based on oxalic and acetic acids .
Lemon, lime, citric acid.
- 🍋 Take a piece of lemon , remove the seeds and peel. Place the slice on the stain, cover with a clean natural white cloth and iron with hot iron .
You can use not the pulp of a lemon, but directly soak a rust stain with lemon juice. By the way, the effect will be better if you first heat the stain with hot air using a household hair dryer before ironing.
- 🍋 Thickly dilute citric acid with water , apply on the stain (or rub the stain well with lemon), sprinkle salt on top and expose to the sun for the whole day. Lemon and the sun – a lethal force for getting rid of rust stains from white t-shirts and shirts)
- 🍋 Dilute 20 g of acid in half a glass of cold water . Bring the solution almost to a boil in an enameled container and place rusty clothes there. Wait 10 minutes. If it was not possible to immediately remove the contamination, then the procedure can be repeated. Rinse thoroughly with cool water afterwards.
- 🍋 Mix citric acid with salt and water, spread on the stain and expose to the sun. During the day, the stain will fade and then disappear.
Toothpaste.
Toothpaste can remove rust from white tulle, knitwear, dressing gown or other light-coloured clothing. Everything is simple here – apply toothpaste or tooth powder diluted in water and on pollution and wait an hour. After the paste, wash and wash the thing. This is an excellent method for light delicate fabrics. Toothpaste is easy to deal with blood stains too
Glycerin, chalk (or tooth powder) and water.
In the vastness of the vast chalk is also recommended for removing stains from colored clothes, but I remember how long it took to get rid of a whitish stain from school chalk from a brown school uniform. So I recommend chalk methods only for removing stains from white and light.
So, mix glycerin, crushed white chalk and water. Rub this mush into a cloth and leave to dry.
Soda or potash.
Potash is used in photography and used as a fertilizer.
Dilute 30 ml of oxalic acid in a glass of warm water. Add a tablespoon of baking soda (or potash) to it. Apply the composition to the stain for 15 minutes.
How to remove rust from a sofa, armchair or carpet?
Rust stains on upholstery can appear both from external factors – accidental contact with a rusty object , and from internal – if the internal metal parts of the furniture corroded and the rust passed to the fabric. Upholstery or carpet cannot simply be picked up and washed, so be careful.
Salt and lemon juice for light colored upholstery and carpet.
- Sprinkle the rust stain with salt, then pour the lemon juice over the salt.
- Steam the contaminated area with a steam iron, steamer or kettle.
- It is best if it is possible to expose the furniture to dry in direct sunlight. So lemon whitens better.
- After drying, shake off the salt and wipe the treated area with a damp cloth soaked in a weak solution of ammonia.
Rust remover
from dark carpet or upholstery.
Coca Cola.
It is full of phosphoric acid, which dissolves iron oxide (rust). It is necessary to lightly soak the rust stain with soda and leave for 9 hours0089, after soaking the cola together with the rust residues with white damp cotton rags.
For colored and light surfaces, you can take Schweppes, Sprite or other colorless soda.
If the rust stain is stubborn, mix equal parts hot water and ammonia. Soak a swab in the cooled mixture and rub the stains until they disappear.
You can also use all the home remedies for rust removal described above.
Apply methods appropriate to the color and composition of the surface to be treated.
Try to apply at a minimum of to make it easier to remove later.
Good video on how to remove rust.
Practical experience.
I hope now, at the sight of ingrained rust on white, you will lightly wave your hand. After all, now, to bring it out with “grandmother’s” means for you – just spit)
Text entirely by the author. Copying any elements of the article is possible only with an active link to the source!
Is it possible to paint hot radiators with enamel?
Can be painted over hot batteries
- admin
- Construction and repair
- 0
Paint selection
People often think that only the front side of the battery should be painted, but this is absolutely not true. Rust appears on the surface of the metal, which spreads over time if it is not removed. You can solve the problem of corrosion with the help of high-quality paint. To make the right choice, you need to know the main characteristics of this product.
Read also: the choice of odorless paint for heating radiators.
The paint must be resistant to high temperatures, because in winter the battery gets very hot. A quality coating will allow the color to last for several years.
For the correct selection of paint, you need to understand its types available for sale:
- Acrylic paint does not smell at all and can even be used in a children’s room. In addition, its color remains natural for a long time. This option is most suitable for winter repairs, since ventilation of the room is not required after painting.
- Alkyd paint is quite resistant to elevated temperatures and is an excellent material for coating a radiator. Its main disadvantage is a strong smell, which means that its use during the heating season is not recommended.
- Battery paint is a type of acrylic paint that needs to be mixed with a thinner.
This material has its advantages: it can be used without pre-priming the surface, the coating is glossy and uniform.
- Oil paint has ceased to be used over time, although it is known to everyone.
In this video you will learn how to properly paint radiators:
This listing is for cast iron batteries. For panel radiators, it is preferable to use car enamel in an aerosol.
White radiators are out of fashion. You can experiment with color, but keep in mind that the battery must fit into the overall concept of the apartment. The radiator in a child’s room can be decorated with patterns or even a landscape.
Everyone chooses for themselves a more acceptable option for coating material, but in order for the paint to lay down evenly, the following tools are needed:
- sandpaper;
- sharp spatula for removing the old layer of paint;
- 2-3 types of brushes;
- small roller;
- cleaning cloth.
This set is needed for high-quality painting, which will transform old and rusty batteries into a beautiful piece of furniture.
Preparation for work and painting
In order to figure out how to paint a radiator, you need to know the principle of this work.
Like any kind of work in the construction industry, painting is done only after surface preparation. First of all, you need to remove dirt and examine the product for corrosion.
After removing the old layer of paint and dirt, the battery must be washed with a cloth dampened with water. Places of swelling must be cleaned with sandpaper; if rotten areas are found, be sure to eliminate them.
At the final stage of preparation, the entire surface of the radiator must be primed. If a material that does not require a primer will be used for painting, then this step is skipped.
Before painting, you need to prepare the workplace, lay polyethylene or newspapers on the floor, protect the wall by attaching thick paper or cardboard to it, and prepare tools.
The paint is applied with a brush in smooth movements from top to bottom – this way you can paint warm batteries without leaving streaks. The layer must be thin and even. After the first layer has dried, the second one is applied.
It is recommended to paint the internal surfaces of the battery first of all, so as not to get your hands dirty in the process. If it is difficult to do this with a brush, then you can use a small roller or even an old toothbrush with a flexible head.
Helpful Hints
Even without special skills, anyone can beautifully paint a heating radiator if they take into account the recommendations and some rules. There are some simple tips from experts:
- there should be no streaks on the painted surface – for this you need to apply the paint as thinly as possible, making smooth movements;
- it is more convenient to paint over the back surface of the battery with a curved brush or a toothbrush;
- when cleaning the instrument with a chemical method, the rules of personal protection must be followed;
- upon completion of painting work using any paint, the room should be ventilated, but it is better to use odorless paints;
- hidden heating elements and pipes can not be painted, so the best heat transfer will be preserved;
- before buying paints and varnishes, you need to carefully study their characteristics.