How to get a smooth paint finish on walls: 12 Tricks for How Painters Get a Perfectly Smooth Paint Job Every Time
12 Tricks for How Painters Get a Perfectly Smooth Paint Job Every Time
12 Tricks for How Painters Get a Perfectly Smooth Paint Job Every Time
Search iconA magnifying glass. It indicates, “Click to perform a search”.
Insider logoThe word “Insider”.
US Markets Loading…
H
M
S
In the news
Chevron iconIt indicates an expandable section or menu, or sometimes previous / next navigation options.HOMEPAGE
Insider
The Family Handyman
2017-11-29T21:29:06Z
Save Article IconA bookmarkShare iconAn curved arrow pointing right.
Download the app
sayot/Flickr
- Painters share a dozen different hacks to use in order to get the best results.
- Keeping a clean room is key, which means lots of dusting and vacuuming.
- Do the trim first before painting the walls.
Paint the trim first, then the ceilings and walls
Dennis Jarvis/Flickr
Pros usually follow a certain order when painting a room. They paint the trim first, then the ceiling, then the walls. That’s because it’s easier (and faster) to tape off the trim than to tape off the walls. And you certainly don’t want to tape them both off!
When painting the trim, you don’t have to be neat. Just concentrate on getting a smooth finish on the wood. Don’t worry if the trim paint gets slopped onto the walls. You’ll cover it later when painting the walls. Once the trim is completely painted and dry (at least 24 hours), tape it off (using an ‘easy release’ painter’s tape), then paint the ceiling, then the walls.
To avoid lap marks …
Jimmie/Flickr
To avoid lap marks, roll the full height of the wall and keep a wet edge. Lap marks are those ugly stripes caused by uneven layers of paint buildup. They occur when you roll over paint that’s already partly dry. (In warm, dry conditions, latex paint can begin to stiffen in less than a minute!) The key to avoiding lap marks is to maintain a “wet edge,” so each stroke of your roller overlaps the previous stroke before the paint can begin to dry.
To maintain a wet edge, paint an entire wall all at once. Start at one end, running the roller up and down the full height of the wall, moving over slightly with each stroke. Move backward where necessary to even out thick spots or runs. Don’t let the roller become nearly dry; reload it often so that it’s always at least half loaded. Keep the open side of the roller frame facing the area that’s already painted. That puts less pressure on the open side of the roller, so you’re less likely to leave paint ridges.
Clear the entire room before painting
Unsplash/Naomi Hébert
If something is too big to take out, move it to the center of the room and cover it with plastic. Use canvas drop cloths. Unlike plastic, they stay put without tape and aren’t slippery.
Avoid drips as you paint
Luca Nebuloni/Flickr
Masking tape does a good job of protecting woodwork — if it’s applied well.
Clean off all the dirt and grime along the edge of the trim with a damp rag. Hold the tape tight against the wall and roll it out so the tape covers the edge. Press the tape against the wood with a putty knife along the entire length. Use painter’s tape that’s at least twice as wide as the trim and leave it flared out to protect the face of the trim from drips. When you’re done, either remove the tape immediately while the paint is still wet or wait until the next day when it’s totally dry. If you pull it free when the paint is partially dry, you may peel off bits of fresh paint along with the tape.
Shine a light across the woodwork and circle flaws
Anthony Storo/Flickr
Position a hand-held bulb (at least 60 watts) so it shines across (rakes) the wood surface to detect loose paint, rough edges and other blemishes in the surface to determine what needs to be filled. Take a pencil and lightly circle spots that need work.
Consider liquid sandpaper, especially on lead paint
Kim Love/Flickr
After final sanding and vacuuming, some pros go the extra step of wiping woodwork down with a liquid sandpaper/deglosser (such as Wil-Bond by Wilson-Imperial or ESP by Flood). This step will ensure a good bond. And if you have to deal with lead paint, this step can replace sanding.
Dust and vacuum thoroughly
Quinn Dombrowski/Flickr
When the first sanding and scraping step is complete, dust off all areas with an old paint brush and vacuum woodwork with a brush attachment.
Fill all holes, even small ones
Jean-Simon Asselin/Flickr
You might assume that new paint will hide tiny dents and scratches, but it won’t. In fact, the new coat of paint highlights minor flaws. Fill dents less than 1/8 in. deep with spackling compound. For deeper holes, use a two-part filler or an epoxy wood filler. It’s more of a hassle to use and you usually end up throwing away a lot of partially hardened filler (mix small batches), but the patch will be hard enough to take a lot of abuse without falling out.
Run a crisp bead of caulk between woodwork and walls
ephidryn/Flickr
Apply a thin bead of paintable acrylic latex caulk only inside the crack where wood meets a wall for a smooth, professional appearance. Remove extra caulk with a putty knife. And buy a dripless caulk gun to save time and frustration. Cut the tip smaller than you think you need.
Sand between coats
US Army Africa/Flickr
No matter how careful you are, you can usually find ridges or bubbles or a few bits of dust and lint in a fresh coat of paint or primer. For the smoothest possible topcoat, hand-sand the entire door after the primer and between coats of paint. It may seem like a lot of work, but it shouldn’t take more than five minutes when the door is flat on the sawhorses. Sand with non-clogging 180- or 220-grit sandpaper or sanding sponges (look for “non-clogging” or “stearated” on the label). Sand just enough to make the surface feel smooth. After sanding, vacuum and wipe down the door with a damp cloth to remove all the dust.
Take a wool-blend roller cover for a spin
Tateru Ishizuka/Flickr
The most important part of your paint rolling setup is the roller cover, also known as a sleeve. It’s tempting to buy the cheapest cover available and throw it away when you’re done. But you won’t mind the few extra minutes of cleanup time once you experience the difference a good roller cover makes. Cheap roller covers don’t hold enough paint to do a good job. It’ll take you four times as long to paint a room. And you’ll likely end up with an inconsistent layer of paint, lap marks and built-up ridges of paint. Instead, buy a 1/2-in.-nap wool blend roller cover and give it a try. With proper care, this may be the last roller cover you’ll ever buy.
Wool covers do have a few drawbacks, though. They tend to shed fibers when they’re first used. To minimize shedding, wrap the new roller cover with masking tape and peel it off to remove loose fibers. Repeat this a few times. Wool covers also tend to become matted down if you apply too much pressure while painting. Rolling demands a light touch. No matter what roller cover you’re using, always let the paint do the work. Keep the roller cover loaded with paint, and use only enough pressure to release and spread the paint. Pushing on the roller to squeeze out the last drop of paint will only cause problems.
Read the original article on The Family Handyman. Copyright 2017.
Follow The Family Handyman on Twitter.
Deal iconAn icon in the shape of a lightning bolt.
Keep reading
LoadingSomething is loading.
More:
Features
Design
Design Contributor
The Family Handyman
- Contributor
Chevron iconIt indicates an expandable section or menu, or sometimes previous / next navigation options.
How to Get a Smooth Paint Finish On Walls
Mark Sharp
Blog, Painting Tips
No one wants to paint a room themselves only to be left with a rough, bumpy finish. If you want freshly painted interior or exterior walls, trim, or doors, you probably want the finished product to look high-quality and smooth.
So, what’s the best way to get that smooth paint finish you’re envisioning? Is there a trick, or a secret the professional painters aren’t telling you?
At the end of the day, while we’d like to be able to snap our fingers and get a perfectly smooth finish, it’s not that simple. There are, however, a few best practices that professional painters follow to get that perfect finish in as little time as possible. Let’s talk through them.
It All Starts With the Prep
Prep work often takes a bulk of the time when painting, and for good reason. If proper prep work isn’t done (or is done lackluster), and the surface underneath the paint isn’t made smooth, of course the paint won’t look smooth. Professional interior painters take the time to prep the surface thoroughly and correctly, using a few best practices:
- They fill in cracks and holes: The pros know that spackle and a putty knife come in handy for covering up cracks and holes that keep paint from rolling on smooth. After filling in with spackle, professional painters will use sandpaper to smooth out the surface of the dried spackle, then wipe the area clean to remove any residual dust and debris.
- They remove all layers of wallpaper (including the adhesive backing) or old, peeling paint: To have a completely smooth finish after painting, professional painters need to work with a completely smooth surface.
 Things like wallpaper adhesive and old, peeling paint create a rough, bumpy surface that doesn’t look good when painted over.
 - They may pole sand the walls: Some walls have bits of previously dried paint or may have a slick sheen. In those instances, a sanding pad on the end of a pole may be used to smooth out the surface prior to painting and etching the glossy surfaces so the new paint application will grip and go on smoothly.
- They clean the surface with a damp cloth: Professional painters wipe the surface down with a damp cloth to remove any dust, dirt or cobwebs that may end up mixed in with the paint and tarnish the end result. We always make sure the surface has completely dried before adding any primer or paint.
 Things like wallpaper adhesive and old, peeling paint create a rough, bumpy surface that doesn’t look good when painted over.
If we’ve said it once, we’ve said it a thousand times: The quality and longevity of your finish is almost entirely due to the quality of the prep work.
Don’t Skip the Primer
Some dark wall colors or tough to stick surfaces may need a primer application to help the top coat ‘stick. ’ Primer seals the surface and provides a smooth and clean area for paint to adhere. While it looks a lot like paint, primer has a higher concentration of solids plus an adhesive binder. Professional painters prime over the whole surface using the proper tools, products and techniques to ensure the right consistency, especially at the spackled areas.
Hire a Professional
To guarantee a smooth finish after painting, consider turning the job over to the pros who’ve done it hundreds of times. They have the patience and skill to do all of the time-consuming prep work that makes or breaks a smooth finish. They also have the knowledge and expertise to choose the right kind of primer for the surface and conditions. And they have the skill to spread the paint evenly for that perfectly smooth finish you want.
A pro knows how to cut in the new paint with the proper brush and then roll into that cut line so that the difference in brushing and rolling is blended. Improper application can result in big strokes of brush marks that can be seen in different light and angles. Where the orange peel look of the roller meets the brush marks needs to be blended by a professional application process.
Getting a smooth paint finish requires doing a proper job, which requires expertise and preparation. A professional painter will take time to prepare surfaces so paint adheres properly. This may involve stripping old paint, filling in holes, sandpapering rough areas, and priming. The end result will be smooth and long-lasting.
Remember: Anything worth doing is worth doing well.
Professional Interior Painting Services
Our home painting experts are ready to help you tackle your painting project. We provide interior wall painting services, including prepping and priming to take the workload off your shoulders. Contact us today for a free painting quote.
How to get perfect smooth finish on painted walls.
I painted my house(interior) 4 years ago and the finish on walls is not bit rough rather than beautiful smooth finish,which was very disappointing
Now its time to paint again and i dont wanna make the same mistake again,last time i think i used the wrong roller sleeve,so the end finish wasnt smooth
Could you please let me know how to get that perfect smooth finish which looks beautiful?and to get that what paint should i use(silk or matt)?and what roller should i use?
Thanks
5
5 Answers from MyBuilder Painters & Decorators
Best Answer
Jessica Louise Painting and Decorating
Newark • Member since 28 Oct 2014 •
17
jobs,
100% positive
feedback
Preparation is everything when it comes to painting, I’d suggest putting a base coat on your walls to show up defects more such as little dint, holes etc, fill any holes, I tend to use the powder filler you mix yourself as its easier to rub down, when all the filler is dry start from the top left hand side of each wall and rub down well with sand paper, use a electric sander if needed I recommend 120 grit. Ensure everything is dusted down swept/hooved up. Now when it comes to painting cheaper brushes wont leave as smooth finish as the more expensive ones do, Purdy paint brushes are expensive but leave a high quality finish. Do all the cutting in before you roll the walls on each coat. Use a 9 inch medium pile micropoly roller sleeve. Id also use a extension pole, roll from top to bottom. always roll the same way, ensure the paint is rolled out well and there is no stipple on the walls if there is you need to roll the paint out more and more. Roll as close as you can to what you’ve cut in such as ceiling, door frames ect.
2015-03-02T09:35:02+00:00
Answered 2nd Mar 2015
Chroma Decorators Ltd
Willesden • Member since 4 Dec 2014 •
8
jobs,
100% positive
feedback
There are ways and ways of achieving that smooth finish.
the way most people do does not indicate it to be the best way anyway.
For that very fine finish its all about mixing your paint right and know your craft!
For instance! If you say you want to roll a wall with standard emulsion (brand is important but not everything) I would recommend ,after all the prep work is done, dilute your paint a quarter as a thinner paint will leave less trail/brush marks or that infamous ”orange peel effect” (which I guess is what you are talking about on here).
if your walls already have it, I’m sorry to say it, but you’ll have to sand it back to the smoothness you require.(dust mask!!)
After having that done,do the cutting in nicely and with no drips!
use a small roller to fade the lines in (take your time on the cut as straight lines gives a sharp feel to the work) when rolling, do not over deepen the roller in the paint, work it, in a way you just get the paint on the actual piles as opposed to the frame (splashes). Now is the important moment!
with that deepened roller on the wall, see how much area it covers (believe me it changes from surfaces to surfaces) and repeat it all the way through. as the paint has been thinned, expect it not to cover much, as you do the first and second layers it will build up cover (usually it takes three).
The final result is a wall that has the same finish as a sprayed wall
hope that helps
2015-03-03T10:00:02+00:00
Answered 3rd Mar 2015
ashcroft decorators
Blackpool • Member since 2 Mar 2015 •
No feedback
Hi one golden rule in painting ceiling and wall surfaces,never use vinyls silk paint as this will highlight all indentations on any suface
2015-03-03T10:00:02+00:00
Answered 3rd Mar 2015
Colour match
Essex Clacton • Member since 23 Apr 2015 •
No feedback
if you want smooth walls it is all about making sure you stir the paint and also put a little water in it and stir very well that way when cutting in with a good brush you will not get limes also when rolling out don’t put no pressure let the roller do the work take your time nice and light on the roller and 3 coats will do the job
2019-01-05T20:40:02+00:00
Answered 5th Jan 2019
Gunay’s Painting and Decorating Services
London • Member since 8 Feb 2021 •
16
jobs,
100% positive
feedback
If you want a smooth surface, the first thing to do is sand the floor. After the plaster repairs and sanding of the walls are done, the floor should be cleaned of dust. Water should be added to the paint as needed and the paint should be applied after thoroughly mixing with a fine patterned roller.
2021-02-12T10:50:03+00:00
Answered 12th Feb 2021
How to Paint With a Roller & Get a Smooth Finish | Home Guides
By Vanessa Salvia Updated February 22, 2021
The invention of the paint roller changed the painting world. Choosing the best paint and the best paint roller for a smooth finish really comes down to using quality paint and a quality roller that is appropriate for the paint and for the task at hand. It also helps to have an understanding of techniques for rolling flawlessly smooth walls, ceilings or doors.
Choosing a Quality Paint Roller
Paint rollers reduce splashes and splatters and cover large, flat areas in a fraction of the time compared to brushes. Paint rollers come in varying sizes, thicknesses and materials. Home Depot explains that natural-fiber paint rollers made from lamb’s wool or mohair are ideal for oil-based paints.
Synthetic paint rollers (made of nylon or polyester) keep their shape better and work best with water-based latex paints. Foam rollers may fall apart sooner than other types of rollers, although these work well for oil or high-gloss latex paints. There are also paint roller covers made of blended materials, which are versatile for any type of paint or surface.
The size of the roller can help to produce a smooth finish. Using a small roller for a large wall means you will have to apply more strokes with the roller, which leaves more potential for brush strokes to appear on your finished wall or ceiling. Standard wall rollers are 7 to 12 inches wide. Consider getting smaller rollers for your trim areas (near baseboards or ceilings), as these will be easier to handle in tighter areas. Mini rollers that are under 5 inches can be easily used for edges and corners.
Best Paint Roller for a Smooth Finish
The thickness of roller covers is called the nap or pile. The best paint roller for textured walls or something like popcorn ceilings is one with a thicker nap, as it will pick up more paint and go into crevices more easily. This Old House recommends paint rollers with shorter naps around 1/4 inch in length for painting smooth surfaces because they can cover the surface without applying too much texture. A thicker nap will not only hold more paint but will more easily apply paint over crevices.
Read the paint roller package, as it will typically explain the material from which it’s made, the nap length and the best uses for that particular roller. The Wooster Brush Company says to decide on the sheen of paint you will be using before choosing the roller cover. Use a shed-resistant, tightly woven paint roller cover for glossy paints, which will show more lint that comes off the brush. A flat or satin paint goes on best with a knit roller cover because knit picks up a lot of paint. Either way, the Wooster Brush Company says that the best paint roller for a smooth finish is a tightly knit, shed-resistant cover.
A nap of 3/16 or 1/4 inch is ideal for smooth surfaces, such as metal, smooth plaster, smooth wallboard or drywall. A medium-sized nap, such as 3/8 or 1/2 inch, is ideal for most walls and ceilings, including lightly textured drywall or wood, acoustic tile, paneling or smooth concrete. The best paint roller to hide imperfections is one that is designed for the type of wall you are painting. Glossy paint will reflect more light and call attention to imperfections more than a matte finish will. The best paint roller for ceilings (if your ceilings are smooth) has a 1/4-inch nap.
Roller Techniques for a Smooth Finish
Once you have made the important decisions about the type of paint and roller you will use, focus on your painting techniques. Fully saturate the roller with paint from your paint tray before applying it to the surface. Work from the bottom up at a slight diagonal, recommends This Old House. Overlap each pass by about 30 percent.
Once you start painting, don’t stop until the surface is completely finished. If any of the paint dries before applying a new stroke, you can see the stroke marks left behind in the partially dried paint (Family Handyman calls these “lap marks”). Paint with a “wet edge” so that each stroke goes over wet paint. Run the roller up and down the full height of the wall with a light touch; don’t try to press on the roller to squeeze out every last drop of paint.
Keep the roller loaded with wet paint and move slightly each time you apply a stroke to your wall. Keep the open side of the roller frame (where the roller slides on) facing the area that’s already painted. That keeps an even pressure on the roller so that you are less likely to leave paint ridges.
References
- Home Depot: Best Paint Rollers For Your Projects
- This Old House: How to Choose a Good Paint Roller
- Wooster Brush Company: How to Choose the Right Roller Cover
- Wooster Brush Company: How to Match the Roller Cover to the Surface
- Family Handyman: Best-Kept Secrets of Professional Painters
Tips
- It’s much easier to get a smooth finish with a flat-based paint than it is a glossy paint. Glossy painted walls catch the light, illuminating bits of dust or poorly taped drywall seams. Flat-based paint does not reflect the light, giving the walls a smoother look.
- If you take a short break, dampen an old towel and drape it over the bucket of paint for up to two hours.
- You can wrap the roller cover in plastic wrap to keep the paint from drying out.
 Glossy painted walls catch the light, illuminating bits of dust or poorly taped drywall seams. Flat-based paint does not reflect the light, giving the walls a smoother look.
 Warnings
- Use only the primer specified on the paint can.
- Although you can purchase sponge-type rollers, it’s tougher to get a smooth finish with those because they tend to leave edge marks on large areas like walls.
Writer Bio
Vanessa is an avid gardener with experience helping things grow in the three corners of the country where she has lived — Florida, Pennsylvania, and Oregon. She is also a journalist and marketing content creator who enjoys cooking and eating, both helpful hobbies for a gardener.
Best-Kept Secrets of Professional Painters
Learn how to paint like a pro and pick up some great tips for achieving a perfectly smooth and even paint job.
Every editorial product is independently selected, though we may be compensated or receive an affiliate commission if you buy something through our links. Ratings and prices are accurate and items are in stock as of time of publication.
1
/
19
Family Handyman
Paint the Trim First, Then the Ceilings and Walls
Finally, the answer we’ve all been waiting for. Professional painters usually follow a certain order when painting a room. They paint the trim first, then the ceiling, then the walls. That’s because it’s easier (and faster) to tape off the trim than to tape off the walls. And you certainly don’t want to tape them both off.
When painting the trim, you don’t have to be neat. Just concentrate on getting a smooth finish on the wood. Don’t worry if the door and trim paint gets slopped onto the walls. You’ll cover it later when painting walls. Once the trim is completely painted and dry (at least 24 hours), tape it off (using an “easy release” painter’s tape), then paint the ceiling, then continue on to wall painting.
2
/
19
svetikd/Getty Images
To Avoid Lap Marks when Wall Painting
Lap marks are those ugly stripes caused by uneven layers of paint buildup, a common problem when wall painting. They occur when you roll over paint that’s already partly dry. (In warm, dry conditions, latex paint can begin to stiffen in less than a minute) Avoid lap marks by maintaining a “wet edge,” so each stroke of your roller overlaps the previous stroke before the paint begins to dry.
To maintain a wet edge, paint an entire wall all at once. Start at one end, running the roller up and down the full height of the wall, moving over slightly with each stroke. Move backward where necessary to even out thick spots or runs. Don’t let the roller become nearly dry; reload it often so that it’s always at least half loaded. Keep the open side of the roller frame facing the area that’s already painted. That puts less pressure on the open side of the roller so you’re less likely to leave paint ridges.
3
/
19
Clear the Entire Room Before Painting
If something is too big to take out, move it to the center of the room and cover it with plastic. Use canvas drop cloths. Unlike plastic, they stay put without tape and aren’t slippery.
4
/
19
Family Handyman
Avoid Drips as you Paint
Masking tape does a good job of protecting woodwork — if it’s applied well.
Clean off all the dirt and grime along the edge of the trim with a damp rag. Hold the tape tight against the wall and roll it out so the tape covers the edge. Press the tape against the wood with a putty knife along the entire length. Use painter’s tape that’s at least twice as wide as the trim and leave it flared out to protect the face of the trim from drips. When you’re done, remove the tape immediately while the paint is still wet or wait until the next day when it’s totally dry. If you pull it free when the paint is partially dry, you may peel off bits of fresh paint along with the tape.
5
/
19
Family Handyman
Shine a Light Across the Woodwork and Circle Flaws
Position a hand-held bulb (at least 60 watts) so it shines across (rakes) the wood surface to detect loose paint, rough edges and other blemishes in the surface to determine what needs to be filled. Take a pencil and lightly circle spots that need work.
6
/
19
Consider Liquid Sandpaper, Especially on Lead Paint
After final sanding and vacuuming, some pros go the extra step of wiping woodwork down with a liquid deglosser such as Wil-Bond by Wilson-Imperial or ESP by Flood. This step will ensure a good bond. And if you have to deal with lead paint, this step can replace sanding.
7
/
19
Family Handyman
Dust and Vacuum Thoroughly
When the first sanding and scraping step is complete, dust off all areas with an old paint brush and vacuum woodwork with a brush attachment.
8
/
19
Family Handyman
Fill All Holes, Even Small Ones
You might assume new paint will hide tiny dents and scratches, but it won’t. In fact, the new coat of paint highlights minor flaws. Fill dents less than 1/8 in. deep with spackling compound. For deeper holes, use a two-part filler or an epoxy wood filler. It’s more of a hassle to use and you usually end up throwing away a lot of partially hardened filler (mix small batches), but the patch will be hard enough to take a lot of abuse without falling out.
9
/
19
Family Handyman
Run a Crisp Bead of Caulk Between Woodwork and Walls
Apply a thin bead of paintable acrylic latex caulk only inside the crack where wood meets a wall for a smooth, professional appearance. Remove extra caulk with a putty knife. And buy a dripless caulk gun to save time and frustration. Cut the tip smaller than you think you need.
10
/
19
Family Handyman
Sand Between Coats
No matter how careful you are, you can usually find ridges or bubbles or a few bits of dust and lint in a fresh coat of paint or primer. For the smoothest possible topcoat, hand-sand the entire door after the primer and between coats of paint. It may seem like a lot of work, but it shouldn’t take more than five minutes when the door is flat on the sawhorses.
Sand with non-clogging 180- or 220-grit sandpaper or sanding sponges (look for “non-clogging” or “stearated” on the label). Sand just enough to make the surface feel smooth. After sanding, vacuum and wipe down the door with a damp cloth to remove all the dust.
11
/
19
Family Handyman
Take a Wool-Blend Roller Cover for a Spin
The most important part of your paint rolling setup is the roller cover, also known as a sleeve. It’s tempting to buy the cheapest cover available and throw it away when you’re done. But you won’t mind the few extra minutes of cleanup time once you experience the difference a good roller cover makes. Cheap roller covers don’t hold enough paint to do a good job. It’ll take you four times as long to paint a room. And you’ll likely end up with an inconsistent layer of paint, lap marks and built-up ridges of paint. Instead, buy a 1/2-in. nap wool blend roller cover and give it a try. With proper care, this may be the last roller cover you’ll ever buy.
Wool covers do have a few drawbacks, though. They tend to shed fibers when they’re first used. To minimize shedding, wrap the new roller cover with masking tape and peel it off to remove loose fibers. Repeat this a few times. Wool covers also tend to become matted down if you apply too much pressure while painting. Rolling demands a light touch. No matter what roller cover you’re using, always let the paint do the work. Keep the roller cover loaded with paint, and use only enough pressure to release and spread the paint. Pushing on the roller to squeeze out the last drop of paint will only cause problems.
12
/
19
Family Handyman
Slap It On, Then Smooth It Out
When painting trim or other woodwork with a brush, I’ve found it’s best to load my brush with paint and then lay it on heavily in small sections using short, quick strokes — just to get enough paint on the trim to work with. Then I blend the paint into the section I painted before and smooth it all out using long finishing strokes in one direction.
13
/
19
Family Handyman
Brush Bristle Saver
Without something to hold them in place, paint brush bristles will curl or splay as they dry. The best way to store them is in the cardboard wrappers that they came in. They’re not just packaging; they maintain the shape of the bristles as the brush dries after cleaning. If you’ve already thrown your brush wrappers away, use paper and a rubber band instead.
14
/
19
Family Handyman
Cardboard Protects Floors Best
Some painters don’t like drop cloths. They can be too big, slippery, clumsy and just downright messy, especially when you need to move them around while they’re still covered in wet paint. That’s why some prefer cardboard, setting it tight to the wall and sliding it with their foot as the work their way around the room.
15
/
19
Family Handyman
No-Maintenance Paint Tray
Don’t bother cleaning or putting liners in your paint trays. Just pour any excess paint back into the can and let the paint in the tray dry completely before using it again. Paint trays with a 1/8-in.-thick paint buildup in them are better for this than clean trays because they’re a little heavier and don’t slide around when you’re loading the roller.
16
/
19
Family Handyman
2/3 Prep, 1/3 Painting
A good prep job often takes more time than painting, but it pays off. The more time you spend prepping a room for new paint, the better your finished paint job will look. Washing, patching, sanding and vacuuming walls, ceilings, trim and doors before you pick up a brush or roller are time well spent. If you don’t take care of small imperfections now, they’ll stick out like a sore thumb once the paint goes on.
17
/
19
Family Handyman
Do the Ceiling, Then the Walls
Before painting any walls, take a good look at your ceiling. If you think it needs refreshing, paint it first. You don’t want to paint the walls and then — in a couple of weeks or years — paint the ceiling. Rolling the ceiling drops a fine mist of paint onto everything below. Painting the ceiling first also allows you to be less fussy along walls. Any paint that gets slopped onto walls will get covered up later when you paint them.
18
/
19
Family Handyman
Skip Brush Cleaning Between Coats
Whenever you take a break from painting or if you’re done for the day, toss your brushes into a five-gallon bucket of clean water to keep them from drying out (make sure all the brushes have the same color paint on them). When you’re ready to start painting again, swish the brushes around in the water and spin the excess out with a paintbrush-and-roller spinner. Do the spinning inside a second empty bucket to protect surrounding walls from flying water drops.
19
/
19
Family Handyman
Repurposed Egg Crates
Whenever you need to paint something small like a picture frame and need to raise it off the table to paint the edges, break out these handy egg cartons. Just cut a couple in half and use them to support the frame’s edges. You can reuse them several times or just throw them away when you’re done.
Originally Published: November 14, 2019
How to Paint a Room
Catherine Falls CommercialGetty Images
1
Sand Away Flaws
Valentyn Semenov / EyeEmGetty Images
To apply a perfectly smooth coat of paint to walls, ceilings, and woodwork, you must start with a perfectly smooth surface. One pro told us that “sander,” would be a more fitting job title for him than “painter,” since he spends so much time pushing sandpaper.
Sanding with the appropriate abrasive paper helps level out spackling compound and drywall joint compound patches, flattens ridges around nail holes, and feathers out repairs to inconspicuously blend into the surrounding surface. Sanding also removes burrs and rough spots in painted wood trim, such as baseboard moldings and window and door casings. And roughing up a glossy painted surface with fine-grit sandpaper allows the new paint coat to adhere more easily.
Use a sanding pole fitted with 220-grit sandpaper to sand the walls vertically from the baseboard up to the ceiling. Be sure to overlap each stroke slightly to keep from missing any spots. Then, sand horizontally along the top of the baseboard molding and along the tops of the walls at the ceiling. Don’t apply too much pressure on the sanding pole or its swiveling head might flip over and damage the wall. Plus, sandpaper tends to load up (clog) when you press down too hard.
To sand decorative woodwork, try using a sanding sponge, which gets into crevices and easily conforms to contours.
2
Press Tape With a Putty Knife
GeorgePetersGetty Images
Painter’s tape is an indispensable part of every paint job, especially when masking off wood trim. But nothing is more discouraging than peeling off the tape only to discover that paint has bled through the tape and gotten all over the trim. To avoid the pain-in-the-neck chore of scraping off the errant paint, do a thorough job of adhering the tape to the trim before you start painting.
Apply the tape to the wood trim, then run a putty knife over the tape to firmly press it down for a good seal. That’ll stop any paint bleeds. And be sure to use true painter’s tape, not masking tape. Masking tape leaves behind a sticky residue that’s hard to clean off. Plus, paint can cause masking tape to buckle and wrinkle, which lets paint seep beneath it. Painter’s tape can be left on for days (some types up to two weeks) and still peel off cleanly.
🛠 Tackle This Next: Pro Tips For Installing Crown Molding
3
Cover Furniture
Timothy Dahl
When painting a room, don’t bother lugging all the furniture out of the room. Instead, push all the furnishings to the center of the room and then cover it with plastic sheets that are taped at the bottom. This will protect the furniture from paint drips and splatters, and also from all the sanding dust.
4
Use Tinted Primer
Thanapol Kuptanisakorn / EyeEmGetty Images
Before the pros paint walls, they fill holes and patch cracks with joint compound. But if you paint directly over the patched areas, the compound will suck the moisture out of the paint, giving it a flat, dull look—a problem called “flashing. ” And those spots will look noticeably different from the rest of the wall. To avoid seeing patched areas through the finished topcoat of paint, it’s important to first prime the walls.
However, instead of using white primer straight from the can, pros tint the primer with a little gray paint or with the color of the finish paint. Tinted primer does a better job of concealing patched areas and covering up the old paint color. As a result, the finish paint coat will be more vibrant and may require fewer coats. This is especially true when painting over colors like red or orange, which could require three or more topcoat coats if you don’t first apply a tinted primer.
5
Buy the Best Supplies
Ezra Dyer
Don’t cheap out on paint and brushes. Cheap brushes are false economy. Purchase the best brushes you can afford, clean them well, and they’ll last you a lifetime. A $3 plastic brush is going to make it look as if you smeared paint on the wall with a rake.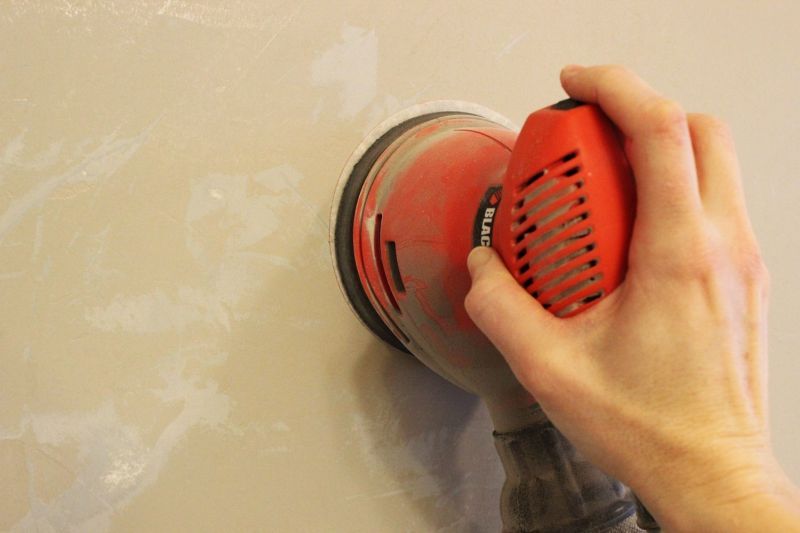 And, the bristles will fall out into the paint. Buy Wooster or Purdy paintbrushes, which cost a bit more than standard brushes, but are much more durable and apply paint very smoothly. A quality 2½-inch-wide angled sash brush is an excellent all-round paintbrush. It’s versatile and you can wash and reuse it until the bristles wear down to a nub.
It’s also important to buy the best paint you can afford. It’ll go on easy, offer the best coverage, and last a long time. Plus, you’ll be able to wash off grubby fingerprints without taking off the paint. And the whole painting job will go quicker and easier—and look better in the end.
➡️ Try These: The 8 Best Paintbrushes for Nearly Any Painting Project
6
Flood
Eliminate Brush and Lap Marks with Paint Extender
Floetrol/Amazon
Now 44% off
$8 AT AMAZON
7
Scrape a Ridge in Textured Ceilings
BanksPhotosGetty Images
When painting along the top of a wall in a room with a textured ceiling, it’s almost impossible not to get paint on the ceiling bumps. Pros have a simple solution: run the tip of a slotted screwdriver around the perimeter of the ceiling, scraping off a little bit of the texture. The screwdriver creates a tiny ridge in the ceiling, which the tips of your paint bristles naturally glide into. Now, you can cut in around the ceiling without getting paint onto the ceiling. And you’ll never even notice the missing texture.
🪛 Check These Out: The Best Screwdriver Sets for Building, Deconstructing, and Quick Repairs
8
Bates Choice
Scrape (Don’t Tape) Windows
Now 40% off
$8 AT AMAZON
9
Box Paint for Consistent Color
Ezra Dyer
When you buy two or more cans of the same color paint, guess what? They’re almost never the same exact color. That’s because paint color varies very slightly between cans. And that small difference can be glaringly obvious if you open a new gallon halfway through covering a wall. To ensure color consistency from start to finish, pros mix their cans of paint into a five-gallon bucket, a technique known as “boxing” paint. Then, you can paint directly out of the larger bucket, which eliminates the need to pour paint into a roller tray (though you should keep in mind that the heavy bucket is harder to move).
10
Finish One Wall Before Starting Another
pastorscottGetty Images
Most DIY painters cut in all the room corners, and then go back and roll paint onto the walls, but that’s not the correct way to paint a room. Pros get a seamless look by cutting in one wall, and then immediately rolling on the paint before the cut-in sections dry. This allows the brushed and the rolled sections to blend together beautifully.
Also, cover your paint bucket, tray, or container with a damp towel when switching between brushing and rolling; that’ll keep your paint and tools from drying out when not in use.
🪣 These Will Help: Tools to Help You Paint Like a Pro
11
Buy an Extra Bucket or Two
Ezra Dyer
It’s smart to have a couple of clean, empty buckets
on hand when painting because freshly shaken paint doesn’t stay freshly shaken for very long. And you can’t bring settled paint back to life with a stir stick alone. So, you must pour paint back and forth between two buckets until you’ve mixed in the solids that have collected at the bottom of each can. That’s the best way, and really the only way, to ensure your paint is properly and thoroughly mixed. And if you have paint in several different cans, mix those too to ensure color uniformity.
12
Wash Roller Covers
RUBEN BONILLA GONZALOGetty Images
Odd as it may sound, it’s important to wash brand-new paint-roller covers before using them to spread paint. Pre-washing gets rid of loose bits of fuzz that inevitably come off once you start painting. Wash the covers with water and a little bit of liquid soap, then run your hands up and down the covers to pull off any loose fibers, a practice called “preconditioning.” And you can start using the roller covers right away; you don’t have to wait for them to dry.
13
Use Canvas Drop Cloths
Tetra ImagesGetty Images
Professional painters don’t use old bed sheets as drop cloths, and neither should you. Thin sheets won’t stop splatters and spills from seeping through to your flooring. And don’t use plastic sheeting either. While plastic does contain spills, the paint stays wet for way too long. And if you step in wet paint, you’ll end up tracking it throughout the house. Plus, wet paint on slick plastic becomes very slippery.
Use what the pros use—canvas drop cloths. They’re more expensive, but canvas isn’t slippery, it absorbs splatters, and it’s durable enough to last a lifetime. And unless you’re painting a ceiling, you don’t need a jumbo-sized drop cloth to fill the entire room. A canvas cloth that’s just a few feet wide and runs the length of the wall is ideal for protecting the floor.
🔨 Your Next DIY: How to Restore a Concrete Patio
14
Light It Up
Ezra Dyer
Here’s another painter term for you: “holiday.” That’s when you miss a spot without realizing it. It’s easy to do, especially with similar colors or rooms with bad lighting. So, get yourself a good, bright work light and use it to check your work, either as you go or when you finish a section. Holidays typically occur around the edges of a room, where you used a brush instead of a roller. Holidays are easy to fix when you’re still working, but much more annoying after you’ve cleaned up and put everything away.
15
Klean-Strip
Clean Dirty Walls With Degreaser
$16 AT AMAZON
16
Take Off Those Electirc Plates
Ezra Dyer
This is a no-brainer. Instead of laboriously masking off or cutting around electrical outlet plates and switch plates, grab your screwdriver and take them off. Then you’ll be able to quickly and easily paint around each electrical device without making a mess. Just be sure to keep track of all the screws, so you can put the cover plates back on once the paint dries.
✅ Extra Credit: How to Cut Screws and Bolts
17
Start With a Loaded Brush
Ezra Dyer
Pros take a “load-and-go” approach to painting. They load the bottom 1½ inch of their brush bristles with paint and then tap each side of the brush against the inside of the can. That knocks off heavy drips and prepares the brush for painting.
By contrast, homeowners often take a “load-and-dump” approach: they dip the brush into the paint, then drag the loaded bristles along the sides of the container, wiping off most of the paint. The result is a brush that’s too dry and has too little paint.
18
Push Paint to Avoid Runs
Kathrin ZieglerGetty Images
When your brush is loaded with paint, it’s easy to create drips and runs by applying too much paint in room corners or along wood trim. To avoid those issues, start brushing about 1/2 inch away from the cut-in area. As the brush unloads paint, move closer and slowly drag the brush along the trim or corner. Let the bristles gently push the paint against the cut-in area where the walls meet. You may have to do this a couple of times to get complete coverage, but it’ll avoid excess paint collecting along woodwork and in corners.
19
Give Yourself a Good Set
Ezra Dyer
In painter lingo, a “bad set” is when you’re in a physically bad position while painting. For example, maybe your ladder isn’t quite close enough, or you’re in an awkward spot with your brush. The good news is that most bad sets can be avoided. Just climb down and move the ladder. Sure, it’s annoying, but it’s not as annoying as falling into your paint bucket because you were hanging off your ladder like an America’s Cup crew member. And sometimes a bad set can be resolved by moving an obstacle. If the refrigerator is forcing you into a tough painting position, stop and roll it out of the way.
🪜 This Will Help: The Best Extension Ladders for Your High-Up DIY Tasks
20
Bag It Up
Ezra Dyer
When you’re ready to quit for the day—but haven’t finished painting—leave the roller cover on the roller frame, then soak the cover in paint. Wrap the cover in a plastic bag to create an airtight seal. That’ll keep the roller cover fresh until you return to painting the next day. If you can’t return to painting for several days, pull the roller cover off the frame and toss it out. Then use a new roller cover the next time.
As for your brushes, rinse them clean with warm, soapy water, especially if you’re using latex paint, which is water-based. Use paint thinner to clean off oil-based paint. Then rake the bristles out straight with a brush comb and slip the brushes back into their original covers or wrap them in newspaper.
Ezra Dyer
Senior Editor
Ezra Dyer is a Car and Driver senior editor and columnist.
How to paint walls without streaks: instructions for painting walls with a roller
Painting walls is a job that requires attention and concentration. To get a good result, you must adhere to a certain sequence and follow the rules. First you need to choose the right paint. It is divided into several types: water-based, PVA-based, acrylic, latex, alkyd, oil, silicone.
Water-based paint is practical, because dust does not penetrate into its structure. All dirt from the surface painted with this type of paint can be easily cleaned with water. PVA-based material is more susceptible to pollution, so it is used mainly for ceilings. However, in conditions of high humidity, it is better not to use PVA-based paint.
Acrylic resin based paints are fade resistant and will last a very long time. They prevent the penetration of moisture, so this type of color scheme can be used in bathrooms and in the kitchen. Latex paints are resistant to mechanical stress, lay on the surface in an even thin layer, and are used for painting plaster and wallpaper.
Alkyd and oil paints designed for outdoor use. The advantages include quick drying and resistance to damage. Silicone paints have the following advantages: vapor permeability, water resistance, long service life, strength. They are used for both outdoor and indoor work.
Italian decorative paints can be distinguished into a separate category. From ordinary paints that give a strictly defined effect, decorative ones leave room for imagination – the final result will depend on the method of application and the thickness of the final layer.
Tools needed for painting
In order to paint the walls in the apartment with high quality, you need to prepare the necessary tools:
- Rollers of different lengths. In addition to the variety in length, they can differ in the material of the cylinder. Fur rollers allow you to paint walls with minimal paint consumption. They absorb a large amount of the mixture, but leave it all on the surface of the walls. Among the shortcomings can be noted the possible gluing of the villi to the wall. A velor cylinder tool leaves a nice even layer on the surface, but uses a lot of paint. Polyamide roller is a fabric cylinder, stitched with threads, with a handle. This type of tool is durable, with the correct application technique, the paint does not flow. When working with a fabric roller, it is worth remembering that it sprays the mixture.
- Sanding block. Tool needed for sanding walls before painting;
- Brush. Used to paint hard-to-reach places, such as corners;
- Masking tape. It is used to seal surfaces that do not need to be painted;
- Paint tray. Made of plastic, used for applying paint to the roller;
- Film. If the area in which the painting work is carried out is filled with furniture, then sofas, tables, chairs, etc. It is better to cover with a film so as not to stain them. It is also desirable to cover the floor.
 It is used to seal surfaces that do not need to be painted;
 Preparing the room for painting
When all the tools are ready, you can start preparing the room for painting. To do this, remove the curtains, move all the furniture to the middle of the room and cover it with plastic wrap or special covers.
To prevent paint from getting on windows, floors, doors, you must use the same film, but securely fix it with masking tape. Thus, the film will not slip and move out. After fixing the tape, go over its edge with a spatula for better fixing. Skirting boards, loot should be sealed with masking tape.
It is better to turn off the power supply to avoid personal injury. Covers from sockets and switches can be removed, and places without boxes can be covered with masking tape. This will give you the best painting result.
Correctly paint the walls in the room, after removing the heating radiators. So you can carefully process the entire surface, not missing even small areas. To do this, you must:
- close the heating valve;
- Unscrew union nuts
- flush
- remove the radiator.
Stock a drip tray so that water from the radiator does not spill onto the floor. If you are not confident in your abilities, it is better to invite a specialist who will do this. Before you start painting the whole room, try to paint on a small area of the wall. So it will be possible to make sure that the color is correct and to understand how long the paint dries.
Painting tips
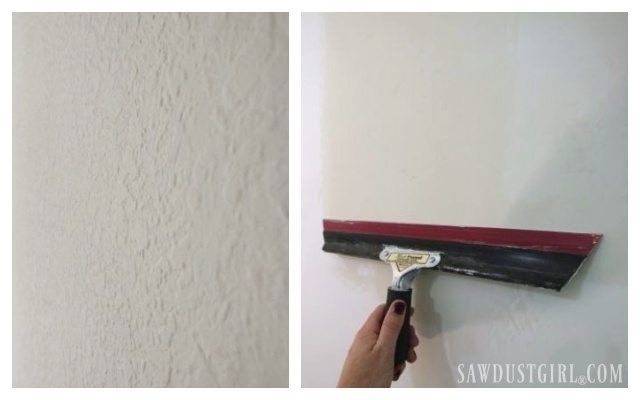
Before painting the walls in the apartment, check their condition. The final result of painting depends on the quality of the wall surface. The walls must be smooth, without cracks and other flaws, otherwise after painting all the roughness will be noticeable. If the surface was previously pasted over with wallpaper (non-woven, paper, liquid), it is necessary to carefully remove their top layer with a spatula. After that, sandpaper is used in order to remove excess irregularities.
Cracks and depressions can be masked with gypsum mortar or putty. To do this, apply a little mixture to a flat spatula and fill the flaw. After the finish has dried, it is worth starting sanding with sandpaper.
For better adhesion with paint, the walls are primed. Some experts advise using a ready-made tinted primer in gray or a shade of paint. Thus, fewer layers are required to achieve a rich, vibrant color.
When working with wooden elements, it is recommended to use special impregnations for wood, which prevent the destruction and decay of natural material.
When all the work with the walls is completed, it is necessary to prepare the roller for operation:
- soak it in soapy water for 2-3 hours;
- rinse under running water;
- dry.

Following these recommendations, you can extend the life of the roller, avoid getting fluff on the wall when painting.
How to apply paint on walls correctly
You can learn how to paint walls correctly with a roller without leaving marks by following the recommendations. For this, it is also worth watching a photo or video in order to better understand the application techniques. There are several ways to paint walls with a roller: movements from the bottom up or from top to bottom and horizontal movements.
The first option allows you to avoid stripes, the second – to capture the entire coverage area. Sometimes these techniques are combined to achieve the best result. Correctly paint the walls with a roller in the following sequence:
- pour the required amount of paint into the pan;
- soak the roller in the paint and roll it out on the corrugated surface of the pallet;
- start staining from the window.

To avoid scratches, streaks, overlapping, do not press the roller too hard against the wall. All movements are performed smoothly, without fuss, then the walls are painted over evenly, without the formation of gaps. It is worth remembering that the second coat of paint is applied only after the first has completely dried.
Surface marking and paint application
For uniform painting, the wall area can be roughly divided into squares. The value of the width of the roller must be multiplied by 5, then you will find out the length of the side of the square. For example, the width of the cylinder on the tool is 20 cm, so the square will have sides of 100 cm.
Now divide the square into 5 vertical stripes and paint over the second, fifth strip, skipping the first, third and fourth. After painting the 5th strip, we return to the fourth, then to the first and third. In theory, the information looks a little confusing, but in practice, such manipulations are very easy to perform.
When the first coat of paint is dry, the second coat can be applied. This must be done in the following sequence: strips No. 3, 1, 4, 5, 2. If the first time you painted the wall with movements from top to bottom, then the next time you should make movements in the opposite direction.
After the first square, you can move on to the second and continue doing so until the entire wall is covered. This technology allows you to spread the paint over the surface with a thin layer, thus avoiding unnecessary material consumption and stains.
Tips for painting walls correctly:
- if it is difficult to visually represent the squares and conditionally divide them into stripes, you can use masking tape;
- do not apply a thick layer of paint, otherwise streaks cannot be avoided. The coloring matter is distributed in several stages in a thin layer;
- do not finish one wall before moving on to another to avoid color shifts;
- if it is necessary to tint the paint, do it before starting work with the entire volume of the mass, otherwise there is a possibility of obtaining a non-uniform shade;
- For the first coat, use a long-haired roller, as it will be able to paint over the desired areas faster. The second time you need to paint the walls with a roller with a pile of 6-7 mm to avoid streaks and overspending of paint;
- if paint has got on a wooden surface, it can be removed with a metal spatula or a clerical knife. To do this, gently scrape off the drops, then walk over the surface with technical alcohol.
 The second time you need to paint the walls with a roller with a pile of 6-7 mm to avoid streaks and overspending of paint;
 Cleaning tools
After finishing the painting work, the tools must be thoroughly cleaned. To do this, you can simply squeeze the roller cylinder with your hand and put it under running water until it is completely clean. Waste water can be discharged into the sewer, it is absolutely safe for the environment.
However, this method of cleaning is only effective if water-based paint is used. If a different composition was used, then it is worth using gasoline, acetone or a special solution. Dry the roller after cleaning.
During work breaks, place the roller in an airtight bag to prevent the paint from drying out. Sometimes, for the same purpose, the cylinder is wrapped with cling film. It should be remembered that this option can be used for short breaks of 2-3 hours. Otherwise, it is better to clean the tools.
The brushes and tray are also washed in warm water. Before reuse, the brush should be soaked in warm water for a few hours so that it becomes slightly soaked and more pliable. If you do not want to wash the pallet, put a plastic bag on it before use or wrap it with foil. After painting is completed, it remains only to remove the bag or foil so that the pallet is clean.
what you need for even painting, paint yourself or yourself, rules, where to start, technology, how to apply at home yourself
Paints.RU
WikiPaints
Paints and varnishes
How to paint a wall: what you need for proper painting in an apartment with your own hands
The answer to the question of how to properly paint the walls in an apartment with your own hands simply cannot be simple and monosyllabic. Almost all the details of future work depend on the state of the room being decorated right now. The property owner may be faced with uneven walls, old wallpaper, crooked corners and pieces of loose putty, or vice versa, start working in a new building with a “pre-finishing” finish. As a rule, it is a set of preliminary stages that takes up the bulk of the time, allowing you to rid the space of all the listed shortcomings. The very process of transforming the interior does not require a special, outstanding level of skill and a list of hard-to-understand tips.
Contents
How to paint the walls on your own
Do-it-yourself painting the walls in the rooms of a house or apartment: where to start
Choosing a paint
Calculating the amount of paint
How to paint the walls for painting: preparing the room
Preparing the walls for painting
Primer
Removal of old paint coating
Rules and technologies for painting walls in apartments
Corner removal
First layer
Second layer
Removing masking tape
How to apply paint on walls on different surfaces and in any room
Brick walls
Specialized wallpaper
Tile
Plasterboard
Wood
Concrete
Whitewashing
Painting walls in the kitchen
How to paint the walls in the apartment: the process of furnishing
Conclusion
How to paint walls on your own
In 2022, heated debates continue to blaze in the construction and design world, in which adherents of ordinary rolled wallpaper sheets and, of course, paint and varnish compositions become participants. However, an increasing number of people are opting for classic paint. Moreover, it is extremely easy to apply such a component to the wall plane. The whole job (at least in a small room) takes from two to four hours, depending on the expertise and technical equipment of the performer.
Self-painting the walls in the rooms of a house or apartment with your own hands: where to start
The first thing to start the whole operation with is the purchase of the necessary tools and materials. You really need a lot of things:
- the coloring compositions themselves, selected by color and in the right volume;
- wide and narrow rollers with complete extensions;
- brushes, brushes, paint trays;
- shovels, rolls of adhesive tape for zoning;
- plastic wrap, gloves and a screwdriver.
However, all of the items listed are easily purchased at the nearest specialized store. You can order high-quality paint coatings, for example, with delivery, using the offers of the Kraski. ru retail chain.
Paint selection
Before you finally decide on the question of what you need to paint the walls in the apartment, you should choose the coloring composition itself. When purchasing this or that container, a beginner plasterer-painter should be guided by the following technical parameters of related substances:
- gloss level;
- hiding power;
- viscosity and consistency;
- moisture resistance;
- characteristic properties and features;
- vapor permeability;
- drying and curing time.
Please note: an extremely important criterion is the absence of any harmful, chemical and volatile components in paintwork materials. As a rule, water-based options that do not include oils, solvents and nitro enamels are considered the most harmless and safe.
Paint amount calculation
In order to avoid unpleasant situations in which you have to run to the store for additional cans of coloring compounds, you will have to make all possible calculations from the very beginning. The formula looks like this: the area of \u200b\u200bwall surfaces is divided by the consumption of the substance, and then multiplied by the number of layers. About 10-15% must be added to the resulting number, forming a certain reserve in case of a shortage. Even a schoolboy will be able to cope with such mathematical operations, especially since there are many specialized, smart calculators on the network today.
How to paint walls for painting: room preparation
As a rule, the work of applying coatings itself does not take at least some impressive time. A small room takes from two to four hours, depending on the expertise and technical equipment of the master. Most of the work concerns only a set of preparatory stages. Many modern specialists have to work at facilities with a variety of shortcomings. These are, for example, uneven slopes, pieces of peeling plaster and old, hard-to-remove wallpaper.
Wall preparation for painting
So, any finishing begins with checking the premises. The result of all related operations should be a flat and clean wall plane, covered with an emulsion, starting composition.
Primer
The process of applying the primer is extremely simple. All activities are carried out according to the steps of the following, as simple as possible instructions:
- We remove excess dust from the equipped surface, using, for example, an ordinary damp cloth or vacuum cleaner.
- We are waiting for complete drying, in parallel diluting the pre-acquired concentrate.
- We apply the primer with a slightly wetted roller, trying to avoid excessive smudges. We carefully go through all the corners and hard-to-reach places with a brush.
- We wait from five to six hours, and then we repeat the whole complex of operations.
As mentioned earlier, even a person who was initially far from the plastering and painting sphere can cope with such work.
Removal of old paint coating
Often, homeowners, before finally dealing with the question of how to properly paint the walls with paint in an apartment with their own hands, have to solve problems associated with the dismantling of the previous composition. However, it is quite easy to rid the room of past layers of paintwork materials. The master should thoroughly wet the surface to be treated, and then use an ordinary construction spatula. In addition, in 2022, on the shelves of modern specialized stores, there is a whole range of substances that facilitate this work. Sold in convenient spray containers, the components are sprayed onto the appropriate area, corroding the old finish without additional effort on the part of the property owner.
Rules and technologies for painting walls in apartments
As mentioned earlier, the operation itself does not include sets of any complex steps. When performing it, you need to be guided by the following instructions:
- First, mix the composition thoroughly using a construction mixer or an ordinary wooden spatula.
-
Fill the paint tray to about a third of its total capacity. Try to close the jar immediately after pouring some of its contents into a suitable container.
- Do not dip the roller completely. Roll it several times on the surface of the coloring component, and then distribute the material using a special ribbed part of the trough.
Please note: the tray itself can be covered with foil or parchment paper – this will facilitate the process of washing it in the future.
Cornering
Initially, you should go through all the joints and hard-to-reach places using an ordinary brush. The size of the classic, “preliminary” strip of this format is from five to seven centimeters. When painting the corners, the master must not forget about other difficult elements of a classic room. As such, there are heating radiators, sockets, switches, mounting boxes, communication nodes, and so on.
First layer
So, the question of what it takes to paint a wall is extremely easy to answer. As mentioned earlier, the main thing in such work is preparation:
-
We close doors and windows, excluding all drafts.
- We spray water using an ordinary spray gun.
- We seal the windows with a film, protecting the room from direct sunlight.
- We begin the staining process, moving from the corner to the wall surface.
- We place each next strip overlapping the previous one (by 5-6 cm).

Thus, moving from the corners to the planes, we gradually finish one side. It is easy to guess that the operation is then repeated in a completely similar format.
Second layer
Experts in the field of plastering and painting recommend starting re-painting only after the final and complete drying of the base composition. About how long you need to wait, as a rule, is described in the instructions for a particular class of paintwork materials. Manufacturers mark such information with all sorts of bright elements, placing them, including on the container itself.
Removing masking tape
The adhesive tape that protects the contours and junctions is removed 15-20 minutes after the component is re-applied. It is important not to forget about this stage, otherwise the substance will dry out, and the canvas will come off with pieces of a freshly painted coating.
How to paint walls on different surfaces and in any room
As mentioned earlier, modern masters regularly face the tasks of arranging rooms, with basic repairs already in place. In addition, today there are a huge number of companies involved in the construction of new buildings according to the most unimaginable standard projects. In houses of the 2022 model, there are concrete, wooden, plasterboard and tiled wall planes that need high-quality refining with paintwork materials. All of these types of materials should be interacted with according to their own, unique instructions. There is no single regulation for them, because drywall, wood, brick or even ceramics are elements that behave in completely different ways, including in terms of decorating.
Brick walls
In fact, there are few options for working with such surfaces. A novice master will have to take care of buying an airbrush and a good brush. First, the plane is cleaned of old dust and plaque, using an ordinary spray gun and a vacuum cleaner. Often you have to use a compressor with a powerful air jet. As the main coating, products from the Caparol brand, for example, Samtex-3, should be used. The number of layers is similar – from two to three, depending on certain parameters.
Specialized wallpaper
The answer to the question of how you can independently and evenly paint the walls in a room with paint, as a rule, is addressed to people who have taken care of purchasing high-quality specialized wallpaper rolls in advance. A modern and most convenient way of finishing allows you to forget about a variety of problems. The substance is applied extremely easily, however, only with proper selection of the base panel. It is worth making a choice in favor of glass and non-woven options, ordinary paper models will not work from the word at all.
Tiles
Probably, any person who is more or less versed in the plastering and painting sphere will say that LKM and tiled planes are incompatible from the word at all. The paint and varnish component simply will not stick to such material, regardless of the number of layers, the presence of additional fixative aerosols, and so on. Of course, you can try oil or facade colors, but, as a rule, you don’t have to answer for the success of such an operation.
Drywall
Plasterboard sheets are canvases that are very easy to paint with high quality and the most correct coloring. True, before performing the main work, the master will need careful preparation. The set of preliminary steps includes the tasks of puttying, cleaning and priming. However, exactly the same cases are faced by a person processing, say, more traditional, concrete surfaces.
Wood
In general, if there are wall planes made of wood in the house, they should be sheathed with sheets of pressed dry gypsum plaster. The fact is that in order to apply coatings to such materials, oily substances will have to be used, which, by the way, have not been very popular in repairs for probably 15-20 years. The timber and lining do not need to be painted at all, they will have enough special impregnation.
Concrete
Questions regarding how to properly paint the walls in a house or room often arise from people who own rooms with ordinary concrete walls. As a rule, such objects are located in new buildings (as well as houses received from the secondary market, but passed through a major dismantling). Working in these conditions is easy and convenient. The scheme is similar: we level, clean, prime, and then apply paintwork. If you want to achieve a more interesting and high-quality result, you will have to take care of preliminary putty or even plaster (with a pronounced curvature of the surfaces).
Whitewash
Products made from slaked lime or calcium carbonate cannot be dyed at all. Experts recommend scraping it completely, using water, a spatula and various rags. Then the plane is simply puttied, and only then the paint is applied. There are no other options for interacting with the submitted material.
Kitchen wall painting
Kitchen areas are literally “weak” places even in the most equipped and advanced apartments. Most of the elements of such zones are subject to regular and severe pollution. Of course, modern technology, hood format devices, and so on, relieve such problems quite well. However, global trouble remains. That is why the masters involved in the arrangement of the presented spaces recommend using paintwork components that are subject to elementary care and washing. The technology of applying coatings itself does not have any significant differences.
How best to paint the walls in the apartment: the process of arranging a balcony
A person who decides to slightly transform the external image of the loggia that has bothered him should take care of buying a roller with a long pile (from 10 mm or more). As a paint, we take an ordinary facade composition, with suitable performance characteristics. By the way, you can purchase such products, say, with delivery, on the official website of the Kraski.ru Trade Network. Here are hundreds of positions of the necessary goods, divided into convenient and functional categories. In addition to the quick transportation of the order to the door of the client, the organization has other, more significant advantages. Our company cooperates with the world’s best suppliers of paints and varnishes, offering its customers the most affordable prices for outstanding products.
Conclusion
As mentioned earlier, the answer to the question of how to paint the walls in a room or apartment with your own hands is multi-component, rather complex. Almost all aspects of future work depend on the basic properties of the equipped premises. Masters have to deal with whole mountains of additional work related to puttying, priming, leveling walls and removing slopes. The procedure for applying the coloring component, as a rule, does not cause difficulties from the word at all. For example, the author of this video talks about how to better cope with the presented task.
step by step guide in 2022
Paint is a practical and convenient coating. She has one significant disadvantage – she does not mask the flaws of the walls. If the surface is uneven, in gaps, cracks and “tubercles” – this will be perfectly visible under the paint. Today we will tell you how to prepare the walls for painting, performing the work in stages.
Preparing the right tools
Work begins with the choice of tools. The set depends on the condition of the surface and the type of old coating:
-
Dismantling of cladding, old plaster, ceramic tiles – you need a spatula, a puncher and nozzles, a grinder and consumables (sandpaper of various fractions).
-
Plastered surfaces with numerous irregularities – you will need a grinder, a puncher with nozzles (can be replaced with a hammer, chisel), sandpaper of various grain sizes, brushes to remove dust.
-
Old wallpaper – a sponge, a spray gun, a spatula will come in handy.
-
Old paint – arm yourself with a solvent, a hairdryer, a scraper, a spatula, a metal brush for a drill.
-
Old whitewash – special solvents, rags, a scraper will come in handy.
Basically, the tools are simple and inexpensive. If you have to remove tiles or old plaster, do not rush to buy a shaft of new “toys” – it’s better to borrow or rent them.
Complex renovation of turnkey apartments
-
All inclusive
The cost of repair includes everything: works, materials, documents. -
Without your participation
After the project is approved, we disturb the owners only when the repair is completed. -
The price is known in advance
The cost of repairs is fixed in the contract. -
Fixed repair period
Turnkey apartment renovation in 3.5 months. The term is fixed in the contract.
Read more about Made
Removing the old coating
Let’s talk more about the first stage of preparing the walls for painting. You need to get rid of the old coating, whether it be paint, tile, wallpaper or plaster.
When it comes to wallpaper, wet the wall and wait for the coating to get wet. Then carefully, using a spatula, remove the sheets.
Attention! When removing old wallpaper, it is necessary to additionally treat the surface with an antiseptic and apply a primer.
Paint removal is carried out with a drill with an abrasive nozzle or a grinder. If dust and debris are scary, which is inevitable, remove the paint by hand. Use a hair dryer and a medium sized spatula.
You can remove the tiles and prepare the wall with a perforator with nozzles. To level the surfaces, use a grinder and sandpaper of various grits (fine, medium and large).
Troubleshooting
If the removal of the old layer is necessary to improve the adhesive and decorative qualities of the paint, then the elimination of defects is necessary to create a smooth surface, without the risk of deformation and peeling of the coating subsequently. At this stage, cracks that require attention are removed. The work is as follows:
-
Sewing is in progress. The crack expands and deepens with a chisel, hammer and spatula. The area is thoroughly cleaned of dust and dirt with a paint brush.
-
The excavation is treated with a primer. In this case, it is recommended to use compositions with a maximum impregnation rate.
-
The damaged area is covered with putty.
-
The last step in eliminating defects will be the overlay of reinforcing tape if necessary (if the crack is large and requires additional reinforcement).
The tape is pressed into the uncured putty and smeared. The finished area is sanded with sandpaper by hand.
Important! Preparation of walls for painting at the proper level is possible only on a reliable basis. If there is damage on more than 25% of the surface, the wall is not considered as such. In this case, only professionals can do the work.
Leveling the walls: can you do the work yourself?
Leveling walls is a time-consuming process that requires skill and effort. However, if you decide to do the work yourself, you should carefully study the available finishing methods. In general, you can achieve a smooth surface using:
-
putty and plaster;
-
plastering using relief application technology;
-
facing materials with a relief surface;
-
plasterboard sheathing.
Each option has its own surface preparation process. But the standard procedure, mandatory for these leveling techniques, will be the puttying of the walls.
Do you need repairs?
We have already renovated more than 500 apartments, we will be happy to help you too
Find out the cost of repairs
What to choose: independent or professional preparation of walls for painting?
Self-preparation of walls for painting is a difficult task that requires knowledge, skills and, of course, time. If you do all the work yourself, you can save on the services of repairmen. True, there is a risk that the work will have to be redone – you can make a miscalculation.
It is easier (and often better) to hire professionals. They will not only do a quality job and relieve you of unnecessary hassle, but they can also glue wallpaper, apply paint, replace laminate and install stretch ceilings – all this “in one sitting”. Yes, you will spend more money on complex repairs. But save your nerves and, more importantly, time that can be spent on work or leisure.
White wall painting tips and examples
In magazines and blogs, white walls are presented as a panacea for all interior troubles. Do you want to visually enlarge the space or make the room brighter? Paint the walls white! Need a versatile backdrop for experimenting with furniture and decor? Do not want to overload the space with shades? You know what to do!
In practice, it turns out that painting the walls white is a little more difficult than simply rolling. What difficulties may arise?
Tikkurila Russia
1. How to choose the right shade of white
You may encounter the first difficulties already in the store where you go to buy paint: white is not a specific and familiar color, but a whole family of shades of different density and warmth. The color of office paper for a printer or ivory, milky and mother-of-pearl, parchment or pearl – shades that are appropriate in a warm pastel interior are not suitable for the desired minimalism.
Anna Muravina
We will have to take into account not only the style, but also the orientation of the windows. Northern blinding whiteness is not desirable – you will simply “freeze” in winter in such an interior; if, on the contrary, there is a lot of sun in the room, shades with a slight grayish tint will help soften its aggressive influence.
Interested in interior design?
Let’s find a contractor according to your criteria
SPACE Architects + Planners
Tip: Shades of white can be combined. For example, choose a colder option for the lower wall panels, and a warmer one for the upper part. The main thing is that a tangible contrast can be traced between them: otherwise the room will look as if you did not have enough of the right paint.
Alexey Trofimov Photography
2. Which is better: matte or glossy shade
For interiors, emulsion paints diluted with water are usually used. They are easy to apply and distribute on the wall, and during operation it is also easy to wash. Prices vary depending on the quality of the resins and pigment used for production. In addition, some paints are applied in one layer, others in two or three.
The finish can also be matte or glossy. Matte paint better hides wall imperfections and absorbs light, but gets dirty faster. Glossy is considered more durable, but not everyone likes its cool sheen.
SEE ALSO
White walls in the living room – 5647 beautiful ideas in the Photo section of Houzz
Design Point
3. Or maybe not paint at all?
After all, decorative plaster can be used instead of paint. Its strength is a light relief or alternation of matte and glossy textures, thanks to which the interior seems saturated. Weak – difficulty in maintenance: if damage appears on the wall, it will be expensive and difficult to restore perfection. In addition, decorative plaster will tie your hands during the next repair: you cannot apply another coating or wallpaper over it, the surface will have to be cleared to the ground.
Alexander Shevtsov
Fact: White Boar tiles are widely used in kitchen and bathroom interiors. Due to the chamfers, shining edges add an additional volume effect to the wall.
Alesya Semiletova
4. If you paint white wallpaper for painting
The algorithm for working with paint depends on what surface you are going to apply it to. Perhaps the most civilized way is to use wallpaper for painting. Both paper, and vinyl, and non-woven coatings hide small imperfections in the wall and tolerate re-painting well.
Glass fabric wallpapers also withstand brushing and do not burn; however, the choice of patterns is not very diverse and the price is usually high.
White Space Design San Francisco
It is believed that wallpaper for painting does not need such a perfectly flat rough surface. Unfortunately, you will understand this only after you paste the wallpaper and paint it. The very first rays of light will ruthlessly emphasize all the irregularities. So whether to take risks or not with savings on preparatory work, everyone decides for himself.
Paintable wallpaper has its pitfalls. Firstly, they can move away from moisture, it is convenient for cats to sharpen their claws about them. Secondly, it is important to glue them perfectly: for a professional, this task will not be difficult, but with self-repair, you will have to spend a few nerve cells.
RELATED…
How to: Choose wallpaper for painting
Anastasia Komarova INdEX
Painting the wall itself
Many people think that painting the wall itself is a good way to save money. This is true only if you are ready to take all the bumps and small cracks as a decorative advantage. If the task is different – to create a flawless white surface – additional (and sometimes quite expensive) wall preparation will be required.
Alexey Trofimov Photography
SEE ALSO
White walls in the bedroom – 5647 beautiful ideas in the Photo section on Houzz
It is important to prime the wall before painting to increase the adhesion of the materials. If this is not done, the paint runs the risk of peeling off sooner than you expect. And if the wall has already been painted, first you need to evaluate the quality of the coating: it is enough to wash or vacuum a flat surface without cracks; if the paint leaves, it will have to be removed with a spatula and the wall primed.
Tip: It is very easy to assess the condition of your coverage. Fasten a layer of self-adhesive tape to the wall and tear off sharply. If there are pieces of paint on the tape, the coating will have to be removed.
Nina Frolova
If the wall is in poor condition, you need to do this: remove the old paint or wallpaper, putty all cracks and scratches, level with fine sandpaper, vacuum away microparticles and primer. You need to start painting from the windows and move towards the doors, and apply the coating with a roller in several directions at once: vertically, horizontally and diagonally.
Lavka-Design
Textured brick
Fashion for brickwork does not lose ground. True, the reddish tint of the brick already seems too aggressive to some: white paint helps to soften the effect. Before applying it to a brick wall, think a hundred times: it will be almost impossible to remove paint from a brick if you stop liking it.
If we are talking about masonry at home, it is likely that there are efflorescences on it: they will have to be removed with a wire brush, then the wall should be washed and left to dry for about a week. And only then paint (otherwise it will show through).
KRAUZEarchitects
Sometimes facade paint is chosen for brickwork. This is a mistake that can cost you dearly: as a rule, there are a lot of harmful compounds in such a coating – there is no problem painting outdoors, but it’s a completely different matter if you have to work indoors!
A primer that creates a water-repellent effect should be applied in a thick layer and allowed to dry thoroughly, and then the paint should be applied with a brush in a horizontal direction, following the masonry pattern.
Architectural workshop 2Yu
White lining / wooden panel
Painting new wooden panels or lining is as easy as shelling pears: first apply a primer antiseptic, then apply three coats of paint with a roller (each of them should dry well). Old panels need to be cleaned of paint. If it does not come off well, a soda solution will help, and after processing the surface will have to be degreased.
Woodstock Cabinet Company
Craftsmanship
It’s no secret that different paints are used to paint the living room and, say, the kitchen. In areas that often come into contact with water, moisture-resistant coatings are appropriate, but before you start painting, it is important to make sure that mold has not appeared on the walls of the kitchen or bathroom. If you notice such unpleasant surprises, look for a way to fix the problem. For example, work with ventilation and deal with drips. You can, of course, pretend that nothing terrible is happening, clean and cover up the stains, but they will inevitably appear again and will spoil both the interior and your health.
SEE ALSO…
- Natural ventilation: how it works
-
Some parents are afraid to paint the walls of the children’s room white because the snow-white canvas will quickly become full of handmade patterns.
Such a scenario of the development of events is not at all excluded, but restoring the colorful layer is still easier than re-gluing painted wallpapers.
Maria Pilipenko
Decorative aspects
Opponents of white walls use the same arguments from year to year: allegedly such a coating looks poor, pale and hospital. In fact, everything depends on the shade and combination of textures, especially since white is the most grateful background for decorative experiments: it is probably not for nothing that all the walls in museums are white.Bright colors of textiles and wooden products will help to soften the whiteness. If your interior tastes come down to hard and cold minimalism, you need to choose another company for white walls: white metal objects, glass surfaces and laconic textiles.
Painting walls with water-based paint
One of the ways to decorate rooms is painting with water-based paints.
Why is this option good? Walls painted with water-based emulsion are combined with interiors of any type. And with the hi-tech and minimalism that are popular today, there are almost no options – the walls should only be smooth, without a pattern. This can be achieved by painting or pasting with plain wallpaper. The second plus is that you can choose any color, and by choosing the right type of paint, you can get a matte or semi-matte surface. The third positive point is that painting walls with water-based paint is a simple process. You can do everything with your own hands.
Painting walls with water-based paint can be done independently, and the result will be at the proper level
Contents of the article
- 1 Which water-based paint to choose for walls
- 2 Characteristics of water-based wall paints
- 3 Preparing walls for painting
- 3.18 Removing old paint
- 3.2 Repairing defects and puttying
- 3.3 Priming
- 4 Painting walls with water-based paint: technology and rules
- 4.
1 Water emulsion roller
- 4.2 Water emulsion application technology
- 4.
Which water emulsion to choose for walls , others paint the outer walls and they do not lose their appearance for years. For this reason, it is necessary to choose a composition for specific tasks and goals.
The base of water-based paints is water containing polymer or mineral particles. When drying after painting, water evaporates, and polymers and minerals form a film on the surface. The properties of this film are determined by the type of polymer, therefore, when choosing, the composition of the water-based paint is of key importance. And they happen:
Having decided on the composition, you need to choose a manufacturer. There is no news here – it is better to pay a little more, but get high-quality paint than repaint everything again in a few months. When choosing, pay attention not only to the price and volume, but also to such an indicator as consumption. It is indicated in grams per square meter and sometimes differs significantly.
And often expensive paints have a much lower consumption.
Characteristics of water-based wall paints
Name Application Special properties Consumption Price per 1 liter Price per square meter TIKKURILA EURO-7 A Concrete, wood, brick, fiberglass (wallpaper), plaster Latex paint on the basis of acrylic 8-10 m²/KG /KG
/KG/KG
292 m²/KG 9072 2 – 36.6 RUB/m² Optimum (Leningrad paints) Concrete, drywall, wood, brick, plaster Waterproof vapor permeable 6 – 8 m²/kg 42 rub/l 5.25-7 rub/m² Dulux Diamond Matt BW Concrete, brick, fiberglass (wallpaper), plaster Increased wear resistance, stains are easily washed off 12-17 m²/kg ² 801 rub/l 5
Dufa Superweiss RD 4 Concrete, fiberglass (wallpaper) White acrylic moisture resistant paint 6. 5 m²/kg
252 rub/l 38.7 rub/m² Preparing walls for painting
Painting walls with water-based paint requires a level surface. It can be special wallpaper for painting or a puttied and primed wall. At the same time, it is impossible to paint over oil paint or whitewash with a water-based emulsion. Previously applied coatings must be completely removed – before plastering, then repair defects, prime, and only after that you can paint.
Special wallpapers can be painted with water-based paints
Removing old paint
The method of removing the old layer of whitewash and water-based paint is somewhat similar. First, “dry”, with a spatula, they clean off everything that happens. To quickly remove the old water-based emulsion from the walls, the surface is moistened with hot water. Just take a roller, dip it in hot water and roll it several times. Leave for 3-5 minutes, then repeat the procedure. Usually, after the second portion of hot water, the coating swells up and is easy to clean off with a spatula.
Some particularly difficult areas need to be moistened again.
With the removal of whitewash from the walls, the situation is similar, but the water used is cold and more may be required – lime is highly hygroscopic. But when wet, it cleans up well. Another feature – after everything has been removed, it is necessary to soak the surface well with a solution of soda. This neutralizes the remaining lime in the pores. After drying, it is already possible to prime and putty.
Remove the old paint from the walls, most often with a spatula
The most difficult process is removing oil paint from the walls. It is inefficient to heat the walls with a building hair dryer – they heat up very slowly. There are also chemical compositions – washes. But firstly, they are toxic, secondly, they are expensive, and thirdly, they remove one layer well, and everything lying below has to be smeared again. In general – not the best way for this situation.
Most often, mechanical methods are used to remove old oil paint from walls.
A brush made of metal wire is put on a drill or grinder. By turning it on at low speeds, they clean off the paint. The method is not bad, but it turns out a lot of dust, which is not good. As it turned out, it is much more efficient to use a drill with a crown for drilling sockets. Oil paint flies off in pieces, there is almost no dust, the process goes quickly.
Repairing defects and puttying
In the case of water emulsions, you can not rely on the fact that the paint will hide the flaws of the walls. Quite the contrary – emphasize. Unless you use silicone emulsion, but even with this paint we advise you to cover a small piece and see if the result suits you. If not, you’ll have to putty.
Cracks and cracks are sealed first. First, the angle of the spatula widens the cracks, removing anything that might fall off. Then they are covered with a primer (dip the brush into the composition and moisten well) and after it dries putty is applied, leveling it with the plane of the wall.
The crack is first expanded, then primed and then covered with putty
If a significant piece of plaster has fallen off, it is better to restore it with a cement-sand mortar. The resulting hole is moistened with water, but it is also better to go through a suitable primer (based on cement), fill it with mortar, level it flush with the wall. The matter is complicated by the fact that further work can be carried out only after the solution has dried, it becomes light gray. But do not try to dry it forcibly – it will crumble and crumble.
When all defects are repaired, the remaining irregularities are smoothed out by puttying the entire surface. The walls are primed first. It is easier to do this with a roller, pouring the composition into the tray.
For further work, you will need two spatulas – one wide, the second – the usual small or medium size.
They work like this:
- Putty is taken with a small spatula and laid with a roller along the large blade.
- A large spatula is pressed with the blade against the wall, carried out in one of the directions, maintaining the same degree of pressure. In this case, the composition is distributed along the wall, filling the irregularities. The thickness of the applied layer depends on the degree of pressure: the harder you press, the thinner the putty layer remains on the wall.
- If streaks, notches or other defects have formed, the spatula is once again drawn over this place, correcting the defect.
- All these steps are repeated until all walls are aligned.
Putty is left to dry for approx. 24 hours (depending on layer thickness, temperature and humidity). Then they take sandpaper or a special mesh, attach it to a grater (a construction tool is a platform with a handle). The remaining strips are leveled with this platform, achieving a flat surface.
Each applied layer of putty is leveled with sandpaper or mesh
Usually there are still imperfections after the first leveling layer. Close them up with a finishing type of putty. In it, the components are ground more finely, the composition of the batch is more plastic, it is applied in a thinner layer. The sequence of actions is the same.
To see if you have aligned the walls well, you need to highlight them from the side. Such lighting will reveal all the irregularities. They are usually leveled with a grater with a stretched fine mesh. If this is not done, the laid layer of paint will reveal the flaws.
Primer
The primer is selected depending on the paint base. Acrylic primer goes under the acrylic base, silicate primer under the silicate base, etc. As a rule, it is sold in canisters of different capacities in the same stores where water-based emulsions are. Apply with a roller.
Wall priming
Why should walls be primed for water-based painting? Firstly, so that the paint holds better, does not crack or blister.
Secondly, to reduce paint consumption. The primer slightly closes the pores, reducing the absorbency of the surface.
Painting walls with water-based paint: technology and rules
The base color of water-based paint is white, but many companies allow you to get any shade from the RAL palette, which is a little more than 200 options. For this, a coloring pigment is added to the composition. You can order tinting in special machines, you can buy color separately and add it yourself.
When tinting a water-based emulsion with your own hands, you determine the color “by eye”, while the machine has programs according to which it measures the required amount of colorants. In any case, at one time it is necessary to tint the entire amount of paint necessary for the walls, and even with a small margin – to paint over stains or scratches. You won’t be able to repeat the same color yourself exactly, and the machines give out slightly different shades.
You can choose any shade
When self-tinting, the paint is first diluted with purified water to the desired consistency (usually it is thick).
Then they take a clean wooden stick or a clean nozzle on a drill, begin to stir the paint in a bucket (drill at the lowest speed). Having opened the color, pour the color in a thin stream. Having received the desired shade, mix for another 2-3 minutes, then leave the water emulsion, wait until the foam settles.
Water emulsion roller
Water-based paint can be applied with several types of rollers:
- Foam rubber. There are in any store, they cost a little, but they absorb too much paint, which can cause microscopic bubbles to appear on the wall surface. The surface will therefore be uneven and rough. The situation is better with high-density foam rubber, but they are more difficult to find.
- Velor. This type of roller is not so widespread, you need to look in specialized stores. When using them, the paint lays down evenly, but velor is a very dense material and it has little winding. Because of this, in the process of work, you will have to dip it in paint too often.
- Fleecy. Painting walls with water-based paint with fleecy rollers is the best choice. The length of the pile can be different, depending on it, the paint layer is thinner or thinner. For painting evenly puttied walls, the length of the pile is unimportant, but it is better not to take too shaggy ones – there may be splashes. There are fleecy rollers made of natural fur or felt, they last a long time, but are expensive. Artificial materials are cheaper, but wear out faster. For water-based paints, polyamide pile is best suited.
For water-based wallpaper paint with a soft relief, it is better to use fleecy rollers made of polyamide fiber or natural fur. The length of the pile in this case is 6-14 mm.
Water-based emulsion application technology
Before painting, on the skirting boards (if not removed), architraves, window sills, masking tape is glued along the edge.
If it is necessary to mark the boundaries of painting on the wall, they are also marked with masking tape – a line is drawn, adhesive tape is glued along it. If the ceilings are already painted, it does not hurt to stick tape on the ceiling as well. So you are guaranteed not to stain it. Please note that the adhesive tape is removed immediately after this area has been painted over. If the paint on the adhesive tape hardens, then it is unrealistic to tear it off without damaging the wall.
Ready-to-use paint (diluted and tinted to the desired color) is poured into the paint tray. To be able to paint the wall up to the ceiling, a long handle is attached to the roller. Usually it is a plastic pipe or a wooden thin well-crafted handle (it is thinner for a rake and it is more convenient to hold it).
Roller up and down movements
Painting starts from one of the corners. The corner itself is passed with a brush, painting about 5 cm on the wall. With a brush, paint over the corner under the ceiling (if you paint to the very top).
Next, they take a roller, dip it in paint, squeeze it against the platform and, starting from the top, roll the paint down. Moving the roller up and down, paint over a continuous strip of paint, going 5-8 cm onto the already painted surface. This way you can avoid the appearance of borders formed during the application of paint.
Water emulsions on the wall “seize” in 10-15 minutes. Therefore, it is necessary to act quickly, without smoke breaks and breaks. If the border of the strip dries, it will then be visible. To avoid this, it is necessary to maintain a high rate of painting.
Paint over the second corner when one bead width remains before it. If you immediately paint the second adjoining wall, you can paint over it with a brush.
It is recommended to apply three coats of water-based emulsion on puttyed walls. After each, you need to wait until the paint dries. The exact exposure time between applying layers is indicated on the bank and is usually 2-4 hours.
If water-based paint is applied to wallpaper, one layer is enough.
Please note! When buying and tinting – three times more paint is required on the puttied surface of the walls than on the wallpapered surface.
90,000 Wall painting design design, photo, ideasContent:
- Advantages of this method
- What kind of emulsion
- Wall painting some0018
- Painting process
- Process of the ceiling whitewashing
- Step 1. Preparation of the solution
- Step 2. Application of the first layer
- Step 3.
Repeat of whitewashing
- How to repaint walls with water-based paint
- Preparing walls for painting
9001 walls covered with wallpaper
Advantages of this method
It is difficult to achieve such an impressive visual result with the usual Russian whitewash as when using complex multi-tiered structures, but it certainly has its advantages. First of all, such a ceiling is left behind by all newfangled designs in terms of reliability and durability. Stretch ceilings are afraid of temperature changes, vulnerable to sharp objects, in general, conservative whitewashing clearly wins here.
Another important benefit of a water-based paint ceiling is the possibility of local repairs. Yes, paint can swell from moisture and other causes, but nothing prevents you from updating the finish within a few minutes in a particular place where the problem arose. In the case of using more complex finishing materials, you may have to disassemble the ceiling completely. Plus, water-based paints easily cope with moisture, which is especially important in rooms with a specific microclimate, for example, in a bathroom.
Do not forget about the main parameters in everyday life – it is easy to care for such a ceiling, just walk with a damp cloth over the surface and it will look like new. And the price of such pleasure is much lower than structures made of expensive elements.
Which water-based paint to choose
There is an extremely rich range of water-based paints on the market. Let’s highlight the most relevant types: mineral, silicate, acrylic and silicone. Let’s take a closer look at these types:
- Mineral water emulsion based on slaked lime and cement. Such paint is inexpensive and performs well on concrete and brick surfaces. The disadvantages include a low service life, once every couple of years you will be forced to update it;
- Silicate paint contains liquid glass with the addition of a tint pigment, so this type of paint should not be used in rooms with high humidity – a bathroom or kitchen.
Paint costs moderate money, and its service life is outstanding – it may well last twenty years;
- Paint based on acrylic resins is durable and wear-resistant, on the contrary, it copes well with rooms where a humid microclimate is noticeable. It costs much more than the previous two types of paint;
- Silicone paint is perhaps the leader in all the most important parameters, but you will have to pay a considerable amount for this – this paint is the most expensive.
Now you know how to choose the right paint for a particular room, it’s time to get down to business.
Wall painting
How to paint the ceiling with water-based paint without streaks
For painting you will need a painting tool – a roller, brush or sponge. A roller is used when painting large flat areas, joints or places adjacent to various objects (plinth, battery, etc.) are usually painted with a brush, and a sponge is used to give a decorative texture. Most often they are painted with a roller with an average pile length. You will also need a tray in which it is convenient to wet the roller and remove excess paint. Also, do not forget to pre-glue the skirting boards, doors, windows and ceiling joints (in case you are not going to paint the ceiling) with masking tape, since the water-based emulsion is quite difficult to remove after drying.
Mixer
The paint itself is diluted with water to a milky consistency. Be sure to wait for the disappearance of the foam that forms when stirring with a mixer. After that, you need to pour a small amount of paint into the bath and drag out the roller in it so that its pile is completely saturated with it and does not leave streaks. You can roll the roller on a piece of old unnecessary wallpaper or on a wooden sheet. Another important tip: before painting – if you paint only a putty wall, you need to apply up to 3 layers of paint, but if the wall is with wallpaper, then you can get by with two layers. Just be careful when painting the wallpaper, try not to fall on direct rays of the sun and protect yourself from drafts.
How to paint correctly
It is better to start painting from the least noticeable angle. First, paint over the corner itself and 3 cm from it with a brush, as the roller may not completely capture this surface.
Then start with wide strips up to 60-70 cm, directed towards the floor, to paint the walls with a roller. Try to ensure that the joints of all subsequent strips do not touch, but slightly overlap each other. Usually the first and third layers are applied vertically, and the second horizontally. Every time you lower the roller into the paint container, do not forget to remove the excess. So you will protect yourself from accidental splashes and ugly streaks on the wall.
Tray for the roller
To facilitate the work, it is advisable to purchase a stepladder, because inaccurate painting of the joints with the ceiling can nullify all your efforts, but this is not an obligatory attribute. Also make sure that the surface to be painted is well and evenly lit. In the evening, you can use a portable cartridge with an electric lamp, which does not heat up much and is convenient to use.
Take your time – it will take about 4 hours for the first coat to dry completely, and for the rest almost 5-6 hours. Never use heating devices to speed up the drying process – the paint structure deteriorates sharply and it begins to warp and fall off!
Several ways to paint walls
Direction of painting
If the walls of your home are covered with decorative plaster or other textured materials, you need to choose a roller with stiff bristles with medium or long pile to paint over various depressions well. After applying the paint, all protruding surfaces are painted very carefully with a sponge. This method gives visual volume and an incredibly beautiful effect is achieved.
The texture can also be given with the paint itself, because no matter how hard you try, small bumps always remain on the wall after painting. By experimenting with the density of paint, you can achieve a blurry pattern and its texture. Now even on sale there are special rollers, with a ready-made pattern or skin patches.
It is only necessary to immediately foresee that when the walls are textured, the consumption of the coloring material increases several times.
Patterned rollers
Painting kitchen walls with water-based paint also has a number of features that are worth paying attention to. It is better not to try to paint over the work surface, since no paint can withstand exposure to high temperatures and steam
It is advisable to open the rest of the surface after applying the water-based emulsion with a special varnish, also water-based. Then your kitchen will remain in its original form for a long time, and the walls will be easy to clean with a regular damp cloth.
If you want to paint the walls in the bathroom, you must immediately clarify the status of your forced ventilation, because if it is absent, the emulsion will begin to fall off after a certain period of time. When painting, the bathtub must be reliably protected from the slightest draft, as well as from moisture and steam.
Of course, it’s better to see how a specialist does it once, so the following video guide will help you avoid blunders, as well as compare your result with the work of professional painters.
How to paint a wall
Tool selection: brushes and rollers
How to paint a plasterboard ceiling with water-based paint
Basic set for painting vertical surfaces.
The quality of staining depends greatly on the choice of instruments. The most commonly used rollers and brushes. The roller can ensure the even distribution of the emulsion. Brushes should be used in areas such as edges and seams. The sponge is used to create decorative effects.
Recommendations for the use of painting tools:
- For uneven and textured surfaces, it is best to choose fleecy sheepskin options.
- Roller with removable coats suitable for large areas.
The main rule for choosing a fur coat: the smoother the wall, the shorter the pile should be on the roller.
- Do not use a foam attachment. Air bubbles may form, which later burst and leave depressions.
- Painting the upper part of the wall must be done with a tool on an elongated handle.
- Brushes 150 and 50 mm are best for painting corners and edges.
- Nylon polyester brush is best for painting. Regular bristles absorb the composition and change shape, while nylon repels it and does not deform.
- A quality brush with tapered, thick, long bristles. The bristles of this brush, after bending, easily restore their shape.
The following materials and tools will be needed for work:
- container;
- special ribbed tray;
- ruler;
- spatula;
- primer;
- putty;
- masking tape.
Preparation
Preparation is an important part of the work. The composition is applied in a small layer, therefore the surface must be as smooth, even as possible, free from defects, chips and height differences.
Before you start, you need to carry out the following activities:
Before starting work, the surface must be prepared.
- If present, remove old coating residue and clean. You can use soapy water for this.
- Let dry and inspect. It probably needs alignment or reconstruction. As a rule, one layer of plaster is enough to give smoothness. To remove depressions and cracks, it is advisable to choose gypsum, and for leveling – alabaster putties.
- After leveling, it must be primed. This step should not be neglected, since the primer not only improves the adhesion of materials and strengthens the base, but also reduces the consumption of the composition.
- Frees space from foreign objects.
- Cover the floor, seal the joints with the ceiling and adjacent walls with masking tape.
- The water emulsion has a very thick consistency, so it must be diluted with water and stirred. For mixing, you can use an electric drill with a mixer nozzle or a simple stick. When the required consistency is reached, tinting can be done by adding the necessary pigment in the right proportion.
- When the area to be painted is very large, care must be taken to ensure that one batch is sufficient for the entire area. Re-achieving the desired shade without automatic tinting is quite difficult.
Painting
We describe the work steps:
- Pour a small amount of the compound into a ribbed tray.
- Dip the brush and apply around the perimeter.
- Lower the roller into the tray and let it soak thoroughly.
- Roll out on any clean surface (cardboard or board) to soak the pile.
- You can start work from anywhere, but probably the best option is on top of the wall. With this sequence, drips and drops will not spoil the painted areas and then roll out with a roller.
- Staining occurs in 2-3 layers.
- Each subsequent layer is applied when the previous one is partially dry.
If you study the technology of work very well, you can easily transform the interior design of absolutely any room. Compliance with all the features of the painting work guarantees you a high-quality and uniform coverage.
https://youtube.com/watch?v=xF6Uh4hIZKg
Preparing the walls
How to paint the ceiling with water-based paint without spots and streaks
Before starting work, the walls must be prepared. It is desirable to achieve a perfectly flat surface of the wall. The surface must be puttied or covered with wallpaper intended for painting. If the wall was previously painted with oil paint or whitewashed, they cannot be covered with a water-based emulsion. The surface is pre-cleaned.
Removing paint
To remove the old emulsion, the wall should be wetted with hot water. This can be done with a roller. After 5 minutes, these actions must be repeated. After the second pass, the coating usually begins to swell, after which it can be easily removed with a spatula. Some difficult areas are wetted again.
Repairing defects and puttying
When working with aqueous emulsions, you must immediately get rid of the idea that such paint will hide defects, on the contrary, it will only emphasize them. The only exception is silicone emulsion. She can still hide small flaws on the surface of the walls. But it is better to prepare the wall as expected.
Cracks and cracks are filled first. After that, they are primed. Before puttying, the crack is artificially expanded and everything that can fall off in the future is removed. Then everything must be carefully cleaned and smoothed out all the bumps.
Priming
The choice of primer depends on the type of paint to be used. If acrylic paint will be used, then it is necessary to take an acrylic primer. The primer is applied with a roller.
Priming will provide a circumstance in which the paint will adhere better. In addition, the consumption of the paint itself is also reduced. The primer closes the pores, as a result of which the area of the absorbent surface decreases.
Creating a textured surface
Very often water-based emulsions are used to create a textured painted finish. For these purposes, a viscous material is required that cannot be diluted with water. You will also need a roller with medium-length stiff bristles, a lint-free roller and a sponge. At the first stage, a roller with a hard coat is used, with its help paint is applied to the wall and fills all the pores. Then the protruding parts of the texture are finished with a lint-free roller or sponge. Often, a different color of paint is used.
Simple fluffy rollers can give quite an interesting texture.
Creating texture with a coloring compound
To create a textured surface, paint can be used without first plastering the wall. If only a regular roller is at hand, you need to dip it in a viscous material and quickly roll it over the surface. After drying, you will get a pattern with pores and textured stains. If you first dilute the composition a little, you get a more blurry pattern. Together with the paint, you can use special rollers with flaps or cutouts.
Water emulsion texture can be applied both manually and with a special roller
Features
When repairing premises, the following are mainly used:
- paints based on organic solvents;
- water-soluble paints.
The compositions of the first group are characterized by a sharp unpleasant odor during application and drying due to the evaporation of resin esters and solvents included in their composition. In everyday life they are called oil, but this is a common name that has almost nothing to do with the actual composition. Among them are oil-alkyd, nitro-enamels and epoxy paints. After drying, they all form a durable film that is not washed off with water.
Such compositions for painting the ceiling today are used only in rooms not intended for domestic needs. They are applied on surfaces not treated with gypsum-based plasters and fillers (cement-based compositions only).
The second group includes paints, the solvent for which is water. Common to them is the consistency of the emulsion, which includes particles of polymers, pigment and water. They are classified according to the polymer used.
When painting, the surface dries to the touch in 1-2 hours, completely – in 6-8 hours, the emulsion does not smell during operation and drying. It is not a mistake to call such paints water-dispersion, since an emulsion is a kind of dispersion solution.
Technology and painting rules
In the basic version, the color of the emulsion is white. It can be easily changed if you add a certain color. Currently, more than 200 shades can be obtained in this way.