Wood furniture restore: How to restore wood furniture
How to restore wood furniture
(Image credit: Kasia Fiszer)
If you learn how to restore wood furniture the right way, you will not only avoid having to replace it, but will bring out the natural beauty of cherished pieces that will add character to your home.
See: How to refinish hardwood floors to give them a new lease of life
‘Beautiful vintage and antique furniture was made to last, so it is well worth going to the time and trouble of making a few running repairs – you won’t find that wonderful patina of age listed in the contents of a flat-pack,’ says independent restoration expert Helaine Clare.
Do, however, consider the age and quality of the piece before restoring it. Unless you know what you are doing, valuable antiques should be left in the hands of a specialist furniture restorer.
How do you restore old wood furniture?
(Image credit: Jody Stewart)
When deciding how to restore wood furniture, it’s important to first assess the extent of wear and tear. Does it just need cleaning up and refinishing, or are more substantial repairs required?
‘Many of us have at home a beloved piece of wooden furniture. Perhaps it is an antique that has been inherited. However, over time it may have become dirty and grimy, and it’s not always easy to know what to do with it,’ says Mike Morris, supply chain manager at leading wood care expert Liberon .
Product choice is key – so get this right before you start. ‘There’s a veritable plethora of wood care products for sale, and choosing the right one for this kind of item can be confusing,’ adds Morris. ‘Bringing back the beautiful good looks of your treasured piece of furniture cannot be left to chance by selecting inferior quality products.
‘The key is to choose a top quality wax. The right specialist wax affords a highly glossy and resilient finish, helps to cover marks and scratches, and will also assist in preventing wood drying out in the future.’
Make sure you choose a wax color that is closest to the natural wood. Always test the product on an inconspicuous area for color, compatibility and end result before beginning.
How do you restore wood furniture naturally?
(Image credit: Colin Poole)
For many people it’s important to restore wood furniture naturally. For centuries, beeswax was used to treat furniture, and is still a popular traditional option today.
Helaine Clare advocates the use of beeswax paste to restore old wood furniture; however, there are a number of modern products containing natural ingredients that have been specially formulated to breathe new life into old wood.
‘Choose one with a good content of carnauba wax, which is found on the leaves of the carnauba palm, native to north-eastern Brazil,’ says Morris. ‘It is known as the “Queen of Waxes”, and contributes to the superior durability of the complete wax formulation, making it ideal for nourishing and protecting all types of wood, including lacquers and French polishes.
‘Liberon’s Wax Polish Black Bison has a good content of carnauba wax and, being highly lustrous, makes wood look simply beautiful. ‘
‘
How to restore wood furniture with vinegar
(Image credit: Kasia Fiszer)
It is not sensible to try to restore wood furniture with vinegar alone, but it is often used as a cleaning solution, mixed with olive oil to nourish the wood.
This solution works better on matte wood than glossy lacquered surfaces, and should not be used on valuable antiques.
Simply mix one part vinegar to one part olive oil and apply a thin layer to furniture before buffing up. However, it’s always a good idea to first try on a small area on the underside before applying over the whole piece.
Restoring wood furniture without stripping
(Image credit: Brent Darby)
If your wood furniture doesn’t require repairs, then cleaning it and restoring it without stripping is the best option.
‘Firstly, remove the old wax using a specialist wax and polish remover, then apply solid wax sparingly, preferably with ultra-fine steel wool,’ says Morris. ‘It is possible to apply the wax with a cloth, but it is easy to overload it. ‘ The wax will help to both restore faded wood furniture and rehydrate the wood if it is dry.
‘It is best if the wax is applied in a circular motion in much the same way as you would polish a pair of shoes, and always work with the grain of the wood.’
Be careful not to apply too much wax, however, as it makes it harder to get a good shine. ‘Many people make the mistake of applying too much, and it is better to build up layers gradually,’ adds Morris. ‘It is harder to overload fine steel wool with the wax, and this application method affords a deeper penetration into the wood.’
Clare uses the same method when applying beeswax paste, allowing the wax to dry for 20 minutes between each coat, and finishing by buffing to a sheen with a soft lint-free cotton cloth.
‘The wood will absorb the wax over a period of time, so to keep it looking good apply at least twice a year,’ says Clare.
‘In future, whenever cleaning the treated surfaces, they can be wiped over with a cloth or duster and re-waxed as required when they begin to look dull and tired,’ says Morris. ‘Certainly, the surfaces should not be washed with water.’
This feature was created by H&G’s sister brand, Period Living magazine
Subscribe to Period Living for more inspiration .
Period Living is the UK’s best-selling period homes magazine. A subscription provides you with all you need to know about caring for and improving a traditional house and garden.
How to strip wood furniture
(Image credit: Bridget Pierson)
To remove thick layers of varnish or paint, you may need to strip wood furniture. ‘Painted furniture is often stripped by immersion in a vat of caustic soda,’ explains Helaine Clare.
‘Afterwards it should be treated to neutralize the chemicals or the wood becomes dry, and a white salty coating is evident. To remedy, dilute half a pint of white vinegar into half a pint of water. Use a cloth to wipe over the wood. ’
’
If the surface of an item of wood furniture possesses an attractive patina of age, then sanding will strip this. However, in some cases it’s desirable to sand wood furniture to bring it up like new again.
‘Using medium-grade abrasive paper held around a sanding block, rub down the wood until it looks dull,’ says Clare. ‘Wet and dry paper used with water contains the dust, making it less messy and minimizing dust inhalation.
One you have stripped or sanded wood furniture, you’ll need to give it a good clean. ‘Use a solution of sugar soap and warm water to clean dirt and grease off the wood’ says Clare.
‘Mop up surplus water as you work to avoid saturating the wood – this raises the grain and roughens the surface. Use clean water and a cloth to wipe away residues.’
You’ll need to give the wood time to dry out properly before applying finishing wax.
How to repair wood furniture
(Image credit: Kasia Fiszer)
You should repair wood furniture if the piece has signs of damage. Where there are splits in the wood, this is easily fixed with wood glue. ‘Clean off dust from the split wood using a paintbrush, then apply wood glue. Position a sash clamp and tighten until the wood is pulled together,’ advises Clare.
‘If the piece is to be left unpainted, protect the surface with off-cuts of wood on the jaws of the clamp. Wipe off surplus glue with a damp sponge and leave overnight.’
Scratches, dents and small holes in the wood can be filled with a specialist hard wax wood filler, usually sold as colored sticks, which may need to be combined and built up in layers to achieve the right shade.
If the furniture has any hardware, this should be checked for damage, and if necessary removed and cleaned. You may need to use release oil if screws are too tight to remove.
How can you tell if you have woodworm?
Some people are worried about bringing old furniture into the home in case it harbors woodworm. However, Clare says that beetles are unable to thrive in warm, dry, well-ventilated houses.
‘To make sure, put sheets of newspaper under suspect furniture,’ she says. ‘Softwood ply, used on the back of cupboards or base of drawers, is where the beetles head for.
‘They tend to emerge in July – tell-tale mounds of sawdust on the paper will indicate current activity.’ Treat affected wood with borax wood preserver.
Antique furniture restoration techniques
(Image credit: Polly Eltes)
If your wood furniture has decorative detail such as marquetry or gilding, then it will need more specialist antique furniture restoration. Consult an expert, who will use the appropriate techniques.
Restoring marquetry
‘Marquetry is effectively painting in wood – using colored veneers or decorative graining to construct patterns or pictures,’ says Oliver White, restorer at Plowden & Smith . ‘Restoring it is quite an artistic process. You first need to identify the species of wood that had originally been used. This can be quite difficult to gauge when attempting to copy antique marquetry.
‘You then need to assemble the veneers in a pack, sandwiching layers on top of each other paying particular attention to which direction the wood grain is running on each veneer, as you don’t want them all running the same way.’
White usually draws the design on paper, and applies to to the top of the veneer pack, which is then pinned together to keep everything in place.
‘The design is pierced out with a fine-bladed saw – a careful process,’ says White. ‘It’s important to keep the blade at a 90-degree angle to the veneers, to ensure that all the pieces fit accurately together.’
The wood may then be ‘sand shaded’ to add more depth and tone before the elements are assembled into a pattern and bonded, before the surface is sealed.
It’s an intricate process that requires specialist knowledge and lots of patience.
(Image credit: Kasia Fiszer)
Restoring gilding
Valuable antique furniture, and particularly mirrors and picture frames, often feature gilding.
‘A lot of pieces will have been poorly repaired in the past, so this work needs to be corrected,’ says Ruth Tappin , specialist antiques restorer. ‘Sometimes an item has been covered with gold-colored paint or emulsion. This can be dry stripped or wet stripped with paint stripper, but this will remove any original oil gilding, which will then need replacing.
‘Oil gilding is fairly easy to learn once you know what to feel for as the oil size dries – this is how you know when you apply the gold.’
Oil gilding gives a matte look to the gold and can be used for both internal and external surfaces – it involves applying the size onto a prepared surface, and applying gold leaf once it becomes tacky.
However, Tappin warns that water gilding – used for high points of decoration – is a harder skill to master. ‘For this process a water and glue solution – gilder’s lacquer – is brushed onto the smoothed bole surface.’ The bole is clay mixed with rabbit glue, which provides a flexible surface that can be burnished.
‘Then the gold leaf is laid on immediately with a glider’s tip – a flat brush made from squirrel hair. This is then burnished with an agate stone to achieve a mirror-like finish.’
It is intricate work, best left to professionals. ‘Trying to lay down a piece of gold without tearing it takes years of practice,’ says Tappin.
As editor of Period Living, Britain’s best-selling period homes magazine, Melanie loves the charm of older properties. I live in a rural village just outside the Cotswolds in England, so am lucky to be surrounded by beautiful homes and countryside, where I enjoy exploring. Having worked in the industry for almost two decades, Melanie is interested in all aspects of homes and gardens. Her previous roles include working on Real Homes and Homebuilding & Renovating, and she has also contributed to Gardening Etc. She has an English degree and has also studied interior design. Melanie frequently writes for Homes & Gardens about property restoration and gardening.
How to restore wood furniture: clean, repair and refinish
Real Homes is supported by its audience. When you purchase through links on our site, we may earn an affiliate commission. Here’s why you can trust us.
We show you how to restore old wooden furniture back to its greater glory.
(Image credit: Colin Poole)
Join our newsletter
Get the best home decor ideas, DIY advice and project inspiration straight to your inbox!
Thank you for signing up to Realhomes. You will receive a verification email shortly.
There was a problem. Please refresh the page and try again.
By submitting your information you agree to the Terms & Conditions and Privacy Policy and are aged 16 or over.
Looking for practical advice on how to restore wood furniture? You’ve come to the right place. Neglected old wooden furniture often suffers from a build-up of dirt and grime, with the diminished colour and lustre resulting in a dull appearance. With this in mind, owners of antique furniture are often left wondering how to restore old wood furniture (often much treasured pieces) to their former glory.
Thankfully, restoring wood furniture is quite easily done and we’ve created this easy to follow guide so that when you come to restore furniture, you’ll know what to do for ultimate success. What’s more, with restoration furniture seemingly always at the forefront of home trends – in both period and contemporary properties – and therefore, more costly to purchase, now you can save on something beautiful by simply creating your own.
- See our guide on caring for, cleaning and polishing wood furniture if you’ve more modern pieces around the home.
More from Period Living
(Image credit: Period Living)
Period Living is the UK’s best-selling period homes magazine. Get inspiration, ideas and advice straight to your door every month with a subscription .
The mahogany writing desk in this project below had ugly watermarks that marred the top that also needed attention. While it’s easy to restore old wooden furniture on a DIY basis, we’d always recommend ensuring you use the correct products. Our guide below talks you through furniture renovation and cleaning done professionally.
Once you’re done, see all our cleaning buys, how-tos and hacks to help keep the rest of your home sparkling. Looking for more expert advice on antique furniture restoration perhaps, and all things period properties – both interior and exterior? Head over to our Period Living hub page.
Everything you will need to restore old wooden furniture:
- Work gloves
- Dust mask
- Paintbrushes
- Proprietary chemical stripper and stripping tool
- Wax and polish remover and fine steel wool (0000 gauge)
- Fine glasspaper and sanding block
- Wood dye
- Wood restorer/ finishing oil
- Wax polish
- Tack cloth and lint-free cloth
Eveything you need to restore old wooden furniture. ..
..
87 Amazon customer reviews
☆☆☆☆☆
£12.89
View Deal
How to restore old wooden furniture: step-by-step instructions
1. Prepare for stripping back
Stripping furniture is messy, but key to wood restoration, so work outside if possible. If working indoors, protect the floors and any furniture nearby and ensure good ventilation. To avoid damaging the finish on the body of the table, cover it in a plastic sheet so that only the top is exposed. Apply stripper liberally with an old brush.
2. Allow layers to dissolve
For a good result when refinishing wood, leave the stripper on for between five and 30 minutes until the finish – a mix of old varnish and polish – has dissolved. The length of time will depend on the composition and thickness of the coating. If the stripper hasn’t removed all the layers just re-spread the paste and it will continue to work.
Refinishing wood furniture may seem like an art but is easily done.
- How to lime wood
3. Neutralise the chemical stripper
Neutralise the wood with a pad of steel wool soaked in white spirit or proprietary wax and polish remover, following the grain of the wood. Before using any chemical always read the label carefully as different strippers require different neutralisers. Failure to neutralise stripper can allow it to reactivate and your wood restoration may not go to plan.
- How to paint furniture
4. Clean off the rest of the table:
The next step to refinish furniture is to wipe away residues with cotton rags and leave for 24 hours. Meanwhile clean away dirt and old polish elsewhere by applying wax remover to a steel wool pad or coarse cloth and working in small areas at a time. Leave for a few minutes to soften the wax and wipe away with a clean cloth before it solidifies.
5. Return to the tabletop
24 hours after stripping the tabletop, use a sanding block and very fine glasspaper to smooth over the wood fibres raised during the stripping process – work with the grain. Shake and vacuum the protective sheet to get rid of dust that could spoil the finished piece. Finally wipe the top with a tack cloth.
6. Tackle areas of bleached wood
When you restore furniture, you’ll notice that every piece is different to tackle. Here for instance, for many years the table was sited beneath a window and the sun has bleached part of the wood, so applying a mahogany wood dye will make the top a uniform colour. Apply generously with a brush and allow stain to penetrate; wipe away excess with a cloth. Ensure an even finish by working in a good light.
Restoration furniture is a the perfect way to introduce something timeless to both period and modern properties.
7. Improve the sheen and finish when refinishing wood
Once dry, apply a coat of finishing oil using a brush or lint-free cloth. Allow oil to penetrate for 10 minutes and wipe away the surplus before it goes sticky. Wait for at least five hours and gently rub with 0000 gauge steel wool before applying a further coat; repeat again – the more coats the greater the durability and sheen.
8. The final spruce up with wood restorer
Finally, sparingly apply a thin coat of good furniture wax over the whole table. Leave for an hour at least and polish with a lint-free cloth. To avoid warping caused by drying out of the wood, position furniture away from radiators and fires. Sunlight will bleach the wood, so ensure it’s not placed beneath a window
Home remedies for restoring old wooden furniture
There are a couple more tricks you can use to restore furniture at home. You can remove surface dirt and old layers of wax polish with a home-made mix of four parts white spirit to one part of linseed oil. If the finish is still looking a bit lifeless, pour some proprietary wood reviver onto a cotton cloth and buff vigorously.
One such remedy which works when refinishing wood furniture is:
- 1 part linseed oil
- 2 parts meths
- 2 parts turps
- 2 parts distilled vinegar
Finally, refinish furniture with some beeswax polish and that should bring it back to life.
Furniture refinishing: How to Refinish Furniture
Learn how to refinish furniture faster and easier by avoiding stripping. A seasoned pro tells you how to clean, repair and restore old worn finishes without messy chemical strippers. Furniture refinishing will be easier from here on out!
1
/
12
Family Handyman
How to Refinish Furniture Without Stripping: Benefits
Stripping furniture is a messy, time-consuming process. And sometimes the results aren’t as great as you had hoped. Fortunately, you don’t always have to resort to stripping to restore your furniture to its original luster. To show you an easier alternative, we enlisted Kevin Southwick, a furniture restoration specialist.
Kevin Southwick specializes in the conservation and restoration of antiques and in custom wood finishes. He also consults in these areas. Kevin’s expertise is the result of more than 20 years’ experience working with and learning about wood finishes and furniture repair and furniture refinishing.
We’ll show you Kevin’s tips for cleaning, repairing and restoring finishes without all the messy chemical strippers and tedious sanding. You’ll save tons of time. And since you’ll preserve the patina and character of the original finish, your furniture will retain the beauty of an antique. One word of caution, though: If you think your piece of furniture is a valuable antique, consult an expert before you do anything.
Staining or painting outdoor furniture helps it stand up against the elements.
2
/
12
Watch this video to see how easy it is to restore furniture yourself
3
/
12
Family Handyman
Assess the Finish with Mineral Spirits
Before you start any repairs or touch-up on your furniture refinishing, wipe on mineral spirits to help you decide what your next steps should be. The mineral spirits temporarily saturates the finish to reveal how the piece of furniture will look with nothing more than a coat of wipe-on clear finish. Don’t worry; this won’t harm the finish. If it looks good, all you have to do is clean the surface and apply an oil-based wipe-on finish. If the surface looks bad even when wetted with mineral spirits, you’ll have to take other measures to restore the finish. We show some of these in the following steps.
4
/
12
Family Handyman
Clean it Up
A thorough cleaning is an important first step in any furniture refinishing renewal project. Removing decades of dirt and grime often restores much of the original luster. Kevin says it’s hard to believe, but it’s perfectly OK to wash furniture with soap and water.
Kevin recommends liquid Ivory dish soap mixed with water. Mix in the same proportion you would to wash dishes. Dip a sponge into the solution, wring it out, and use it to gently scrub the surface. A paintbrush works great for cleaning carvings and moldings. When you’re done scrubbing with the soapy water, rinse the surface with a wrung-out sponge and clear water. Then dry it with a clean towel.
5
/
12
Family Handyman
Fix White Rings
White rings can be easy to get rid of, or they can be a real nightmare. First, slather the ring with petroleum jelly and let it sit overnight. The oil from the petroleum jelly will often penetrate the finish and remove the ring or at least make it less visible.
If that doesn’t work, you can try a product such as Homax White Ring Remover or Liberon Ring Remover. They often work but may change the sheen. If these fixes don’t work, consult a pro to see what your other options are for your furniture refinishing project.
6
/
12
Family Handyman
Scrape Paint Without Damaging the Finish
Paint spatters are common on old furniture, and most of the time you can remove them easily without damaging the finish. Here’s a trick we learned to turn an ordinary straightedge razor into a delicate paint scraper. First, wrap a layer of masking tape around each end of the blade, and then bend the blade slightly so it’s curved.
The masking tape holds the blade slightly off the surface so you can knock off paint spatters without the blade even touching the wood. Hold the blade perpendicular to the surface. The tape also keeps you from accidentally gouging the wood with the sharp corner of the blade. The curved blade allows you to adjust the depth of the scraper. If you tilt the blade a little, the curved center section will come closer to the surface to allow for removing really thin layers of paint for your refinishing furniture project.
7
/
12
Family Handyman
Replace Missing Wood: Apply Epoxy
If you discover missing veneer, chipped wood or a damaged molding, you can fix it easily with epoxy putty. Kevin showed us the process he uses (watch a video of him patching a piece of chipped veneer with Quickwood), and the resulting repair is so realistic that it’s hard to spot. When it’s hardened, the epoxy is light colored and about the density of wood. You can shape, sand and stain it like wood too, so it blends right in. Quickwood and KwikWood are two brands of this Tootsie Roll?shaped epoxy. You’ll find it at home centers and specialty woodworking stores for about $9 a tube.
To use this type of epoxy, you slice off a piece with a razor blade or utility knife and knead it in your gloved hand. When the two parts are completely blended to a consistent color and the epoxy putty starts to get sticky, it’s ready to use. You’ll have about five or 10 minutes to apply the epoxy to the repair before it starts to harden. That’s why you should only slice off as much as you can use quickly.
See photo for how to replace missing veneer. Here are a few things you can do before the putty starts to harden to reduce the amount of sanding and shaping later. First, smooth and shape the epoxy with your finger. Wet it with water first to prevent the epoxy from sticking. Then use the edge of a straightedge razor to scrape the surface almost level with the surrounding veneer. If you’re repairing wood with an open grain, like oak, add grain details by making little slices with a razor while the epoxy is soft.
8
/
12
Family Handyman
Replace Missing Wood: Finish the Epoxy
After the epoxy hardens completely, which usually takes a few hours, you can sand and stain the repair. Kevin sticks self-adhesive sandpaper to tongue depressors or craft sticks to make precision sanding blocks. You can also use spray adhesive or even plain wood glue to attach the sandpaper. Sand carefully to avoid removing the surrounding finish.
Blend the repair into the surrounding veneer by painting on gel stain to match the color and pattern of the existing grain. You could use stain touch-up markers, but Kevin prefers gel stain because it’s thick enough to act like paint, and can be wiped off with a rag dampened in mineral spirits if you goof up or want to start over.
Choose two colors of stain that match the light and dark areas of the wood. Put a dab of both on a scrap of wood and create a range of colors by blending a bit of the two. Now you can use an artist’s brush to create the grain. If the sheen of the patch doesn’t match the rest of the wood when the stain dries, you can recoat the entire surface with wipe-on finish to even it out.
9
/
12
Family Handyman
Restore the Color with Gel Stain
It’s amazing what a coat of gel stain can do to restore a tired-looking piece of furniture. The cool part is that you don’t need to strip the old finish for this to work. Kevin demonstrated the tip on this round oak table. The finish was worn and faded. He loaded a soft cloth with dark gel stain and worked it into the surface. Then he wiped if off with a clean cloth. It was a surprising transformation. Of course, gel stain won’t eliminate dark water stains or cover bad defects, but it will hide fine scratches and color in areas where the finish has worn away.
There are other products, but Kevin prefers gel stain because he finds it easier to control the color and leave a thicker coat if necessary. Also, since it doesn’t soak in quite as readily as thinner stains, gel stain is somewhat reversible. Before it dries, you can remove it with mineral spirits if you don’t like the results. Gel stains offer some protection, but for a more durable finish or to even out the sheen, let the stain dry overnight and then apply a coat of wipe-on finish as shown below.
10
/
12
Family Handyman
Fill Small Cracks
If you find nail holes or tiny cracks after applying the final finish, fill them with colored wax fill sticks, wax repair sticks or fill pencils, found at home centers and paint stores.
The directions tell you to rub the stick over the defect. But Kevin recommends breaking off a chunk and warming it up in your hands. Then shape it to fit the flaw and press it in with a smooth tool. He uses a 3/8-in. dowel with an angle on the end. For cracks, make a thin wafer, slide it into the crack and then work the wax in both directions to fill the crack. Buff with a soft cloth.
11
/
12
Family Handyman
Get Rid of Dents
You can often get rid of small dents by wetting them. The moisture swells the crushed wood fibers back to their original shape. (You can’t fix cuts or gouges this way, though.)
Moisture must penetrate the wood for this to work. Finishes prevent water from penetrating, so Kevin suggests making a bunch of tiny slits with a razor blade to allow the water to penetrate. Use the corner of the blade, and keep the blade parallel to the grain direction. Next, fill the dent with water and wait until it dries. If the dent is less deep but still visible, you can repeat the process. As with most of the repairs we talk about here, the repaired surface may need a coat of wipe-on finish to look its best.
12
/
12
Family Handyman
Renew the Luster with Wipe-On Finish
The final step in your restoration project is to wipe on a coat of finish. After you clean your furniture piece and do any necessary repairs and stain touch-up, wiping on a coat of finish will restore the sheen and protect the surface. Any wipe-on finish will work—Minwax Wipe-on Poly is a common brand. But Kevin prefers a wipe-on gel finish like General Finishes Gel Topcoat Wipe On Urethane. It’s thick, so it’s easy to put on with a rag. One coat is usually all you need to rejuvenate an existing finish.
To apply wipe-on finish, first put some on a clean rag. Apply it in a swirling motion like you would with car wax. Then wipe off excess finish, going in the direction of the grain. Let the finish dry overnight and you’ll be ready to proudly display your furniture restoration project after you’ve learned how to refinish a table.
Originally Published: October 17, 2018
Wondering how to refinish wood furniture? Here’s a beginner’s guide!
If you’re wondering how to refinish wood furniture but aren’t sure where to start, this is a great beginner’s guide. See the step-by-step instructions and tips from my personal experience below.
How to refinish wood furniture: A total beginner’s guide
Hey all! I figured for today’s post I would take it back to some basics. I haven’t been doing a done of furniture refinishing over the last few years simply because we haven’t had a need for more furniture.
But since we’ve moved, I’ve been doing some thrifting and acquiring some new pieces for the house. Since this house was built in the 60s, it is perfect for older pieces.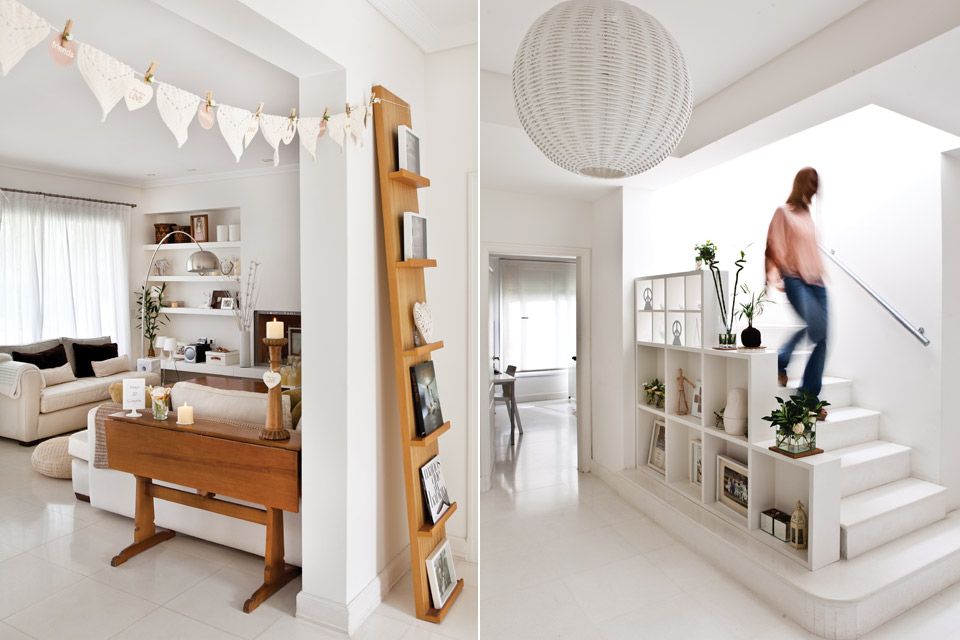 I found the table I’m working on in this post while thrift-picking around town one day.
I love it because it’s small, even when fully extended. And the extension mechanisms are all wood, not metal—meaning less prone to failure/breaking. So this post builds on my much older how to stain and seal wood post with some extra info for furniture.
What to look for in a wood furniture piece to refinish…
I want to talk a bit more about why I chose this piece to take home before we go over how to refinish wood furniture. First, this piece was cheap! And I could fit it in my little car 🙂 But a few of the reasons I chose this piece are also good rules for furniture thrifting in general.
1. Look for wood furniture without a veneer
First—if you’re looking to refinish a piece (not paint it), I recommend looking for pieces that are solid wood and do not have a layer of wood veneer on top. It’s definitely possible that a piece has solid wood under wood veneer and you could sand it off and refinish. I’ve done that.
But it’s also possible that there could be something like a composite material under the veneer. While that would be fine for painting, it’s not great for refinishing. This table was solid wood with no veneer anywhere.
If you notice that there appears to be a thin later on the surface of the piece, it’s likely a veneer. On older pieces, the veneer will be cracked or chipped in places. It is definitely possible to repair and refinish veneers, but it isn’t great for beginners.
So, since this is a guide for beginners, I recommend looking for pieces that do not have a veneer and that are solid wood.
2. Look for wood furniture that doesn’t have a ton of detail
If this is one of the first pieces you’ll refinish, it’s best to look for small- to medium-sized pieces that do not have a ton of detail. That’s because a ton of detail makes sanding more of a pain.
This table had really great lines, and you’ll see in later photos of the legs that they are very simple. The construct of the table is timeless and clean—and easy to sand! Perfect for a beginner.
3. Look for pieces that are stable
It’s certainly possible to repair and replace parts on thrifted furniture. However, if you’re a beginner, it’s probably a good idea to find a piece that doesn’t need any structural repair.
I love that this table was stable, and both leaves were fully functional. I could focus solely on refinishing the table instead of repairing broken mechanisms.
Refinishing supplies you’ll need
Here is a list of my recommended supplies if you’re new to refinishing wood furniture! Everyone uses slightly different tools, and that’s okay—but this is a good get-you-started list.
- Orbital sander
- Sanding discs in different grits
- Fine-grit sandpaper for hand sanding
- Dust mask
- Wood stain
- Small roller
- Disposable gloves
- Finish of your choice—I’m using Minwax water-based polycrylic in a matte finish
- Assorted rags—some you’ll be able to wash and reuse, some you’ll need to trash
- Recommended but optional: Tack cloth, wood conditioner
And here’s how to refinish wood furniture!
Always take the proper precautions and safety measures before working with any tools or materials. Wear safety equipment and work with a professional to complete projects when necessary. Read my full terms of use and disclosure for more. Happy building and stay safe!
Step 1: Wipe down and prep the piece
The first step is to wipe down, inspect, and prep the piece. My table had pretty dense cobwebs on the underside, so I wiped those off with a damp rag. I also wiped down the rest of the piece so I could get a better idea of what blemishes were actually part of the finish.
If you can easily take your piece apart, this usually makes it easier to sand and refinish. For example, if the top of a table comes off of the base, or if the seat of a chair comes off of the legs. I decided to keep mine as one piece since this is a fairly small table.
Step 2: Sand, sand, sand the furniture!
The next step is to sand off the existing finish. As you can see in the pics, this table had a ton of discoloration, scratches, nicks, and water stains. I use an orbital sander to sand off the finish. If you’ve never used one, you’ll get the hang of it pretty quickly.
When you turn it on, you’ll notice that it starts vibrating. The sander is moving the sanding disc area around in random circles, which is perfect for removing existing finishes without creating additional marks or unevenness.
Most imperfections will probably be in the finish you’re sanding off. So once you’re done removing the original finish, the surface should be free of blemishes. If some stains or scratches went a bit deeper, simply give them a bit more time with the sander.
The water stain on the side of the table needed just a bit more sanding down after I took this picture!
How do I know what type of sandpaper to use for refinishing furniture?
I recommend purchasing a multipack of sanding discs. If the finish is really difficult to get off, you’ll want to use a lower grit sandpaper. I would recommend something in the 100s.
This table’s finish came off really easily, though. So I just used a 220-grit disc, which is finer. The lower the number, the coarser the grit. While that helps remove tougher finishes, it also leaves a rougher surface.
So if you start with a smaller grit, you’ll want to work your way up and use a higher-grit disc after removing the finish to even out the surface and make sure everything is super smooth. That’s why a sanding disc multipack is nice to have on hand.
Once I’d removed all of the finish with the 220-grit disc, I went in with a piece of 220-grit sandpaper and gave the entire table a once-over by hand. This polished the piece really nicely.
Step 3: Clean off and prep the furniture for staining
Once the original finish is completely removed, I recommend wiping down the entire piece with a damp cloth. Let the piece dry, and then inspect it to see if you need to do any sanding touchups before you begin staining.
You can also choose to use a wood conditioner before staining your piece. This helps the wood absorb the stain more evenly. I personally skip this step and do not use a wood conditioner.
I like to see how the grain takes the stain, and if I’m not happy with how it looks after the first coat, I’ll add a second coat of stain to hopefully even things out. This works for me, but others swear by using wood conditioner!
Step 4: Stain your wood furniture
Now it’s time to really start transforming your piece. I love this step! I recommend flipping your piece upside down and starting from the bottom up. In my experience, this is the easiest approach when staining and painting furniture.
I chose a Minwax oil-based semi-transparent stain in English Chestnut for this project. It’s the same stain I already had on hand from the DIY fireplace mantel shelf, and the color worked perfectly. There are a variety of stains and brands you can choose from. Make sure to wear disposable gloves!
To apply oil-based stains like this one, I prefer to use a rag. Whenever we’re throwing out an old shirt or something, I cut it up and add it to the rag bin. Perfect for DIY projects like this one. I mix the stain up and then dip the rag in.
Then I simply wipe it down all over the pieces. The wood will soak the stain in. After I let the stain sit for about 5 minutes or so, I go in with a new clean rag and wipe off all of the excess stain that the wood isn’t soaking in. If you don’t do this, the finish will be all sticky.
A benefit of using a rag instead of a brush—other than it being much cheaper!—is that you can wrap the rag around your finger and stick it into tight places like the corner below.
It seemed that the legs on my table were made of a different type of wood than the top, which is not totally uncommon. Therefore, the legs and the top took the stain a bit differently.
After a few hours, I assessed how to stained piece had dried. The top was a bit lighter, so I grabbed a rag and wiped on another coat of stain. Remember to wipe off the excess and watch for drips that might dry sticky!
Finished stained table!
Step 5: Seal and protect the wood
Once your piece has dried completely (I let mine sit overnight), it was time to seal the wood. Wood is porous, which is why the stain sinks in so well. But that also means that the wood will soak in everything else…like water, food, etc. It will also scratch easily.
Adding a finish on top of the stain helps protect your piece and make it easy to wipe down and keep clean. For this piece, I am using Minwax water-based polycrylic in clear matte. I didn’t want any real shine added in or anything.
I don’t usually have a preference for oil-based vs. water-based topcoats. However, I do find that oil-based finishes go on very evenly with a brush, while water-based topcoats show streaks more easily. See the second pic below. (I also have a post on the difference between polyurethane and polycrylic.)
I ended up sanding this down a bit after it dried and using a small roller instead. This helps the finish coat go on super evenly and level out even more as it dries.
Before you apply the topcoat, you can wipe down your entire piece with sticky tack cloth to remove any stray pieces of lint, dust, or cat hairs. Or you can be somewhat lazy like me and wipe it down with a damp rag that doesn’t shed.
I applied two coats of the polycrylic to the table’s base and legs, but I added a third coat to the top since it would get more traffic. Follow the instructions for recoating on the finish you’re using.
Between each finish coat, I recommend going in and sanding lightly by hand with very fine-grit sandpaper (the 220-grit works fine). This will help remove any bubbles in the finish, as well as smoothing out any roller strokes or lines. Obviously don’t sand the final coat!
My refinished wood table…
And here is the finished piece! You’ll want to check the cure time for whatever finish you use. That’s because while it might seem dry to the touch, it might not be fully cured. Until it is, it can nick or scratch very easily. Once it is cured, it will be very durable!
What do you think? I am delighted with how this one turned out! This piece is going to go in my new sunroom and, if I’m being honest, it will probably hold plants. 🙂
🙂
Pin my beginner’s guide for how to refinish wood furniture!
Restor-A-Finish | Howard Products
Restor-A-Finish | Howard Products
‹ return to wood care products
- Restor-A-Finish is a unique finish-penetrating formula that restores wood finishes while blending out minor scratches, blemishes and abrasions
- Available in nine colors to match almost any wood finish tone; Neutral, Maple-Pine, Golden Oak, Cherry, Walnut, Mahogany, Dark Walnut, Dark Oak, and Ebony Brown
- With a simple wipe-on, wipe-off process, most finished wood surfaces that seem to need a complete refinishing job can be restored in a few minutes
- Removes white heat rings and water marks, sun fade, oxidation, smoke damage and most other blemishes
- Restor-A-Finish restores the finish without removing any of the existing finish
- Before you go to the extreme of stripping it, restore it
- Features
- Colors
- Directions
For over 50 years, Howard’s Restor-A-Finish has been a standard in the antique industry. Because Restor-A-Finish preserves and restores beauty to the original wood finish, it helps preserve the antiques’ authenticity and value, whereas stripping the finish may literally strip the piece of its value. Restor-A-Finish penetrates faded lacquer, shellac, and varnish finishes to bring back the original color and luster. It restores the depth of grain in wood finishes, going much deeper than temporary “scratch cover” products. Restor-A-Finish penetrates and permanently restores most wood finishes without removing any of the existing finish – this is why it is very popular for antiques. Restor-A-Finish maintains the original “patina” of an antique finish, maintaining its character and value as an antique. To protect the newly restored finish Feed-N-Wax is recommended as a follow-up to Restor-A-Finish.
“Restore It – Don’t Strip It!”
Permanently revive and restore the original color and luster in one step, without removing any of the existing finish. Most wood finishes that seem to need a complete refinishing job can be completely restored in a few minutes with this simple wipe-on, wipe-off process. White heat rings and watermarks, sun fade, oxidation, smoke damage, and most other blemishes can be quickly blended away. Before you go to the extreme of stripping it, try restoring it!
Almost any existing wood tone, from a light Birdseye Maple to a dark Jacobean, can be closely matched using one of the nine available finish colors. Restor-A-Finish should be used in a color that best matches your finish. If you are uncertain about which color to use, then choose a color slightly lighter than your finish. It’s recommended that you test Restor-A-Finish in an inconspicuous spot to make sure you like what it does and how it matches the finish.
Restor-A-Finish is a unique finish-penetrating formula that contains a small amount of stain combined with just the right amount of solvent and restoring oils, giving it the unique ability to penetrate and permanently restore most existing finishes without removing any of the existing finish.
Choose the color of Restor-A-Finish that best matches the finish of your wood. Test on an inconspicuous area. Apply with a small pad of cloth, cover a small area at a time and immediately wipe dry. Do not pour directly on finish. To remove stubborn white rings, oxidation, or light scratches, apply Restor-A-Finish with a pad of super fine (0000) steel wool. Finishes vary in hardness, so test pressure to be used with (0000) steel wool on an inconspicuous spot. Rub lightly in the direction of the wood grain until blemish is blended away. Cover a small area at a time and wipe dry. To protect and maintain the newly restored finish, follow up with Howard Feed-N-Wax.
When using a soft cloth or steel wool, rub with light pressure but hard enough to blend away the damage. As you restore the finish be sure to periodically check your progress. Always rub with the grain of the wood. Some dry faded finishes will only require a quick wipe-on, wipe-off application and will quickly absorb Restor-A-Finish. Other finishes will require a little more work. Still other finishes may require leaving the Restor-A-Finish on longer so it can penetrate into the finish and restore color and depth of grain deep into the wood. All finishes are different, so testing first may be required. Always wipe off excess Restor-A-Finish.
For best results, wait at least 30 minutes and then apply a coat of Howard Feed-N-Wax to protect and maintain the newly restored finish. Then re-apply Feed-N-Wax as needed, or when the finish starts to look dry.
Treating carved woods: Restor-A-Finish has saved many hours of labor by quickly restoring color and depth of grain on carved wooden furniture, clocks and picture frames. Simply apply Restor-A-Finish with a small paintbrush or soft toothbrush and wipe dry.
** If a high gloss finish should appear dull due to the use of steel wool, polish it out with Restor-A-Shine Polishing Compound. Restore-A-Shine is perfect for the final step in restoring high gloss finishes by buffing away fine scratches only seen in the light. These super fine lines in the finish from a distance creating the look of “dullness” on high gloss finishes and can be easily buffed away with Restor-A-Shine Polishing Compound.
Precautions
First test Restor-A-Finish on a small inconspicuous area to check results, penetration into the finish, correct color, and if to use (0000) super fine steel wool or a soft cloth. Apply Restor-A-Finish to a small area at a time and always wipe dry. Be careful to protect fabric, carpets, or linoleum when applying Restor-A-Finish, as it may leave a permanent stain. If spilling does occur, immediately scrub area with soap and water or a stain remover and wipe dry.
Do not use polyurethane over Restor-A-Finish. Keep in mind that the purpose of Restor-A-Finish is to restore an existing finish. No need to put another finish on top, just Feed-N-Wax. Also, Restor-A-Finish may not be able to penetrate harder “plastic” finishes, imitation simulated wood finishes, or some hard polyurethane finishes. Not recommended for floors or exterior surfaces. May not work well on “one step stain and poly” finishes. Wait 30 days to dry if using polyurethane or other clear coat finishes on top of Restor-A-Finish.
CAUTIONS: DANGER. CONTENTS MAY CATCH FIRE. FUMES MAY CATCH FIRE. CONTENTS HARMFUL. MAY IRRITATE EYES. MAY IRRITATE SKIN. Do not mix with other chemicals. Do not smoke. Do not swallow. Do not get in eyes, on skin or clothing.
Keep out of reach of children. Keep away from flames, such as a pilot light, and any object that sparks, such as an electric motor.
FIRST AID: If swallowed, DO NOT INDUCE VOMITING, Call Physician immediately. If breathed in, move person into fresh air. EYE CONTACT: Immediately flush with water for at least 15 minutes. SKIN CONTACT: Wash with soap and water. Contains Hydrogenated Mineral Oil, Isopropanol, Acetone. Store in a cool place. Keep container closed.
USE WITH ADEQUATE VENTILATION. To avoid breathing vapors, open windows and doors or use other means to ensure a cross ventilation of fresh air through work area. If you experience eye watering, headaches or dizziness, increase fresh air or wear respiratory protection (NIOSH/MSHA approved with organic vapor filter) or leave the area. Avoid prolonged contact with skin. Close container after each use. Do not transfer contents to bottles or unlabeled containers. Before using this product in the workplace, read the Safety Data Sheet (SDS) available online. This product is intended for occasional use only. Intentional misuse by deliberately concentrating and inhaling the contents may be harmful or fatal. Reports have associated repeated and prolonged occupational overexposure to solvents with permanent brain and nervous system damage.
WARNING: This product can expose you to chemicals including Ethylbenzene, which are known to the State of California to cause cancer, and Toluene, which is known to the State of California to cause birth defects or other reproductive harm. For more information go to www.P65Warnings.ca.gov.
This product is made from the finest raw materials available and manufactured to proven formulation under strict quality control for its intended use on natural wood finishes. However, results obtained with the use of this product under a variety of conditions may depend on circumstances beyond our control. Howard Products, Inc. and the seller therefore disclaim any responsibility for expense or consequential damage of any kind. The only warranty extended, expressed or implied, is for defective workmanship or materials.
© Copyright 2022 Howard Products.
All Rights Reserved. Accessibility
How to Refinish Wood Furniture
Your wood furniture piece is valuable to you. Your furniture may hold substantial monetary value, too. So when it’s in bad shape, why replace it? Furniture refinishing—the craft of making old pieces new again—is within the grasp of any do-it-yourselfer who is interested in this fascinating craft. Furniture refinishing rarely costs much: It’s mainly about devoting enough time and patience to this exacting yet rewarding project.
Equipment / Tools
- Sponges
- Clean buckets
- Respirator
- Eye and hearing protection
- Steel wool
- Putty knife
- Waterproof gloves
- Paint brushes
- Clean rags
- Sandpaper, varying grits
- Oscillating electric sander
- Manual sanding block
Materials
- Dish soap
- Liquid paint stripper
- Mineral spirits
- Wood glue
- Pre-stain wood conditioner
- Stain
- Wood coating
-
Clean Furniture
With warm water and a squirt or two of dish soap in a clean bucket, wipe down dusty, dirty, or mildewy furniture with a sponge. Change out the water for clean, cool rinse water. Use another sponge and wipe down the furniture with the rinse water.
 Let the furniture dry for a day or two until the wood is thoroughly dry.
-
Apply Stripper
Because wood furniture usually does not have many flat surfaces that are easy to strip with a sander, use a liquid stripper.
Wearing gloves, eye protection, and breathing protection, brush on the paint stripper in a thick coat or as recommended by the instructions. After an hour or two, the paint should start to bubble up. This means that it is ready for scraping.
If you are using citrus-based paint strippers, you may need to wait for up to 24 hours for this less-potent (but environmentally friendly) stripper to take action. In some cases, wrapping the areas where the stripper has been applied with plastic may expedite the stripper.
Warning
When using strippers or any caustic chemicals, work only in open or well-ventilated areas. Working in these areas does not preclude the need to wear a respirator. Always wear an N95 respirator when working with these chemicals.
-
Remove Existing Finish
Once again wearing gloves, eye protection, and breathing protection, scrape away the wet paint with the putty knife. You may want to use improvised devices of different sizes to work into all of the areas: old screwdrivers, 5-in-1 tools, paint lid openers, and more. Steel wool is especially valuable for getting into small spaces. Be careful not to rub too hard, as this will gouge the surface.
-
Repair Furniture (Optional)
Wait a day or two for the furniture to thoroughly dry. With the wood furniture cleaned and stripped, you can now clearly see any damage to the piece. Loose sections may be able to be tightened by applying wood glue, then clamping them. Missing sections of wood possibly can be strengthened and replaced with epoxy resin wood filler or other wood filler product, depending on your intended finish. Be sure to read product instructions before proceeding.
-
Sand Wood
Sand the furniture down to bare wood.
Use the oscillating electric sander on as many of the flat, broad sections that you can. Use caution and work slowly near curved edges to avoid creating unintended flat spots. Switch to a manual foam sanding block for tight areas and grooves. Begin with lower gauge grits and work up to grits in the #220 and #320 range.
Tip
If you want to achieve a glass-smooth, pore-free finish on your wood furniture, apply a wood grain filler. With a plastic spreader tool, spread the grain filler to the wood, much like skim coating a wall. After the filler has dried, gently sand it down with #320 grit sandpaper until it is smooth.
-
Stain Furniture
Wearing personal protection, apply stain to the wood furniture with a rag or brush. Apply multiple thin layers rather than one or two heavy layers, as this helps you control the coloration.
It also helps to begin with a pre-stain conditioner. This clear penetrating liquid prevents the stain from being blotchy in some areas and thin in other areas.
-
Coat and Protect Furniture
Protect your wood furniture with coats of water- or oil-based polyurethane coating. Brush or wipe the coating on. Alternatively, you may choose to apply penetrating oil such as tung oil or Danish oil. Oils are best for low-impact wood furniture where surface protection is not as important.
 Let the furniture dry for a day or two until the wood is thoroughly dry.

 Use the oscillating electric sander on as many of the flat, broad sections that you can. Use caution and work slowly near curved edges to avoid creating unintended flat spots. Switch to a manual foam sanding block for tight areas and grooves. Begin with lower gauge grits and work up to grits in the #220 and #320 range.

The most common mistakes when refinishing wood furniture are surprisingly easy to prevent, so why do people make so many? Many mistakes happen as a result of jumping into the refinishing project too hastily without getting a good idea of what is needed regarding materials, time, and the proper steps to be taken.
Spend some time visualizing the finished project, researching, and paying attention to the process. You are going to need time to get there. Impatience to get going and racing to the finish can set you back.
Not Cleaning the Surface
Before refinishing, you need to clean the surface thoroughly. That in itself could save you hours of work, as sometimes after cleaning you might find that all a piece needs is retouching. Thoroughly clean the surface with a wood cleaner or wax remover to see if you can salvage the present finish.
Failing to Strip Completely
When you have determined that you do need to strip a piece, always remove all the old finish or paint thoroughly. Leaving spots will yield an uneven surface when you finally start finishing it. Apply enough stripper to keep the surface wet, and never work in direct sunlight as you can dry the wood. Remove the finish completely before sanding to get the surface ready for the new finish.
Not Waiting Long Enough
When you don’t wait long enough for the stripper to work, you will have to scrape the wood to get the old finish off. Check to see if it comes off easily before removing it. Leave the stripper on longer if the old finish doesn’t come off easily.
Waiting Too Long
If you spread the stripper and let it sit for longer than required, the paint can become hard again. Plan to complete the stripping in the time required, so you can remove the paint while it is still soft.
Failing to Make Necessary Repairs
Before you begin refinishing and right after stripping, check for any repairs that need to be made to the surface. Do this before sanding and staining. This will assure a better finish.
Not Sanding Properly
Before you apply your stain, the surface should be smooth. Otherwise, it may not accept the finish properly. Proper sanding assures a smooth finish. Use the right grit of sandpaper for the job.
Applying Too Thick a Coat
When you are applying a stain or paint, resist the tendency to put a lot of it on all at once. Too thick a coat will only create an uneven and unattractive finish, and not get the work done sooner. Apply the product, and wait for the first coat to dry before continuing with the next one. You will be able to find the instructions for the proper waiting time on your container.
Warning
Following safety precautions is essential. Always remember to protect your skin and eyes, even when using substances that have low volatile organic compounds (VOCs). Wear proper gloves when handling paint strippers and refinishing products. Make sure there are no open flames. Work in a room with plenty of ventilation. The failure to read and follow manufacturers’ instructions for paints, waxes, varnishes, or strippers is one of the most common mistakes.
Do-it-yourself technologies for restoration and repair of wooden furniture
If wooden furniture has lost its former splendor after a few years, do not worry. Thanks to the restoration, it is quite possible to return the original elegance and aristocracy to the surfaces. Doing it yourself is a labor intensive process. However, if you clearly follow all the steps, the result will not be long in coming.
Wood restoration without polishing
Even with the most careful handling of furniture, chips or scratches can appear on surfaces. Restoration will help get rid of them. The easiest way to restore the gloss to a piece of wood interior is to treat it with a composition containing orange oil. This is easy to do with your own hands: put water on a clean sponge, heat it in the microwave for half a minute. Then, using a spray gun, spray the composition on the surface of the cabinet or table, then walk over them with a warm sponge. Wear gloves to protect your hands.
If there is a large stain, special tools and accessories are required: retouching marker, wax, denatured alcohol. For restoration, the surface is cleaned with soapy water and dried. The next step is to wipe the lightened areas of wooden furniture with alcohol, most often this helps to restore the original color. In case of deep damage, scratches and stains are painted over with a marker, wax is applied to give shine.
When chipped, putty will have to be used. It is best to purchase a light variety and complement it with color to obtain a shade that is most suitable for the color of the surface.
Procedure:
- Coat the chip with compound, including the adjacent area.
- Wait until dry.
- Sand with sandpaper.
Restoration of a wooden surface with polishing
The technology of renovating the lacquer layer is considered especially difficult. But even this type of work with wooden furniture can be done independently. The restoration process begins with the removal of dust and degreasing. To do this, use a soap solution or dishwashing detergent.
After waiting until the washed elements are completely dry, proceed to restore the polish:
- If the surfaces are dark, iodine will help mask the scratch. To get the most accurate shade, you should dilute it with water. If the color is unusual, then it is better to choose a retouching marker.
- It is allowed to use shoe polish in a suitable tone.
- To eliminate deep scratches prepare a composition of softened wax and turpentine (proportion 4:3). The resulting product is applied to the polish with a soft cloth and rubbed.
 The resulting product is applied to the polish with a soft cloth and rubbed.
 If there is a stain on the polish, the easiest way is to remove it with gasoline and a soft cloth. If the stain is ingrained, multiple treatments will be required, but as a result, the damage will be eliminated. After that, the surfaces are polished with a velor cloth to a shine.
Method of working with various types of stains:
- From hot (white circles) – wipe with alcohol, then – polish with linseed oil.
- Deep damage from hot – lubricate the area with a mixture of alcohol and drying oil, polish.
For the restoration of polished furniture, simple but effective compositions can be prepared. Mix turpentine, linseed oil and vinegar (proportions 2:2:1), apply to the surface of natural wood. Wait for absorption. After that, polish with a piece of cloth. To bring a table or cabinet in order will help the composition, the components of which – beer and oil – are taken in equal amounts. It is applied to a napkin, then it is carried out along the facades and countertops, allowed to soak. Then polished.
How to remove polish from wood furniture
When you are renovating, you may find it necessary to remove polish from wood furniture. Most often, during restoration, it is replaced with matte tinting paints.
There are several ways to remove the coating:
- Mechanical. With the help of a grinder, all the work will be done very quickly. If there is no equipment, coarse-grained sandpaper will be required. The varnish is carefully scraped off until the wood surfaces are visible. Then, with a fine-grained sandpaper, the elements are cleaned to a smooth state. The work is dusty, so the eyes are protected with glasses, the mouth and nose with a cotton-gauze bandage or a respirator.
- Glass. The main tool is a piece of glass, work is carried out with gloves for safety. The sharp edges of the fragment should carefully remove the polishing elements. If there are recesses, the coating is removed from them with special care. The final stage is grinding with sandpaper (fine spraying).
- Building dryer. The device heats the varnish layer to high temperatures, it starts to melt. It remains only to clean the coating with a nozzle. The downside of this method is that when melted, the varnish emits a very unpleasant odor. In addition, working with a building dryer requires certain skills and caution. Next is the final cleaning with sandpaper.
- Chemical. The easiest way is to buy the composition, apply it to the facade or countertop in accordance with the instructions. Work is carried out only on the street or with an open window, since the fumes are toxic. The product is carefully distributed over the surface, waiting for the required time, cleaned with a spatula.
 The sharp edges of the fragment should carefully remove the polishing elements. If there are recesses, the coating is removed from them with special care. The final stage is grinding with sandpaper (fine spraying).
 How to paint over polished furniture
The first step is to dust the surfaces. To do this, they are wiped with a damp cloth, then allowed to dry. Next, a layer of putty is applied, it will help mask irregularities and defects. After drying, walk along the surface of the emery, it will remove excess putty and help achieve high-quality alignment.
Then apply a primer. Its purpose is to protect against fungus and mold, to ensure better paint application. After drying, proceed to dyeing. The main tools are a roller or a brush. Paint on a wooden surface is applied in several thin layers. It is better to brush over the furniture several times than to make one thick layer. This will help to avoid smudges, to achieve uniformity. The secret for a successful restoration: the paint is applied in different directions: first horizontally, then vertically. Do the same with varnish.
Paint sequence:
- inside;
- seams and edges;
- outside.
Whether or not to remove varnish depends on the quality of the coating. Smooth, defect-free allows direct painting. If the polishing is in poor condition, replete with cracks and chips, it is better to remove it first.
Restoration of wooden veneer furniture
Renovation and repair of veneered surfaces is quite complex and involves the use of our own methodology. If moisture gets on the wooden furniture and the veneer “swells”, you will need PVA glue and a regular syringe. The “bubble” is pierced, glue is injected into the cavity. A cloth is placed on the damaged area, a heavy load is placed on it for the best grip. If the work is carried out on a concave or convex part, then the sandbag will play the role of oppression.
Other ways to work with veneer when swollen:
- If alcohol glue is used: it is enough to iron the damaged area through the gauze with a slightly heated iron. The detached fragment will return to its place.
- If the previous method did not help, pre-moisten the gauze. Before work, PVA glue can be introduced under the coating for reliable fixation.
 Before work, PVA glue can be introduced under the coating for reliable fixation.
 Surfaces can often crack due to moisture ingress. Restoring the veneer will help gluing on PVA when heated with an iron through the fabric. If this method does not help, the damaged area of \u200b\u200bthe coating must be broken off. It cannot be carefully cut off – after restoration, the fracture is less noticeable than the incision. Next, carefully remove the old glue from the separated element and the main surface, clean it with sandpaper. After that, glue is applied to a piece of veneer, applied in place, combining the fault lines. The surface is covered with a cloth on which the load is placed.
To eliminate chips and scratches on veneered structures, markers are used, the main thing is to choose a “tone on that” shade. If the damage is deep, then a small amount of molten wax is placed in the gap with a spatula. You need to wait until it completely hardens, walk on the surface with sandpaper with a light coating. The final stage of work is varnishing.
If it was not possible to find a marker that matches the color of the veneering, the restored product can be painted. The paint can be transparent or colored. Acrylic compositions are often used for restoration, they dry quickly, have many shades. This coating protects wooden furniture from rotting and mold. There are special options that repel dirt.
Quick and creative methods for repairing a wooden set
You can make an unusual piece of furniture from an old table, a worn-out wardrobe or a falling apart bed. Modern techniques available for work even for beginners will help.
Decorating and masking imperfections with decoupage
Decoupage is a common restoration technique. Furniture items will take on a new life, all work can be done independently at home. The essence of the technique is that wooden surfaces are decorated with drawings from paper napkins or wallpaper. Paper elements are immersed in the adhesive composition, and then glued to the facades. When the composition hardens, varnished.
Tools and materials
You need to prepare:
- original source – napkins or wallpaper;
- PVA glue;
- sandpaper;
- solvent;
- putty for woodworking;
- pencil;
- tape measure, ruler;
- stationery knife;
- brush or roller;
- varnish.
Procedure
Once the materials have been prepared, the decoupling restoration can begin. Algorithm:
- Preparation of wooden furniture: cleaning from dust and dirt, smoothing with sandpaper. Primer.
- Taking measurements and preparing elements of wallpaper or napkins. Cut should be with a margin.
- Glue preparation. PVA is dissolved in water (proportion 1:3). The amount of composition depends on the size of the decorated area.
- Apply the resulting adhesive to the wrong side of the napkin or wallpaper. Work with a roller or brush. If the composition is quickly absorbed, apply 2-3 layers.
- Lay the sheet face up on the surface to be decorated. It is rolled over with a roller to get rid of air bubbles. Alignment to obtain a perfectly smooth canvas.
- Dry the coating.
- Trim excess warp along the contour.
- Varnished. It is applied in many layers, drying each one thoroughly.
 If the composition is quickly absorbed, apply 2-3 layers.
 Tips and Tricks
Surfaces for this technique must be smooth. The presence of dents, chips and other damage is unacceptable. Wallpaper is needed paper, vinyl and non-woven are not suitable.
For beginners, it is better to start with small pieces, they are much easier to stick on.
Decorating and masking defects with painting
Another interesting creative repair option is painting the facades and tabletops of wooden furniture. Even those who have not been drawing since their school years can do this at home. The secret is simple – we will use a stencil.
First, the surface must be prepared: cleaned, leveled, primed. Next – paint in the selected basic tone. The base is laid in several thin layers. You can use acrylic or water-based paints, they work well, are not afraid of dampness and do not fade. Oil paints, acrylic, even gouache or watercolor are suitable for painting.
There are several ways to apply:
- Choose the picture you like, print it on paper, then make a template.
- Buy ready-made stencils.
- Use lace or guipure to create an original pattern.
The template is applied to the facade or countertop, fixed with adhesive tape, the paint is applied with a brush or from a spray can. You can remove the stencil only after complete drying.
How to repair minor damage to furniture
In case of minor damage to furniture, you can carry out restoration on your own, even without experience. For example, if a solid wood cabinet has lost its luster, it can be saved by treating the facades with a specialized tool.
The inside of the banana peel will help to remove scuff marks. A nail file will help to eliminate small irregularities. Of course, sandpaper is also used, but it is rougher.
After swelling of the wood due to moisture, the situation can be saved with a mixture of olive oil and salt. The components for restoration are mixed, applied in a thin layer to the affected area, lightly rubbing in a circular motion. Leave on the surface of the furniture for half an hour. Salt will help draw out the liquid, and oil will renew the fibers of the tree, making them more elastic.
Materials and tools used
The set of necessary tools and materials depends on what kind of restoration work is being carried out. There is no universal list of everything you need to work with furniture. However, an electric tool is often used to modernize wooden surfaces. It can be bought or rented. It is better to work with a professional tool – it will help to get a better result.
Here is a sample set of what is needed for restoration:
- sander for removing varnish from furniture or polishing;
- screwdriver;
- building dryer for drying wood surfaces after painting;
- electric jigsaw for fast cutting of decorative and geometrically complex elements;
- construction vacuum cleaner for dust protection.
In addition to professional tools, you should prepare in advance other materials important in restoration work:
- brushes and rollers;
- spatulas;
- sandpaper;
- protective clothing (respirator, gloves, goggles).
Depending on the specific type of work, consumables are also purchased: paints, varnishes, primer, putty, impregnation, wax.
Shellac varnish is often used for restoration. It helps to emphasize the sophistication of wood furniture, to give it a new, but completely natural shade. Well restores varnish, but to obtain the desired effect, the application of 40-60 layers is required.
Nitrocellulose is used to restore large areas of lacquered surfaces. This composition for restoration is applied to the furniture with a sprayer. Household spray guns do not allow you to get the optimal speed of work, so drops of composition and smudges will appear on wooden surfaces.
Pentaphthalic lacquer is another popular home repair product. Additional tools or equipment for restoration will not be required. The composition is applied with a paint brush, in which case the wooden surfaces become glossy. Those who want to get a matte effect should apply the varnish with a swab. The maximum number of layers is 4.
How to speed up the restoration
Restorations often require considerable time. It can take months for antique furniture to take on new life. The term also depends on the materials: varnishes, primers, paints are applied to the wooden surface. You can proceed to further work only after complete drying.
To speed up the process, choose a compound that dries quickly. In addition, the work plan must be thought out in advance in order to immediately purchase the necessary equipment and materials and not go to the construction market several times.
These are the main points that will help you to restore and repair wooden furniture yourself. The main rule is accuracy, haste is inappropriate.
Video
How to restore old furniture at home, tips – Do-it-yourself furniture restoration
Restoring old furniture is not a cheap service. Is it possible to save money and do everything yourself at home? Or is it not worth trying? Looking ahead, I’ll say that doing furniture restoration with your own hands is difficult, but real. Subject to a number of conditions.
David Bader Photography
First, let’s figure out whether you need to restore furniture yourself or is it better to entrust this work to professionals? Agree, there is no point in experimenting with the “home” restoration of antiques. Only professionals will be able to recreate the original shapes and finishes. At home, you can not “guess”.
+ Save time and effort. It only seems like one-two-ready – the craftsmen with your chest of drawers will have to tinker with for several weeks. Imagine that you need to do this in the evenings after work and on weekends: it may happen that work will be a burden.
– Complex logistics. Cabinets and sideboards will most likely have to be dismantled in order to be taken out of the apartment for delivery to the workshop. As a result, additional expenses for delivery to the restoration workshop.
– If there is no elevator in the house, you will have to call movers and hire a Gazelle. Of course, all these efforts can be taken over by the workshop staff, but additional services will be included in the cost of restoration work.
Stahl Antiques & Antique Furniture Restorations
Place is the deciding factor
When renovating old wooden furniture, dust and odors are almost inevitable. For example, you can remove the old paintwork either by grinding (dust) or by chemical compounds (smell). Many protective and covering compositions for wood also have a pungent odor. If possible, move furniture restoration work to non-residential premises. It can be a garage, utility room, loggia or balcony.
If you live in a private house, then in good weather you can work in the yard. But in this case, pay attention to the conditions for using the paint and varnish compositions specified in the instructions: minimum and maximum temperatures, air humidity and reaction to direct sunlight.
Tip: if the only possible option is a room in an apartment, cover all other furniture with a protective film, remove textiles and carpets for a while. Also cover the floor with a film to avoid stains from chemical compounds.
Ian Wall Furniture Restoration
Tools and Materials Needed
Depends on the size of the piece of furniture and your understanding of comfort. If the table is small, you can get by with only a hand tool. If you don’t want dust when sanding, washes can be used. Do not tolerate strong odors – use water-based varnishes and paints to cover. The list of materials and tools in each case will be individual.
Ian Wall Furniture Restoration
You will need different grits of sandpaper, a spatula, brushes and rollers. But, in order to properly sand even a small coffee table or stool by hand, it will take several hours. Professionals use an eccentric (orbital) grinder for these purposes, which is not available in every household. In addition, you may need a screwdriver, electric jigsaw, building hair dryer. It is more convenient to remove dust immediately – with a construction vacuum cleaner.
Tip: is only worth buying a power tool if you have a lot of old wooden furniture that needs restoration or if you plan to do it regularly. At the same time, all these tools are universal and are often used in other repair work. There is a construction or major renovation ahead – purchase it, it will come in handy on the farm. If your plans include the restoration of only one piece of furniture, ask your friends for the tools for a while, or rent them. With a good tool, things will go faster, and the result will look neater and more professional.
Cardona Antique Furniture Restoration Co.
Where to get materials for restoration
For restoration work you may need: paint removers, compounds for filling chips and scratches (wood putty, furniture wax, furniture sealant), paint and varnish materials (paint, enamel, impregnation, oil). Finishing is easy to buy at any building materials store, but I advise you to order goods exclusively for furniture restoration (furniture waxes, pencils, sealants, furniture edges) in online stores that deliver / send goods throughout the country.
Advice: look for ads from private individuals on websites. It is not uncommon for people to sell surplus material, or the color doesn’t fit, and they list the items on the internet flea markets. On the Internet, you can also find recipes for making some materials for restoration at home.
DOXA Home
How long will it take
Furniture restoration at home is not a quick process. Everything about everything can take from a few days to a whole month. And the point is not only in painstaking work, but also in the peculiarities of the use of paints and varnishes. Putties, primers, paints, varnishes require a certain drying time before applying the next layer: from several hours to a whole day.
If you don’t have much free time, but you take the process seriously, carefully plan the stages of work. Often the delay occurs due to the fact that there is no certain product or tool – you will not run around the shops before each next stage.
Tip: For , to speed up the process, choose products that dry quickly. For example, water-based paints and varnishes dry faster than alkyd-based counterparts. One of the “fastest” coatings is Danish oil. It does not require pre-priming and interlayer grinding at all, and the second layer can be applied after 30 minutes.
Stahl Antiques & Antique Furniture Restorations
Restoration steps
hard-to-reach places. Often it is enough just to remove the fittings and hinged doors, remove the drawers. Whether to disassemble the frame completely – look at the situation. Glued elements such as a box in the photo are definitely better left assembled.
Tip: Before starting work, take a picture of the object and the attachment points of its elements. Arrange the fasteners in small bags and sign what elements it is intended for. This will make it easier for you to assemble the parts after restoration.
Aleksey Bereznyak
2. Removing old paintwork
There are three ways to remove old paint, varnish or enamel: sandpaper, paint remover or using a blow dryer. Choose the method that is most convenient for you and best suited for your piece of furniture. You can combine methods: for example, peel off a layer of paint heated by a hairdryer with a spatula on even surfaces and sand it with sandpaper on uneven, rounded areas.
Important: Be sure to use personal protective equipment – work with gloves and a respirator. In the case of using a building hair dryer, be especially careful not to burn the wood under the paintwork.
Cardona Antique Furniture Restoration Co.
3. We eliminate external damage
Scratches, cracks and chips on furniture are masked with the help of special means. Volumetric damage can be puttied with putty on wood, applying it in several layers. Cracks and scratches – fill with furniture wax.
To work with wax, a wax melter or a portable gas burner is used, but wax can be melted without special devices, for example, on a stove or a building dryer. Small scratches are well masked by a furniture touch. To ensure that the restored areas are not visible, the color of the materials used should be close to the shade of the wood from which the furniture is made. The texture of wood can be artificially recreated using a furniture marker.
SashaDOIT
4. Getting ready for the final coat
Before applying paintwork, the surface of the product should be carefully leveled, excess waxes and putties should be removed. To do this, consistently use fine-grained sandpaper (P180-P240). Wipe off the dust build-up after sanding with a damp cloth and allow the surface to dry before the next step. Some paints and varnishes require a coat of primer before painting.
Kelly Nelson Designs
5. Apply top coat
The new look of your chest of drawers (stool, coffee table, etc.) depends on the selected paint material. If you want to preserve the natural look of wood, use transparent varnishes and oils for wood. Give preference to water-based varnishes, as alkyd and polyurethane tend to give the wood a yellow tint. If you want to slightly tint the tree, give it a shade of noble wood species, choose the so-called glazing compositions: colored varnishes, stains, oils and waxes.
If you see your chest of drawers in color, use enamel or furniture paint. On sale you will find both colored paints and white bases that can be tinted in any chosen shade. Please note that many varnishes and stains require intermediate sanding, because after applying the first layer, the pile of wood is lifted.
Tip: With , start applying the top coat on the interior of the furniture, backs, sides, and finish on the front. It is difficult for beginners to avoid small smudges of paint and varnish, but they want the front side to look perfect.
Ekaterina Lieberman
6. Installing fittings
After restoration, you can return the old fittings to their place or replace them with new ones. It all depends on the condition of the details and your desire: either to preserve the authentic appearance of the furniture, or simply to “refresh” it.
As you can see, all furniture restoration problems can be solved, and everyone can master the process. But even if the case still seems long, complicated or costly, do not rush to abandon the idea. It can be made even easier.
RELATED…
Good question: What to do with old furniture?
SashaDOIT
Ideas for a “quick” furniture restoration:
Just paint
You don’t even have to remove the old coating – remove dirt from the furniture (use any means for “kitchen” cleaning), lightly sand, apply a layer of adhesive primer and two or three coats of paint. It may not come out as perfect as with a full restoration – be prepared.
RELATED…
How to paint a wooden chest of drawers with a gradient – step by step instructions
Daria Nazarenko
Do it casually
Of course, not every style will tolerate this, but sometimes such “antics” are welcome. Especially if you are repainting brand new furniture without damage.
RELATED…
28 ideas for those who want to redo an IKEA chest of drawers
perfectly imperfect
Coat with “white” varnish
This is usually done with dark wood – after sanding it is processed using the dry brush technique – the surface is not completely painted over, but deliberately leaves traces and a visible base.
Important: may not turn out as perfect as in the case of factory “bleached oak”. Might have to be redone.
Daria Trebol
In the photo: the kitchen doors are finished using decoupage technique
Paste using decoupage technique
Choose images that will blend well with each other and fit your interior. It can be wallpaper, geographical maps, old newspapers, decoupage napkins, or even inscriptions, as in the photo. Carefully stick on the surface and secure with clear varnish to make the furniture resistant to moisture.
Janna Makaeva/Cutting Edge Stencils
Apply an ornament
It is difficult to see scratches, roughness and irregularities in the diversity of patterns and ornaments. Using this technique, you can effortlessly turn even the most ordinary piece of furniture into the central art object of your home. The easiest way is to order a stencil and apply a drawing through it – then it is not necessary to have artistic skills.
Design Studio INTERIKA
Leave as is
This is definitely the easiest way to give a chest of drawers a second life. Old things are good without restoration. After all, all these chips, scratches and scuffs are evidence of their rare antiquity. Perhaps it is enough just to wipe the dust off the chest of drawers and find a good neighbor for him.
RELATED…
- How to restore an old armchair – step by step instructions
- DIY Location – Detailed Guide with photo
In your city …
Trust your furniture to professionals repair and restoration on the Houzz
VASHISTION … DIY furniture? Are you satisfied with the result? Share your experience in the comments.
materials for wood Borma Wachs (Italy)
Home > Furniture restoration and repair
Any furniture or wooden coverings are subject to physical stress and environmental influences. Often we are faced with a situation where the furniture is still new, but due to minor damage, it loses its original appearance and looks untidy. The most common wood defects are scuffs, cracks, chips, damage to the paintwork. Sometimes a small scratch spoils the look of the entire interior and the question arises: “How to fix damage to wooden furniture?”
Let’s try to figure out how to make this simple furniture repair with your own hands.
In general, this process is not very laborious, but there are some subtleties in the restoration of wooden interior items. The Italian company Borma Wachs has been producing products for self-repair of furniture for over 70 years and is one of the world leaders in this field, retouching materials from this manufacturer are ideal for repairing minor defects.
Consider the most popular problems with furniture and wood products:
1. Minor abrasions and scratches.
If the damage to the paintwork is minor, then it can simply be painted over with a special touch-up pencil or marker.
You should pay attention to the tinting composition of these products, the Borma Wach company produces pencils for restoration based on Profix and Profix Pen alcohol stain, as well as retouching markers based on Holzmarker opaque enamel.
You can also buy tinted varnish or colored enamel in bubbles with a brush inside. To eliminate a scratch, you just need to choose the color that suits you best and carefully paint over the damaged area.
Please note that alcohol stain needs to be fixed with varnish or some other top coat. You can learn more about this product on page Pencils and Markers for furniture repair and restoration .
2. Deep scratches and cracks .
If the crack in the wood flooring is deep enough, it must first be repaired with soft or hard wax. This material is rubbed into the treated surface, after which it is varnished or enamelled. Wax can be selected according to the color of the wood being processed, or you can buy a transparent hard wax and choose a tinted varnish or enamel. You can learn more about this product on page Hard and soft wax for furniture .
3. Chips in wood .
A chip in a wooden surface is a serious defect, but nevertheless it can be repaired by yourself. As we have already said, hard and soft wax is used to repair defects. But to combat chipping, wood putty would be a more appropriate choice. Borma Wachs produces putty on a water, nitro and polyester basis. This material is applied with a spatula and after drying completely imitates wood. Putty is also selected by color and can be tinted with stain.
4. Paint damage .
It is not uncommon for a lacquered furniture or floor to be dented by a heavy object being dropped. In this case, it is very difficult to restore the integrity of the coating, the most suitable materials for this are Holzspray retouching non-halo varnish spray or transparent varnish in a bottle with a brush inside. These materials are selected according to the degree of gloss of the restored surface.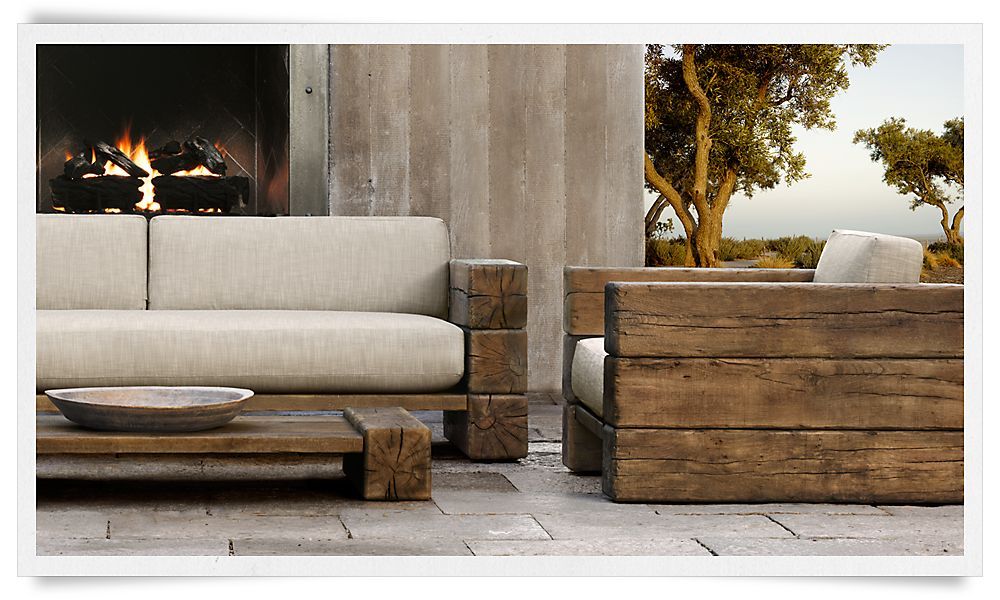 However, it is not possible to completely level the surface with a spray varnish. For more information about spray varnishes, see page
Restoration Spray Varnish .
Materials for minor repairs and restoration of Borma Wachs furniture you can buy in section Restoration materials in the Online Store.
In conclusion of the review of methods for dealing with defects in furniture, it should be noted that all materials can be mixed together to obtain the desired shade. You can see the colors of retouching pencils, soft and hard waxes, as well as retouching varnishes and enamels in Color chart .
We reviewed the four most popular types of minor damage to wooden furniture and described how furniture is repaired and restored by hand. To eliminate each of them, easy-to-use materials are used.
If you decide to completely restore furniture or flooring, then you will need professional materials and the ability to use them.
In particular, a special lacquer remover is used to renew the paintwork, after which the wooden surface is sanded and processed again. This is a much more time-consuming process, but it is within the power of anyone who seriously sets out to restore furniture. The main thing is to be patient and not be afraid to experiment in the use of materials for wood finishing.
See also:
– Pencils and markers for furniture repair and restoration .
– Hard and soft furniture wax .
– Spray varnish for furniture restoration .
Our Wood Perfect online store has been operating for 10 years.
Due to numerous requests from visitors and regular customers, having extensive experience in the decoration and restoration of furniture and wooden products, we began accepting orders for the restoration of wooden furniture, as well as other products.
The PRICE is calculated individually for each product, for this you need to send photos of your furniture . .. (and defects where restoration is necessary) to the email address; [email protected]
Master restorer works in his own equipped workshop in Shchelkovo, MO.
Repair of wooden furniture at home in Moscow: inexpensive, high quality, fast.
Wooden furniture is environmentally friendly, durable, high performance. It creates a special microclimate, coziness and comfort in the house. Interior items made of natural wood do not lose their attractiveness for a long time and are often inherited. But there are situations when wooden furniture requires urgent repairs. This can be caused by natural temporary wear, as a result of mechanical damage, careless handling, damage by pets. The gloss of glossy lacquered coatings is lost, dents, cracks, scratches, chips appear, paint is erased. Contacting a specialized company is the right step towards eliminating such problems.
Repair of wooden furniture includes
-
elimination of defects
wood coating, grinding, polishing, impregnation; -
painting work
, restoration of the natural texture of wood; -
strengthening the furniture frame
, replacement of the main fasteners; -
replacement of damaged items
, renovation of fittings;
Masters of our company repair wooden furniture made of solid oak, beech, ash and other wood species. In the process of work, a careful attitude to each element and the complete safety of personal property are guaranteed.
Our workshops are equipped with modern, specialized equipment. We purchase components, fabrics and consumables only from trusted suppliers. All our craftsmen are proficient in modern restoration techniques and have practical experience in this field for more than 10 years. Offered prices, as well as regular promotions and special offers, will please budget hosts.
Our clients
Reviews
Each repair is a separate case, and the cost depends on many parameters:
complexity and labor costs, cost of materials, location of repairs and
furniture dimensions. Here we give an approximate cost, and you can also use our
calculator.
I ordered a reupholstering of a kitchen sofa with an intricate and rather inconvenient configuration. I took up this at the insistence of family members – I myself would prefer to buy a new one. Now I see: no new one is needed, the master completed the upholstery in an exemplary way.
Elena, December 2017
I express my gratitude for the work of master Alexei and the constant support from Sergei. Quickly and very efficiently, they reupholstered a part of the sofa, which was catastrophically damaged by the sharp claws and teeth of a beloved pet.
Natalia, November 2017
Many thanks to Alexander for the fast and high-quality upholstery of my sofa. Now it’s better than new. Great job!
Galina, August 2017
CJSC “Central Polyclinic of the Literary Fund” thanks the team of LLC “Franch-Guide” for the professional performance of furniture repair work. Repair of furniture is made qualitatively and quickly. Thank you for your cooperation.
CJSC “CENTRAL POLYCLINIC OF LITFONDA”, April 2017
In July 2016, MAOU “Secondary School No. 6” turned to the company Profremontmebeli furniture for a furniture upholstery service.
Thanks to the organization for the efficiency. February 2017 Just leave a request and we will contact you.
I give my consent to the processing of personal data in accordance with Law No. 152-FZ “On Personal Data” and accept the terms of the policy on the processing of personal data
All our services
(Scroll to view block)
Frequently Asked Questions
Yes, we do. After the departure of the master, a contract for the provision of services is drawn up, and an invoice for payment for services (prepayment) is issued. After the completion of all works, an invoice for payment of services (balance) is issued, and a complete set of closing documents (act of completion, invoices, contracts) is provided.
First, a contract is concluded, which specifies the cost of work and materials. The advance payment is usually 50% of the order amount. This money primarily goes to the purchase of materials that will be used in the repair.
Yes, you can. Our masters make qualitatively any kinds of work on repair of upholstered furniture. You only need to leave a request, and we will return your furniture to its original appearance.
Yes, of course. You can independently purchase the material you need. In this case, the cost will be calculated a little differently. For more information, it is better to contact our consultant by phone +7 (495) 357-72-73.
Not at all. We will perform upholstery of an individual element: pillows, armrests, backrests, etc.
Our main specialization is the repair of upholstered furniture, including upholstery, upholstery or restoration. We work with sofas of all types, armchairs, chairs, specialized upholstered furniture. We also do work on carriage screed, wall drapery, upholstery of modular systems, production of wall panels, repair of wooden furniture and restoration of paintwork.
We usually work from home. It is more convenient for both the client and us. In addition, you do not have to once again take out and bring in furniture for transportation. This will increase its service life. In some cases, we transport furniture to a workshop equipped with all the necessary tools and equipment. And after the work is completed, we return the furniture […]
Yes, of course. All work is carried out in accordance with the contract, which also indicates the warranty period – 365 calendar days.
Usually we repair furniture at home, however, it is possible to take it to the workshop. The terms of repair depend on the number of repaired items, complexity and size. Usually, the repair of the sofa takes from 1 to 2 weeks. Urgent orders are fulfilled on the same day.
Yes. We carry out travel outside the Moscow Ring Road at a distance of up to 80 km.
Yes, of course. The master measurer always brings with him a catalog of fabrics and leathers that we can offer you for replacement. The catalog contains several hundred samples of materials – you will definitely find the best option.
No. We will coordinate with you a suitable day and a convenient time for the visit of the master. On the appointed day at the appointed time, he will come to you.
No. Departure of the master at home to assess the cost and select material from the catalog is completely FREE!
The initial view of the master is necessary to assess the scope of work, select the necessary material, its quantity, consumables and, most importantly, to estimate the cost.
Select file
By clicking on the “poison” button, you consent to the processing of your personal data
Callback
Leave your contact details and we will call you back within 15 minutes.
Your name is
Your phone
I give my consent to the processing of personal data in accordance with Law No. 152-FZ “On Personal Data” and accept the terms of the policy on the processing of personal data
Restoration of wooden furniture in Moscow cheap – Mebelink
Service price
from 800 ₽
Our advantages
For more than 10 years in the market
Large range
materials
Springs high
qualifications
Warranty 3 years
for all work
Description
Reviews
Stages of work
Choose work 9000 , especially the old one needs proper care. But it is not always possible to carefully and timely care for wooden surfaces, and if functional elements or accessories fail, then the problem of repair can become quite acute. The Mebelink workshop offers to quickly and efficiently restore wooden furniture in Moscow. Our masters will professionally repair and restore the appearance of furniture and its functionality, saving you from having to buy new interior items.
When?
Restoration work may be required in case of natural wear, creaking or loss of stability of the furniture, as well as the appearance of various defects or breakages:
- Chips;
- Scratches;
- Stains;
- Cracks;
- Blisters in coating or wood;
- Dents, etc.
All these defects can occur both from the influence of external factors – temperature fluctuations, excessive humidity, and due to mechanical damage or improper care. Also in need of restoration are pieces of furniture whose protective coating has worn off or is too thin. When the colorless composition begins to crack, moisture and dust enter the wood, which can lead to more serious defects.
How is it?
Restoration of wooden furniture is carried out in several stages:
- Preliminary inspection and drawing up a work plan.
Important! For antique and rare furniture, it is important to choose gentle types of repair and restoration that will not cause the loss of presentability of interior items.
- Thorough cleaning of surfaces from dirt.
- Sanding wood and polishing metal elements.
- Repair of structures, frame parts, functional parts.
- Elimination of chips and scratches (primer, putty, painting).
- Structural reinforcement.
- Replacement of functional parts, fittings, decor.
- Paint application.
If the furniture contains soft parts, it is possible to carry out work to replace the upholstery fabric or filler.
How much does it cost?
The cost of repair and restoration of wooden furniture is calculated individually and may vary based on the following factors:
- Complexity of restoration work.
- Cost of materials.
- Urgency.
- Type of furniture.

We work with various types of structures – chairs , tables , cabinets , bedside tables , bookcases , chests of drawers , shelving Your wooden furniture will be like new after restoration, and such repairs will cost much less than buying new interior items. You can clarify your questions and place an order both by phone and through the website.
The main stages of work
Mebelink for the service
Restoration of wooden furniture
in Moscow
Service
Free challenge
Memorial designer
Conclusion
Treaty 9000 quality
Packaging furniture
Delivery of updated furniture
to you
The materials we use
We are able to work with both traditional and modern materials,
from jacquard and leatherette to flock, chinille and luxury leather.
Restoration of the wood color of the armchair and replacement of the upholstery
“How beautiful he is now” – with such a phrase, our customer accepted our work!
More about the project
Restoration of the buffet in 1962
A real treasure of our time.
More about the project
Restoration of an old table
Restoration of furniture is a separate art form!
More about the project
Leave a comment
Full name or organization name*
Enter your full name or organization name!
Enter E-mail!
Comment*
Enter a Comment!
Attach photo
Photo not added
I consent to the processing of personal data in accordance with the privacy policy
Reviews
Galina
Hello! It took a long time to choose a furniture workshop! We had old chairs and an 18th century table. The master treated the restoration of my furniture with a soul, gave advice on choosing a fabric. The price for such a complex work did not change by the end of the work and was acceptable. Restored very carefully to the last detail and much ahead of schedule. Once again, many thanks to the Mebelink company, I am very satisfied and will be happy to recommend the workshop and the master to my friends!!!
Do you need to update your furniture?
Call +7 (499) 390-42-91 and +7 (926) 141-96-33
or leave a request to find out the exact cost of work do-it-yourself — ISaloni — interior studio, wallpaper salon
Contents
Technologies for the restoration and repair of wooden furniture with your own hands
If wooden furniture has lost its former splendor after a few years, do not worry. Thanks to the restoration, it is quite possible to return the original elegance and aristocracy to the surfaces. Doing it yourself is a labor intensive process. However, if you clearly follow all the steps, the result will not be long in coming.
Restoration of wooden surfaces without polishing
Even with the most careful handling of furniture, chips or scratches can appear on the surfaces. Restoration will help get rid of them. The easiest way to restore the gloss to a piece of wood interior is to treat it with a composition containing orange oil. This is easy to do with your own hands: put water on a clean sponge, heat it in the microwave for half a minute. Then, using a spray gun, spray the composition on the surface of the cabinet or table, then walk over them with a warm sponge. Wear gloves to protect your hands.
If there is a large stain, special tools and supplies are required: retouching marker, wax, denatured alcohol. For restoration, the surface is cleaned with soapy water and dried. The next step is to wipe the lightened areas of wooden furniture with alcohol, most often this helps to restore the original color. In case of deep damage, scratches and stains are painted over with a marker, wax is applied to give shine.
When chipped, putty will have to be used. It is best to purchase a light variety and complement it with color to obtain a shade that is most suitable for the color of the surface.
Procedure:
- Coat the chip with compound, including the adjacent area.
- Wait until dry.
- Sand with sandpaper.
Restoration of a wooden surface with polishing
The technology of renovating the lacquer layer is considered to be particularly difficult. But even this type of work with wooden furniture can be done independently. The restoration process begins with the removal of dust and degreasing. To do this, use a soap solution or dishwashing detergent.
After waiting until the washed elements are completely dry, proceed to restore the polish:
- If the surfaces are dark, iodine will help mask the scratch. To get the most accurate shade, you should dilute it with water. If the color is unusual, then it is better to choose a retouching marker.
- It is allowed to use shoe polish in a suitable tone.
- To eliminate deep scratches prepare a composition of softened wax and turpentine (proportion 4:3). The resulting product is applied to the polish with a soft cloth and rubbed.
 To get the most accurate shade, you should dilute it with water. If the color is unusual, then it is better to choose a retouching marker.
 If there is a stain on the polish, the easiest way is to remove it with gasoline and a soft cloth. If the stain is ingrained, multiple treatments will be required, but as a result, the damage will be eliminated. After that, the surfaces are polished with a velor cloth to a shine.
Method of working with various types of stains:
- From hot (white circles) – wipe with alcohol, then – polish with linseed oil.
- Deep damage from hot – lubricate the area with a mixture of alcohol and drying oil, polish.
For the restoration of polished furniture, simple but effective compositions can be prepared. Mix turpentine, linseed oil and vinegar (proportions 2:2:1), apply to the surface of natural wood. Wait for absorption. After that, polish with a piece of cloth. To bring a table or cabinet in order will help the composition, the components of which – beer and oil – are taken in equal amounts. It is applied to a napkin, then it is carried out along the facades and countertops, allowed to soak. Then polished.
How to remove polish from wood furniture
When you are renovating, you may find it necessary to remove polish from wood furniture. Most often, during restoration, it is replaced with matte tinting paints.
There are several ways to remove the coating:
- Mechanical. With the help of a grinder, all the work will be done very quickly. If there is no equipment, coarse-grained sandpaper will be required. The varnish is carefully scraped off until the wood surfaces are visible. Then, with a fine-grained sandpaper, the elements are cleaned to a smooth state. The work is dusty, so the eyes are protected with glasses, the mouth and nose with a cotton-gauze bandage or a respirator.
- Glass. The main tool is a piece of glass, work is carried out with gloves for safety. The sharp edges of the fragment should carefully remove the polishing elements. If there are recesses, the coating is removed from them with special care. The final stage is grinding with sandpaper (fine spraying).
- Building dryer. The device heats the varnish layer to high temperatures, it starts to melt. It remains only to clean the coating with a nozzle. The downside of this method is that when melted, the varnish emits a very unpleasant odor. In addition, working with a building dryer requires certain skills and caution. Next is the final cleaning with sandpaper.
- Chemical. The easiest way is to buy the composition, apply it to the facade or countertop in accordance with the instructions. Work is carried out only on the street or with an open window, since the fumes are toxic. The product is carefully distributed over the surface, waiting for the required time, cleaned with a spatula.
 The work is dusty, so the eyes are protected with glasses, the mouth and nose with a cotton-gauze bandage or a respirator.
 Work is carried out only on the street or with an open window, since the fumes are toxic. The product is carefully distributed over the surface, waiting for the required time, cleaned with a spatula.
 How to paint over polished furniture
The first step is to remove dust from the surfaces. To do this, they are wiped with a damp cloth, then allowed to dry. Next, a layer of putty is applied, it will help mask irregularities and defects. After drying, walk along the surface of the emery, it will remove excess putty and help achieve high-quality alignment.
Then apply a primer. Its purpose is to protect against fungus and mold, to ensure better paint application. After drying, proceed to dyeing. The main tools are a roller or a brush. Paint on a wooden surface is applied in several thin layers. It is better to brush over the furniture several times than to make one thick layer. This will help to avoid smudges, to achieve uniformity. The secret for a successful restoration: the paint is applied in different directions: first horizontally, then vertically. Do the same with varnish.
Paint sequence:
- inside;
- seams and edges;
- outside.
Whether or not to remove varnish depends on the quality of the coating. Smooth, defect-free allows direct painting. If the polishing is in poor condition, replete with cracks and chips, it is better to remove it first.
Restoration of wooden veneer furniture
Renovation and repair of veneered surfaces is quite complex and involves the use of our own methodology. If moisture gets on the wooden furniture and the veneer “swells”, you will need PVA glue and a regular syringe. The “bubble” is pierced, glue is injected into the cavity. A cloth is placed on the damaged area, a heavy load is placed on it for the best grip. If the work is carried out on a concave or convex part, then the sandbag will play the role of oppression.
Other ways to work with veneer when swollen:
- If alcohol glue is used: it is enough to iron the damaged area through the gauze with a slightly heated iron. The detached fragment will return to its place.
- If the previous method did not help, pre-moisten the gauze. Before work, PVA glue can be introduced under the coating for reliable fixation.
 The detached fragment will return to its place.
 Surfaces can often crack due to moisture ingress. Restoring the veneer will help gluing on PVA when heated with an iron through the fabric. If this method does not help, the damaged area of \u200b\u200bthe coating must be broken off. It cannot be carefully cut off – after restoration, the fracture is less noticeable than the incision. Next, carefully remove the old glue from the separated element and the main surface, clean it with sandpaper. After that, glue is applied to a piece of veneer, applied in place, combining the fault lines. The surface is covered with a cloth on which the load is placed.
To eliminate chips and scratches on veneered structures, markers are used, the main thing is to choose a “tone on that” shade.
If the damage is deep, then a small amount of melted wax is placed into the gap with a spatula. You need to wait until it completely hardens, walk on the surface with sandpaper with a light coating. The final stage of work is varnishing.
If it was not possible to find a marker that matches the color of the veneering, the restored product can be painted. The paint can be transparent or colored. Acrylic compositions are often used for restoration, they dry quickly, have many shades. This coating protects wooden furniture from rotting and mold. There are special options that repel dirt.
Quick and creative methods for repairing a wooden set
You can make an unusual piece of furniture out of an old table, a battered closet or a crumbling bed on your own. Modern techniques available for work even for beginners will help.
Decorating and masking imperfections with decoupage
Decoupage is a common restoration technique. Furniture items will take on a new life, all work can be done independently at home. The essence of the technique is that wooden surfaces are decorated with drawings from paper napkins or wallpaper. Paper elements are immersed in the adhesive composition, and then glued to the facades. When the composition hardens, varnished.
Tools and materials
You need to prepare:
- original source – napkins or wallpaper;
- PVA glue;
- sandpaper;
- solvent;
- putty for woodworking;
- pencil;
- tape measure, ruler;
- stationery knife;
- brush or roller;
- varnish.
Procedure
Once the materials have been prepared, the decoupling restoration can begin. Algorithm:
- Preparation of wooden furniture: cleaning from dust and dirt, leveling with sandpaper. Primer.
- Taking measurements and preparing elements of wallpaper or napkins. Cut should be with a margin.
- Glue preparation. PVA is dissolved in water (proportion 1:3). The amount of composition depends on the size of the decorated area.
- Apply the resulting adhesive to the wrong side of the napkin or wallpaper. Work with a roller or brush. If the composition is quickly absorbed, apply 2-3 layers.
- Lay the sheet face up on the surface to be decorated. It is rolled over with a roller to get rid of air bubbles. Alignment to obtain a perfectly smooth canvas.
- Dry the coating.
- Trim excess warp along the contour.
- Varnished. It is applied in many layers, drying each one thoroughly.
 Work with a roller or brush. If the composition is quickly absorbed, apply 2-3 layers.
 Tips and Tricks
Surfaces for this technique must be smooth. The presence of dents, chips and other damage is unacceptable. Wallpaper is needed paper, vinyl and non-woven are not suitable.
For beginners, it is better to start with small pieces, they are much easier to stick on.
Decorating and masking defects with painting
Another interesting creative repair option is painting the facades and countertops of wooden furniture. Even those who have not been drawing since their school years can do this at home.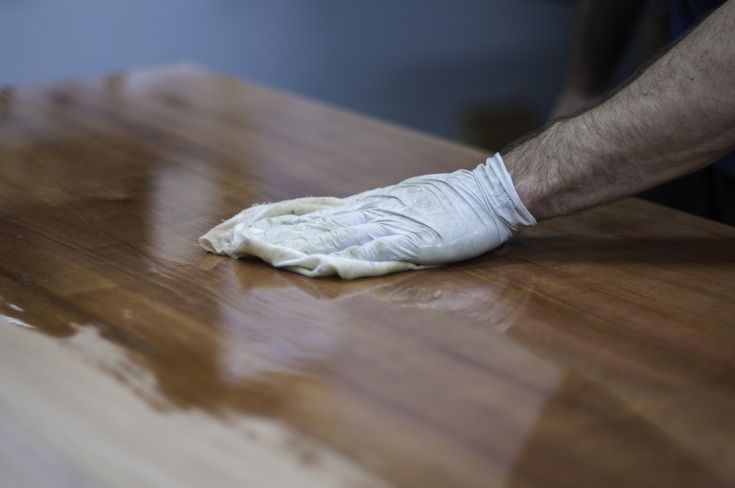 The secret is simple – we will use a stencil.
First, the surface must be prepared: cleaned, leveled, primed. Next – paint in the selected basic tone. The base is laid in several thin layers. You can use acrylic or water-based paints, they work well, are not afraid of dampness and do not fade. Oil paints, acrylic, even gouache or watercolor are suitable for painting.
There are several ways to apply:
- Choose the picture you like, print it on paper, then make a template.
- Buy ready-made stencils.
- Use lace or guipure to create an original pattern.
The template is applied to the facade or countertop, fixed with adhesive tape, the paint is applied with a brush or from a spray can. You can remove the stencil only after complete drying.
How to repair minor damage to furniture
In case of minor damage to furniture, you can carry out restoration on your own, even without experience. For example, if a solid wood cabinet has lost its luster, it can be saved by treating the facades with a specialized tool.
The inside of the banana peel will help to remove scuff marks. A nail file will help to eliminate small irregularities. Of course, sandpaper is also used, but it is rougher.
After swelling of the wood due to moisture, the situation can be saved with a mixture of olive oil and salt. The components for restoration are mixed, applied in a thin layer to the affected area, lightly rubbing in a circular motion. Leave on the surface of the furniture for half an hour. Salt will help draw out the liquid, and oil will renew the fibers of the tree, making them more elastic.
Materials and tools used
The set of necessary tools and materials depends on what kind of restoration work is being carried out. There is no universal list of everything you need to work with furniture. However, an electric tool is often used to modernize wooden surfaces. It can be bought or rented. It is better to work with a professional tool – it will help to get a better result.
Here is a sample set of what is needed for restoration:
- sander for removing varnish from furniture or polishing;
- screwdriver;
- building dryer for drying wood surfaces after painting;
- electric jigsaw for fast cutting of decorative and geometrically complex elements;
- construction vacuum cleaner for dust protection.
In addition to professional tools, you should prepare in advance other materials important in restoration work:
- brushes and rollers;
- spatulas;
- sandpaper;
- protective clothing (respirator, gloves, goggles).
Depending on the specific type of work, consumables are also purchased: paints, varnishes, primer, putty, impregnation, wax.
Shellac varnish is often used for restoration. It helps to emphasize the sophistication of wood furniture, to give it a new, but completely natural shade. Well restores varnish, but to obtain the desired effect, the application of 40-60 layers is required.
Nitrocellulose is used to restore large areas of lacquered surfaces. This composition for restoration is applied to the furniture with a sprayer. Household spray guns do not allow you to get the optimal speed of work, so drops of composition and smudges will appear on wooden surfaces.
Pentaphthalic lacquer is another popular home repair product. Additional tools or equipment for restoration will not be required. The composition is applied with a paint brush, in which case the wooden surfaces become glossy. Those who want to get a matte effect should apply the varnish with a swab. The maximum number of layers is 4.
How to speed up the restoration
Restorations often require considerable time. It can take months for antique furniture to take on new life. The term also depends on the materials: varnishes, primers, paints are applied to the wooden surface. You can proceed to further work only after complete drying.
To speed up the process, choose a compound that dries quickly. In addition, the work plan must be thought out in advance in order to immediately purchase the necessary equipment and materials and not go to the construction market several times.
These are the main points that will help you to restore and repair wooden furniture yourself. The main rule is accuracy, haste is inappropriate.
Video
Do-it-yourself wooden furniture restoration
Like any other material, wood has a certain service life. But is it worth it to immediately get rid of old furniture that has lost its attractive appearance or has fallen into disrepair? After all, if you approach the matter wisely, in most cases it can be restored, giving a “second life”. What is the restoration of old wooden furniture? Basically, if you look at the articles on this topic, in which the emphasis is on “do it yourself”, it all comes down to a simplified understanding of the meaning of the events. It turns out that it is advisable to deal with it if we are talking about old and expensive (antique) products. And it seems like it’s not worth it to “reanimate” various “crafts” from chipboard and the like – a waste of time.
How fair this is is up to you, reader. But the author has no doubt that in any home there is something “cheap” (for example, a simple highchair), which you don’t want to part with, especially if it’s done with your own hands – after all, it’s a memory. The following are the main (simple) types of work on the restoration of furniture items and the technologies being implemented, and it is not difficult to decide what exactly is suitable in this or that case. By following these simple guidelines, you will have great-looking furniture.
General information
To correctly choose the best method for restoring furniture and the right materials, it is worth understanding what can be restored.
- Frame (base).
- Exterior part of furniture (i.e. finishing of external surfaces).
- Gilding.
- Thread.
- Fittings.
- Soft “areas” (eg chair seats, sofa upholstery).
- Various coatings (lacquer, veneer, paint).
It is possible that at some stages you will have to resort to the services of a professional (at least in terms of consultation), but still, the “lion’s” part of the work, with a skillful approach, can be done by yourself.
Restoration is a complex of measures consisting of separate stages. Depending on the type of furniture, the degree of its deterioration, the nature of the damage, some of the points can be skipped, but it is simply necessary to list those with which to start.
- Photography. This is practiced mainly by professionals, but in everyday life, if we are talking about a complex structure, it is desirable to fix its original appearance.
- Dismantling. Any restoration must be combined with the repair. This is what many do not think about, believing that it is enough just to update the “facade” of the furniture, and the job is done. But what is the point of doing, for example, lamination, if the whole structure “walks like a walker”. In addition, disassembly reveals hidden defects in furniture. Only those components that are securely fastened are not subject to it.
 This is practiced mainly by professionals, but in everyday life, if we are talking about a complex structure, it is desirable to fix its original appearance.
 The main types of restoration work – master class
Paint painting
The simplest technique, and is applied to inexpensive wooden furniture to hide defects and give it an original look.
Operation:
- Removal of dirt and foreign matter. To do this, the piece of furniture is washed with a soda solution of low concentration.
- Drying.
- Base alignment. Before further processing of the tree, it must be sanded and sanded.
- Degreasing. This is necessary so that the applied compositions “adhere” to the material more firmly.
- Wood priming. This solves two problems – the surface layer is strengthened and the absorption of paint is reduced, and therefore its consumption. Depending on the design features of the furniture, the soil is laid with a swab, roller, and on hard-to-reach areas – with a sprayer.
- Applying the first coat of paint.
- Drying furniture.
- Once the paint has hardened, the designs can be applied.

Acrylic compounds are best for staining wood.
Decoupage
In other words, pasting wooden furniture with various applications (pictures, figurines, patterns). This technology is advisable to use when the defect is only in a separate area, and it needs to be masked in an original way, at no additional cost. But if the furniture is worn out, you can paste over everything.
Work order:
- Preparation of wood (specified above) depending on the degree of damage.
- Sticking applications.
- Varnished.
Special kits available. If you plan to paste over a significant area, then you can not cut out a large number of patterns (figures), but purchase a ready-made kit.
Veneering
The point is to fix the thinnest layer of wood on the furniture surface. There is veneer on sale, and cutting the desired fragment from the sheet with your own hands will not be difficult. This technique allows you to give the cheapest, worn-out furniture a sophisticated (newfangled) or antique look. Depending on the purpose of its restoration, the appropriate veneer is selected. In fact, this is an imitation of newer or more expensive designs.
There are several veneering techniques. But in everyday life, with your own hands, it is easiest to implement the following furniture restoration technique.
Work order:
- Preparation of wood and veneer fragments.
- A thin layer of glue is applied to the fastened surfaces (optimally – PVA).
- After a few minutes, necessary for its slight “setting” (depending on the thickness of the layer and the temperature in the room), the veneer is applied to the furniture.
- Top – white paper.
- The veneer is then ironed with a hot iron. This ensures a uniform distribution of glue over the base and better adhesion to the veneer.
If the surface is overall, it is advisable to additionally “walk” on it (after a high-quality warm-up) with a wooden lath, which is pressed in as much as possible. Such careful processing will avoid the appearance of wrinkles or bubbles.
Craquelure
The essence of the technique is the artificial “aging” of wooden furniture. This technology is the simplest of all used (giving wood relief, multi-layer painting, firing, and a number of others). It is easy to make craquelure with your own hands.
Work order:
- The first way is to apply a special (craquelure) varnish to painted, not completely dry wood. As a result – the formation of a cobweb of cracks. Their dimensions and depth depend on the amount of varnish and the consistency of the paint (degree of curing).
- The second method is the use of compositions of different colors. That is, after some “drying” of the main paint, another one is applied to the tree, contrasting with the first.
This method is unpredictable in its results. Before using it for furniture, it is worth practicing on wooden blanks. A little practice will help you understand how much the primary layer should “grab” and in what quantity, on which areas to apply the composition for craquelure.
Laminating
For this, vinyl films are used, which are sold in any furniture store. They imitate various types of wood (by color, structure), and it is not difficult to choose a good option.
But this method of restoration has a limitation – it is implemented only on flat areas of furniture. Where there are height differences, various bends, it is quite difficult to do lamination with your own hands. It will take care, accuracy and time.
How to stick the film is indicated in the attached instructions.
Lacquering
For wooden furniture, one of the most common techniques. In fact – a classic restoration.
Operation:
- Removing the old coating.
- Inspection of the surface and determination of the degree of its damage. If there are defects, then there are several methods to eliminate them – bleaching (in case of damage by fungus or rot), brushing, puttying, and so on.
- Base leveling and sanding.
- To remove the remaining dust, the wood is wiped with a damp cloth. Sometimes foreign fractions, when it comes to large areas (for example, cabinet doors), are washed off with water.
- Wood drying.
- Stain application. The feasibility of this and the procedure (how many layers, the composition is colorless or tinted) is determined individually.
- Lacquering furniture.

There are tinting varnishes for sale. It will be much easier to work with them, and, importantly, faster.
There are many other techniques used in furniture restoration. Anyone who has seriously decided to master this business should study all the articles available on the Internet. For example, about brushing. This is a rather voluminous topic, and only a superficial description of the essence of the technology will not be of much use to the reader. But in most cases, for the restoration of wooden furniture, especially with your own hands, the methods discussed above are sufficient.
Things to consider
- When doing furniture restoration with your own hands, it is advisable to combine several methods. For example, apply a drawing only in a certain area, and treat all other surfaces with varnish. Combinations can be very different; the main thing is that the drugs used are “combined” with each other.
- Art painting of furniture is not a simple matter. Not every one of us is “friends” with a brush. Therefore, if such a restoration technique is chosen, it is better to purchase (or make it yourself) the appropriate stencils. They are inexpensive, but will greatly help in the decoration of the piece of furniture. It is enough just to apply a template on a certain segment and apply paint from a spray can (sold in any auto / goods store in a large assortment).
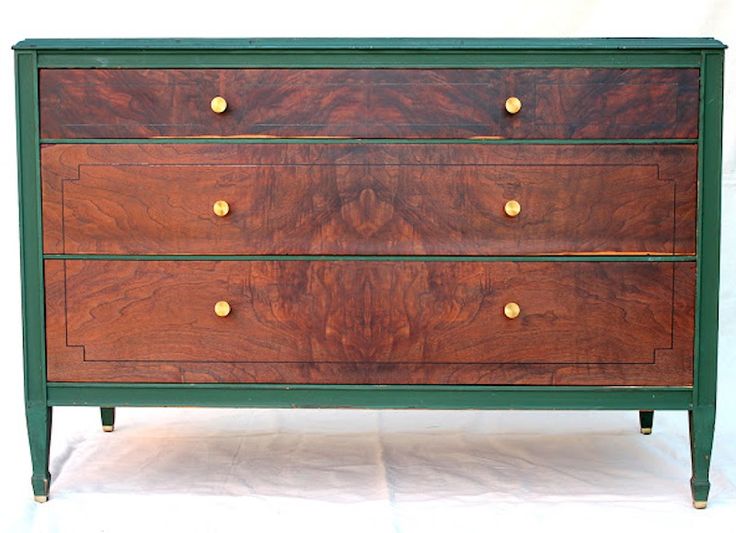 Combinations can be very different; the main thing is that the drugs used are “combined” with each other.
 Tips
Stains left on wood (for example, on a tabletop) by a hot object can be easily removed with mastic, which is used when polishing cars. With a soft swab moistened with this composition, it is enough to wipe the defective area, and the old varnish coating will be removed. After that, this area can be treated with a wax-based preparation. From above, if necessary, apply a new varnish.
Blisters on veneered furniture can be removed without restoration. It is necessary to pierce the formed “bubble” and squeeze out the accumulated air. After that, introduce a small “dose” of PVA glue under the veneer layer (using a syringe) and press down with a load. It dries pretty quickly, and this technology does not take much time.
When choosing a colorless varnish for wood, it should be taken into account that polyurethane compounds gradually turn yellow. When choosing a remedy for furniture restoration, it is advisable to focus on preparations based on cellulose or acrylic.
Scratches often appear on the wood. Naturally, we are not talking about any restoration of furniture in the full sense in such situations. Such defects are eliminated relatively easily.
- Minor scratches. This is just retouching. This can be done with a marker of the corresponding color.
- Deep scratches. Such defects are eliminated with the help of furniture wax or mastic. They are heated and loaded into the crack. Sometimes it is enough just to carefully rub the drug into the wood. Depending on the degree of its damage, it is not difficult to choose the appropriate technique.
 Depending on the degree of its damage, it is not difficult to choose the appropriate technique.
Various chips, places of fiber detachment are well masked with a brown marker or iodine. The latter is even preferable, since when it is diluted with water, you can choose the shade more accurately. Above – colorless varnish.
If the damage to the wood is significant, then it is easier to restore the area with your own hands using putty. On sale there are compositions for wood of different shades. But it is not a fact that from memory it will be possible to choose the most suitable one. Therefore, it is more expedient to purchase a light drug, and at home, adding paint to it, experimentally achieve the desired result. After hardening, it remains only to sand and apply furniture varnish.
Do-it-yourself restoration of wooden furniture
Exclusively high-quality wooden furniture is subject to restoration by one’s own hands – this must be understood and recognized.
It only makes sense to breathe a second life into something that has served faithfully for many years. What was made by masters with a capital letter.
Agree, furniture made of Chinese chipboard is unlikely to fall under this concept. Her destiny is recycling.
Contents
- What does the restoration of wooden furniture give the owner?
- Restoration of “cosmetic” defects
- Full restoration of wooden furniture – show diligence and imagination
- When might you need professional help?
What does the restoration of wooden furniture give the owner?
Old furniture that has been invested with a piece of soul during creation should not die. Such things are an elegant decoration of any private house, any spacious apartment. Cleverly “ennobled” wooden furniture can become a key accent in the interior, inspire the creation of interesting design solutions – from classicism to Provence.
Restoration of “cosmetic” defects
If the furniture has small minor “injuries” – abrasions, scratches – then they can simply be painted over. How? Any artistic paint: the only thing is that you need to carefully choose the color. You can hide the “treated” place with a special composition or ordinary transparent nail polish.
Deep scratches and cracks are successfully treated with furniture wax. On sale you can find transparent or colored, soft or hard samples. Warm up and rub the product. In the case of using transparent wax, the top area will need to be painted over with enamel or colored varnish.
Transparent wax is able to help out your “property” more than once – it is more profitable in economic terms.
If there are chips or deep impact holes on the surface of the furniture, you will have to go to the store for wood putty. The product should be applied carefully, in thin layers, allowing each of them to dry thoroughly. When the defect is completely eliminated, the area must be treated with sandpaper, wiped and varnished.
Complete restoration of wooden furniture – show diligence and imagination
If the condition of your furnishings is so serious that varnish, paint and putty alone are indispensable, only a major restoration of wooden furniture with your own hands will help change the atmosphere in the house.
Restoration technology step by step
- Removal of old hinges, fasteners, etc., if their reliability and appearance leave much to be desired.
- Removal of old paint. To do this, the surface is covered with a paint remover with a flute, and after an hour they are passed over it with a spatula. Rusted metal elements are treated with a special solution. Decayed, dead areas of the surface must be removed with a metal brush. Then the structural elements are quickly washed under running water.
Note! Water should not penetrate deep into the wood – just rinse.
- Dry. It is carried out in the open air, but in no case under the scorching sun (several days).
- Putty. It should immediately make a reservation – it is not always needed. For example, when oak furniture is being restored and there is a desire to preserve the effect of antiquity on a surface that has not been mutilated by time.
- Painting. Acrylic is perfect for painting prepared objects – it will protect the wood from destruction. Of the enamels, alkyd is better – although it dries for a long time, it is of high quality. You can refer to the formulations in the spray. As a “working tool” use a sponge, brush, roller. Two or three layers of coating are made, each of them is allowed to dry thoroughly. As for the color scheme, cream, coffee, peach and other pastel shades will be just right, especially for painting.
- Varnished. Depending on how much sheen you want, choose a glossy, matte or silky finish.
- Painting. This item is entirely up to you. Want to express your creative ambitions? So why not! For a Provence-style house, choose a floral theme, for a country home – stripes and squares. In general, you can come up with your own unique style – the main thing is not to overdo it.

If it becomes necessary to glue individual structural elements, a two-component epoxy adhesive should be used.
 Both surfaces are lubricated (a certain pause is maintained) and tightly compressed. During the day, things do not touch.
When do you need professional help?
In some cases, the restoration of old wooden furniture may require the replacement of backs, walls, doors, legs. What to do? Of course, contact experienced craftsmen to make an identical part. At home, it is not always realistic to do such a delicate matter, since machines, cutters, etc. will be required.
materials for wood Borma Wachs (Italy)
Any furniture or wooden coverings are subject to physical stress and environmental influences. Often we are faced with a situation where the furniture is still new, but due to minor damage, it loses its original appearance and looks untidy. The most common wood defects are scuffs, cracks, chips, damage to the paintwork. Sometimes a small scratch spoils the look of the entire interior and the question arises: “How to fix damage to wooden furniture?”
Let’s try to figure out how to make this simple furniture repair with your own hands.
In general, this process is not very laborious, but there are some subtleties in the restoration of wooden interior items. The Italian company Borma Wachs has been producing products for self-repair of furniture for over 70 years and is one of the world leaders in this field, retouching materials from this manufacturer are ideal for repairing minor defects.
Consider the most popular problems with furniture and wood products:
1. Minor abrasions and scratches.
If the damage to the paintwork is minor, then it can simply be painted over with a special touch-up pencil or marker.
You should pay attention to the tinting composition of these products, the Borma Wach company produces pencils for restoration based on Profix and Profix Pen alcohol stain, as well as retouching markers based on Holzmarker opaque enamel.
You can also buy tinted varnish or colored enamel in bubbles with a brush inside. To eliminate a scratch, you just need to choose the color that suits you best and carefully paint over the damaged area.
Please note that alcohol stain needs to be fixed with varnish or some other top coat. You can learn more about this product on page Pencils and Markers for furniture repair and restoration .
2. Deep scratches and cracks .
If the crack in the wood flooring is deep enough, it must first be repaired with soft or hard wax. This material is rubbed into the treated surface, after which it is varnished or enamelled. Wax can be selected according to the color of the wood being processed, or you can buy a transparent hard wax and choose a tinted varnish or enamel. You can learn more about this product on page Hard and soft wax for furniture .
3. Chips in wood .
A chip in a wooden surface is a serious defect, but nevertheless it can be repaired by yourself. As we have already said, hard and soft wax is used to repair defects. But to combat chipping, wood putty would be a more appropriate choice. Borma Wachs produces putty on a water, nitro and polyester basis. This material is applied with a spatula and after drying completely imitates wood. Putty is also selected by color and can be tinted with stain.
4. Paint damage .
It is not uncommon for a lacquered furniture or floor to be dented by a heavy object being dropped. In this case, it is very difficult to restore the integrity of the coating, the most suitable materials for this are Holzspray retouching non-halo varnish spray or transparent varnish in a bottle with a brush inside. These materials are selected according to the degree of gloss of the restored surface. However, it is not possible to completely level the surface with a spray varnish. For more information about spray varnishes, see page
Restoration Spray Varnish .
Materials for minor repairs and restoration of Borma Wachs furniture you can buy in section Restoration materials in the Online Store.
In conclusion of the review of methods for dealing with defects in furniture, it should be noted that all materials can be mixed together to obtain the desired shade. You can see the colors of retouching pencils, soft and hard waxes, as well as retouching varnishes and enamels in Color chart .
We reviewed the four most popular types of minor damage to wooden furniture and described how furniture is repaired and restored by hand. To eliminate each of them, easy-to-use materials are used.
If you decide to completely restore furniture or flooring, then you will need professional materials and the ability to use them.
In particular, a special lacquer remover is used to renew the paintwork, after which the wooden surface is sanded and processed again. This is a much more time-consuming process, but it is within the power of anyone who seriously sets out to restore furniture. The main thing is to be patient and not be afraid to experiment in the use of materials for wood finishing.
See also:
– Pencils and markers for furniture repair and restoration .
– Hard and soft furniture wax .
– Spray varnish for furniture restoration .
Our Wood Perfect online store has been operating for 10 years.
Due to numerous requests from visitors and regular customers, having extensive experience in the decoration and restoration of furniture and wooden products, we began accepting orders for the restoration of wooden furniture, as well as other products.
The PRICE is calculated individually for each product, for this you need to send photos of your furniture … (and defects where restoration is necessary) to the email address; [email protected]
Master restorer works in his own equipped Workshop in Shchelkovo, Moscow Region.
Restoration and repair of wooden furniture, order in Moscow – Workshop OBIVSHIK
Stages of wooden furniture restoration
The process of returning old antique furniture is complex and consists of several stages, each of which is important and cannot be ignored. The end result of the service depends on this. The workshop of the company “Upholsterer” has all the necessary equipment that may be required for restoration work. And the Restorers to whom you entrust your favorite product have invaluable experience.
How the restoration process works:
- Inspection and assessment of the degree of damage to the product. Our masters in your presence will evaluate the appearance of the item and determine the degree of damage.
- Budgeting. Each stage of work and materials will be specified in the contract.
- Delivery to workshop.
- Disassembly. In the workshop, the furniture is disassembled into its component parts, cleaned of varnish. If required, damaged fragments are replaced with new ones.
- Recovery. The most important stages are the repair of the frame, fittings, chair springs, armchairs, sofas, dresser doors, dressing table, cabinets, upholstery and other elements.
- Additional special effects. We can change the color of the coating, decorate the object with figured carvings, create a “pseudo-Provence” effect, apply decor, insert stained-glass windows and much more.
- Finishing assembly. After a thorough check of the quality and functionality of the furniture, we pack it and deliver it to the client.
 We can change the color of the coating, decorate the object with figured carvings, create a “pseudo-Provence” effect, apply decor, insert stained-glass windows and much more.
 All stages of restoration are carried out using high-tech equipment, modern tools and quality materials.
What can be restored in the upholstery workshop
If you like to decorate your interior with natural wood furniture or modern woodworking products, then sooner or later you will need restoration. Upholsterers are ready to help you repair:
- antique furniture that has been used by more than one generation of the family, cabinets, tables, chests of drawers, antique bookcases, sideboards;
- any product of valuable wood, such as mahogany, rosewood or sandalwood;
- items of modern furniture production – veneered or made of solid wood.

Any furniture is transformed in the hands of our craftsmen, so you can entrust them with your favorite and antique items that keep the history of your home.
Why it is worth ordering the restoration of wooden furniture in the company “Upholsterer”
Sometimes owners of antique furniture try to restore their favorite items at home on their own and face a number of problems:
- the need to purchase high-quality paints and varnishes, primers, putties;
- dust and dirt when disassembling and cleaning furniture from the old coating;
- specific odors from wood treatment compounds;
- unbearable and unhealthy smell of paints and varnishes;
- lack of space for restoration in an apartment or room;
- noise that neighbors can complain about.
Turning to the Upholsterer company, you exclude all unpleasant chores from your daily life and do not experience any discomfort from the need to inhale harmful and toxic smells of varnish, dust, and clean up after the completion of restoration work.
We know of cases when customers, in order to save money, turned to unverified companies and became victims of scammers or received their furniture in a horrific, inappropriate condition, actually damaged by the manipulations of non-professionals.
With us you draw up a contract that guarantees you a high quality of work. Even at the stage of inspection and evaluation, you will present the result, and we are fully responsible for the safety of your property.
Restoration of old wooden furniture in compliance with the technology – the credo of the company “Upholsterer”
Solid wood furniture has a unique structure and original natural color, so working with it requires certain skills, professionalism and compliance with certain technologies. The features of the material complicate the restoration process, so it is important that the master knows all the subtleties of the technology and works in compliance with the rules for working with wood.
During the restoration of wooden furniture, our masters use the following methods:
- Aging – furniture that has served for decades should show signs of aging. Having completely removed the varnish from the furniture, the master artificially creates the effect of scuffs, imitates the result of exposure to sunlight, which leaves traces of a burnt coating.
- Patination – this technique emphasizes the conformity of the product with the spirit of the times and the style of the interior. The surface relief of the object will stand out due to the play of varnish colors. What shade and where exactly to apply, the client decides.
- Brushing is a way to emphasize the unique texture of wood, which could have been slightly lost over the years of use. In the process of restoration, the master scrapes the wood fibers from the surface with a special tool, returning the original “woody” pattern to the products.
 Having completely removed the varnish from the furniture, the master artificially creates the effect of scuffs, imitates the result of exposure to sunlight, which leaves traces of a burnt coating.
 Another popular way is decoration. Pictures covered with varnish are often applied to antique pieces of furniture. If they are worn out or have lost their beauty and brightness, our craftsmen will replace them with new ones.
Masters of the company “Upholsterer” not only own unique technologies for the restoration of antique wooden furniture, but also understand the styles and directions corresponding to different time periods. They can always give valuable advice and help you decide which technologies should be applied in your case.
How to determine that wooden furniture needs repair: signs of restoration
Often the owners of old furniture do not even suspect what kind of interior decoration a chest of drawers, a bookcase, upholstered furniture, a table or chairs made by craftsmen in the last century or even earlier can become. Products can be thrown into a closet and gather dust there for years, but if you carry out restoration, they will acquire their former gloss and bring their “zest” to the house.
Only a professional can evaluate an interior item and determine what kind of restoration it needs. But the visible main signs of the need for repair will not hide from the eyes of the owners of wooden furniture:
- loss of gloss, faded fragments;
- abrasions, many scratches;
- paint damage;
- cracks and deep scratches on the wood surface;
- chips;
- deformation of threaded sections;
- inlay violations.

Only by calling specialists, you can identify defects that are not always noticeable and not striking. They need to be eliminated so that the old product can become a worthy representative of a private or even a museum collection.
Restoration of wooden furniture
It is often difficult to part with old furniture – either it is dear as a memory, or it keeps a special comfort, or it is very comfortable and you don’t want to change it. Wooden furniture is not only practical to use, but quite solid.
However, with negligence, wooden furniture has unpleasant consequences – breakage or deformation of certain parts, chips, scuffs, cracks or scratches.
Wood products generally require special care.
Unfortunately, many owners forget about it, and therefore they are faced with the need to restore wooden furniture – but it is not necessary to buy a new one, as you can simply contact us and restore old wooden furniture.
Masters of Mebel Servis are ready to perform restoration of wooden furniture of any complexity at a decent level.
This service is a rather complex and painstaking process. Restoration of wooden furniture aims not only to transform an old piece of furniture and restore its attractive appearance. The main task of this procedure is to restore the furniture to its beauty so that no one would guess about the past repair.
Repair and restoration of antique wooden furniture
When choosing a workshop that will carry out restoration or repair work, you should be especially careful about this process. An attempt to save money can result in damage or a complete loss of priceless items.
What We Offer:
- repair of loose and broken parts
- restoration of lost decor fragments
- Paint replacement
- restoration of peeling, worn or lost veneer
- Restoration of wooden furniture
implies the preservation of the original frame of the product. As a rule, works on restoration of wooden furniture include the removal of old paintwork, surface restoration ( removal of chips, scratches, abrasions ), production of lost furniture fragments.
If you are interested in our services, just send us a photo for evaluation or call a specialist for evaluation .
Wooden furniture restoration at home in Moscow
If you need wooden furniture repair, use the YouDo website to find a contractor. So you will find professional specialists ready to carry out repairs of any complexity. You do not need to take your broken furniture to a service center, because. service is provided at home. Private masters carry out work in any district of Moscow.
Which types of work can be ordered profitably
Private craftsmen repair wooden furniture using modern technology. They are ready to provide recommendations, as they have been engaged in the restoration of various furniture for a long time:
- kitchen
- upholstered
- antique
You can also order the repair of natural wood products. Private craftsmen will help restore old antique furniture: mirrors, chests of drawers, cabinets, cabinets, sofas, etc.
Performers will eliminate major and minor defects (scratches, cracks). For the care and restoration of surfaces, they use products that are selected individually and depend on the type of furniture. They are also ready to assist in removing stains of any complexity.
How surface renewal processes are carried out
Specialists will restore furniture if it is necessary to eliminate mechanical damage. In the course of work, they remove the old paint and varnish coating and apply a new one. To remove varnish, emulsion washes are used.
Using a spatula, private craftsmen remove damaged or burnt coating. After that, the furniture is completely dried. Then the surface is cleaned with a fine-grained sandpaper. Lacquer is applied to a smooth surface. How much does such an update of wooden furniture cost, you can always find out from Yuda’s performers after submitting an application.
Another problem that private craftsmen will quickly solve is the replacement of part connections. You can seek help if:
- furniture doors are stuck or do not close completely
- doors open too freely
- do not hold hinges
- drawers are jammed
Private craftsmen use modern equipment and tools that allow you to quickly and inexpensively solve any of the problems. They will analyze the condition of the furniture and inform you about the complexity of the repair and the price for it.
In the event that there are problems with the doors, they can be solved by installing metal inserts that will strengthen the structure and hold the doors, cabinet, cabinet, chest of drawers. If the doors do not hold, private craftsmen will be able to fix the hinges more securely or completely replace them.
The creaking drawers will also be repaired by Yudu’s private craftsmen. To do this, they use modern tools or perform a complete replacement of old boxes with new ones at an affordable cost.
Renewal of furniture legs
When furniture legs are repaired, legs are reinforced. The problem of their instability occurs in cabinets, bedside tables, sideboards, chairs, stools. To replace the legs, the old parts are dismantled and cleaned of varnish. Before processing, the surface is degreased, after which the desired area is covered with glue and the necessary part is applied to it.
Be sure to remove all adhesive residue. This allows not only to give the furniture an aesthetic appearance, but also to remove the chemical agent from the surface, thereby preventing the destruction of the paint layer.
Benefits of cooperation
Yudu wood furniture restorers are ready to perform any kind of work at affordable prices. The price for the service depends on the type of damage. Cooperation without intermediaries allows you to inexpensively update damaged furniture.
Restoration is carried out in any part of Moscow. Repair of wooden furniture is carried out with an individual approach, especially if the work concerns antiques. To achieve the best results, private craftsmen analyze the composition of furniture wood, and then select the most appropriate way to work with it. You can order wooden furniture repair on the Yudu website at any time convenient for you.
How to restore wooden furniture: clean, repair and polish
Looking for practical advice on how to restore wooden furniture? You have come to the right place. Abandoned old wood furniture often suffers from a buildup of dirt and grime, dulling its color and luster. With this in mind, antique furniture owners often wonder how to restore old wood furniture (often very valuable items) to their former glory.
Luckily, restoring wood furniture is fairly easy, and we’ve created this easy-to-follow guide so you know what to do for maximum success when you come in for furniture restoration. What’s more, with restoration furniture that always seems to be at the forefront of home trends – in both vintage and contemporary real estate – and therefore more costly to acquire, you can now save on something beautiful by simply building your own.
- See our wood care, cleaning and polishing guide furniture if you have more modern furnishings.

More from Period Living magazine
(Image credit: Period Living)
Period Living is the UK’s best selling magazine for period homes. Get inspiration, ideas and advice straight to your door every month with a subscription.
The mahogany desk in this project below had an ugly watermark defaced at the top that also needed attention. While refurbishing old wood furniture is not difficult, we always recommend using the right products. Our guide below will tell you about professional furniture repair and cleaning.
When you’re done, check out all of our cleaning purchases, instructions and tips to help keep the rest of your home radiant. You may be in need of more professional advice on restoring antique furniture and all antique property – both interior and exterior. external? Go to our Period Living Center page.
Everything you need to restore old wooden furniture:
Everything you need to restore old wooden furniture …
How to restore old wooden furniture: step by step instructions
1.
 Preparing for dismantling
Removing furniture is a messy business, but it is the key to wood restoration, so work outside if possible. If you work indoors, protect floors and any furniture nearby and ensure good ventilation. To avoid damaging the finish of the table body, cover it with a plastic sheet so that only the top is visible. Apply the stripper liberally with an old brush.
2. Let the layers dissolve.
For a good result when refinishing wood, leave the remover on for 5-30 minutes until the coating – a mixture of old varnish and polish – dissolves. The length of time will depend on the composition and thickness of the coating. If the stripper has not removed all layers, simply spread the paste again and it will continue to work.
Restoring wooden furniture may seem like an art, but it’s easy to do.
3. Neutralize the chemical cleaner.
Neutralize the wood with a steel wool swab impregnated with mineral spirits or special wax and polish remover, following the grain of the wood. Always read the label carefully before using any chemical, as different strippers require different neutralizers. If the stripper is not neutralized, it may reactivate and wood restoration may not go as planned.
4. Clean the rest of the table:
The next step in refinishing furniture is to wipe off the residue with a cotton cloth and leave it on for 24 hours. In the meantime, brush away dirt and old polish elsewhere by applying wax remover to steel wool or a rough cloth and working on small areas at a time. Leave for a few minutes for the wax to soften and wipe off with a clean cloth before it hardens.
5. Return to the countertop
24 hours after sanding the countertop, use a sanding block and very fine glass paper to smooth out the wood fibers raised during the sanding process – work with the grain. Shake and vacuum the protective sheet to get rid of any dust that can ruin the finished part. At the end, wipe the top with a sticky cloth.
6.
 Treatment of bleached wood areas
When you restore furniture, you will notice that each piece is different. will make the countertop uniform in color. Apply generously with a brush and allow the stain to penetrate; wipe off excess with a rag. Ensure an even finish by working in good light.
Restoration furniture is the perfect way to bring something timeless to both antique and modern objects.
7. Improve gloss and finish when refinishing wood.
Once dry, apply a coat of finishing oil with a brush or lint-free cloth. Let the oil soak in for 10 minutes and wipe off excess before it becomes tacky. Wait at least five hours and rub gently with a 0000 steel wool before applying the next coat; repeat again – the more layers, the greater the durability and shine.
8. Finishing spruce with wood restorer
Finally, carefully apply a thin coat of good furniture wax to the entire table. Leave for at least an hour and polish with a lint-free cloth. To avoid warping due to wood drying, place furniture away from radiators and fires. Sunlight will discolour wood, so make sure it is not under a window.
Home Remedies for Restoring Old Wooden Furniture
There are a couple of other tricks you can use to restore furniture at home. You can remove surface dirt and old layers of wax varnish with a homemade mixture of four parts mineral spirits to one part linseed oil. If the finish still looks a bit lifeless, pour some proprietary woody fragrance onto a cotton cloth and buff vigorously.
One such product that works when refinishing wooden furniture:
- 1 part linseed oil
- 2 parts methamphetamine
- 2 parts turpentine
- 2 parts distilled vinegar
- Dish soap, sponges and towels
- Paint stripper
- Varnish thinner
- Sander
- Fine sandpaper
- Paint scrapers (plastic or metal)
- Epoxy putty
- Wood Sealant / Lacquer / Polyurethane
- Stain or paint ( Minwax is a great brand, be sure to choose the right color!)
- Fall
- Wax
- Goggles
- Chemical resistant gloves
- Vacuum cleaner
- Natural bristle brushes
- Masking tape
- Lots of clean rags and rags
- Clean water bucket
- Stirring sticks
- Empty paint or coffee cans
- Adhesive and clips for repairing and reinforcing furniture
-
Is the piece solidly built?
-
Stable or will it need to be re-pasted?
-
What will it look like after the renovation?
-
Rejuvenation
-
Repair
-
Restore
-
Visible rings and watermarks visible under existing trim.
-
Surface feels tacky even after cleaning.
-
Worn spots and stains remain even after cleaning.
-
The wood has darkened due to a discoloration of the clear coat.
-
There are cracks in the existing finish to the wood.
-
Finish peeling and peeling.
-
Wear protective equipment, including goggles and chemical resistant gloves.
-
Before you start, read the label on the chemical remover and follow the instructions (especially how long the cleaner needs to stay on the wood surface).
-
Use rags or cardboard under furniture before sanding or using a chemical paint remover.
-
Apply the chemical stripper with a quick and even brush stroke as the product begins to evaporate.
-
Use a natural bristle brush to penetrate the grooves.
-
Apply another coat of stripper over if the coating does not come off after 30 minutes of soaking.
-
Allow parts to air dry for 24 hours before proceeding to the next step.
-
Dispose of leftover chemical products safely by consulting with your local waste disposal company.
-
If it’s an antique, you may not want to paint over it to keep it authentic.
-
If you don’t like the existing wood color or texture, you can repaint it to another color.
-
If the part is to be used in a high traffic area, it may be more resistant to stain and sealant damage than paint.
-
If the product is not made of high quality materials, you can paint it to make it look better.
-
The type of wooden furniture you want
-
The reliability you need
-
The type of wood your furniture is made of
-
How the product will be used and how often
-
Your own skill level
-
Use full or natural light:
-
Keep your work area clean:
-
Mixing products:
-
Spot color test:
- Start by cleaning antique furniture with a soft cloth dampened with soap and water. Dry thoroughly.
- If the part has a shiny surface, you can wipe it down with Deglosser Liquid Sanding Deglosser . I also did this to darken a piece of furniture with pretty good results. You won’t achieve a completely new look, but it can help bring an overly red or orange tone down a notch.
- The instructions on the bottle say to use thin steel wool to apply the liquid if your piece of furniture has deep scratches. That’s exactly what I did. If you want to achieve the same color finish, use the stain that best suits your piece. Approximately 9 different finishes are available.
- After Howard is well finished, dry and remove excess with a cloth or paper towel. You may need to repeat drying and wiping a couple of times.
- The instructions also say to finish with Howard’s food and wax. I will do this after a couple of days to allow the Restor-a-finish to fully absorb.
The addition of wax will protect the finish and can be used for occasional cleaning.
- Remove hardware from antiques and wash with soap and water.
- Using an old toothbrush, rub Howard’s Pine-Ola Copper and Brass Polish over the handle or handle. (Or anything brass or copper)
- I like to clean all the parts and then buff the polish and the polish to a shine.
- Wash with soap and water and dry thoroughly.
1 wax, and that should bring him back to life.
How to restore old wooden furniture
Are you going to an auction or a thrift store? While you’re there, take another look at those old tables, chests, and everything stuffed into weird corners. . . and don’t be distracted by ugly paint or varnish. What’s under the surface can be quality furniture that makes a great addition to your own home or can be a welcome source of extra cash.
Often the difference between a dust collector and a garbage collector is just one simple step: repainting. I have spent some time learning this skill and find it very useful and profitable. My house is full of old furniture that I bought for next to nothing and made beautiful at a low price. . . and there’s a thing in the basement right now that cost me $90 and should easily sell for over $300 when I’m done with it. I admit that the work is not exactly fun, but now that I have perfected my methods, I really think that home business is really fun and rewarding.
My first and most important piece of advice to anyone who wants to copy my success is: “Forget all the repair manuals you may have read.” Most of these jobs place incredible demands on your time and money. For example, a perfect glossy finish is difficult to apply and is a waste of effort. The same goes for most “grain fillers” and sealants. It’s the same with oil. fragile finish. Forget all that and let me tell you about my favorite method for restoring old wood furniture… a faster and less expensive method that makes beautiful old wood look like beautiful old wood.
What you want In used furniture, look for good wood hiding under layers of poorly applied paint or varnish. The more carefully its quality is hidden, the more valuable the piece will be when you’re done. Many small items and almost anything that is lightly crafted will be auctioned out of sight. . . so it’s best to bet on the big glued freaks.
The material, construction and appearance of old furniture is more important than the details or its current state. I even bought pieces that fell apart, provided the wood wasn’t cracked and the joints themselves – unlike their wobbly fasteners – were in decent shape.
Look at the undersides, chips, etc. to see what the wood looks like and don’t be fooled by plywood (they peel, split and bleed, and pieces coated this way are worthless at best if only they don’t. .. unusually for some reason). Below are my favorite materials, listed in order of preference: oak, walnut (although there may be stripes on the finish), pine, maple, and birch. Mahogany bleeds heavily and is very soft. As far as I know, other forests may be normal, but you are unlikely to encounter them.
Furniture and Tool Restoration Workshop
First, you will need a well-lit and ventilated place to work. . . away from fire, children and livestock. An old barn is fine if you don’t need a floor. (The paint stripper not only eats away any surface, but also newspapers, cardboard and plastic.)
You will be using a lot of semi-paste stripper and some liquid. Avoid “flushable” products. . . they are dirty and can ruin furniture. Also avoid homemade beer, which works but is often more dangerous than commercial alkalis and can harm wood. Keep in mind that any paint remover is a , which means . . . and treat it accordingly.
The varnishes you buy should only be glossy polyurethane or epoxy as they are the most durable and easiest to use. You will surely regret any flirtation with a cheap penny finish or “lacquer stain”. I would also avoid “antiques”. Bad way on beautiful wood, and if the surface is damaged, I’d rather cover it with oil paint applied over a heavy primer.
What about stains? The oldest tree does not need it. . . but if you do buy such a product, make sure it is compatible with the polish you are using. Ask the person at the paint store (and make sure it’s – that’s paint, not a dime or hardware store if you have the dealers choice).
The following is a list of required tools, roughly in order of use:
1. Goggles. Always, I mean ALWAYS, wear them. . . and work clothes with long sleeves.
2. Cloth gloves. I have not found any rubber or plastic that really stops the paint from peeling off. The skin is useless too.
3. Hand cream to be applied before putting on gloves and after washing dishes. If you skip this precaution, your skin will keep you awake at night.
4. One large, flat, blunt metal scraper (such as a pancake rag or spatula) and many smaller homemade wooden scrapers.
5. A bucket of slime to catch all the mess, even if you don’t care about the floor in your work area.
6. Small wooden brush with fine, stiff bristles (for wet strippers).
7. Toothbrush (only for cleaning dry surfaces). No. 2 and No. 0000 steel wool. Also a lint-free cloth, if you can find one, for applying the polish.
10. Glue. White glue is easy to use, but just about any kind will do. However, forget the concealer adhesive and beware of high solvent adhesives that can stain or ruin the finish.
11. Screws, etc., if needed.
12. Other tools? There is only one rule: do not buy anything expensive unless you are sure that you want to dive deep into this business.
Finally, the most important tool of all. . . the one you’ll need the most: patience. Throughout the work, work carefully (with love, if you can).
Preparing the furniture
Dismantle the table or similar in careful ways. If its connections and screws are solid, it’s okay … don’t torture them by trying to separate them. Any loose fasteners should be unfastened. The old adhesive, etc., can then be removed and the pieces left separated until the refinishing is complete.
Cleaning wooden furniture
First of all, wash an inconspicuous part of the product with soapy water to see what comes off. Sometimes the “black paint” turns out to be just a water stain, and you are already at home. (However, never wet bare wood or the grain will rise.)
Bad luck with water treatment? Then, liberally but gently wipe the stubborn remover with a rag swab. Wait an hour. . . and when the chemical has lifted the paint, push the coating away (large areas first, then the details). Note that I said “push”, not “scrape”. The goal is to remove the paint without damaging the wood. Use as little pressure as possible rather than trying to push softened debris back. The stripper is a real tool, the scrapers are just an extension of your hands.
Paint stripping adhesive left on too long becomes tacky and most of it should be removed between paint scraping cycles. When nearly all of the old trim is safely placed in the tack pail, remove any residue with #2 steel wool and wipe the piece dry with a rag.
Parts can be cleaned with a liquid stripper. . . but remember that such a preparation “cuts” differently than half a hundred, and does not leave the wood exactly the same. To avoid streaks, keep the stripper on large, flat surfaces: only let it hit other parts.
Remove softened paint with wooden scrapers, string, and a wooden-handled brush, allow surface to dry, and brush off remaining debris from crevices with a toothbrush. (However, do not use a tool to remove the liquid, otherwise the plastic will melt.)
Give the product you are working on , dry for a day or more. Then grate – only with grain! – with steel wool No. 2. (It’s not sanding! You only need to cut off the frosting left over from the stripper.) Finally, give the piece a good rub down with a rag, paying particular attention to detail.
Fine
If the part you are restoring is not currently striped, good. If this is the case, either lighten the dark areas with liquid paint remover on a rag, or treat the light spots with a few drops of stain applied in the same way. Evenness, not perfection, is the goal.
I’ve said it before and I’ll say it again: old wood is beautiful on its own, and I don’t think most of the furniture needs to be painted. If you feel otherwise, use restraint so that the end effect is natural. Lightly apply paint, wait a few minutes and wipe with a rag. Never try to get a deep spot in one coat or the paint will look bad. Let the finished work dry overnight before varnishing it.
Professionals clean the furniture with a vacuum cleaner and a “rag” just before varnishing.. . but you can get the same effect by carefully wiping the surface with a rag. Then wipe the finish with a lint-free cloth. Hurry up, work the coating well (it will be a separate sealant) and make sure that there is no excess left on the corners and edges. Let the part dry completely, dust it again and apply another coat (less varnish this time). Repeat the whole process as often as you like. . . but keep those jackets light!
When you have applied enough thickness of varnish to suit your needs (remember, you want the surface to look like wood, not glass), rub the dried top coat lightly with No.0000 steel wool to remove the shine. The result is a beautiful, low sheen protective coating that is very hard and waterproof and looks and feels like an expensive oil finish.
If necessary, assemble the part using only enough adhesive to do the job (excess white adhesive can be wiped off with a damp cloth). Then, if you want a high sheen like old furniture in museums, apply a thin coat of wax and rub it off.
Sale
Don’t rush to sell the product, otherwise you will get less than it’s worth. If the product is not small, advertise it separately or only with similar items. Display it in your living room or other beautiful place. . . not in the workshop if there is no clear area for demonstration. And if the thing is really first-class, consider getting it appraised, and then sell it with a closed auction.
It’s actually hard to lose money on good wood, beautifully finished, no matter how you handle the deal. Demand for any kind of quality woodwork is currently high and constantly improving. You should be doing quite well rescuing Cinderellas from the junk shop and revealing their true beauty.
Learn more about how to breathe new life into old furniture:
• Tips for Repainting Used Furniture
• How to Reupholster Furniture
• The Many Benefits of Repainting Old Furniture
Originally Published: September/October 1975
Pro Tips for Refinishing Solid Wood Furniture: A Craftsman’s Guide
Pro Tips for Refinishing Solid Wood Furniture: A Craftsman’s Guide
Restoring old or antique wooden furniture is a popular hobby that has been growing in interest in the past few years. This is a creative and rewarding DIY project that can provide you with eclectic and high quality items for your home or office.
But there is a lot to know when it comes to do-it-yourself furniture repair. There are certain steps to follow and many factors to consider. Whether you’re restoring a family heirloom or finding a rough diamond, the following wood furniture polishing tips will help you with your next project. This guide will also help you know when to polish antique furniture and how to polish wood tables, chairs, chests of drawers and more.
Wood Furniture Repair Checklist
Before you start restoring or repairing wood furniture, it’s important to get all your supplies in order so you can complete your project more efficiently. Below is a helpful consumables checklist to follow when starting your next wood furniture renovation project:
Other materials that may be useful include:
Deciding when to repair antique furniture
Before you start removing the trim from a wooden chest of drawers, tables or chairs, you first need to decide if it needs to be removed at all. Sometimes the wood doesn’t need to remove the existing trim. Rather, all it needs is a clear coat to be rubbed down to bring it to life.
Many furniture repair and restoration enthusiasts and experts oppose refinishing wood furniture for fear that it will reduce its monetary value. However, representatives of the other camp of amateurs and professionals in the field of furniture restoration will argue that re-polishing furniture prolongs its life. They believe that if your goal is not to get a monetary return on your investment in a product, then restoring and refinishing the product will allow you to get more value out of it in the long run.
If you’re wondering what signs to look for when deciding to refurbish antique furniture, or whether it should be restored at all, there are some initial considerations to consider. The first step is to inspect the unique product and determine whether it is worth doing restoration. Ask yourself some of the following questions:
If an item is painted, there is usually a reason for it. Owners paint over items when trying to hide dents, stains, and other imperfections. You can get more than you expected with a painted wood piece. In some cases, you may be better off choosing a piece that only has lacquer on it.
Items before the 1960s are usually made of solid wood. Any parts after that are usually not made from solid wood, but instead are made from laminate and chipboard. These materials usually do not require additional finishing. On the other hand, old wooden objects created before 1850 can be quite valuable. If you are not sure about the value of an item, consult an antiques expert before starting a refurbishment.
Check the strength of the part. If it wobbles from side to side, is uneven, or falls apart somewhere, it will need to be taken apart and re-glued (and held together with clamp until the glue dries) to ensure stability. Ask yourself if you are ready to take this step. If so, can you do it yourself or will you need to hire a professional to do this? If you’re specifically wondering how to polish wooden chests of drawers, look at the drawers and see if they hold together correctly.
Refinished antiques can often turn darker than the original wood. To get an idea of what the finished state will look like, find the part of the item that remains original and untouched. Whatever color it is, expect the final product to be darker. Also ask yourself if you like the texture of the wood or not. If you don’t, then it’s not worth the time to refinish the item if you plan to keep it for yourself.
Based on your answers to these questions, you will be able to determine how much of your equity you are willing to invest in a furniture restoration project. If, after answering these questions, you decide to proceed with a furniture restoration project, then the next step is to determine how you will restore it.
Choosing a way to restore wooden furniture
Restoring wooden furniture is not the first and only way to bring an object back to life. Instead of completely refinishing a piece, you can simply rejuvenate or repair it. There are three main categories of furniture restoration projects:
While keeping the existing finish, you can simply wax the surface and restore it. This is the simplest method and works with wood furniture that is still in good condition.
Without removing the trim, you can repair dents and cracks by touching up some worn areas. This method allows you to save the finish, but use special tools to fix the product.
Using a fine sander or sander, you can remove the current finish, make any necessary repairs and touch up, and then apply a new finish.
With these options in mind, you may still be wondering if refinishing your wood piece is the right way to go. If you’re unsure, you should be aware of the various signs that indicate it’s time to refurbish your wood furniture.
Signs it’s time to refurbish your furniture
There are several different signs that it’s time to renovate wood furniture that you should be aware of when starting a restoration project. These include different items to look for and different methods you should use when looking for these signs. Here are a few ways to know if it’s time to repair antique and wooden items:
If your furniture has any of these marks, it might be time to refurbish it. Even if the product does not display all of these signs, you may still feel that its current condition looks terrible and you are better off just completely refurbishing it.
But before you go to town with chemicals to strip wood furniture, you can use the white spirit method (see video below) to determine if the item needs to be polished. To do this, pour about mineral spirits on the surface of your wooden chair, table or chest of drawers.
You can rub a section of wood with mineral spirits and wait for it to soak. This will show what the finish will look like if you skip the re-polishing steps and just apply a clear coat. If the finish looks good, you don’t need to dive into the refinishing process. Instead, you simply clean the part and apply varnish.
Our Top Furniture Renovation Tips
If you decide to continue refinishing wood furniture, here are a few tips to follow.
The following are six basic steps that deal with how to polish wood furniture and how to clean finished wood:
Step 1: Clean the part cleaning the item in question. This is especially true if the item has been stored in a warehouse or outdoors for a long time. Also, if you don’t know exactly where the part came from, chances are it’s covered in a layer of dirt from dust and dirt buildup.
Many people think that using a heavy duty cleaner will remove particularly dirty items more effectively. However, the easiest and most effective way to clean and protect your item is to simply use a mixture of Dishwasher and warm water. Some pros suggest using Dawn or a similar dishwashing detergent.
Scrub the surface gently with a soapy sponge, or use a brush if your item has moldings or carvings. After you have cleaned the surface, rinse it off with fresh water using a wrung out sponge. After the soap has been removed, pat the bar dry with a towel.
Step 2. Assess the current condition of the furniture
Once you have cleaned the piece, you will get a better idea of the overall scope of the project. paint, dents, chips and cracks.
Perform an overall assessment of the part and determine what needs to be done to repair it. This will help you determine what supplies you will need, such as scrapers, epoxy putty, and putty wax.
Step 3: Remove Old Finish
If you’ve never done this before, you might be wondering how to sand wood trim. There are two main ways to do this. The first way is to sand it and the second way is to use a chemical cleaner:
Use coarse sandpaper, sanding block or sander to sand the surface until the surface is smooth. Once most of the finish has been removed, switch to medium grit sandpaper to remove the shine. Finally, finish with fine grit sandpaper to smooth the wood until all finish is removed. Don’t forget to rate your sanding work to get a perfect finish by watching the Youtube video above.
Chemical stripping products are designed to easily remove finishes from wood. Choose a liquid or semi-paste product that may or may not contain methylene chloride (MC). Spread the remover evenly over the surface of the wood with a bristle brush.
Let the strippers stand for the time recommended by the stripper, the surface material should wrinkle and be scraped off. Continue using the scraper until all trim has been scraped off. Apply lacquer thinner to rub the wood and remove any remaining residue, finish or wax from the remover.
If you have never stripped wood before, here are some tips you can follow to make the job safer and easier:
Step 4. Apply a coat of sealant
Once the finish has been removed and the product is completely dry, it’s time to move on to coating. If you have used a chemical cleaner, you may need to sand the surface of the furniture with 120 grit paper to completely remove any residue.
An optional step is to fill in the texture of the wood furniture to your liking. If your furniture has a dense wood grain, it will not need filler. However, if your furniture has a more open texture, such as oak or mahogany, you can apply grain filler. You will need to choose the right grain filling product, depending on whether you want to emphasize or tone down the grain, and what color you want to end up with. Also check if grain filler should be applied before or after staining.
Finally, you need to seal the wood to prepare it for staining. The sealer protects the wood and creates a base for the stain to spread more evenly. Apply a thick layer of sealant and let it soak into the wood. Wipe off excess with a clean rag. After the sealant has dried, sand the surface of the furniture again with fine-grained sandpaper.
Step 5: Stain or stain the wood
After applying the sealant, the next step is to paint the wood furniture. This is a personal decision and there is not necessarily a right or wrong answer. When choosing between staining or staining wood furniture, consider the following:
There are several stain removal options. There are stains on a water, oil or gel basis. There are also products that are stain and finish two in one. Be sure to follow the instructions on the product label before dyeing. Minwax is a great brand of stain to use. There are many colors to choose from, so be sure to test the color of the stain on another piece of wood before applying it to the furniture.
Paints
also have several options to choose from. There are various types of paintwork, such as oil-based enamel or latex, that provide a durable finish. Follow the instructions on the product label before applying a coat of paint.
Step 6: Apply the Finish
The final step after painting the wood furniture is to apply the top coat. There are different finish products to choose from. Your choice will depend on several factors, including:
Because some finishes are designed to be sprayed, additional spray tools are required to complete them. Beginners and hobbyists are advised to use lacquers that can be wiped or brushed on.
Here are some of the many brush and wipe finishes to choose from:
These are simple products and easy to use. An oil finish tends to soak into the wood well and makes it easy to rejuvenate later on. They don’t provide much surface protection, so they’re best used on chairs or chests of drawers rather than countertops.
The wipe varnish can be applied in multiple coats if desired. This allows you to control the level of sheen your furniture will end up with.
Brush applied, oil-based polyurethane varnishes are durable and can protect your furniture from scratches and dents for years to come. This type of finish is suitable for coffee , dining and kitchen which are subject to heavy wear.
Once you have chosen the best product to finish your particular piece of furniture, you can add a coat of wax paste to enhance its shine and further protect it from scratches.
Latest tips for finishing wood furniture
Now that you have a better understanding of the process of deciding when and how to repair wood furniture, here are some helpful tips to keep in mind during the process:
When painting or painting and finishing wood furniture, make sure you work in a fully lit area. This will help you see streaks, streaks, or missed spots before it’s too late.
Throughout the furniture repair process, remember to keep your work area clean. This includes cleaning up dust after sanding. Dust particles can get on the surface of the wood and get under stains and finishes. Once you’ve vacuumed up the dust, wipe the wood with a damp cloth before applying the top coat.
Never shake a stain or varnish container. Instead, gently stir the mixture to make sure all the ingredients are properly distributed and do not settle to the bottom.
Don’t rely on what the samples say when you decide how the stain will look. Always test the stain on a separate area of furniture first, and then apply it to the entire surface. This will prevent any unwanted surprises when you start covering the most visible areas.
Preserving your wood furniture
Once you have completed your wood furniture repair or restoration project, it is important to maintain and protect it as best you can. This includes cleaning and cleaning the product regularly and preventing damage.
If you’re looking to invest in new, high quality wood furniture for your home, browse our inventory at AmishOutletStore.com to see our fine selection of handcrafted dining, living and bedroom pieces. Our solid wood furniture comes in a variety of finishes and will last for generations to come.
How to Repair Wood Tables / Furniture: 10 Steps (with Pictures)
Once you have sanded all surfaces using 80 grit paper, now is the perfect time to repair woodworking or replace any parts.
If your part was made using traditional joining methods such as seam, dowel, mortise, tenon and glue, they may have loosened over time if your part is old or has gone through a hard life. Some joints, such as table legs, wobble more than others, making the table unstable, so it’s best to try and fix them.
If you have any loose seam in this design just squeeze some wood glue / PVA glue as deep into the seam as possible, too much glue is better than too little as you can always remove any extrusion. connection by checking the angles and evenness with a set square (assuming your feet are vertical, if they are not you will have to use an adjustable corner square find the angle from the foot which is ok and compare that to what you are repairing) and spirit level.
A few tips for repairing tricky joints:
If you can’t get the nozzle of the bottle of glue into the joint and the adhesive is squeezing out all over the outside of the joint, I sometimes use a surgical syringe to squeeze some glue right into the joint. joint crack.
Sometimes clamping joints together when repairing them is difficult because other parts are in the way or for some reason it is quite inconvenient, so I sometimes use a car/trailer ratchet strap to tighten the joint and evenly distribute the clamping pressure around the part. I usually use MDF/wood/corrugated board scraps to protect the wood from the metal ratchet. Alternatively, you can use an old belt/straps, or even rope if it’s small. Edged wood can always be used as a tensioner between the part and the belt. I find this to be a good way to clamp large or irregularly shaped objects.
Another tip: leave the squeezed out glue to become elastic/tacky, which can take from 15 minutes to a couple of hours, depending on the conditions and the amount of glue squeezed out, and scrape it off with a sharp one, it is better to wipe it with a damp cloth, and sometimes, only sometimes, leaving a mark where you rubbed the glue on the wood so you can never remove it. However, if you’re careful, you can still wipe off the glue with a damp cloth if you like.
Back to my project. Some of my table legs were loose but they just needed to tighten the bolt up to the corner bracket. However, I did notice that the corners of the wood were split at the top where the bolt inserted into the legs (you can see this better in the photos), although I believe they have been like this since they were made, and it doesn’t affect the structural integrity of the table at all, I’m a bit perfectionist so had to fix it even if it won’t be visible.
I tore off the cracked piece until it completely broke off or hung on the shard, as it’s actually easier to repair than trying to glue a tiny gap. It seems counter-intuitive I know, but in fact the piece will come back perfectly, the wood splinters mean it will only fit one way. Apply some glue and put it back in place, it should snap into place, and clamp with a piece of wood between the wood surfaces and the surfaces of the clamp, so that the chipped piece is flush with all the planes of the leg and so that the clamps cannot damage the wood.
How to restore antiques without refinishing.
Over the past year, I have tried at least 3 pieces of furniture in our lobby. After my last purchase on Facebook Marketplace, I finally found “the one”.
However, my perfect size and dream style sideboard was inexpensive due to the condition it was in.
There were rather deep scratches and abrasions on the top. The rest of the item is in very good condition, but the top was in such a state that it probably needs to be polished.
While I might consider refining it in the future, I just didn’t want to waste the time needed for a bigger project like this right now. I just wanted to restore.
My mom has highly recommended this product to me for years, and on one of my recent trips home to Louisiana, she sent me home with a few bottles. In fact, she sells quite a few of these items from her kiosk in the antique shop.
I used it to bring a few antiques to life. But when I shared my stories on Instagram recently, you definitely wanted to know more! So, I thought it would be worth blogging about it.
This is not a sponsored post. I just really like this product. This post contains affiliate links.
This china house was in excellent condition, but I would describe it as “thirsty”. I used some of Howard’s tools to darken the surface a bit.
I have a full recap of my featured Instagram stories below.
How to use Howard’s Restor-A-Finish to restore antique furniture without refinishing.
Restoring brass knobs and knobs with Howard’s Brass Polish.
If you want to restore the beautiful shine of your original brass hardware, try Howard’s Pine-Ola Copper and Brass Polish. I’ve never seen something like this work with such ease.
Be sure to check out Howard’s Wood Products. I have yet to find one that I didn’t like.
I love that these products help restore antiques while maintaining their original look. Scratches, white heat rings, watermarks, smoke damage, and fading almost disappear with Restore-A-Finish.
Looking for more inspiration? One of my favorite renovation projects also involves skillful woodworking. I turned the bed into a desk! Click on the image below.
8 tips for repairing and repairing damaged wood
Wood is a beautiful decorative element, but it often needs a little work to reach its full potential.Here are eight easy ways to repair and restore common wood problems. Let the natural beauty of your home’s wooden elements shine through!
1. Natural wood restoration
Try a natural ingredient before buying wood stain. Coconut oil not only moisturizes the wood, but also restores its natural color and soft sheen. It may appear that the wood is darkening, but it is actually a restoration of a healthier and more natural color. Pretty cool secret power of coconut oil, huh?
2. Naturally Stain & Darken
For a darker yet more natural color on wood, try vinegar! You can use balsamic or apple cider vinegar, whichever color you prefer. If you rub the vinegar with a wire brush, this wonderful wooden craft will take it to the next level!
3. Repairing Minor Dents and Scratches
To repair fairly minor damage, simply use this all natural recipe to repair wood.
Thoroughly mix a cup of oil (rapeseed oil will do) and a cup of vinegar (white or apple cider). Follow the instructions for use and your wooden parts will look like new in no time! You can also fix scuff marks by rubbing them with a walnut!
4. Serious Damage Repair
If you have a lovely piece of wood but it’s hard on the eyes, it’s time to disassemble the Bondo Universal Filler! Bondo is an alternative to conventional wood fillers and is preferred by many furniture restorers on Hometalk. Stir Bondo, apply to uneven, damaged area, then sand. After that, you can repaint the entire part to look even.
5. Return to the main wood
If you have an old piece that has been stained and abused over the years, peel off the layers of time by stripping it down to the original beautiful wood. Depending on the size of the problem area, you can either sand it (fine) or use liquid paint remover (large). To apply the liquid stripper, spread it evenly with a wood shaving brush to create a nice thick coat. Leave the paint remover on for 30 minutes, then scrape it over the wood thread. Get an accurate step by step guide from Finding Silver Pennies on Hometalk.
6. Wood Repair Like A Pro
Wood repair may sound simple; just buy a stain and apply – but check with the furniture repair experts at Hometalk, there’s a lot that can be done to improve the staining process. First, remember to sand the wood even if you don’t see any finish or top coat. You have to sand the grain (in the same direction as the wood grain). For best results, start with a coarse grain and finish with a fine grain. A beautiful smooth wooden surface will easily absorb stain and evenly stain. Apply the stain with a rag for better control and buff thoroughly at the end for a more durable and attractive end result!
7. Repair Holes
Do you love the look of reclaimed wood or pallets, but old unattractive nail holes get in the way? Well, give them a shot with this recovery trick! It’s better to fill the holes with wood rather than glue to keep the stain looking even and natural. Just sharpen a toothpick, skewer or even a caramel apple stick and stick it in! Once you’ve sanded it to a finish, you’re ready to go!
8. Fix watermarks
Is that annoying watermark refusing to cooperate with your restoration or repainting efforts? Spray on that pesky stain on your boot! A shouldac finish such as Zinsser Bulls Eye Spray will close the mark and prevent seepage so you can paint with peace of mind. Check out how Debbie put a wand on her water stain on Hometalk.
Furniture repair and restoration is easy if you only have the right instructions! On Hometalk you can easily find all the repair manuals for any furniture!
How to Refinish Wooden Furniture: Tips and Tricks
Reamalgamation is a grand revival technique that can make alligator-crazed, cracked, and scratched furniture look like new. In essence, reamalgamation is almost liquefying a damaged finish so that it dries firmly and flawlessly. It works like magic, it’s simple, and eliminates the need for refinishing. If it doesn’t work, then you haven’t spent too much time and effort trying.
Alligation, cracking and cracking are basically the same thing. All are caused by sunlight or temperature changes, and all can be removed by re-amalgamation. The alligator trim has many fine lines intersecting in a coarse pattern; the insane finish has messy lines running all over the place; and cracked finishes have larger lines or only one line running across the surface. Scratched surfaces can only be repaired if the scratches do not go below the surface of the coating. If the scratches are on the wood itself, you will need to polish the surface.
The type of furniture finish determines the solvent used for reamalgamation: shellac is reamalgamated with denatured alcohol, lacquer with lacquer thinner, and the lacquer/shellac mixture with a mixture of three parts alcohol and one part lacquer thinner. Lacquer is usually not subject to re-amalgamation.
Before finishing, thoroughly clean the furniture with mineral spirits or turpentine to remove all wax and dirt. Do not work on a very wet day if the finish is covered with shellac; the alcohol used to thin the shellac can draw moisture out of the air and into the varnish, causing haze or redness.
The secret of reamalgamation is fast work, especially with varnish. Start with a small area to get a feel for it; once you are satisfied with your results, continue mixing all the finishes. Apply a moderate amount of thinner with a new, completely clean natural bristle brush. Buy a store-bought mixer or mix it yourself. Use denatured alcohol for shellac, lacquer thinner for lacquer, a three-to-one mixture of alcohol and lacquer thinner for the lacquer/shellac mixture.
To regrind the finished surface, apply the thinner along the grain of the wood in quick, long strokes; work quickly and don’t let the brush dry. Do not attempt to erase any cracks or scratches at this stage; many of them will disappear as the coating dries. If you work too hard on individual marks, you can actually remove the coating instead of thinning it out.
As the solvent dries, the coating will have a high gloss and then become very dull after about 30 minutes. If the reconnection is successful, the scratches and nicks will disappear and the finish will appear hard.
Reamalgamation is not always a one-step process. If the cracks in the finish are deep, two or three applications of thinner may be required to remove them. If reamalgamation does not work, the problem is probably with the wood; you will have to repair it.
After the repaired surface has blunted, lightly buff the finish with a #0000 steel wool, working in one direction along the grain. Don’t use too much force, just lightly polish the surface. Then wipe the surface with a clean cloth. If the reamalgamated coating is very thin, clean the surface with an adhesive cloth and apply a new layer of the same coating on top of the old one. Let the surface dry, lightly polish it with steel wool No. 0000, and then rub the furniture with hard wax. Polish the waxed wood with a clean cloth.
Restoring discolored surfaces
Reddening, milky discoloration of the finish is a common problem with shellac-finished furniture and can also be a problem with lacquered wood. Redness does not affect varnish coatings. The redness is caused by moisture—long-term high humidity, exposure to water, or simply age. If the haze is not too deep, you can remove it with a #0000 steel wool and oil, or by re-wetting the finish.