Plywood edges: How to Cover Plywood Edges –{Without Fancy Equipment!}
How to Cover Plywood Edges –{Without Fancy Equipment!}
In this post, I’ll show you how to cover plywood edges quickly and easily without any special tools!
This post contains affiliate links. See policies.
Plywood is useful in many furniture and cabinet building projects. But the exposed plywood edges aren’t always a desired feature in the finished product.
.
So for those times you want to cover the plywood edges to make it to look like solid wood, I like to apply Iron On Edge Banding.
.
RELATED: If you’re new to working with plywood, check out this helpful guide for how to cut down your own plywood sheets!
What is Edge Banding?
Plywood iron on edge banding is a thin solid wood veneer that has a nice, smooth, sanded side.
And it has a rougher side with pre applied glue.
The glue will melt when heat is applied, which is how you get it to stick to the plywood. But before we get to that part, let’s talk about types of edge banding.
What Type Do You Need to Cover Plywood Edges?
Edge banding comes in rolls in various sizes and types. Personally, I use a lot of it, so I buy it in large rolls on Amazon (it’s cheaper that way). But, you can usually find them in smaller rolls at your local Home Depot store if you won’t be needing a lot of it.
They come in almost every wood type you can think of and sizes varying from about ½″ wide to over 2″.
.
To make the colors match on your finished project, it’s important to chose the same wood type as the plywood you are using.
.
For example, if you are covering edges on birch plywood, use birch edge banding. If you’re using red oak plywood, use red oak edge banding, etc.
.
Here’s an example of where I used birch edge banding with birch plywood on this writing desk:
And here’s an example of red oak edge banding used with red oak plywood on this modern console cabinet:
And finally, here’s an example of hickory edge banding I used on my hickory plywood cabinet doors:
Now, it does also come in black or white that can be used with any wood type if you’re planning to paint your project.
.
As far as size, I find it easiest to chose a size SLIGHTLY wider than the thickness of plywood I’m covering.
.
For example, the ¾″ plywood I normally use is actually 23/32″. So I use ¾″ wide edge banding because it’s 1/32″ wider. This just gives me a tiny bit of overhang on each edge once applied.
.
I can sand that off to give me a nice, clean edge (more on that in a minute). HOWEVER, you don’t want too much overhang or you’ll be sanding a lot of unnecessary material off.
.
I recommend NOT using edge banding that is more than 1/16″ wider than your plywood thickness.
How to Cover Plywood Edge with Iron On Edge Banding
There are a TON of ways to “edge band” plywood. Many of them require fancy router bits or equipment.
.
But what I love about iron on edge banding is that literally all you need is an iron to apply it…like, legit…an iron–like you use on clothes.
.
NOTE: Don’t use a good iron for this–no matter how careful you are, you will eventually get glue on the iron and you won’t want to transfer that to your clothes.
.
Simply line the end of the roll up with the edge of the plywood.
Heat your iron to the cotton setting (no steam), and apply heat to the edging.
If you look really close, you can watch the glue start to melt between the edging and the plywood. Once you see that, you can move the iron down and work your way down the piece.
The most important part is that after the glue melts and you move the iron, you need to either use your fingers (it will be HOT!) or a scrap wood block to press the edging down while the glue cools (it’ll only take a couple seconds).
.
If you don’t press the edging after the glue melts, the edge can tend to cup upward and not stick well. I like to work in small sections or 6-12″ at a time and melt the glue, then run my block along it, then move over and do the next 6-12″ section.
.
If for any reason the edge banding doesn’t stick well or gets out of position, just go back over it with heat again and reposition it as needed.
.
Once you reach the end of an edge, you need to cut or break the edge banding. You can cut this with a utility knife, but I find it easier and cleaner to simply “break” it off.
Just fold it over the edge like shown.
Then, fold it backwards.
And it should break off pretty easily, if not, keep folding back and forth and try again, or just use a knife.
Repeat the process for the other exposed sides and when you come to a corner, let one side SLIGHTLY overlap the other–you can sand this down flush later.
Once the banding is applied and the glue has had a chance to cool, it’s time to sand–see those rough edges and glue squeeze out above?
.
You can hand sand if you prefer, but I like to use an orbital sander with 220 grit sandpaper and sand along these edges to get everything nice and smooth.
If for any reason there is some loose edge banding you find while sanding, reheat your iron and touch up anywhere the glue didn’t hold. Just remelt and press it in place good.
.
I’ll address a few other common issues you may encounter and how to fix them below, but at this point, once you’re done sanding, it’s ready to use in your project and/or paint/stain as desired 🙂
Will Edge Banding Stain the Same Color?
Yes…IF you followed what I said earlier about matching your edge banding to the type of plywood you are using.
.
There is no special technique or procedure for staining or finishing edge banding. Since it’s real wood veneer, it takes stain just like real wood.
.
Check out this modern console cabinet for an example. The front edges, top, and doors were all edge banded plywood and they stained the same.
DIY Modern Console Cabinet
Do You Need Edge Banding if You’re Painting?
No. You can use other methods to cover your plywood edges if you are painting, BUT, I usually still use edge banding for mine.
.
Some people prefer to putty the edges and sand well. But I find that many times, if I’m looking at the right angle, I can still see the plys when I use this method.
.
So, I still edge band EVEN IF I’m painting. But, I always encourage you to try it my way and try it your way, then pick which one you’d rather do 🙂 Whatever works for you…works.
.
Here’s an example of a drawer front I painted after applying edge banding to it.
What if the Edge Banding Bubbles?
Once thing I’ve noticed about iron on edge banding over the years is that applying a water based finish will expose any weaknesses in its application.
.
The water based finishes will cause bubbling anywhere that the glue didn’t properly adhere. You will literally see like a bubble pop up underneath the edging.
.
DON’T FREAK OUT. This is fixable.
.
To fix this problem, first, try using a clean, but old rag (not your good stuff) over this area and use the iron over that to reheat the spot. Press the bubbled spot down and try to get it to stick underneath.
.
If that doesn’t work, use a needle or a knife to make a SMALL incision or puncture on the bubble to allow air to escape and try again to heat the glue and press it in. Then just putty and touch up the small hole if needed.
Won’t it Eventually Peel Off the Plywood Edges?
Maybe? To be honest, I can’t tell you how long glue on edge banding will last.
.
But what I can tell you is that I’ve been using it (A LOT) for about 3-4 years and haven’t had any issues that I’m aware of where it’s peeled off anything I’ve put it on.
DIY Closet Cabinets
If properly applied with good adhesion, I wouldn’t expect it to fail. I’ve got it on all my kitchen cabinets and closet doors (seen above) that we use multiple times a day and haven’t had a single issue in well over 2 years.
.
If exposed to a lot of direct moisture or direct steam (like in a bathroom), it MIGHT have some issues in time. But, if you have that much steam and moisture in your bathroom, the least of your concerns over time will probably be the edge banding on your cabinets haha.
.
As with most anything else, edge banding will become easier and easier the more you do it. It’s not really a “fun” task, but it does make a HUGE difference to take your builds up a notch vs just leaving the exposed edges.
RELATED: Easy DIY Bookshelf Build
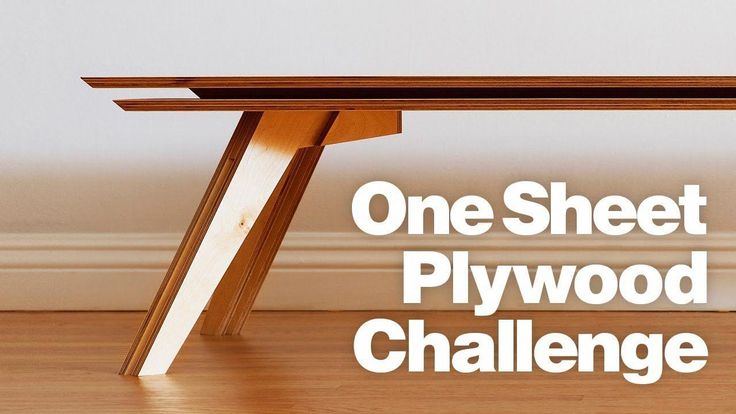
One Sheet Plywood Shelf
If you’re interested in learning a few more helpful tips to take your builds to the next level, I’m sharing 5 furniture building secrets here.
.
And if you’re interested in where to get your edge banding, this is my favorite brand and size I’ve been using for my ¾″ plywood for years.
.
I hope you found this post on how to cover plywood edges helpful and if you want to save it for later, be sure to pin it!
And if you want to be the first to know about awesome new content on Woodshop Diaries, be sure to sign up for the newsletter below.
.
Until next time, happy building 🙂
6 Ways to Cover Plywood Edges — 3×3 Custom
Sometimes plywood is the best option for a project due to cost or stability. The only problem is the exposed plywood edge… so here are a few methods to cover up that ply!
Check out the full build video below!
*Links below are affiliate links, I get a small commission when you click on them at no extra cost to you 🙂
The easiest method is iron on edge banding you can purchase. I personally don’t love the stuff for heavy use projects, so I’m going skip over that one.
Sometimes you might find thin veneer edge banding is the best option for a project, but it might be hard to find edge banding that matches the plywood you are working with. So, if you are looking for an easy way to get some matching veneer edge banding for a specific project, here is a cool way to do it…
#1 – Thin Veneer Edge Banding
Raise your table saw blade so it’s slightly higher than the thickness of the plywood you want to cover.
Then move the fence so the blade will cut right underneath the veneer layer of the plywood.
Take a scrap from the project your working on, and cut away!
You can see in the picture below that the blade is cutting right underneath the top veneer on the plywood.
Cut it loose with a utility knife.
Now you have a matching veneer for the wood species of plywood you are working with!
Just glue it on and use some tape as a clamp to hold it in place as the glue dries. It may also be a good idea to use a clamping caul here for even pressure along the board.
After the glue dries, you can trim the excess and you’re done.
The best part about this method is you have the exact color match for the plywood you are using so it’s a very seamless look. Wood colors vary even within the same species. So this is a great option when you can’t find edge banding that matches your specific plywood.
I would only use this for projects that won’t see heavy use since I don’t see this as being particularly strong. Let’s move on to something stronger…
#2 – Simple Hard Wood Edge Banding
The next method is even simpler, hard wood edge banding.
Mill some stock to be slightly thicker than the plywood you are using. Then rip a strip that’s 1/4” wide.
You can try to match the plywood by using the same wood species or use a different kind of wood to add contrast.
Then again, simply glue it on and you can use tape as clamps.
Once it’s dry you can trim it to final size and flush it up so it’s the same thickness as the plywood.
You can do this with a flush trim bit or a block plane.
This is a great option and I have used this for many projects.
While this is a lot stronger than the thin veneer edge banding, I think we can make this stronger by adding some joinery to the mix…
#3 – Tongue and Groove Edge Banding
This method can be done on the router table like I did, or you can use a dado blade at the table saw.
I used a 1/4” slot cutting bit to make the groove in the plywood first.
Raise the bit so it is cutting in the center of the ply and adjust the fence so 1/4” of the bit is sticking out. This will create a 1/4” deep 1/4” wide groove in the center of the plywood edge.
Next step is to make the tongue in the hard wood.
Lower the bit so when it cuts on both faces of the wood, it leaves a 1/4” tongue in the middle of the board. You can do a few test cuts to make sure the bit is at the right height.
Before cutting, nudge the fence ever so slightly towards to bit, maybe just 1/32, just to leave some room for glue when you glue it up.
Then make two passes on both faces of the board to create the tongue in the center of the hard wood.
It’s best to leave the board extra wide when doing this because it is safer to work with larger pieces at the router table.
After the tongue is cut, you can trim it to final width at the table saw.
Because the tongue and groove lock into place, the glue up goes really smoothly.
Another great thing about this joint for edge banding is you can cut it to any width you want and add some sort of edge detail or profile. In the picture below, I cut a deep bevel into the edging, but with this method you can add any edge detailing you want, like a round over or an ogee.
I love how strong this method is. That hard wood is going to stay in place because of the joinery and it’s great that you can add details to the edges.
I see two downsides to this method.
1 – It’s not completely seamless. You will see the joint if you look up close.
2 – It might be time consuming to adjust the router bit to get the perfect fitting tongue… which leads me to the next method…
#4 – Splined Edge Banding
This method is the same basic idea as Tongue and Groove, except instead of making the tongue on the hard wood, you make a matching groove in the hardwood.
Then you can rip a 1/4” thick piece of plywood into a 1/2” wide strip to fit in between both of the grooves.
After gluing it up this is just as strong as the tongue and groove, but it takes half the amount of time to make because you don’t have to change the router bit (or dado blade) setting at all, and you only have to make one pass on the hard wood instead of two. There is the extra step of ripping the 1/4” plywood though…
This is just like the tongue and groove so it has the same same positives and negatives.
It’s great because it’s strong and you can add any edge profile you want.
Downside, you will see the seam at close inspection, so it will not look like a solid board… Let’s try something that could be strong yet seamless….
#5 – V-Groove Edge Banding
This method would typically be done at the router table with a v-groove bit or a specialty router bit set (Here’s a video explaining how to do this with a v-groove bit – Stumpy Nubs Edge Banding Video). I don’t have the correct bit, so here’s a way to do it at the table saw.
Tilt the table saw blade to about 30 degrees or so. and keep making passes on both faces of the board until there is a point on the edge.
You may want to leave this point a tiny bit flat just to leave some room for glue.
Do not change the angle of the blade!
Do make sure the tip of the blade is just as high as the middle of the point you made in the previous step.![]()
To make the matching v-groove in the plywood, you will need to set up a sacrificial fence.
If your blade tilts to the left and your fence is on the right, like mine, you want to set the sacrificial fence so the left point of the tooth is in line with the face of the sacrificial fence right at the point where it is coming out of the throat plate.
Run the sacrificial fence and stop half way through the cut
Clamp down the sacrificial fence and pass the plywood through on both faces to create the v-groove shape on the edge.
It doesn’t matter at what angle your blade was set to, as long as you didn’t change the angle from step 1, the two parts will fit nicely together.
What’s cool about this method, is after you glue it up, you can trim the excess right up to the edge of the plywood to make it a really seamless look.
This joint will be plenty strong because of the surface area in the v-groove joint and it will also be seamless. I think this is a much better option than typical iron on veneer edge banding, but the table saw set up might be a bit cumbersome… The correct v-groove bit would definitely be easier.
#6 – Edge Banding Router Bit Set
This method combines the strength of the Tongue and Groove with the seamlessness of the V-Groove using a set of two router bits.
The first bit makes the tongue and the 30 degree v-groove in the hardwood in one pass.
Set the bit height so the part that cuts the tongue will be in the center of your board and set the fence so it’s in line with where the tongue will be cut as well.
This can be done in one pass, again I left the material extra wide here so it is safer to handle at the router table, it will be cut to width later.
Then swap out to the other bit in the set that makes the matching groove and the 30 degree v-groove cuts.
Use the tongue you just cut to set the correct bit height.
Then make the cut in the edge of the plywood.
This might take a few test cuts to get the correct fence position. It also might be a good idea to double stick tape a straight edge to the top of the plywood so it is fully supported on the fence. There is such a thin veneer left over from this cut, it’s better to have something stronger for the piece to ride along on the out feed fence.
If you look closely at the picture below, you can see how strong this joint will be because of the tongue and groove. Also, how I was able to cut right up the edge of the plywood to make a seamless look because of the 30 degree angles built into the joint. This is by far my favorite alternative to thin veneer edge banding!
This was such a fun experiment!
Moving forward I am going to use the Edge Banding Bit set if I want a seamless look and the tongue and groove if I need to add a profile to the edge… but I’m sure the other options will be put to use as well!
Shop TipsTamar Hannahplywood edge banding12 Comments
0 Likes
How to finish plywood edges for painting: 2 easy ways!
Plywood is a great choice to build with, but if you don’t want to deal with exposed stacked sides, here’s how to finish plywood edges for painting. I’ll share two easy ways you can choose from based on your project!
How to finish plywood edges for painting: 2 easy ways
Today’s post is for two quick tips about how to finish plywood edges for painting. I love unfinished edges on plywood when I am staining, but it can look rough when painted. Luckily there are two really simple ways that you can cover those stacked plywood edges for a more polished look.
I am going to be showing pics from a few past projects and one current project to illustrate what a difference finishing plywood edges makes for paint application. The first two projects used iron-on veneer edge banding—our DIY murphy bed and attached shelving unit and Ramona’s toddler play workbench. The third project is a Lego table I’m still working on for my cousin’s kid. 🙂
Option #1: Use iron-on veneer edge banding to cover plywood edges for painting
The first option to discuss is using iron-on veneer edge banding. This stuff is super easy to use and works with a variety of different types of plywoods, but I think it’s easiest on the thicker plywoods.
It comes in a roll with glue already on the back, but it isn’t sticky—you need to apply heat to melt it. The width is typically just over 3/4″ to accomodate a variety of plywood thicknesses. I typically have a bit of overlay that needs snapped off or sanded down.
Veneer edge banding also comes in different finishes. Birch, oak, etc. However, I usually don’t pay much attention to the finish since I am almost always using edge banding on projects I plan to paint. The finish would be more important on stain projects.
Below are a few nifty before and afters from the murphy bed shelving. You can see the huge difference between the unfinished version with exposed edges and the finished version with edge banding!
GRAB THE PLAN HERE!
You can grab this free build plan in my Dropbox library of woodworking plans. Just drop your email below.
How to apply veneer iron-on edge banding
To apply veneer iron-on edge banding over plywood edges, I first measure the edge I need to cover. Then I use a regular pair of scissors to cut a piece of edge banding to side and put it in place with a bit of painter’s tape.
If the area you need to cover is shorter and not curved or anything, painter’s tape might not be necessary. You could just hold it in place while you melt some of the glue so it stays put. However, for longer curved areas like the end of the murphy bed and Ramona’s toy workbench below, painter’s tape is a huge help.
For the murphy bed, I used a regular household iron to apply the edge banding. However, last year I got a little Cricut EasyPress Mini for my Cricut heat projects…and it works perfectly for iron-on veneer edge banding as well! It’s super easy to use and gets pretty hot—and it’s small and nice for precision work. (Here is a very similar but cheaper off-brand version.)
To trim the edge banding down to size, I’ve found it’s easiest to transfer the banding then let it cool. Then fold the excess edge banding over to snap it off. Use fine-grit sandpaper to sand the remainder down smooth. Fill in as necessary with wood filler (like areas where two edge bands meet at corners).
Option #2: Use wood filler to fill gaps and smooth over edges
Speaking of corners…although edge banding is super easy to use, it isn’t my favorite for corners. That’s because it’s kind of hard to get perfect corners where two pieces of veneer edge banding meet. For situations like this, I like to use wood filler. It takes a bit longer, but it looks fantastic.
Here is a picture of some gross plywood edging I used for a table I was working on. It has some missing areas and gaps that needed a lot of cleaning up, so I opted for wood filler. I used the kind of wood filler that goes on bubblegum pink and turns to a natural wood tone when it’s dry.
How to apply wood filler on plywood edges
To apply wood filler on plywood edges, just use a putty knife or your fingers to smooth it into cracks and gaps. It probably won’t be perfect the first time, and I’ve honestly found it easier to use my fingers. It’s messy, but it washes off easily.
Once it dries, sand it down using fine-grit sandpaper. Do some minor touchups in areas that need additional filler and let those dry. Sand as necessary. You can see the progression of the process below—wood filler one in the first pic, then a pic of the first coat dry. Then the two pics below those are after I added a touch up coat.
Before final coat touching up the imperfectionsAfter final coat touching up the imperfectionsAfter final coat touching up the imperfections
It looks beautiful painted! You’d hardly know it was ever plywood. And there’s no weird area where the edge banding strips meet one another on the corners. You can also use the wood filler to slightly round the edges on the piece of wood.
So that’s it, folks—two easy answers for how to cover plywood edges for painting. Both look and work great—it’s really up to you which one you use based on your project and needs. Good luck!
Pin my post about how to finish plywood edges for painting!
How to Cover Plywood Edges – 3 Beginner-friendly Ways – 3 Beginner-friendly Ways
Three basic beginner-friendly techniques for covering plywood edges that will help you build professional-looking furniture and projects.
Many people wonder if it is okay to use plywood for building furniture. The answer is a resounding YES!
There are many advantages to using plywood for your projects
- It is flat.
- It is stable; it will not expand or contract over time.
- It comes in many varieties.
- Large sheets are a fraction of the price of getting lumber in that size.
- It is very strong.
The downside?
Ugly profile edges where you can see all the layers created when that plywood sheet was assembled.
No matter how much you sand the edges of the plywood, you will still see the deep crevices created as the thin layers were joined with adhesive.
Depending on the quality of plywood, you may also see gaps and holes on the edges.
Don’t get me wrong, sometimes, seeing the exposed plywood edges can add a whole bunch of character. I loved seeing the exposed edges on my vegetable organizer.
In fact, you can even make patterned plywood – all using plywood edges as I did here.
Most likely, however, you will want to cover those exposed plywood edges. Covering the plywood edges will give your project a more polished, professional finish.
How do I hide ugly plywood edges?
We are going to discuss three options for hiding plywood edges:
- Wood filler/spackle
- A solid wood trim piece
- Edge Banding
***This post contains referral or affiliate links. It is a way for this site to earn advertising fees by advertising or linking to certain products and/or services. Please read my full disclosure here ***
Video
Cover Plywood Edges with Wood Filler/Spackle
The first option for finishing plywood edges is to use a wood-filler, or similarly spackle, to fill in those uneven crevices with a putty knife.
Advantages to the wood filler or spackle method are:
- They can be applied easily.
- Both dry quickly.
- Creates a smooth finish, perfect for painting.
- You can paint your project the same day.
I have a full detailed tutorial on how to use wood filler and spackle to get a professional-looking smooth finish on painted plywood.
See how the spackle method worked on the DIY A-Frame Desk.
On the rotating bookcase, I decided to simply use wood filler on the edges because the plywood was great quality and smooth and only the edges needed attention.
Cover Plywood Edges with Solid Wood Trim
Another option to hide your plywood edge is to use a solid wood trim piece.
For this method, you can place a 1×2 or other hardwood piece with the necessary dimensions on the raw edge of the plywood and use wood glue and a brad nailer to secure it to your build.
The basic steps are:
- Cut a strip of lumber the length of your plywood.
- Join it to the plywood edge using wood glue and clamps.
- Sand off excess glue.
- Stain or paint your build.
I used solid wood trim in the DIY record player stand and the Craft Closet Organizer.
However, solid wood trim may not work in all situations:
- It can add thickness to the piece of plywood (when attaching a 1×2 to a plywood edge)
- You have to ensure it is perfectly flush with the plywood.
- You will have nail holes to fill which may not be best for stained projects.
Advanced techniques:
Another option for trim is to use joineries such as tongue and groove, spline, or v-groove joinery. Tamar at 3×3 Custom has a great in-depth article about these methods.
While joinery is a great option, they are more advanced methods and require special tools, such as a router table and router bits, jigs, etc that a beginner may not have in their shop.
Solid wood trim can look fantastic and give your piece a professional touch, but it is more complicated and time-consuming than the other two options.
Cover Plywood Edges with Edge Banding
This is probably my favorite method which can be used whether painting or staining!
What is Edge-banding?
Edge banding is simply a thin veneer of real wood. It typically comes in rolls and can be purchased plain or in an iron-on option that has a thick layer of pre-applied glue.
Plain veneer edge banding can be difficult to get an even clamping pressure across your whole piece.
Iron-on edge-banding has many features making it great for beginners.
- Pre-applied glue makes adhering it quick and easy.
- The variety of types of edge banding makes it easy to match the wood in your build
- It also comes in a variety of widths.
- Edge banding can be stained along with the rest of the build.
- Edge banding can be painted.
Matching edge banding to wood:
Edge banding is available in various veneers so you can match the type of plywood you are using.
- If you are using birch plywood, you can use birch edge banding.
- If using walnut plywood, you can use walnut edge banding
- and so on.
I’ve seen edge banding in red oak, walnut, birch, cherry, and many other color/grain options.
If you plan to paint your project, you can even use white edge banding! This is routinely used with MDF or melamine-coated shelves and pieces.
Some of the projects I have used edge banding in:
- DIY Record Player Stand With Storage
- Small DIY Dresser with Patterned Veneer
- DIY Lego Table with Storage
One of the common concerns with edge banding is if it will not hold up or if it will peel off in the future. If you use the right material and apply edge banding correctly, you can easily avoid those issues.
Edge banding before or after assembly
Although, you can apply edge banding to any plywood edge – even after it is assembled, I recommend applying it before you assemble the pieces to get that beautiful seamless look.
It can be VERY awkward and hard to apply edge banding once the boards are assembled.
Edge banding has a thickness to it, which you will have to account for in the joint if applying after building.
Simply check and ensure which edges will be visible and will need edge banding and apply before you start assembling.
How to apply iron-on edge banding
Applying edge banding is a very beginner-friendly method.
Material and Tools Needed
- Plywood piece /project
- Pre-glued edge banding of your choice – to match the plywood being used or white if painting the project.
- Scissors
- Household Iron or EasyPress Mini
- A way to remove excess edge banding. Options are :
- Utility knife
- Trimmer tool like this one
- Random orbital sander with 150 grit sandpaper
- block plane or a router with a flush-trim bit
- Sanding block with 220 grit sandpaper.
Step-by-step Tutorial
As I mentioned, applying edge banding is super easy!
Step 1: Prep
- Clean the plywood edges and make sure that there is no dust on them.
- Bring the iron up to temperature the highest temp and ensure that the steam setting is off. If using the EasyPress Mini, set it up for the highest setting.
I love being able to use the EasyPress Mini for my projects. The advantage of using the EasyPress Mini is that:
- it is small and lightweight.
- It is easy on the arms
- can get into tight spaces more easily. It is especially useful if applying edgebanding to a vertical surface.
Step 2: Apply edge banding
- Place one end of the edge-banding on one end of the exposed plywood edge.
- Begin by heating up the first 4-5” of the material.
- Once the first section’s glue is melted, you can move to the next section. You can also go over it with a roller to ensure full and complete contact with the plywood.
- Repeat the above steps until the entire edge is covered.
Important tips when applying heat:
- Slowly move the iron along the edge banding that has been placed on the plywood edge.
- Keep the iron moving to avoid any burn spots.
- Slightly tilt the iron on each corner so that all the glue adheres to the banding thoroughly.

- Once the glue is completely melted, you will notice it oozing out along the edges slightly. This is the indication that you are ready to move on to the next section.

What to do at the corners
When you get to the end of the edge, there may be two situations:
- You are ending there – in which case, you can scribe with a utility knife or just bend the edge banding until snaps off.
- You have to continue to the next edge – in which case you simply fold over the corner and continue to apply heat along the next edge.
Step 3: Trim off the edge banding
Typically, edge banding will be wider than the width of your plywood. You will need to trim off the excess to get that seamless look.
There are a few techniques that can be used to trim excess edge banding.
- Using a Trimmer tool.
If using a trimmer tool, you can slide it along the edge and cut off the excess veneer.
Follow that with light sand of a 220-grit sanding block or random orbital sander to make the edges smooth and remove glue residue.

- Using a random orbital sander
Use 150-grit sandpaper in a random orbital sander to sand away any excess edge banding and glue residue.
Using a random orbital sander is now my preferred technique for trimming off edge banding. It is quick and easy.
Important: If you use an orbital sander to even out the edges, just be careful about a few things:
- Use a medium speed.
- Move it lightly in the direction of the edge, not away. Moving away could cause the banding to split.
- Be sure not to sand too much away.
A note about the sandpaper: The glue residue can be very harsh on the sandpaper. I have recently started using these sanding block sheets and sanding discs. These are washable! You can simply scrub off the dust and glue residue, dry the sheets and use them again!
Look at how great edge banding can look on your project!
Fixing Plywood edge banding
One of the major advantages of plywood edgebanding is that if you make an error in the positioning or decide you didn’t want an edge to have edge banding, you can simply re-heat the edgebanding and pull it up.
You can then reposition the edge banding and re-attach it by applying heat like before.
Summary
There you have it, three great techniques for covering plywood edges that even a beginner DIYer can do!
Which method you pick will ultimately depend on if you are painting or staining and the type of look you are going for.
I use all three methods in my various projects with edge banding being the most common. It is the easiest, mess-free, reasonably priced method.
You will also like
How To Finish Plywood Edges (Like A Pro)
Are you trying to cover the edges of plywood in your woodworking projects? Learn how to finish plywood edges with veneer edging with this easy step-by-step tutorial. This is the easiest way to hide raw edges of plywood for a finished, completed look.
Plywood is an affordable and easy material to use in woodworking projects, but the raw edges can leave it looking unfinished. For a more finished look, veneer edging or edge banding (and sometimes called edge tape) is a great way to finish the plywood edge before painting or staining.
Table of Contents
- Our projects with plywood
- What is plywood?
- What is edge banding for plywood?
- Video tutorial
- Supply list
- #1: Measure edge and trim edge banding
- #2: Place the edge banding
- #3: Adhere
- #4: Trim edges
- FAQ: Finishing plywood edges
This how to finish plywood edges tutorial contains affiliate links, but nothing that I wouldn’t recommend wholeheartedly. Read my full disclosure here.
Plywood is easily one of the most affordable types of wood for woodworking. We’ve used plywood for everything from seating, cabinetry, walls, and even organizational projects. It’s really the end-all to DIY projects!
What is plywood?
Both plywood and MDF wood are similar in that they are made by binding different wood products together. Plywood is made with thin layers of wood veneers glued together in combination with other types of binders (like resin).
This layering makes plywood a strong option that is less susceptible to warping because the veneers are generally rotated as they are glued together.
This rotating is called “cross graining” and it helps make plywood less like to warp, split when nailed, and reduces the natural expansion and shrinkage. unfinished look plywood can have.
Plywood is a much cheaper option when buying lumber compared to hardwood alternatives.
Plywood also comes in large sheets, like 2-feet by 4-feet and 4-feet by 8-feet. These large panels are convenient to use in projects that require large surface areas of wood (like cabinets).
What is edge banding for plywood?
The veneers are visible on the edge of plywood panels and appear as lines. You could even describe them as looking similar to the pages on the side of a book. These raw plywood edges show the layers of the different species of wood that were pressed together.
You can either choose to embrace the layers as this retro entryway bench does, or you can cover them up if you prefer.
That’s where edge banding comes in! Edge banding is an adhesive veneer that covers the outside edges of plywood so it appears as a finished piece, instead of seeing the layers of material. The adhesive on the tape is activated with heat by using a household iron.
We used edge banding when we made our bedside table and it worked like a charm! It really smoothed out that cabinet edge, leaving a smooth surface that wouldn’t snag or look unfinished.
After applying edge banding, you can complete your project with a stain or paint.
TIP: The edge banding color should match the same species of plywood you are using for your project. It’s important that these match as different types of wood will accept wood stain differently, so we want them to look the same when finished.
Video Tutorial: Finishing Plywood Edges
Applying edge banding to plywood is a really easy process. Watch the video below to see the full tutorial, plus a few tips!
If you love DIY videos, be sure to subscribe to our YouTube channel, so you don’t miss the next one! We share weekly renovating and DIY tutorials.
How to Cover Raw Edges of Plywood: Step-by-Step Tutorial
Supplies used in video:
- Edge banding
- Household iron
- Utility knife
- Sanding block
- Heat resistant gloves
Start with a clean work surface. Make sure the plywood edges are free of any dust or debris that could prevent the adhesive from sticking.
For the bedside table, we began with the vertical edges and then the horizontal edges. Whichever edges you work with first, be sure to complete each of them so all of the banding lines are even.
For example, if you start with horizontal edges, complete all of the horizontal edges before moving on to the other edges. Otherwise, you will have overlaps in various spots.
Step 1: Measure each edge and cut edge banding to size.
Start by measuring the plywood edge you will cover.
Then, unroll the banding and use a utility knife to trim the banding accordingly. We recommend trimming a piece slightly larger than what you will need.
This will make it a little less cumbersome to work with as you apply the heat and begin trimming.
Step 2: Place the edge banding.
Place the top of the banding flush with the top edge of the plywood. Double-check for length.
Depending on what you are sealing, you could also use a clamp to hold the veneer in place.
Line up the tape so any excess width hangs off the outside of the edge so it can be easily trimmed. We will trim the excess width with a utility knife in a later step.
Step 3: Adhere the edge banding.
To adhere the banding to the plywood, hold the veneer in place (this is where work gloves are handy!) and place the iron on top of the banding. Hold for a few seconds, then release.
The banding should adhere to the furniture. After the glue is activated, you have about 30 seconds to adjust the banding before it sets, so be sure to make any adjustments quickly.
Then, double back with the iron down the edge of the plywood to adhere the entire length of the veneer. You may have to go over the length a few times. Do this slowly and gently – just like ironing clothing. You shouldn’t need to apply too much pressure.
Keep the iron moving and don’t let it sit on one spot for too long as it could burn the wood.
When covering areas between other pieces of banding, like a horizontal shelf edge, use the same process and trim the excess very carefully to not cut into the other banding pieces that are already attached.
Step 4: Trim and finish the project.
When the adhesive has cooled in place, trim the excess banding with a utility knife. Using a new, sharp blade, trim the width and length excess being careful not to dent or scratch the plywood.
When all sides have been covered, gently use a sanding block or sandpaper to smooth things out. Do not sand against the adhesive in order to prevent pulling up the edge banding. Sand in a downward motion, towards the plywood edge.
Now, you are ready to stain or paint your plywood project!
FAQ: Finishing Plywood Edges
Do you need to cover plywood edges?
While edge banding isn’t necessary, it gives the project a more finished look and protects it from snagging on things.
What do you cover plywood edges with?
Edge banding or other adhesive veneer is best for sealing plywood edges. We used this EdgeMate veneer tape and it works great.
Can you stain edge banding?
After edge banding has adhered, cooled, and dried, you can stain or paint over the banding.
How to cover plywood edges before painting?
You can cover plywood edges with a wooden veneer or edge banding, as we’ve shown in the tutorial. However, since seeing the wood grain is not necessary if you are painting, you can also opt to simply cover the plywood edge with wood filler or spackle, sand smooth, and paint over it. This is an alternative way to cover plywood edges before painting that does not require edge banding. Learn more about covering plywood edges with spackle here.
How do you trim edge banding?
Using a utility knife, carefully trim away excess edge banding. There are special trimming tools that you could purchase to trim the edges, but we found they weren’t necessary. A utility knife worked fine.
Do you sand before edge banding?
Sanding isn’t necessary before edge banding but can be done if the plywood edge is rough or uneven.
How do you install plywood edge banding?
Installing plywood edge banding is easy to apply with a household iron. The glue on the back of the edge banding tape is activated from the heat from the iron.
Every time you decide to use plywood in your woodworking projects, you’ll need to make a choice. Leave the plywood edges exposed intentionally or cover them up with edge banding?
Either option is a good one and totally up to you – but don’t let the task of covering the plywood edges stop you. It’s a very simple process!
Follow along with our step-by-step tutorial to learn how to finish plywood edges like a pro!
Materials
- Edge banding
Tools
- Household iron
- Utility knife
- Heat resistant gloves
- Sanding block
Instructions
- Start with a clean work surface. Make sure the plywood edges are free of any dust or debris that could prevent the adhesive from sticking.
- Start by measuring the plywood edge you will cover.
- Place the top of the banding flush with the top edge of the plywood. Double-check for length.
- To adhere the banding to the plywood, hold the veneer in place and place the iron on top of the banding. Hold for a few seconds, then release.
- When the adhesive has cooled in place, trim the excess banding with a utility knife. Using a new, sharp blade, trim the width and length excess being careful not to dent or scratch the plywood.
- Gently use a sanding block or sandpaper to smooth things out. Sand in a downward motion towards the plywood edge.
- Stain and paint your project!
 Make sure the plywood edges are free of any dust or debris that could prevent the adhesive from sticking.
 Chelsea @ Making Manzanita
Chelsea is the founder of Making Manzanita – a DIY and renovation blog – where it’s all about making your house a home you love one DIY at a time. Chelsea and her husband, Logan, have been renovating homes since 2015 and have seen the sweat equity pay off. They enjoy teaching readers how to renovate with confidence. As an influencer, Chelsea has collaborated with brands like The Home Depot, Etsy, Behr Paint, DAP Products, Walmart, Frog-Tape, and Kreg Tools. Making Manzanita has participated in One Room Challenge and was a finalist in the Fall 2019 Jeffrey Court Renovation Challenge.
How to Finish Plywood Edges Using Edge Banding
Price
Time
Difficulty
Working with plywood is an economical way to build furniture, but it has a major downside: the dreaded plywood edge.
It doesn’t paint well, it doesn’t stain well, and it gives away the fact that you didn’t use solid wood on your entire project.
Luckily, it’s really easy to finish plywood edges to give your plywood projects a more professional look. There are a few different options to cover your plywood edges, but today we’ll focus on edge banding.
Before we dive into the how-to, let’s get a few questions about edge banding answered.
The ONLY tools you need to DIY
Want to build magazine-worthy furniture and decor? The Essential Tools Roadmap will show you what tools you actually need to complete 95% of DIY furniture and home improvement projects (it’s not as many as you think!).
What is iron-on edge banding and is it durable?
Iron-on edge banding is a strip of wood veneer with heat-activated adhesive on the back. When you run on iron along the adhesive, it melts the adhesive and adheres the veneer to your surface. It’s a great method for finishing plywood edges.
Yes! Iron-on edge banding is durable, if you apply it correctly that is. It’s a simple application process, but there are a few key things you need to keep in mind. We’ll cover all the details you need to know to get a durable result.
Can edge banding be painted? Stained?
Edge banding can be painted or stained. Since the edge banding is a wood veneer, if you get the edge banding that matches your wood type, your paint or stain should take to your edge-banding the same it takes to the rest of your plywood.
The key is to get edge banding that matches your wood type. If you have red oak plywood, you need red oak edge banding. Birch plywood? Get birch edge banding.
How do you trim edge banding?
The short answer is to use an edge trimmer, but we’ll go into more detail in the full tutorial.
Alright, let’s start DIYing!
This post contains affiliate links for your convenience (which means if you make a purchase after clicking a link, I earn a teeny-tiny commission, but it won’t cost you a penny more)! Click here to read our full disclosure.
What You’ll Need
- Iron
- Edge trimmer
- Edge banding – The exact type and size will vary based on your type of plywood. You want your edge banding to be the same type of wood as your plywood and slightly wider than your plywood.
How to Apply Plywood Edge Banding
Wish you could build magazine-worthy furniture and decor without a workshop full of expensive tools? Get the Essential Tools Roadmap and find out which tools are essential to DIY and which 3 tools you should start with.
STEP 1: CUT YOUR EDGE BANDING
Cut your edge banding to 1-3″ longer than your piece of plywood. If you go longer, that’s a-okay.
You can use scissors or you can simply bend it up and down a few times to snap the edge banding.
STEP 2: IRON ON YOUR EDGE BANDING
Your edge banding should be wider than the plywood edge you’re covering. Center up the edge banding on the plywood so that you have an equal overhang on both sides.
Starting at one end, start ironing your edge banding. Run your iron across the entire plywood edge to get it generally in place, then slowly go back over the edge banding 1-2 times.
Move slow enough for the adhesive to really warm up.:no_upscale()/cdn.vox-cdn.com/uploads/chorus_asset/file/19586319/fiberboard.jpg)
As you’re ironing, make sure to keep your iron level. You don’t want to tilt off towards one side.
Wait 5-10 minutes for the adhesive to cool down. This is VERY important. Don’t try to trim your edge banding until it’s cool.
STEP 3: TRIM THE ENDS
To trim the ends, simply bend the edging down along the end of the board. Then fold it back up and back down a few times until it snaps off.
If you find that snapping off the edges is causing the edge to not look clean, you can trim the ends using the same method the you’ll use to trim the sides.
STEP 4: TRIM THE SIDES
Now it’s time to grab the edge trimmer. You can also use a utility knife, but for a few dollars, the edge trimmer will save you time and give you better results.
Place your plywood slightly off the edge of a table so that the excess edge banding on the side is facing up.
Line your edge trimmer up with the edge of your board and glide it across your plywood.
Apply downward pressure so that the edge trimmer cuts a close to the edge of your plywood as possible.
You can go over your entire piece or just certain sections multiple times with the edge trimmer if needed.
Flip your plywood over and repeat with the other side.
STEP 5: SAND
Using 120-220 grit sandpaper, lightly sand the edges and sides of your edge banding. The key here is to get everything nice and smooth.
Sometimes we don’t get the ends or sides trimmed down perfectly and you can see some of the edge banding extending past the end of the board. You want to look for areas like that and sand it down until you can’t see where the plywood ends and the edge banding begins.
STEP 6: IRON AGAIN
This is the last step that most people skip over, but is really helpful in ensuring lasting results.
Go over your edge banding with the iron one more time. Make sure that every little inch of your edge banding is ironed down and adhered to the plywood edge.
The most common place to have issues is on the ends. Go over each corner one last time.
There you have it! Now you know how to finish plywood edges using edge banding! The key to lasting results is to make sure that there’s no edge banding extending past the plywood edge and that everything is fully ironed down.
Discovering that there is really is easy to finish plywood edges opens up a lot of DIY possibilities. Suddenly you go from feeling limited by plywood to being able to use it on just about anything. From painted TV lift cabinets to stained oak litterboxes. The possibilities are endless!
Frequently Asked Questions about Edge Banding
Can edge banding be stained?
Yes! Edge banding stains really well and should stain very similarly to the rest of your plywood. One thing to keep in mind is to make sure to remove any adhesive that might sneak out the sides. The adhesive doesn’t take stain, so if there is any on the sides, you will have areas that don’t stain. The sanding step will get rid of any excess adhesive.
Can edge banding be painted?
Yes! Edge banding paints well. It’s very smooth, so it’ll give you a great finish for paint projects.
What brand of edge banding do you use?
When we posted about edge banding on TikTok, some people complained that their edge banding wouldn’t stain and asked us what brand we use.
We use either Edge Mate or Edge Supply. We don’t have a preference between the two. They’ve both applied easily, stained well, and have held up over time.
What are you using to cut off the excess edge banding?
We use the Band-It Edge Trimmer. It’s not going to cut everything perfectly, but it’s fast and easy. I much prefer it over a utility knife. Not only do I think it cuts a little bit better, but you don’t have to worry about the knife slipping and slicing your finger.
The key to edge banding will always be to take the extra time to sand. Don’t think that getting a nifty little tool will get you out of the most important step!
Can I use a heat gun to apply edge banding?
Yes, you can use a heat gun to apply edge banding. You just need some sort of heat to activate the adhesive.
Can I use a regular iron to apply edge banding?
Yup, we use a regular iron to apply edge banding. If you’re doing a lot of DIY projects, you might want to invest in a cheap iron to keep just in your garage. It doesn’t need to be fancy. We use a regular iron that was less than 10 bucks.
Is edge banding necessary?
That’s up to you. Edge banding is not structural, so it’s not technically necessary. However, I think it’s necessary to accomplish the look we are going for on most projects.
You can make some cool designs using the natural plywood edge, but for projects that you want to look like a solid piece of wood, you’ll definitely benefit from using edge banding. It will make your projects look much more professional.
Can you apply edge banding to curved surfaces?
If you need to apply edge banding to a curved surface, you can–it just might take a little more maneuvering.
When we built this entryway bench, we need to apply edge banding to the curves, but our iron wouldn’t squeeze into the curves. If you need to apply edge banding to a curved surface and your iron is too large, you can use a heat gun on the curves.
Or you can do what we did and just glue the edge banding in place. We used Titebond II and taped the edge banding in place overnight to let it dry. Believe it or not, the edge banding has adhered wonderfully to the curve and hasn’t budged.
Does edge banding hold up over time?
If you take the time to apply it well, then yes, it holds up great. Since adding the additional step of sanding the edges of the edge banding, we’ve never had an issue with edge banding peeling up.
How to process the edges of plywood? | Glory to the creators
How to process the edges of plywood
- admin
- Construction and repair
- 0
How to treat plywood?
Plywood is a material widely used in construction. It is obtained by gluing veneer layers together with the condition that the wires of each subsequent layer lie perpendicular to the fibers of the previous layer.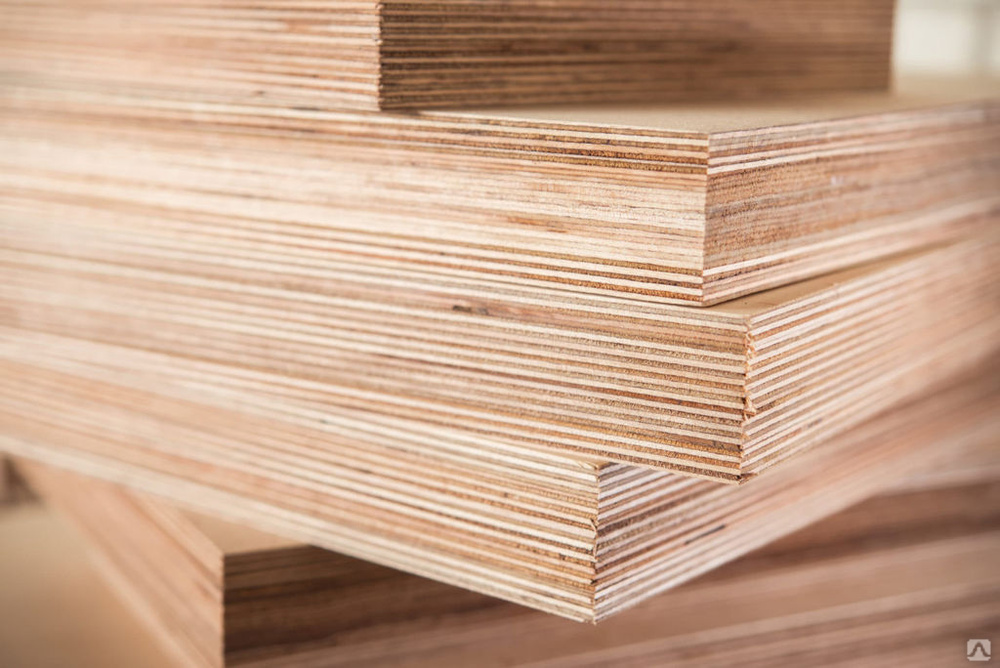 As a rule, the number of layers of veneer is odd.
How to treat plywood? There are both mechanized and manual methods. However, despite its appearance, this material is quite durable, which can cause rapid tool wear.
Plywood finishes:
- Sawing. For sawing the sheet from the front side, it is better to use a band saw, from the reverse side – a circular saw.
- Edge alignment. How to process plywood, in particular its edges? To avoid splitting, it is better to plan the edges of the material in the direction from the corners to the middle.
- Drilling. You can prevent chipping around the hole by using a sharp drill with a front cutter. Work should be carried out from the front side using a lining.
- Sanding. In the process of processing plywood, coarse sandpaper is used (from No. 80 to No. 100), while the grinding itself is carried out perpendicular to the structure of the tree. If grinding is carried out for varnishing or painting, fine-grained abrasive paper should be used in the work, and the processing itself should be carried out in the longitudinal direction.

- Primer. Given the fact that plywood is a natural wood material that tends to expand and contract under the influence of temperature, pressure and humidity, priming must be carried out without fail. When deciding how to paint plywood, pay attention to the elastic paint. With its help, you can effectively protect the material from cracking. If the sheets are to be used in difficult conditions, processing is recommended on both sides.
- Laser and milling cutting. The best way to cut material is to use a laser. With its help, you can create holes of complex shapes, in addition, due to the high precision of execution, the amount of waste is significantly reduced. If the work is done with a gas laser, different beam temperatures and blowing power are selected for different types of wood. Also, the thickness of the workpiece, the size of the embedded fragment, etc. are taken into account. Slotting requires high qualifications and experience. If it became necessary to create holes for self-tapping screws, then when choosing how to cut a sheet of plywood, do not forget about self-tapping screws with domed caps and washers for them. This will eliminate the risk of the cap penetrating into the finish veneer while screwing in the fasteners. Plywood cutting can be rough and finish. With the finishing version, the cutting of parts occurs with high accuracy. In furniture production and the manufacture of decorative products, the milling method is used. It allows you to create elements of complex shape and configuration, as well as to achieve complex transitions and break lines, which cannot be achieved with a manual method.
 This will eliminate the risk of the cap penetrating into the finish veneer while screwing in the fasteners. Plywood cutting can be rough and finish. With the finishing version, the cutting of parts occurs with high accuracy. In furniture production and the manufacture of decorative products, the milling method is used. It allows you to create elements of complex shape and configuration, as well as to achieve complex transitions and break lines, which cannot be achieved with a manual method.
 How to paint plywood?
Thanks to the application of coloring compositions, the natural textural pattern of the material is emphasized. In addition, the surface of the sheets can be processed completely. Colored plywood can be used for exterior and interior decoration. The paint is applied with a brush or with a sprayer. When applying the mixture with a sprayer, a more uniform treatment is achieved. It is also possible to apply paint with a foam roller. The brush is best used in hard-to-reach places. Having decided to combine several shades of paint, cover the work area with masking tape, protect the floor and furniture around with plastic wrap. Before applying the finishing layer, the surface is treated with a special solution that protects against the appearance of fungi and blue.
When choosing how to paint plywood, pay attention to the fact that indoors it is better to use a water-based composition, for example, acrylic. If the sheets are to be used outdoors, the application of wood enamel paints (eg pentaphthalic compounds) is recommended. They fit great and dry quickly. Today, you can purchase ready-made compositions and in the basic version (there is the possibility of self-tinting). If the plywood was stored in a humid room before painting, it should be dried beforehand.
Varnishing plywood
If varnish is to be applied, the surface must first be sanded with fine-grained sandpaper, cleaned of dust and primed. Lacquer on plywood is laid in several layers. In this case, the composition is distributed over the entire surface of the canvas with long strokes. Varnishing tools can be brushes, rollers or spatulas for varnish. After the layer is applied, it must be allowed to dry and only then begin the next call. The larger the layers of varnish, the more beautiful and durable the coating. The modern market of paints and varnishes offers a wide range of compositions.
Alcohol-based or nitrocellulose varnishes, as well as oil, polyester, polyurethane and urea-formaldehyde compounds are available for processing plywood. Nitro-varnishes are the most popular. Their indisputable advantages include high moisture resistance, quick drying, hardness and elasticity. Alcohol solutions are rarely used. Polyurethane compounds are becoming more and more popular every day. This fact is explained by their high resistance to moisture and weathering, durability and wear resistance. Apply such compositions in bulk or spray. The most popular among oil and oil-resin solutions are copal and pentaphthalic varnishes.
The final touch of varnishing plywood is surface treatment with vegetable oil or linseed oil. With this technique, you can give the wood a rich shade.
Source: http://aquagroup.ru/articles/chem-obrabotat-faneru.html
Plywood can be worked in a variety of ways, including both standard hand tools and specialized power woodworking tools.
Some of the treatments are aimed at improving the technical characteristics of the material – for example, the treatment of plywood from moisture, while others are used as exterior finishes.
To process plywood, you need to know the features of working with this material.
Finishing the surface
After sanding, a smooth plywood surface is an excellent basis for subsequent finishing work. Possible options for protecting or decorative transformation of the material will be described below.
Painting
If you are interested in how to treat plywood from moisture, then painting is the best option to protect this material. There is both technical painting, which involves covering the material with a solid color to protect it from external factors, and artistic painting, in which a pattern is applied to the surface.
If you chose primer or paint, you should be aware that the veneer may crack over time, so if you plan to use the material in conditions of high humidity or outdoors, the material should be painted on the reverse side.
Many home crafters are interested in how to treat plywood before painting to avoid the appearance of fungus and blue during its entire life. Before applying the finishing layer, it is advisable to use special protective solutions for wood, which you can buy at a hardware store.
Paint coat for plywood can be applied by brush or spray.
Lacquering
We open the surface with varnish.
How to treat plywood before laying on the floor? The best way is to varnish. Lacquered plywood sheets look great and are very easy to keep clean.
To achieve a laminate look, the following steps must be followed:
- Before varnishing, the surface should be sanded with fine sandpaper.
- Dust that has formed during the grinding process must be carefully removed, after which the surface is varnished.
Sawing
Tip!
Adhesive in plywood board blunts cutting tools, so carbide products are desirable.
The material cuts perfectly with modern systems using laser beams and hydraulic systems with a pressure of 3500 bar.
Cutting plywood sheet.
If you want the best sawing result, then use a circular or band saw and follow a few tips below:
- First, we cut across the fibers of the front side, after which we saw the canvas along the fibers. In this way, splitting of corners is avoided.
- On the front side, work is best done using a hand or band saw, for the reverse side, a circular and contour will do.
- When working with a circular saw, experts recommend using a high speed and a low feed rate.

Drilling
In order to carry out high-quality drilling of holes in the canvas, follow a few recommendations:
- To ensure that the hole has a clean edge, you should use a drill equipped with a front cutter.
- Start drilling from the front.
- Splitting on the back can be avoided if you use a backing sheet.
Drilling a plywood sheet.
Assembly
Plywood sheets may be fastened with nails, staples, glue, screws, bolts or rivets. When starting the installation with your own hands, you need to prepare the slab, that is, you should decide how to treat the plywood from moisture in order to prevent possible expansion and contraction of the material (this will be discussed below).
Experts recommend leaving a gap of 2 mm at the joints (for example, between a steel frame and a plywood sheet), for which an elastic filler is used.
Tip!
For heated structures, the plywood boards must be adequately ventilated.
Types of connections
Joints and joints are the most important elements of plywood construction. Today, there are many types of fastening plywood sheets: sheet pile, spike, bolt, etc. We nail the sheet.
The most sensitive part of such constructions are the ends, and therefore they should be processed, especially if the material is planned to be used outdoors.
Consider the most popular types of connections:
- Use nails.
- For wall, ceiling and floor panels it is advisable to use threaded nails or special screws. In this case, it is desirable that the hat be depressed or hidden.
- For hidden driving, wire nails are an excellent choice.
- Acid-resistant nails are recommended for exterior cladding because they provide better rust protection.
- Nails should be selected so that their length is 2.5-3 times the thickness of the panel.
- Nails can be driven close to the edge (12-15 mm).
- Screw connections.

Screw connection type is the most common.
In some cases, plywood panels are fastened with screws.
Instructions for use of screw connections include the following recommendations:
- The head of the screw screwed into the panel must not cut into the face veneer.
- Washers must be used when using domed nails.
- When fastening sheathing sheets to metal structural elements, you can use special screws to fasten the plywood from the back so as not to damage the front side.
- If the panels are used as floor coverings for trailers and containers, they should be fixed to the metal chassis using self-tapping threaded screws. For example, to securely fasten a 27 mm thick plate, use M6x40 mm screws. First, the screw must penetrate the body of the plate, and then cut a thread in the metal.
- Using threaded bolts, it is very easy to fasten thin plywood panels to metal structures, which is actively used in transport engineering. In this case, the bolt hole should be 2 mm larger than its diameter. To protect the plywood, nuts and washers are placed under the bolt heads.
 In this case, the bolt hole should be 2 mm larger than its diameter. To protect the plywood, nuts and washers are placed under the bolt heads.
 Tip!
Do not overtighten the bolt to avoid damage to the plywood board.
If the plywood is used outdoors, an overtightened bolt will push into the surface of the board and cause moisture to swell, causing cracks in the material around the bolt.
- A variety of hinges, shelves and locks can be easily attached to the surface of the plywood board at either end. If you want to place screws from the edges of the panels, use the clamping fixtures after drilling the holes for them.
- Bonding.
Application of adhesive.
Uncoated plywood can be easily glued with any wood glue. The choice of adhesive in this case depends on the method of work, the moisture content in the environment of use and the required strength.
The most common adhesives for this job are: PVA, epoxy, phenol, polyurethane, etc. PVA is excellent for indoor applications because it has no strong odor and has excellent bonding properties that withstand various adverse conditions.
Epoxy-type adhesives are recommended for bonding metal coated plywood.
Tip!
Bonding laminated plywood is not recommended as this material is not capable of permanent bonding.
Now you know all the basic principles of working with plywood. This material is very flexible and easy to process if you are aware of its key features. In the presented video in this article you will find additional information on this topic.
Source: https://fanera-info.ru/operacii/24-obrabotka-fanery
How to finish the edges of plywood
Contents
- Types of processing
- Sawing
- Working with edges
- Driving
- Grinding
- Looping
- Types of installation
- Types it is better to buy impregnation for plywood (2 videos)
Plywood is a multilayer veneer material used in construction and repair. The layers of veneer are glued together with the condition that the fibers of the next layer are perpendicular to the fibers of the previous one. The layers are most often in an odd number.
Lacquering – as one of the methods of processing plywood
Types of processing
If you are thinking about how to process plywood, then you should know that the board can be processed in many different ways, both manually and mechanized. Immediately I want to notice that plywood is very durable, despite the appearance. During processing, it causes very rapid wear of the tools due to the interlayer adhesive. Recently, laser cutting, etc., has been increasingly used for its processing.
Sawing
The best sawing results will be achieved with a band saw or a circular saw. A chip-free cut can be achieved by sawing in accordance with all the rules and standards. You need to start with a cut across, then along. This method will prevent splitting corners.
How to cut a sheet of plywood correctly
When sawing the outside, a band saw is preferable, and on the back, a circular saw.
Edge work
Sometimes it may be necessary to level the edges after sawing, for this they can be trimmed a little. The best result is achieved by planing in the direction from the corners to the middle, which avoids splitting. They also need to be polished well. The ends must be painted several times with paint with special strengthening additives.
Drilling
To ensure that the hole is chip-free, use a sharp drill, preferably with a front cutter. You need to drill from the front side, using a lining to prevent splits on the back.
Sanding
When sanding the surface, coarse abrasive paper (#80 to #100) is most often used, and the sanding itself is carried out perpendicular to the wood grain. For sanding for varnishing, painting, etc. use fine-grained sanding paper, sanding in the longitudinal direction. A completely finished surface is an excellent basis for the required design processing. In the future, plywood can be varied in almost any way. When choosing a paint or primer, consider the tendency for cracking. If the sheets were stored in high humidity conditions, then they must be dried to a normal state before finishing. Do not forget to carefully clean the surface of the sheet from dust. This procedure must be repeated at the beginning of each stage of finishing.
How to properly sand plywood
Primer
Plywood is a completely natural material that shrinks and expands depending on temperature, humidity levels, pressure, which is why a surface primer is required. Elastic paint will also be a good protective against cracks. When using plywood in unsuitable conditions, it is necessary to paint the panels on both sides with special paints.
Mounting options
Plywood is a versatile material that can be attached using a variety of fasteners, from glue to screws. It is very important to consider the choice of how to process plywood and the conditions for its operation. Before starting installation work, you need to prepare plywood, do not forget to take into account the possible compression and expansion of the boards from changes in humidity levels. For example, at the junction of two plates, it is imperative to leave a gap of 2 mm, sealed with an elastic filler. If the structure is heated, then there must be ventilation.
Types of connections
When the boards are correctly installed, the various connections will give you the maximum result of practicality and reliability, it is very important to consider the choice of how to treat the plywood. The weakest part of any plywood construction is its ends. We must not forget about the processing of joints, especially if the plywood will be placed outdoors.
If the plywood is joined correctly, a good floor will be obtained
Butt joint or strip jointing is preferable for walls, but for outdoor structures, strip jointing is the most suitable option, and profiles made of aluminum will protect the edges of your plywood slabs, as complete immunity to corrosion makes them an indispensable material for the facade. But, if for some reason it is mandatory to use an open joint, then the edges of the plates must be properly processed. As mentioned above, about 2 mm should be left for the future expansion of the panel, but for a butt joint, 3-6 millimeters should be left. Groove-ridge is used to install sheets on the floor, roof. It will prevent any lifting of the panels, keeping the roofing material safe and sound.
Gluing
Unfinished panels are very often glued with ordinary glue. Which glue to choose depends on the desired result of the work. The most popular: PVA, epoxy, phenol. PVA glue is perfect for joining plates that will be used indoors in the future.
Plywood parts are well glued with PVA glue
It is colorless and connects wood very well, especially uncoated wood. Epoxy and phenol will do just fine in the harsh and fickle conditions of the outside world. Metal elements with plywood are connected with epoxy glue. Both surfaces must be checked for cleanliness and moisture before gluing.
It is highly recommended not to glue film-coated plywood, as it will not stick to the glue for a long time. If it is absolutely necessary to glue the plate by lamination, then the film layer must be removed.
Video on how to properly handle the surface
Nails
Self-tapping screws and screws with a hidden head are the most effective for floors and walls. Acid-resistant nails must be used to install the outer cladding sheets, they are not subject to corrosion. The length of the nail should be three plywood thicknesses. Panels on the ceiling or walls are nailed at intervals of 10-20 cm along the edges and 20-30 cm in the middle of the panel itself. Underfloor sheets are installed at intervals equal to 2/1 of the wall/ceiling spacing. It is better to hammer in nails at a distance of 15 mm from the edge.
Conclusion
After reading our article, it will not be difficult for you to process plywood. All methods work and are tested, it remains only to choose your own. If you have any proven method of your own, do not forget to share it in the comments, because perhaps it will be the most convenient.
Plywood is the most popular material in the construction industry. This is due to its low cost. This is both a plus and a minus. The lower the price, the more it is exposed to moisture. The question arises: how to impregnate plywood for moisture resistance and how to increase its strength?
Construction of plywood
Plywood is a building material consisting of several layers of veneers connected to each other. How moisture resistant it is depends on the composition of the adhesive that binds the layers. Highly resistant to moisture is a material in the production of which bakelite varnish or glue is used. They are able to withstand direct exposure to water. Thanks to this, the material can be used for the manufacture of boats and other swimming facilities without additional processing. There is only one “but” – too high a price.
Other materials that are ideal for construction work and furniture production begin to delaminate and rot when exposed to high humidity. It is possible to increase the protection of plywood from moisture by impregnation with special substances. It should be noted that some of them cope with their task with dignity.
On the video: which plywood is better.
Processing methods
Plywood can be treated and protected from moisture in several ways. Here are some of them (the most common in everyday life):
- filling with PVA glue;
- drying oil coating;
- treatment with nitro paints;
- fiberglass bonding.
Next, we will take a closer look at the best way to process plywood and how to do it correctly.
Protecting plywood from moisture and decay with PVA putty has many advantages. It reliably protects the material from many negative factors. Here are step-by-step instructions on how to complete the protection process:
- Before processing the material to increase moisture resistance, it is placed parallel to the floor and a layer of PVA glue is applied.
- Give the initial layer time to soak well, then cover with another layer of PVA.
- Carry out the process until glue stains begin to appear on the wrong side of the sheet.
- The slab is turned over and the impregnation process is repeated.
After the work is completed, lay the slab on a flat surface and allow it to dry naturally. The disadvantages of this process include a rather long processing time. Plywood will have to be protected from moisture for 3-4 days.
A similar impregnation can be done using epoxy resin. But this is quite an expensive pleasure and it is not harmless to human health. Sheets treated with epoxy resin are used only for outdoor use.
Drying oil
Drying oil is the simplest way to impregnate a plywood board from water. Processing is carried out in the following way:
- Beforehand, the solution (plywood oil) should be heated to a temperature level of 60 0 C, due to this its penetrating ability increases.
- Then we impregnate the horizontally located sheet with drying oil using a brush.
- After completing the impregnation process of one side, proceed to the other.
- Be sure to carefully coat the ends of the plywood.
- When the first layer is applied, we begin to dry it forcibly with an iron or hair dryer.
- After completion of drying, we proceed to the repeated process of applying drying oil and forced drying.
The number of layers may vary. Stop treatment with drying oil only when the solution ceases to be absorbed by the material (full achievement of the water-repellent effect).
After this treatment, the plywood can be painted or varnished. Often the question arises of how to cover the plywood on the floor.
 This method is ideal for this purpose.
 Fiberglass
It is possible to protect plywood with fiberglass, but for this it is necessary to work with waterproof varnishes that do not contain epoxy or polyester resins. The protection technology consists of the following steps:
- The polished board is varnished.
- After allowing the applied layer of varnish to dry for about two hours, fiberglass is glued onto the surface of the plywood.
- Re-apply a layer of varnish on the ends of the board and leave to dry completely.
- The treatment is completed by applying another layer of varnish and drying the impregnated plywood in natural conditions.
Tip! In the absence of fiberglass, you can use ordinary gauze. After it has been varnished, it will reliably protect the material.
Nitro paint
Another way to treat plywood from moisture is nitro paint. This is especially true when the material will be in direct contact with water, for example, when repairing a boat or arranging a damp room.
Here are the instructions for doing the work with your own hands:
- Initially, you need to sand the surface and cover with drying oil.
- Allow the drying oil to dry completely and apply liquid paint as a primer.
- Apply a coat of nitro paint to primed sheets.
- We cover the surface of the plywood with a cloth, which must be impregnated with nitro solvents in parallel.
- After drying is complete, re-treat with diluted nitro paint. The resulting moisture-resistant material is suitable even for the manufacture of boats.
Important! The last layer of nitro paint is made quite thin. Otherwise, the degree of strength decreases.
Surface preparation
Before the plywood is impregnated from moisture, its surface must be prepared. This process consists of several stages:
- Drying of the plate is carried out. It should be such that the protection of plywood is of high quality.
- This is followed by surface grinding. Before impregnating plywood for moisture resistance, it is necessary to clean it well. To do this, use fine-grained sandpaper. For convenience, it is attached to a wooden block, and the surface is polished with such a device.
- Particular attention is paid to the ends of the sheet. All chips and burrs are removed. If the chips are quite large, you can use wood filler.
Grinding can be done with a grinder. Sanded by hand does not have the same surface quality as with the help of special tools.
It is advisable to acclimatize the plywood, how long this process will take depends on the temperature. If the material is intended for work indoors, then one day is enough for drying, on the street at a temperature of 8 0 C and below – 3 days.
Important! The plates are impregnated for some time, and then they must be stacked on a flat surface to dry completely.
Now you understand how to treat plywood to increase its moisture resistance and hydrophobic qualities at home, and it is not necessary to buy expensive brands. You can use quite effective processing methods presented above.
What kind of impregnation is better to buy for plywood (2 videos)
There are a number of methods that work best on materials such as birch or softwood plywood. Among them are manual and machine processing using tools made of hard steel alloys – the glue that holds plywood boards together can quickly damage non-professional processing tools. High-precision plywood cutting is carried out using functional laser cutting systems, as well as hydraulic installations, the pressure of which is 3500 bar.
Plywood sawing
The optimal tool for sawing plywood is a circular or band saw. When implementing this procedure, you should follow a number of rules. First of all, the canvas is sawn across the fibers and then sawn along the front side. Thus it is possible to avoid deformation of the corners. A band saw or hand saw is ideal for sawing the sheet from the front side, softwood or birch plywood is sawn from the back side with a contour or circular saw. In the case of using a circular saw, a low material feed rate and a high rotation speed are required. The teeth must not penetrate deeply into the sawn surface.
FSF plywood and its drilling rules
To obtain even holes when drilling, the tool must be as sharp as possible and have a front cutter. The process starts from the front side of the plywood sheet. It is possible to avoid deformation of the hole on the reverse side of the product by using a backing sheet.
For working with plywood, with which the floor, walls and ceiling are mounted, nails with threads or special screws are best suited for use. The head of such a screw or nail should be invisible on the surface – depressed or hidden. Simple wire nails are also good for blind driving. External panels of the room, as a rule, are nailed with acid-resistant nails – they retain their structure for a long time and are not subject to corrosion.
The nail should be between two and three and a half times the thickness of the plywood sheet along its length. Nails are driven in at a distance of 10-20 cm along the edges and 20-30 cm in the center on the panels that finish the ceiling and walls. 20-30 cm at the edges, 40-50 in the center – the ideal interval for the location of nails in the panels under the floor. Nails can be hammered in without retreating much from the edges due to the fact that laminated plywood consists of strips of veneer, the fibers of which are arranged transversely. On average, 12-15 mm recede from the edge.
When creating structures resistant to mechanical stress, the strength of nails and their fixation are taken into account. They are hammered in in a strictly defined order, the nails must have a large length and large hats. Screws are also acceptable. For a stronger fixation, it is permissible to use glue at the joints of plywood sheets.
Plywood fastening with screws
FK plywood is often fastened with screws. The use of screws is acceptable in the production of exhibition stands, furniture, shipbuilding, etc. The holes in the panel to be reinforced with screws are pre-drilled. Their diameter should be equal to the diameter of the screw itself and the minimum hole in the frame. The head of the screw should not be depressed when screwing in, it remains outside. When using nails, washers are used to protect the panel from being pressed into the head. If the plywood panel is attached to a metal surface, a special mounting method and special screws must be used to maintain its integrity.
Self-tapping screws are used to fasten the plywood sheets to the metal chassis when installing the floor in trailers and freight containers.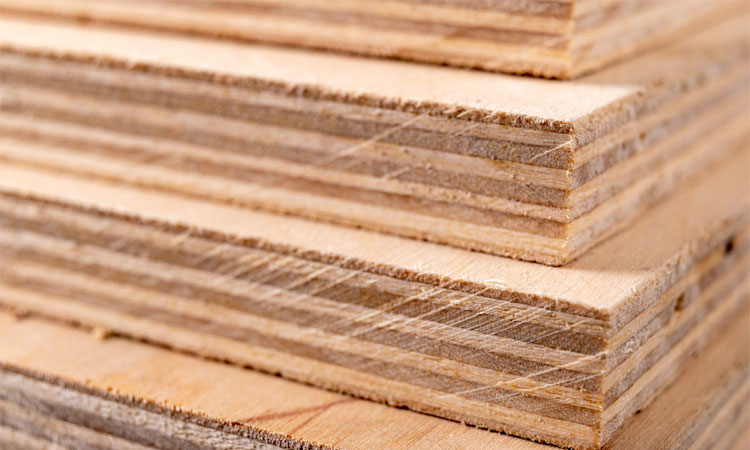 The thread first enters the plywood sheet, and then into the metal. This method of installation does not require much time.
Moisture-resistant plywood in the field of transport engineering is mounted to various metal structures also using self-tapping screws.
Plywood panels are fairly easy to attach with bolts. The diameter of the hole in the panel should be approximately 2 mm larger than the diameter of the bolt leg. Protect the panel from damage by the head of the washer and nut. In this case, the bolt must not be too tight, otherwise the surface of the plywood sheet will be deformed, especially if it is used outdoors and is exposed to environmental influences. Moisture will begin to penetrate into the deformed area, which will cause the surface to swell, the appearance of cracks around the bolt head.
Shelves, locks or hinges can be easily attached to the surface of the plywood sheet. Especially often, clamping devices are used in this case, since the fastening with their help is as strong as possible. When screwing screws on the edges of the panel, holes must be drilled in the required places in advance.
Choosing a plywood mounting method
There are many ways to fasten plywood sheets to various structures: fastening with nails, screws, glue, staples, bolts, fasteners, etc. When choosing a method, it is necessary to take into account the conditions in which the structure will be used ; strength required from it, as well as appearance. Prior to installation, it is necessary to take some steps to prepare the slab itself: measures to prevent the possibility of compression or expansion of the slab under the influence of moisture, temperature changes, etc. The gap between the plates should be approximately 2 mm. Acceptable for use and elastic filler, which is placed between the steel frame and the edge of the panel. If the stove is to be used at above average temperatures, it must be ventilated.
Connection of plywood panels and its types
There are several types of connection of panel structures. When installing plywood panels, special attention should be paid to their joints. After all, the plywood plate from the end is subject to deformation. Undesirable consequences can be avoided by performing a spike or tongue and groove connection in accordance with all the rules. With their observance, the design will be able to serve for a long time.
Seam, tongue-and-groove, open connection of plywood sheets used in ceilings and walls. It is also possible to install horizontal and vertical aluminum profiles, which are able to protect the edges of the slab from any impact. They do not corrode and are therefore ideal for use on building facades. If the open joint of plywood sheets is carried out outdoors, the design requires additional processing. Under the expansion of the plywood sheet should be left 2 mm per 1 m. If they are joined end-to-end, the distance increases to 3-6 mm.
Tongue and groove connection used for floor and roof installation. With this connection, the likelihood of lifting the panels is minimized. They can withstand any impact. Fastening is carried out with the help of hidden nailing.
Optimum load-bearing capacity can be achieved by using a stepped profile or similar profile with flanges that support the edges of adjacent panels. These profiles are used for the installation of floors in trailers or containers intended for cargo transportation.
Bonding of plywood sheets
Birch plywood or softwood, unfaced, to be bonded with any adhesive designed to work with a wooden surface. Depending on the level of humidity when using the finished structure, its required strength, a certain type of glue is selected. As a rule, phenol, PVA glue, polyurethane, epoxy resin, etc. are used.
PVA glue is optimal for indoor use. It glues wooden surfaces quite firmly, it has no color. Epoxy and phenol also bond fairly well and are used outdoors. The first of them, as a rule, is necessary for gluing plywood sheets with metal surfaces.
Plywood, as a finishing material, requires the use of contact adhesives. Such adhesives are needed for use indoors, where facing works are performed.
Film faced plywood usually not glued; long-term bonding is also not characteristic of plywood with a film coating. When gluing plywood with a film coating, the surface must be cleaned in advance to the wood layer. For these purposes, sanding paper can be used. In this case, epoxy glue is needed. From the surface of the plywood sheet, dust and moisture must first be removed.
Apply the adhesive evenly to both surfaces to be bonded using a brush. Additional pressure force can be achieved with nails or clamps. In this case, there should be an interval between the nails – 1 nail per 40 sq.cm. Do not leave excess glue on the surface. Before using the substance, you must read the instructions that the manufacturer offers.
Sanding plywood sheet
The surface of plywood sheet is usually sanded with coarse abrasive paper. Grinding is carried out perpendicular to the wood structure. If you need the most even processing, for example, for further varnishing of the product, fine-grained paper is used. Processing is carried out in the longitudinal direction of the wood structure.
Finishing the surface of a plywood sheet
The surface of the plywood after grinding can be further processed in various ways: laminating, painting, laminating, impregnating with special solutions, etc. When choosing a material for processing, it is necessary to take into account the possibility of cracks on the veneer. You can also cover the processed plywood sheet with a laminate or veneer made from valuable types of wood. Thin film and special wallpapers are also used.
Pre-finished plywood panels should be dried well, especially if stored in high humidity. The surface must be clean. Dust removal is carried out before each new stage of finishing. The coating can be applied in one or two layers.
Working with edges
The edges of a board that has just been sawn can be evened out by trimming them a little. Planing should be carried out from the corners of the panel to its middle, in this case the maximum effect will be achieved. It is also possible to sand the edges of the panel and paint them with acrylic paint in 2-3 layers.
If you are planning to buy plywood, you should remember that the wood from which it is made is a natural material that can expand or contract depending on the level of air humidity and temperature effects. The inner face of the veneer may have small cracks that shrink or expand depending on certain factors. That is why a plywood sheet needs to be primed before it is painted. In this case, the paint must be elastic and used in the right combination.
Paint applied to the paper base will not allow cracks to occur even in high humidity. Also, at high humidity, the plate must be painted on both sides and its ends must be carefully processed. Special paints are used for painting plywood sheets used outdoors.
Plywood can be painted in several layers: in this case, the grain of the wood will be hidden. A sprayer or a brush are the best tools for applying paint in this case. Painted plywood can be used both for interior decoration and for installation outside. The last coat of paint must be preceded by a layer of special impregnation, which will not allow fungus and blue stain to form on the panel.
Plywood, the price of which in the sale depends on the quality of the material from which it is made, can be varnished – thus it will have an aesthetic appearance. Lacquered surface is easy to clean. Before applying varnish, the plywood panel is sanded with sandpaper, the dust formed in this process is removed, and the surface is covered with a pre-prepared varnish.
Plywood processing. Information for home masters.
Plywood processing
Plywood is very easy to process. It can be processed in various ways, both with simple manual and electric woodworking tools. When processing
For general purpose plywood, attention should be paid to the fact that the glue used to glue veneer sheets quickly disables and dulls the cutting tool, therefore, increased requirements for hardness are imposed on tools for processing plywood. There are also modern laser and hydraulic cutting systems, but in the context of our story it makes no sense to talk about them, because rarely does anyone use them at home.
Sawing
The best sawing result is obtained when using a circular saw. A band saw can produce a so-called “wave”. To get a clean cut, sawing must be done correctly. Sawing first
plywood is needed across the direction of the fibers of the front side, then along. This way we avoid splitting the corners. On the side of the higher grade plywood (front side), sawing is done with a hand or band saw, on the side with a lower grade – with a circular or contour saw. When sawing with a circular saw, it is necessary to use a high blade speed and a low feed ratio of plywood. The depth of penetration of the teeth of the saw blade should be set small.
Drilling
To get a neat hole, you need a drill that is sharp enough and is equipped with a front cutter. You need to drill from the side with a higher grade. In order to avoid splitting on the reverse side of the plywood board, a backing sheet must be used.
Nailing
For fastening plywood to walls, ceiling and floor, it is best to use threaded nails or special screws, it is desirable that the cap is hidden or pressed in. In order to prevent hats from being visible on the surface, ordinary wire nails can also be used. When using plywood for outdoor use, it is best to use acid-resistant nails as they protect against rust on the surface of the plywood.
The nails should be 2.5-3 times longer than the thickness of the plywood. The interval between nails for plywood boards for walls and ceilings is recommended to be 10-20 cm along the edges, 20-30 cm in the middle, depending on the load and type of nails. In plywood floorboards, the spacing should be 20-30 cm along the edges and 40-50 cm in the middle. Since the structure of the plywood board is a strip of veneer with a transverse and longitudinal arrangement of fibers, nails can be placed close to the edge. A suitable distance to the edge of the plywood board is 12-15 mm.
In structures where resistance to loads is required, strength and reliable fixation of nails play an important role. Nails must be hammered in in the correct order, they must be long, with large hats. It is more reliable to use screws or self-tapping screws. Structural strength can also be improved by using glue on the plywood joints.
Assembly
In structural work, plywood is fastened with glue, nails, staples, screws, rivets or bolts. When choosing a plywood fastening method, it is necessary to take into account the operating conditions, the required strength and appearance. Before installation, it is necessary to prepare the plywood in terms of the final operating conditions. Precautions must be taken to prevent possible expansion or contraction of the plywood board due to moisture or temperature changes. It is advisable to leave a gap of 2 mm at the joints. An elastic filler can be used, for example, between the edge of the panel and the steel frame of the structure. In heated structures, it is necessary to provide for normal ventilation of the plywood board.
Plywood butt joint
The type of butt joint greatly affects the quality of plywood structures. There are several types of butt joints of plywood boards: tongue-and-groove, spiked and others. When performed correctly, they provide structural integrity for walls, floors, and supporting members. The ends of a plywood board are usually the weakest link, so the joints must be especially carefully processed, especially if the plywood is intended for external work.
When finishing walls and ceilings, the following connections are recommended
plywood fk butt: open, tongue-and-groove, seam and strip connection. For outdoor applications, striped joints provide the best protection against external influences. Vertical and horizontal aluminum profiles protect the edges of the plywood board well. Rust resistance makes them a suitable material for facades. However, if for architectural reasons an open joint is preferred in outdoor applications, the edges must be treated in a certain way. Approximately 2 mm/m must be saved for panel expansion. In butt joints, this distance should be 3-6 mm. Tongue and groove joints are commonly used for floors and panels that go under roofs. It effectively prevents panels from lifting and damage to roofing materials, and is able to withstand greater loads than a conventional butt joint. The panel is fastened with hidden nailing.
Best strength is achieved by using a stepped profile or similar special profile with flanges supporting the edges of the mating plywood boards. Such profiles are used, for example, in the manufacture of floors for shipping containers or trailers.
Bonding
For gluing plywood, you can use wood glue of any darkness, which is suitable for the specific operating conditions of the product. So, PVA is used for interior work. This adhesive is colorless and has good bonding strength. Phenolic and epoxy resins are used for the manufacture of outdoor products, as they are able to withstand adverse atmospheric conditions. In addition, epoxy compounds are indispensable for bonding metal and plywood. The adhesive must be applied to a dry and clean veneer surface. It is veneer – if laminated plywood is used for gluing, then the film must be peeled off to a layer of wood, for example, using sanding paper. When gluing, it is necessary to coat both surfaces: for this, a brush or roller is used. You can fix the glued plywood sheets with clamps, screws or nails.
Sanding
For sanding plywood, sandpaper designed for woodworking is used. Grind across the grain: sometimes you can also use sanding in a circular motion.
If an exceptionally smooth finish is required, for example for high-quality lacquering, sand with fine-grained paper along the grain direction of the wood. It is important to recall that
plywood fk and fsf grade III and
above is usually already sanded.
Surface finish
After sanding, the surface of the plywood is an excellent base for finishing. There are the following types of plywood finishing: lamination, lamination, painting, impregnation with special paint or mortar, etc. The surface can also be covered with laminate or fine wood veneer. It is possible to use a thin film. Plywood can be wallpapered. If plywood boards have been stored at high humidity, they must be dried to a normal moisture content before finishing. The surface should be thoroughly cleaned of dust resulting from previous processing. Cleaning must be repeated before each stage of finishing. Depending on the required quality, it is necessary to apply 1-2 coats of coating.
Ending
To align the ends of the plywood board after sawing, they can be planed with a planer. The best result is achieved if you cut in the direction from the edges to the middle, thereby avoiding splitting at the corners. Panel edges can also be sanded. The ends must be painted 2-3 times with acrylic paint with special additives.
Primer
Wood is a natural material that expands and contracts depending on the temperature and humidity of the environment. Cracks are observed on the outer side of the face veneer, which expand and contract under the influence of temperature and humidity changes. Therefore, if it is planned to paint the plywood surface, then it must first be primed.
Coloring
Staining gives plywood a natural texture pattern. The surface of the slab can also be completely painted, without revealing the grain of the wood.
The paint is applied with a brush or spray. Painted plywood is used for both interior and exterior work. But before painting the plywood
it is recommended to treat with a special solution to protect against blue and fungi, since the biological stability of transparent paints
limited due to the minimum binder content.
Varnished
Lacquered plywood has the best decorative qualities and is easy to keep clean. For varnishing it is necessary to use plywood sanded with fine-grained sandpaper. Before varnishing it is necessary to carefully remove the dust formed during grinding.
It’s easy to buy plywood!
Look at our prices for FC plywood!
prices
© 2008-2022 Plywood, wood-based materials FDPM
Working with plywood the right way
Plywood can be worked in many ways, both with standard hand and power woodworking tools. However, it should be noted that the adhesive in the plywood board causes rapid wear of the cutting tools, so it is recommended to use tungsten carbide tools. Plywood can also be cut with modern laser beam cutting systems and hydraulic systems at a pressure of 3500 bar.
Sawing
The best sawing results are obtained with a band saw or a circular saw. To get a clean cut, sawing must be done correctly. First, sawing is done across the direction of the fibers of the front side, then along. This method avoids splitting corners. On the best, front side of plywood, sawing is done with a hand or band saw, on the reverse side – with a circular or contour saw. When sawing with a circular saw, a high speed and a low feed rate are recommended. The penetration limit of the saw blade teeth should be small.
Drilling
Holes with even edges are obtained if the drill is sharp enough and equipped with a front cutter. Drilling should start from the front side. Splitting on the back of the board can be avoided by using a backing sheet.
Using nails
For wall, ceiling and floor panels, threaded nails or special screws are best suited, preferably with the head hidden or pressed in. For hidden nailing, ordinary wire nails are also suitable. Acid-resistant nails are recommended for nailing exterior cladding panels as they provide the best rust protection on the surface of the panel.
The length of the nails should be 2.5-3 times the thickness of the panel. The interval between nails for wall and ceiling panels is considered suitable – 10-20 cm along the edges, 20-30 cm in the middle, depending on the load and type of nails. In floor panels, the spacing should be 20-30 cm along the edges and 40-50 cm in the middle. Due to the structure of the plywood board being strips of cross-grain veneer, nails can be driven close to the edge. A suitable distance to the edge of the panel is 12-15 mm.
In load-bearing structures, strength and nail retention play an important role in their integrity. Nails must be hammered in in the correct order, they must be long, with large hats. You can use screws. As noted above, the fixation of the structure can also be improved by using adhesive at the joints.
Screw connections
In many applications, plywood panels are fixed with screws. In finishing, in the manufacture of cabinet furniture, exhibition stands and shipbuilding, screws are preferred. Auxiliary holes can be pre-drilled, with the hole in the panel matching the diameter of the screw and the smaller hole in the frame; the diameter of the latter will be half of the previous one. The screw head must not penetrate into the face veneer. If domed nails are used, washers must be used. When attaching sheathing plywood to metal structural components, special screws can be used to fasten the plywood board from the back without damaging the front side.
Freight container and trailer underfloor panels are usually attached to the metal chassis with self-tapping threaded screws.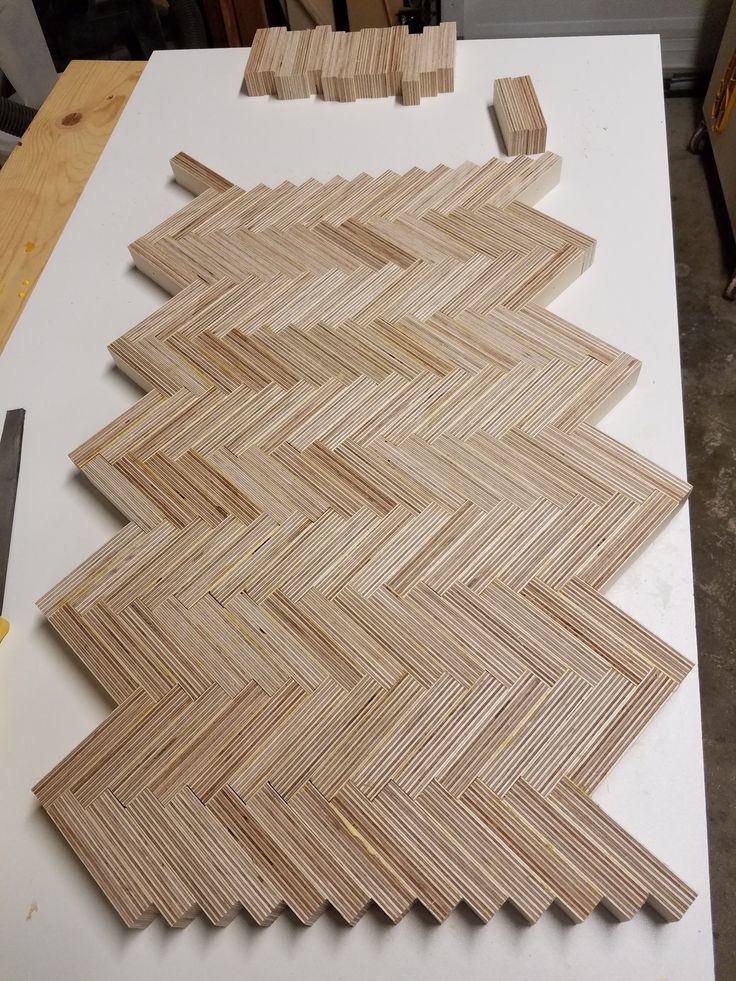 For example, 27 mm thick plywood boards can be fastened with M6x40 mm screws. The screw first penetrates the plywood board and then cuts a thread in the metal. This method is fast enough.
Thin plywood panels for transport engineering are also easily fastened to a metal structure using the aforementioned self-tapping screws. Plywood boards are easily fastened with bolts. The hole for the bolt should be 2 mm larger than the diameter of the bolt itself. There should be washers and nuts under the bolt heads to protect the panel surface. To avoid damaging the wood under the bolt, do not overtighten the bolt. Where plywood is used outdoors, an overtightened bolt may press into the surface of the board, causing it to swell with moisture. This will cause cracks in the plywood surface around the bolt.
Locks, hinges, shelves, etc. can be easily and securely attached to the plywood surface from either side or edge. The most durable is the fastening with clamping devices. If it is necessary to place screws at the edges of the panels, the holes for them must be pre-drilled.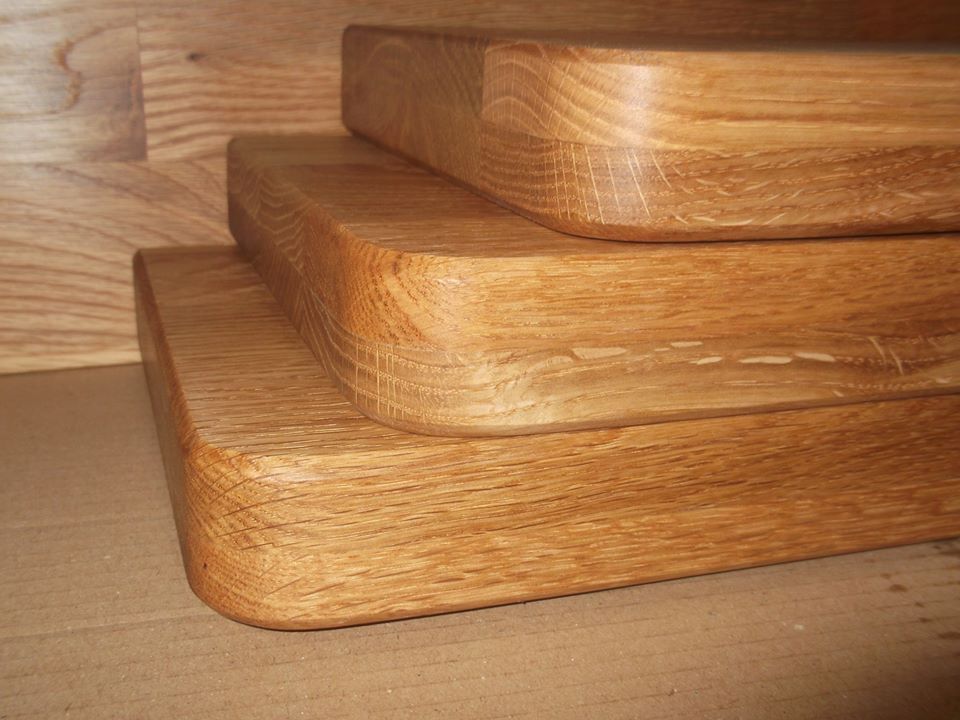
Assembly
Plywood can be attached to the structure with glue, nails, staples, screws, rivets or bolts. When choosing a mounting method, it is important to consider the operating conditions, the required strength and appearance. Before installation, the plywood board must be prepared in terms of end-use conditions, precautions must be taken to prevent possible expansion or contraction of the board due to exposure to moisture or temperature changes. A clearance at the joints of 2 mm is considered necessary. An elastic filler can be used, for example, between the edge of the panel and the steel frame of the structure. In heated constructions, the plywood board must be adequately ventilated.
Joint types
Joints and joints are important components of plywood structures. There are many types of joining plywood boards: tongue and groove, and others. When performed correctly, they provide structural integrity for walls, floors, and supporting members. The ends of a plywood board are usually the most sensitive part, so special attention must be paid to the processing of the joints, especially if the plywood is intended for outdoor use.
Butt, open, tongue and groove, seam and strip joints are recommended in walls and ceilings. In outdoor applications, various stripe connections provide the best protection against external influences. Vertical and horizontal profiles made of aluminum effectively protect the edges of the plywood board. Their resistance to rust makes them a suitable material for facades. However, if for architectural reasons an open joint is preferred in an outdoor application, the edges must be properly finished. Approximately 2 mm/m must be saved for panel expansion. In butt joints, this distance should be 3-6 mm. Tongue and groove joints are commonly used for floors and panels that go under roofs. It effectively prevents panels from lifting and damage to roofing materials, and is able to withstand greater loads than a conventional butt joint. The panel is fastened with hidden nailing.
Best load-bearing capacity is achieved by using a stepped profile or similar special profile with flanges supporting the edges of adjoining panels. Such profiles are used, for example, in the construction of the floors of cargo containers or trailers.
Bonding
Bare plywood is usually glued with any wood glue. The choice of adhesive depends on the method of operation, the moisture content of the end-use process and the strength required. Common types of glue: PVA, phenol, epoxy, polyurethane, etc. PVA glue is suitable for indoor use. This adhesive is colorless and has good bonding strength. Phenol and epoxy adhesive have high bonding strength, able to withstand adverse environmental conditions. When bonding plywood to metal, an epoxy-type adhesive is recommended. Contact adhesives are commonly used for bonding large surfaces and for faced plywood intended for indoor use.
It is not recommended to glue laminated plywood. Film-coated plywood is not capable of long-term bonding. If film-coated plywood is attached with adhesive, the surface to be bonded must first be sanded down to a layer of wood, for example with sanding paper. It is desirable that the glue was epoxy. The surface to be bonded must be dry and clean.
Apply the adhesive evenly to both bonding surfaces with a roller or brush. The desired pressure force is achieved with clamps, screws or nails. A suitable spacing between nails is 1 nail per 40 cm2. Any excess adhesive should be removed before it cures. Always read the adhesive manufacturer’s instructions carefully.
Sanding
The plywood surface is usually sanded with a relatively coarse abrasive paper (#80 – 100) perpendicular to the grain of the wood. If exceptionally smooth processing is required, for example for high-quality varnishing, sanding with fine-grained paper in the longitudinal direction of the wood grain is recommended.
Surface finish
The sanded, smooth surface of the plywood provides an excellent base for subsequent finishing. Plywood can be laminated, laminated, painted, impregnated with special paint or mortar, etc. When choosing a paint or primer, it is important to consider the cracking tendency of the veneer. The surface can also be covered with laminate or fine wood veneer. It is possible to use a thin film. Plywood can also be covered with wallpaper. If plywood boards have been stored in high humidity conditions, they must be dried to a normal moisture content before finishing. The surface should be thoroughly cleaned of dust resulting from previous processing. This procedure must be repeated before each stage of finishing. Depending on the required quality, 1-2 coats are applied.
Edge finishing
To even out board edges after sawing, they can be trimmed slightly. The best result is achieved if you cut in the direction from the corners to the middle, thereby avoiding splitting at the corners. Panel edges can also be sanded. The ends are painted 2-3 times with acrylic paint with special additives.
Primer
Wood is a natural material that expands and contracts depending on the combined effect of temperature and humidity (despite the transverse layers of veneer inside the board). Cracks are observed on the inside of the face veneer, which expand and contract under the influence of moisture changes. For these reasons, a preliminary primer is necessary for subsequent painting. Elastic paints are used, and the correct combination of paints is important.
The painting of the paper backing completely prevents cracking of the paint layer due to moisture In humid and outdoor applications, plywood boards must also be painted on the reverse side. Under such conditions, end-face finishing is important and must be carried out especially carefully and several times. Plywood intended for outdoor use must be painted with special paints.
Painting
Painting gives the plywood a natural texture. The surface of the slab can also be completely painted, without revealing the grain of the wood. The paint is applied with a brush or spray. Colored plywood is acceptable for both interior and exterior decoration. But before the final painting, the surface must be treated with a special solution to prevent the formation of blue and fungus, since the biological stability of transparent paints is limited due to the minimum content of the binder.
Varnished
Varnished birch plywood is visually pleasing and easy to keep clean. Before varnishing, the surface of the panel must be sanded with fine-grained sandpaper. Dust generated during sanding must be carefully removed and the surface covered with diluted varnish.
rmnt.ru
KRASFAN plywood mill Sosnovoborsk Krasnoyarsk Territory
KRASFAN plywood mill Sosnovoborsk Krasnoyarsk Territory
Manufacture and wholesale of plywood products.
Get calculation
Plant capacity for incoming raw materials:
220 thousand m 3
Number of employees:
> 450 people
Plant capacity for finished products:
85 thousand m3 3
Product catalog
We produce plywood in sizes (2440 x 1220) mm and (2500 x 1250) mm, in thicknesses from 09 mm to 40 mm.
General Purpose Softwood Face Plywood
is carried out according to the requirements of GOST 3916.2-2018
Make an order by phone:
Tel: +7 (960) 753-15-54
Get Construction Construction
is carried out one hundred 7.4.5.5 -2017
Make an order by phone:
tel: +7 (960) 753-15-54
Get an estimate
12-001-00534109-2018
Make an order by phone:
tel: +7 (960) 753-15-54
Get an estimate
hardwood
Make an order by phone:
tel: +7 (960) 753-15-54
Get a quote
prev
next
About the company
The KRASFAN Plywood Mill was established in 2016 on the basis of the Yenisei Plywood Plant. After a complete modernization of production in 2017, the company began to produce plywood and fuel raff briquettes from coniferous and hardwood. Now the products are in demand all over the world. The company is the initiator and participant of the industrial (industrial) park project “Sosnovoborsk. Tekhnodrev – 2020″, implemented as part of the strategy for the socio-economic development of the Krasnoyarsk Territory.
Read more
technological process
The enterprise is equipped with modern equipment of well-known European and American companies, such as Linden (Canada), COE (USA), RAUTE (Canada), Spartech (USA), Valon Kone (Finland), USNR (USA) and many others .
Section for unloading, acceptance, storage of round timber
Supply of timber to production
Section for debarking
Section for hydrothermal processing of raw materials (HTP)
Plot of produced beamed veneer
School of drying and processing veneer
Plutory appliance and gluing plywood
Cold pressing
section of format pruning
School of peeling
Plywood)
next
Certificates
The plant’s products meet the highest international quality requirements, have all the necessary certificates of conformity and are in great demand in Russia and abroad.
Safety and Ecology
Ecology
Safety
Ecology
Working in the wood processing industry, which is an integral part of modern society, we strive to make our interaction with the environment more and more harmonious. Our efforts are aimed at protecting the environment, recycling waste and saving energy resources. We make sure that the company’s activities do not cause even minimal damage to the environment, and we cooperate with waste disposal companies.
More
Labor protection and industrial safety
The main goals in the field of labor protection and industrial safety are the creation of healthy, safe working conditions and the formation of a sustainable mechanism for safe behavior in the workplace among employees, the development of skills to anticipate and prevent incidents. The implementation of these goals is achieved through ensuring compliance with the requirements of the legislation regulating the activities of the enterprise in the field of labor protection and industrial safety.
More
Human Resources Policy
The Human Resources Policy is aimed at renewing personnel, attracting and retaining highly qualified specialists at the enterprise, improving the skills of employees and reducing staff turnover.
The company conducts excursions for high school students and graduates of educational institutions, students can take industrial and undergraduate practice. An agreement on strategic partnership and cooperation was signed with SibGTU. Academician M. F. Reshetnev. To attract young specialists, career guidance is carried out in the following areas:
Professional consultations for students to stimulate the process of choosing a future profession in technical areas
Selection of applicants, training of workers and specialists for the enterprise for targeted training under the state plan
Carrying out activities to increase the prestige of working professions and technical specialties among schoolchildren and students
prev
next
Our vacancies
prev
next
Vacancy
Supervisor of production and timber rafting
- Full time
- Place of work: Sosnovoborsk
- Employment in accordance with the Labor Code of the Russian Federation
Requirements:
- Knowledge of the basics of taxation and forest commodity science
- Knowledge of the basic conditions for the supply of timber
More
Responsibilities:
- Determining the quality, grade, size, quantity and volume of timber
- Record keeping
Vacancy
Deputy director for logging
- Full time
- Place of work: Sosnovoborsk
- Employment in accordance with the Labor Code of the Russian Federation
Requirements:
- Higher forest engineering education
- Experience in a logging company
More
Responsibilities:
- Ensuring the efficient operation of logging sites
- Organizing the work of logging contractors
- Operations management
Vacancy
Timber removal truck driver
- Full time
- Place of work: Sosnovoborsk
- Employment in accordance with the Labor Code of the Russian Federation
Requirements:
- Driving license category “E”
- Work experience from 3 years
More
Responsibilities:
- Timber removal
Vacancy
Chief Economist
- Full time
- Place of work: Sosnovoborsk
- Employment in accordance with the Labor Code of the Russian Federation
Requirements:
- Confident PC user: MS Office, 1C, legal information systems
- Work experience from 3 to 6 years
More
Responsibilities:
- Preparation and modern submission of periodic statistical reporting
- Analysis of FCD, DKZ, production indicators
- Preparation of initial data for the formation of BDDR and BDDS
Vacancy
Car driver (for timber removal)
- Full employment
- Place of work: Sosnovoborsk
- Employment in accordance with the Labor Code of the Russian Federation
Requirements:
- Driving license category “E”
- Work experience from 3 years
More
Responsibilities:
- Timber removal
prev
next
News
prev
next
09-06-2022
LLC “KRASFAN” Segezha Group restores forest in the Krasnoyarsk Territory
Loggers of the plywood mill in the Krasnoyarsk Territory have started a comprehensive program of compensatory reforestation.
More
07-06-2022
LLC “KRASFAN” develops personnel cooperation with Siberian State University. M.F. Reshetneva
On May 30, Maxim Zamyslov, General Director of KRASFAN LLC, took part in the work of the jury that evaluated the Cup of Senior Students. Competitions were held in the KVN format.
More
22-05-2022
Segezha Group launched film faced plywood production line at KRASFAN LLC
Segezha Group launched film faced plywood (FOB) production line at KRASFAN LLC plywood mill in the Krasnoyarsk Territory. The capacity of the line is 700 m3 per month.
More
17-05-2022
“We remember and thank the defenders of the Fatherland!”
Employees of Segezha Group enterprises in the Krasnoyarsk Territory congratulated veterans on the Great Victory Day.
More
05-05-2022
At the job fair at the Siberian State University named after. M. F. Reshetneva Segezha Group invited graduates to work at KRASFAN LLC
April 26 and 27 at the site of the Siberian State University. ak. M.F. Reshetnev Segezha Group presented the plywood mill KRASFAN LLC. An enterprise operating in Sosnovoborsk and recruiting personnel for work.
More
prev
next
Read all news
GET A CALCULATION
Please fill in all the fields so that we can
send you a calculation
Telephone
Message
The largest plywood mill in Russia opened in the Krasnoyarsk Territory (photo) / News of the economy of Krasnoyarsk and the Krasnoyarsk Territory / Newslab.Ru
May 27, 2011 08:44 PM
Share
0
Socio-economic development of the Krasnoyarsk Territory
27 May 2011 20:44
The largest plywood mill in Russia started operating in the Krasnoyarsk Territory — on May 27, a production line for the production of veneer was launched at the Yenisei Plywood Mill in Sosnovoborsk. It is the main component for the production of plywood.
The launch ceremony was attended by Chairman of the State Duma of the Russian Federation Boris Gryzlov, Governor of the Krasnoyarsk Territory Lev Kuznetsov and Chairman of the Supervisory Board of Yenisei Plywood Mill LLC Alexander Katunin. Recall that the project of a plywood mill in Sosnovoborsk was presented to the regional government back in 2006, the launch was previously planned in December 2009of the year.
Boris Gryzlov noted that the launch of the plant is an important event in the life of the Krasnoyarsk Territory and Sosnovoborsk. “I also have my share in this, because the idea of deep processing of the forest was expressed during the congress of the United Russia party in Krasnoyarsk in 2005. Of course, our country is rich in minerals, oil, gas, clean water, rich in forests, but we have children, grandchildren, we cannot destroy the forest today, exporting it. I think this is absolutely wrong,” Gryzlov said. He said that a number of economic decisions had been made regarding the increase in customs duties on roundwood exports. “It has risen to 25%. Over the next few years, this duty will become such that it will be unprofitable to export roundwood, ”the Chairman of the State Duma emphasized.
Governor of the region Lev Kuznetsov said that several more enterprises are preparing to launch in the region. “By the end of the year, in December, we plan to launch the first stage of the Boguchany timber processing complex, a large-scale construction of the Mekran furniture factory is underway, the Lower Angara region is the Boguchanskaya hydroelectric power station, and the construction of an aluminum plant is being completed. In addition, the topic of new deposits in addition to Vankor and the establishment of long-term, understandable to the investor, rules of state support in the form of benefits on customs duties, on tax benefits on the extraction of useful claims are relevant for us – today they are critical for the region in matters of developing the south of Evenkia “, Kuznetsov concluded.
The plant in Sosnovoborsk will produce plywood and veneer. Nearby there will be a building for the production of oriented strand board (OSB). Gryzlov noted that there will be no waste from the timber that will be supplied to the plant. “Everything that will not go into OSB, plywood, veneer will go into bioenergy fuel. These are pellets that will allow us to compete with other energy sources in terms of heat and electricity,” he said.
The plant will provide the city with more than 500 new jobs. In addition, new jobs will appear due to logging. In addition, at the opening of the plant, Gryzlov told the workers that their wages would be higher than the average for the Krasnoyarsk Territory.
In his opinion, the plant has great prospects: “We have 900 million cubic meters of timber annually. This is an increase to the volume that is. And we procure about 250 million cubic meters. We have a huge reserve for increasing production volumes in the timber processing complex. ”
”
Share
0
56
Discuss on the forum
Socio-economic development of the Krasnoyarsk Territory
Digest subscription
Newsletter is published once a day in the evenings.
Wrong email format
You have successfully subscribed
Most read
Society
7:42
Heating season starts in Krasnoyarsk50
Incidents
September 18
A 46-year-old Zheleznogorsk worker hit “bream” on an 8-year-old boy who stood up for his grandmother at a bus stop (video)39
Incidents
September 18
Berezovsky district is being decriminalized in the Krasnoyarsk Territory38
Digest subscription
Newsletter is published once a day in the evenings.
Wrong email format
You have successfully subscribed
For readers: FBK (Anti-Corruption Foundation, recognized as a foreign agent) recognized as extremist and banned in Russia,
Navalny’s headquarters, National Bolshevik Party, Jehovah’s Witnesses, People’s Will Army, Russian National Union, Movement against
illegal immigration”, “Right Sector”, UNA-UNSO, UPA, “Tryzub im. Stepan Bandera”, “Misanthropic Division”, “Mejlis of the Crimean Tatar people”,
the Artpodgotovka movement, the all-Russian political party Volya, AUE, the Azov and Aidar battalions. Recognized as terrorist and banned:
Taliban, Caucasus Emirate, Islamic State (IS, ISIS), Jabhad al-Nusra, AUM Shinrikyo, Muslim Brotherhood, Al-Qaeda in
countries of the Islamic Maghreb”, “Network”, “Columbine”.