My house extension: Access denied Error code 1020
10 things you need to know before building a house extension
So, you’re considering extending your home?
Most people are full of enthusiasm and keen to crack on with any new project, but with a little thought, careful planning and patience you will be much more likely to get your desired end result. Before you get carried away with the excitement of the project and start choosing new kitchens or furniture, there are many, more important things that you need to know and understand.
Here are just 10.
1. Quality
One of the first things we ask clients is “why do you want the extension?” There are a multitude of answers but they usually fit in with one or a few categories:
a) This your forever home and you’re extending to maximise the space for your long term enjoyment.
or:
b) You want to change the building into your final dream property?
You may already have your home in a great location with no intent on moving again. If you’re settled in your location the reason to extend may simply to be gain extra space and create your dream home. If that’s the case the project is much more about maximising the value of day to day experience of your home, and usually a better quality building would be required.
c) You want to add value to you home.
If the project is all about increasing the property value, it would be worth speaking to an estate agent to get a feel for what value potential your home has. Inevitably there will be a glass ceiling in the area, and in relation to your property plot and setting. A careful balance needs to be struck between producing a high standard of finishes and not spending more than will be recouped upon sale.
d) You need to create much needed extra space in the short term until you can afford to move.
Think how much you will spend on your extension against the cost of moving.Consider that after removal costs, legal fees, stamp duty and resettlement costs, you’re going to want to redecorate and make some changes to the property you move into. All of that money is often dead money by the time you’re up and running. How far would that money go in improving the home you’re in. If you would be altering the property you are considering moving to, then spending that extra money on improving the property you’re in could make a home that your would never consider leaving!
e) There’s just that bit of your home that niggles you every time you see it / use it.
Unless you have a home you really hate (in which case move now!) then for a modest budget, you can usually make some really effective alterations that provide the space you want and makes the whole property work for you, look and flow much better.
2. Cost
What budget do you have to deliver the project?
It’s time to be honest and up front.
Many people clam up at the mere mention of the budget but the purpose of setting a proper budget is so that design time isn’t wasted and so the final design is something that can be afforded by you, and actually delivered.
Your budget is not to do with setting architectural fees, or your consultants and contractors spending up to the top end of your budget. If you know from the outset what your budget is, and what you would be prepared to spend, then a professional architect will always try to bring projects in under budget and provide best value.
However, most people want more than can actually achieve with their budget. Unless you tell your architect what your budget is, then there is no way that they can tell you whether your expectations are realistic.
As exciting as your project may be, try to be realistic and honest about the money available. Another point to remember is that generally speaking extensions and alterations are not zero VAT.
Therefore bear in mind that your spending power is reduced by 1/6th of your budget. VAT will be charged on all builder’s fees, materials, building control fees and professional fees. It is commonplace in the building industry for all prices to be quoted nett of VAT.
The good news is that there is no VAT charged on planning application fees, works to adjust a home to suit the requirements of a person with disabilities or works to create a new dwelling. However legislation changes all the time, it is worth consulting HMRC for the latest information.
As a rule of thumb indication of the overall cost of your extension, you can expect to pay approximately £1000 to £1250 per square metre for the building cost. This will of course vary in relation to the quality and complexity of construction.
3. Time
How long is it all going to take?
A typical project might take;
-
1 ½ months survey and design time prior to planning
-
2 ½ months in the planning process.
-
1 ½ months to produce working drawings and submit for building control for approval.

-
2 to 4 weeks to tender a project
-
2 weeks to mobilise a contractor to start.

If there are additional requirements associated with gaining planning permission and building control approval, this can delay the process. However, a good architect will usually foresee planning and building control issues before they arise and be able to address them when they do.
Try to plan when you want the work to commence on site. For obvious reasons most want their projects to start in the spring or summer. Bear this in mind and allow time to design, get your permissions, tender and get the builder scheduled.
When the project starts on site the duration of the build will depend on the size of the project, whether works need to be phased (such as when you are still living in the home through construction) and also the complexity of the project.
Other impacts on programme are the ‘good old British weather’ and the availability of the contractor’s resources. So before contractors even start on site it could take a minimum of 6 ½ months unless the proposal is permitted development. For permitted development projects you can reduce the programme by 2 ½ months.
Key point: If you want to be “in for next Christmas” like everyone else:
start now!
4. Cost, quality, time triangle.
You might want it all, but something will have to give. A great way to establish the most important criteria for you and your project is to consider the cost, quality, time triangle.
This will place some clarity and direction into your proposal and brief to the design team. It will not only help you to make decisions, but also guide your architect on your preferences.Use the triangle in the diagram below and put a dot on the paper in relation to what is the most important thing to you with your project.
A time focused project will have a spot around the time point. For a cost time balance, the spot will be along the line between the cost and time points. A perfectly balanced project would have a dot right in the middle.
5. Services
The services within your home refer to the supply of electricity, gas, water and drainage.
Take a look at the space that you want to develop.Is the the area where you’re planning to extend going to affect the services to the property? If the answer is yes then you may need to think about moving the water, electric, or gas meters?
Don’t forget the drainage to the property. Is there drainage in the area of the proposed works? Drainage is sometimes adopted by the local water board, particularly when shared with the neighbours. If you intend your extension to be built over an adopted sewer, a ‘build over sewer’ application will be necessary. If you’re unsure this is a question to ask your architect.
6. Neighbouring properties
Ask yourself will your proposal affect the neighbouring properties?
-
Do you share a party wall?
-
Could there be problems with overlooking?
-
Could they complain about their “Right to light?”
-
Are there any significant trees on site that may need to be removed? Whose trees are they? Are they protected?
-
Who owns the boundary fence, wall or hedge?
-
Would your addition overshadow their garden?
7. Planning & Neighbours
If planning is required, the chances are nowadays your neighbours will object. People tend to object to planning applications as some sort of hobby.
If you don’t already speak to your neighbours, now is the time to start thinking about when you might have that cup of coffee to explain your project and get them on board. Typically this would be pre-planning.
However, don’t be alarmed if your neighbours are not in favour with your proposals and the conversation becomes heated. Not everyone can have a rational conversation about something they feel so strongly about. They will want to offload their concerns and objections to the proposal without listening carefully to the facts.
The key to this is to stay very calm and let them have their opinion. Make sure to record what they said and pass this to your architect. There may be an easy alteration that resolves their objection.
If your neighbours still object, ultimately they will have to raise a material planning objection and submit this to the local authority. It will fall to the case officer at the local planning authority to weigh up the objections, decide whether there are material considerations and determine if the proposals are acceptable.
8. Design style
In your plan get some ideas about the styles that you like. If you’re unsure of what style you may want a great way to assemble some ideas is through Google Images, Pinterest and also Houzz.
Pinterest is a great tool for gathering images as you can collect images on a virtual board and share these with your chosen architect.
9. The whole project
Try to think beyond the extension itself. When organising an extension you can get caught up with planning the extra space and forget about the rest of your existing home.
Your new extension can affect the rest of the house. Depending on what your new plans entail you may need to budget for spending money elsewhere to make improvements to the overall space.
For example, if you are planning on creating a new kitchen and family space that leads directly onto the garden, you may want to allocate money towards improving the garden, landscape design or even interior design of the house.
Whilst the house is being altered it is the perfect time to complete other works that create mess and disturbance. If you can, why not get all the improvements done together to save time, future mess and money? Plus the overall affect will be much more impressive and satisfying!
10. Sustainability
Is your development an opportunity to improve the thermal performance and lower the running costs of your new home?
Your existing house may currently suffer thermally in areas due to condensation, single glazed windows, poor ventilation and the lack of loft insulation. This could be an ideal time to improve the sustainability of your home whilst saving you money in the long term.
Older properties have the most to gain in this respect, there are many easy wins if you know what to look for.
Think about:
-
Cavity wall insulation
-
Loft Insulation
-
Energy efficient windows and doors
-
Upgrade your boiler & radiators – will your existing heating system be able to cope with your new plans?
-
Solar panels
-
Ground source or air source heat pumps?
Your architect should be able to advise on the best strategies to make a leap in thermal efficiency in your home. Sustainability aside, this is an opportunity to make your home much more comfortable.
Having read the above key points you have a great basis in which to form your brief with your architect. This will save time throughout the process allowing you to be clear about your expectations from the outset, and tasking your professionals to deliver the desired finished result.
If you have any questions just ask us in the comments below, or why not give us a call and let’s get your project started!
Want to find out more?
Download our FREE guide here.
10 Things you need to know before building a house extension
With this eBook, you’ll discover 10 quick essential tips for planning your home project. Before you get carried away with the excitement of the project digest this useful guide.
The result: you’ll learn essential information and know-how and to equip you with thought, careful planning and patience to get your desired end result.
Discover more and click on the image to download today.
Will my home extension be worth it?
Many of our home extension clients ask the same question: Does a home extension make financial sense? It’s a good question to ask. A home is one of the biggest purchases many of us will make, so we need to think carefully about the money we invest into it.
However, there are two ways to look at what ‘worth it’ means. The first is in simple financial terms – the cost of the extension. The second is in emotional terms – the value of the extension.
Here are some things to consider.
A home extension in simple financial terms
In terms of seeing a financial return, a home extension is something you should be thinking of as a medium- to long-term investment – say five or more years.
As house prices rise over time, if you plan to stay in your home longer term, it is likely that your home extension will become, in terms of financial profit, worth it. You will also have had years of enjoying your home extension.
If you’re not planning to stay where you are for the long term, we suggest a better way to realise value is to gain planning permission for the extension, but not build it. The value that planning permission will add to a property is typically far more than the cost of securing it, making it a ‘quick win’ in comparison to actually building the extension.
A home extension in your individual financial situation
It’s easy to look at the cost of a home extension in broad brush financial terms. But the reality is that it depends on your individual financial situation.
Let’s say your property is currently valued at £250,000. You want to add an extension that will cost £100,000 to build but your property would only be worth £325,000 afterwards, then in simple financial terms, the figures don’t add up. However, in some instances our clients will still consider proceeding with the project since overall they consider that it will be worth it. It’s to do with absolute value and there are two scenarios to illustrate the principle.
Let’s take the example of the £250,000 house and the £100,000 extension that would create a house worth £325,000 again.
In scenario one, the remaining mortgage on the house is £50,000 and you could finance the extension with savings or only a small extension to your mortgage. In this situation, although the crude numbers don’t add up (£250,000 + £100,000 does not equal £325,000), your equity in the property is much greater than the cost of the extension. In this instance, you may feel that a home extension is worth it.
On the other hand, let’s say your mortgage is £200,000 and you would need to extend the mortgage by £100,000 to finance the extension. In this scenario, the home extension would not be worth it, because you could be at risk of negative equity.
Of course, all this is very theoretical. The figures rely on knowing with absolute certainty what the house will be worth when the work is completed. In reality, this is difficult to know. Estate agents will be able to offer advice, but they will be rightly cautious when giving prices based on plans.
In our experience, the prices given after work has been completed are noticeably higher than they were when they were just plans on paper. This is because it is much easier to see what has been gained. Our projects also tend to have a wow factor that adds value in its own right. But even when a property is valued after a project has been completed it’s still only theoretical until it’s actually been sold. And who wants to build an extension then sell their home just to find out its true value?
Paying it forward…
“The house couldn’t breathe properly because it was painted outside and plastered inside. Everything we’ve done has helped it to breathe again. The dampness has almost gone and the cold you get in the winter is no longer there. It’s a complete revelation – we’ve gone from a very cold, damp house to a very warm, dry house.”
James, Communion client
As well as considering potential financial gain, it’s also worth remembering that a home extension can be a good way to solve common problems.
Could it fix the problem with the ageing, leaking conservatory? Will it give you a bigger kitchen that it will be easier to live life in? Will it improve the flow of your home? Will it mean you can open the back door and go straight into the garden? Will it give you space for an office? Does it provide a room so people can come and stay?
Often we work with people who will be looking to stay in their home for the foreseeable future. We often hear the term ‘forever home’. By undertaking the project they are hoping to create a home that really works for them, not to mention reduces future maintenance issues.
In effect, by completing the work our clients are looking to release long term value for themselves. They are effectively buying low (by buying at today’s prices) to be able to enjoy the future without needing to worry.
Because some things are more important
“There’s just so much space and light now. The communal area serves different purposes with a TV area and a kitchen. It means even though someone might be watching TV you can still have conversations together. There’s also still the lounge which we can use as a quiet area. There’s a lot more space to store the kids’ stuff and when they have friends round the space works so much better. We’re living together in a different way.”
Communion client
There are also emotional considerations.
A bigger kitchen diner would let you entertain friends and spend more time together as a family. Swapping the positioning of the sitting room would let you enjoy the sunset sipping a glass of wine. Additional bedrooms would let you host family at Christmas. A more welcoming entrance would make you smile when you came home every day.
These experiences give almost priceless enjoyment and when your home extension is designed around these precise needs, they come as part of the package.
In other words, if your home extension creates your dream home and one you delight in living in, there will likely be a ‘value gain’ far greater than the financial cost. People spend a few thousand pounds each year to live in beautiful accommodation for two weeks when they go on holiday. For a similar sum each year in mortgage repayments, you could have a home that you live in and enjoy all year round. You’re releasing long term value, day by day, year by year. And all the time, the value of your asset is rising because it’s being filled with more and more happy experiences and precious memories.
What’s more important: cost or value?
You can – and should – look at a home extension in terms of the financial cost. You need to be sure that the investment you make in your home extension is one you can afford to make financially and won’t leave you in negative equity. But you should also look at a home extension in terms of the value it will give you.
If a home extension gives you the right amount of space in the right location and allows you to live your life as you choose, then we think it’s definitely ‘worth it’. Though the financial investment can be significant, the return on the investment is often greater still.
“I love, love love, my house.”
Communion client
All You Need To Know
A home extension is an effective way of using all the space in your house. It also adds value and improves the outlook of your house.
Home extension ranges from building extra rooms, extending current space, plumbing, plastering, laying foundations and may also be extended to interior designing.
Extending your home would allow you to enjoy more room and beauty with your family without looking for a new house altogether.
How To Add An Extension To Your Home?
Planning an extension is a rather important project, and proper planning has to be done to make sure the whole process runs smoothly.
From budget to costs to permissions, all these have to be looked into thoroughly before starting the extension.
Before The Extension
Several things that have to be looked into before extending your house:
Planning Permission
The most important and tricky part of extending your home would be to acquire permission. It is vital to go through your plans with a builder or architect familiar with the local authority and the guidelines.
A general guide for an extension that requires permission would be:
- Extension that covers half the area surrounding your home
- If your extension is towards a road
- You are planning to increase the overall height of the building
- You plan to extend more than six or eight metres from the rear of a semi-detached home
- If you have decided to extend more than 4 metres for your single-storey extension
- If your single-storey extension exceeds more than half the width of your house and extends to the side of your property.
- If the materials that will be used differ from the original style of the house.
- There are plans on building a balcony or raising your veranda
- Your house is listed.

Planning Considerations
There are a few other things that you must also consider when extending your home.
For instance, your neighbors:
If you have overlooking neighbors, features such as balconies may cause unhappiness or arguments. Hence it is best to discuss it first with them. As for windows, try using obscure frosted glass or install them at higher levels.
Another important thing to consider is that adding a second storey or having an extension too far out from the back may overshadow the neighbors.
Lastly, it is important to bear in mind if your proposed extension leads towards a nearby road or highway, as it might disrupt or interfere with the visibility of the motorists.
Building Regulations
Building regulations are another matter that has to be taken into serious consideration. Whether or not it requires permission, it must comply with the building regulations.
You would need to make sure that all those in charge can either self-certify their work or will liaise with the local authorities at your council to have their work certified.
If you do not meet the requirements, the local authorities can serve you a notice to take the extension down, or you could also face troubles when selling your home without the relevant certificates.
Fire Regulations
Most extensions would naturally comply with the fire regulations due to the inert qualities of building materials.
Materials such as bricks, plasterboard and concrete blocks can normally control the spread if a fire occurs for at least 30 minutes.
If you have any exposed major structural components such as timber posts and steel beams, they must be protected with plasterboard lining.
Also, holes that have been cut for lighting should be fitted with fire hoods.
Modern extensions are built with timber-frame wall panels and are lined with inert plasterboard that slows down the passage of smoke and fire.
If you are looking at building a garage, then the walls and ceilings must be plastered with a special pink-coloured fire-resistant plasterboard.
The fire regulations can get more demanding when building or extending to three storeys or more. Special fire doors and a safe escape corridor down to the main exit have to be part of the plan.
Home Insurance Cover
Before starting your home extension project, you should contact your insurer provider and discuss your plans.
This is vital as extensions will most likely increase the rebuild cost of your house and may affect the premium prices.
As a house extension is a rather big project, sometimes a mishap could happen, and if your insurance provider is unaware of the extension, your policy may be void.
You will be informed by the insurance provider if your current policy covers the new extension or if you need to top up some amount to make sure everything is well covered.
It’s good to have your home insured to make sure you have peace of mind if any issues occur.
Lastly, you should also check with your builder if your property has professional indemnity insurance to cover the costs should something unwanted happens.
Leaseholders
If the property you are on is on lease, you need to check the details of your lease to ensure that you are allowed to make the extensions.
It is important to look into this step fast and get approval and sign-off from the freeholder before starting the work.
Party Wall Agreement
Party walls are walls shared between a terrace or semi-detached house, and they divide the homes of two different owners.
It also includes the garden walls built close to a neighbor’s property, usually within three to six metres.
Therefore, a party wall agreement is required for loft conversions and extensions that involve the insertion of steel supports or when digging new foundations.
Consider Access
Access in and out of your house is crucial when planning an extension.
Get your builders to propose good and accessible ideas to ensure that neither you nor your neighbours will face any issues later on.
This is especially if you live in a terrace house and the rear access may become inaccessible during the extension work.
Designing The Extension
Who’s the best person to design your extension? Of course, an architect will be able to draw up your plan professionally, which would mean a better result.
Do You Need An Architect?
The decision of engaging an architect or not would solely depend on you and the scale of the project.
There is no law that says you must get an architect, but some people find it easier as they would be able to have their plans drawn professionally for a better end result.
However, do consider an architect’s fees and include them in your budget. If the budget permits, then do go ahead and engage one.
Briefing An Architect
Details, details, and more details. You’ll want to provide as much information as possible and what you expect from the project.
Besides that, the timeline, payment and deadlines should all be ironed out before starting a project.
Choosing A Builder
Another important step in home extension is getting a builder. Not just any builder but a professional and reliable one.
Before engaging one particular person or company, do as much research as you can. Check out their reviews online, ask around and make comparisons with other builders.
Questions to ask when deciding on a builder include:
- How long do they take to complete a project?
- Do they manage to complete the project within budget?
- Did they face any unforeseen problems with past projects, and how did they deal with them?
Before choosing your builder, be sure to go through all this thoroughly to ensure that your house extension goes smoothly.
Read ‘How to Choose a House Extension Builder in San Diego’ for more tips on choosing a builder.
Home Extension Cost
The cost to extend a home would depend on the size and extent of the project. It also depends on the structural work involved and the type of materials used.
According to MyBuilder, the average cost of a 4m x 6m extension could range from $10,000 up to $50,000 and even more depending on the size of the extension, materials used and the builder.
Do bear in mind that the extension cost of a two-storey is not that much from a single storey as the main cost here would be the foundations.
Home Extension Quotes
It is always best to get quotes from three different contractors for the work and settle for the one that best meets your expectations and budget.
Sometimes, you will have to ask more than three firms, perhaps five or six, to be able to get three different quotes.
Nevertheless, it is always best to shop around before making a final decision.
Home Extension Budgets
Before setting a budget for your extension, you will first have to list everything that you would like included.
Next, compare your quotes thoroughly, looking at each item. Remember to check if the value-added tax (VAT) is included when looking into pricing services and materials.
Always set an extra 10% on your budget for any additional or unexpected costs.
For more on home extension prices and budgeting, read ‘How Much Does a House Extension Cost in 2022?’
Is An Extension Worth It?
Yes, if you have always dreamed of having a bigger living room or adding on a study or even a bedroom, an extension is surely worth it.
Additionally, an extension may also increase the value of your home, making it easier to sell in the future.
Home Extension Company
A house extension can be complicated. Major extensions, especially, may not be a walk in the park. However, with the right advice and help, this process can be smooth and hassle-free. Thus, hiring a house extension company may be a great step.
Companies such as Style & Structure offer complete designing, custom building and remodeling services to improve your current home. You won’t have to worry about the project as we’ll be there with you from the start to the project’s conclusion.
Reach out to us if you’re looking for house extension company in San Diego or the Bay Area. We are passionate and have excellent design skills, and together we can make your dream home a reality.
Browse our gallery to see some of our past home remodeling projects, and connect with us today to get started on your home extension journey!
Is It Worth Extending My House? The Top Benefits Of A House Extension
Is It Worth Extending My House?
Whether you have a bundle of joy on the way, a house filled with teenagers or simply want to create the perfect haven for relaxation, a home extension is ideal for enhancing living space. Not only are extensions a cost-effective alternative to moving, but they also add property value should you sell up in the future.
If you are considering building a home extension yet still not entirely convinced whether it is a better alternative to moving, then we are here to help! We understand that any construction work on your home is a significant investment, and you must be set on your decision before scheduling any work to commence. With this in mind, we have put together a guide answering the question, “are house extensions worth it?”
Any construction work on your home takes careful consideration and extensive planning to ensure that you can enjoy your new living space. Particularly when building a home extension, you must bear in mind factors such as the desired use of the room, along with whether you have enough land to accommodate the build. To help you to determine whether a house extension is the best route for you or whether you should begin planning your move, we have answered the following questions:
- Should I Move House Or Extend?
- Are House Extensions Worth It?
Project: Rear house extension in Tattenhoe, Milton Keynes
Should I Move House Or Extend?
Since 2005, the average UK house price has risen from £150,633 to over £230,000, so it’s no surprise that more homeowners than ever are now asking themselves, “should I move house or extend?” Unfortunately, there is no set-in-stone answer to this question as the best-suited option will differ based on your circumstances.
For example, if you love your local community and are settled in the area, building an extension would be ideal. It will also be far more cost-effective, and there will be endless customisation options to allow you to make the new space your own. However, if you are restricted in terms of land and extending will mean that you no longer have a garden space, you may put more consideration into upsizing to a larger property. For those who live in a listed property or conservation area, you may find that extending is not an option at all as you will not be able to gain planning permission. These are just some of the many factors that will help you to weigh up your options. Other questions we recommend asking yourself include:
- What is your budget? Is the budget strict, or do you have room to add more?
- Do you have a strict timeframe? i.e. extra space required for a new baby arriving in a few months.
- Could you see yourself living in your home for many more years? If yes, then an extension is a great idea, but if the answer is a no, should you save the money and put it towards moving?
- Realistically, how much extra space do you need? This will help you to understand whether an extension is enough to meet your needs.

Project: Bungalow extension in Wavendon Lodge
Are House Extensions Worth It?
As professional builders in Milton Keynes, not only have we spent many years working with clients to build their dream home from scratch but also others who have unlocked the full potential of their existing property through renovations.
As house prices are continuing to increase and with over a year of pandemic restrictions in mind, moving to a new property and area has become less of a desirable option for many homeowners. Instead, many have opted to take advantage of their current space and alter their home to make it unique to their family. So if you are asking yourself “are house extensions worth it?”, here are just a handful of the excellent benefits:
- 1. Adds Value To Your Home
- 2. Alternative To Moving House
- 3. Tailor The Design To Your Family Needs
- 4. You Do Not Always Need Planning Permission
- 5. Provides Additional Living Space
Project: Single storey extension in Milton Keynes
1.
 Adds Value To Your Home
Whether you are planning to put your property on the market or simply wish to future-proof your home, building a home extension is a fantastic way to add value. Increasing living space is undoubtedly going to boost your sale price, along with the amount that potential buyers are willing to deposit, which means that a home extension is likely to come alongside a significant return on investment. If you are hoping to calculate how much your chosen extension size will add to the value of your property, then head over to the Office for National Statistics. Here you will find a tool which enables you to submit your postcode and extension size to determine how much the investment could be worth.
When considering building a conservatory to add value, it is vital to keep in mind that whether your property is appealing to potential buyers is hugely dependent on the quality of the build. A poorly designed extension filled with potential problems will most definitely not catch the eye of buyers. Instead of seeing a room filled with potential, they will see a host of repair and renovation fees on top of their house deposit. To ensure that you can reap the monetary benefits of a house extension, it is imperative only to trust qualified, reputable builders. Clarkson Builders has many years of experience designing quality extensions in Towcester and the surrounding areas, so clients can have peace of mind that their property couldn’t be in safer hands. Teams will spend time drawing up bespoke architectural drawings before providing a full project managed home extension construction process.
Project: Bungalow extension in Wavendon Lodge
2. Alternative To Moving House
As mentioned above, an extension is one of the best home renovations to consider if you are looking to increase space without moving home. This, inevitably, costs considerably less and removes the hassle of house hunting, packing up your home and moving into the next. Instead, all you will have to put up with is construction work on your home for a few months then you can begin living in your spacious property. You would have saved a considerable amount of money which can be invested in decorating your extension.
Investing in a house extension as opposed to moving is also ideal if you have a growing family who is settled in the area. Moving nurseries, schools, and colleges can be incredibly stressful for the younger members of the family, not to mention daunting. By staying in the same area, children can stay with their friends and continue their studies where they feel comfortable, without the disruption of having to start fresh.
Project: Double-storey front extension in Newport Pagnell
3. Tailor The Design To Your Family Needs
When enlisting a professional construction company to install a home extension, you are free to tailor every component of the design to suit the needs of your family. From windows and doors to the overall architecture, every aspect of your conservatory can be made bespoke to your requirements.
When opting for any of our renovations in Olney and the surrounding areas, you will be paired with a skilled architect who will work with you to bring your vision to life. Architectural drawings are ideal for giving you an accurate idea of what to expect from your home extension once it is complete, allowing you to make any amendments before the build commences to ensure that you are thrilled with your results.
Project: Extension in Walnut Tree, Milton Keynes
4. You Do Not Always Need Planning Permission
The beauty of a house extension is that, in most cases, you do not need to apply for planning permission in order to extend your property. The majority of extensions fall under ‘permitted development’, which are rights that you are given as a homeowner to make changes to your property without having to contact local authorities for permission.
Most property owners should never have a problem with regards to planning permission, aside from those who live in ‘designated areas’. If you live in, for example, a National Park, World Heritage Site or Conservation Areas, then you may have difficulties gaining permission to begin construction work on your property. However, if you do not fall into the above categories, you can schedule a home extension providing that it meets the following criteria:
- The extension does not take up more than half of the properties land.
- The top of the extension does not exceed the highest part of the current roof.
- The eaves of the extension are not higher than the existing properties eaves.
- The extension is not built forward of the principal elevation or, if it fronts a road, the side elevation.
- The extension does not include a balcony, raised platform or veranda.
- No alterations have been made to the existing roof.
- There has been no chimney, flue or vent pipe installed in the extension.
- The extension does not have a microwave antenna such as a satellite dish.
For more information on everything that you need to know about permitted development, take a look at Homebuilding & Renovating.
Project: Rear house extension in Tattenhoe, Milton Keynes
5.
 Provides Additional Living Space
By far, one of the most sought-after benefits of constructing a house extension is its ability to instantly provide additional living space. As mentioned previously, a home extension is perfect if you are beginning to outgrow your property yet want to avoid packing up and moving to a new area.
There is an abundance of opportunities when considering the uses of your new space, and your final decision should be based on the needs of your family. Have you recently started to work from home and need an office? Would you like to build a playroom for the younger members of the family? Do you want to create a space where you can entertain guests?
The possibilities really are endless, which means that you can transform your extension in any room that you wish. You could even opt for combining your extension with your existing home to create a large-scale open-plan space. This is fantastic for those who adore the idea of an open-plan kitchen-diner that integrates with the living room. Adopting the open-plan living approach continues to grow in popularity, thanks to its ability to encourage all family members to spend time together as opposed to shut off in separate rooms. If you’re stuck for inspiration on how to decorate an open-concept space, we love the 30 stylish ideas featured on Elle Decor.
Although every homeowner is free to transform their extension into any room that they wish, we suggest keeping the basics neutral to future-proof the room. Keeping walls, flooring and ceilings a simple, neutral palette means that should you want to change the use of your extension in the future, there will be no need to redecorate completely. You will, instead, have a blank canvas that can be decorated to incorporate your theme through furniture, accessories and finishing touches. Opting for a neutral colour scheme is also ideal for creating the illusion of a larger space. As opposed to dark colours, which absorb light, paler shades reflect both natural and artificial lighting, allowing it to bounce across the room.
Project: Extension in Walnut Tree, Milton Keynes
Transform Your Property Into The Home Of Your Dreams!
Enhancing your property with a home extension comes alongside a wealth of benefits, helping you to save both time and money while enjoying a spacious home filled with possibilities. If you are beginning to outgrow your current property, building an extension is a fantastic alternative to moving home. It couldn’t be easier to tailor every component of your conversation to fit with the needs of your family, meaning that you can enjoy your dream home without having the hassle of selling up.
If you are interested in a home extension and in need of expert guidance, then please feel free to contact Clarkson Builders. Our team are always more than happy to answer any questions that you may have, helping you to design a space that every member of the family will love. For project inspiration, we also recommend taking a look at our case studies page for just some wonderful examples of how we have helped clients to transform their property.
Building a House Addition: Pros and Cons
Whenever interest rates drop and home equity loans become affordable, an orchestra of hammers and saws arises across the nation. This is the sound of workers frantically building house additions. The house addition is the single most expensive home remodeling purchase a homeowner will ever make. If enough rooms are being built, the total expense can easily slide into six figures. Unlike an interior paint job or landscaping, a house addition is one project that cannot be undone. So it pays to carefully consider this process, which can be alternately rewarding and taxing, from all angles before writing that first check to the contractor.
Pros
House Additions Are All Your Creation
You may have an old house that was initially created by a builder and subsequently changed over the years by other homeowners. When you install new floors, paint the walls, or remodel a bathroom, you are only adding your unique touch to this pastiche.
But a home addition is space that you can legitimately claim as your own creation. Building an addition is like designing a whole new house without the expense of a whole new house. Few remodeling projects are as thrilling and creatively satisfying as working with the blank slate that addition-building affords you.
Additions Surpass Other Ways of Adding Space
When you look at the various ways to add space to your house, no other space-creating method matches the house addition in terms of financial and emotional value.
A sunroom may not be as good of an investment as other additions if a buyer views it as a lesser quality space or not as functional. If you decide to invest six figures into a fully conditioned sunroom, you might as well just build what you really want, a house addition.
Finished basements are viable spaces for living and entertaining. But unless you have a daylight basement, where one side is ground-level or nearly so, basements can be gloomy places with few or no windows. Plus, you are not adding any more square footage to your home.
Room additions can best be described as mini house additions. These are an addition but are only one room, not multiple. True house additions comprise many rooms. While room additions are your best cost-saving alternative to house additions, they still come at a considerable financial cost and disruption of your privacy.
Great High Cost-Value Ratio
According to Home Advisor’s True Cost Guide, at least 65 percent of the cost of a mid-range two-story addition may be recovered at the time of sale. The key phrase, “may be recovered,” means that there is no way of predicting the real estate market years in advance. It is typically cheaper to build an addition than to buy or build a new home that equals the space of your existing house plus an addition. At the very least, the closing costs involved with selling your old house and buying the new house would push this option over the top.
Cons
Higher Resale Price Not Guaranteed
Because peripheral costs increase, you may still lose money when you decide to sell the house. More space within the addition means higher heating and cooling costs, more windows to wash and gutters to clean, increased property taxes, and more house to clean.
Even though additions offer the potential for higher cost-value ratios than other renovation projects, you still may not recover the full cost of the addition when you sell. It is a gamble that many homeowners make. Building an addition with the full knowledge that you will sell the home within a year or two usually means losing money, unless you are in a particularly hot real estate market.
House Additions Use up Property Space
Unless you are adding a second story, you will lose yard space by building an addition. Once you build the ground-level house addition, this is space that can never be recovered. If you have young children and you like for them to play outside, you may want to hold off on the addition until they have matured or no longer care about outside play. The trend toward smaller and smaller yards continues as mammoth-sized homes envelop lots. In some communities, a backlash against yard-gobbling homes and additions has provoked calls for changes to zoning and permitting.
Addition Building Is Emotionally Taxing
In the first few days of building an addition, it can be thrilling. At first, you can barely wait for the workers to show up. They cannot seem to arrive soon enough.
Then one Saturday you wake early to the roar of a gas generator five feet from your bedroom window and realize that your romance with building an addition has hit the rocks. Worse than that, your relationship with your spouse or partner may hit the rocks. Many causes contribute to this, some of which can include: having work crews in your house six days a week; noise and dust; constantly dealing with the contractor rather than each other; lack of privacy; and that ultimate relationship-stressor, money worries.
House extensions: everything a homeowner needs to know
By Heather · 20 Jul ’22
·
11 min read
Why move when you can improve? With a home extension, you can get the space you need, while also being able to stay in the area you love. What’s more, with the right home extension, designed by the right architect, you not only get to enjoy the day to day benefits, but you may also find the value of your property benefiting too.
So, how do you go about creating a home extension?
In this ultimate guide for homeowners, we’ll be helping you explore your options. This will not only include showing you what home extension options you have, but diving deep into the ins and outs of getting your project on site. From planning to building regulations, budgeting to finance, we’ll be leaving no stone left unturned in this comprehensive guide.
Want tailored advice? Simply click here to book a FREE consultation.
Home extension types
Home extensions come in all shapes and sizes, so finding the right one for your property only requires a little bit of research. Here are some popular extension types you might consider…
Learn more about the types of house extensions available.
Front house extension
Extending the front of your home has the major benefit of keeping your rear garden intact. This extension can be used to enlarge your living room, create a new ground floor bedroom, or even just add in a new porch. However, as this extension will be visible on street level, it will be subject to more planning scrutiny.
Learn more about front house extensions.
Side of house extension
Situated to the (you guessed it) side of your house, this extension is a fantastic option for anyone looking to put a sad looking alleyway space to good use. A side house extension can be used to level off the rear of your home and create a compact new addition that transforms the property. Though small, these mighty extensions have been used to create some truly stunning open plan kitchen diners. What’s more, you might be able to achieve yours without the need for a full planning application.
Learn more about side of house extensions.
Semi-detached house extension
If you live in a semi-detached property, there are plenty of extension types for you to explore. With only one side of your property attached to a neighbour, you and your architect can extend your house in a way that doesn’t impact on the next door’s privacy or create any party wall matters. Semi-detached house extensions can also benefit from permitted development rights, which can help during the planning stage.
Learn more about semi-detached house extensions.
Terraced house extensions
It can feel a little daunting to extend a terraced house, but you needn’t be worried. Although you’ll need to factor in the privacy of your neighbours, along with their right to light, you will still enjoy plenty of design freedom. Of course, you should be aware that it’s likely your project will affect either a shared wall or boundary with one (or maybe both) of your neighbours. In this scenario, you will need to ensure you serve a party wall notice and get permission before construction begins.
Learn more about terraced house extensions.
Rear house extensions
Extending the rear of your house is a very popular option. Often used to expand key living areas, such as your kitchen, the rear extension is a highly versatile addition and can be used to create all kinds of space. You might opt for a new ground floor bedroom, utility room, home office, or even playroom. You may also use popular glazing, such as bi-fold doors, to create better connection to your garden space and bring lots of natural light into your home.
Learn more about rear house extensions.
Flat-pack house extensions
Flat-pack or prefab extensions are relatively newcomers on the residential scene, but have been rising in popularity over the last few years. Because they’re primarily built off-site, they’re a very cost effective way to extend your home and have much shorter construction times – meaning you don’t have to live on a building site or rented accommodation for very long. However, many flat-pack homes offer little to no customisation, and so you can lose one of the main benefits of extending your home, which is that you end up with a home tailored to your family.
Learn more about flat-pack house extensions.
House extensions costs
Before you start any project, it’s important to work out a budget and a financing strategy. At Resi, our brokers can help you explore different lending options, simply click here to get started.
Overall, the cost of a house extension will vary massively depending on…
- Extension type
- Size
- Design complexity
- Location
- Quality of materials and professionals used
- Pre-existing site condition
Learn more about the cost of house extensions.
How much money can DIY save you on a home extension?
If you’ve got the skill set, doing things yourself can help save you thousands on a home extension. However, you should be cautious about the risks involved. Mess up a key element of your build, especially anything relating to structure, and the cost of repairs will likely cancel out any savings you made at the time.
Therefore, unless you’re qualified, we recommend you stay away from…
- Roofing
- Plumbing
- Electrics
- Demolition
Learn more about DIY and home extensions here.
7 tips to keep house extension costs down
At Resi, our home improvement experts have plenty of tricks up their sleeves to help you keep costs down.
If you’re looking to reign in your budget, consider this advice…
- Make pricing your project as easy as possible with a good measured survey and building regulations package
- Properly assess your contractor quote
- Thoroughly vet your suppliers and specialists
- Consider adding a project manager
- Research your materials
- Think about moving out during construction
- Get the right funding plan
Learn more: 7 tips to keep house extension costs down
Financing a house extension
When it comes to financing your home extension, many people fail to do their homework and instead rely solely on their savings. But this is just one way of getting your extension off the ground. Make sure you’re also considering these alternatives…
House extension loan
For smaller projects, using an unsecured personal loan could be a good option, depending on the deals available to you at the time. They’re a great option if you’re only looking to cover short-term costs, as they don’t come with set-up fees attached. However, due to the high interest rates, you’ll want to make sure you pay this type of loan back quickly, as well as back sure you borrow less than £30,000.
Learn more about financing your house extension
House extension remortgage
For larger projects – over £30,000 – you might want to consider remortgaging or securing a further advance. This route is very attractive, as it can utilize both the existing and future equity of your home to get you the amount you need. What’s more, it also gives more flexibility than just using savings alone.
Personal savings
The benefits of using personal savings are obvious. With no lender involved, you needn’t worry about interest rates or payment plans. This is very appealing but there are some downsides to this approach. For instance, it can take time to get your savings to where they need to be and, during this time, inflation can go up, taking your project out of reach. Savings are also quite inflexible, putting you in a difficult position if you’re not budgeting a contingency fund at the same time.
Get tailored financial advice with Resi Finance
House extension ideas
A side home extension in Lambeth
Side extensions are a fantastic way to use up dead space around your property. Typically used to extend older housing stock, a side extension squares off a property with an alleyway present and expands key living areas.
This Lambeth project was completed in 2016, and used the side extension to create a broken plan kitchen/living room – complete with a glass ceiling and exposed brick wall.
A wraparound house extension in Southwark
Many people assume wraparound extensions have to be a massive undertaking, but as this Southwark project shows, they can be very economical. Rather than losing an entire alleyway or a large chunk of your rear garden, a wraparound allows you to take a little from both – resulting in plenty of space but without the sacrifice!
For this project, we combined the wraparound house extension with a matching brick facade and gorgeous Crittal french doors. This creates not only a beautiful kitchen diner, but leaves space to the side for raised bed and a picturesque view for the living room.
Get more house extension ideas by visiting our portfolio.
When you’re focused on your architectural plans and securing planning permission, it might seem like the interior design of your extension is a problem for future you – but no! Trust us, thinking early on how you want the new space to feel and function day to day will help you avoid expensive mistakes and ensure you the space you always dreamt of.
We asked our interior design partners, My Bespoke Room, for the top design mistakes to avoid. First on their list was people not thinking about the final layout of the room and where key items of furniture will be. Problems arise when you move in and realise there’s a radiator where your sofa should be, or a sideboard with no plug socket nearby for a table lamp.
It’s also very common not to think about how the new extension will sit next to the original part of the house. It can be wonderful to have a big ‘wow’ moment as you enter the new space from the old but it’s still important to have a thread that joins them so it’s not completely jarring. You can do this by using the same flooring throughout or by using colours on the walls in the same hue e.g. light pastel colours that are all different but sit happily next to each other.
Another big mistake is not maximising the natural light in your new space. It’s so important to think about where the light will be throughout the day and what times of the day you will use the room. For example, an open plan kitchen, dining room will be in use throughout the day and so you’ll want to maximise light as much as possible. Living rooms however tend to be used in the evenings and so are better placed in parts of your home that aren’t flooded in natural light.
You can avoid expensive mistakes by hiring a professional interior designer from just £195 for their bespoke consultancy service. Book a free chat to discuss your project here.
Environmentally friendly house extensions
More and more homeowners are becoming more environmentally conscious, especially when it comes to their households. With our homes accounting for 27% of the UK’s carbon emissions, there’s no better place to start your eco-friendly journey. And, luckily, there are plenty of ways to make your home extension plans that little bit greener.
How to build an energy efficient house extension
One of the best ways to bring your carbon emissions down is to ensure your home uses energy efficiently. The three areas to focus on in this regard are…
- Lighting
- Heating
- Insulation
Learn more about energy efficient home extensions here
What is the house extension process?
While each house extension is unique, it’s likely you’ll be running through the same list of tasks as your neighbours. Traditionally, this process has felt fragmented and confusing, but with services like Resi, you can sit back and relax, as our team guides you from Point A to Point B.
Get a free quote for Resi’s all-in-one service
Most projects will need to undergo these stages before they reach the construction stage…
- Measured survey
- Proposed design
- Planning permission
- Structural engineer
- Party wall notice
- CCTV surveyor
- Building regulations package
- Putting your project out for tender
- Selecting a contractor
Do you need an architect for a house extension?
You are not legally required to hire an architect.
However, this doesn’t mean you should rule them out. Architects are highly skilled in home design and bring a range of benefits to any project. Some of the most important reasons to consider hiring an architect are…
- Better design
- More added home value
- Expert guidance
- Increased planning success
- Plus more!
Learn more: Do you need an architect for an extension?
 youtube.com/embed/yWU03hpI2G8″ title=”YouTube video player” frameborder=”0″ allow=”accelerometer; autoplay; clipboard-write; encrypted-media; gyroscope; picture-in-picture” allowfullscreen=””/>
House extension drawings
Once you get started with your home extension project, you can quickly get lost in all the talk concerning drawings. What are elevations? Which do you need for planning?
For most projects, you’ll need the following types of construction drawings to get your project through planning and ready for construction…
- Existing drawings
- Design floor plans
- Elevations
- Structural drawings
- Electrical drawings
- Plumbing and sanitary drawings
Lean more about house extensions drawings and plans.
House extension regulations
When it comes to regulations, you better strap yourself in for a long ride. From planning permission to building regulations, structural drawings to party walls, there’s plenty of hoops you’ll need to jump through before you’re legally ready to start construction.
The main regulations you should focus on are…
- Planning permission
- Building regulations
- Party wall matters
What kind of survey do I need for my house extension?
Surveying your property is one of the first steps of any project, and it is often underestimated how important this stage really is. By producing the existing drawings most of your team will use through the course of your project, getting a high-quality survey can make all the difference to both the results and your budget. Afterall, make a mistake here and resolving the error can be costly.
So, what kind of survey will you need? Your options will include…
- Commercial grade laser surveys
- Measured surveys
- Hand-drawn surveys
- Topographic surveys
Learn more: What kind of survey do I need?
House extension without planning permission
Can you build a home extension without planning permission? Yes!
If your project comes under your permitted development rights, you’ll be able to avoid the need for a full planning application. However, this doesn’t mean you’ll be able to escape the planning process entirely. It’s still highly advised you apply for a lawful development certificate, in order to document your project was legal at the point of construction. And, if you plan on building a large rear extension (up to 6m or 8m in length, depending on whether or not your home is detached), then you are legally required to apply for prior approval.
Permitted development rights are great for removing subjectivity from the planning process, but getting the right documentation will take roughly the same time as a full planning application, so if you’re looking to cut down on timings, think again! They also don’t cover all properties and come with strict design guidelines.
Learn more: house extensions you can build without planning permission.
Can I add an extension to a listed building?
Adding an extension to a listed building isn’t impossible, but your options will be limited.
Unlike other properties, you won’t benefit from permitted development rights, so a full planning application will be required. You’ll also need to obtain listed building consent, which will take into consideration:
- History of the building
- Character features
- Measures you’ll take to protect key features
- Size of your extension
- Design of your extension
Learn more about adding an extension to a listed building
How to add an extension to the house – photo
After I, on a tip from the local administration, received a plot of 7 acres as my property, I began to build a house on this plot. Since the site was small, I also laid the house initially small – only 80 square meters.
Part of these meters was allocated for the bedroom and living room, part was allocated for the kitchen, corridors and other auxiliary premises. Everything was put together in the best possible way.
However, everything happens in life, and my wife’s parents decided to move to live with us. Which, in general, is not bad, but not about that conversation. Additional residential and common areas were urgently needed. And it is impossible to solve this issue reasonably and budgetarily, except to attach an extension to the house, using the already existing wall of the house as one of the walls of the new premises.
Deciding how to add an extension to the house
In order to do everything correctly and competently, and most importantly, cheaply attach an extension to the house, they sat down with the father-in-law to think over a sheet of paper. They took pencils, a calculator and, as usual in our country, a bottle. We sat like this with him every evening in the winter and decided how we would build an extension, and what rooms should be in it, and so on.
In general, despite the bottle, or maybe because of it, the planning process was progressing well. And here is what we have planned:
- First, in order to attach an extension to the house, you will need to remove the insulation from one of the walls of the house and remove the facade facing material – siding.
- Secondly, we decided not to move the living quarters into the extension, but, on the contrary, to move the utility rooms there – a pantry, a toilet and a boiler room. Since we would still have to make an additional bathroom and do the wiring of the heating system, it seemed reasonable.
- Thirdly, we decided to make the roof of the extension common with the roof of the house, in one line. That is, the roof of the extension will be a continuation of the roof of the house – then the snow will not linger on the roof of the extension for a long time. Yes, and this design will look better than an extension under a roof with a different angle of inclination.
- Fourthly, we decided to attach an extension to the house in such a way that the floor of the extension was slightly lower than the level of the floor in the house. This would save on the construction of the foundation of the attached premises, but more on that below.

Such “scheduled meetings” were very productive, but our “halves” after a week of practice decided to stop them, which my father-in-law and I were not at all happy about.
All subsequent “meetings” were moved from the kitchen at home to a tea house in our village, and the discussion of this issue continued there.
How to save money on an extension to the house
In order to make the process of moving my father-in-law and mother-in-law into our home painless, there had to be some good solution to justify this move in our own eyes. Arguments were put into play about looking after the grandchildren, about helping the father-in-law in construction work and about helping the mother-in-law with the housework.
And in order to make the move quite profitable, they decided to build an extension to the house in the most budgetary way, and use the money from their apartment to grow and buy something useful for the common family. For example, a new car.
How to save money on an extension to the house, as happened with us:
- First, you should think about building an extension with cheap materials. If the house is made of brick, then you can attach an extension from a bar, for example. Or, as in our version, attach a frame extension to the house from gas silicate blocks. This allows you to get new premises in the house at a price per square meter lower than the main premises.
- Secondly, you can save on concrete work. Since the rafters of the extension are attached to the wall of the house at one end, part of the load will be taken by the main foundation of the house. So you can make a foundation for an extension in a lightweight version. At home, we made a foundation for an extension in the form of an MZFL, 2 times smaller than the main foundation of the house.
- Thirdly, the insulation from one of the walls of the house is removed and transferred to the extension wall. The same is done with facade materials and other decor. So you only need to insulate the extension and sheathe it in half – you will need to buy insulation and sheathing for only 2 walls.
- Fourthly, since we decided to place utility and technical rooms in the annex, we decided not to insulate the annex to the full program, but to make it 5 cm smaller insulator. In addition, the boiler room, with the active combustion of the boiler, heats itself. And if in frosts the boiler is strongly stoked, then next to it you get a real bath.
 If the house is made of brick, then you can attach an extension from a bar, for example. Or, as in our version, attach a frame extension to the house from gas silicate blocks. This allows you to get new premises in the house at a price per square meter lower than the main premises.
  In addition, the boiler room, with the active combustion of the boiler, heats itself. And if in frosts the boiler is strongly stoked, then next to it you get a real bath.
 Speaking of the sauna. It is quite possible that after the successful completion of this extension to the house, my father-in-law and I will begin to attach a bathhouse to the house, since we already have experience in effective planning.
Here are some options on how to add an extension to the house – photo:
At the moment, the foundation of the extension is completely ready, my father-in-law and I filled it in at the very beginning of April. Now the process of tying the frame and erecting the extension truss system is underway.
As soon as new moments appear in my “attachment epic”, I will post them here in the form of updates, stay tuned.
Share with friends:
Assault to the house
Content
- Where to start the extension planning
- Registration of the extension, we understand the details of
- Papers for the non -capital structure
- Capital type
- extension.
- Materials for walls and roofs
Planning a future extension to the house requires a fairly thorough preparation and at least an approximate calculation of the parameters of the foundation, walls, roof. It will be necessary to resolve the issues of selecting material and, of course, you need to understand the question of how to legalize an extension to the house. Without legal registration of a new housing construction plan, an extension will be considered a self-construction and, according to all laws, is subject to demolition.
How to start planning an extension
Any option for an extension to a house is based on four main documents on which the future fate of the building will depend:
- Building permits;
- Project of a new building with detailed details of the implementation of the most important nodes, for example, a diagram of an adjoining to the main building or a foundation device;
- Scheme of the location of the extension on the site plan, with marked distances between individual buildings;
- Construction estimate.

Often building an extension to a house is just a small cosmetic extension of an existing porch, porch or outdoor terrace. Both elements already appear in the original project of a private house, so its owners believe that nothing needs to be changed in the documents. The external dimensions of the house with an attached premises do not change, the distances between objects according to sanitary and fire safety standards remain the same, so there is no point in messing with bureaucratic procedures for re-registering a capital building.
Similar logic can still be understood if we are talking about a country panel house, a wooden dacha or any other structure erected without a foundation or falling under the definitions of a temporary one. If we are talking about the construction of capital-type structures, the arrangement of an extension always entails certain consequences.
Note! Refusal of registration, except for a fine or forced dismantling of a building, is primarily an investment “in the air” with the risk of losing everything.
A professionally designed and built extension to the house, photo, can increase the capitalization of the object from 30 to 60%. The situation is quite common for modern brick buildings erected on the slope of a hill or mountain. Instead of a porch on piles, an extension to the brick house is being completed, which allows increasing the living space by 40-50%.
Properly executed documents will allow, for example, to increase the amount of collateral in the bank or simply sell the building at its real price. Whereas an illegal addition to the house will only create problems.
Registration of an extension, looking into the details
In order to correctly assess the possible amount of bureaucratic red tape, it is necessary to draw up the following description in as much detail as possible:
- Determine the purpose of the future building, its size and location relative to the house;
- Make sketches, you can even draw by hand, but with the obligatory observance of the generally accepted rules for paperwork, it is best to use ready-made projects for extensions to the house;
- Make a separate document detailing the construction of the foundation or foundation, walls and roof of the extension.

All of the above will be required in order to properly classify buildings. Any options for an extension to the house, photos are either classified as capital buildings or non-capital buildings.
The paperwork scheme depends on how the employees of the city inventory bureau classify the building.
Non-capital construction papers
The issue of correct classification is not as obvious as it might seem at first glance. Non-permanent outbuildings include:
- Stairs and porches at the new entrance to the house;
- Sheds, terraces, verandas, balconies;
- Auxiliary and temporary extensions, if they do not affect communications or load-bearing structures of a permanent structure.
Some experts and some lawyers define a non-capital extension as a structure without a foundation, but it would be wrong to follow such a rule in all situations, since there are a huge number of by-laws and clarifications to the norms of the Urban Planning Code, plus numerous court decisions that contain provisions that contradict each other . Therefore, before legalizing an extension to a private house, it will be useful to get acquainted with at least some of the regulatory documents.
To design such an extension to the house, do the following:
- Order a drawing for the extension and make a technically competent description of the structure;
- Write an application to the Bureau of Technical Inventory to amend the passport of a capital building, that is, a house with an extension;
- Wait for the inspection of the erected structure of the extension to the house;
- Make changes to the project of the house.
As a rule, there are no problems with registering a non-capital extension to a house, but even if an official refusal is received, registration can be done by a court decision.
Construction of a capital type extension
Most of the brick, stone or metal frame extensions are legally considered permanent. One of the arguments used by experts in substantiating their decision is the presence of a foundation in any of its forms. Therefore, when planning a full-fledged extension to the house, the owners show miracles of ingenuity, which is worth building a structure with a cantilever or balcony type of attachment to the walls of the main house.
According to the law, a capital extension will require a building permit from the regional department of architecture and capital construction.
Documents to be submitted:
- Application with a photocopy of the passport;
- Registration certificate for the house and attached site plan;
- Project of the future extension with a short explanatory note.
Upon a positive decision, the owner is issued a written permit for the construction of the structure, subject to registration and registration of the structure in the state register.
After the extension to the house is completed, it will be necessary to go through all the bureaucratic procedures at the BTI, where they may be forced to make an additional examination for the compliance of individual components with the SNiP and GOST standards. After entering into the technical documentation for the house, the changes are registered in the state register of capital construction and real estate.
Of course, you can put up a building without all this bureaucracy, but as practice shows, it is still cheaper to register an attached building.
How to plan an extension to a house
The second headache of any process of building an extension is the inadequacy of the box of the main house building. Only in 1 out of 100 cases, when drawing up a house project, the future owner is wise enough to provide for the possibility of expanding the main structure of the building due to one or two extensions. The most common problems are the imperfection of the foundation system or claims from neighbors.
What to do with the foundation
The simplest situation is when a full-fledged two-meter strip foundation is laid under the main building. In this case, under the attached premises, it is possible to use a shallow type of strip foundation without any special fears. If the height of the extension is higher than one floor, then the foundation will have to be deepened to the freezing level, the upper armo-belt must be tied up with the floor slab of the main building.
The most reliable and durable extension to the house is made on the same foundation with the brick box of the house. For example, you can use the foundation area occupied by an open veranda. To reduce pressure on the corner sector of the foundation, the extension box is partially supported on the foundation of the veranda, and most of the weight is transferred to piles driven at a distance of at least 60 cm from the blind area line.
If the house stands on a shallow or piled foundation, then the simplest solution to the problem is to use a slab foundation. The foundation slab for the building is poured over an area 2 times larger than the dimensions of the annex itself. At first glance, it looks like a waste, but in fact this is just a way to reduce the impact on the foundation of the house and make a reserve for the future. In all other cases, experts recommend placing the building on a pile foundation without rigid binding to the supporting structures of the house.
Materials for walls and roofs
Three types of materials are most often used for arranging an extension box:
- Aerated silicate blocks or foam concrete on a strip foundation;
- Timber or metal frame structures on pile foundations;
- Hollow ceramic bricks on a slab foundation.
In principle, it is possible to build an extension from any material, even from rubble or concrete blocks, but in practice, they try to make the attached building as light as possible so as not to break the foundation, so even brick buildings today are a rarity.
Most often, the box is built from foam concrete blocks, they are light, relatively easy to lay walls and cost less than bricks. Due to the excellent heat and sound insulating characteristics, the building can be made with huge windows or even a whole wall of glass.
The second most popular is the frame system. The use of a profiled pipe and a steel profile allows you to assemble an openwork glass extension on two floors. The weight of such a structure will only be slightly more than a wooden frame, so a particularly powerful foundation for the building will not be required. The only condition for the construction of a metal-frame extension will be the correct placement of the structure relative to the foundation of the house. The best option is the inner corner of the facade, which provides maximum rigidity of the foundation and stability of the walls.
The traditionally attached room to the house is preferred to be installed on the corner of the main building. This part of the foundation of a brick or block house has the highest rigidity and stability, which in turn has a beneficial effect on the attached box itself.
If an additional room is built from wood concrete or aerated concrete, while the place for the foundation is in the center of the main building, in this case it is necessary to take measures to increase the stability of the attached box by all available means.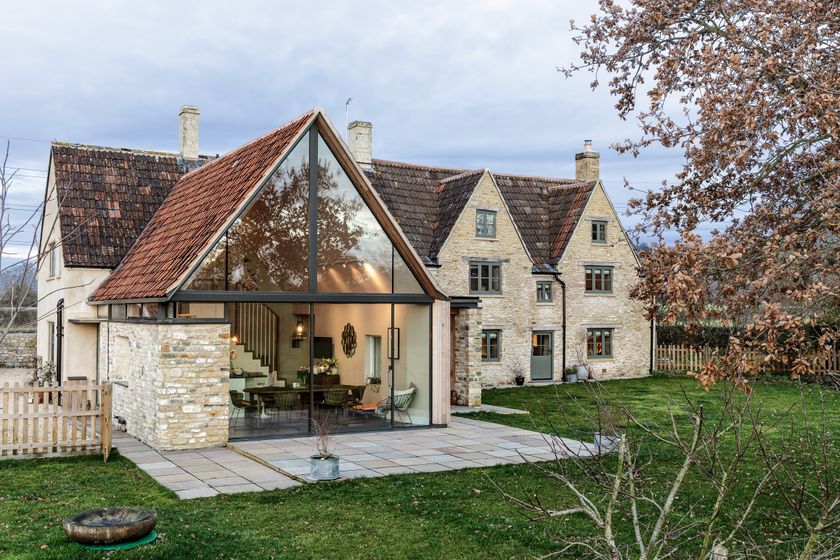
This could be an additional brick wall or a rebuilt common roof.
The exception is frame structures made of timber, as a rule, a box made of board and timber has sufficient rigidity and relatively low weight, so it can be attached anywhere in the house, without regard to the foundation.
Conclusion
When choosing a plan or project for a small room, you must take into account possible problems from neighbors. Oddly enough, according to statistics, the majority of court decisions on the forced demolition of extensions in the private sector are based on complaints and claims against neighboring houses. Therefore, it is not enough to plan the foundation and start construction, it is also necessary to provide the building with permits in case of a possible conflict.
-
Building a toilet in the country with your own hands
-
Do-it-yourself bath from glued laminated timber
-
Do-it-yourself children’s wooden house
-
We build a cellar with our own hands
Do I need to register an addition to a house on my own land?
All about Real Estate
Mikhail Bondarev Author of the article
During operation, it may be necessary to make changes to the construction of a private house, to increase its area. Then an extension is being built, which allows you to add one or more rooms to the existing square meters. Do I need to register it and how is it done?
Contents:
- What is an extension to a house?
- Do I need to register an addition to a house on my own land?
- Procedure for registering an extension before construction starts
- Registration of an extension if it has already been built to a private house under a dacha amnesty
What is an extension to a house?
Any constructive change to an existing structure is its reconstruction (clause 14, article 1 of the Town Planning Code of the Russian Federation). An extension to a residential building can be either on either side, increasing its dimensions in length or width, or upwards when the number of storeys changes.
An extension is an addition to a house that is not indicated in the project. It happens:
- capital – built on a foundation, occupies additional land area, has one or more common walls with an existing house;
- non-permanent – non-residential premises that do not require a foundation (veranda, shed, porch, open terrace, etc.).
Depending on whether the extension is capital or not, the process of its registration is different. Any non-capital construction may not be documented, this will not entail the application of sanctions to the owner. It does not radically affect the design features of the house, does not infringe on the rights of neighbors, and does not pose a danger to the life and health of residents.
But the legislation is constantly changing and it is not known how difficult it will become to register such an extension later. Today it is a matter of calling a cadastral engineer who will certify the new parameters of the house. Then the documents are submitted for registration along with the title documents for the land and the house.
A slightly different procedure if the extension is capital. It can be used to carry out a registration complex of events even before the start of construction or to do it after.
Do I need to register an extension to a house on my own land?
An extension to a residential building must be documented because:
- the total area of the object changes. New parameters must be registered in case the house is subsequently sold, inherited, etc. It is important to arrange a new area in the case of shared ownership of a house, because the size of the shares will change;
- when erecting, all construction standards must be observed, including setbacks from neighboring sites. In case of violation, the extension may be assigned the status of a self-construction. When registering, it is assessed whether the interests of neighbors are affected by marking the new boundaries of the object on the site plan. To do this, the cadastral engineer draws up a new cadastral passport for the house.
 When registering, it is assessed whether the interests of neighbors are affected by marking the new boundaries of the object on the site plan. To do this, the cadastral engineer draws up a new cadastral passport for the house.
 As a general rule, before erecting an extension, it is necessary to notify the authorized body and obtain permission for its construction.
But until March 1, 2026, the registration of individual housing construction objects can be carried out without such a document, under a dacha amnesty.
Algorithm of actions for registering an extension before construction starts
When building a residential building, all necessary standards must be observed, including mandatory setbacks from neighbors, roads, etc. Reconstruction, i.e. a change in parameters in connection with the construction of a capital outbuilding must also comply with these standards. In order not to be recognized as a self-construction, it is better to agree in advance with the authorized body and obtain permission. To do this, do the following:
Step 1. Prepare a project for the planned extension.
This can be done by yourself or by a qualified professional. When creating a project, it is necessary to take into account the features of the land and the house.
For an individual residential building with no more than three storeys (not higher than 20 meters from the ground), intended for a single family, it is not necessary to prepare a reconstruction project.
Step 2. Draw up a notice to the authorized body of the intention to reconstruct the house.
Fill out and send to the administration (urban planning department) a notification, where you indicate your personal data (name, address, passport details), cadastral number of the house, title documents for the land, information about planned changes, method of obtaining permission. All specified data must be supported by relevant documents.
According to paragraph 1.
 1 of Part 17 of Art. 51 GrK and part 5 of Art. 16 of Law No. 340-FZ dated 03.08.2018, currently, when reconstructing an individual housing construction facility, obtaining a permit is not required.
 Step 3. Get a new technical plan for the renovated house.
After completion of construction work related to the reconstruction of a residential facility, it is necessary to conclude an agreement with a cadastral engineer to carry out work on the preparation of a new technical plan for the house.
Step 4. Prepare documents for registration.
The following must be submitted to the authorized body:
- notification that the reconstruction is completed;
- technical plan of the house as amended;
- title documents for the land plot on which the house was built.
Step 5. Submit the documents to the authorized body (local administration).
All changes will be registered based on the application of the authorized body. The owner of the land and the house is obliged, within 30 days after the completion of the extension, to transfer the necessary documents to the administration in person, by mail, through the MFC or the State Services portal.
Documents are checked for compliance with legal requirements and sent to Rosreestr for registration. At the same time, a notification is sent to the owner.
Upon completion of the registration process, the owner of the reconstructed house receives an extract from the USRN with new data.
Registration of an extension, if it has already been built to a private house under a dacha amnesty
Until March 1, 2026, citizens engaged in the construction or reconstruction of an individual housing construction facility are exempt from obtaining an appropriate permit.
If the house is on the plot of individual housing construction or private household plot, then for the reconstruction already done, you need to go to court, because you had to send a notification earlier.
 If the site is a garden / summer cottage, then a technical plan is enough for the reconstruction.
 If the extension has already been erected, the procedure for its registration is as follows:
- An agreement is concluded with a cadastral engineer for the execution of a new technical passport. The passport can be issued in electronic form or sent by a cadastral engineer to Rosreestr, certified by an enhanced qualified electronic signature.
- Documents for registration are submitted to Rosreestr or through the MFC.
- As a result, the owner receives a new extract from the USRN.
In case of refusal, the extension can be legalized in court. At the same time, it is necessary to prove that:
- the dimensions of the reconstructed house are within acceptable limits;
- during construction, all building regulations were observed;
- the interests of the neighbors are not infringed (the necessary indents are observed).

With a positive court decision, it will be possible to register a house with changed parameters. In case of refusal, the court will oblige to demolish the building.
Reconstruction of the house, associated with its increase, will affect the cadastral value of the object. This will affect the amount of property tax, it will become higher.
Do-it-yourself house extension – photos of options
Contents
- Required documentation and permits
- Options for using extensions
- Types of extensions
- Open (summer)
- Closed
- Warm
- Cold
- Two-story
- Types for construction technology and materials
- From SIP-panels (sandwich-panels)
- Construction stages of extension
- Foundation
- Lower strapping row and floor
- Walls
- Roof and truss system
- Single pitch
- Double pitch
- Exterior trim
- Interior trim
( (beam, beam)
Living in a private house, many people face a lack of free space in it. The way out of this situation is an extension.
It can be a great summer kitchen or porch, pantry, hallway, play area. In addition, it will take less time to build it than to redevelop the entire building, and with a sensible project, little money will be spent.
Required documentation and approvals
While developing the layout of the room, it is important to calculate everything down to the smallest detail.
When the main building has been standing for more than one year, and the owners decide to arbitrarily add a porch or room without any documentary justification, this is fraught with penalties and, even worse, can cause accidents in buildings.
Therefore, at this stage, you will have to spend a lot of money in order to obtain permission for an extension. The procedure for collecting documentation is one-time and does not require further intervention.
To arrange an extension in accordance with the current legislation, you will need:
- Obtain written consent from neighbors.
- Order a study of the soil at the site of the future structure for the reliability and safety of the arrangement.
- Provide a completed construction project.
- Conduct an assessment of the condition of an existing home.
- Obtain confirmation of the legality of the project from electricians, firefighters, utilities, a construction company with an official license.
- Obtain building permits from local architects.
- After the completion of all work, the services that issued the permit must accept the object and allow it to be used.
- Register the erected extension with the tax service, the cadastre.
- Re-conclude new contracts, taking into account the new area with public utilities (electricity, gas, water).

In order not to waste time on the development of the project, it can be ordered from one of the construction companies that, for an additional fee, will do the main paperwork for you.

Applications for extensions
Depending on the purpose of the future premises, it may be necessary to waterproof, insulate, and connect communications.
Among the most popular applications for an extension to a country house are the following:
- Canopy. A simple summer design that assembles very quickly and easily. Serves as protection from the scorching sun, precipitation. Allows you to relax in the fresh air in warm weather. Pouring a solid foundation is not required. Enough installation of supporting pillars made of logs, shaped pipes or concrete. The roof is made of polycarbonate, slate. Walls as such are not provided. They are replaced by carved wooden railings, light fabric hung in the corners.
Photo: a canopy made of timber in front of the entrance to the house. A great place to enjoy nature on a warm summer day.
- Porch. Often laid out from a foam block or mounted from wood. The railings are made of forged gratings, beautiful balusters. The roof is sheathed from profiled sheet, tiles. Roofing material must match the type of the main house. The number of steps is selected individually.
- Terrace. An additional area is equipped as a rest room. The foundation will need to be poured. Depending on the upcoming load, tape or columnar is selected. The walls are built from gas block, cinder block, slabs, timber.
- Covered veranda. Fully residential area, which is used all year round. It is complemented by a large number of windows with reliable double-glazed windows. There are doors. The walls are brick, block. Needs warming. You will need to think over the heating system.
Article in the topic: “Glazing of verandas and gazebos”
- Garage. Attached to the house is cheaper than standing detached. The walls are sheathed with fireproof materials. The roof is covered with slate, metal tiles. The main condition for building a garage near the house is good ventilation so that there is no smell of diesel fuel or gasoline in the house.
- Summer kitchen or dining room. Communications (water, lighting, sewerage) are mandatory. It will not be superfluous to provide ventilation. An excellent room for canning in the country in the summer.
 The roof is sheathed from profiled sheet, tiles. Roofing material must match the type of the main house. The number of steps is selected individually.
Other options are also possible – in the form of a home library or a mini-cinema. Here the choice is individual.
Types of extensions
By design, there are several types. Let’s analyze each of them.
Open (summer)
A striking example is a beautiful terrace with an interesting design. Its construction can be ordered from specialists or you can try to build it yourself according to a previously drawn up drawing.
The main details of such a summer extension include:
- Foundation elements (pillars or piles).
- Terrace posts (often made of wood) with a diameter of 10*10 cm. Fixed at a distance of 1.3 to 2 m from each other.
- Floor boards. Planed or tongue-and-groove are taken.
- Profiled sheet, ordinary ondulin, metal tile are suitable for roofing material.
- Additional finishing elements. This should include carved wooden balusters, railings.

Photo: wooden terrace overlooking the sea
Decking is a popular flooring material for summer residents. Unlike standard wood, it does not need to be treated with antiseptics and is not afraid of environmental exposure.
Closed
Full-fledged living quarters. It is arranged as a harmonious continuation of the house under a common roof. It can be made fully glazed with panoramic windows or with partially glass windows and solid walls. The choice is at the discretion of the owners, depending on the idea of interior design.
To build a closed space near the house, you will need to think in advance which side the entrance will be from. It depends on the type of door and fittings to it.
Photo: insulated brick extension with glazing
From building materials you will need:
- Frame elements in the form of pillars. They are assembled from boards measuring 4 * 10 cm. Stabilizers 4 * 10 cm.
- For exterior decoration, siding or lining is used, less often – plastic.
- Entrance door with a set of fittings and double-glazed windows according to the number of window openings.
- Material for roof decking (slate, tiles, corrugated board).
- Bricks are taken for walls, and aerated concrete blocks are used to quickly build walls.
- Masonry and foundation mortar. It is kneaded by hand or ordered ready-made with a feed from a concrete mixer.
- The floor is made of tongue-and-groove boards from 3.5 cm thick.
 They are assembled from boards measuring 4 * 10 cm. Stabilizers 4 * 10 cm.
 Closed outbuildings are either warm or cold.
Warm
Attached structure can be used all year round. Therefore, it will be necessary to fill in a reliable foundation with thermal and waterproofing. The installation of screw piles will speed up the work.
Photo: veranda under the same roof with the house
If the house is from a fresh log house, then an additional room must be built from wood. It will take more time to lay brick walls, but such a room will last many times longer.
In order to better retain heat in the room, it is recommended to insulate the facade, especially carefully in the corners – cold bridges should not form in these areas.
At the request of the owners, part of the walls is replaced by panoramic windows.
Cold
This is a covered room with windows, access to the street, but no heating. Used as a greenhouse in warm weather, a dining room, a continuation of the porch.
Photo: veranda with panoramic glazing
It can serve as a boiler room on the ground floor if a large house is heated with wood or coal. In this case, fireproof materials (gas silicate, brick) are taken for construction and cladding.
Double deck
Refers to complex structures.
Not suitable for a one-story house. Used for large cottages.
If you want to learn how to build a two-story gazebo, follow the link.
The most popular option is a balcony. It can be open, fenced with forged metal gratings, or glazed. Colored stained glass windows look beautiful. The lower part is sheathed with siding, plastic.
Types of extensions according to construction technology and materials
Let’s analyze the most popular types in more detail.
Frame-panel
Making a frame extension is not difficult. In addition, it is a budget, quick-to-assemble option for summer holidays.
Benefits:
- light weight;
- setting speed;
- inexpensive materials;
- versatility of use.
The frame is erected in small sizes – 2 * 2 m, 2 * 3 m or decent – 5 * 2 m, 6 * 3 m. It all depends on the budget and purpose.
Photo: construction of a wooden veranda frame on a screw foundation. Material: timber, board.
Profile pipes or wooden beams treated with antiseptics are taken as the basis.
Does not require expensive foundations.
 The weight of the materials will be small, so a columnar foundation is enough, and on complex soils a pile foundation.
 The frame is formed along the perimeter of the future extension. For reinforcement – under each wall separately.
Outside and inside the structure is sheathed with chipboard, OSB boards (optional). In order to better retain heat in it, a heater is laid between the plates. Layer thickness – from 5 cm.
Suitable for this:
- Styrofoam;
- foam;
- mineral wool;
- sawdust.
Additionally, it is recommended to waterproof the insulation from the outside and inside. Otherwise, it will get wet and lose its working properties.
Photo: we sew up the extension frame with fiberboard sheets.
For external finishing of the structure use:
- block house;
- sandwich panels;
- plywood;
- polycarbonate;
- lining;
- plastic.

roof can be:
- single slope;
- double slope;
- hip and other shapes.
As roofing material take:
- ondulin;
- slate;
- keramoplast;
- metal roofing.
The shape of the roof, the material for it should be selected in harmony with the main building or made entirely of the same materials.
Brick
As a rule, this is a closed living space with heating.
Brick different:
- long life;
- durability;
- choice of shapes, colors, masonry techniques.
But at the same time, a strip or monolithic foundation will have to be poured under such a structure. Laying takes a lot of time and effort. If you order from specialists, then the price will be high.
The building should adjoin the house as tightly as possible, without the formation of cracks, gaps.
 Otherwise, in winter, these areas will begin to freeze, which will lead to the formation of fungus indoors.
 Reliable double-glazed windows are inserted into window openings. Gas heating is often replaced with an interestingly shaped fireplace. Think in advance of its location and the exit of the chimney.
The brick building will make a good greenhouse, home library, billiard room, games room.
Block (foam concrete, aerated concrete)
Unlike bricks, blocks are inexpensive and light in weight. Due to the porous structure, they have good thermal insulation and are fireproof. Large sizes significantly speed up the laying process. The construction does not require a reinforced foundation.
Disadvantage – block structures need to be lined. Otherwise, their surface will quickly collapse under the influence of moisture.
Used for laying residential premises. Thanks to smooth walls, they are suitable for any kind of interior decoration.
Wooden (log, bar)
Such an additional room is relevant if the house itself is made of wood.
Regardless of the type or breed used, any wooden structural element needs to be protected from moisture, fire, insects.
Follow the link to read an article about wood impregnation options that are suitable for outdoor use and safe for indoor use.
It is easier and faster to make a building out of timber. They look beautiful, have good thermal insulation and are cheaper than log ones.
From SIP panels (sandwich panels)
The material got its name due to the fact that it consists of two layers of OSB, and between them there is a layer of insulation (polystyrene, polystyrene, mineral wool). SIP panels are moisture resistant, not afraid of temperature changes.
They are used in the construction of frame-panel structures or as an external finishing material. The panels are fastened on top of the finished timber frame. They also make window and door openings. Slots, gaps between the plates are filled with mounting foam.
Stages of construction of extension
The main stages of construction are the same for different types of structures. Let’s analyze each of them in more detail.
Foundation
The choice of the type of foundation depends on the materials, future load, soil.
Under a light frame veranda, an open wooden extension, a columnar, piled foundation is enough.
Fastening the lower harness to screw piles
To understand the choice of a suitable foundation, read the articles:
- Types of foundation for gazebo
- Strip foundations
Under brick, block dwellings, tape or monolith will be required.
If the premises will be used as a summer kitchen, dining room, then it is necessary to lay communications, make hydro- and thermal insulation when pouring the foundation.
Thematic material:
- Insulation of the foundation of the house outside
- Insulation of pile-screw foundation
Bottom strap and floor
A budgetary way to protect against moisture is to lay sheets of roofing material and coat them with bituminous mastic. Wooden parts are impregnated with antiseptics.
For the lower trim, it is allowed to use a beam with dimensions of 15*15 cm. Recommended wood species are larch, oak.
The first row is laid strictly according to the level. The beam at the joints is not connected. The second should overlap the joints on the first. Both rows are fixed with pins.
An alternative to timber – boards 5 * 15 cm. They are connected with self-tapping screws.
The lower harness is laid to the cross beam (beds). Lags go on top. If the project requires it, then insulation is laid between the lags, and then a draft floor of edged boards. Moisture resistant plywood is used for the finishing floor.
Walls
For frame construction, part of the walls can be assembled on the ground and then screwed. Another option is to recruit gradually on the spot.
You need to start with the installation of corner supports from a bar, exposing them at right angles. The distance between the posts is slightly less than the width of the insulation. In places of future window openings, doors put additional supports. The upper strapping is carried out according to the same principle as the lower one.
Mounting the walls of the future veranda
Expensive materials are rarely used for wall cladding of such extensions. Quite enough siding, OSB, lining.
Capital brick structures are built gradually. First comes the laying of pillars, then walls. The optimal brick is ceramic.
To save money, it is allowed to use white silicate, but then you will have to spend extra money on decorative plaster. Without cladding, the silicate will begin to crumble over time.
It is much cheaper to expand the space with a foam block structure. They are easy to lay and cost less, but additional finishing will also be required.
Roof and truss system
There are several types. Let’s take a look at two of the most popular.
Single slope
It is easier to build, therefore it is in the greatest demand.
If the building is on the side, then its roof is a continuation of the roof of the house.
Elements of the truss system, battens are impregnated with an antiseptic.
Photo: installation of the extension truss system
It is important to consider that the rafters should extend 25 cm beyond the boundaries of the walls so that excess water does not fall on the building.
Further work order:
- A waterproofing material is laid on top of the finished rafters.
- Sheets of mineral wool, polystyrene or other insulation are placed between the beams. Fix the vapor barrier.
- Now plywood is fixed with self-tapping screws, roofing material is laid (soft, flexible tiles).
- Another option is to make a crate from boards and fix slate and corrugated board with special overlapping nails.
When constructing a flat roof, it is important to provide an angle of inclination between 20 and 45 degrees. This is necessary so that precipitation in the form of snow does not accumulate from above, does not create an additional load.
If desired, the roofs of the house and the extension can be combined. To do this, the upper row of the roof of the extension is placed under the lower row of the roof of the house, the joints are waterproofed.
Gable
More complex design. It consists of two slopes of the same size, which are combined in a ridge. Gables are installed between the slopes. They can make small windows or even a balcony.
Read the article: “How to make a firewood shed”
This roof is worth choosing if the owners want to get one more additional room, like an attic or an attic.
Gutters are installed on top of the roofing material to drain precipitation.
The main disadvantage is the high consumption of materials and the high cost of construction.
Exterior trim
The main principle of choosing raw materials for finishing is compatibility with the design of the house.
Photo: brick cladding of fiberboard extension
Popular options:
- vinyl siding;
- decorative bark beetle plaster;
- artificial stone;
- plastic.
Walls are often plastered as this allows for a wide range of application techniques. It’s inexpensive and not hard to do yourself.
Interior decoration
The design of the premises is done according to the taste of the owners.
Can be fixed with drywall sheets, wallpapered or painted. Or, for example, sheathe the walls with wooden slats, overlay with artificial or natural stone.
The situation is slightly different with the ceiling. Read the article on the choice of suitable materials and methods for filing the ceiling.
The erection of a reliable extension is a well-planned project that requires careful calculations from the owners, a competent approach to each stage of work. But even with a limited budget, it will be possible to make a good garden design for a summer holiday without the help of specialists.
How to legalize an extension to the house – Build your own house
M Many private home owners believe they have the right to do anything with their property. In many cases, this is true, but there are situations when, in the absence of permits and necessary approvals, there may be problems with the law. These include the construction of extensions to the main house. Here’s how to legalize an extension to the house and whether an extension project is needed, we’ll talk in this article.
How to legalize a non-permanent extension to a house
Non-permanent extensions include: terraces, balconies, verandas and any other buildings that do not have a foundation. Legalization of such changes to the original design of the house is possible at any time and, as a rule, does not present any difficulties. It is enough just to make changes to the existing technical documentation for the house, i. e. make an extension project.
This whole procedure takes place at the BTI. If a private house has several owners, it is necessary to provide written consent of all owners for the construction of an extension. After receiving from the BTI technical documentation with the changes made and with the indicated additions, the approval process can be considered completed.
How to legalize a capital extension to a house
An extension to a house will be considered a capital extension if it implies permanent residence in it and requires the construction of a foundation for its construction. The procedure for legitimizing such changes is more complicated and will require much more time. It is possible to legalize an extension to a private house in two ways: before its construction and after its construction.
In the first case, you carry out an extension, based on an approved project, having all permits and approvals, that is, your extension is already legal.
In the second case, until the moment of giving legality, the extension is considered to be unauthorized.
Sample HTML Page
If you decide to make your extension fully official and legal before it is built, you will need to do the following:
Collect all necessary documents. Among them, there must be confirmation of your ownership of both the house itself and the land on which it is planned to build an extension. If the house has several owners, then the written consent of all owners is required for the reconstruction. The necessary permits also include the approval of all services to which the house is connected (gas service, water supply and sewerage, electricity, sanitary and epidemiological stations, and so on).
If the house does not have centralized water supply and sanitation, then you do not need to obtain permission from these authorities. Among the documents submitted for building permission, there must be a plan of the house itself and a project of the proposed extension (in some cases, a sketch is enough). The list of required documents may differ from the above and in each case depends on the specific conditions.
Is it possible to legalize an extension to the house
Submit all documents to the building or architecture department of the municipality. The basis for obtaining approval for the construction of an extension will be your application with a corresponding request. If there are no gross violations of the requirements of the supervisory authorities, there are properly executed permits for the construction of an extension from all owners and neighbors (if necessary), there are no problems with the ownership of the house or land, and an extension project has been made, then, as a rule, the administrative authorities issue the required approval .
On the basis of the permission received, register the extension with the Rosreestr authorities, pay the necessary state fees.
Extension project
Sample HTML page
An extension to a house is any functional room. A balcony, a loggia, a winter garden or an additional bedroom – all this will be considered an extension to the house. Mandatory elements of the construction of an extension to the house are: the foundation and walls. Unlike a house, there may not be overlaps here. As you can see, during the construction of the extension, the project will not be superfluous, since calculations are required for the construction of the foundation and walls.
When a court decision is required
The main difference between the legalization of an already built extension is that legalization is carried out by a court decision, where you are the plaintiff, and the municipal authorities are the defendant. The package of documents for submission to the court is almost completely identical to what is needed to legalize the extension before its construction. The difference is that instead of an application, it is necessary to draw up a claim with a request to legalize the previously built extension to the main house.
A positive court decision is also possible only if all permits and approvals are available. The final step will be registration of the extension and payment of the fee. If you are doing legalization yourself, then regardless of how you do it, pay attention in advance to those points that can make it much more difficult to obtain permission, and sometimes even make it impossible.
Reasons for refusal to register extension
The most common reasons for refusal to legalize extensions are:
- Failure to comply with important architectural, sanitary, fire regulations and rules;
- Incomplete package of permits, there is no extension project;
- Lack of documents confirming the ownership of the house or land;
- Use of non-certified or unsafe materials in construction.
And so we figured out how to legalize an extension to the house. The most difficult step in legalizing an extension is the collection of necessary documents. In the next article I will tell you how to donate land.
RECOMMEND ALSO READ:
Sample HTML page
Time passes, and it turns out that a private house no longer satisfies the owners with its size and amenities. A decision is made to expand its area with an extension. We will tell you how to do it efficiently and at no extra cost in the article.
Save money without sacrificing quality – space requirements and materials
Poorly thought out design of the extension will eventually force something to be redone or completed, attached to the country house. In order not to get into such a situation, we think through all the nuances, weigh the advantages and disadvantages of our idea. We start with the choice of location and size.
Each type of additional room has its own specific features in connection with the use, requirements for insulation, waterproofing and others. If a decision is made to build an additional living room in the country, then this is tantamount to building a small house. It is required to reliably insulate, to prevent the appearance of dampness. If you plan to stay in cold weather, you need to think about heating.
Another common type of outbuildings are kitchens and bathrooms. The requirements for them are practically the same. First of all, we think about engineering communications and sum them up even before the start of construction. Sewer pipes, water pipes are much more convenient to lay before pouring the foundation than to make their way under it later. Increased attention requires waterproofing flooring. We are thinking about warming, but if the kitchen is planned for summer, then this can be saved.
Expand the house and an extension of the veranda. The structure is light, serves for summer holidays, protects the entrance from wind, snow and rain. It is carried out in many versions: from the simplest in the form of a boardwalk, low walls with a roof on pillars, to a complex one with walls, a door, windows. No insulation is required, otherwise it will no longer be a veranda, but foundation waterproofing is necessary.
The extension to the house must be in harmony with the main structure. If the house has an exterior finish, then it will not be difficult to repeat it on the attached premises. With all materials, wood is well combined, which looks great even without additional finishing. The best option would be a frame structure:
- is built quickly, in just a few months;
- does not require a major foundation, because it is light;
- without special knowledge and skills is available for DIY construction;
- will be cheaper.
The base for the extension is made on the same level as the foundation of the house. When attaching the structure to the house, we do not do it tightly – over time it will shrink – but leave an expansion joint. In this regard, frame structures, which do not give vertical shrinkage, compare favorably.
If the structure is attached to the front wall, the roof continues the main roof and is made single-pitched. We choose the slope in such a way that the snow does not linger and the rain flows down. If this is an extension to the side wall, then the roof repeats the configuration of the main one. The roofing material is the same as on the roof of the house, if different, it is important that they are combined.
Post base – fast, cheap, reliable
Concrete, brick or a combination of both are used for the columnar foundation of an extension to the house. It is done mainly for a living room or a veranda. If applied to a kitchen or bathroom, thermal insulation of the entry of utilities into the house will be required. Since protection concerns an average of half a meter of pipes, you can go for such expenses, it will still come out cheaper than a strip foundation. The floor is made of boards, for concrete you will need a lot of material for backfilling, a fence around the perimeter.
We start with the marking of the site, the installation sites of the pillars are one and a half meters from one another. A separate pit 50 × 50 cm is dug under each pillar, with a depth greater than the freezing of the soil. At the top, we expand the pits a little: about 10 cm on each side. We fill the bottom with a layer of sand of 10 cm, carefully ram, then crushed stone or broken brick, which is also rammed.
We lay out the film for waterproofing, bring the ends to the surface. If we plan to build brick pillars, we pour a little concrete mortar for the base into each pit and wait for it to set. When concrete pillars are planned, we tie the reinforcement at the top along the entire height, lower it into the pits. We provide an equal distance between the walls. We put pieces of brick under the bottom to raise the reinforcement by about 4 cm.
We make formwork for the plinth, inside which we run the film. Concrete is poured in layers, each layer is pierced several times with a bar so that air bubbles come out. It is important not to rush, it is better to wait until it seizes, then continue pouring. We carefully level the top of the column and wait about two weeks until the concrete hardens. All this time, pour heavily with water, cover with burlap or film.
When the foundation is strong enough, the formwork is removed. We heat up the bituminous mastic, apply it to the poles and immediately glue the pieces of roofing material for waterproofing. Between the pillars there was a space that it is desirable to fill up in order to insulate the floor. We use ordinary earth mixed with rubble or pieces of brick. We fall asleep in layers of 10 cm, we ram. The technology for erecting a strip foundation is practically no different, but unlike a columnar one, it is solid.
Getting Started – Bottom Rail and Extension Floor
So, we settled on the frame version as the fastest and cheapest. In order for a tree to serve for a long time, it is required to adhere to two rules: make reliable waterproofing and carry out antiseptic treatment. Of course, the wood must be well dried. For waterproofing, the most reliable means is bituminous mastic. It is possible to use several layers of roofing material, but it is short-lived.
Then we make the lower harness. Usually a beam of 150 × 150 mm is used, but boards of 150 × 50 mm can be used. We lay them horizontally around the entire perimeter, leveling with the outer edges of the foundation. We do not connect the boards of the first row to each other. The second row is laid on top, overlapping the joints in the first.
In the boards laid in this way on the foundation, we make through holes for the studs and connect them. If it is tape, we drill and connect on the ground, and then lay it. To get the effect of a single beam, we knock it down with nails in a checkerboard pattern after 20 cm. It turns out a strapping of the desired thickness, which also has additional advantages:
- is much cheaper than bars;
- is very easy to connect to each other, with bars it is more difficult.
To the beds we attach the bottom trim of the same boards 150 × 50 mm, installed on top of the edge along the outer edge. We fasten them together and with the beds with 90 mm nails. Next, we expose the logs from a similar material installed on the edge. The distance between them is 60–80 cm, but it all depends on the size of the frame extension: the longer the logs, the already we install them. They are attached to the binding board with nails, 2 on each side.
Now we proceed to the floor insulation. The cheapest, albeit not very environmentally friendly option is tiled polystyrene foam with a density of at least 15 kg / m 3 . Its advantage is that it is the only one of the heaters that is not afraid of moisture. We nail 50 × 50 mm bars to the lower edges of the log, which will hold the polystyrene foam. A thickness of 15 cm is required: we use sheets of 10 and 5 cm. We lay it so that the seams of the lower and upper rows overlap.
The base is ready. We lay the subfloor on top. So that it does not warp over time, we lay it, alternating the direction of the annual rings. We look at the cut: we put one board with an arc up, the other – down. We make the finishing floor from plywood, the joints are apart. A rough base is not necessary in the presence of edged tongue-and-groove boards with a thickness of 30 mm or plywood 15 mm. We lay directly on the lags.
Wall installation – two assembly technologies
There are two technologies for assembling frame structures. The first is called frame-panel, when the entire assembly is carried out on the ground, then the finished structures are installed in place and fastened together. Sometimes the frame is sheathed immediately, which makes it even stronger. Another method involves gradual installation right on the spot. Which is more convenient – everyone decides for himself. The shield assembled on the ground cannot be lifted alone; helpers will be required.
We start the construction of the frame from the corner posts. For them and intermediate racks, we use a beam of 150 × 150 mm or even 100 × 100 mm. The distance between the racks is determined by the width of the insulation, which we find out in advance. We arrange the pillars so that the gap between them is 3 cm narrower than the width of the insulation. So we will save on waste-free use of the material and improve the quality of insulation without leaving gaps.
Fastening can be done simply and securely with metal brackets installed on both sides of the uprights and fixed with stainless screws. Before finally fixing the rack, we carefully check its verticality, this is especially important for corners. One incorrectly set beam will cause the entire extension to bend.
Temporary braces are used to maintain the correct shape of the framework, which are installed from the inside and last until the outer skin is attached. If the sheathing is made of a hard and durable material such as plywood, OSB, GVK, it is able to independently strengthen the base, which will stand securely after removing the temporary cuttings. When soft material is planned for sheathing: siding, lining, then permanent braces cannot be dispensed with. It is better to install them two at the bottom and at the top of each rack.
In the places where windows and doors are installed, we fix the crossbars. We make the racks next to them double: they experience increased loads and should be stronger. The final fastening of the frame is carried out by installing the upper trim. In order not to invent anything, it can be similar to the bottom one: beds made of two boards fastened together and the actual harness made of the same boards installed on the edge. To it in the same way as the floor logs were attached, we nail the floor beams from the boards 150 × 50 on the edge with nails.
We constantly check the geometry of the entire building, as well as the correct installation of the posts and crossbars: the posts are strictly vertical, the crossbars are horizontal.
 youtube.com/embed/W3nCeX_yoo8″ frameborder=”0″ allowfullscreen=”allowfullscreen”>
Shed roof – construction and technology
The roof of the house with an extension consists of two parts, which should be harmoniously combined into one. If the extension is built on the side, the roof will be a continuation of the main one, it remains only to repeat its design in order to lengthen it. When an attached building is located along the length, its roof is made single-pitched. The slope is provided by the difference in the height of the front and rear pillars. The height of the rear ones should ensure that the roof of the extension goes under the main canopy.
The roof is supported by rafters, which are laid on beams. They are made of thick boards, to ensure fixation, we make special grooves. We cut them on the ground according to the template so that they are all the same. Then, after installation in place, it will not be necessary to align horizontally. We process the grooves with mastic, install and fasten to the walls with brackets, metal corners on studs. If the length exceeds 4 m, we install additional vertical supports.
Laying a sheathing over the rafters. Depending on the roofing material, we make it solid or in increments of 0.3–0.6 m. The need for a solid wooden flooring arises when soft material is used, we make a sparse one for all other types of roofing. We make fastening depending on the type of roof. We fasten profiled sheets and metal tiles with special self-tapping screws with sealing washers, ondulin – with nails with a wide hat. We provide wave overlap. Don’t forget about the final design: the wind strips not only protect the roof, but also give it a finished look.
Insulation is a mandatory operation for an extension
For the insulation of buildings, mainly mineral wool and polystyrene are used. Mineral wool resist fire, low thermal conductivity. They have a small weight, a form of release convenient for consumers: rolls, mats. Another popular insulation is foam. Its advantages: it is inexpensive, it is not afraid of fungus, moisture, decay. But there are two big drawbacks: it is very fond of rodents, it releases toxic gases in case of fire.
Insulation from the inside is carried out in the following sequence:
- We mount the waterproofing, pre-cutting strips of the required dimensions. We fasten with staples using a construction stapler in such a way as to ensure an overlap. We sheathe the frame completely, driving in staples every 10 cm.
- We lay the insulation between the posts. We provide a snug fit to wooden structures, close the seams between the individual elements of the insulating material, overlapping the next layer.
- We fix the vapor barrier, even if we use foam. The fact is that it is necessary to protect not only the insulation, but also the tree. Fastening is carried out similarly to waterproofing.
- Sheathing the walls from the inside.
