How to build an extension on my house: Access denied Error code 1020
4 Free Tips on How to Extend Your House Cheaply on a Budget ✅
Skip to content
4 Free Tips on How to Extend Your House Cheaply on a Budget
House Extension on a Budget – What You Need to Know
4 Free Tips on How to Extend Your House Cheaply on a Budget
So, you want to extend your home to add on some extra room or add value to your property for resale through house extensions.
The idea of expanding out to the back, front, or side of your property, moving up to finish a loft conversion, or down to finish a basement or cellar space is appealing to helping your family find the needed space to stretch out. This is a wonderful dream of a thought, but when your finances are tight and the thought of the cost of extension work makes you anxious, or you’re losing sleep over the thought of the money you will need to shell out, and you don’t know how to go about it, house extension projects and elaborate extension designs on a limited budget can be a bit constraining.
We have put together some free tips on how to extend your house cheaply on a budget when you are ready to begin building an extension.
Cut Costs by Keeping It Simple with Just the Basics
Simplicity Saves Money
Not every complicated detail is vitally important to implement into your house extension design. Keeping it simple is the way to go, and it doesn’t mean the finished project will be boring just because you built smartly and saved money. Elaborate, dream room additions seem amazing, but you can get a lot of extra room on a budget when you keep your extension designs plan simple. Simplicity is really just beauty without the chaos and clutter. Some may even call it minimalism, which is a popular way of life.
Focusing on simple designs does not mean you have to forfeit style. It merely means you will stretch your home extension designs budget to its maximum potential so you can focus on the interior design elements without worrying about going over budget.
For instance, a square house extension design with a simple pitched roof is the least expensive way to go as opposed to designing custom angles or curves or adding unnecessary building and design components. Also, choose construction materials that are available and do not require special orders. You can often still get the look you want without spending a fortune. For instance, if you’re wanting the look of dormer windows on a loft extension, opt for roof lights instead. For kitchen extensions, you can open up an exterior wall with a bi-fold door that will bring in a lot of natural lighting, and fold up out of the way when you want to extend your indoor kitchen, eating, and cooking space to the outdoors.
Diy Projects Keeps Money in Your Pocket
Do It Yourself Wherever Possible
Do-It-Yourself projects can save you a bundle when you’re building home extensions. Some of the best DIY house extensions money-saving projects include painting, tile work, some flooring installation, adding a window bench seat, or cabinet installation and refinishing work.
Whatever you are handy at, give it a try. The main thing to keep in mind with DIY work is to never tackle anything above and beyond your skills and ability especially when it comes to major structural work, live electricity, or extensive plumbing work. DIY will also require some amount of research ahead of time as well so you don’t run into trouble with discovering your home addition doesn’t comply with local building regulations after you have spent time and money trying save on the work. Of course, there are some areas of adding onto your home that you will not want to scrimp on. Do what you can yourself, and save the expenses for areas you absolutely need an expert to complete.
Know Before You Build
Before you start any DIY work or hire someone to work on your home extension, the best cost-saving step you can take is to plan properly. Do a little local research to make sure you understand and abide by any building regulations or planning permissions for your home and property. If you share a wall with your neighbour, you will need to comply with the Party Wall Act.
Save yourself time and problems which could bring your home extension project to a grinding halt in a hurry by simply discussing your plans with those living nearby. Your best step is to talk with your neighbours before doing any work on adding to your home since it may interfere with their natural lighting or infringe upon their property. Save yourself an expensive headache later down the road by knowing everything expected for you to following legal requirements for your build and planning well.
Proper Planning Saves Money
Check Credentials of Your Builders
Be Careful Who You Hire
While there are plenty of reputable builders able and available to help you with your house extensions, be careful. There are also many disreputable contractors who are waiting to take advantage of any willing victim. Avoid being ripped off by always asking for and following through by checking references for accuracy and credibility. Whatever you do, never pay in advance for the promised work for the cost of extension. The time to pay is after you have been invoiced for work and only if you are completely satisfied. If the home extension requires lengthy work, make arrangements to make payments in stages as each phase of the work is complete. Go over every detail of your extension designs including a written cost of extension before any work begins.
Get More Home Improvements Ideas:
Watch the professionals – House Extension In Action:
- All
- Home Extensions
- Wall Removal
Home Renovation – South Norwood Stage 2Website Admin2021-09-02T09:31:43+00:00
Internal House Refurbishment – South Norwood Stage 3Website Admin2021-09-02T09:56:36+00:00
Roof Construction – South NorwoodWebsite Admin2021-08-05T13:44:54+00:00
Is It Better To Move House Or Extend in 2022?
Written by Martha Lott
14th Nov 2019
(Last updated on 27th Jul 2022)
12 minute read
The Covid-19 pandemic left many people wanting to move house near the coast or countryside as well as the need for more garden space and garages for offices or gyms. However, with house prices increasing rapidly, many people are left wondering is it more beneficial to extend or move house. It’s important to weigh up the costs of both as well as the reasons for moving or extending.
An extension will help add value to your home as well as creating space, but, the cost needs to be thought through. Whether you should move house or extend should be based on what will benefit you and your family the most, so we’ve put together this guide to help you weigh up the pros and cons to make the decision easier.
This article will cover the following:
-
The Facts
-
Is It Better To Extend?
-
Which Home Extensions Are Worth It?
-
Changes in Permitted Development Rights
-
Is It Better To Move Home?
-
Save Time and Money on Your Move
The Facts
According to data by TSB Bank, 2 in 5 homeowners would rather build an extension than move house. In May 2019, Permitted Development Rights were subject to new regulations, altering planning laws affecting extensions. TSB’s research discovered the public’s opinion on these new laws and whether it would affect people’s decision to extend.
Despite almost 80% of Brits believing that the new planning laws would cause more disputes amongst neighbours, 41% of homeowners would still choose to extend rather than move house. As a result of this change in law, 19% of homeowners are now more likely to build a rear extension in the next 3 years due to the new laws allowing the right to build larger rear single-storey extensions.
Interestingly, 35% of those wishing to extend stated that they would go as far as remortgaging their house to release equity in order to afford the extension, you’ll need a remortgage solicitor to help you do this. Refurbishing and extending properties have been slowly growing in popularity and this research confirms that it’s still a major consideration for many British homeowners.
For those who would prefer to extend rather than move, the main reasons for their decision were their attachment to their current home (50%), the cost of moving being too expensive (49%) and also the locality being better than elsewhere (25%). Clearly, the cost of moving house is a major issue for homeowners and is a major reason for many Brits choosing to extend.
TSB’s Head of Mortgages, Nick Smith, stated that “It’s no surprise that homeowners cite the cost of moving as one of the biggest barriers to affording a new home or moving up the property ladder. Building an extension is a great way to add extra space without having to undertake the additional costs such as stamp duty and legal fees.”
Considering the benefits of extending properties, James Ginley FRICS, Technical Director, Legal & General Surveying Services, said: “Where space is at a premium quite simply adding floor area adds value. However, good design, layout and functionality of homes is increasingly important. Home buyers want the space but tasteful extensions and modern open plan living areas offered by extensions are value-generating.”
Enter your postcode
Is It Better To Extend?
Generally, extending your home will be a cost-effective investment that will pay back on itself when you eventually sell – but not always. The location and demand of your property will usually guarantee that your extension will add value to your home when it comes to selling. For example, it’s often financially feasible to add a basement in a London property due to high demand and property prices. However, this might not be the best idea in other regions of the UK.
That said, extending in some form or another is often a more sensible approach from a financial perspective. Building costs for an extension depend on location, size and the type of build you will be planning.
Cost of Extending A House
These are the average costs for a single-storey extension in the UK, not including VAT. These prices will vary depending on size, location and extra services.
| Extension Service | Price |
|---|---|
| Extension Per Square Metre | £1,500 – £2,000 |
| Planning Permission | £190 – £206 |
| Property Survey Fees | Starting at £400 |
| Architect Fees | (Between 3-10% of extension cost) Minimum of £2,700 to £4,000 |
| Building Regulation Checks | Usually 10% of extension cost |
Before work even begins, you will need to gain planning permission unless your extension is single-storey that does not extend more than 3 metres away from the original property. This will cost between £190-£206 depending on extension size and location. According to Homebuilding & Renovating, for an application for an extension in England, the cost is currently £206. However, this price differs throughout the rest of the UK, with an application in Wales costing £190.
If you the plans for the extension interferes with your neighbour’s property, you may require a party wall agreement to continue. This means that you will have to obtain your neighbour’s permission before starting the work. You’ll have to find out if you need a party wall agreement.
Don’t forget that when planning an extension on a house, you have to include the cost of the plans for said extension. You may either choose to hire a professional architect or architectural technician to draw up plans for your chosen builders or you could hire a firm to design and build your extension all in one. These architectural drawings can cost an average of around £500-£1,000, depending on the scale of the job, the details of the extension and also the company you’re working with.
The average cost of a single-storey extension can range from anywhere between £1,500 – £2,000 plus VAT per square metre. On top of that, you may be expected to pay anywhere between 3-10% of the building costs on fees for architects, structural engineers, building regulation approval and planning permission, if required. This price will vary depending on the quality of work, the location of the property and also the company you use.
The cost of extending your house could increase if you decide on a two-storey extension. For a good quality extension, the average double extension cost will be £1,800-£2,500 per square metre or possibly more (again, not including VAT).
The Verdict
While moving house can take a while to process, so too can extending on your property. Your home will temporarily become a building site until completion, which will most likely be stressful for yourself, as well as your children and any pets you might have. Equally, you may have to deal with extra costs as you wait for completion if you have to move out during the period of the build.
However, extending on your current property is an feasible option that is cost-effective, saving you from going through the house buying and selling process. But always keep in mind that you may not make your money back from this investment. It may not always be suitable if you’re not planning to stay at your property for the foreseeable future.
Enter your postcode
Which Home Extensions Are Worth It?
There are many types of extensions that you could add to improve your home. However, it’s important to know which would be worth the money and effort before you start spending your entire budget. To help you decide which extension would be the best fit for you and your home, we’ve created a list of some of the extensions that are more likely to increase the value of your property.
Keep in mind that each extension varies depending on the quality of work completed. But the best extensions to consider before planning are:
Single-Storey Extension
If you’re looking to add extra living space to your home, then a single-storey extension is the perfect fit for you. From rear extensions to side return extensions, there are a few sub-categories involved for you to look through to help you find the perfect plan. This type of extension is particularly suitable for those with a growing family who are looking for extra space.
Single-storey extensions can cater to a variety of budget types as the smaller the plan, the less it will cost. This seems like a sufficient cost to extend a room or hallway and give your home the well-needed space you’re looking for. It could add between 5%-10% to the value of your home.
If you’re looking for even more space, then consider getting a double-storey extension as this can then increase the value of your home by as much as 20%. But it will cost a lot more to complete.
Loft Conversion
Whether you’re adding a bedroom, bathroom or both by converting your loft, the value of your home could increase by 12.5% by having this work done. Depending on where you live and the company you hire, you could expect a cost of around £1,000 per square metre.
Loft conversions are one of the most popular and inexpensive ways to add space and value to your home. It’s one of the least disruptive extensions, ensuring that you and your family are provided with the necessary added space without the chaotic disturbance that often comes with building work.
Conservatory
Adding a conservatory can be a more affordable type of extension, costing around £5,000 in total, depending on the size. They are also fairly easy to install and can add as much as 5%-7% value onto your property. Conservatories have become a popular extension throughout the UK, helping homeowners enjoy their garden without the dreaded British weather putting a damper on their evening.
Kitchen Extension
A kitchen extension can be costly, averaging between £1,260 and £1,680 per square metre depending on the size of your property. When done right, it can add a lot of value to your property. You have to think about the plans and budget so that the necessary work is completed to the highest of standards.
Like bathroom extensions, kitchen extensions can be more complicated than other extension types. You have to consider the plumbing involved with a kitchen extension and how the work needs to be expertly done. It can be worth the budget and the work but it does have to be done right.
Any of the above types of extensions can be used to add enough space to extend your kitchen. Don’t forget to compare plans and find the one that best fits you and your requirements.
Changes in Permitted Development Rights
Depending on what work you’re planning to have done, you may or may not need planning permission. If you do not need planning permission, then permitted development comes into play.
In May 2019, Permitted Development Rights were subject to new regulations, altering the planning laws in the UK. The main change that connects to extending a property, is the new order that states that the regulations now make the right to build larger, rear single-storey extensions permanent. This means that homeowners can now build larger extensions, subject to the approval process, without worrying that their provision will expire.
For more information, it’s advised that you read the government’s explanation of permitted development for homeowners here, so that you’re aware of what work is allowed and what is not.
Do I Have Permitted Development Rights?
If you do not need planning permission, then your permitted development rights come into play. However, it’s important to be aware that any space added by previous owners of the house since 1948 counts towards your allocation.
Below are the most common situations where you will most likely not have permitted development rights or have restricted rights:
- If you live in a Designated Area like a National Park, Conservation Area or an Area of Outstanding Natural Beauty
- If you’re self-building a new project where the proposed plans are bigger than the existing property
- If you live in a flat or maisonette
Other than these situations, you will most likely have permitted development rights. But it’s always recommended that you conduct thorough research before beginning work and talk to your local authority.
Enter your postcode
Is It Better To Move Home?
As mentioned above, building an extension can be tiring and may burn a hole in your pocket as costs and fees will have to be paid throughout the process. Most regions and properties will allow you to make your money back on an extension, but some renovations may devalue your home.
Moving house is the other option if you require more living space or certain features such as a garage. It’s a more viable option, and worthwhile if you do not want to commit to staying in a property for the long-term.
Cost of Moving House
The fees below are based on the costs of buying and the selling costs for the average UK property of £251,000 in 2021. Please note all prices vary depending on location, house type and size.
| Moving House Service | Price |
|---|---|
| House Deposit | £30,000 on average (15%) |
| Property Survey Costs | £500 (RICS Home Survey Level 2) |
|
Solicitor’s Fees for Selling a House |
£1,000 |
| Solicitor’s Fees for Buying a House |
£1,040 |
| Estate Agent Fees | 1-3% of value |
| Average Removal Company Cost | £1,181 |
The main cost you’ll be hit with is the deposit for your house. The average house deposit stands at around £30,000 for a 15% deposit.
On top of this, you will also have to pay for a property survey starting from around £400, conveyancing fees for both buying and selling a property, estate agents fees which are between 1-3% of the value, and a removal company which averages at £1,181.
It’s also important to remember that you’ll have to calculate stamp duty when considering the overall cost of moving house. Stamp duty varies depending on where you are in the UK, but it is an added fee to pay when purchasing a house over a certain price.
The Verdict
Moving is a stressful time and uprooting your family from friends and familiar areas could be detrimental in the long term, as well as the difficulty of funding the costs. However, moving within your current local area to a larger property will be easier on your family. Depending on what you’re looking for in a new home, it could work out cheaper than extending, or if you’re after garden space, moving in the best option.
Save Time and Money on Your Move
There is no set answer to whether it is better to move house or extend on your current property, as it will depend on individual situations. Extending may seem like the easier option, but will still be disruptive to your family’s living and may not be as cost effective in certain regions.
Likewise, moving house will save your current property from turning into a building site but could cost you thousands. If you do decide to move house, make sure to compare removal companies. We’ll connect you with up to 6 trusted and verified removal companies in your area.
How to build a smart home extension
Most smart homes are the product of add-ons, modifying an existing house and bolting in smart lighting, heating and more. The result can be a mismatch of products and an ugly-looking finish. When you’re starting from scratch and have the walls and floors up, things don’t have to be that way. We will show you how to build a smart home extension and what you need to plan for.
The key point here is to overspecify – as you never know when you might need something later down the line, it’s better to have and not need, and all that.
Put Ethernet everywhere
While Wi-Fi has certainly improved with the likes of mesh systems boosting wireless speeds throughout your home through additional wireless access points, it’s still not perfect. And even mesh networks reach their limitations and, such as the Netgear Orbi RBK50, benefit from using Ethernet to connect up the satellite access points. In all cases, having a physical connection to a device, be it a smart home hub or media streamer, is more reliable than using wireless only.
Related: Best Wi-Fi extenders
I fully recommend putting in as much Ethernet as you can around your new extension. There are several areas to focus on. First, is the main connection to your router. Most routers have three or four Gigabit Ethernet ports, which at first seems quite limiting.
However, you can boost the number of points by connecting Gigabit Ethernet switches to your router. A simple eight-port Netgear ProSafe GS108 costs around £30, but gives you additional wired capacity.
You can daisy-chain switches together, but be careful about overdoing it. The final connection to your router and, therefore, the internet is a single Gigabit Ethernet cable. If you daisy-chain too many devices, you’re introducing a bottleneck. That said, it may be convenient to extend access through a second switch in some cases, particularly to low-bandwidth devices, such as smart home devices.
In my home, I have three switches in the main house. One is behind the TV and is for all of the media devices there, including Sky Q, an Ultra HD Blu-ray player and the TV. This switch is directly connected to the router.
A second switch is placed under the floor at the back of the house and serves for the kitchen extension. This is connected directly to the main router but has a daisy-chain link to a third switch, located in the hall cupboard, that serves as the home for the smart home hubs. Plan where you want your switches to be located as, ultimately, you’ll need to run Ethernet cables to them.
There are two ways to run Ethernet: run a patch cable and poke it out a hole in a wall or floor, or terminate the run at a wall socket that you plug a separate cable into. The first is the easiest and dirtiest: you just run a patch cable. Cat 5e will deal with Gigabit Ethernet, but go with Cat 6 if you want future support for 10Gbit Ethernet. Cables are quite cheap, with a 10m Cat 6 cable costing less than £10. You can have a maximum of 100m of cabling, but 50m should cover the longest length you’ll realistically need.
Running a patch cable means that you have a connector on either end, which doesn’t look very neat. However, this doesn’t always matter. For my cupboard with smart home hubs, I have a cable come up out of the wall and connect into a switch. As the cable’s in a cupboard, you can’t see it, so there’s no need to terminate it neatly. Having a place for smart home hubs is really handy, particularly as the cupboard is roughly in the middle of the house, giving decent coverage.
Likewise, under a run of kitchen cabinets, there’s another cable, which can’t be seen. This plugs into the hub that runs the smart cat flap (a SureFlap Microchip Pet Door Connect) and is a good use of space.
Particularly when building a kitchen, think about using the under-cabinet space for such devices, but stick away from any areas that could be exposed to water, such as under the sink or the dishwasher.
Think about running Ethernet upstairs through any voids that you might have. I have a cupboard upstairs that houses the boiler and is just above the kitchen. While the work was being done, this gave me a perfect opportunity to run a cable into this cupboard, hooking up the Orbi RBK50 via Ethernet.
The second way of running cables is neater. Terminating in a wall-mounted socket, you avoid unsightly cables poking out. Instead, when you want to use a port, you just plug a shorter cable into the wall socket and the device you want to use. I have a Sky Q Mini box plugged into a port in the kitchen.
When terminating the socket, you’ll need a cable to be run to a pattress box, and then terminated in an RJ45 female connector. An Ethernet crimping tool is used to make the connection. It’s often easier to buy a run of patch cable, then snip the end off and re-terminate in the socket.
For even easier convenience, try a Quick Connect box from Nexxia: you just plug a patch cable into the rear and you’re done, with no additional wiring. The downside is that these connectors are a little deeper, so you’ll need a pattress box deep enough.
Place as many connectors around your new extension as you think you might need. If you know where you’re going to put a TV or desk, place sockets there; don’t be shy about placing an extra socket or two elsewhere: you never know when you may move things around.
Height is important. You can place the sockets at the traditional level near the floor, but that may not work for all applications: with a wall-mounted TV, for example, a higher-level Ethernet socket could be really useful; I wish I’d done this in my kitchen.
In all cases, you end up with a bunch of Ethernet cables or sockets at the points you need to use them, with the other ends collated near the switch. Don’t worry if you end up with more cables than you have switch ports for, as you don’t need to connect up everything, just the cables that you’re actually using. For this reason, labelling the cables can be useful.
My way of doing things is to have a top-down diagram of the new area, which I mark up with numbered Ethernet ports. To match the cables with the numbers (if you didn’t at the start), I start by unplugging all cables from the switch. Then, I plug a laptop (any device will do) into the end of an Ethernet cable or wall socket (the opposite end to the switch) starting a port 1.
At the switch end, I plug and unplug cables until a port lights up: this shows there’s a connection, and the cable can be labelled as port 1 using a bit of masking tape. Repeat with the other cables until you’ve done the entire run.
Plan your smart lighting
Smart lighting can transform a space, particularly if you go with colour-changing bulbs, such as with the Philips Hue, as I did. As you can see from the images below, the kitchen can take on completely different looks and feels, just by adjusting the colour. It really is the final wow factor, in my opinion.
I went with Philips Hue for two reasons: there’s a wider choice of bulb fittings, and there are dedicated remote light switches, so the lights can be operated as ‘normal’ without using an app or a voice assistant, such as Alexa. However, these options remain a valid form of control.
For me, smart lighting is about the effect – rather than necessarily seeing the lights – so we had the kitchen built to house these products without them being seen. Spotlights (GU10s) sit out of sight in the side of the original building. Around the skylight, we had a small shelf built, which the LED strip is connected to (you can run up to 10m of lighting in this way). This gives illumination, but you mostly don’t see the LED strip and it also lights up the outside of the house.
The Hue LED strip is powered by a plug-in power adaptor. Normally installations can be a problem, but not in this case, as we had a power socket installed in the top of a kitchen cupboard and just ran the cable through the newly-built ceiling into the cupboard. Again, it’s worth thinking about where you may need sockets. In my setup, only two main bulbs are visible inside the housing that we picked for them.
Control of the lights is via a Hue Switch, which connects magnetically to the fridge on the way into the kitchen. The middle section can be removed and used as a remote control. However, just in case something goes wrong (or I move and want to take the bulbs), there are dedicated normal light switches. By default, these are left on and never touched. Hue is smart and in the event of a problem, turning the switch off and then back on again turns the bulbs on, with them set to warm white.
Outside, the garden office already had GU10 up and downlighters. I mirrored these on the extension, kitting them all out with Philips Hue White Ambience (temperature-changing bulbs), hooked up to another Hue Switch. So, now, the garden and kitchen both operate with smart lighting.
Related: Amazon Alexa guide
Plan smart underfloor heating
If you’re going to put in underfloor heating, then you need to place the heating manifold somewhere sensible. While you’re doing it, it makes sense to think about underfloor heating. I run Honeywell Evohome in my house, which is compatible with underfloor heating.
A Honeywell Single Zone Thermostat Y87RF2024 did the job, with a T87RF2033 Wireless Thermostat for temperature measurements and a BDR91 Wireless Relay Box to control the underfloor heating manifold. This just adds an additional zone into the house, which is as controllable and programmable as any other room.
Related: Best smart thermostats
Work out where your smart speakers and audio are going
If you want audio around your home, then think about what you can do with the walls opened up, and you can run cabling. I opted for two high-level power sockets on either side of the room: one each for a Sonos Play:1 speaker that I mounted on the wall. There’s also a Sonos Sub located under the kitchen counter for bass. The beauty of doing things from scratch is that everything is hidden.
An Amazon Echo Dot sits above the wall-mounted TV, powered by the USB port on the back of the Sky Q Mini box. I overcame the lack of power points at TV height by using a multi-way adaptor behind the TV.
I also had a speaker cable run along and out of the back of the extension, wall-mounting weather-proof speakers outside. These are connected to a Sonos Amp, which is sat in a box under the old dining room floor: there’s little need to see a Sonos player like this. In the summer months, it means quality outdoor music, which I can also play inside – no more messing around with Bluetooth speakers.
There is one area where you’ll have to make a choice. I mirrored the outdoor speakers to the Sonos Play:1 speakers inside. Typically you pick the left and right speakers by standing and looking at them. However, standing inside and looking out is the mirror image of standing outside and looking inwards at the outdoor speakers. In my case, it would mean that the left indoor Sonos speaker was next to the right outdoor speaker and vice versa. My advice, if you end up in a similar situation is to match the outdoor to the indoor, so left is next to left, and right next to right.
What else to look out for
Make sure you have plenty of power sockets and areas to put things. I have a Dyson 360 Eye robot vacuum cleaner that keeps the kitchen looking neat and tidy. A lower-level power socket and a slightly shortened run of cupboards gave plenty of room for the cleaner to sit out of the way when it’s not in use.
Related: Best robot vacuum cleaners
Got any more tips or tricks for dealing with a new-build? Tell us @trustedreviews
A homeowner’s checklist for building an extension
One of the best ways to add value to your home is by adding space.
And with the pandemic seeing homeowners rethinking how they use their homes, it’s no surprise to see extensions becoming more and more popular.
But undertaking major work like this requires a great deal of thought and many homeowners simply don’t know where to start.
In this guide, we’ll explore everything you need to know about building an extension…
Building an extension: Where to start
The first thing to establish when building an extension is what your needs are and your reasons for wanting to extend.
If you’re thinking of extending because you need more space, consider where you are most in need of additional square footage and how you use your property’s existing space.
And if you’re contemplating an extension because you want to add value before selling your property, you’ll need to put yourself in your buyer’s shoes.
Ask yourself who your potential buyers are and think about the kind of space would appeal to them.
Will an extension add value?
Ask yourself right from the start whether your plans for an extension will add value to your home if and when you come to sell it.
Sometimes properties in a certain location have a ceiling price, so it can be worth speaking to your local estate agent to get an idea how much value major work might add to your home.
Do I need permission to build an extension?
Most extensions don’t require planning permission, as they often fall under permitted development rights.
However, it’s important to know what you can and can’t do under permitted development before you start planning your dream extension project.
Under permitted development, you can do the following without requiring planning permission:
- Extend from the rear of your detached property by eight metres for a single-storey extension or three metres for a double-storey extension
- If your property is terraced or semi-detached, you can extend to six metres to the rear of the property for a single-storey extension
- Build a single-storey extension no higher than four metres to the eaves and the overall height no higher than the existing property
- Build a two-storey extension if it is no closer than seven metres to the rear boundary
Any extension must not take up more than half of the original land around the property without planning permission and extensions should be built with similar materials to the original property.
There may be different rules for properties in conservation areas or if a building is listed.
So, always speak to your local authority planning department before starting work, to establish if planning permission is required for what you want to do.
Building regulations for extensions
Any property extension must comply with building regulations.
That means whoever builds your extension must be accredited by an official governing body, such as FENSA for window fitters and Gas Safe for gas engineers, or be able to liaise with the local council who will certify the work.
Failing to comply with building regulations means you could be forced to remove your extension at great cost and inconvenience, as well as being unable to sell your home in the meantime.
Buildings insurance and extensions
Before starting work on an extension, contact your buildings insurance provider to let them know about your project.
As the extension will almost certainly increase the rebuilding cost of your property should it be destroyed by fire or flood, your buildings insurance policy will need to be updated.
Your existing policy may cover you, but it’s always worth checking and being prepared to pay an increased premium for any additional cover.
Neighbour disputes
One of the most common causes of friction between neighbours can be building work.
Should you need planning permission for your extension, the local authority will contact your neighbours for their views.
However, it’s often a good step to let your neighbours know about your plans before the planning department.
Outline exactly what you’re doing and try to provide peace of mind if they have any concerns.
Not only will this keep relations positive, it could also mean they are less likely to oppose the plans with the local authority.
The Party Wall Act
If you’re planning an extension and your property is connected to another property, or properties, you may require a Party Wall agreement with your neighbour(s).
Party walls are shared walls that divide the homes of separate owners, but also include garden walls built over boundaries and excavation work conducted within a certain distance of a neighbouring property.
A Party Wall agreement may be needed if your extension requires groundwork or the use of steel supports that could affect the structure of a neighbouring property, or properties.
How to build an extension – your checklist
Here’s everything you’ll need to do to get your extension started…
1. Speak to an architect
There’s no legal requirement to use an architect to design your extension.
But doing so can often mean a better result.
Architects are trained to make better use of space when designing your extension, so if you have specific needs and goals you want to achieve, it could pay to have a professional in your corner.
However, you’ll need to add their fees into your budget.
2. Picking a tradesperson to do the work
This is arguably the most important decision you’ll make around your extension project.
Start by speaking to friends and family for recommendations.
Even if they haven’t used a particular builder themselves, they may be able to put you in touch with someone they know who has.
There’s no better confirmation of a tradesperson’s work than word of mouth, even in this digital age where reviews and comments are readily available online.
But do use the Internet, too.
Websites such as Trustpilot or Checkatrade, which both vet their reviews for accuracy and honesty, are great places to start.
Shop around for a builder, of course, but picking the cheapest doesn’t always pay off in the long run.
Get quotes from at least five companies and match them up with your budget for the work.
If you’re particularly drawn to a more expensive quote based on a builder’s previous work or great reviews, only stretch your budget if you can genuinely afford to do so.
3. Finalise your budget early
Staying on budget and not overspending on your extension is crucial if you’re looking to add value to your home.
Make early decisions on what you want and stick to them.
Changes to design or to fixtures and fittings once work is under way will only cause your costs to rise.
And remember: Having a small fighting fund set aside can really help, because major building work can sometimes spring some surprises.
4. The build
Although almost all extensions are different in some way, most will follow a similar process through the construction process.
Here’s what you can expect:
- Site security, storage, access, and risk assessment
- Demolition (if any), groundworks and drainage
- Erection of walls and roof
- Window / door fitting
- Fitting of downpipes and drainage connections
- External finishing (rendering, painting)
- Internal renovation work
- Electrical / gas / plumbing fit-out
- Flooring and internal decoration
- Final clean and handover
The cost of building an extension
Factors that can influence how much your extension costs include:
- Design specification
- Planning costs
- Size, shape and height of the extension
- Groundworks
- Issues with trees
- Site constraints and access
- Fixtures and fittings
- Windows and doors
- Number of trades required
As a rule, you should factor in between £1,200 and £2,500 per square metre for your extension, although very high specification finishes can be as much as £3,000 per square metre.
What is the cheapest way to build an extension?
Building an extension will always cost a considerable amount of money.
However, there are things you can do to help minimise the costs, including:
- Opting for a simple configuration rather than a complex design
- Using simple building materials
- Choosing less expensive interior fittings
- Positioning plumbing and waste close to existing systems
- Keep groundworks simple and site extensions away from trees, drains and sewer systems
You can also potentially lower your planning costs by:
- Designing an extension that falls under permitted development
- Ensuring a larger extension is acceptable to planners before you apply for formal permission
How long does it take to build an extension?
A small single storey extension of around three metres should take between three and four months to build.
A larger extension, or one over more than one storey, could take around six months.
However, the time it takes to design an extension and obtain any required planning permission often means the overall process takes much longer – sometimes up to 12 months.
Further reading…
- Your step-by-step guide to home renovations
- How to add value to your garden
- 10 great ideas for your front entrance
The dos and don’ts of building an extension
- Spectator Life
- Spectator Life
- Property
From Spectator Life
Text settings
CommentsShare
House prices are increasing at their fastest rate for seven years, jumping by as much as 10.9 per cent according to the Nationwide in their most recent survey. Is now the time to stay put and extend rather than go through the hassle of moving into a supply constrained rising market? And if you do extend, is it guaranteed that you’ll add value? Adding an annex or a loft extension, according to Shawbrook Bank, a home improvement loan provider, indicates that you’ll add 5 per cent to the value of a home and separate research by Nationwide suggests that 20 per cent of the value can be added if you build in a double bedroom and en-suite bathroom.
However, if you really want to make sure you’re adding value, a national statistic doesn’t mean very much when it comes to specific properties. You’d be wise to consider that some elements of an extension will add more value than others. And in some cases, you could destroy value.
Here are my top seven tips to help you make the most of any works you undertake:
Why are you doing these works in the first place?
There are generally two right answers to this question. The first is to create more space and the second is to create better space. It’s amazing how many home extensions have been bolted on to a home simply to add more space without much thought as to why. If your extension doesn’t achieve these two aims, you’re unlikely to increase your property’s value.
Where is the space going to be added?
It may be more expensive to add a basement than a loft extension. However, upstairs is likely to add more value than down. Unless your subterranean space has access to natural light (through a lightwell, glass ceiling or dug out garden space) this ship has sailed. Loft conversions are back. Why? Because they add useable areas without taking precious outside space. However, if you are in the roof, unless the space has a good floor to ceiling height, you won’t be adding a premium.
Master the stairs
It’s easy to forget about the stairs in our haste to add space elsewhere, but I have been to so many houses where a tiny and often very steep staircase has been added to launch you into the top floor or down to a basement. Saving floor space this way is a false economy. So are overly modern staircases with glass treads (pets hate them) or glass handrails (sticky handprints love them!). A well-balanced staircase is under appreciated but will likely deliver an investment return.
Don’t be afraid to move or remove a wall
The number of extensions I have seen where the space doesn’t work are too numerous to count. And I never understand why no one has thought about how the space will be used, the difficulties of shoehorning too much into an area or even forgetting where the afternoon sun arrives at the building. Side returns can be a tremendous investment, particularly for a Victorian terraced house. However, if you simply create a lot of new space that’s dark or relies solely on artificial light, or doesn’t work with the rest of the house, you’ll not reap a reward for your efforts.
Use an architect
I don’t just mean for you to appoint one. But engage with them so that you find the very best solutions. Space that’s well planned will always add value. And so will a scheme that has been properly applied for with permissions secured and certifications obtained.
Consider inside and outside
If you are going to take some of your garden, make sure that you make the space work in harmony. That may mean bifold doors, but it also means hard landscaping outside and around your extension too. If the result is ugly or looks unnatural compared to the existing property, it will not matter how much square footage you have added. Nobody is going to pay a premium for a monster house.
Fix problems along the way
Use the opportunity of doing works to fix problems. If you create a lovely big kitchen, dining, snug… don’t forget that just because it’s warm in summer and leads into the garden it could be chilly in winter. Adding underfloor heating is easy if you’ve got a project underway but not something that can be an afterthought.
And here are five mistakes to avoid:
1. Don’t lose a garage to create an extra room. With the advent of electric cars, a driveway and off-street parking will once again be a premium. At one stage there was a big shift for space and a street was perfect for a car. No longer is that the case.
2. Resist the urge to build huge subterranean TV rooms. They may be flash and bondesque, but they won’t add much to the value to your home. Likewise that wine cellar you’ve always coveted. Instead, focus on useful living space.
3. Don’t turn a property into something it’s not… even something as simple as a four-bed house in a three-bed house street may not achieve its full potential when it comes to selling.
4. Beware of losing precious garden space. In a post pandemic world in which we are enlightened to the joys of the outdoors, gardens are at a premium.
5. Avoid using materials that don’t work together or look cheap; they will make your extension stick out like a sore thumb and harm its potential to add value.
A good extension should not only add square footage but enhance the existing spaces in your home. Better space always sells and achieves full value. It’s always worth making sure that you use the best materials and high quality workmanship. And beware of a national statistic. Yes, space in an urban setting is a premium and if you add space, you’ll add value. In a rural setting where space and design are imperative, an ugly extension on a beautiful house will blight rather than delight.
House Extensions: Should You Extend or Move?
Extend or move? It’s a question presented to countless Brits each year as they begin to feel like they’re outgrowing their home in its current state. It’s an understandable predicament that requires serious thought. Fortunately, we’ve highlighted the benefits and considerations you should be making, to make your decision a little easier.
Choose to extend
Adding to your current home comes with numerous benefits, not least an improved layout. But you should also be careful not to fall into the trap of pushing through changes that will have a harmful impact on the value of your home or make it harder to sell in the future.
Understanding how to extend your house
To maintain and, ideally, improve your home’s market value, it’s important to undertake appropriate extensions. Any exterior work is simply building onto land you already own, so you should treat it as a balancing act between what you’re losing and what you’re gaining.
On the other hand, you can capitalise on your available land by making savvy decisions. For instance, extending your home to accommodate an extra bedroom can see the value rocket by 15%, while an interior loft conversion that combines bedroom and bathroom can see you net an additional 21%. If you’re city based and struggling to build outwards, consider excavating and building a basement to boost your property price by up to 15%.
It’s easy to let your dreams run away with you, so be sure to think about whether your extension fantasy offers realistic value.
Will you benefit from an extension?
If your present abode isn’t in your long-term plans, you should really think hard about whether an extension is even a worthwhile avenue. Put into context and answering the common query: ‘How much is a single storey extension?’, the average cost to build at the lower layer of your home can be anywhere between £1200-2000+ per square metre, depending on your location.
This, when combined with the cost of planning permission, which can come in at over £200, and unforeseen extras, can eventually leave you out of pocket when it comes to putting your house on the market.
Will an extension make a future sale more difficult?
A crucial factor in choosing whether to extend or not is whether any proposed plans will hinder the future sale of your home. Even if you’re not considering uprooting just yet, it’s always worth taking a step back and thinking about whether your ideas are future proof. While your big extension might improve your property superficially, and you’ll be within your right to demand a greater asking price, the work done might appeal to a much smaller band of buyers so take longer to find a suitor.
Making the move
If you’re beginning to outgrow your property, entering the market may seem to be the logical next step. After all, scaling up lets you enjoy the spacious gain without going through building site pain. Right? While this is often the case, it’s not always the most financially sound decision. If you’re considering a move, establish your budget based on the equivalent value of your current property plus the proposed hypothetical cost of an equivalent extension.
This is a straightforward practice, but lets you explore the market with a clear point of comparison. If your dream property comes in over budget, it might be worth investing in an extension, instead.
Can you get planning permission before buying a house?
If your main motivation for moving is with a view to taking on an extension project with a new property, you might be wondering whether your grand plans will be permissible according to planning laws. Generally, without the need for planning permission, a single storey rear extension cannot stretch more than three metres beyond a house’s original footprint, or four metres if a property is detached.
For anything on a greater scale, however, it’s encouraged to check with the local council if your plans will pass regulations before completing a purchase. They will also point you in the direction of any other past permissions requested on the property, as well as any structural changes already made.
Funding your new home or extension
Whether you extend or move, it’s no secret that improving your current living situation costs money. A lot of money, in fact. And unless you have considerable savings, you should have a plan in place to finance your decision.
What is the cheapest way to build an extension?
The cheapest way to build an extension is to get involved yourself, whether completely or partially. Learning the ropes for basic construction is achievable, but, if your building work requires structural engineering competency, you should always consult a professional. There are a couple of ways to draw capital for your project:
- Re-mortgage you home
Most lenders will allow you to re-mortgage your home to undertake extension work. However, this naturally depends on the amount of work required and the proposed cost to extend house boundaries. Additionally, be prepared for your lender to ask you for a working schedule that gives them assurances of completion.
- Bank loan or credit card
If re-mortgaging your property isn’t a possibility, taking out a bank loan or credit card payment might be your only option. Be aware, though, that interest rates on these loans will be much higher than re-mortgaging, because the agreement isn’t explicitly tied to your home.
Deliberating over whether to extend or move can be challenging, with so many factors to consider. If you find somewhere more spacious within budget, improve your hand as a buyer and get a cash offer on your current home so you can enter the market chain free. For even more insight in the property world, discover the latest from us.
DIY extension from foam blocks to the house: important nuances of all stages of construction
Send request
Call a specialist
Owners of private houses eventually think about expanding the usable area of the building. Some dream of an extra bedroom, others want to build a spacious living room-kitchen. But one question unites them all: what material should the new walls be made of? The best option is an extension to the house from foam blocks . Why are they so good?
Distinctive properties of foam blocks
Porous material has gained recognition since its introduction to the construction market. Professionals in their field immediately saw a number of advantages in the foam blocks:
However, there are also disadvantages. Among them, one can single out the need for waterproofing, since the material is vulnerable to environmental influences, and an unpresentable appearance. The last minus of the master is corrected by the external decoration of the facade.
Options for an extension to a house made of foam blocks
An additional room can be attached to a brick, wooden, frame or block house. An extension can be residential or serve as an economic purpose. For example, you want to build a garage, workshop, barn. The main thing is that the walls of the main building should not be dilapidated, and the foundation should have sufficient strength characteristics. Experts also believe that the age of the building, the house should not exceed 15 years.
Building an extension to a house from foam blocks: important steps
To have an idea of how to build an extension to a house from foam blocks, you should familiarize yourself with a clear algorithm of actions. Each stage has its own nuances, ignorance and neglect of which can significantly affect the reliability of the design.
Design
You don’t have to be an engineer or an architect to plan your own addition to your house. It is enough only when drawing up a project to take into account the following points:
- Ground load – calculation of the weight of the structure is important for the selection of the foundation.
 Knowing the desired parameters of the future premises, you can easily complete this task online.
 - Number of window and door openings.
- The need for communications and installation of additional layers of vapor and heat insulation.
In this way, you can avoid many problems during construction.
Please note! When conducting electricity or plumbing, it must be borne in mind that in the first year the walls may move slightly in relation to each other. If possible, it is advisable to abandon this type of work for a certain period.
Foundation selection
The foundation of an additional building is one of the most important issues. It is necessary to decide not only on the type of foundation for an extension to the foam concrete house, but also on the method of tying it. The most commonly used bases for this purpose are slab, pile and tape.
Slab foundation
This type of foundation is relevant for clay heaving soil, which is characterized by stable shifts during seasonal floods. The foundation is formed by installing a drainage sand and gravel layer, followed by laying a homogeneous reinforced concrete slab on it. Such a base does not lend itself to deformation from spring-autumn shifts, and the building practically does not shrink. Among the minuses of the slab foundation is the high consumption of material, as well as the inability to build a basement.
Pile foundation
This type of foundation is useful in areas with high groundwater levels. A reliable foundation is created by screwing ready-made steel screw piles or forming reinforced concrete supports. In the latter case, wells are dug, deep to dense layers of soil, reinforced and poured with concrete.
Strip foundation
The simplest and most commonly used foundation, which can be created without special equipment. When installing the foundation, it is only important to take into account 2 requirements:
- the new base must be level with the old one;
- The strip foundation of the extension is created of the same type as the foundation of the house – monolithic, prefabricated or brick.

Two different foundations must be connected to each other without fail. Otherwise, the joints of the two buildings will crack. If an extension of foam blocks is being built to a brick house, reinforcement is embedded in the old base to a depth of 30 cm. The free ends of the rods of the same length are installed in the new foundation. It is also possible to fasten the two bases and the building as a whole by fixing metal bars. Their thickness should be at least 6-8 mm. The bars are cut into the foundation and into the walls of the old and new buildings to a depth of 15 cm in increments of 2-3 rows of masonry up to a height of 2.5-3 m above the base level. The metal is fixed in the planes with a cement-sand mortar.
If the extension is made to a wooden house made of foam blocks, then a rigid binding is irrelevant. Due to the large difference in the properties of the materials, uneven shrinkage of the structures will occur, which will lead to the destruction of the walls at the connection points. Therefore, a gap is left between the two foundations, which is filled with insulation – polyurethane foam.
A leveling screed with a thickness of 10 to 30 mm is laid over the base, if necessary, using a building level. Next, the foundation is covered with a waterproofing layer. Most often, ruberoid is used for this purpose.
Construction of walls
Installation of the first row of foam block masonry starts from the corners of the perimeter, they are set strictly according to the level. The evenness of the planes depends in direct proportion on how the beginning of the walls is laid. For the installation of the first row, a cement mortar is used, then the laying is carried out on a special glue for foam blocks. The upper part of the porous material is wetted with water to ensure better adhesion. Glue is applied to the bottom and side surfaces of the blocks. The thickness of the seams should not exceed 2-3 mm. The reliability of the structure is ensured by reinforcing every 3-4 rows of masonry.
If the extension is to a wooden building, a small gap is left between the new and old wall. Each row of masonry is reinforced with a metal mesh with a 2×2 cell, which is fixed to the wooden surface at 90 degrees with a metal bar for self-tapping screws. At the end of the construction of the walls, the gap is blown with mounting foam.
Installation of lintels
Before attaching a foam block extension to the house, it is necessary to have a clear idea of the height of the walls and the thickness of the floor. Based on this, calculate the height of the door and window openings.
Jumpers for them can be made in 3 ways:
- Metal corners are purchased, which are installed on top of the side surfaces of the future window or door. For the reliability of their fastening, gaps are made in the foam blocks. As a result, the corners seem to move into the masonry. Their ends can be additionally fixed with self-tapping screws. Foam blocks are laid on top, the parameters of which are also previously prepared for their fixation between the corners.
- Implementation of monolithic lintels with removable formwork. Pre-cook the reinforcing cage of the specified parameters. Next, formwork is installed. It is carried out from wooden shields, which are attached to the side surfaces of the opening. A kind of box is created. In the middle, the entire perimeter of the formwork is laid out in blocks cut into thin parts, after which the reinforcing cage is fixed there. As with laying walls, the stones are moistened with water, and the formwork is poured with concrete mortar. All surfaces of future openings are smoothed to the level of foam blocks. After the concrete hardens, the wooden shields are removed.
- Precast lintels made of U-shaped foam blocks. They are either purchased ready-made or made independently. For their masonry, a temporary rigid support is pre-made from boards or timber. Then U-shaped blocks are laid, which should go onto the wall by at least 30 cm. A reinforcing cage is fixed in the resulting cavity (closer to the inside of the wall). Further, the fixed formwork pre-moistened with water is poured with fine-grained concrete, compacted by bayonet. The surface is aligned with the top faces of the blocks. Supports are removed only after the final solidification of the solution.

 Further, the fixed formwork pre-moistened with water is poured with fine-grained concrete, compacted by bayonet. The surface is aligned with the top faces of the blocks. Supports are removed only after the final solidification of the solution.
 Armo-belt installation
Armo-belt installation technology, the task of which is to strengthen the entire extension structure, is no different from the installation of monolithic window and door lintels. A frame is knocked down from wooden shields along the entire perimeter of the building, the resulting cavity is reinforced, wetted with water and filled with fine-grained concrete, after which the surface is smoothed.
U-shaped blocks can also be used to mount the armored belt. First, corners are formed, and only then masonry is performed around the entire perimeter. Accordingly, hollow blocks are reinforced, wetted with water and poured with concrete. The finished armo-belt is given time for which it can completely harden and settle.
Please note! To ensure the integrity of the structure of the old house and the extension, the armored belt is connected to the walls of the first building by binding, as is the case with the foundation.
Ceiling and roof
After all joints have dried, proceed to the installation of the ceiling. It can be made of lightweight solid slabs or wood. In the latter case, a mauerlat is attached to the load-bearing wall of the old building – a horizontal bar that will support the rafters. Its thickness depends on the angle of inclination of the roof – the larger it is, the thicker the base should be. After proceeding to the installation of the truss system of a shed roof. The design is mounted at an angle in order to ensure water flow. All wooden materials are treated with fire-resistant, anti-fungal agents and mixtures that create a barrier against rot. Next, a hydrobarrier is laid, which is often used as roofing material. If the room is residential, it will not be superfluous to lay steam and heat insulation on the roof. The listed layers are mounted before the hydrobarrier.
Important! In order to prevent water from seeping between the wall of the building and the adjacent roof, the ends of the roofing material are heated and glued to the surface of the old house at an angle of 90 degrees.
Metal tiles, corrugated board, bituminous tiles, etc. are used as roofing. All of these materials are relatively light in weight and attractive in appearance. Upon completion, hemming is performed.
Finishing work
When the extension to the house made of foam blocks with your own hands is ready, doors and windows are installed, the building is insulated and decorated. To protect the windows from the penetration of sunlight and “unwanted guests”, you can install outdoor blinds – rafshtora. Now the installation of solar curtains is a popular trend more among commercial organizations (cafes, business centers, shops), but advanced private traders who are interested in the modern look of the exterior and the functionality of each product also install solar curtains.
The simplest way to create an aesthetic appearance is to stick foam panels with further puttying and painting. However, siding, decorative plaster or artificial stone looks more attractive.
Comments
Write a comment
what materials can be used to make an extension to the house, as well as how to get permission for a future extension
Everything is changeable in this world, including our ideas about the reality around us. And what seemed yesterday still sufficient and satisfying all our ideas about housing, for example, today, according to our understanding or due to really changed circumstances, turns out to be insufficient, cramped, small in area. What can be done in this case if it is not possible to build a new house? One thing you can advise is to expand the usable area of \u200b\u200bthe dwelling by making an extension.
Contents
-
1 What will the extension provide?
-
2 Options of extensions to residential building
-
3 Of which material an extension is built
-
3.
1 ANSTRUCTION of BRUS -
3.2 FART ANSTRUCTION FROM PENTAL 9000 9000 9000 9000 9000 9000.
-
-
4 We build the extension ourselves
-
5 How to competently legalize an extension?
 1 ANSTRUCTION of BRUS
 What will the extension give?
An extension is a extension of the space of your home. What can be placed on these newly appeared square meters? There are a lot of options here. It can be:
- summer kitchen;
- conservatory;
- library;
- living room and others.
It all depends on your needs, either desire or need. But when you have already decided what you lack the most, a question about the material, which you need to prepare in order to translate your plans into reality.
Usually, for the construction of an extension, materials are used that will not burden the attached segment, but will make it warm enough. Most often, the choice falls on timber and sandwich panels. However, if we are talking about an extension where a winter garden will be placed, then it should be taken into account that the glass walls will create a rather heavy structure , which will require powerful foundation. A solid foundation is also absolutely necessary if the extension is brick, for example, to the same brick house.
Options for extensions to a residential building
There are many options for extensions, but the following are accepted as the basis:
- side extension with a combined roof;
- side extension with separate roof;
- superstructure of the second or more floors;
- mansard extension.
If we talk about the first type of extension, it should be noted that this is the most budget-friendly option, since the roof of the main house remains the same, only slightly lengthening by the size of the extension. The main building is completed from one of its sides (if necessary, on both sides), then a passage is made between them and the total area of the building is increased exactly by the size of the area of the extension.
The second type of extension is identical to the first, with the only difference that it has own roof, when it is not possible to arrange a common one with the main house. This, of course, increases the consumption of material, the amount of necessary work, and, accordingly, the cost.
In the case of planning work on the superstructure of the second or more floors, it should first of all be borne in mind that not every building can be built on. In this case, we are talking primarily about the possibilities of the foundation of the house. If the initially possible multi-storey house was not planned, then its foundation can be is not strong enough. Therefore, such a foundation simply cannot withstand a structure of several floors. In this case, you need to consult with specialists on the possibility of strengthening the foundation in order to increase its strength. If the answer is no, it may be worth considering other types of extensions.
What material is the extension built from?
Timber extension
Timber is considered one of the best materials used for this purpose. And no matter what kind of timber it is – glued, rounded or planed – thanks to its parameters, work will be carried out in a much shorter time. Its advantages:
- is produced in wood processing enterprises, which ensures its sorting by wood quality;
- subjected to a special treatment which ensures the resistance of the timber to rotting and excludes damage to it by a wood bug;
- heat treatment is possible, by means of which the bar is given the desired color for the customer ;
- any type of timber – material eco-friendly , able to create a natural ecological system in the house.

Beam – natural building material, from which an extension can be made both to a wooden house and a brick or block house, at least as a veranda or summer kitchen.
Frame extension
This is a budget version of the extension, as it does not require significant investments in consumables. In addition, it can be erected on the basis of a pre-prepared foundation with a minimum investment of time. Frame construction involves the creation of an extension based on a frame of metal beams or wooden bars erected around the perimeter and over the entire area of each of its walls.
After frame the outer and inner plane of each wall is sheathed with special boards used in construction – chipboard or OSB – between which any insulation is laid . As such, mineral wool, woodworking waste – sawdust, polystyrene foam, etc. can be used. The insulation on the street side must be insulated from moisture beforehand without fail.
In general, this type of structure is easy to install, and with a certain amount of effort, almost any householder can build it.
Brick Extension
The construction of this kind of extension in the main building, of course, requires certain knowledge and skills, but the extension will be more solid and durable. Several points are important here:
- In order to preserve the style of the main building, an extension made of bricks, as a capital structure , should be erected from the back of the house.
- Since the brick building has a significant weight, then the foundation for such an extension must be solid .
- Expenses for obvious reasons will increase taking into account the cost of bricks, the cost of the foundation, as well as the cost of internal plastering of the walls.
- The method of joining the main building and the extension will require special care.

Foam block extension
Such an extension is no less durable than a brick one. A very advantageous in many respects modern building material – foam blocks:
- does not require the construction of such a powerful foundation as in brick construction, since its average density is several times less compared to brick construction, which means it is lighter;
- for the same reason of low density, which means the presence of air pores, foam blocks retain heat better;
- due to the large dimensions of foam blocks compared to brick faster than a building is being erected;
- financially, such an extension is much more profitable.
The only drawback of this material is the need to protect it from the effects of an aggressive external environment, usually for this purpose the walls outside are lined with siding or bricked.
We are building an extension ourselves
So, we have considered above varieties of extensions, and what materials they are actually built from. We will now try to develop a common extension for all types of extension algorithm for its construction, so that, if necessary, you can start working on your own.
- First of all, before erecting this kind of structure, you should determine for yourself what purpose will be this area added to the house. And you should not hope for the usual “We’ll see!”. After all, a lot depends on the purpose of the future extension. Say, if your house has a high foundation, and you are going to place a guest bedroom or a kitchen with a dining room on the newly attached area , then this extension will have to be raised to the same level. This means that it is necessary to make a similarly strong foundation to the level of the main building. But a garage or an outbuilding does not require this at all.
- It is also important to decide on various kinds of communications. Again, it depends on the purpose whether it will be necessary to conduct only electricity in this new room or whether water supply and sewerage will have to be supplied here.
- An archival moment – docking of the main building and the extension, for whatever purpose it was built. Any extension should be an organic continuation of the main building, not crack, its foundation should not sag .
- Roofing also causes many difficulties. And here you need to take into account the following : the roof of the attached segment should be lowered just below the level of the main roof of the house. The overlap formed in this case will not allow moisture from atmospheric precipitation to enter the joint, and, therefore, inside the room.

How to competently legalize an extension?
So, at the family council, it was decided to expand the living area and build an extension to the main building. However, so that later, upon completion of construction, it would not be necessary to run through the courts and prove their ownership of this structure and the legality of its construction, one should act in accordance with with the procedure established by law . And this means that you need to obtain permission for the construction of an extension from the local authority and contact a licensed design organization to develop an appropriate project and determine the type of materials for work.
A decision will also be made here on the water and electricity supply of the future facility. Next comes approval of the planned construction with supervisory authorities and the city department of architecture. After these events, you can start building. Upon their completion, the inspection is carried out by the supervisory authorities, only after their verdict on recognizing the object as meeting all standards, the owner receives act of commissioning building . And this means that you can register an extension at the Registration Chamber.
- Author: Anna Nikolaevna Miroshnichenko
Rate this article:
(8 votes, average: 3.3 out of 5)
Share with your friends!
DIY house extension
Contents
- The most common type of extension
- General concept of how to make an extension to the house in the easiest way
- Special case of foundation
- Building walls, how to make the extension as stable as possible
- Roof of the extension
- Conclusion
There can be an infinite number of reasons why you suddenly need to make an extension to the house, from expanding the living space in the form of a veranda to re-equipping the heating system of the building with the removal of the boiler and boiler in a separate room, as required by the safety instructions. As a rule, this is a small room, 2×3 m or 2×5 m, which does not require special work skills; any novice builder is quite capable of making such an extension to the house with his own hands. It is only necessary to plan the work correctly and outline the main range of tasks.
The most common type of extension
Before you build an extension to your house, you will need to spend more than one day to solve the most important planning issues. Any attached premises will subsequently need to be legalized by amending the documents and registering with the authorized bodies. There are many ways to make an extension to the house with your own hands so as not to get involved in paperwork, but it will be very problematic to sell or bequeath such housing construction in the future.
At the planning stage, several cardinal issues will need to be resolved:
- Where to put an extension to the house, any hurry will mean inconvenience in using the house. In a couple of months, the building will have to be dismantled and redone, dooming yourself to extra costs and the unpleasant pleasure of dismantling;
- How to make a foundation for an extension to a house. One of the most difficult issues requiring the help of specialists. If built at random, it is possible that the extension will move away from the main wall in the first spring;
- The choice of materials for the walls and roof, despite the minimum amount of construction, the total cost of building an attached building can result in a substantial amount.
 One of the most difficult issues requiring the help of specialists. If built at random, it is possible that the extension will move away from the main wall in the first spring;
 It is traditionally believed that the same materials should be used for the annex as for the main building. This approach is justified if we are talking about an extension to a large brick country house. In other cases, the task can be simplified and an extension to the country house can be made inexpensively. For example, to make an extension of aerated concrete, especially since for a one-story building most of the work can be done by hand.
The roof and truss system for an extension to the country house is made of timber and forty boards, the colors and material for the roof are selected either to match the roofing of the cottage, or use what is at hand or in the nearest hardware store.
The general concept of how to make an extension to the house in the simplest way
An extension for a boiler room, a bathroom or a summer kitchen is practically no different, except that you have to make an additional passage through the roof of the room for the exhaust pipe. The dacha extension is always carried out according to the simplest scheme, from the materials most suitable for dacha buildings, in this case, from foam concrete.
The construction of foam concrete blocks will require a fairly rigid foundation, so the answer to the question of how to make an extension to the house will be as follows – it is necessary to make the most stable and reliable foundation for the extension.
The general rule is that when choosing the type of foundation, you must follow the same scheme as for the main building. If the cottage is on piles, then the additional room must be placed on pile supports, if a slab foundation is used, then the extension will have to be equipped with a slab, or both buildings should be installed on the same base.
Most often, a country house is built of ordinary bricks on a strip foundation. From the point of view of costs, the concrete tape has the best price-rigidity ratio, therefore, if the task is how to make an extension to a brick house, the tape version of the foundation for the extension will look the most attractive.
Special case of foundation
An extension to a country house brick frame can also be made of ordinary brick, for example, if the owners do not want to bring dissonance into the overall appearance of the building. In this case, there is a problem with the fact that the extension, even from lightweight hollow bricks, creates an additional load on the strip foundation of the main building.
You can’t just dig a trench under the walls of a country house, pour a concrete strip and put an extension to the box on it. At most in the coming winter-spring, the heavy body of the extension will pull the old foundation, which will lead to the formation of cracks in the walls of the house, the extension will have to be dismantled and dismantled.
To avoid this situation, the foundation for the brick extension is made according to the following scheme:
- a dozen bored supports;
- End supports are replaced with concrete columns or steel pipes with a diameter of 150-200 mm, they will take the main weight from the truss system and roofing;
- The rest of the foundation for the brick extension is made according to the tape scheme in the traditional way.
In order to tie the piles and the strip foundation of the extension, you can use floor beams or cast a screed slab up to 50 mm thick. The slab will serve as an internal spacer for the walls of the extension and at the same time evenly transfer the load on the heaving foundation to the brickwork of the house.
As a result, the extension will be securely connected to the main building through the expansion joint between the house and the extension and the support system for the rafters and the ceiling. The extension itself can even be lined with finishing bricks or tiles, since the entire mass of the extension will put pressure on the ground already at a considerable distance from the foundation of a country house.
The described foundation scheme for a brick extension in a country house or a private house today is the most optimal in terms of cost, reliability and safety, since the pile system guarantees a secure hold of the attached box even on the most heaving soils.
How to build an extension with your own hands
The first thing to do before making an extension to the house of brick is to remove all debris, sod and plan the site on the site where the extension to the building will be erected.
The stage of arrangement of the foundation strip
The scheme for the construction of the strip foundation is no different from the manufacture of a shallow foundation for any other building. In this case, the foundation for the annex will be carried out according to the scheme of a closed rectangle. Initially, with the help of a cord, you will need to mark the center line, and then outline the edges of the future trench under the foundation.
The depth of the shallow tape should be at least 60 cm, width 50-60 cm.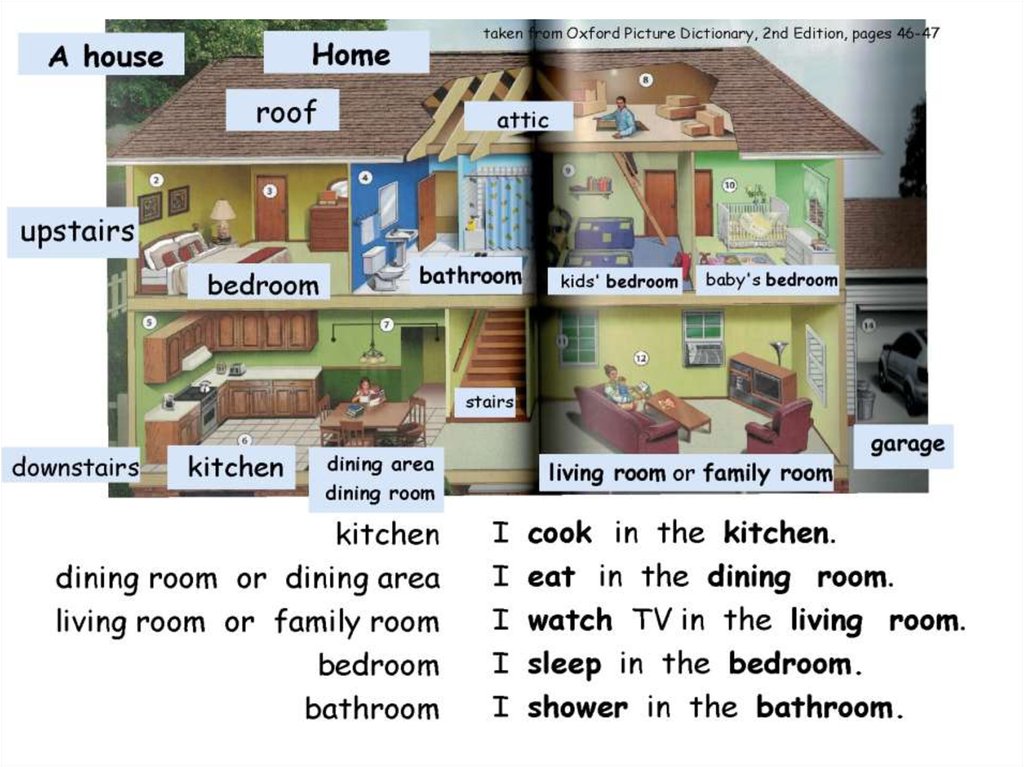 The determining value is the depth, if the soil is too soft and wet, you can increase the depth to 70 cm. In this case, it will be necessary to make drainage and a groundwater drain line from the foundation.
At the planning stage, boundaries or contours are applied to the walls of the house, along which the extension will fit into the dimensions of future walls. So far, downed formwork panels are being set according to the marks. The heads of the shield walls are reinforced with struts. Next comes the laying of reinforcement and preparation for pouring concrete. In order to provide the extension with an additional margin of rigidity, the soil is planned inside the perimeter of the foundation. After backfilling with gravel and laying the reinforcement, the site under the extension must be poured no later than four hours after the foundation tape has been concreted.
The result is a hybrid version of the foundation, slab-and-strip, it has sufficient rigidity to make the extension in the form of an open box. Part of the extension wall will be replaced by the facade of the house. The poured concrete of the foundation must be covered with a film and periodically moistened with water. Until the foundation has hardened, the concrete is cut with a ruler or plaster rule to get a perfectly horizontal plane, if this is not done now, the extension to the house will turn out with a slope.
Building walls, how to make the extension as stable as possible
The height of the slab above the ground is about 10 cm, this is not enough to protect the extension from the foam block from groundwater and rainwater, so experts recommend laying the basement of red brick at a height of 25- 30 cm. Immediately after laying the basement, the foundation of the extension is treated with coating waterproofing and the roofing material is glued.
The extension walls are laid out with a special adhesive that provides good adhesion and at the same time reduces the thickness of the joint. In the construction of the extension, instead of the rear wall, there is a brickwork of the house. As a result, the extension to the house is quite rigid even without the use of reinforcement.
The foam block is quite simply cut with a hacksaw, so there are practically no problems with tying the extension rows. For the manufacture of a window opening in an extension, ready-made foam concrete embedded lintels are used or they are cast into a formwork with steel bar reinforcement. In a similar way, a doorway is formed. Even on a reinforced foundation, the extension will shrink for another year, so reinforcing any windows and doorways in this case is mandatory.
The walls of the extension are carefully cleaned of excess glue, and defective seams are filled with glue mass and rubbed with a spatula. In fact, it turns out an extension with perfectly smooth and even walls. The foam concrete extension must be plastered or covered with “bark beetle”, the protective coating can be replaced with siding or painting with acrylic paint, and the foundation can be closed with a blind area.
Extension roof
Arrangement of the truss system and roof of the extension begins with laying the ceiling beams. Previously, Mauerlat boards are laid out on the walls of the extension, and metal squares are stuffed on the wall of the house, on which the ceiling beams will rest at one end.
The next step is to lay the rafters on the extension beams. The slope of the roof is small, so the construction of a shed roof is as simple as possible.
Stuff a cornice plank along the perimeter of the extension and sew up the ceiling with a wooden plank. Next, a vapor barrier film and mineral wool are laid on the ceiling of the extension.
Lathing boards are stuffed onto the roof rafters, after which the film wind protection is stretched, and metal tiles can be laid.
Conclusion
An extension to a foam block house is currently considered the most budget solution, but for a utility room, an extension to a summer house or building a garage, this is the best construction option. At the same time, the construction technology is available to anyone who has at least somehow come into contact with the construction business in their activities. The only difficult moment is the planning of the foundation, which can be done with the help of experienced craftsmen.
-
Building a toilet in the country with your own hands
-
Do-it-yourself bath from glued laminated timber
-
Do-it-yourself children’s wooden house
-
We build a cellar with our own hands
Do-it-yourself extension to a brick house, how to do it right
Today we will look at how to make an extension to a brick house so that it does not move away, sag and cracks appear at the joints. An extension to a brick house can be made of a different material.
Example:
- Brick outbuilding;
- Timber extension;
- Frame extension;
- Foam blocks;
- Gas silicate blocks;
- Wooden outbuilding and so on.

Let’s take everything in order.
Professional builders know that it is extremely difficult to add a new extension to an existing building without cracking along the seam.
Deformation, tears and cracks result from differences in shrinkage. The old building has long sagged, taken its place, and if there are fluctuations, then they are insignificant.
A new building tends to settle heavily in the first year after construction, causing connections to break.
- 1 Foundation Fill
-
- 1.0.1 Brick annex to the brick house
- 1.1 How to bandage the extension with the house
- 1.2 Frame building to the brick house
- 1.3 Elephant to the brick house
-
- 1.3 Elephant In order to minimize risks, the main attention should be paid to the foundation.
It must not differ from the foundation under the main building. That is, to be exactly the same in width, depth and content.
The foundation for the extension must be proportional in terms of loads, identical to the main foundation.
It is not recommended to connect the new foundation to the main foundation, as any connection will break. The extension will definitely settle and break the connection.
Therefore, when pouring a new foundation, it is recommended to make a small indent from the old one. That is, at the points of contact, between the foundations, lay a roofing material, a tarred (pine) board or a thin sheet of foam.
The foundation is being poured either with the letter P, or along a circular closed contour. See the picture below.
Another little trick from practitioners. If the foundation, located parallel to the main building, is made wider than the rest of the foundation, then, when settling, the extension will not move away from the building, but will move even closer to it.
For example, the main foundation is 50 centimeters wide, increasing the parallel trench by 10 centimeters, and this side will settle a little less than the rest of the walls.
Brick extension to a brick house
The foundation and formwork are ready, now the question arises, how to properly attach the brick to the wall? This applies not only to brick outbuildings. The same recommendations apply to foam block or gas silicate block extensions.
Just like the foundation, it is undesirable to make a bunch of walls. Of course, it is impossible to give one recommendation for everyone. Much depends on the quality of the soil under the building.
Another important factor is the size of the extension. If the extension is large, then there is a concern about how stable it will be, without being fixed on one of the sides.
Therefore, large extensions are best done as a separate building, which is built close to the old building.
In this case there will be a circular, closed foundation, all 4 load-bearing walls and a separate roof not connected to the main building.
If the extension is small, then it can be made in the form of the letter P, without reference to the house.
In any case, you should consult a specialist, indicating:
- soil characteristics,
- extension dimensions,
- wall thickness,
- material from which the extension is being built.
How to tie the extension with the house
If you still decide to tie the extension with the house, then you should start with the foundation.
This work is very difficult and costly. You will need to drill holes in the old foundation into which the reinforcement is glued. Note that do not clog the reinforcement, namely, paste it on a special glue.
The same operation is done with the walls. To join the walls, they also drill holes into which the reinforcement is glued.
Then lay the mesh in the seams, after several rows of masonry. The roof and roof are made common.
However, even with such a tight connection, there will still be cracks or breaks.
Frame extension to a brick house
Sometimes attached to a brick house:
- Frame extension;
- Wooden outbuilding;
- Outbuilding made of timber and other lightweight materials.
In this case, it is not necessary to pour the strip foundation. It is quite possible to make an extension on a columnar foundation.
Then, a wooden frame is assembled on a strip or column foundation. One side of the frame is attached to the main building. For example, as shown in the photo:
Or in this way, photo:
Then, the frame is sheathed with the main material: timber, boards, panels, and so on.
A small gap that forms between the brick wall and the frame is blown out with mounting foam.
Also common in our country is the method of connecting a wooden extension to a brick house by chasing the wall. In this case, the wooden frame is partially recessed into the wall and screwed with mounting brackets.
Extension to a brick house, video
We advise you to read:
- How you can use the old brick in the country.
- How to properly heat a new brick oven.
- Expanding a window in a brick house, expert advice.
- How to make a homemade brick machine.
- Which house is better from timber or brick, video review.
- Do-it-yourself brick fireplace.
How to make an extension to a wooden house without a foundation with your own hands?
How to fix an extension without a foundation to a wooden house
A house built with wood is not only beautiful. Housing is considered environmentally friendly and does not cause any harm, and the emitted essential oils contribute to easier breathing and have a positive effect on the psyche. And if during the construction all technological recommendations were met, then such a house will delight its owners with an excellent performance.
But time passes, and it happens that a small wooden house no longer satisfies with its parameters, and this leads to discomfort. In this case, a decision is made to expand the space.
You can solve the problem with the help of an extension. How to choose a material
There is one golden rule in construction that should not be broken or ignored. Its essence is that the construction of an extension follows from the material with which the house was built. This was due to the fact that the market was not saturated with a special variety. There you could find only brick, cinder block and clay.
But fortunately, technological progress does not stand still, and the building materials market offers many options. Their choice largely depends on the financial capabilities of the consumer, as well as on his individual preferences. Therefore, today the golden rule can be grossly violated.
When choosing a material for an extension, bricks or blocks should be preferred. The main difference between them is their properties and quality. The final decision must rest on these two factors, and it must be taken into account.
Brick is a good material.
Has its own advantages: - is characterized as strong and durable;
- fireproof;
- conducts heat;
- is resistant to temperature changes;
- is fairly static;
- has good sound insulation.
But taking into account the fact that it will have to be laid out in several layers, it will cost the consumer a tidy sum. It is also worth considering the fact that the brick is a fairly cold material. To achieve the most comfortable temperature conditions in the extension, it will be necessary to insulate the facade of the walls. And this plus additional costs.
Important! If during the construction work all technological recommendations regarding brickwork were met, then the extension can serve its owner for many years.
Bricks require a solid foundation to support the load.
It is worth paying attention to the cinder block. This material has a number of advantages that distinguish it from many others.
The most basic plus is that its pricing policy varies within low prices. Due to its size, the number of required blocks is several times reduced compared to bricks. The porous structure helps to retain heat inside the room, which means: you do not have to additionally insulate the walls.
Important! The material does not contain toxic substances. Eliminates the risk of mold or other dangerous fungus. Not interested in rodents and insects that could settle in it or somehow damage it.
The foundation for the cinder block requires an insignificant, shallow depth of up to 0.5 meters. This is due to its lightness and relatively low weight.
Building without a foundation: is it possible?
In fact, experienced builders and craftsmen are confident that any building needs a solid foundation if the owner wants it to last for many years. Its absence entails the destruction of the walls in the future, which can float.
Cracks will actively form due to the difference in soil levels, and this will entail damage and additional costs. But if the extension is made according to the principle of a loggia, then it is possible that the work will end in success. In any case, it is worth seeking the advice of an experienced specialist.
What to make an extension to a private wooden house?
Very often people have to build an extension to their house. The reason may be the need to increase the space, but a simple redevelopment of this problem does not solve, and you have to expand. Or the house was initially uncomfortably designed – for example, the “box” adopted by architects earlier, which is completely irrelevant today, because complex projects are now in vogue. Perhaps the early construction did not take into account the “wind rose”, so it was necessary to make an additional protective structure in the form of a garage, veranda or workshop.
In general, there are many reasons why people decide to intervene in the integrity of the house. At the same time, it is very often necessary to redo housing made of wood – especially if it is an old housing stock. Consider how an extension to a wooden house is made and how realistic it is to build it with your own hands.
Not an addition, but a complete part!
It is important to understand that the extension is not at all an appendage to the main building, as it might seem from the name. It is also an important element of the whole structure. Structurally connected with it and subsequently affecting the entire viability of the house. If this is not taken into account, in the future there may be problems with the stability of the entire house. Not to mention that the appearance of the house can be spoiled. Therefore, do not try to save on a good foundation, a well-thought-out project – these flaws will come out after an increase in the cost of maintaining a house, an increase in heat loss and many other surprises.
And, of course, you need to agree on construction projects and obtain all the necessary permits. The foundation is the basis in every sense
Whatever construction of an extension you start, you cannot do without a foundation. Since the extension is a constructively independent structure, it is also desirable to build it in two steps to make the foundation, and after a year, when it settles down, shrinks, continue the construction of the rest. This will help to avoid deformation changes in the design and, therefore, prevent the occurrence of cracks and other defects.
The foundation is always arranged taking into account the terrain, soil, weight of the house and extension. It can be U-shaped adjacent to the house, or it may not be connected to it at all (this also happens when they decide to build a fourth wall in an extension).
As for a wooden house, the foundation of the extension requires special attention. Depending on the choice of material for the extension and on the way it is attached to the house, the foundation base can be either tied to the house with reinforcement or separated from it with expansion joints – so that parts of the house of different materials sit autonomously and do not lead the corners of the house.
Frame-based extension
Frame-based extension organically fits into the design of the house
The construction of an extension to a wooden house can be started from any wall material. However, in terms of price-quality ratio, an extension using frame technology will be preferable to others. It does not require a complex foundation and heavy walls. At the same time, the shrinkage of such a structure is minimal, you can quickly finish and complete the construction. At the same time, it is quite possible to do such work with your own hands. By the way, the frame construction method involves thinner extension walls without reducing thermal conductivity, so the building is smaller, and the living area itself is larger.
With this material, the foundation is sufficient without deepening, it is easy to make it with your own hands, for example, tape or tile. A waterproofing material – roofing material – is laid on top of it.
An important point is compliance with the general style of the main building.
After all, if an old house is built of timber or logs, then it will not be easy to make and cut an extension from a completely identical material, both from a technical point of view and from a material standpoint. But it is possible to sheathe the frame extension with the material that imitates the walls of the house. In this case, it will be possible to repeat the cuts, and the ends, and other structural elements. To attach an extension to a wooden house, studs are attached to the walls of the house, and wall sheathing elements will subsequently be nailed to them. The frame itself can be made with your own hands according to the diagram below.
- Lay the perimeter of the piping with a beam of at least 15 cm. With the same beam or board, set the corner posts using a level.
- Make the top trim out of edged boards. Fasten the boards to the top trim with self-tapping screws.
- Insulate the walls with expanded polystyrene, polystyrene or mineral wool.
- Lay the hydro- and vapor barrier, securing them also with self-tapping screws.
- Sew up insulation with OSB boards, plywood, drywall, etc.
Timber frame technology extension
Timber house extension can be used as part of the house
In general, these are all variants of the frame method. In this case, the frame is also a bearing part, and the cladding is made of glued or profiled timber of small section. The beam acts simultaneously as an external facing material.
At the same time, if everything is done correctly, an extension to a wooden house with your own hands will come out no worse than in the picture about wooden architecture.
The new part may shrink for the first six months, and in order to avoid distortion, it is attached to the old building either with metal brackets or special metal corners. Both of them are not tightly fastened to allow the extension to “play” a little when the beam shrinks.
The connection of two foundations is better when both foundations are made by the same method – if using tape, then they are fastened with reinforcement.
If you connect everything correctly, then the extension will be securely attached to the main building, despite the movement of the soil. Foam concrete extension
Foam blocks during construction allow the developer to take advantage of additional architectural opportunities
This material has advantages – it is light, warm, and easy to build. But at the same time, foam concrete is brittle and undergoes deformation. Facing work cannot be postponed until next season, so that the seams do not burst, while the quality of the blocks is often criticized.
Another point – the heterogeneity of the materials of the extension and the house can lead to displacement from the effects of weather and other factors. Therefore, if you intend to attach from foam concrete, then the best option would be not to connect them, but to lay a layer of mineral wool between them, which is then sewn up with any suitable material.
Do the same with the brick building.
By the way, brick, as well as foam blocks during construction, allow the developer to take advantage of additional architectural opportunities. Use of metal frames for an extension
Metal frames are applicable for the construction of low-rise private housing
Modern manufacturers recently have a new offer – strong and durable metal frames. They are applicable for the construction of low-rise private housing or an extension is needed.
Foundation for an extension – how to make a new residential unit part of the whole?
Necessary tools and materials
Is it true that the foundation for an extension differs from the main one, what are its features? Many people are looking for the answer to this question, because when adding additional rooms to an existing house, you want these rooms to also have a reliable foundation. We have collected the most important tips and instructions in this article.
Wouldn’t the extension be complete without a foundation?
Everyone knows what role the skeleton plays in the human body, similar functions are assigned to the foundation. In fact, this is the basis that is responsible for the reliability and durability of the building. Also, it is the foundation that provides heat and dryness in the room. If the base is of poor quality or does not fit the specific conditions, then dampness will appear inside, the floors may deform and even deteriorate. It also levels the ground level and prevents the penetration of carcinogenic gas from the soil into the dwelling.
The choice of foundation should be taken with particular care. After all, it is necessary that it freely withstand the load and correspond to the type of soil. At the same time, there is no need to overdo it, for example, if you can fill in a strip or column foundation, then there is no point in replacing these simpler options with a complex monolithic base. Firstly, it is too expensive and will not justify the investment.
Secondly, the first ones are much easier to perform and you can do them yourself even without outside help, but you won’t be able to lay a concrete slab on your own. It is mainly built of stone or concrete, but there are also wooden structures. If the building is lightweight, then you can give preference to a shallow base located above the freezing point. But most often its depth should be below this level. According to its purpose, it is divided into carrier and combined. The latter, in addition to standard load-bearing functions, must also provide seismic protection. There is also a special type, it includes “swinging” and “floating” foundations, their pressure corresponds to the pressure of the excavated soil.
Which type of base to choose from?
In this paragraph, we will consider what types the foundation for an extension is divided into. Tape can rightfully be called universal, because it is perfect for both heavy and lightweight structures. It is located only under the outer and outer load-bearing walls.
It is mainly poured from concrete; to make the structure more reliable, it should be reinforced with iron rods. If you are going to make this type of foundation with your own hands, then it is better to give preference to the prefabricated version. The disadvantages include high cost. Universal strip foundation
But the columnar foundation, on the contrary, refers to budget options. But it is advisable to use it only when it comes to lightweight structures, for example, you need to tie a frame extension to a wooden house. The supports are special pillars located at intervals of 1.5 to 3 meters. These pillars must be placed at the intersection of load-bearing walls. It is best to make such elements from brick or reinforced concrete, but larch bars can also be used. However, such supports are expensive, and wood is not durable.
If you are going to build a fairly massive building, while weak soil prevails, then you should give preference to the pile type of foundation.
This design consists of supports connected by means of a strapping beam. How can two foundations be connected?
The foundation for the extension can be rigidly attached to the base of the dwelling, resulting in a single structure. Such a decision is relevant if the site has a weakly or non-heaving type of soil. It is also worth giving preference to this option when you are going to make an extension of several floors and want to connect it to the main housing through one roof.
If the base is a slab, then a solid foundation must also be poured for additional housing. At the same time, it is necessary that its thickness be at least 400 mm or the base of the residential building should have protrusions. In this case, it is possible to weld the reinforcement of the slab to the frame of the new foundation. In addition, if you wish, you can do everything with your own hands.
Monolithic foundation slab
Tape-to-tape connection requires a sand cushion and longitudinally slotted reinforcement.
Metal rods are driven into specially prepared holes in the base of the house and form a frame for a new foundation. Next, the joint is made by means of a release about 40 cm long. You can also build a separate base for an extension, which will be located in close proximity to the house. A sheet of roofing material should be placed between the two bases. This material acts as an excellent waterproofing, you can also place a layer of thermal insulation or get by with a simple tow. In this case, it is very important that this layer allows the new base to not collect water during rainfall and not damage the foundation of the house. From the outside, special decorative overlays are fixed to the wall, covering the seam.
Laying the foundation – we do it according to science
Now let’s move on to the practical part and consider how to make a foundation for an extension with your own hands. This detailed instruction will help save on the services of a master, because it is designed for independent construction work.
Building a foundation for an extension with your own hands
How to make a foundation for an extension to a house – a step-by-step diagram
Step 1: Choosing a base
The new foundation must fully match the type of the old foundation. In addition, the load and type of soil are taken into account. For example, if we are talking about a massive extension to a brick house, then it is necessary to lay a tape or make a pile foundation. But if the additional room is adjacent to the wooden housing, then it is possible to get by with a cheaper columnar option.
Step 2: Calculations
Regardless of whether you prefer a fixed type of connection or a separate foundation, the depth and width, as well as the dimensions of the foundation pillars, if any, should be the same as the foundation of the house. Determining these parameters is quite simple. It is necessary to dig a hole next to the housing wall and measure the dimensions of the base. If there should be no questions about how to measure the depth of a structure, then in order to measure the width, you should take a rod, bend one of its edges by 90° and push it horizontally under the foundation.
Then we turn the rod until its bent part rests on the back side. After that, you need to make a mark on the bar and pull it out. By measuring the distance from the hook to the mark, we find out the width. Step 3: Preparatory work
Preparatory work must be carried out before the foundation for the extension can be poured. If you decide to give preference to a rigid connection, then we dig a trench of a given size and drill holes in the existing base. Moreover, their diameter must exceed the thickness of the reinforcement. Metal rods should also be prepared. It is necessary to make a longitudinal slot on their end and insert a special wedging insert into it.
Step 4: Forming the frame
We drive the reinforcement with wedges into the prepared holes. The number of rods is taken at the rate of 20 pieces per square. Thus, the frame of the future foundation is formed. To ensure a secure connection of the following parts, it is necessary to leave the edges of the reinforcement with a length of about 300 mm, which will subsequently need to be welded .
Step 5: Installing the formwork
Now you need wide wooden boards. We form the formwork of the given dimensions. We securely fix its walls with props, earth, cinder block, etc. You can close the inside of the formwork with polyethylene. The latter is especially true if you are pouring only part of the foundation and you will have to reuse these boards.
Step 6: Pouring mortar
Prepare a mixture of cement, sand, gravel and water. It is very important to keep the proportions right. For example, for the M300, you can take 10 kg of cement, 30 kg of sand, 40 kg of gravel, mix everything well and pour 40 liters of water. If the concrete is too dense, then you should dilute it with a liquid, but only add it in small parts so as not to spoil the solution. We pour concrete into the formwork and wait a few days until it completely hardens. We moisten periodically, otherwise cracks may appear.
Step 7: Forming a column foundation
Making such a foundation is relevant when a lightweight extension adjoins a wooden house.
We drill wells so that they are below the freezing level of the soil. We form a sand cushion and install fiberglass reinforcement. This material has excellent properties and does not require additional treatment with waterproofing compounds. Formwork of specified dimensions is also formed and poured with concrete. This foundation for an extension is the easiest to perform, and everyone can create it with their own hands. Step 8: Construction of a separate foundation
But when the number of storeys of the main and adjoining housing is different, then a separate foundation should be made in close proximity to the former one. The distance between the two bases is from 2 to 5 cm, depending on the number of storeys of the new premises. The higher it is, the wider the seam is selected. We fill this gap with thermal insulation materials or tow. Then a special decorative overlay is attached to the wall of the housing. In this case, it is very important to correctly mark the base.
To do this, we stretch the cord on the pegs around the perimeter of the future site and check if the diagonals are equal. If the heaving type of soil prevails on the site, then the floor of the extension must be made so that it is not lower than the flooring of the main housing by the amount of possible deformations. Foundation for an extension to a wooden house
If you consistently follow all the recommendations that will be given in this article, then almost any owner will be able to build a foundation for an extension on their own. Moreover, if you do it yourself, then the cost of construction will be significantly lower than that of workers hired by ad. The ideal option can be considered if the key points of how the main construction was carried out and if there is a project with geodetic survey data remained in memory. All this will greatly facilitate and speed up the construction of the foundation.
Types of foundations
Linking the main and attached foundations
When thinking about an additional extension to your main house, you should understand that it cannot be just taken and stuck.
Any construction activity must be carried out consciously and after strict calculations. Otherwise, you can damage the existing housing. After all, the new extension will have an impact on the ground, which can begin to move, which will cause damage to the structure. Therefore, when building an extension, it is necessary to connect its foundation with the foundation of an already standing house. Start binding to the house
The foundation can be tied in several ways:
- rigid connection, this method should be used in those houses that have been built for a long time and their foundation has already settled down. In addition, with the help of simple calculations, you should make sure that the load that has arisen will not bring deformation of the old foundation;
- arrangement of special expansion joints.
Slight setback, rigid connection should under no circumstances be practiced in areas where non-rocky soils exist.
Let’s consider in more detail each of the ways to arrange a new foundation for an extension to a wooden house .
Rigid foundation connection system
Before you start pouring the foundation for an extension, remember what type of foundation the house was built on. We most often use tape or columnar types of foundation, less often you can find a foundation based on slabs or piles.
In addition to the type of foundation, several other factors that may affect future construction should be determined, namely:
- depth at which the foundation is laid;
- determine the space it occupies under the house;
- to identify the types and types of building materials that were used in the construction of the base.
There will be no particular tragedy if some of the information is lost, it can be restored as a result of new research. For this, a special ditch is dug along the old foundation, which gives an idea of the size of the foundation. Its depth is determined using a simple tool, a piece of reinforcement, with an end like a poker. This end should be pushed under the base so that it literally lies under it.
Reinforcing wall for the foundation
After that, the reinforcement should be turned to a horizontal position and stretched to the stop of the back wall, after which a notch should be made in the place where the wall ends. We remove the probe and repeat the operation along the entire wall, this will allow us to get a fairly accurate picture of the dimensions of the foundation.
The new foundation must be built exactly the same type as the old one. Moreover, this should be done after calculating the heaving of the soil at the construction site. Calculations must be done in any case, there should be no excuses that I am building a small extension, or it will be made of lightweight materials. In addition, the new foundation should not lie deeper than the old one, they should be located on the same level.
At the next stage of construction, we will need to drill holes for reinforcing reinforcement. The holes for it should be slightly larger than the diameter of the rods themselves.
Inexperienced builders often have a question: to what depth should reinforcement be deepened? To calculate it, there is a universal formula: the recess should be 35 rod diameters. There are times when the width of the base of the house is not enough to drill holes of the required depth. In this case, proceed as follows: vertical slots are made at the end of the plate, into which special wedges are inserted. This system is called anchoring, with its help the new foundation will receive a strong bond with the old one.
It is very important to correctly calculate the required number of reinforcing bars. This will envy the strength of the entire structure, if an insufficient number of them are installed, then the foundation will be weak, if more than the technology requires, then this is a waste of money. As a rule, they are installed at the rate of 5 pieces per quarter meter. The required length of the rods can be cut with a grinder, or you can order ready-made ones. To enhance the effect of the installed rods, small pieces of metal or nuts can be welded onto their free end.
These ends will be filled with concrete, as a result of which the structure will receive additional reinforcement. Proper arrangement of thermal seams
The thermal seam avoids the negative effects of seasonal and daily temperature fluctuations. To obtain a so-called expansion joint, when pouring a new foundation, a small gap should be left (2 cm for small buildings and 5 cm for buildings more than one floor high) between the new and old foundations. A board of the required thickness wrapped in plastic wrap and placed between two bases will help to get the right and even seam.
Digging a trench and pouring the future foundation
Before starting to dig trenches for the future foundation, it is necessary to clearly determine where it will be located and mark its boundaries. This will greatly facilitate the implementation of all future work. For a more visual marking, you can use pegs and a skein of twine. The diagonals that are laid at the corners of the trench will make it possible to understand how correct the future foundation will be.
With the help of a plumb line, you can get even and regular walls, because this is also an important factor that affects the strength and quality of the future structure. Expansion joint
If the extension is small, you can dig the trench yourself, otherwise it is better to use the services of special equipment. After a hole of the required size has been dug, it is necessary to carry out primary insulation in it, pour a pillow of sand and gravel. Then you should think over all the necessary connections and communications, and you can start pouring the foundation.
Pouring the foundation into the formwork
When making concrete, a few mandatory rules must be observed:
- choose frost-resistant cement for the foundation;
- strictly observe the sequence of adding concrete components: water, crushed stone, fine-grained sand, and only then cement;
- Ready-made concrete is quickly delivered to the work site, it quickly hardens and becomes unsuitable for pouring;
- place the formwork only after the trench has been filled with concrete, remove it no earlier than one week after pouring;
- before erecting an extension, waterproofing must be laid on the foundation.
Ready-made foundation for an extension
If all these conditions are met, it will be possible to successfully, by one’s own efforts, obtain a quality foundation for the future extension of one’s own wooden house. At the same time, the cost of the construction itself will cost you at the price of building materials and rented tools.
Video – foundation for an extension to a wooden house
How to make an extension to a house (terrace, veranda) with your own hands
P Do-it-yourself addition to the house of any room that increases the usable area, increases amenities, improves the quality of our home (and to be honest, its market value), it is very, very difficult. Especially an extension to a brick house, or a house made of other stone materials. It seems that we are not building a new house, but improving the old one, but all you can see is that the extension will either warp or crack, or else you need to quickly disassemble it before it falls .
.. But, if you know how to make an extension to the house , to fulfill some simple requirements, then it is not the gods who burn the pots, and the extension of the veranda to the house will give only the pleasure of additional comfort! It is about the construction of an extension to a private house, about possible mistakes, about how to prevent them or eliminate them, if they are made, we will tell in this instruction. Contents
1. Deformation of the extension foundation.
1.1 Settling of the extension relative to the main building.
1.2 Ground freezing depth.
2. How to build an extension to the house.
2.1 A solid foundation for a do-it-yourself extension.
2.2 Lightweight extension to the house (terrace, veranda).
2.3 Do-it-yourself exterior and interior decoration of an extension, terrace or veranda.
3. Important tips for building your own extension.
4. Issues related to the construction of an extension (terraces, verandas).Deformation of the foundation of an extension, terrace, or veranda
Why is it that a seemingly high-quality extension to a residential building and, in fact, the house itself behave like a cat and a dog, completely unwilling to be friends? Yes, just because these buildings are different! In order to understand what is the matter here, consider the situation from the very foundation of the building. Ninety percent of subsequent troubles originate here.
Let’s start with such a type of work as backfilling of foundation sinuses. It is carried out with soil of certain qualities, usually loams of low humidity. Moreover, often, you can’t dig up such soil as you need somewhere nearby and you have to buy it. Backfilling is carried out in layers, in layers of a maximum of 50 cm, with compaction with a rammer. However, the problem is that loosened soil, even compacted, as a rule, has a density less than the natural base, and, in addition, compaction is often neglected or it is not done well enough.
Now, looking at the figure below, we will see that the foundation of the extension will have a bulk base under it, which is obviously less strong than the foundation of the house and, therefore, the risk of subsidence is very high.
The second important factor is that under the load from the weight of buildings, any soil shrinks (with the exception of perhaps rocky). Only the magnitude of this shrinkage differs. That is, any structure slowly sinks, sits down until the bearing capacity of the soil compacted under the weight of the building becomes equal to the load from the weight of the structures of the structure. This process, having the greatest intensity immediately after the erection of the building box, gradually slowing down, practically stopping not earlier than in a year or two.
Settlement of the extension relative to the main building
A situation arises when the main building, the house, has already “settled down”, and the new attached building begins to sag, moving relative to the main building.
And if part of its foundation rests on bulk soil, and part of it falls on soil of natural density, we will get a very complex deformation, in which cracks can appear in the most unexpected and unpredictable places. In this case, it is not easy even for a specialist to present a general picture of drawdowns and possible consequences.
The consequences of natural shrinkage can be somewhat reduced by increasing the construction period by a couple of years, if, of course, such a possibility exists. It looks like this. We let the foundation stand for a year or two, after which we build an extension to the house on the foundation that has already given some shrinkage. Of course, the additional load will still cause some shrinkage, but it will already be noticeably less.
The next, no less common cause of deformations is different operating temperatures.
Ground freezing depth
Those who have been at least a little involved in construction work have probably heard about the notorious freezing depth of soils, and that foundations should be built below this level.
Few people know why this should be done, but this is due to the fact that when moisture freezes, in one quantity or another it is necessarily contained in soils, they expand or swell. Such swelling, occurring under the foundations, causes significant additional loads, and usually uneven. As a result, there are malfunctions of varying degrees of complexity, from the appearance of “hairy” (thin as hair) cracks, to significant deformations that can bring the building to a critical state (Fig. 1). And this is where problems arise, on the one hand, because extensions are often made unheated (for example, a veranda), and the joint operation of structures artificially connected into a single block, operated in different modes, and even for a long time, requires taking into account many factors that not every professional civil engineer can do. In addition, often the foundations of the extension (hoping that it is made of lighter materials and will not exert a significant load) are made shallow, that is, above the freezing depth.
How to build an extension to the house (veranda, terrace) with your own hands
In order for the house and the extension to work as a single unit, they try to create a reliable connection between them, for which they use various types of anchors, the simplest of which are ordinary pieces of rebar. You can also buy commercially available special anchors for these purposes. With all the prevalence of this method, the use of anchors gives a real effect only with careful calculation. Otherwise, the anchors simply will not withstand the load and the effect of them will be zero. Or maybe worse. Alas, it is not uncommon for inexperienced builders, relying on an anchor, to the detriment of the foundation, to end up with deformations not only of the extension, but also of the main building.
Is it possible to prevent the problems described above, or at least minimize their impact? Of course it’s possible.
Reliable foundation for an extension to the house with your own hands
To begin with, for capital, heavy buildings, it is necessary to make a reliable foundation based on soil of natural density, which will already significantly reduce subsidence, reducing it to natural and fairly predictable consequences.
To reduce the cost, the foundations for the extension can be arranged fragmentary, for example, columnar, using stuffed piles, etc. When the extension, erected on a high-quality foundation, gives a natural draft, we finish the place where they adjoin each other. Subsequently, cracks in this place will no longer form, except perhaps barely noticeable, hairy. Do-it-yourself lightweight extension to the house (terrace, veranda)
The next opportunity to reduce the effects of foundation settlement is the installation of a lightweight extension. This can be, for example, a frame extension to the house (one of the options for such an extension is schematically shown in Fig. 2) made using bent metal profiles, which are not a problem to buy today, and walls made of foam concrete blocks, or foam, followed by plaster .
Finally, one of the most effective ways to ensure the acceptable operation of the extension and the main building, having reconciled in advance that it will not work to cross a hedgehog and snake, is to perform the so-called sedimentary, or rather, deformation seam.
This solution provides an optimal combination of performance and reliability of the structure. Do-it-yourself external and internal decoration of the extension, terraces
As for the subsequent finishing, it may be a good option to use materials like siding, that is, materials that allow a significant degree of deformation without noticeable external manifestations. It is worth thinking about such a possibility for interior decoration, especially since the choice of materials that can be bought for use at the junction of the house and the terrace from the inside of the room is much wider (MDF, plastic “lining”, “liquid” wallpaper). A variant of such a finish can be seen in the photo.
Important tips for building an extension to the house with your own hands
Summing up, let’s make some generalizations. Firstly, if an extension to the house with your own hands is seen precisely as an extension, and not as an extension of one of the existing premises, it should be carried out as a separate building, with an expansion joint, properly calculated foundations and other accessories of a full-fledged building.
Second – in the case when the construction of an extension to the house is considered as an extension of any of the existing rooms of the house, it is worth considering the option of building it using the existing load-bearing structures. In the article, a similar option was referred to as a frame extension to the house, a variant of which can be something like a console or a balcony, i.e., a light hinged element, the existing structures acting as the supporting base of which.
In this case, an expansion joint is not necessary, although the construction itself seems to be less reliable in terms of durability, as well as less protected from damage. Accordingly, such a solution cannot be recommended as the outer walls of buildings in places where the possibility of malicious destruction of building structures (for example, in order to enter a house) is not ruled out.
Of course, other solutions are also possible (in particular, on the foundation), but all of them will definitely be more expensive, and the result will be the same, if not worse.


 You can solve the problem with the help of an extension.
  Has its own advantages:
  The most basic plus is that its pricing policy varies within low prices.
  Cracks will actively form due to the difference in soil levels, and this will entail damage and additional costs.
 And, of course, you need to agree on construction projects and obtain all the necessary permits.
 After all, if an old house is built of timber or logs, then it will not be easy to make and cut an extension from a completely identical material, both from a technical point of view and from a material standpoint. But it is possible to sheathe the frame extension with the material that imitates the walls of the house. In this case, it will be possible to repeat the cuts, and the ends, and other structural elements.
 If you connect everything correctly, then the extension will be securely attached to the main building, despite the movement of the soil.
  By the way, brick, as well as foam blocks during construction, allow the developer to take advantage of additional architectural opportunities.
 Secondly, the first ones are much easier to perform and you can do them yourself even without outside help, but you won’t be able to lay a concrete slab on your own.
  It is mainly poured from concrete; to make the structure more reliable, it should be reinforced with iron rods. If you are going to make this type of foundation with your own hands, then it is better to give preference to the prefabricated version. The disadvantages include high cost.
  This design consists of supports connected by means of a strapping beam.
  Metal rods are driven into specially prepared holes in the base of the house and form a frame for a new foundation. Next, the joint is made by means of a release about 40 cm long.
 Then we turn the rod until its bent part rests on the back side. After that, you need to make a mark on the bar and pull it out. By measuring the distance from the hook to the mark, we find out the width.
 We drill wells so that they are below the freezing level of the soil. We form a sand cushion and install fiberglass reinforcement. This material has excellent properties and does not require additional treatment with waterproofing compounds. Formwork of specified dimensions is also formed and poured with concrete. This foundation for an extension is the easiest to perform, and everyone can create it with their own hands.
  To do this, we stretch the cord on the pegs around the perimeter of the future site and check if the diagonals are equal. If the heaving type of soil prevails on the site, then the floor of the extension must be made so that it is not lower than the flooring of the main housing by the amount of possible deformations.
  Any construction activity must be carried out consciously and after strict calculations. Otherwise, you can damage the existing housing. After all, the new extension will have an impact on the ground, which can begin to move, which will cause damage to the structure. Therefore, when building an extension, it is necessary to connect its foundation with the foundation of an already standing house.

 Inexperienced builders often have a question: to what depth should reinforcement be deepened? To calculate it, there is a universal formula: the recess should be 35 rod diameters.
  These ends will be filled with concrete, as a result of which the structure will receive additional reinforcement.
  With the help of a plumb line, you can get even and regular walls, because this is also an important factor that affects the strength and quality of the future structure.
 .. But, if you know how to make an extension to the house , to fulfill some simple requirements, then it is not the gods who burn the pots, and the extension of the veranda to the house will give only the pleasure of additional comfort! It is about the construction of an extension to a private house, about possible mistakes, about how to prevent them or eliminate them, if they are made, we will tell in this instruction.


 Few people know why this should be done, but this is due to the fact that when moisture freezes, in one quantity or another it is necessarily contained in soils, they expand or swell. Such swelling, occurring under the foundations, causes significant additional loads, and usually uneven. As a result, there are malfunctions of varying degrees of complexity, from the appearance of “hairy” (thin as hair) cracks, to significant deformations that can bring the building to a critical state (Fig. 1).
 To reduce the cost, the foundations for the extension can be arranged fragmentary, for example, columnar, using stuffed piles, etc. When the extension, erected on a high-quality foundation, gives a natural draft, we finish the place where they adjoin each other. Subsequently, cracks in this place will no longer form, except perhaps barely noticeable, hairy.
  This solution provides an optimal combination of performance and reliability of the structure.
