Fitting a front door: How to Replace an Exterior Door (DIY)
Installing a New Exterior Door
By Matt Weber
I recently built a nice, big deck at the rear of our project house, but there wasn’t a door to access it from inside. I decided to install the door in the kitchen at the corner of the house, since the only other two options were the master bedroom or a bathroom. The kitchen posed problems of its own, with a huge set of oak cabinets leaving us only about 8 feet of wall space with which to work. The project was definitely a challenge, but I managed to support the ceiling, cut through the wall, reframe the wall and install the door. Here’s how it went.
A T-Jak is a helpful tool to support the top plate while you install the studs.Use a T-square to mark the ceiling joists near the location of your temporary brace wall.
Solid Support
Any time you’re cutting the studs out of a load-bearing wall, you must construct a temporary brace wall to support the overhead load. If you’re dealing with a multistory structure, I’d suggest consulting a structural engineer about how to support a heavy load. In this case I was working on the top floor with only the roof overhead, which is easily supported by the bracing techniques shown here. To build this, I first marked the proposed location of the door on the wall, and then marked the location of the ceiling joists. Make sure the brace wall runs perpendicular to the ceiling framing, otherwise you’re just holding up drywall.
Measure between the top and bottom plate, and cut the temporary studs to fit.
I then installed a top and bottom floor plate, each made of 2-by-10’s. Protect the flooring and finished ceiling by placing a few sheets of corrugated cardboard between the plates. Extend the brace wall so the top plate extends a few feet beyond each side of the proposed door location so the overhead framing is completely supported when you cut through the existing wall. Build it about 3 feet out from the wall you’re about to penetrate to allow room to work.
“Snug” the studs in place. Use shims if necessary rather than banging them into position with a hammer, which might damage the floor or ceiling.
It’s nice to have an assistant hold the top and bottom plates while you install the temporary studs to support the ceiling, but I didn’t have that luxury. Instead, I used a T-Jak, which is a threaded, telescoping cabinet jack that works great for all sorts of overhead installations when you need a third hand. Beginning in the center, locate each 2-by-4 stud beneath the marks for the ceiling joists so you’re transferring the weight directly to the vertical support.
Make sure the studs are plumb on each face and toe-screw them into place.
When installing the studs, don’t bang them with a hammer to wedge them in place—doing so risks damaging the floor and ceiling. Instead, “snug” them between the plates, using shims if necessary. To make sure they stay in place, I fasten them temporarily by toe-screwing the studs into each plate once they’re plumb.
Diagonal cross-braces strengthen the temporary wall.
Finally, I finish up the brace wall with a couple of 2-by-4 cross-braces fastened with two screws each to the edge of the 2-by-4 studs. I positioned the cross-braces in an “A” shape to allow some headroom to walk through when working.
Temporary brace wall complete.
Tear Down that Wall
As long as you’ve got a brace wall in place, you might as well take advantage of this convenient frame on which to hang plastic sheeting. The homeowner will appreciate this dust barrier when you cut through the wall and kick up all sorts of airborne debris.
Use the brace wall as a frame to hang plastic sheeting as a dust barrier.
These days, many electronic stud finders offer the multi-functionality to detect pipes and electrical lines inside a wall. Use one if you’ve got it; otherwise proceed cautiously as you open the wall so as not to cut through such obstructions. This wall had no plumbing but did have an electrical outlet that was wired through the floor plate.
A drywall saw helps to remove the panels neatly, without smashing the gypsum board to dust and crumbles.I used a Rotozip with a flush-cut accessory to cut through the perimeter of the drywall panels.
One extremely handy tool for opening the wall in an orderly fashion is a flush-cut saw. In my case, I used a Rotozip with a flush-cut attachment, which I highly recommend for this type if work. I slightly modified the flush-cut attachment by duct taping a wood shim onto the cutting guide, which gave me the exact depth-of-cut I needed to slice the drywall without |penetrating the framing—or anything else—on the other side. I then used a hammer to open the wallboard even further, pulling it away from the nails that held it on the studs, and then prying up the nails. Drywall can be a dusty mess to demolish, so remove it in as orderly a fashion as possible so you’re dealing with large panels rather than tiny chunks.
Use hand, eye and breathing protection when removing the old fiberglass batts.
Next, remove the insulation. Fiberglass can irritate the eyes and skin, so wear safety protection and dispose of the old batts in plastic bags.
This diagonal cross-brace complicated my job. This building technique was used to compensate for non-structural sheathing.
At this point I ran into an unexpected obstacle: a 1-by-4 cross-brace supporting the corner of the house framing due to a lack of structural sheathing. The sheathing panels were an old fiberboard material used primarily as an insulator, and it doesn’t have the shear strength of today’s stronger, engineered wood sheathing. So, I had to re-frame the wall using an atypical method to accommodate the lack of structural sheathing, throwing a wrench into the standard framing procedure I was hoping to detail in this article.
Shown in this diagram is a typical framing method for a single entry door.
There are two important things to point out. First, see the diagram above for the details on framing a standard door opening. You can probably expect to build according to that sketch, rather than my method that employed a monster 4-by-12 header, some extra doubled studs and metal strapping to frame this door. Second, I do not necessarily advocate framing your door using the method shown in the photos, in case you encounter a similar problem with your project. As always, consult your local building inspector for an approved method, as requirements for shear walls and general construction will vary among localities, based on everything from high-wind exposure and seismic concerns to simple politics. Do as your inspector says, not as I do.
Starting at the bottom remove the studs by cutting through the nails with a recip saw.
That being said, the methods for cutting through the wall and installing the door will remain the same among standard pre-hung door installations.
The trimmer studs should be cut to support the header from beneath, and then face-nailed to the adjacent studs to strengthen the door frame.
Framing the Door
After cutting out the cross-brace with the Rotozip, I cut the existing studs out of the house wall by using a recip saw to slice through the nails at the top and bottom of each stud (start at the top). Refer to your door for the recommended rough opening size—mine was 34 inches wide, 82 inches high. When reframing the wall, you should double the studs that frame the door. The two inner studs, called trimmer studs, should be cut to support the door header from beneath. The header is designed to assume the load that would have been supported by the studs that you’re removing; it transfers the weight to the trimmers. Unlike the monster 12-by beam I used as a header, most single entryways can get by with a 4-by-4 header. (For example, a 4-by-4 No. 2 Douglas fir header achieves a maximum span of 48 inches, which is much wider than a standard entryway.) For smaller headers the distance between the header and the top plate may be taken up by cripple studs (partial studs). Always make sure your rough opening is plumb, square and true.
A door header must be the same thickness as the framing members.
For my particular situation, I was afraid to remove any more siding to replace the sheathing because the siding was dated from 1978, and I couldn’t find an exact match. Replacing the siding for the entire house was not an option. My solution was to sandwich a sheet of rigid foam board between two 2-by-12’s (to provide a thermal break), and to install the header not just over the door frame, but extending all the way to the corner of the house as well as over the second stud bay on the opposite side of the door. I doubled all the studs, and fastened the header flush beneath the ceiling top plate and over the studs, allowing the 82-inch high rough opening (accounting for the floor plate, which was still in place). I nailed the heck out of everything, and installed 4-inch wide sheet metal strapping the framing, running from the top plate, across the header and over the interior face of the new studs. I riddled the strapping with nails driven into all the framing components.
It’s critical that the rough opening for the door be framed completely plumb, back to front and left to right.In my case, the header extended from one corner of the house, across the door frame and over the following stud bay. This is not a typical door frame and it may not be an acceptable method in your area. Check with your local code official.
Other options include replacing the sheathing, or installing new steel let-in or wood diagonal braces to keep the shear flow from the corner to the foundation. I reiterate: If you’re dealing with non-structural sheathing, consult your local building official for acceptable methods.
Metal strapping running from the top plate, over the header and over the face of all four doubled studs helped add shear strength to this door frame. Again, this is not typical.
A Better Way to Frame a Door in Non-structural Sheathing
EHT reader and professional engineer, Gerard J. Duhon of Texas-based Engineered Foundation Solutions, offers a by-the-book method of framing a door without structural sheathing.
“The space which was available to the author was very limited, so there are few options,” says Duhon. “Two options are available, one involving steel sheet and one involving plywood sheet. In both cases, a sheet of the steel or plywood material must be cut to fit from stud to stud and plate to plate. Both sides of the doorway should have this sheet installed. The plywood should be ¼” thick, and can be attached to studs and plates with 10p nails. The steel should be 14 gauge, about .075” thick, and can be attached by drilling the sheet and using #10 screws. A quicker attachment is to drive concrete nails with a powder-actuated gun. Observe safety and personal protection if the gun is used. 14 gauge steel plate can be obtained from steel suppliers for about $50 for a 4 x 8 sheet.
“To finish the wall, if plywood is used, use construction adhesive to place ¼” Sheetrock over the plywood, to match the thickness of the adjacent sheetrock. If steel is used, the thickness is minimal, finish with the normal sheetrock thickness, use construction adhesive to hold in place. The repair above will yield the equivalent resistance to shear as the let-in bracing, but would be inadequate for resistance to seismic and windstorm perils.”
Editor’s Note: Thanks for the advice, Mr. Duhon. Our staff is always anxious to learn better practices in home improvement, and pass along this information to our readers. You can visit the website of Gerard J. Duhon, P.E. at www.texashomeengineer.com.
Next, I cut out the sheathing and Styrofoam, insulation to expose the back of the siding.
Point of No Return
Once the rough opening was constructed I used the Rotozip to cut away the sheathing and Styrofoam insulation from the entryway. I then used the same tool to cut the outline of the door frame through the metal siding at the top and bottom.
I used a 4-foot level to mark the plumb lines of the rough opening, then cut through the siding using a cordless circ saw with a homemade edge guide. I used the Rotozip to cut the outline of the rough opening through the siding at the top and bottom of the door location.
My next move was made from the outside of the house, where I marked plumb lines on the sides of the door frame, connecting my top and bottom cuts. I followed my cutlines with a lightweight 18-volt Makita circ saw, using a homemade edge guide that I built a couple of years ago. The thin kerf of the blade made short work of the siding, and as I zipped up the second side of the frame, the metal panels fell to the ground with a glorious crash. I then removed the floor plate between the trimmer studs, and the rough opening was ready for business.
I cut and pry loose the floor plate to make room for the door sill.Damage done–a big hole in wall. Here, I’m quietly praying that the door installation goes off without a hitch because I’ve done some serious damage to the house.
At this point I felt a splash of mixed emotions. On one hand, demolition is kind of fun and exhilarating, and I got a surge of adrenaline while thinking, “Wow, I’ve just put a big hole in this house. ” That was followed by a wave of panic as I fretted, “No turning back, now—you’ve gotta fix this.”
Caulk the sill and the brick mold trim around the door perimeter, and then tilt the pre-hung door into the rough opening. Fasten it temporarily with a screw through the jamb. Do not screw it down tightly at this point. This door is manufactured by Therma-tru, courtesy of Lowe’s (www.lowes.com).Wrap the door frame with weatherproof flashing. I used a self-adhesive flashing arrier fro Cofair Products.
Installing the Door
I picked up the pre-hung fiberglass door at my local Lowe’s Home Improvement store (www.lowes.com). It’s a Therm-tru door, which is well insulated for weather protection and comes pre-primed with pre-cut holes for the door knobs. The installation procedure for this door is basically the same as most other pre-hung doors. In some cases, a split-jamb door may be required for thicker walls, because they install from both the interior and exterior of the house to sandwich the wall between the split jamb.
Once the hinge side is plumb and fastened securely, do the same to the latch side. Install wood shims for a snug and plumb fit. After the door is fastened in place you can cut away the extra shim material with a utility knife.Plumb the hinge side of the door first, using shims as necessary. It’s especially important to use shims behind the hinge plates.
This article depicts a single-jamb door that tilts into the rough opening from the outside. I had to decide whether to set the brick molding of the new door into the metal siding, so the siding butts against the side of the trim, or if I should set the brick molding on top of the siding, concealing the cuts. I opted for the latter method so the brick mold would hide any rough cuts in the metal. However, the protruding profile of the siding meant the door was pulled slightly to the exterior side of the house rather than being flush with the drywall on the interior side. This positioning made the interior-side trim work more difficult—just something to think about in case you try this at home.
The Therma-tru door includes an uninstalled No. 10 x 2-1/2 wood screw for each hinge. Once the door is plumb and fastened. Drive the screw through the open hole in each hinge to anchor the door frame and prevent sagging.
Before installing the door, wrap the rough opening in flashing. For ground level doors, a sill pan is recommended. Since this was a second story door, I went with continuous aluminum flashing beneath the sill, and used some flexible adhesive flashing from Cofair Products around the top and sides, lapping it over the surrounding sheathing and tucking it behind the siding.
I recycled the Styrofoam insulation to use as weatherproofing around the door frame and then caulked everything together.
Apply large beads of caulk over the sill flashing. Also, apply a bead of exterior-grade caulking around the back of the brick mold around the entire perimeter of the door. Tilt the door into place.
Some Lexel sealant applied around the brick mold gives the door a weather-tight seal.
At this point I pressed the brick molding flush with the metal siding and drove a couple of screws into the door jamb to hold it in place temporarily. Plumb the hinge-side of the jamb first. Using a 4-foot level, plumb and level it both right and left, inside and outside. When positioned, drive screws through the hinge side jamb into the studs using 3-inch exterior-grade screws. Leave the screws loose. Place wood shims between the opening and jamb, above the temp screws and behind each hinge location. Check again the jamb side is plumb and straight, then finish driving screws in the middle, then the top and bottom. Once the hinge side is secure, you can adjust the rest of the frame and fasten in the same manner. Remove excess shim material by cutting it away with a razor.
Shown is the new back door before installing drywall and adding paint and trim.
From that point forward, it’s all a matter of sealing the door and addressing the cosmetics. I used some Lexel sealant to double-seal the exterior side of the door, and then installed drywall and decorative trim, filled the fastener holes and repainted everything. I installed a doorknob and deadbolt, and that completed the new back door that conveniently accesses our nice, new deck.
How to install a door frame and front door
If you need to install a front door and you’re thinking about embarking on a DIY project then go no further. These DIY instructions on how to install a door frame and front door will guide you through the process step by step.
You don’t need to be a master craftsman to install front doors but there are some things that you will need before you undertake this task, and any knowledge about tools and/or wood is a plus. Installing entry doors can be tricky, but following this guide will make your task a bit easier.
Note: Installing entrance doors requires working with tools so you should proceed with caution, we take no responsibility for any injuries or damages that occur using this process; if you’re unsure of how to install front doors or you’re unsure of any parts of the process then seek help from a professional. If you’re unsure then ask a professional.
This is how you should install front doors; follow these steps to successfully install an entrance door frame and door:
1. What do you want /need from your front door?
The first step in the process is to think about is what you want or need from your entry door. Yes, front doors open and close, but there are other functions that you may need from your front door. Entrance doors can look good and be the gateway to your home, but they have other functions as well.
Depending on the space that you’re installing the front door, you may have one or several needs or wants for your front door. Things to think about are:
- Does it need to have aesthetic appeal and function simply (act as a gateway)? Or does it need additional functions as well? For example, entry doors may need to be sound proof, provide security etc.
- Do you need it to be space saving? For example, like a sliding door.

- Entry doors can have additional features like glass panels, so think about the additional features you want (if any).

2. Survey the space
Before you decide on the type of entry door you’ll be using, you need to do an initial survey of the space where you’re installing it, to determine if your needs and wants for the front door fit within the space, as well as to save you time when it comes to the actual installation. Installing front doors can be easy if you do the prep work up front.
Firstly, survey the space to see how a front door will fit into it. Check how the entry door will open; there could be restrictions when opening the door in a small space so it may be better opening inwards rather than outwards; generally, entrance doors open inwards but this depends on your space. Knowing the space and how the front door will fit into the space is key to getting it right.
Entrance doors need to be flush with the opening they’re in, however the physical opening where you plan to install the frame and front door may or may not be square, plumb and level. Square means corners are 90 degrees, level means straight and is measured by a tool called a “level”, and plumb is vertical, most accurately gauged by a plumb bob.
Inspecting the opening and the floor to check for level and plumb, prior to installation, lets you know whether you need shims (a thin and often tapered or wedged piece of material, used to fill small gaps or spaces between objects), and where you may need them. Without doing the survey, you may blow out your installation time.
Now that you know what you want when it comes to entry doors, as well as the physical details of the space, you can start thinking about the type of front door you want to install into the space. 3. Measure the opening
Measure the opening to get the exact measurements, so you can use these when selecting your frame and front door. When you’re discussing front doors with whomever you’re buying it from, they’re guaranteed to require the measurements. You can do this step after selecting your entry door, but you may have more work cut out for you if the front door you select and the physical opening and space aren’t compatible.
Measure the height of the opening, and then measure the width at both the top and the bottom. Then, check each side with a level. The sides don’t have to be perfectly plumb (they rarely are), but they do need to be close enough to allow adequate room for your door. If your rough opening is 12 mm bigger than your door, but the sides of the opening are each 12 mm out of plumb, then the opening isn’t big enough to hang your door properly. Finally, check to see if the walls are plumb.
4. Select your front door and frame
Now that you know what you’re working with and how your wants and needs fit into it, you can decide on the type of front door you’re going to use.
It’s a minefield out there with all the choices of entrance doors available, so speak to an expert if you’re feeling overwhelmed, they’ll advise you which entrance door is best suited to your needs as well as the space. 5. Make sure you have everything you need
Having everything you need before proceeding with the frame and front door installation will make your job that much easier, so be prepared. Remember installing entry doors can be a challenge if you haven’t done the work upfront.
You’ll need:
- Measurements of your frame and front door
- The actual front door and frame that you’ve selected
- Measuring tape
- Rafter square
- Shims (if required)
- Saw to trim door jambs (if floor isn’t level)
- Level
- Hammer and finish nails or air compressor and finish nailer
- Long screws to secure the door
- Construction screw to secure latch side
6. Level the floor
The most important step of installing front doors is making sure the bottom of each doorjamb (a jamb is the vertical portion of the door frame onto which a door is secured) is at the correct height. If you’re installing an entry door on a finished floor and the floor isn’t level, you’ll have to cut a little off the bottom of one of the jambs.
Use a level to check the floor. Rest a level across the opening and level it with one or more shims. Mark the shim at the thickest point, and measure the thickness of the shim at the mark. That’s exactly how much you’ll need to cut off the jamb at the opposite side of the opening.
7. Use plumb lines and shims
Plumb the sides of the door frame with shims. Once you know whether you need to shim up the base of the door frame due to an unlevel floor, you can use a plumb line to help you shim the sides of the frame. Hang the plumb line from the top of the frame on either side of the door, and measure from the framing to the wall to know which sides are out of plumb and where to place your shims. This will roughly plumb the framing to prep for the casing frame; use the measurements of the casing to know how much you need to adjust if the door framing is out of plumb. Front doors and openings don’t always match exactly so this step will most likely be required.
8. Cut down the high side of the jamb (if required)
If your floor isn’t level then you will need to cut down the high side of the jamb, using a saw. It’s easy to cut off the wrong jamb, so make sure you cut the jamb that rests on the high side of the floor. It’s the one on the opposite side of the opening where you marked your shim; a rafter square works well as a saw guide.
9. Use blocks to level jamb bottoms
Tip of the day: If you’re installing an entrance door on an unfinished floor and need space under the jambs for carpet, then just rest the jambs on temporary blocks while you’re hanging the front door. Adjust the size of the blocks so the bottoms of the jambs are on a level plane. You can leave a space under the jambs of anywhere between 3/8 inches to 5/8 inches, depending on the thickness of the carpet and pad.
10. Fit the Frame
Move the door frame/casing into place for a rough fitting and for final adjustments. Once your shims are all in place, you can fit the casing into place. Because you’ve done all your shimming and adjustments prior to putting the casing into place, this part of the installation should be relatively simple, since the frame will slide into place on top of the existing shims and be roughly level and plumb. However, you may still need to make small adjustments after the frame is moved into place, all of which can be done with wooden shims to jimmy the front door in the direction that you need to make it plumb and level.
11. Mount the frame
Mount the case of the door onto the wall framing. Use finish nails, and nail through the case and shims into the framing of the wall itself. Don’t try to nail into an area where there are no shims, because there will be an open gap between the door casing and the wall framing itself. You can fill in any open gaps with wood shims and nail the case into place accordingly. Use an air compressor and finish nailer or a hammer and regular finish nails.
12. Attach front door and check gap at door stops
Once you’ve attached the front door, remove the plug that holds the door slab in place, and make sure the door opens and closes properly. The front door should come in contact with the door stop evenly the whole length of the stop. If one side of the entry door hits the stop first, you’ll have to adjust the jambs by moving either the top side or the bottom side of the jamb in or out, depending on which part of the front door hits the door stop first.
13. Install longer screws in each hinge
Securing entry doors is important. Replace one of the hinge screws on the top hinge with a longer screw that goes right through the casing and into the wall framing to keep the front door from sagging over time. If your screw won’t fit through the hinge casing, then you can bury the screw into the wood beneath the hinge casing, then mount the hinge casing with the other two screws over the top. You can repeat the process for the other hinges if you want additional security for your entrance door. Front doors get used all the time so securing the other hinges is recommended.
14. Secure the latch side
To prevent the latch side from being knocked out of place when the entry door is slammed, install a long construction screw behind the latch plate. Pre-drill and countersink a hole in the corner of the latch plate space so it won’t interfere with the latch plate screws. Don’t use longer screws in the latch plate holes because they’re too close to the edge and can split the framing lumber.
There you have it, installing entrance doors has never been easier. This simple step by step guide to installing a frame and entrance door will help your DIY project be successful. Ensure that you do the prep work before you start the entry door installation so you save time.
Installing entry doors can be tricky so if you’re unsure of any part of the process, don’t put yourself at risk, rather speak to a professional. They have extensive experience with installing frames and entry doors professionally; they’ve more than likely installed hundreds of front doors so they know what to do and how to use the tools correctly. If you’re unsure then ask a professional.
Fitting front doors to your home and knowing how to get it right
This section includes information on accurate measuring of doors and door frames prior to fitting front doors.
Timber doors and/or frames, you will need to check that your door is or can be one of our standard sizes which are regularly used, if it is not, either refer to your preferred choice of door within our web site, email for advice on altering the standard door to size or choose to purchase a Bespoke (made to size) door.
We can, in most cases, offer an alternative idea before you go to the expense of buying a bespoke door, the Standard sizes we use for exterior doors are numerous; please refer to our web site.
You can in most cases cut solid timber Exterior front doors to fit a smaller size opening by up to 20mm (3/4″) from each of the four edges. Please allow the new door to sit somewhere dry overnight to acclimatise.
Do not stand the door against an external wall as this can encourage it to twist or bow, always try and decorate the door before fitting and choose a dry day to fit it.
Measuring front doors and Frames; When measuring either your interior or exterior door ignore the current door size and follow this advice and any relevant advice offered throughout our DIY pages.
Width: Measure the door between the frame at the top, the middle and the bottom.
Tell us or choose a door(s) to suit the widest size, always remember that you are responsible for making sure that the widest size can be adjusted by you to suit the narrow area of any part of the opening without compromising the stability or affecting the look of the door.
Height: Measure from the carpet/floor covering to the underside of the timber lintol.
Thickness: Now and only now do you measure the door to find out how thick it is at present, with Interior doors you may have to compromise and fit a slightly thinner door, this does not normally present any problems.
REMEMBER WHEN MEASURING FRAMES; The above advice may be different if ordering a door and frame, always check the overall outside sizes of the frame against the overall inside sizes of the frame and choose the correct combination of those sizes to suit the opening and to ensure the frame will go into the opening, this may involve you ordering a frame that is slightly smaller than the current frame, now measure the frame breadth, ie; from the inside face to the outside face, you can always add a sub frame or concealed plates to make a frame fit the width or height but it can be very difficult and sometimes impossible to adjust the frame if you have ordered it too big.
Please Note: The DIY advice provided is only a guideline for the installation of interior or exterior doors. We cannot accept liability for any mishap, injury or damage caused to you, your property or a third party while using any of the above tips and advice.
All our advice is offered freely but you should always take care to ensure that your interpretation of the advice is sensible before proceeding with any project however small.
See the above DIY info and read the other DIY pages for more advice, especially if ordering or fitting a timber frame.
1. Stand the door in front of the frame. If the door overlaps the frame or is tight between the door and the frame, then mark with a pencil where the adjustments are required.
There should be a 2mm or 3mm gap between the door and the frame on both sides and the top.
If you do need to cut the door down to size, keep in mind that you need to cut all four sides of the door equally whenever possible to retain an accurate shape or pattern if the door is panelled.
2. For small adjustments in size, use a plane to shave the wood. Always start on the outside of any door edge and plane in towards the middle of the door thickness.
If you need to make a more substantial adjustment it is advisable to use a panel or circular saw.
Please be aware that circular saws are quite capable of (jamming) kicking back. It should be obvious but isn’t always, you should never place your hand anywhere near the side or the front of the circular saw blade.
3. If you intend to use the existing hinge recesses in the frame, the positions need to be marked on the door frame.
Position and support the door at an angle to the upright and mark on it where the tops and bottoms of the hinge recesses are for each hinge.
4. If you intend to use new hinges you will need to mark their positions on the frame and the door.
Exterior doors should be hinged between 125-150mm (5-6 inches) from the top and 175-230mm (7-9 inches) from the bottom of the door.
Exterior doors are heavier and require a third hinge in the middle of the door. If the door is made of hardwood then it is best to use brass hinges sized 100mm (4 inches), 125mm (5 inches) or 150mm (6 inches). This site sells hinges in single quantities to allow you to buy as many or as few as you require.
5. Care should be taken when chiselling out the recesses for the hinges, the best way is to (using a small saw) cut across the thickness of the door every 3/4″ or 20mm and only to the position which your hinges will cover.
This action prevents the door from splitting beyond your hinge position.
Always make pilot holes when screwing into the wood as this will prevent the wood from splitting.
To make the screws go in easier, rub the screw thread with a bar of soap.
Make sure that the hinges fit their recesses snugly.
6. Once the hinges are attached to the door, screw each hinge into position using one screw only.
Check that the door opens and closes properly before screwing in the remaining screws. If it does not, then unscrew and make minor adjustments to the position of the hinge, within the frame.
Repeat this procedure until the door position is correct and view our other DIY info for fitting locks etc or view our videos on YouTube.
Advice on how to fit front doors.
Printable Version
Tips and Tricks for Fitting a Door in a Door Frame
By
Lee Wallender
Lee Wallender
Lee has over two decades of hands-on experience remodeling, fixing, and improving homes, and has been providing home improvement advice for over 12 years.
Learn more about The Spruce’s
Editorial Process
Updated on 04/11/22
Reviewed by
Deane Biermeier
Reviewed by
Deane Biermeier
Deane Biermeier is an expert contractor with nearly 30 years of experience in all types of home repair, maintenance, and remodeling. He is a certified lead carpenter and also holds a certification from the EPA. Deane is a member of The Spruce’s Home Improvement Review Board.
Learn more about The Spruce’s
Review Board
Martin Deja / Getty Images
If you have never worked with doors within an old house, you may have the reasonable assumption that you can remove a slab door and replace it with another slab door on a one-for-one basis. After all, the door has been hanging there for decades. How hard can it be to re-hang?
What often happens is you spend countless hours trying to get doors to fit into door frames. Sometimes, it is virtually impossible, because the door frame gets out of square when the house’s foundation subsides. So, it is not your fault at all if the door doesn’t fit well.
Exacerbating the problem: previous owners may have gradually adjusted the door to fit that ever-changing door frame. Bottoms get shaved off; sides get planed, hinges get tweaked. Eventually, you are left with a door that fits only that one, unique door frame—just like a glove.
When the Door Doesn’t Fit the Frame
One trick you can use when re-hanging a door is to reconfigure casing and trim around the door. The door remains as it is and everything around it is slightly rebuilt to fit around that door. This is not a hack to solve all of your problems, but it will take care of any issues you might have with excessive gaps.
Tricks to Install a Larger Door in a Small Frame
Cut the Door
Cutting down parts of the door is usually more reliable than paring back the door frame. Most slab doors have between 1 and 4 inches of solid material that run around the perimeter of the door. This material can be cut down with a radial saw, table saw, or circular saw.
The tops and bottoms of the door afford more room to cut than the sides. On the hinge side, mortises will need to be recut. The latch side is more difficult because of the position of the door knob.
Readjust, Plane, or Sand Down the Door Jambs
If the door frame surrounding the door is smaller than the door, you may be able to readjust the frame. Most door frames are installed with space between the frames and the outer studs. Replacing the shims with thinner shims may give you more room to expand the door frame.
If you only need a little bit more space, you may be able to sand or plane down the door jambs without removing them.
Tools
- Electric nailer
- Hammer
- Finish nails
- Shims
- Sander
- Plane
Materials
- New door casing and trim
- Screws that are slightly longer than current hinge screws
- Adjustable door hinges (optional)
Instructions
Remove Trim and Hang the Door
Remove the trim around the door, except for the hinge-side. In many cases, it is possible to remove trim without breaking it. In other cases, you may need to break up the trim. Medium-density fiberboards, or MDF, is especially prone to accidental breakage, so with this, it is often more expedient to demolish it and purchase new MDF trim.
With those three sides of the trim removed, hang the new door as you normally would.
Assess Level and Swing
You want your door to be level and swing smoothly. Set a level on top of the door. Slowly swing the door open and closed, watching the bubble on the level. If it ever goes out of level, take note of where this is happening and mark this arc on the floor with chalk or removable painter’s tape.
Adjust the Hinges
In many cases, you can correct level at the hinges, by tightening or loosening the screws that hold the hinges to the casing.
Installing special adjustable hinges gives you more room to play with. These hinges can be adjusted up to 1/4 inch vertically—a significant distance when it comes to hinges. By adjusting one hinge in one direction and the other hinge in a different direction, you can make major changes in the door’s level.
Add Longer Hinge Screws
Even normal, non-adjustable hinges can be adjusted slightly. One way to pull hinges tighter is to remove the existing screws and replace them with slightly longer screws. Ram these in as tight as possible if the door is scuffing at the opposite end of the frame. By contrast, you can add a cardboard spacer cut to the size of the hinge mortise if you need to close a slight gap at that opposite end.
The door should clear the finish flooring by about 1/2-inch. Keep in mind that this is the finish flooring, not the substrate. So, if it is sub-floor right now and you hang the door with a 1/2-inch clearance, it will drag once the finish flooring is installed.
Build Casing and Trim
Build a casing that follows the configuration of the door. The inner door casing can be moved incrementally inward (towards the door) by adding wood shims. Tack into place with an electric nailer rather than hand-nailing.
Once the casing is in place, the trim follows the lines of that inner casing. With trim, you especially will want to use an electric nailer, which drives thinner nails than traditional finish nails.
Paint trim and casing to complete the project.
The 5 Best Door Installation Companies of 2022
6 Steps to Install an Exterior Door
Though the process is much the same, exterior door units are inherently more complex to install than interior doors, because of the need to make them weathertight. If you discover rot in the existing door frame or the surrounding framing, attend to that before installing a new unit. Follow these six steps in install an exterior door.
1) Prepping the opening
Most of the prep work involves leveling and weatherproofing the bottom of the opening. That’s where water is most likely to enter and damage flooring, subflooring, and framing. When installing an exterior door, cover the work area with tarps to contain the mess and heavy cardboard to protect finish floors.
Before ordering the new door unit, measure the height and width of the RO and the thickness of the wall. Check the trimmer studs for plumb, the header and sill for level, and corners for square. Generally, the RO will be 2 in. wider than the door—or 1⁄2 in. to 1 in. taller and wider than the framed unit. (When the prehung unit arrives, check all these measurements again—and the dimensions of the unit as well.)
Determine the height of the finish floor. In most cases, prehung doors come with a combination sill/threshold already attached—usually screwed to the bottom of the jamb legs. In new construction, this combo sill/threshold sits directly on the plywood subfloor, although in some installations the doorsill sits directly on top of the floor joists with subflooring and finish flooring butting up against it.
If the subfloor isn’t level—common in older homes—one option is shimming beneath a doorsill and then filling between shims with a cementitious mix. Cedar shims are OK over a dry concrete subfloor, but if the doorway is damp or unprotected, use plastic shims.
Install a sill pan, even if the doorway is protected by an overhang. Given the popularity of rubberized self-adhesive flashings these days, most builders fashion a sill pan from membrane such as the Moistop Corner Shield. Because most of these products are flexible and self-sealing, they can be easily fitted into corners or rolled to create water dams. If your region gets driving rains, a prefabricated metal or plastic sill pan is another option. Whatever the pan material, however, fold its ends and back edge up—as shown in the drawing below—so the pan will confine any water that gets under the sill. All sill pans should be caulked well inside corners and along seams. If you use a bituminous membrane, make sure the sealant you use is compatible with the membrane. Butyl-based sealants are usually a safe bet, but check manufacturer’s specs for both products.
2) Sill pan for exterior door
PRO TIP: Sill pans fashioned from a bituminous, self-adhered flashing material are easier to fit and secure than preformed, sheet-metal sill pans. An aluminum-faced flashing such as DuPont FlexWrap is easy to run up the sides of a rough opening and form into corners to get a good seal. Screwing or nailing down metal sill pans, on the other hand, compromises their ability to keep water out. An aluminum-faced flashing such as DuPont FlexWrap is easy to run up the sides of a rough opening and form into corners to get a good seal. Screwing or nailing down metal sill pans, on the other hand, compromises their ability to keep water out. |
Before installing the door, weatherproof the sides of the RO by folding building paper or housewrap into the opening, making sure that it overlaps the upturned edges of the sill pan. Alternatively, if you haven’t yet installed a water-resistive barrier, you can attach flexible, self-adhesive flashing tape to the sides of the RO that will overlap the tops of the sill pan. Flashing tape comes in widths up to 12 in. and can be easily shaped and smoothed around the corners of the RO. Finally, to direct water away from framing, the outer lip of the sill pan must overlap any exterior flashing beneath the sill. To keep water out, above always overlaps below.
3) Dry-fitting the door
Once you’ve prepped the opening, place the door unit in it to see what needs doing. This is a dry run, so leave the door in the frame. You’ll need a helper for this sequence.
Test-fit the door frame in the opening. Center it right to left in the RO; there should be 1⁄4 in. to 1⁄2 in. of clearance around the frame so it can be shimmed. Then, margin the frame—center it within the thickness of the wall. Jamb edges inside and out should be flush to wall surfaces, or 1⁄16 in. proud to accommodate framing quirks.
Is the door frame square? If it is, there will be an even reveal (gap) between the door and the jambs all the way around the door. If not, the frame is skewed. To square it, remove the frame from the opening, and tilt the frame to one side until acute corners (less than 90°) become square and the reveal is even all around. Factory-made exterior door frames are made from heavy stock, milled to exact specifications, and reinforced with sturdy sills, so they rarely arrive out of square. Place the unit back in the opening and check that the reveal is even.
Assuming the reveal is even, remove the unit from the RO. If the bottom of the opening is not level, attend to that now, as described in “Leveling a Doorsill” above. Then caulk the bottom of the opening with a triple bead of caulk.
4) Installing an exterior frame
There is no one right way to install a prehung exterior door. Some carpenters prefer to install door frames with doors in them. Others prefer to remove the door, plumb and attach the hinge jamb, rehang the door, then attach the other jambs. Although the photo sequence shows the door removed, both methods are described here.
Method 1: The door stays hung
Pry off the shipping blocks, remove the plastic plugs from the lock bore, and place the unit into the RO. (At this point, assume the doorsill is level.) Approximately center the unit left to right in the opening, then margin the hinge jamb while a helper keeps the unit from tipping. Near the top of the hinge jamb, drive in a 10d finish nail through the face of the jamb to tack it to the trimmer. (You may have to open the door to do this.) Then hold a 6-ft. level to the edge of the jamb and then to the face of the jamb to see if the hinge jamb is plumb.
| PRO TIP: Hand-nail the finish nails used to tack a frame to the RO and leave nail heads sticking up. If you use a nail gun for this operation, you’ll likely drive the nails all the way in—making subsequent adjustments difficult. |
If the sill is level and the frame has remained square, you should get a plumb reading. Also, sight along the frame to make sure the jamb stock is straight. If the hinge jamb is plumb, insert pairs of shims between the hinge jamb and the trimmer stud—one pair of shims behind each of the three hinges and two more pairs spaced equidistant between the hinge shims. Because you and your helper will have a door between you, you’ll need to communicate constantly as you insert shim pairs from both sides and continually check for plumb.
If, on the other hand, the hinge jamb is not plumb, the frame may be racked slightly. Again, assuming that the sill is level, insert a flat bar between the frame and the trimmer near the top of the frame, and pry the frame out on one side until the hinge jamb is plumb. Then tack the hinge jamb as described. If the hinge jamb is bowed, that could give you an off-plumb reading, too. Adjust shims and use nails to adjust the bowed section.
Once you’ve plumbed and secured the hinge jamb, read the reveal—make sure there is an even clearance between the door and the jambs—to position the head and the latch jambs. Use nails to draw the frame toward the trimmer or adjust the shims so the reveal is uniform—typically about 1⁄8 in. As you work the jambs, also use the edge of your Speed Square to make sure frame edges are margined in the wall.
One final aside: Precased door units can be shimmed only from the inside. In that case, insert a shim, fat end first, until it butts against the back of the casing, then slide additional shims, thin edge first, until shims are tight. Nail or screw below each stack of shims, then close the door and see if it seats evenly against the frame.
Method 2: Remove the door
After prepping the opening, pull the hinge pins and remove the door from the frame. (As is the case in the directions above, assume the doorsill is level.)
Center the frame left to right in the opening, and margin the frame. If you’re working solo and want to make sure the frame stays margined, tack temporary cleats to the outside of the frame and to the exterior sheathing, as shown in the photo. Tack it lightly though, because you’ll probably need to reposition the frame as you plumb its sides.
|
Before installing a prehung exterior inswing door, remove the door and test-fit the frame in the opening. The 2×4 cleats nailed to the sheathing act as depth gauges, so jamb edges will be flush to sheathing. |
Shim and secure the hinge jamb first, checking for plumb often. |
 Here, installers place shims slightly above and below the hinges so the hinge screws sticking through the jamb won’t snag on the shims.
Start with the hinge jamb. Having margined the frame, drive a 10d finish nail in the middle of the hinge jamb about 6 in. down from the top; leave the nail head sticking out. Using a 6-ft. level to check for plumb, shim the jamb behind each hinge: top, bottom, and then middle hinge. If you nail just below the shims, they’ll be easier to adjust. Use two 10d finish nails for each shimming point and, again, leave the nail heads sticking up. As you hold your level against the jamb hinge, note whether the jamb stock is straight. If it bows, you’ll need to nail or adjust shims to pull the jamb into line. In all, use five pairs of shims (and nails) to secure the jamb hinge.
Using a framing square to ensure that it’s roughly square to the hinge jamb, tack the head jamb to the header. The head jamb’s position is approximate at this point because you’ll use the door to fit things more exactly. With the aid of a helper, set the exterior door back on its hinges. Close the door and note how it fits the frame. Without weatherstripping, there should be an even reveal, about 1⁄8 in. wide, around the door.
After plumbing and securing the hinge jamb, rehang the door so you can use it as a gauge to align the head jamb and the latch jamb correctly. This method is particularly helpful if the door is slightly twisted or warped because you can align the latch jamb to the door.
If the door hits the edge of the latch jamb, that jamb may be bowed or the shims behind the hinge jamb may be too thick. Adjusting an uncased exterior door frame is similar to “working” an interior door frame. Shim the head jamb and then the latch jamb—fine-tuning the jambs so the 1⁄8-in. reveal between the door and the frame is constant. Operate the door to make sure it opens and shuts without binding. The latch jamb should have four or five pairs of shims, and the head jamb should have at least three. Then fit insulation between the frame and the RO, install casing, and flash the unit, as described in the following section.
|
As you adjust latch and head jambs, make sure there’s an even gap (typically 1⁄8 in.) between the door and the jambs all around. |
Shim the head jamb after plumbing the latch jamb. If the frame is uncased, you can insert shims from both sides and easily slide them in and out. The white line inside the jambs is kerf-in weatherstripping. |
Shimming Exterior DoorsShim exterior door frames at five points along each side jamb. Along the hinge jamb, shim behind each of the three hinges—or as close as possible if hinge-screw points stick out of the back side—and add two more sets of shims spaced equidistant between hinge shims. Space shims along the latch jamb at roughly the same intervals, but don’t shim directly behind strike plates or dead bolts. Shim the head jamb midway and at both corners. Exterior door frames are often installed with pairs of 10d galvanized finish nails that go through or slightly below each pair of shims. Here are some fine points to consider:
|
 Using two nails at each interval keeps the frame from twisting. Other builders favor pairs of 2 1⁄2-in. stainless-steel trim-head or plated flathead screws because they grip better and can be removed easily. In addition, many builders remove the middle screw of the top hinge, shim behind it, and replace the original screws with 2 1⁄2-in. or 3-in. screws that sink deep into framing.
 Then snap off the waste. You can also use a Japanese saw or an oscillating multitool.
5) Sealing, casing, and flashing the frame
If any edges or faces of the frame are still unfinished, prime or paint them before installing exterior casing.
If the cavity between the jambs and the framing is accessible only from the outside, fill it with insulation before installing the exterior casing. I favor packing the cavity with loose fiberglass or recycled cotton insulation. Should you need to adjust the frame at some future time, you will be able to do so easily. If you fill the cavity with spray foam—even low-expanding foam—you are, in effect, gluing everything together and creating a huge mess for the next person to work on the frame. Avoid high-expansion foam at all costs: It’s so powerful that it can easily bow jambs into the opening and bind doors and windows.
Before attaching casing, air-seal the gaps around the frame. There are two primary ways to do this. The first is to apply self-adhesive flashing tape so that it straddles the gap between the jambs and the housewrap. The second way is to run beads of siliconized acrylic caulk around the jamb edges and the RO, then press 6-in.-wide fiber-reinforced paper flashing strips into the caulk. These strips aren’t self-adhesive, so staple edges that overlap the sheathing. Whether you use tape or strips, align their edges back 1⁄4 in. from the inside edge of the frame so they won’t be visible. (Strips are favored by builders who want a thinner material between frame jambs and casing, or those who have not yet installed housewrap and want to slide flashing under the housewrap at the head and sides.)
|
Secure the frame, trim the shims flush, remove the temporary cleats, and apply a bead of caulk to the jamb edges. Keep the caulk back at least 1⁄4 in. from jamb faces. |
Apply flashing strips to the edge of each side jamb so that it beds in the caulk. |
 However, before applying exterior casing, apply a second bead of caulk over the flashing paper. Double-caulking virtually eliminates air and water infiltration. Staple the other edge of the strip to the sheathing.
If the unit’s doorsill has horns that extend beyond the side jambs, trim each horn to match similar details elsewhere on the house. Typically, horns line up with the outer edge of side jambs or protrude 1⁄4 in. beyond them. Because the sill is pitched, you’ll need to cut the bottoms of the casing at the same angle; use an adjustable bevel gauge to transfer the angle to the casing.
Attach the casing. Set the inside edges of jamb casing back 1⁄4 in. from the inner edges of the jambs to create a 1⁄4-in. reveal. Then nail up the head casing. If casing corners are mitered, nail through the joint to draw it tight. Note: A flashing strip or piece of flashing tape will be applied over the upper leg of the cap flashing to direct water away from the sheathing. (Above overlaps below.)
6) Door-casing reveal
|
As you install casing, drive a finish nail through corner miter joints to keep them from separating. You can also glue the joint, but this joint will be kept in place by the stucco that surrounds it. Note the 1⁄4-in. reveal between the casing and the edge of the jamb. |
Install cap flashing atop the head casing, nailing its upper flange as high as possible. This metal flashing will be overlapped by a self-adhesive flashing tape and stucco. Cap flashing should overhang the casing slightly along the front and at the ends of the casing so water drips free. |
Once you have installed the head casing, attach the head flashing (cap flashing) that was supplied by the door manufacturer. If your prehung door didn’t come with head flashing, any sheet-metal shop can fabricate a piece of galvanized head flashing with the proper offset for the thickness of the head casing so water drips beyond it. Many lumberyards also carry a variety of preformed flashing, and brickworks carry specialized head casing.
Caulk the head casing/sheathing joint, press the cap flashing down onto the casing, then use large-head nails to nail the top flange of the flashing to the sheathing. Apply self-adhesive flashing tape or strip flashing over the top leg of the head flashing, and run housewrap and siding down over that.
RELATED STORIES
- Install a Prehung Exterior Door
- Leveling a Doorsill
- How to Install a Prehung Exterior Door
Excerpted from Renovation, 5th Edition (The Taunton Press, 2019) by Michael Litchfield and Chip Harley
Available in the Taunton Store and at Amazon.com.
How to Fit an External Door
Building industry expert, Roger Bisby, demonstrates how to fit a JB Kind External Extreme door. Easy to fit in a day, External Extreme doors are perfect for fitting into an existing or new wooden door frame. Watch the easy to follow steps in the video below.
JB Kind’s external doors are beautifully crafted using the highest quality, sustainably sourced materials, however, timber, and particularly oak, needs some protection from the elements to ensure its longevity and maintain its appearance.
A Step by Step Guide to Hanging Your External Door
If you’re fitting an oak veneered external door, ideally it should be positioned back from the front of the building. If this is not possible, then to provide some protection, a canopy or open porch should be fitted which extends out at least 1.5 metres. Taking these measures will provide shelter to your front from the rain and hot sun, something that’s particularly important when the exterior door is facing south or southwest.
You will need:
- External Door Treatment
Tools:
- Pencil
- Plane
- Saw
- Chisel
- Electric Drill
- Screwdriver
- Tape Measure
Step 1: Measure Any Door Frame Alterations
Take your door and place it in the frame to accurately measure what, if any, alternations need to be made.
Step 2: Marking Up The Alterations
Mark up the door appropriately, assuming it needs any modifying / trimming. If the amount to be removed is only small, then the best place to trim from is the hanging edge. This will cause the least disruption to your door and, should you make any error, it will be the least visible. If you need to make larger reductions in your door’s size then you need to make sure that you trim equally from both sides. If, once you have measured up, you realise that your door will actually need a great deal trimming from it to make it fit your opening, then please contact us for advice. None of our external doors are designed to be reduced excessively and you could compromise the door’s stability.
Step 3: Trim/Plane Door
To trim your door, a sharp plane will be adequate for smaller amounts and for larger reductions you will need an appropriate saw. As per our advice above, take care to work equally, evenly and avoid splintering on the top and bottom edges where components join together.
Step 4: Position The Hinges
Once your external door is the correct size, you’ll need to mark the position of the hinges. Always use three good quality, four inch hinges incorporating steel washers. Wooden doors are heavy and washered hinges are essential if you want your door’s fixtures to last. Using a sharp chisel, cut out for the hinge plates in the door edge to correspond with those in the frame.To trim your door, a sharp plane will be adequate for smaller amounts and for larger reductions you will need an appropriate saw. As per our advice above, take care to work equally, evenly and avoid splintering on the top and bottom edges where components join together.
Step 5: Adding The Hinges
Affix the hinges and put the door into the frame, attaching the remaining hinge plate within the corresponding cut out in the frame.
Step 6: Affixing Latches and Locks To Door Edge
Now it’s time to fix the latch or lock mechanism to the door edge. Most locks or latches will be supplied with instructions and/or templates to show you the correct position in which to place them on the door’s edge. In the case of panelled doors, take care to avoid rail joints as this will significantly weaken the joint.
Step 7: Treating External Doors
It’s time to treat your external door now. This is a vital step in the process, especially for an external door as this treatment will be your external door’s only protection against the elements which it will encounter. To choose the correct type of treatment or sealant for your door, make sure you take note of our advice in our external door care section. Before you begin to treat your door, the door should be removed from the frame and all ironmongery should also be removed to enable a full protective treatment to be applied to ALL exposed faces edges and cut-outs. We can’t emphasise enough how important this stage is, particularly with our high quality oak veneered doors.
Step 8: Fitting External Accessories
Remember to fit a weather bar to the lower outer edge to prevent moisture damage.
Step 9: Refitting The Ironmongery
Once the treatment has been applied and has dried properly, refit the door and the ironmongery.
CONGRATULATE YOURSELF!
The process of hanging your new external door is now complete – we hope you, and visitors to your home, enjoy it!
Click here to view our range of External Doors
Do-it-yourself front door installation: step by step guide (15 photos)
05/24/2020
Read in 10 minutes.
Listen to article
84
168934
Installing a door affects safety, sound and heat insulation. Installing a front door is a complex process, so it is better to entrust it to professionals. Any violation can degrade the properties of the door. For example, the door will no longer hold cold and loud sounds, drafts will appear in the apartment. Poor installation sometimes leads to damage to the door structure, and this is already unsafe.
It is possible to install the front door yourself if you strictly follow the rules. How to install the door – we tell in the article.
Content
- Door installation tools
- Do-it-yourself front door dismantling
- Preparing the doorway for installation
- Removing the door leaf
- Door handle installation
- Apply masking tape
- Filling with mineral slab
- Installing the frame in the doorway
- Installing the door leaf in the doorway
- Foam filling
- Removing the protective film
Door installation tools
The fittings of the front door must meet 3 main requirements:
- Hammer drill / drill / screwdriver
- Pencil
- Screwdrivers
- Hammer
- Level
- Nail puller
- Roulette
- Knife
- Household sprayer
Are all the tools ready? We proceed to the installation of the door.
1. Do-it-yourself front door dismantling
1) Remove the plaster if it closes the door frame
2) Remove the door leaf from the hinges. Please note that welded loops must be cut with a grinder. If the hinges are collapsible, lift the door up (by placing a tool under it), so it will come out of the hinges.
Dismantling of the door leaf by a specialized Torex team
3) Remove the door frame. The metal box is mounted firmly. To remove, remove the anchor bolts or self-tapping screws with a perforator. If slopes are installed, first remove them with a puncher.
Dismantling of the old box by a specialized Torex team
If there are welded elements or self-tapping screws are not removed with a screwdriver and a puncher, arm yourself with a Bulgarian saw with a disc tip. You can cut down all the elements with it. The main thing is to strictly observe the sequence of actions. Start sawing from the bottom of the door (near the threshold) and go in a circle without breaking the line.
Be careful. When dismantling an old door, you can damage the doorway so much that it will have to be restored. And this is additional financial and time costs.
When the door is dismantled, we proceed to the next step.
2. Preparing the doorway for installation
Clean the doorway of all debris. If the opening was damaged during dismantling (for example, plaster fell off, brickwork crumbled), seal the cavities with mounting foam. Otherwise, these cavities will let in drafts and noises from the entrance.
Preparing the doorway for installation
The doorway is ready – we begin the installation of a new door.
The door should be 20-30 mm smaller than the opening. On each side there is a space of 10-15 mm. Such gaps are necessary for filling with mounting foam.
3. Remove the door leaf
To do this, lift the open door vertically up and remove from the hinges. Temporarily remove the door leaf to the side by placing its mat.
4. Install handle
Different manufacturers have different fittings, but the general principle remains the same. We will write about your kit, and you will be able to navigate:
Included with our door Torex is a package with accessories, which includes:
- 2 handles with decorative caps
- Square rod or just a square – 1 pc.
- Screws – 6 pcs. for attaching the handle to the door
- Hexagon for attaching the handle to the square.
Also, some models of door blocks may include a turn signal, 2 M4 screws.
Installing the door handle
1) Unscrew the decorative trim counterclockwise
2) Insert the square with the stem with the recess down into the hole
3) Lock with a locking screw using a hexagon
4) Insert and firmly press the handle with a square into the hole on the outside of the door
5) Fix the handle with three screws
6) Install the handle on the inside of the door and press firmly against the canvas
7) Fasten with three screws and fix the handle with a hexagon to the square
8) Install the decorative trims on the handle on both sides.
Ready! Move on.
5. Apply masking tape
Stick masking tape on the door frame from the front and inside. So you protect the box from mounting foam and cement-sand mortar.
Sticking masking tape on the door frame before installation
6. Fill the frame with mineral slab
Mineral slab is a high-quality insulation that prevents cold and noise from entering the apartment. We supply a mineral plate complete with a door.
Insert strips of mineral board under the metal plates around the perimeter of the box.
Fill the entire box around the perimeter completely. Do not leave areas unfilled with mineral slab.
Before installing the door frame, you need to install a piece of plastic pipe or a special cloth to bring wires into the house.
7. Insert the box into the doorway
1) Insert the box evenly vertically and horizontally
Installing the box in the opening
2) Use the mounting pads (wedges) to adjust the horizontal level. The mounting gap between the threshold and the floor must be at least 10 mm.
3) Adjust the box vertically using a building level and secure with mounting pads from the inside.
Installing the box in the opening
4) Do not change the position of the box and drill holes in the wall through the mounting holes on the box. Use anchor bolts or frame dowels and a puncher for this.
Start from the side of the loops, from above. Drill holes with a depth of 10-15 cm at the attachment points using a drill (drill). It is important not to move the box relative to the opening. After installing each of the anchors, be sure to check its position horizontally and vertically.
For walls of foam, gas, expanded clay concrete, use a hammer drill only in drilling mode (unstressed).
5) Check again if the box is level using a level
6) Fix the door frame with fasteners from the side of the hinges
Checking the installation of the box using a level
The door frame stands exactly in its place – it’s time to take on the door leaf.
8. Insert the door leaf into the frame
1) Hang the door leaf on the frame by inserting it into the hinges
Hanging door leaf
2) Close the door and check the operation of the locks and handles. If problems arise, you must immediately adjust the lock post of the box in relation to the bolts of the locks or handles using pads
3) Drill holes in the wall through the remaining holes
4) Fasten the anchors, but do not fully tighten
5) Close the door, check the vertical and horizontal, whether the door leaf is level with respect to the frame.
In the open middle (30-150°) position, the canvas must remain stationary.
Checking the operation of the front door locks after installation
9. Fill with mounting foam
1) Blow out the filling points from dust and brick chips. Wet the wall surface with a spray bottle.
2) Fill the mounting gap with mounting foam.
Filling the gap with mounting foam
3) Foam especially carefully at the bottom in the threshold area. So you avoid blowing and drafts.
Filling the threshold zone with mounting foam
4) Fill the holes from the bolts with mounting foam and insert plugs from above (we also provide them in the kit).
Entrance door Ultimatum Next from Torex after installation
10. Remove protective films
Torex front door protection with cling film
Remove protective films from the door leaf after finishing work, if you are doing repairs. And after installing the slopes.
How to install door slopes (additions) we described in detail in the article.
Once again, we draw your attention to the fact that installing an entrance door is a technically complex process. We advise you to entrust it to professionals. So you will avoid problems with the operation of the front door.
If you damage the door during installation, then repairing or buying a new door will cost a lot. Torex certified installation teams will install your door quickly and professionally.
If for some reason the door is damaged during the installation process, Togeh factory specialists will repair or replace it free of charge. You can find out detailed information and the cost of installing a door in the “Customer Support” section at the link.
Like the material? Like
84
Share:
Have questions?
Fill out the form and our specialist will contact you.
By clicking on the button, you consent to the processing of your personal data User Agreement
Metal entrance door installation: basic steps and recommendations
Contents
What will you learn
Determining Factors
Main stages of work
opening requirements
Flanging and casing
We meet the door fully armed
How to install the doors of the DS series
Filling in the gaps
The nuances of installing models with a thermal break
We install doors of the Factor series
Caution: new doors
When setting is prohibited
7 steps when ordering doors with installation
What you will learn
The living space may lack the necessary furniture, household appliances or utensils. But something that no apartment or house can do without is the front door. When choosing entrance doors to a cottage or apartment, the owners evaluate the reliability, practicality and visual appeal of the models in order to give preference to one of them. The purchase will 100% meet your expectations if the installation of the front door is carefully and professionally performed. The Guardian company, which has been producing entrance metal doors, locks, fittings, decorative panels and furniture facades for more than 20 years, regularly trains service employees on the proper installation of doors, and also gives advice to customers. The manufacturer’s recommendations will help you avoid mistakes during installation and easily cope with the task if you decide to do it yourself.
Determinants
The following factors influence the installation features of street metal doors:
-
Model construction.
-
Appointment (for a house, apartment or entrance).
-
Type of opening (material, condition).
-
Mounting method.

The main criterion for the correct installation of the front door in the house will be to maintain the balance of the door unit at any opening angle. Installation errors can negate all efforts to choose a high-quality and beautiful door, so such an important process requires careful preparation.
Milestones
From the moment you planned the installation of an entrance metal door to how it takes its place in your home, you need to go through the following steps:
-
Check what material the walls are made of.
-
Make measurements.
-
Choose the door model you like from the Guardian collection and place an order. At the same time, pay attention not only to the design, but also to the technical characteristics.
-
Prepare tools and supplies.
-
Dismantle old doors (if any).
-
If necessary, expand the opening, level the walls.
-
Check the condition of the new block and try it on in the opening.
-
Perform installation of the front door to an apartment or house.

Opening requirements
Installation of a metal door is possible in the opening of a brick or concrete wall with a thickness of at least 160 mm. These are standard requirements for the reliable operation of the door, under which the durability of the structure is guaranteed.
If the opening is made of sand concrete, foamed concrete and other materials with a density lower than red brick, it is necessary that the foreman inspect the opening on site and determine the installation method. To strengthen the opening, metal channels, elongated mounting pins, lugs or other elements can be used. The assessment of the installation method is made by the master, based on the weight and design of the door, the features of the opening and load-bearing walls.
Before installing metal doors in a cottage or apartment, you should carefully clean the doorway to the supporting structures. Remains of mortar and plaster should not remain.
After that, you need to prepare the necessary tools.
Flanging and casing
When installing entrance doors with a thermal break or another type, it is important to choose the right flanging – the location of the box.
It can be installed:
The second option increases the burglary resistance of the structure. Along with this, the opening angle is limited and the possibility of installing an additional internal door is lost.
Doors in a wooden house are a special case. In such a situation, it is preferable to install an entrance wooden door, because the installed metal door runs the risk of deforming due to shrinkage of the house. You can prevent the problem by applying the basis for future entrance street doors – a special frame. It is simply called “pigtail” or “casing”. This base (it consists of several elements) is assembled and inserted inside the opening, and the door is already inserted into it. The casing for the front door in a wooden house plays an important role. It prevents the risk of deformation after installation of the front door due to drying and subsidence of logs.
The window of the front door in a wooden house goes like this:
-
An opening is cut out, then grooves and spikes.
-
The threshold is installed, it must be pulled and fixed with self-tapping screws.
-
Lay sealing material, install structural elements.
-
They put the top.
Frame options
The window frame of the front door should be made taking into account the thickness of the door frame. When installing the casing, rigid fixing of structural elements cannot be done (except for the lower part), so as not to interfere with the movement of logs from top to bottom when shrinkage occurs.
If you install metal entrance street doors into the opening of a wooden house without casing, this may lead to deformation of the door frame and, as a result:
-
The door will not open and close properly. Reinstallation may be required.
-
There may be gaps between the logs, and the beam located above the door will hang on the top of the box.
-
The main types of pigtails are distinguished depending on the technology that was used in the manufacture of elements of its design:
-
Adhesive (the elements are represented by several parts, which are connected by micro-spikes and glue).
-
Solid-massive (the frame is made of solid wood).
-
Combined.
We meet the door fully armed
Do-it-yourself front door installation may require the following tools and auxiliary materials:
-
perforator;
-
drill;
-
sledgehammer;
-
a hammer;
-
chisel;
-
construction level;
-
welding machine;
-
Grinder;
-
protective glasses;
-
cement mixture or foam;
-
asbestos fabric;
-
screwdriver;
-
mount;
-
drill for concrete with a diameter of 12 mm;
-
set of socket wrenches;
-
sprayer with water;
-
wooden bars (wedges, clearance plates).

When everything is prepared, you can inspect the ordered door unit and get to work.
How to install DS series doors
Installation of doors of different series has its own nuances, which should be discussed in more detail.
When installing standard DS doors, the door leaf must be removed from the door frame. Install the mounting plate into the hole on it and turn it 90º degrees. To ensure rigidity of the block, it is recommended to weld the plates to the box before installing it.
The door frame is installed in the opening and is set according to the level and plumb. It must be secured with wooden wedges. Through the holes in the plates, holes are drilled 150 mm deep into the opening in order to hammer the mounting rods and weld to the mounting plates. Hole diameter – 14 mm. There will be three or five of them in total (for DS 8U and DS 3U).
To carry out the installation of handles, they must be set taking into account the overhang of at least 24-26 mm and fixed with screws (they are provided in the kit).
After that, the canvas is hung on the box and closed. At this stage, you need to scrupulously study how uniform the gaps are on all sides. If necessary, adjust the door frame lock post horizontally and vertically. The seals must fit evenly, the holes for the locking bolts must be appropriate.
After that, you need to drill two holes (four for DS 3U and DS 8U) on the lock rack through the mounting plates and weld. We check how the lock key and the turntable turn, having previously closed the lock and the latch. At this moment, nothing should jam, pull, interfere.
If necessary, press the box in the middle of the rack, drill a hole in the wall and hammer in the middle rod. If the locks and latches work flawlessly, the rod must be welded. When the operation of the crossbars is checked, it is possible to bore holes for them in the door frame, if necessary.
In a similar sequence, install the door block with fastening through the frame.
Filling gaps
If you order entrance doors with a turnkey installation, then, according to your desire, filling the gaps can be done in one of two ways:
-
With the help of a cement solution (it is prepared in a ratio of 1: 3). The doorway is pre-moistened with water and the gaps begin to be filled with cement mortar. This work should be done carefully and scrupulously, continuous. There should be no slits, overflows, bundles, shells more than a centimeter in size. After that, outdoor metal doors with a thermal break or other type require careful handling until the mortar has completely set. In particular, it is forbidden to slam the door.
-
With the use of mounting foam. To do this, stick paper tape on the door frame.
Its width is 30 mm. This is done to protect the surface from external damage with excess foam. From the inside of the box, two clearance plates are fixed on each side. They can be made from plywood, fiberboard or wood. After that, the entrance metal doors with a thermal break or ordinary doors should be closed with a latch, take a foam bottle and fill the gaps between the opening and the box. In the coming days, handling the door should be careful. You can’t slap her.
 Its width is 30 mm. This is done to protect the surface from external damage with excess foam. From the inside of the box, two clearance plates are fixed on each side. They can be made from plywood, fiberboard or wood. After that, the entrance metal doors with a thermal break or ordinary doors should be closed with a latch, take a foam bottle and fill the gaps between the opening and the box. In the coming days, handling the door should be careful. You can’t slap her.
Installation considerations for thermal break models
When installing doors DS 6 and DS 10, the following recommendations should be taken into account:
-
In a homogeneous opening (made of concrete, brick and other materials), entrance street doors with a thermal break are installed at a distance of up to 2/3 of the thickness from the inner surface of the wall.
-
If the wall opening has insulation, then metal doors with a thermal break DS 6 and DS 10 are placed behind the insulation (in the warm part of the wall).
-
The doorway should be insulated. Need thermal insulation from the air space of the premises of metal structures with high thermal conductivity. Otherwise, moisture will condense on the inside of the entrance doors to a house with a thermal break.

We install doors of the Factor series
Doors “Guardian” from the Factor series are in demand among consumers who want to buy entrance doors inexpensively with installation by specialists or who plan to do it on their own. The procedure should be the following. After unpacking the product, you need to separate the door leaf from the box (it must be removed from the hinges).
The door frame has vertical posts into which mounting eyes are installed. They are fixed with self-tapping screws. In the middle part of the racks, lugs with a bend are placed.
After that, the box is placed in the opening. Please note that its flanging should fit well against the wall. The box is calibrated in terms of level and plumb, fixed with wedges.
After drilling holes with a diameter of 12 mm through the eyes to a depth of at least 150 mm, anchor bolts are inserted into them. So that the casing does not move away (does not turn out), the end of the bent lug shelf must rest against the opening or wedge.
Handles are installed, as for doors of the DS series. The canvas is hung on the box and the doors are closed, checking the uniformity of the gaps around the perimeter. Fix the lock post so that it fits evenly. On the side of the lock post, holes with a diameter of 12 mm must be drilled to a depth of at least 150 mm in order to install the anchor bolts and bend the nuts. The emphasis of the bent flange of the lug against the wedge must be provided.
Next, they close the locks and check: how tightly the canvas fits to the seal, whether the keys turn freely in the locks. If necessary, press part of the rack towards the blade or away from the blade. Then, a hole with a diameter of 12 mm (depth – 150 mm) is drilled in the supporting structure of the opening through the middle mounting plate with the bend of the rack. Insert the anchor bolt from the kit that comes with it. A wedge (clear plate) is installed under the end of the bent shelf of the eyelet. The bolt nut is tightened through the wedges to ensure uniform gaps between the leaf and the door frame. At this stage, it is necessary to check that the casing fits well to the wall along the entire height.
After that, a peephole is installed and the gaps are filled with mounting foam or cement-sand mortar M-70. If a door from the Factor series with a laminated coating was installed, the film is removed.
Caution: new doors
When it is planned to install an entrance metal door to an apartment or house, it is better to familiarize yourself with the recommendations of the manufacturers in advance:
-
If you bought insulated entrance doors with a thermal break or other metal insulated outdoor entrance doors, store them in the right conditions until the time of installation.
Do not leave panels, platbands, trim in polyethylene to prevent the possibility of swelling, peeling and other problems.
-
It is better to install a decorative panel after the completion of construction and repair work, when the home will be warm and dry.
-
If such work has to be carried out when the door unit is installed, make sure that water does not splash on it and dust does not settle. To do this, you can put an impromptu cover made of protective material on the entrance street insulated doors. Holes are cut in it for a vertical drive and lock bolts. The rest is securely closed and held together with tape (use material that breathes). Carefully! The adhesive tape must not fall on the decorative panel.
-
Take care of the wells of the locks: if dust or debris accumulates in them, there may be a problem with operation.
-
Installing doors with decorative platbands allows you to create an aesthetic look of the finished work.
They help to hide the gap between the door and the wall, as well as create a harmonious visual transition. You should be aware that the installation of platbands is carried out last after the completion of other work.
 Do not leave panels, platbands, trim in polyethylene to prevent the possibility of swelling, peeling and other problems.
 They help to hide the gap between the door and the wall, as well as create a harmonious visual transition. You should be aware that the installation of platbands is carried out last after the completion of other work.
When installation is prohibited
The climatic conditions of different regions of Russia have an impact on the use of building materials. Temperature fluctuations should also be taken into account when choosing entrance doors with a thermal break for a country house or apartment doors. The instructions for installing the front door are strictly prohibited:
-
Installation of doors with decorative panels that have not undergone appropriate processing in rooms where the temperature rises above 60º degrees and falls below 10º degrees, and humidity exceeds 60%.
-
Installation of insulated metal street and other types of doors in places where there is exposure to direct sunlight, as well as near heat sources.
If this prohibition is violated, the plastic may dry out, peel off, the film may swell, and the original color may be distorted.
 If this prohibition is violated, the plastic may dry out, peel off, the film may swell, and the original color may be distorted.
7 steps when ordering doors with installation
Considering that the price of entrance doors to an apartment with installation is quite acceptable for customers with different budgets (you can check the exact figures with dealers in your city/region), many people prefer to entrust this serious matter to service professionals. But this does not mean that you can remain an outside observer. The Guardian recommends that you carefully prepare for the installation process and be careful:
-
Prepare the work area. Remove unnecessary things, free up space as much as possible for the convenience of the actions of the masters.
-
Because the installation process can be dusty and welding-intensive, make sure you protect your property from accidental damage.
-
Be sure to be present during the installation or delegate this authority to another responsible person.
-
Before starting installation work, check that the door unit is in a neat condition (without external defects), and that all the necessary elements are included in the kit.
-
After installation, the service staff will tell you about the rules of operation, the nuances of care. This will be helpful even if you have studied the recommendations before purchasing thermal break entry doors or other doors.
-
You will be given a passport for the door unit (save it and a document indicating the purchase price of street entrance metal doors to be able to use the warranty). You will also receive a set of keys.
-
Carefully inspect the appearance of the installed door block, try opening and closing the door, look through the peephole.

Only after that you can sign the acceptance certificate. If defects in the product or problematic points during installation were found, be sure to indicate this in writing. Or do not sign the act until the deficiencies are eliminated. An important point: the manufacturer gives a guarantee for the product itself, and the dealer – for the installation.
The Guardian company wishes you a successful choice of insulated entrance outdoor doors at a suitable price and easy installation in accordance with our recommendations.
This article is well complemented
- How to make a doorway
- How to choose the entrance door to the apartment: a door guide from A to Z
Do-it-yourself front door installation: photo + video
A properly installed front door not only ensures the safety of property, but also reduces heat loss (due to frame insulation) and reduces the audibility of what is happening outside the house or apartment. First of all, you should know that installing the front door with your own hands is possible. Moreover, you can do everything alone, but if the canvas is heavy, it is easier to work together. There is nothing complicated in the technology itself, but there are several features that you need to know before starting the installation yourself. 9Ol000 hole
Preparing for installation
The old door must be removed before installation. This must be done carefully, trying not to damage the opening too much. Then the installation of the front door will be quick.
Some types of steel entrance doors
Removing the old door
First remove the door leaf. If the model is with removable hinges, the doors are opened, a crowbar is placed under the lower edge of the canvas, and lifting the doors, they are removed from the hinges. If the hinges are non-separable, you will have to unscrew them. It’s better to start from the bottom.
After that, the slopes are dismantled, the wallpaper is removed, the plaster or putty is beaten off. The task is to determine how the box was attached, to find attachment points. If the door frame is metal, usually these are anchors, pieces of reinforcement. At the junction, they are cut off with a grinder. When all fasteners are cut off, the old box is squeezed out or knocked out. But with this procedure, excessive efforts are not necessary: you can destroy the box so much that it needs to be repaired.
When dismantling, it is necessary to cut off the old fasteners
If the frame of the old front door is wooden, everything is simpler. Side racks can be cut approximately in the middle, and then, prying with a crowbar, break out of the opening. After the sidewalls are removed, the lintel can be removed easily. Also, the threshold is removed without problems.
Preparing the opening
After the old door has been removed, the doorway is prepared for installation. First, all pieces of putty, brick fragments, etc. are removed. Get rid of everything that can fall off. Then evaluate the opening, which is the result. If there are large voids, they are filled with bricks planted on cement mortar. Small potholes can be ignored. If there are gaps, it is better to cover them with a solution too.
This is what happens when the door is removed.
Existing significant protrusions that may interfere with installation must be removed. You can use a hammer and chisel or a grinder with a cutting disc.
Carefully inspect the condition of the floor under the door frame. In old buildings, a wooden beam is installed in this place. Often it is already rotten, crumbled. If so, delete it.
If the bar still looks intact, check the condition of the wood with an awl. With a solid effort, stick a few into the wood, shaking a few times, take it out. So you check in different parts of the beam. If it enters with difficulty, to a shallow depth, the hole remains small, then everything is fine. If not, it enters easily, it is crushed and / or crumbled from rocking, the wood has become unusable. It also needs to be removed.
Beat off everything superfluous
The vacant place is filled with the same beam (treated with impregnation from rotting), brick is laid. The gaps are filled with mortar.
As a result of all these actions, the doorway should be more or less even. So that you can install a new front door without interference.
Installation of metal doors
Steel (metal) doors are most often installed as entrance doors. The door frame, door frame and the outer surface of the door leaf are made of metal. To ensure the required degree of heat and sound insulation, the canvas is laid with soundproofing material. From the side of the room, the entrance doors can also be sewn up with metal, or they can be with sheet material (budget option).
The structure of the metal door
Rubber insulation is laid on the frame along the perimeter of the porch (sometimes on the door leaf). It performs two functions: it serves to seal and reduces the strength of the sound that occurs when the door slams shut. It turns out a reliable, warm and “quiet” front door.
Preparing the door
Since it is problematic to insert a lock into a metal door, the doors are ordered immediately with a lock. You receive a kit that includes an already installed lock. Pens come separately. Here they need to be installed in place, screwed with screws. Before installation, you need to check the operation of locks and latches. Everything should work smoothly, without effort and problems. If everything is fine, you can proceed with the installation of the entrance metal door.
Preparing a steel door for installation: checking the operation of the lock, insulating the frame with mineral wool
If the doors are installed with access directly to the street (in a private house, for example), the door frame is laid outside with insulation. You can use stone wool cut into strips. It is inserted into the frame and held by the force of elasticity. It has a significant disadvantage: it is hygroscopic, which is why the doors can rust from the inside (if they stand as an exit to the street and are not sealed tightly). In multi-storey buildings, this is not critical: there is no precipitation at the entrance. Another way out is to put foam or fill the frame with foam. They are not afraid of moisture, and the thermal insulation is normal.
To ensure that the paint and varnish coating of the box is not damaged during installation and subsequent finishing work, it is pasted around the perimeter with masking tape. It is removed after the slopes on the door are made. If some wires come through the door frame, it’s time to install mortgages – a piece of plastic pipe or corrugated sleeve through which these wires will get inside.
Installation of interior doors is described here. Read more about sliding doors here.
Masonry and concrete wall mounting
It is more convenient to install doors in which the leaf can be removed. Before installation, it is removed from the hinges. The door frame is inserted into the prepared opening. Below it is placed on mounting pads 20 mm high. She should become free in the opening.
We put the door frame on mounting pads
By changing the thickness of the pads, we achieve that the lower frame is strictly level. This is checked using the building level. Having set it horizontally, we set it vertically: so that the racks do not deviate either forward or backward, but stand strictly vertically. This is also checked using a level, only the bubble device is located on the short part of the tool. Another option is to check with a plumb line.
Checking if the door frame is level vertically
After the frame is level, it is wedged with prepared wedges. They can be carved from wood, or you can buy plastic ones. Wedges are inserted on long racks rub pieces, at the top – two. They should be placed near the fasteners, but not overlapping them.
Example of installing a wedge
After installing the wedges, it is checked once again whether it stands correctly: in the horizontal and vertical planes. There should be no deviations.
Next, the installation of the metal door frame in the opening begins. There are two types of mounting holes: steel eyes welded to the box and a through mounting hole (there are actually two of them: in the outer plate of a slightly larger diameter and in the inner one of a smaller one).
Two types of mounting holes
There is no difference in mounting method. Just frames with holes in the body of the box can be installed on thinner walls. This may be important if the installation of the front door is in a panel house: it is far from always possible to put doors with eyelets in them.
Fastening through a through hole
Fasten iron entrance doors to anchors or pieces of steel reinforcement, 10-12 mm in diameter. The diameter of the fastener is selected for the existing holes. If anchors are to be used, their head must fit into the outer hole and “get stuck” in the inner one. The diameter of the reinforcement must match the diameter of the holes. In any case, holes are pre-drilled under them.
We take a puncher, drill and anchors. The drill is taken of the same diameter as the fasteners. Its length should be at least 30 cm. To more accurately determine how deep you need to drill, masking tape is attached to the drill. It marks a distance that is slightly more than the required depth.
We mark the drill along the length of the anchor
The installation of fasteners from the side of the hinges begins. When drilling, it is important not to move the installed box. Drill from above first.
We drill holes from above, from the side of the hinges
Install the anchor, finishing it with a hammer. To sink it to the inner edge of the box, insert a screwdriver into the slots, and tap the handle of the screwdriver with a hammer. Then, when the anchor is driven in, it is still tightened a few turns with a screwdriver. We check if the box has been moved during operation – we take the level and check everything.
We drive the anchor deeper
Install the fasteners at the bottom in the same way. We also check verticals and horizontals. If the door leaf is not heavy, you can already at this stage check how correctly the box is set. To do this, they hang the doors and check how evenly they “sat down”, whether there are distortions, cracks and other troubles, how much the locks and latches match and work normally.
If the blade is made of thick sheet steel, weighs about a hundred kilograms, two fasteners are clearly not enough. Then install all the fasteners from the side of the hinges, as well as one from the side of the lock. After installing each fastener, the verticality and horizontality of the box is checked. Then they carefully hang the canvas and check how it “walks”. If everything is fine, continue mounting the fasteners. No – you will have to remove the already installed mounts and set the frame in a new way.
We put the anchor in the door frame of the entrance door from below, checking the verticality of the post
After checking, the canvas is removed again, the already installed anchors are finally tightened. Then they put everything that is needed on the side of the loops, then on the side of the castle. When everything is finally installed, hang the door leaf in place again.
The assembly gaps must now be filled with foam. To install the front door with your own hands, it is better to take it with a small expansion coefficient: it is easier to work with it. In order for the polymerization of the foam to proceed normally, the cavities that will be filled are wetted with water from a spray bottle (ordinary household). Then everything is slowly filled with foam.
It is necessary to blow out the entire width of the door frame: then there will be no blowing and the sound insulation will be better. When installing a door with iron, you don’t have to worry about opening the box: the rigidity of the metal is such that the expansion force of the foam is far from enough. Therefore, you can lather generously.
Blow out mounting gaps with foam
Only if foam gets on the door leaf, it must be removed immediately with a damp cloth. After 5 minutes, you just won’t wipe it off. As long as it’s wet, it comes off without a trace. Then you have to scrape, but this does not go away painlessly: traces will remain. The polymerization of the foam will end after 24 hours. Then we can assume that the installation of the front door with your own hands is hung. It remains to make slopes on the door.
Mounting the box with lugs
If there are welded plates on the box – lugs – the box is set up in the same way: on linings. Then it flattens out and wedged. Then there are two options:
Read here how to adjust the front door made of metal and plastic.
Installing an entrance door in a wooden house
In a wooden house, any windows and doors are mounted not directly to the wall, but through a casing or a shackle. An okosyachka is a wooden beam that is movably attached to a log house (from a log or a beam – it doesn’t matter). It is connected by a tongue/groove connection and held by the force of elasticity. A door frame is already attached to this beam.
Installing a door in a wooden house: first make a casing
This is a necessary measure. After all, a wooden house is constantly changing height. For the first five years, he sits down – due to shrinkage and compaction of the landing seams. The first year, doors and windows are not installed at all: too big a change. In the second year, the movements become less pronounced, but are always present. Therefore, it is impossible to rigidly fix the doors: they can jam or bend, or they will interfere with the normal shrinkage of the log house.
To do this, cut a groove in the doorway. They make a casing from a bar in the form of the letter “T”. The width of the groove should be slightly less than the thickness of the spike: to keep well. They insert it into a spike, hammering it with a sledgehammer. That’s all. No other fastener.
Please note: the height of the posts is much less than the height of the opening: after installing the lintel, there must be at least 3 cm left for the expansion gap. It is covered with mineral wool. This is also necessary so that the doors do not warp during shrinkage.
Installation of the front door in a wooden house in the section
After the installation of the casing, a box is attached to it. Anchors are useless here. Powerful self-tapping screws or screws are needed. Under them, it is also necessary to drill holes, but take a drill slightly smaller than the diameter. Please note: the fasteners should not reach the wall in length (this can be seen in the photo above).
This video shows how to make a casing by forming a groove in the opening.
This video shows another type of pigtail manufacturing: a spike is formed in the opening. With a chainsaw, everything turns out quickly, but this level of ownership is available to few.
Installation of the entrance door in aerated concrete
Another building material with special features is aerated concrete. It does not hold shock loads well, therefore it will not work to fix the entrance doors like a brick wall: they will simply fall out. The solution is this: to make a frame out of a metal corner, which will be held on the wall due to the stop.
Frame for mounting a metal door in a house made of aerated concrete
At the same time, jumpers that tighten two corners are made in those places where fasteners will be located – lugs or mounting holes. And it is on these jumpers that the door will hold.
Features of the installation and design of metal doors – in the video.
 youtube.com/embed/ho9vGjc7IU4″ frameborder=”0″ allowfullscreen=”allowfullscreen”>
The second mounting method is less common. It requires less time and material costs. But it is not known how reliable the front door, mounted using this technology, will stand. No data yet.
90,000 setting the front door with your own hands: step -by -step instruction
Content
- Measurements and preparation of the opening
- Dismantling of the doorway
- Clusters and voids
- TOMALICAL RECREASE OF ENTERS
- Ways of fastening the structure
- Through eyelets
- Through a through hole
- Through metal grips
- Completion of the installation process
. And as practice shows, reliability is determined not only by the quality of the product itself and the materials from which it is made, but also by competently carried out installation. Installing entrance doors is a responsible matter, therefore, so that the end result does not disappoint, it is recommended to study the installation instructions.
Measuring and preparing the opening
So, the old front door no longer meets its purpose, both in terms of functionality and reliability. It is necessary to purchase and bring to the house (apartment) a new model, which is selected both in appearance, and in terms of functional indicators, and in size.
But before you go to the store, you need to measure the dimensions of the doorway. You need to get to its ends, which are hidden under the platbands with a layer of leveling mortar and mounting foam:
- The architraves are dismantled, there is no need to stand on ceremony with them, they will no longer be useful in the future.
- The plaster layer is removed.
- If mounting foam was used during installation, then this will also have to be removed.
- The threshold is being removed.

You have an entrance door in front of you, and you can clearly see the edges of the opening (as the door frame is called in the professional language) and the ends of the opening. There is always a gap between them. Now you need to measure the distance between the opposite ends of the opening. This should be done at least in three places with an equal distance between measurements. The same is true for the horizontal direction. Of these, the smallest values \u200b\u200bare selected, which are taken as the basis for the dimensions of the door frame with a deviation of 1-2 cm to the smaller side.
For example, if the height of the opening turned out to be 2.12 m, then a size of 2.1 m is taken to select the height of the loot. which each door has its own dimensional parameters. Therefore, the actual dimensions of the opening will have to be adjusted to fit standard door structures from a specific model range.
Dismantling the hatch
The complexity of dismantling the door hatch will depend on what material the walls of the house are built from. If it is gas, foam or expanded clay concrete, then all dismantling work must be carried out with great care – it is important not to spoil the fragile masonry, which is prone to chipping.
Removing the old frame from the opening
In general, the procedure is as follows:
- the door leaf is removed from the hinges;
- the box is cut with a grinder or a hacksaw into several parts.
- cut pieces are dismantled with a crowbar or crowbar.
Cleaning the doorway
Cleaning consists of removing old fasteners, flimsy plaster and, if any, foam from the ends and adjacent areas.
Old metal fasteners are removed by grinder
But if the house is old and the front door has been used for more than a dozen years, then it is necessary to check the floor beam, which is installed above the doorway. If its quality leaves much to be desired, then you should think about how to replace it. It is better not to carry out this repair operation with your own hands.
Pay attention to the area below the threshold. Usually in brick houses that have been in operation for a long time, wide openings are formed, filled with loose brick material, so this garbage must be disposed of.
Filling cracks and voids
When all defects in the doorway are found, they must be repaired with an ordinary cement-sand mortar, which is diluted in a ratio of 1:3 (1 part cement to 3 parts sand). Large voids are filled with broken or solid bricks and mortar. Small ones – only with a cement mixture, the same applies to cracks. Before sealing the latter, it is recommended to use a deep penetration primer. It will not only fasten the grains of the wall material together, but will also go deep into the thickness of the concrete, making it more durable.
If you need to level a large area, you can install guides from boards, fastening them with a clamp
There is no need to level the surfaces of the ends of the doorway. You can raise the floor, fill the screed, or level the place under the threshold.
Installation instructions for entrance doors
A few useful tips before proceeding with installation work:
Installing the frame
First of all, the door must be disassembled into two parts: a leaf and a frame. The latter is installed in the doorway and leveled both vertically and horizontally. In this case, the installation is done on stands made of wood or plastic. It is best if these are cone-shaped inserts that will be easy to knock out after the installation work is completed. Although sometimes the masters do not touch them, leaving them in the opening as additional support.
Door Quick Installation Instructions
Note that the front door is installed flush with the outside of the wall. And it should open outward. After setting, the diagonals of the frame are checked, they must be the same in length.
Methods of fastening the structure
There are several methods, so each must be considered separately. Fasten the door frame at least 10 points: 2 from the bottom and top, and 3 from each vertical end.
Through eyelets
Manufacturers of metal door models offer designs that already include so-called eyes – metal strips welded to the frame, in which holes for fasteners are made. Therefore, the attachment process itself is as follows:
- the strips are folded back against the wall surface so that they are pressed as tightly as possible;
- holes are made through the holes with a puncher to fit the length of the anchor;
- the latter is inserted through the eyelet into the hole in the wall and tightened with a wrench.
Steel pins can be used instead of anchors. They are driven into the hole, and the ends are welded to the eyes by electric welding. To increase the strength of the fastening, cement mortar can be poured into the hole, and then the pins can be hammered. If reinforcing bars are used as fasteners, then the depth of the hole should be within 15 cm.
Through hole
Some manufacturers of entrance metal doors at the stage of their production provide through holes in the ends of the frame. If there are none, then you can drill them with your own hands using a drill or puncher.
Through the holes with a perforator, recesses are made in the ends of the opening, where either anchors or pins are inserted. If the front door is made of wood, then only anchors are used for fastening in this way, the nuts of which must be recessed into the body of the box. Therefore, under them, an expansion of the hole is made to fit the diameter of the nut, and the planting depth should be equal to the thickness of the fastener. Pins are not used in this case, because there is nothing to weld them to.
Through metal grips
This variant of fastening the entrance door is only possible if a metal frame made of a profiled steel angle is additionally installed from the outer edge of the opening.
Metal strips 3-4 cm wide, 2-3 mm thick and 2-3 mm thick must be welded to the door hinge from the inside at the attachment points. They are welded either perpendicular to the parts of the box, or obliquely. There are no particularly strict requirements in GOST.
Fastening to the frame is relevant for walls made of blocks, read more about this later in article
Thus, the box is held on the outside by edging, and on the inside – with metal hooks.
And a few more useful tips about the sequence and correct fastening:
- you need to start fastening the box from the side where the hinges are installed;
- the process itself is done from top to bottom;
- after each fastener, the box is checked for the verticality of the installation: they fixed one side, hung the canvas, checked whether it opens well – you can go to the other side of the loot; the same with the top and bottom.
This is important! Checking the verticality of all sides of the box is carried out using a level at ALL stages of installation: before attaching to anchors, during attachment and after mounting the leaf
Read more about the nuances of the technology for installing metal entrance doors.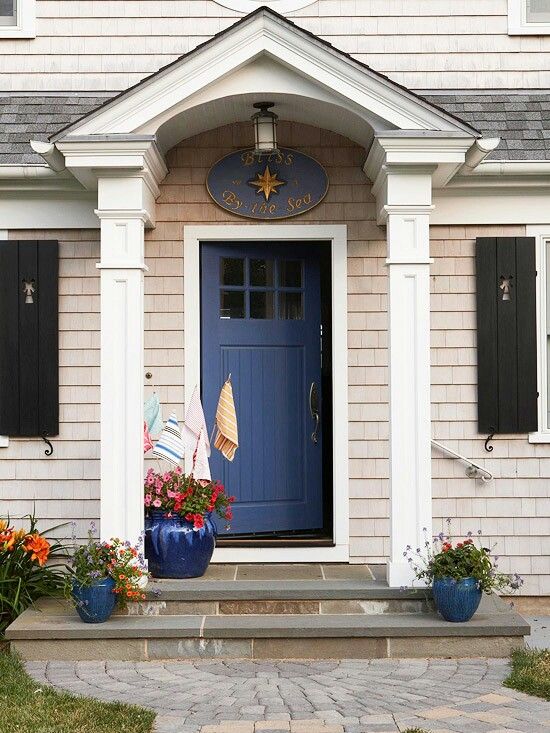
Completion of the installation process
The check showed that the door is correctly positioned, it opens and closes freely. The door leaf must be removed again, and the surfaces of the loot must be pasted over with masking tape, because it’s time to close the gaps and finish.
Foaming must be done on both sides
- Mounting foam fills the gap between the ends of the opening and the box. It will not only act as a filler, but also a heater. By the way, you may find information on how to remove dried foam from the door useful.
- The same can be done with cement-sand mortar, where building gypsum is added. The latter sets quickly, so the solution dries quickly.
- The surface of the gap is puttied to maximum evenness. To do this, you may need to apply the mixture in several layers.
- Make slopes that are painted or covered with decorative material.
- Add extensions if necessary.
- Masking tape is removed.
- Platbands are installed from the outside. If the door is wooden, then they are attached to the frame with self-tapping screws, the caps of which are sunk into the wood by 0.5 mm. After that, the hats themselves are closed with decorative caps. If the box is metal, then the platbands are attached to it with rivets, screws or bolts.
- Handles are installed on the door, hinges are lubricated.
- Hinged door leaf.
 If the door is wooden, then they are attached to the frame with self-tapping screws, the caps of which are sunk into the wood by 0.5 mm. After that, the hats themselves are closed with decorative caps. If the box is metal, then the platbands are attached to it with rivets, screws or bolts.
 This is a step-by-step technology for installing a door in a brick or panel house.
Installation in openings made of gas, foam and expanded clay concrete
Expanded clay block private house or buildings from gas or foam blocks belong to the category of buildings with fragile supporting structures. Therefore, in order to install an entrance door in them, it is necessary to take into account two important requirements prescribed in SNiP and GOST:
- Increase the number of fasteners on the vertical sides of the box within 4-6 for each side. At the same time, their laying depth should not be less than 20 cm. For fastening metal doors in a foam concrete wall, you cannot use standard metal anchors, which quickly loosen in soft blocks due to intensive opening and closing of the door. In such houses, according to the standard, it is better to use chemical anchors, such as Hilti.
- Install a two-frame crimping structure made of steel angles with a flange width of 40 or 50 mm. In fact, it is still the same edging, only on both sides of the wall. Both structures are fastened together by crossbars made of metal plates 3-4 mm thick.
 At the same time, their laying depth should not be less than 20 cm. For fastening metal doors in a foam concrete wall, you cannot use standard metal anchors, which quickly loosen in soft blocks due to intensive opening and closing of the door. In such houses, according to the standard, it is better to use chemical anchors, such as Hilti.
 Binding of the opening from metal corners
Installation in a wooden house
Installation of the door structure is carried out according to the following scheme:

More details about this process can be found in the article “Installing the front door in a wooden house.”
Dimensional accuracy, a strictly step-by-step procedure for carrying out operations, the correct alignment of the chute in all planes and reliable fastening of the door are the basic rules for its installation and a guarantee of the quality of the final result.
Do-it-yourself front door installation: work sequence
0228 How to install entrance metal doors: step-by-step instructions
Installing an entrance door is not difficult, especially if a person is armed with the theoretical knowledge necessary for this business. In this case, you only have to adhere to some requirements, monitor the installation plane and not disrupt the process. Following the recommendations of experts, installing the front door with your own hands will not seem difficult. This will be discussed in this article, in which, together with the dveridoma. net website, we will describe in detail how the front door is installed independently.
Do-it-yourself front door installation photo
Do-it-yourself front door installation: aperture preparation , it is worth talking in more detail. The ease and quality of door installation fully depends on how correctly you do this.
What is meant by the term “doorway preparation”? Naturally, this is an adjustment of its dimensions to the dimensions of the door – the more accurately you do this and the smaller the gap between the door and the opening, the more reliable it will be to install the front door. This is explained simply – the length of the protruding part of the anchor. In addition, an overly wide opening ensures that the door is installed as if in a suspended state – not a single part of the box can adhere to the walls, which in itself is not very good.
How to install an entrance door photo
Such a door will hold, the only question is – how will it do it (reliably or not)? In the same way, we can talk about an excessively small doorway, which, as a rule, does not make it possible to properly level the doors and seal them no less well with mounting foam. In general, there should be a golden mean here, which varies from 15 to 25 mm between the door frame and the opening.
Iron front door installation
With an increase in the doorway, questions usually do not arise – as a rule, it is expanded with the help of a grinder or a perforator. But with the question of how to reduce the doorway, many people have problems. Moreover, they appear in most cases when a slight decrease is necessary. Reducing the opening by 100mm is much easier than, for example, by 50mm – in the first case, the issue can be solved with a brick, and in the second, it simply cannot be physically done. As a rule, in such a situation, an additional frame made of metal, for example, a corner, is simply inserted into the opening. A structure is boiled out that wraps around the wall in the opening on both sides, and unnecessary voids between the frame and the wall are filled with cement mortar.
How to install the front door, see the video.
 youtube.com/embed/bmcaqfrZ2c0?feature=oembed” frameborder=”0″ allowfullscreen=””>
How to install entrance metal doors: step-by-step instructions
The opening is ready, now you can safely proceed to the direct solution of the question, how to install the front door? To make it easier to comprehend this whole ingenuous process, we will present it in the form of a certain sequence. So, the installation of the front door in a house or apartment is as follows.
- We install the door in the opening. We just slide it into place, and so that it does not fall, we open the canvas exactly 90°. And so that the upper part of the box does not move away from the wall, we substitute a support under the bottom of the door leaf. That’s all, the first preparations are completed. You can step aside and see what came of it, and at the same time take the rack level to perform further work, which involves solving the question of how to install the front door yourself?
- Armed with a level, it’s time to start leveling the door block. Here you will need to orient it so that all the planes of the new door take a clear position in relation to the vertical level. To begin with, we set the level on that part of the door frame on which the hinges are located and, substituting wooden bars or wedges under the lower opposite corner of the box, we achieve the required position of the door block. In principle, if the door is assembled correctly, then putting the rack with hinges in level, all other indicators of the evenness of the door installation should be normal. Except perhaps the plane of the door to the wall of the opening. This is what should be done next.
- It all depends on the evenness of the wall itself – in most cases, it makes no sense to push the bottom or top of the box. The door is installed exactly on the wall – this, of course, causes some inconvenience, but you can put up with them. As the inconvenience delivered by such an installation, spontaneous opening or closing of doors under its own weight can be distinguished.
Installation of entrance metal doors photo
- Now fix the door frame. It is better to start from the top, from the side of the canopies. Through special eyes, we drill a hole in the wall and insert the anchor into it – until we tighten it. We do the same with all other lugs on this side of the door frame. Again, we do not tighten the anchors yet, but go to the side of the door frame and repeat the procedure for drilling and installing the anchors on the other side.
- Now we arm ourselves again with a level and clamp the anchors from the side of the awnings, clearly maintaining the vertical of the rack with awnings. By level, it is quite simple to determine which of the anchor screws to pull and which to release. After one side is finished, go to the other and repeat the attachment procedure. Do not forget to control the installation level. As a result of all your efforts, the door block should, as it were, hang in space on anchor screws. If, after installing the iron front door, it wobbles a little, it’s not scary – the assembly foam, which seals the door, will help to finally fix it in the opening.
- Door block health monitoring. We close the doors and check how the lock snaps into place. In principle, everything should be in order, but if the bolts of the lock engage when passing through the reciprocal holes, this means that the doors are not set correctly and they will need to be further adjusted in level. If everything is fine, then proceed to the next stage of work.
- Sealing the front door is the last stage of work, which involves installing the front door to an apartment or house. Everything is quite simple here – we take a large bottle of polyurethane sealant (mounting foam), give it a good shake, the bottle can even be heated in hot water (in this way the foam output increases) and blow out the gaps between the door frame and the opening, first from the sides, and then from above . It is not necessary to blow foam under the threshold – this gap, if there is one, is filled with cement mortar. Why? Because foam from constant loads from a person’s legs is broken over time.
Installing the entrance door to the apartment photo
 Here you will need to orient it so that all the planes of the new door take a clear position in relation to the vertical level. To begin with, we set the level on that part of the door frame on which the hinges are located and, substituting wooden bars or wedges under the lower opposite corner of the box, we achieve the required position of the door block. In principle, if the door is assembled correctly, then putting the rack with hinges in level, all other indicators of the evenness of the door installation should be normal. Except perhaps the plane of the door to the wall of the opening. This is what should be done next.

In conclusion, considering the topic, installing the front door with your own hands, I want to note the fact that after sealing the box with foam, it is better not to use the door for 6 hours – during this time the foam will harden and finally fix the door in the opening.
everything you need to know about the installation of entrance doors
After purchasing the entrance doors, installation is necessary, which some owners of apartments and houses decide to carry out on their own. If you study the process, prepare the necessary tools and materials, everything will work out. It is recommended to work with a partner, since the sash is quite heavy, you will need help with measurements and installation. Consider the 5 main stages, which usually go through the installation of entrance doors. To begin with, about what is being prepared for work.
Entrance door installation tools
Depending on the dismantling and installation work to be done, different tools will come in handy. It is better to have the maximum set at hand. You may need the following electrical appliances, fixtures and materials:
- perforator;
- Bulgarian;
- welding machine;
- nail puller;
- crowbar or axe;
- hammer;
- screwdriver;
- laser and classic level;
- tape measure;
- pencil and note paper;
- sharp knife;
- spray bottle with water;
- cement, sand, bucket and trowel;
- polyurethane foam;
- wooden wedges;
- pieces of rebar.
Dismantling
Before installing the entrance doors, remove the old structure. Actions may vary depending on the design of the housing and the state of the opening. In any case, first remove the door leaf from the hinges. It is heavy and will interfere with work. If the sash is fixed on the card sheds, the canvas is lifted with a crowbar, and the upper loop jumps off the inner rod. To remove one-piece hinges, unscrew the fixing screws.
The door frame is then removed. It is attached to the side of the room. Lightweight structures are fixed with anchors. If so, there will be hardware holes in the side box. If the anchors cannot be unscrewed, they are cut off with a grinder. Massive models are often fastened with pieces of reinforcement welded to the lugs.
Dismantling is sometimes done by a grinder. First, the gap is cleared from the mounting foam and cement mortar, and then the fasteners are cut out. In metal entrance doors, the trim is often welded to the box. The anchors are located on the side of the apartment. The platbands of wooden models are easily removed with a crowbar or pry off with an ax blade. When the fasteners are removed, take out the box.
Preparing the door opening
After dismantling, the opening in the wall may be damaged or slightly out of size. When measuring an opening with an old front door, it is not clear how much space is occupied by durable concrete or masonry, and how much mounting foam and plaster. The insulating material is completely removed. The doorway is prepared as follows:
- Examine the damage and assess whether the size of the door frame corresponds to the opening. If it is smaller, the material is removed with a puncher in accordance with the measurements of the door body. Let the gap between the box and the opening be 1.5-3 cm.
- The shape of the opening may be disturbed when the old housing is removed. If necessary, it is reduced by applying a cement mortar, or expanded.
- Loose sections of the opening are removed before masonry or concrete. Apply cement mortar to the required level. The fasteners of the box must be included in dense material. Then it is firmly fixed. Large chips and cracks are hermetically filled so that there are no drafts. Small roughness is acceptable – they will hide with mounting foam and putty.
- If the wall is made of fragile gypsum blocks or aerated concrete, the opening is reinforced with a metal crate. She will hold the entire door structure.
- Threshold can be reinforced with an embedded element – timber or brick. It is checked for strength and replaced if necessary.
Installation of the front door
Before proceeding with the installation, it is determined with the flanging – the location of the door frame. From the outside, it can be flush with the wall or recessed towards the living space. In the second case, breaking the doors becomes more difficult, however, the opening angle of the canvas is reduced. Also, there may not be enough space to install a second door. If the canvas is flush with the wall, the sash opens wide and there is free space in the slope towards the apartment.
Installation of the entrance door is carried out in the following steps:
- The product is dismantled to separate the frame and leaf, wiped from dust. The frame is installed first. Before removing the canvas, the position of the sash is marked with masking tape relative to the box at the top, bottom and near the lock.
- The frame is inserted into the opening and fixed with wooden wedges. The laser level checks the vertical and horizontal of all racks.
- The position of the box is precisely verified so that its mechanisms and locks work properly.
- Wooden wedges are used for leveling until the door block is in the correct position. First fix the rack with loops, starting from the bottom corner. Then – the top corner and the middle.
- The geometry is leveled. Check the correct fastening of the box by hanging the sash on the hinges, guided by the marks from the masking tape.
- Fix the lock post by level. Its position is checked in the closed position of the sash.
- Testing the operation of the lock. Estimate the position of the canvas in the open at 90 and 45 degrees.
- Grease the hinges.
3 methods of fastening the entrance door
Each model of entrance doors has one of the following types of fixation:
- On pins or anchors through the frame body.
At the factory, 3 holes are drilled in the profile of the side parts of the frame. Through them, hardware is hammered into the wall.
- Eyelets welded to pieces of reinforcement that are driven into the wall. This is a slightly more laborious method. Next to all the lugs, 2 metal rods are driven into the wall. They are welded to the eyelets.
- Anchors through eyelets. Holes for fasteners are pre-drilled in the wall.
After fixing the frame, the sash is put on the hinges. Check whether it evenly sat down, whether it runs smoothly when opening. If there are squeaks, lubricate the hinges again.
Gap Finishing
There are 2 ways to fill the small space between the box and the wall. Most often it is treated with mounting foam. It completely insulates the gap. Before starting work, the box and the sash are glued around the edges with masking tape so as not to get dirty. The gap is cleaned of construction dust and moistened with water from a spray bottle.
The foam is chosen with a low coefficient of expansion so that it does not create excessive pressure and does not deform the box. The voids are filled by about 70%, the composition is allowed to expand and solidify. Cut off the excess on the sides.
For increased strength, use a different method. The technological gap is filled with a thick mortar of cement and sand. The composition enters the metal U-shaped profile. Fasteners are hidden, sound insulation is increased. This method has a peculiarity. In the event of dismantling in the future, it will not be easy to remove the door frame.
Installing architraves
Installation of metal doors is often simplified by the fact that they are produced with welded architraves. Then the design is simply installed in the box. Platbands, made separately, are attached to it with rivets. Many models are sold with embedded locks and eyes. It remains to screw the handle. It is inserted into the nest and fixed with a hardware.