Removing bathtub: How to Remove an Old Bathtub
How to Remove an Old Bathtub
Bathtub removal is possible without hiring a pro. Just follow our 10-step guide.
By Katina Hazimihalis | Last Updated:07/13/2022
The Complete Guide to Removing a Tub
Whether you want to replace your tub with a walk-in shower or swap out a 70s-era eyesore for something more modern, planning a DIY tub removal leaves more money in your budget for the rest of your bathroom remodel. This project will take several hours and involve some heavy lifting, but a homeowner with some DIY savvy can accomplish it with a few tools you probably already have on hand.
We’re here to show you how to remove a bathtub without calling in a pro—and clear the way for creating the bathroom of your dreams.
DIY Bathtub Removal FAQs
How much does bathtub removal cost?
The average cost to remove a bathtub is $106, with a range of $68-$146. Of course, if you are removing the tub yourself, the cost will be what you pay for tools and disposal.
Can I remove a bathtub myself?
Absolutely. Your tub doesn’t even have to be detached. Just grab some tools and safety gear. Also, be prepared to do some heavy lifting—you may want to ask a buddy for help.
How to dispose of a bathub?
For broken, stained or cracked porcelain tubs, you’ll need to throw it away. Consider renting a dumpster for hassle-free disposal—it can be delivered right to your driveway so you save time and effort carrying the heavy pieces back and forth. Otherwise, you’ll have to wait for bulk curbside pickup or take several trips to the dump yourself.
Can I donate or recycle a bathtub?
Yes, just be sure that there are no stains or cracks in the porcelain. Places like Habitat for Humanity’s Habitat ReStore will gladly accept your old bathtub (and sink or toilet for a bathroom remodel). It may be possible to have them pick it up.
Donating your bathtub is a great way to keep it out of the landfill. Plus, if you are remodeling an outdated bathroom, your vintage fixtures will be popular at a local salvage store.
Remove a Bathtub Yourself in 10 Easy Steps
Step 1: DIY Bathtub Removal Tools & Supplies
Before getting started, gather the necessary tools to complete your bathtub removal.
To change out a bathtub, you’ll need:
|
Tools and Materials |
Safety Gear |
|---|---|
|
Screwdriver |
Safety glasses |
|
Wrench |
Work gloves |
|
Allen wrench |
Closed-toe shoes with study soles |
|
Jigsaw |
Face mask (optional) |
|
Prybar |
|
|
Drain key (for drain crosshairs) |
|
|
Tub drain extractor (no drain crosshairs) |
|
|
Putty knife and utility knife |
|
|
Drywall saw or reciprocating saw |
|
|
Plastic sheeting or old plastic bags for vent cover |
|
|
Roll off dumpster* |
*Depending on what city you live in, curbside trash pickup may not be an option.
Find a Dumpster for Your Bathroom Remodel
Step 2: Shut Off and Drain Water
You’ll need to do some quick prep work before you start tearing out your bathtub.
- Shut off the water to the bathroom at your home’s main water shut-off valve.
- Turn on your tub’s faucet to drain any water left in the pipes.
Pro Tip
Tape plastic sheeting over your vents to keep dust from spreading throughout the rest of your home.
Step 3: Remove Your Tub’s Hardware
Time to strip the faucet and drains from your tub. You can remove these in any order, but it’s often easiest to start from the top and work your way down.
How to Remove a Tub Faucet
- Scrape away any caulk between your faucet and the wall using a utility or putty knife.
- Check for a screw on the underside of your faucet.
- If there is no screw, grab the faucet with both hands and turn counterclockwise until it detaches.

- If there is a screw, use an Allen wrench to remove it. Pull the faucet away from the wall.
- Check the exposed pipe for an adapter—it will look like a piece of threaded metal on the end of the pipe.
- Disconnect the adapter by using an Allen wrench to remove the screw fastening it to the pipe.

How to Remove Faucet Handles
- If you have lever-style handles, use an Allen wrench to remove the screws holding them in place. Screws are usually found under the lever.
- For other handle styles, use a Phillips screwdriver to remove the screws. If screws aren’t visible, they’re probably under a “plug” on the front of the handle—often carrying the manufacturer’s logo. Use the tip of your screwdriver to pry off the plug and expose the screw.
- After removing the screws, slide the handles off the valve stems by pulling them toward you. If the handles are stuck, spray on a coat of WD-40 and wait 10 minutes before trying it again.

How to Remove Drain Covers and Drains
- Unscrew the drain cover using a screwdriver or Allen wrench.
- Pry up the cover and pull it from the tub.
- If there are no screws, just pry up the cover with a screwdriver or putty knife. If it won’t come out when lifting it straight up, try twisting it counterclockwise, as it may be threaded in.
- Find the screws on the overflow drain cover. They’ll either be located on the cover’s face or under the bottom edge of the faceplate.
- Use a screwdriver or Allen wrench to remove them.
- Locate the access panel for your bathtub’s pipes on the other side of the wall behind your tub.
- If there is no access panel and the bathroom is on the ground floor, check the basement ceiling under your bathroom. If they aren’t accessible from your basement, you’ll need to cut through the drywall behind your tub to reach the pipes.
- Locate the main and overflow drain pipes.
- Disconnect both pipes by turning the nuts counterclockwise with a wrench.

How to Remove Bathtub Drain Flange
A drain flange—also referred to as drain basket or drain body—is the visible part of the drain in the bathtub.
- Remove the stopper.
- Toe-touch stopper: Unscrew it counterclockwise.
- Push-pull stopper: Pry open and twist it counterclockwise.
- Lift and turn stopper: Unscrew it counterclockwise, then yank out the post.
- Trip-lever stopper: Take off faceplate and pull the hardware out.
- Unscrew the bathtub drain.
- Clean the drain opening so you can remove the drain basket or flange easier.
- Insert the drain key onto the drain crosshairs and use a wrench or pliers to clamp onto the key. Then, turn the drain key counterclockwise to unscrew the flange.
Don’t have drain crosshairs?
- Grab your tub drain extractor if your drain basket doesn’t have crosshairs. The extractor will grip the walls of the drain flange.
- Clamp your wrench on the extractor tool and rotate clockwise to remove.
- The drain should come out after a few rotations. However, if it’s an older drain you may need to blow hot air on it first, which helps soften the plumber’s putty.
 The extractor will grip the walls of the drain flange.
Keep in Mind
If your drain is in poor condition from rust or calcium build-up, you may not be able to unscrew the clog. Don’t hesitate to use extra force or ask someone for help.
Step 4: Take Down Tile
To remove your bathtub, you’ll first need to tear out the surrounding tile. Here’s what to do:
- Score the tile grout with a utility knife up to about 8 inches from the rim of the tub.
- Pry off the tile with a putty knife.
- Repeat until all tile has been removed.
Step 5: Cut Through Drywall
Now that you can see it, it’s time to get rid of the drywall:
- Cut the drywall into manageable pieces with a drywall saw. Be careful not to sink your saw in deeper than half an inch to avoid cutting into studs. If your walls are plaster, use a reciprocating saw for this instead.
- Use a prybar to pull the drywall pieces from the studs.
- Carry debris to your dumpster so you’ll have a clear, safe work area for the next step.
 Be careful not to sink your saw in deeper than half an inch to avoid cutting into studs. If your walls are plaster, use a reciprocating saw for this instead.
Step 6: Remove Screws Securing the Tub
You’re in the home stretch! Time to finally work on the bathtub. First, through, you need to get rid of what’s holding it to the wall.
- Locate any screws securing the tub to wall studs.
- Detach any caulk that might be covering the top of the screw.
- Remove the fasteners with a screwdriver or prybar.
Step 7: Cut Away Caulk
There’s still one place where the bathtub is attached to your bathroom: the floor. Luckily, it’s easy to detach it:
- Cut through any caulk between the tub and floor with a utility knife.
- Push on the tub gently to ensure the caulk seal has been broken.

Step 8: Pry the Tub Out
It’s time to do some heavy lifting. You may need a friend for this step.
- Pry the tub a few inches away from the back wall using your pry bar.
- Check the space behind to make sure it is fully detached from the wall.
Step 9: Saw Tub Into Smaller Pieces
Bathtubs can be quite heavy. Make the job easier by cutting the pieces down to size.
- Cut the tub with your jigsaw near the drain so that you now have two pieces.
- Continue cutting the tub until you feel confident you can carry the pieces.
Step 10: Remove and Dispose of Each Piece
You’ve put in all the work, now it’s time to finish the job and get the tub out of your bathroom.
- Work with a helper to pry each piece up and pull it out of its space.
- Use caution when removing the piece with the drain hole to avoid damaging pipes.
- Carry each piece to the dumpster.

So, You Removed Your Bathtub – Now What?
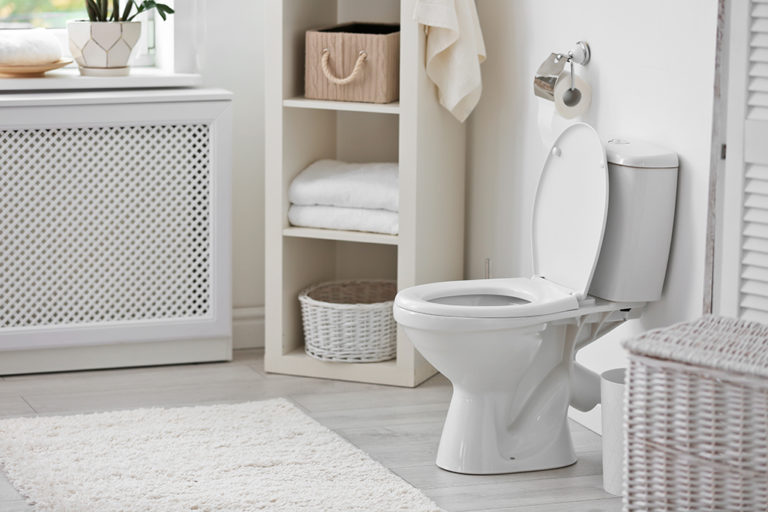
If you’re gearing up for a full-scale remodel, changing out an old tub is just one piece of the puzzle. Use our bathroom demolition guide to completely gut your bathroom. With tips for tearing out your vanity, toilet and more, you’ll save money by giving your contractors a clean slate to start from.
Other Sources
Cost to Remove a Bathtub. (2022, January). Retrieved from Homewyse.com
Franco, M. How to Remove a Bathtub Drain. (2021, June 4). Retrieved from Homeserve.com
What Do You Think?
Have thoughts on bathtub removal and disposal? We’re listening. Head over to Twitter or Facebook,
and use #dumpstersblog to join the conversation.
Need a Dumpster for Bathtub Disposal?
Call 833-499-7510
Request a Quote
How to Remove a Bathtub
By
Lee Wallender
Lee Wallender
Lee has over two decades of hands-on experience remodeling, fixing, and improving homes, and has been providing home improvement advice for over 12 years.
Learn more about The Spruce’s
Editorial Process
Updated on 07/17/22
Reviewed by
Johnathan Brewer
Reviewed by
Johnathan Brewer
Johnathan Brewer is a home improvement expert with over two decades of professional experience as a licensed general contractor specializing in kitchen and bath. He has been featured on HGTV’s “Super Scapes,” “Curb Appeal the Block,” “Elbow Room,” DIY Network’s “House Crashers,” “This Old House,” and OWN Network’s Emmy award winning show, “Home Made Simple.” Jonathan is also a member of The Spruce Home Improvement Review Board.
Learn more about The Spruce’s
Review Board
Fact checked by
Jessica Wrubel
Fact checked by
Jessica Wrubel
Jessica Wrubel has an accomplished background as a writer and copy editor, working for various publications, newspapers and in public libraries assisting with reference, research and special projects. In addition to her journalism experience, she has been educating on health and wellness topics for over 15 years in and outside of the classroom.
Learn more about The Spruce’s
Editorial Process
kbwills / Getty Images
Project Overview
Removing the bathtub opens up space for fresh opportunities—a new bathtub, a shower conversion, or clearing the area for a vanity, countertop, or storage.
Unless you plan on a complete bathroom tear-out, removing the tub is a delicate process that preserves as much of the building materials as possible. With careful planning, it is possible to remove the tub while minimizing damage and mess.
Before You Begin
Removing a bathtub is a two-part process: first, detach the tub from plumbing and surrounding building materials; second, lift the bathtub out of place and move the tub from the bathroom.
Detach Tub and Remove Obstacles
Bathtubs are solidly attached to a number of places. Methodically removing these attachment points and obstacles will free up the tub so it can be lifted out. Attachments and obstacles might include:
- Bathtub drain
- Overflow drain
- Fixtures
- Caulk
- Tile, acrylic, or fiberglass surround
- Drywall or cement board
- Fasteners
Remove Bathtub
Lifting a standard alcove bathtub out of its enclosure presents unique spatial and weight challenges.
Once the plumbing has been detached and the tub surround has been removed, one end of lightweight acrylic or fiberglass tubs can be lifted until the tub is vertical or nearly vertical. In this position, the tub can easily be rotated out of the enclosure.
Steel or cast-iron bathtubs’ weight, combined with the awkward lifting position, make these tubs more difficult to remove with this method. The tub can be lifted out by cutting away a couple of key wall studs and swinging one end of the tub outward.
Another method is to open one section of the wall and slide the tub straight out. Or you can break up the tub with a sledgehammer or cut it in half with an angle grinder.
Removing the tub from the bathroom without damaging walls, the toilet, or the countertop is best accomplished with a helper. But if you are alone, you also have the option of sliding the tub out on blankets or wheeling it out an appliance dolly.
Safety Considerations
Wear eye, breathing, and hearing protection when removing the bathtub, especially when breaking up or cutting up the tub. Shut off power to the area before breaking into the walls. When removing wall studs, make sure that this is not a load-bearing wall.
Equipment / Tools
- Pry bar
- Flat-head and Phillips screwdrivers
- Cordless drill
- Drill bits and drivers
- Drain plug wrench
- Pliers
- Caulk-stripping tool
- Electric oscillating multi-tool
- Sledgehammer
- Personal protection: eyes, hearing, breathing
Materials
- Garbage bags or other receptacle for removed items
Detach Tub and Remove Obstacles
-
Turn off Water
Turn off the water supply to the bathtub.
Intermediary controls might be located nearby behind an access panel. If there are none, locate the home’s main water shut-off valve and turn it off.
-
Remove Bathtub Drain
First, remove the drain stopper. Next, turn a plug wrench or clamping needle-nose pliers counter-clockwise to remove the drain assembly. Completely remove the piece and clear out any remaining plumber’s putty with your fingers.
-
Remove Overflow Drain Grate
With the flat-head or Phillips screwdriver, turn out the screw that holds the overflow drain grate to the front side of the bathtub.
-
Remove Fixtures
Unscrew the bathtub faucet by hand by turning it counter-clockwise out of the wall. Remove faucet handles by unscrewing the center screws. Some handles may have plates covering the screws which can be pried off with a flat-head screwdriver.
Tip
The bathtub faucet and controls usually are not attached to the bathtub.
While they do not have to be removed, it’s usually a good idea. This helps you avoid accidentally breaking them off when the tub is removed. -
Peel out Caulk
With a caulk-stripping tool or a screwdriver, scrape away all caulk between the bathtub and the wall surround.
-
Remove Surround
All bathtubs will have a waterproof surround made of tile or synthetic material. Surrounds extend over or against the bathtub’s top integrated flange, effectively trapping the tub in place.
Synthetic tub surrounds must entirely be removed. Use the prybar to peel them off. Start at the top or side of the tub surround.
With tile surrounds that you wish to preserve, often just the top one or two rows of tile need to be removed. Remove sections of tile by grinding out the grout with an electric oscillating multi-tool fitted with a masonry blade, then prying off the tile with a pry bar or cold chisel.
-
Remove Drywall or Cement Board
If any drywall or cement board found beneath the tub surround acts as an obstacle to tub removal, it must be removed.
The drywall or cement board may extend over the top integrated flange or it may butt directly against the top of the flange. In either case, the materials need to be fully or partially removed.
Use the pry bar and cordless drill to remove these materials.
-
Unscrew or Pull out Fasteners
Nails or screws driven through the top integrated flange attach the bathtub to the wall studs. Pull out nails with the pry bar or the claw end of a hammer. Turn out screws with the drill.
Tip
For troublesome fasteners or just to save time, cut off fasteners with the multi-tool equipped with a metal-cutting blade.
-
Extra Items
Assess the tub for any other obstacle or attachment point. Sliding glass shower doors must be removed. Whirlpool tubs must be unplugged and all hoses detached or cut.
Bathroom flooring that butts up against the bathtub’s front apron should be removed now if you intend to remove it anyway.
Otherwise, leave it in place.
 Intermediary controls might be located nearby behind an access panel. If there are none, locate the home’s main water shut-off valve and turn it off.
 While they do not have to be removed, it’s usually a good idea. This helps you avoid accidentally breaking them off when the tub is removed.
 Otherwise, leave it in place.
Remove Bathtub
-
Break up Bathtub (Optional)
If the bathtub will be sent to a landfill or its materials recycled, it’s sometimes fastest to break or cut up the tub in place.
Break up a cast-iron bathtub by hitting it with a sledgehammer. Start at the front edge or at the apron.
An angle grinder fitted with a metal-cutting blade can cut through a metal bathtub, too. Make one cut, either widthwise or lengthwise. Push the two pieces together by a few inches, then remove them individually.
-
Tilt Bathtub up to Vertical
Light-weight bathtubs can be tilted upward from the end opposite the drain overflow. First, fit the hook end of the pry bar over the top of the flange. Then, lean over the tub, propping your free hand against the long wall behind the tub. Pull up on the pry bar.
Once you have lifted the tub a few inches, quickly remove the pry bar and switch to using your hand.
Keep pulling up until the tub is vertical. It helps to have an assistant control the far side of the tub so that it does not get caught on the overflow-and-waste pipe.
Warning
Once you have lifted up the tub a few inches, insert a two-by-four in the area between the wall and the tub. This provides a safety buffer for your hand in case the tub drops back down.
-
Remove Studs
Often, the tub will not have enough room to tilt upward due to studs or wall materials on the lifting side. You may need to remove horizontal two-by-fours at the level of the integrated flange. Or you may need to remove a vertical stud at the corner of the tub to help the tub swing out. If it is deemed necessary to remove any framing, it may be necessary to hire a professional to avoid any possible problems that might occur and any subsequent repairs needed thereafter.
Tip
Generally, the more wall space that you can free up, the better your chances of cleanly lifting the end of the tub.
-
Loosen Tub Apron
If the tub will not be saved, another trick with metal tubs is to bend the apron corner forward. Often, this will provide enough room to clear the wall and swing the tub out.
Or, if you have enough space to reach behind the tub apron, metal supports can be unscrewed and removed. This loosens the tub apron and gives the tub more flexibility.
-
Move Tub Out of Bathroom
- Carry Tub: If you have an assistant, you can carry the bathtub out of the bathroom. One person at each end of the tub picks up the tub with gloves. Then, rotate the tub 90 degrees. This reduces the tub’s width to between 15 and 18 inches so it will fit through the bathroom door.
- Slide Tub: If the bathroom flooring will be replaced, you can slide the tub directly across it and out the door. Or, use thick blankets as padding to protect the floor and to help with sliding.
- Wheel Tub: Heavy bathtubs can be moved with appliance dollies.
Bathtub Weights Type of Bathtub Weight Metal 60-inch alcove tub 65 to 75 pounds Acrylic 60-inch alcove tub 60 to 70 pounds Acrylic 60-inch whirlpool tub 90 to 120 pounds Modern rolltop cast iron tub 350 to 400 pounds Older cast iron bathtub 400 pounds+
 Keep pulling up until the tub is vertical. It helps to have an assistant control the far side of the tub so that it does not get caught on the overflow-and-waste pipe.


How to Remove a Bathtub
Photo: istockphoto.com
Maybe you dream of upgrading to a modern jetted model, or simply want to switch to a stall shower to gain square footage—whatever your reason, that old bathtub has got to go. While a cast iron tub of yesteryear can weigh as much as 500 pounds, removing it yourself (well, with three or four strong friends) is entirely doable. You’ll need the right tools, of course, and some plumbing know-how is helpful when disconnecting drainage and water supply lines. But if you follow the procedures outlined here, the process of removing a bathtub should go smoothly.
Before starting, protect the floor from damage by laying down sheets of plywood. And keep in mind that your junk may be another homeowner’s joy: Cast iron claw foot tubs can fetch as much as $800 on the salvage market, and the feet alone could net you upwards of 40 bucks!
Tools & Materials
- Screwdrivers
- Needle nose pliers
- Pipe wrenches
- Water pump pliers
- Saw with metal blade
- Grinder with diamond bit
- See full list «
- Chisel
- Utility knife
- Crowbar
- Safety goggles
- Sledgehammer
- Rust-removing solvent
- Pipe plugs
- PVC cleaner
- PVC glue
- Plumber’s putty
- Plumber’s tape
- Push-to-connect end caps
Step 1
Shut off the water supply. Freestanding models generally have a shutoff valve on the exposed line that runs to the faucets, but for other bathtubs you may need to turn off the h3O to the bathroom or even the entire house. Open tub faucets and another faucet in the house to bleed the water pressure off the lines. When no more water runs from the tub faucet, you’re ready to move on.
Advertisement
Step 2
Remove the overflow and stopper assembly. These vary slightly by bathtub, but typically the overflow consists of a plate with one or two screws that holds a stopper lever. Once the plate is unscrewed and removed, slip the lever hook off the linkage bar with your fingers. Next, disconnect the stopper from the drain by unscrewing or pulling, depending on type.
Step 3
Remove the drain flange with a dedicated drain flange removal tool, or stick a pair of needle nose pliers in the drain flange, twist counterclockwise, and pull. If yours is a freestanding tub, gather your able-bodied buddies: You might be able to lift it up and off the drainpipe at this point. For built-ins—or if the drain flange on a freestanding tub is stuck—proceed to the next step.
Need a hand with that?
Find licensed removal experts in your area and get free, no-commitment estimates for your project.
Find Local Pros
+
STEP 4
Detach the drainpipe. For a freestanding tub, reach underneath and cut through the drainpipe close to the bottom of the bathtub with a reciprocating saw that is fitted with a metal blade. For built-in tubs, you’ll have to gain access from below, through a basement or crawlspace, to disconnect the drainpipe. Use pipe wrenches or water pump pliers to grasp and twist the pipe loose at a connection. If the joints are glued PVC, cut the line with a reciprocating saw.
Photo: istockphoto.com
STEP 5
Cut away a horizontal strip of wall about 6 inches above the bathtub to reveal the tub flange, and remove any screws that secure the flange to the wall studs. You can use a reciprocating saw to cut wallboard, but take care not to cut the studs or any mechanical elements, such as wires or pipes that might be in the stud spaces. If the wall is tiled, use a grinder with a diamond blade to cut through a horizontal grout line and then pop off the individual tiles below with a chisel.
STEP 6
Cut away caulking around the bathtub with a utility knife, and then pull the tub out and onto the plywood. If the bathtub sticks, carefully pry it loose with a crowbar. As soon as you pull the bathtub, stuff a large rag in the top of the now-open drainpipe to block smelly sewer gases; this will also ensure nothing gets accidentally dropped into the line. In high concentrations, sewer gases can be toxic and flammable, but the small amount that filters out of the tub line will be more obnoxious than hazardous.
STEP 7
If the old bathtub has value and you wish to salvage it, remove the feet (which should twist off) counterclockwise. If rusted in place, spray with a rust-removing solvent to loosen. Then carry it out with the help of your friends. Take some measurements first, however: You may need to pull hinge pins and remove a door to gain enough space to fit the bathtub.
Advertisement
If the tub is worthless to you, cover it with an old, heavy towel or blanket and put on goggles and a long-sleeve shirt for extra protection from flying chips. Then break the tub into manageable pieces with a sledgehammer. You can also cut steel, fiberglass, and plastic tubs into smaller pieces with a reciprocating saw.
STEP 8
If you have no plans to install a new bathtub in the old one’s place, you’ll need to terminate the water supply and drain lines. Terminating a drainpipe involves removing the drain trap and the drainpipe back to at least the nearest plumbing connection. Then you can install a cap or plug on the pipe. The process will vary slightly depending on your piping:
- For PVC, cut the pipe with a reciprocating saw, and then clean the pipe end with PVC cleaner. Next, apply PVC glue to both the end of the pipe, and on the inside of a matching PVC cap, and slip the cap over the end of the pipe.
- For galvanized pipes, use pipe wrenches or water pump pliers to loosen the pipes at a joint, and then install a corresponding cap or plug, using plumber’s putty and plumber’s tape to hold the cap in place. If you run into a cast iron trap (very hard, dark metal), or a lead trap (so soft, you can nick it with a knife) that connects to a cast iron drainpipe, call a plumber to cut it to avoid breakage. It’s difficult to cut cast iron pipe without specialized tools.
 If you run into a cast iron trap (very hard, dark metal), or a lead trap (so soft, you can nick it with a knife) that connects to a cast iron drainpipe, call a plumber to cut it to avoid breakage. It’s difficult to cut cast iron pipe without specialized tools.
STEP 9
In order to terminate the water supply lines, you need access to the stud space behind the faucets. If the tub installer did not put in an access panel in the room on the opposite side of the faucets, you’ll have to open up that section of the wall with a reciprocating saw in order to reach the water supply lines.
Advertisement
Once you have access, remove the faucet(s). Pop off the caps with a flathead screwdriver, removing the screws. Then use a pipe wrench to remove the faucet sleeves and stems. The spout may have a setscrew on the underside, or the whole thing might twist off, counterclockwise. After cutting the water supply lines, cap them with corresponding push-to-connect end caps.
With the tub out and both water supply and drain lines successfully sealed, you’re free to repurpose all of that newly opened square footage however you’d like! Whether you plan to turn the room into a half-bath with storage for linens or keep renovating until the entire space is a dreamy walk-in closet, rest assured that the bulk of the work (literally) is done.
Need a hand with that?
Find licensed removal experts in your area and get free, no-commitment estimates for your project.
Find Local Pros
+
How to Remove a Tub to Install a Shower | Home Guides
By Shala Munroe Updated December 01, 2021
When you’re ready to give up your old and dated bathtub and install a more modern stand-alone shower in your bathroom, the first step is removing the old tub. This sometimes requires you to cut the tub into pieces so it can fit through the bathroom door. Unfortunately, it often also requires you to remove the drywall surrounding the tub, which means you must replace the drywall before installing your new shower.
How to Remove a Tub to Install a Shower
-
1. Protect Your Flooring
Tape dropcloths to your bathroom floor to protect it and help with cleanup. If you have a tile floor, add cardboard as well to cushion the tile from falling tools or damage along the edge of the tub when you remove it.
-
2. Shut Off the Water
Turn off the water to the bathroom at the main water-shutoff valve. Test that the water is turned off by trying to turn on the water in the bathtub.
-
3. Remove the Drain Cover
Remove the drain cover and overflow drain cover by loosening the screws with a screwdriver. Use a flat-head screwdriver to pry up the covers if necessary.
-
4. Remove the Faucet Knobs
Pop off the covers on the faucet knobs if you have a hot and cold knob.
Remove the screws and pull off the knobs. If you have a single water adjustment handle in the middle of the shower, remove the screw holding the plate cover in place. Unscrew the screw on the back of the handle and pull it off. -
5. Remove the Faucet
Look under your faucet to see if there’s a screw holding it in place. If so, use an Allen wrench to loosen the screw, then pull the faucet away from the tub. If there’s no screw, turn the faucet counterclockwise until it pulls easily away from the tub, says DIY School.
-
6. Access the Pipes
Locate the pipes that attach to the tub. If you have a basement or garage under the bathroom, you might be able to access the pipes from below by standing on a ladder. If not, use a drywall saw to cut through the drywall in the room behind the bathtub to access the pipes.
-
7. Disconnect the Drain Pipes
Disconnect the two drain pipes – the main drain and the overflow drain – from the tub by tightening an adjustable wrench onto the locking nuts and turning them counterclockwise.
-
8. Release the Surround From the Drywall
Cut a line through the caulk surrounding the bathtub and the acrylic tub surround, if you have one, using a utility knife, instructs Home Depot. Pry the edge of the surround away from the drywall with a claw hammer, then pull on the surround to release it from the drywall. If it doesn’t separate easily, cut into the drywall with a utility knife 1 inch above the surround and pull the drywall and tub surround away from the studs. If the surround is screwed in place, remove the screws with a screwdriver and pull the tub surround away from the wall.
-
9. Remove the Tub
Cut through the tub near the middle with a jigsaw to separate the tub into two pieces. Pull straight up on the back piece, then slide it over the other piece slightly to give you room to pull it away from the tub wall, having a friend help you. Remove the second piece as well by pulling it back and up, away from any exposed pipes.
Alternatively, you can cut an angled piece out of the bottom front corner of the tub to help you lift it up and out of the walled-in tub area. This makes it more difficult to remove through the narrow bathroom door, so measure the door before trying to move the bathtub in one large piece.Things You Will Need
-
Dropcloths
-
Painter’s tape
-
Cardboard
-
Allen wrench
-
Screwdriver
-
Adjustable wrench
-
Ladder
-
Utility knife
-
Drywall saw
-
Claw hammer
-
Jigsaw
-
Measuring tape
Tip
Installing the shower where a bathtub once sat requires some advance plumbing skills to move the drain, which usually sits in the center of the shower floor, and the water-control knob, which is typically higher in showers than in bathtubs or shower-and-tub combinations.
Warning
Buy a shower surround that comes in at least three pieces.
A one-piece shower and surround that fits the space of a bathtub is likely too big to fit through your home’s doorways. -
 Remove the screws and pull off the knobs. If you have a single water adjustment handle in the middle of the shower, remove the screw holding the plate cover in place. Unscrew the screw on the back of the handle and pull it off.
 Alternatively, you can cut an angled piece out of the bottom front corner of the tub to help you lift it up and out of the walled-in tub area. This makes it more difficult to remove through the narrow bathroom door, so measure the door before trying to move the bathtub in one large piece.
 A one-piece shower and surround that fits the space of a bathtub is likely too big to fit through your home’s doorways.
References
- DIY School: How to Remove a Bathtub Step by Step Process
- Home Depot: How to Remove and Replace a Bathtub
Tips
- Installing the shower where a bathtub once sat requires some advance plumbing skills to move the drain, which usually sits in the center of the shower floor, and the water-control knob, which is typically higher in showers than in bathtubs or shower-and-tub combinations.
Warnings
- Buy a shower surround that comes in at least three pieces. A one-piece shower and surround that fits the space of a bathtub is likely too big to fit through your home’s doorways.
Writer Bio
Based outside Atlanta, Ga., Shala Munroe has been writing and copy editing since 1995. Beginning her career at newspapers such as the “Marietta Daily Journal” and the “Atlanta Business Chronicle,” she most recently worked in communications and management for several nonprofit organizations before purchasing a flower shop in 2006. She earned a BA in communications from Jacksonville State University.
Removing and Replacing Your Bathtub in 11 Steps
Looking to replace your old bathtub with a cleaner new model but don’t know how to get rid of the old tub? Well, you are in luck, because the process is surprisingly simple. Simple, not easy, however. So, first and foremost, be sure to ask for assistance-whether it be professional or just another person to help you with the heavy labor, because you will surely need it and your safety comes first, especially with a project that includes something as heavy as a bathtub.
To feel the quality of stone resin, simply request a free material sample from Badeloft.
Removing a bathtub
To properly remove your old bathtub, first, before all other steps, is to make sure your area is safe and prepped. This means keeping your workspace unobstructed by people and other objects-this may mean removing vanities such as sinks or toilets out of the way depending on the size of your bathtub. In any DIY job, safety comes before any other step, so please, make sure your area is clear and that you have enough room to maneuver both your body and your bathtub as well. Remember that installing a new bathtub will be highly labor intensive, so best not to take any chances when it comes to small inconveniences that may result in highly preventable accidents down the road. In short, move your toilet or sink out of the way, regardless of the small hassle.
Getting started: Common Questions about removing and installing a new bathtub
How long does it take to remove a bathtub?
Depending on your skill and knowledge level, anywhere from 3-4 hours to half a day, depending on the setup and layout of your bathroom.
What tools do I need to use?
First and foremost, you should not undertake any part of this process without protective eye, ear and face wear. Gloves are required unless you are a seasoned professional. Beyond protective wear, you will need:
- An adjustable wrench
- An assortment of pry bars
- Screwdrivers of varying sizes
- Pliers
- Slip-joint and Channel-lock pliers
- Hammer
- Socket wrench
- Keyhole saw or a similar cutting device like a utility knife
Do I need to hire a professional?
An interesting question as some of these steps can be completed without professional help. But if this is your first removal/installation, consulting a professional is advised.
How much does it cost to remove an old tub?
The cost of removing an old tub will largely depend on many different factors such as the bathtub material or cost of the old tub or whether you hire professional help, but your price tag will start around $300+ starting at a minimum.
How to remove an old bathtub in 11 steps
1. Prepping the area
As stated before, please properly prep your area before starting. First, shut off your water and power, then remove any extra obstructions from the area, such as the toilet or vanities if you do not have enough room. For this step, you will need several screwdrivers, a small saw or keyhole saw. This step will usually take around 3-4 hours, depending on the size of your bathroom, so be prepared. If your bathroom is particularly complex, you may need to hire a professional for this step if you are unsure of how to remove your toilet and sink without any complications.
2. Removing the drain, faucet and other attachments
Now that your water is shut off and your area is prepped, you can begin by removing the drain, faucet and other attachments connected to your bathtub. This step may be a bit different depending on your drain type as many tub drains have different components that need to be carefully removed first, but typically many have easy to unscrew tops that allow you access to the drain flange on the bottom. Now that your drain flange is revealed, you will need a special tool sold at your local hardware store to remove the drain flange. After your flange is removed, use a screwdriver to disconnect the waste and overflow valve cover on the sides of your tub. For the next step, you will need to gain access to the underside of your tub, either behind the wall or the floor below the bathroom. You will need a pair of channel lock pliers to disconnect the pipes below the T-shape where the drain and overflow valve intersect. Once you’ve loosened the nut connected the drain pipe, unscrew it by hand and lift out the entire section. Now, with your major components dealt with, simply remove your tub spout so it will not be obstructing your installation. Many come with screws screw orientations that hold them in place, but if not, simply twist and turn counterclockwise.
3. Separating the tub from the wall
With your piping and drains sorted out, you now need to remove your old tub from the wall. Begin by measuring out and drawing a guideline all the way around your existing tub. Afterwards, cut out a section roughly 6-7 inches above your existing guideline on each side of the tub you are installing. Clear the wall so you have free access to the screws and nails securing the tub flange or lip to the wall. Now, remove the screws and nails all way around the top and sides of the tub with a pry bar and a utility knife. This would also be a good time to remove any trim molding on your alcove and to clean up any caulk in the area as well.
4. Removing/disposing of the old tub
Before continuing, it is highly advised that you have assistance on this next step, as it can be quite dangerous on your own. Now, to dispose your old tub, grab some 2x4s, about 2-3 and have one person lift your tub while the other slides them onto the 2x4s, allowing your tub to get off the floor while also functioning as skids. Above your tub, there will be a crosspiece of wood that supports the edge of the bathtub and reinforces the installation, this is known as ‘stringer’ piece. You will need to remove any stringer supports left on the wall as well. With the area free, you may now clean out any debris or loose nails that occupy this area before installing your new bathtub.
Now, how will you dispose of your old tub? Well, that question will largely depend on what type it is. Cast iron can be broken up into smaller pieces with a sledgehammer while other materials such as porcelain, fiberglass and acrylic can be removed whole with some assistance. Please contact your local sanitation department for best method of disposing of your old bathtub. If you have questions regarding the disposal method, you can simply contact your sanitation department for further information.
5. Choosing a correct bathtub
With a free space available, you are now ready to pick your new bathtub. Measure the width and depth of your available space to determine what kind of tub you need. Though, if you don’t want to relocate or re-orient your plumbing, you can simply follow what direction your drain opening is. Facing your space, if the drain opening is on the left, you need a left drain tub, if it appears on the right instead, then a right drain tub. This of course is not set in stone, though some plumbing work will be required if you simply just want a different bathtub, regardless of orientation and of course, before installing, make sure that your floor is level, and if not, use a leveling compound to even it out.
6. Protecting your tub during the move
Although this step mostly pertains to porcelain and fiberglass, it is good practice to protect your bathtub from fractures and drop impacts regardless if they can weather it or not. So, before installing, keep your new bathtub packaged, and when removed, cushion it with cardboard to prevent any of the exposed surface to be damaged before installing.
7. Securing the new tub
Now, with assistance, using the same method as before, you will set your new tub onto the 2x4s that you used to remove your old tub and slide it into place. Once placed, check the levels and if necessary, use spacers to even it out-you want to have no gaps between your bathtub and the wall if possible once it is fully installed. Now, take a pencil and mark the reference line of all the studs all the way around your bathtub. Once done, remove your tub and put it aside.
8. Installing a new stringer
With your studs and rivets marked, you will need to take the height of your bathtub and measure that same distance below the reference line on each stud. This will serve as the mark for the top edge of the new stringers you will need to install. Cut some 2x4s the length of your new tub and use deck screws to fasten them to the studs on the new reference marks you made.
9. Now attach the overflow drain/installing a new bathtub drain
Now, we are ready to install your new bathtub! So, to start, we need to turn the tub on it’s side and install it according to the manufacturer’s specs. Afterwards, you should take a bit of plumber putty or any loose based polymer and wrap it around the underside of your new drain flange. Position the drain shoe on the underside of the tub and screw the drain flange into the new threads. Secure it completely with the drain tool you used to remove it any then scrap off any excess putty. Now, to connect the overflow valve or drain, you need to place a rubber gasket onto the overflow elbow pipe and position it behind the bathtub and attach the cover plate inside. Afterwards, connect the overflow pipe and the drain pipe, resulting in an intersecting ‘T’ formation. Install the drain strainer onto the flange to wrap it up.
10. Securing the new tub and testing it out
With your plumbing sorted, carefully move the bathtub back into place. If done correctly, the drain flange should rest on the stringer that was installed along the back wall. Also, the drain and overflow plumbing from your bathtub should be aligned with the rough-in drain outlet in your bathroom, or more specifically the drain along the floor. At this step, be sure to connect all the pipes together and tighten snugly. Reattach your spout and shower peripherals and test out your bathtub.
11. Double check your work and install new molding and walling
Now, hopefully with the previous step, everything is running fine without any further incident. Double check your plumbing before securing the studs with roofing nails, securing your bathtub entirely. Word of caution, please do not drill the flange, and instead use the head of the fastener instead to hold it down otherwise you risk damaging the exterior. Reinstall your baseboard, and apply moulding in front and along the tub. Finally, reapply your drywall and apply waterproof paint to restore the walls you took out initially for installation. and your screws and nails before lining your bathtub with more chalking
Common Mistakes when installing a new tub
The most common mistakes made when installing a new tub come from inexperience. With limited knowledge, there is alot that can go wrong, from damaging the bathtub, incorrectly installing plumbing aspects or at their worst, injuring yourself and others. Of course, if you can DIY this project, it can be rewarding, as well as an immense time saver, but if you are inexperienced, we recommend you take this project in steps. You can always DIY some of the less complicated aspects, while some of the more advanced parts of the project we recommend hiring a professional to assist both for your time and safety concerns.
When removing your old bathtub, please take all the proper precautions and remember that safety comes first, no matter what hassle, so do yourself a favor and research what you can easily do and what you may need a professional for.
How to Remove a Bathtub (SAFELY!!)
Jeff Patterson
May 17, 2016
Bathroom Plumbing, DIY Bathroom Remodel
Today you’ll learn how to remove a bathtub.
But first, I lied by accident.
In my tutorial on how to remove a bathroom floor I said we were keeping the bathtub.
But it turns out that was a BAD idea.
You’ll see why this was necessary and get a sneak peak at the new tub.
Tub removal isn’t all that bad.
Although I did have some funny moments and palm to face incidents!!
Bathtub Removal Supplies
Here are the supplies you need to remove a bathtub
- Gloves
- Safety Glasses
- Respirator
- Hammer
- Super Bar
- Reciprocating Saw
- Utility Knife
- Channellock Pliers
- AutoCut Copper Pipe Cutting Tool
- Impact Driver
- Impact Driver Bits
- Duct Tape
- Rags
- These Amazon Links help support Home Repair Tutor, many thanks for using them
What’s the first step you should take?
How to Remove a Bathtub…Safety FIRST
First things first, place duct tape over your tub drain.
This stops debris from going down the drain and clogging your pipes.
Small but powerful tip.
Turn the water off to the house – do this at the main shutoff. Which is usually in the basement (at least here in Pittsburgh) or garage.
Then drain the water.
I did this in the kitchen.
Turn the electric off.
The tub I was removing was a whirlpool tub.
So it had electric running to it.
The last thing you want is to get shocked while removing a tub.
That’s a bad obituary.
Remove the shower curtain and curtain rod
Remove the shower head
If you’re reusing the shower head here’s a tip.
Place a rag over it.
Use your Channellock pliers to loosen it from the shower arm.
This prevents the channel locks from scratching the shower head finish.
Our shower had an old school 3 handle setup.
If your shower looks the same remove the screw from the handle.
Pull the handle and escutcheon off the shower stem.
I had to, ahem, coax the handle off the stem with my Channellocks.
This is the escutcheon
Remove the stems from the shower plumbing by turning them counterclockwise.
This is where Channellocks come in handy, love LOVE these to death.
Check the tub spout for a set screw.
If you have one, loosen it with an allen wrench.
Turn the tub spout counterclockwise or simply pull it off the copper.
These are the very first steps for a tub removal.
The fun demo is next…
Tub Surround DEMO (fun times)
If you need a cathartic experience demoing a tub surround is the answer.
Grab a super bar and hammer.
Side note: any project with a hammer is fun, right!!
Pound the super bar behind the tub surround and pry it loose.
Not a bad idea to cut silicone caulk at the corners and tub.
In this example our tub had FRP (fiberglass reinforced plastic) on the main wall.
That’s what I’m prying off.
But you’ll likely have a one piece or three-piece fiberglass tub surround.
Cut the corners of the tub surround with a reciprocating saw.
This makes pulling the surround off the wall pretty straight forward.
If you have plaster or drywall behind the surround remove it with a hammer.
This plaster was nasty. It’s over 100 years old!!!
Repeat this process for the plumbing and back wall of the tub.
Before you can tear out the tub you need to tackle the plumbing.
This is easy.
Tub Plumbing…the FINAL Swan Song
A few weeks back I showed you how to install shut offs in a tub.
Well, that was done before I decided to demo this tub, haha.
That said if you’re keeping the copper plumbing, you’ll love these tips.
Cut the copper pipes using an AutoCut tool (by far my favorite copper pipe cutter).
Then slide on SharkBite shutoffs.
Yep it’s that easy.
Although I recommend checking out the full tutorial on how to install SharkBites.
My video shows you all the details of the next several steps.
You have to remove the tub overflow and drain.
I almost forgot to take out the tub drain which was kind of funny.
Watch the video to see me suck in my stomach to get the tub out of the house!!
What’s Next
We also have videos showing how to remove a toilet and how to remove an old flooring from a bathroom (6 layers!!!).
If you’re doing a bathroom remodel and need help, join one of our online courses – they’ll make your bathroom renovation much easier!
Let me know if you have any questions and I’ll do my best to help.
Cheers,
Jeff
Remove a Fiberglass Bathtub and Surround
How to clean the bathroom from yellow stains: simple ways to whiten the bath
Taking a bath is a very pleasant process, it allows you to relax, unwind and recharge with positive energy for the whole day. But this pleasant pastime can be damaged by the aesthetic component – the presence of yellow spots and plaque on the bath. Perhaps, each of us in life at least once had a question, how to clean the bath from yellowness? In this article, you will find great ways to clean the bath from yellow stains and what products to use.
Does the bath cover matter when choosing a cleaning agent?
The process for how to remove yellow spots on an acrylic bath and a similar procedure for an enamel coating can be very different. It is very important to choose the right tool and not damage the surface.
How to clean an acrylic bath from yellowness?
Acrylic bathtubs love gentle care – abrasive products and cleaners containing alcohol can damage the sensitive acrylic coating, so when choosing how to clean an acrylic bathtub from yellowness, it is better to turn to liquid sprays or gels. The chlorine content isn’t as bad for acrylic surfaces, so in addition to getting rid of stains, you’ll be able to kill any harmful bacteria effortlessly.
What products should I use for an enamel bath?
Enameled bathtubs are not suitable for cleaning with strong acids or bleach. The use of such enamel cleaners can contribute to the appearance of rust in the future.
How to clean the bath from yellow plaque at home** ?**
Mini-survey
Has the process of cleaning the house changed during the self-isolation regime?
No, cleaned the same way as before
0%
Yes, cleaned more often
0%
Yes, used disinfectants more often
0%
Yes, I have started cleaning with a vacuum cleaner, special cloths, sponges, etc. more often.
0%
0 vote(s)
There are many ways to remove yellow stains from acrylic bath or enamel surfaces, but there are a few that are particularly effective, which we will try to tell you about.
4 effective techniques to get rid of yellow stains in the bath:
All you need is a good cleaner and protective rubber gloves (because you definitely don’t want to sacrifice your velvety skin in the name of cleanliness). Be sure to try any new product on an inconspicuous surface before using.
1. Cleaning products
The easiest option. The choice of remedy depends on the coverage, as we noted above, as well as on your personal preferences. If you want a whiter result that also kills all harmful bacteria, opt for chlorine-based products such as Domestos spray or gels. We’ll warn you right away – bleaching products are more suitable for light-colored baths. Of course, when using chlorine-containing products, it is better to first test them on a small area of \u200b\u200bthe coating and be sure to wear gloves.
2. Soda solution
Grandma’s remedies never fail. And in the case of how to clean the bath from yellow spots, this is also the case. A solution of soda with hydrogen peroxide will help you in this matter. The solution should be of the consistency of gruel, and it should be applied to the surface of the bathroom with a soft sponge. Then leave the bath for about half an hour, and rinse everything with warm water. Before using this and other cleaning methods, be sure to test it on a small area of the surface.
3. Vinegar solution
Vinegar solution is particularly effective for removing stains from acrylic and marble bathtubs. This is a natural remedy that allows you to get rid of not only limescale, but also yellow stains and soap stains. It is necessary to dilute 0.5 liters of vinegar in warm water and leave for at least 4 hours. After that, drain the water and carefully wipe all remaining stains with a sponge.
4. Shampoo
The most unexpected but well-deserved contender for cleaning your bath. When you don’t have cleaning products on hand or don’t have time to dilute the ingredients, shampoo can be a great way to go if you’re wondering how to get yellow stain out of your tub. Therefore, if you need to quickly get rid of plaque or soap stains in a quick way, feel free to pay attention to the shampoo in your bath as a cleaning agent. After using this method, you need to thoroughly rinse off the residue to avoid soapy deposits.
For deep cleansing and the fight against all harmful bacteria, we advise you to try Domestos gentle bath gels and sprays. Just be sure to test any new product on a small, inconspicuous surface and read the instructions carefully.
-
Choose products according to the bath surface.
-
Wear protective rubber gloves.
-
Test any product on a small area of the bathroom to avoid damage.
-
Store cleaning products in a safe place out of the reach of children.
Cleaning the bathtub and shower, removing limescale with a steam cleaner
In the shower cabin and bathtub, stubborn dirt builds up over time on ceramic surfaces, ceramic tiles and shower screen. Soap-limescale, which is formed when hard water is mixed with soap, often cannot be removed with conventional cleaning products. However, a few helpful tips and the right tools will guarantee you an excellent result.
How is soap and lime scale formed?
When the fatty acids found in ordinary soap react with hard water salts, a soap-lime scale is formed. After washing in the shower or in the bath using shampoo or shower gel, this plaque forms constantly – it appears on tiles, ceramics, glass and plastic surfaces and gives them an untidy look. Water alone can’t do it anymore. And even after cleaning with a conventional cleaning agent, a greasy layer often remains on the surface. Therefore, in such cases, it is recommended to use a special cleaning agent. If this option does not suit you, stubborn dirt can be removed with a steam cleaner or home remedies.
Descaling with a steam cleaner
Soap residues and dirt in the tub and shower can be very gently removed with hot steam. In addition, the steam cleaner can be used to treat any surface, including stone tiles, which allows you to clean the entire shower or bath at once, including plumbing fittings.
Cleaning order:
- Use a hand-held nozzle with a microfiber cover for cleaning, on insensitive surfaces an abrasive microfiber cover can be used.
- In steam mode, use the hand nozzle to scrub dirty surfaces on ceramic tiles, glass surfaces and ceramics. Lime-soap deposits are dissolved and collected with a microfibre cloth. For large surfaces, you can also use a floor nozzle – this will speed up the process.
- To remove limescale deposits from taps, use the round brush in steam mode.
- Steam can also be used to clean the drain if necessary.
- After cleaning, wipe dry all surfaces with a microfibre cloth or vacuum with a glass cleaner and everything is sparkling clean again.
Effective household bath and shower cleaners
A mixture of vinegar and dishwashing detergent also effectively removes soap residue. Both components should be mixed in a container or spray bottle with water. Apply a mixture of vinegar and dishwashing detergent generously with a sponge or spray bottle to the surface and leave for a few minutes. Then wipe off the remaining soap and wash off all residues from the surface with clean water. Treat glass surfaces with glass cleaner or remove deposits with a steam cleaner. Coatings on plumbing fixtures are often easily damaged by contact with acids, so the mixture should not be left on for long periods of time and should then be rinsed off with plenty of clean water. You can also use citric acid. Dissolve 3-5 tablespoons in 1 liter of water and treat the surface with a solution. The advantage of citric acid: unlike vinegar, it has no smell.
You can also use baking powder or baking soda instead of dishwashing detergent. So much vinegar should be added to them to make a paste. Then you need to rub this paste into the surface and leave for 10-15 minutes. After that, rub with a sponge until the lime-soap deposits are dissolved and rinse off the residue with clean water.
Caution: stone tiles are sensitive to acids, so home remedies such as vinegar and citric acid are not suitable for cleaning.
Removing soap and lime scale with cleaning agents
Soap and lime scale is effectively removed by cleaning agents. However, the following points must be observed:
- To prevent the cleaning agent from being absorbed into the tile joints, they must first be wetted.
- The excess water must then be removed from the ceramic tiles to avoid a decrease in the concentration of the cleaning agent. To do this, you can use, for example, a vacuum cleaner-glass cleaner.
- Using a soft, non-scratching sponge or mop, apply the alkaline cleaner (undiluted) in stages to the surface and leave for 3-5 minutes. Then rub the surface again. To remove limescale and soap deposits, you can also use cleaning products for plumbing.
- Then rinse surfaces with clean water until all cleaning agent residue is removed.
Good prevention: against soap residue and limescale
It is better not to postpone the removal of limescale in the bathroom. If you regularly clean and take into account a couple of points, you can avoid tedious scrubbing in the future. These recommendations will help prevent the rapid formation of soap and lime deposits in the shower or bath:
- After each shower or bath, all surfaces should be rinsed with cold water. This allows the soap residue to be removed.
- Always dry the walls of the shower stall or bathtub after use with a cloth, a rubber-edged shower scraper or a glass cleaner to prevent the formation of residues and lime deposits.
- If you have a bath screen, shake or dry it after showering.
- To avoid scale build-up on plumbing fixtures, wipe them dry with a microfiber cloth.
By the way, this way you can prevent the formation of mold in the bathroom.
Suitable bath and shower cleaning products
Steam cleaners
Cordless wipers
Bathroom cleaners
You may also be interested in:
Mirror cleaning
Bathroom cleaning
Kitchen cleaning
How to remove black mold in the bathroom and bring it out forever?
The bath is one of the most comfortable places in the apartment. To make it as comfortable as possible, we make expensive repairs, resort to the services of a designer. But there is one thing that will nullify all attempts at improvement – black spots that suddenly appear, which are almost impossible to remove. How to remove black mold in the bathroom and get rid of it forever? We will tell you.
Causes of black mold
The ideal conditions for the appearance and reproduction of the fungus are humidity and heat. For both of these conditions, the bathroom is the best place. Infection is very simple: basic spores can be contained in building mixtures, on workers’ tools, but most often they enter through ventilation.
Thus, no housing has guaranteed protection against the appearance of mold colonies.
What factors contribute to black mold in the bathroom?
High humidity
It forms a favorable nutrient medium for microorganisms. First of all, this is condensate, which penetrates into poorly insulated cracks between tiles, into the porous surface of walls and ceilings (if they are painted or wallpapered).
UV free
Direct sunlight is the main enemy of the fungus. However, not all apartments can boast of having windows in the bathroom; for the northern latitudes, the problem becomes more acute due to the low annual insolation.
Poor ventilation
Warm, moist air can linger in the bathroom for a variety of reasons. The most common is clogging of the ventilation shaft or design and construction errors. This is one of the most common causes of mold.
No special treatment
If antiseptics were not used during construction or repair, then the fungus will appear sooner or later with a probability approaching 100%. And given that special compositions (or the inclusion of special substances in finishing materials) have been used relatively recently, and not all developers include them in the finish, then such processing becomes mandatory for all apartments and houses.
Rating of cast iron heating radiators of 2022
We present to your attention the rating of the best cast iron radiators
heating in 2022 in terms of quality and reliability, made on the basis of feedback from buyers and sellers of the Lanskoy shopping center, as well as professional experts . ..
..
How to remove black mold from the bathroom?
The extraction process can be divided into several stages:
- determining the depth of the lesion – if the black spots are superficial, then they can be cleaned, if the colonies have penetrated deep under the tile or into the plaster to the ceiling, then repairs are needed;
- examination of the affected areas – check not only the obvious areas (faucet, bathtub, sink), but also heated towel rails, the space under the bathroom, all tile joints, the ceiling;
- elimination of the factors that led to the appearance of mold – ensuring the full operation of the hood;
- total cleaning using industrial or folk remedies, as well as mechanical cleaning;
- treatment with antiseptics;
- regular inspection of the condition of surfaces.
Start cleaning
Before taking decisive action, let’s decide how to deal with mold in the bathroom without compromising our own health. Remember: mold causes many diseases.
If it enters the body with inhaled air, it can cause allergies, skin diseases or provoke serious illnesses up to tuberculosis.
The second factor is working with active compounds for removing the fungus, which can lead to burns of the mucous membranes, respiratory tract and skin. Therefore, it is necessary to use personal protective equipment – long-sleeved clothing, a mask or respirator, goggles and rubber gloves.
Of the tools, it is better to use a scraper and a hard toothbrush, you can use the Effect sponge if the surface is scratch resistant. Of the products that can be bought in the store, it is recommended to use those that contain chlorine – the fungus is afraid of it.
Which faucet is better – single lever or double lever?
Plumbing fashion is no different from the general one: the same trends of returning to the past and its rethinking according to the principle “it used to be better!”. When the first lever-operated faucets came on the market, they immediately became a hit – primarily because of their convenience. However, later the valves returned to the shelves and fashionable interiors. Which mixer is better – single-lever or two-valve? Let’s see.
Folk remedies that help remove mold from the bathroom forever are also widespread:
- copper sulfate – 100 grams per 10 liters of water, apply with a brush, as it is caustic;
- tea tree oil – effective for small areas affected, no need to wash off, but you should refrain from taking a bath and shower for 12 hours;
- soda slaked with vinegar – apply soda to the surface, then pour vinegar on top: it is assumed that the resulting foam will clean the porous material well, besides, the vinegar itself is quite caustic;
- a mixture of water, vinegar, hydrogen peroxide and boric acid in a ratio of 4x2x2x1 – moisten a cloth and wipe the affected areas;
-
borax (1 cup) per 2. 5 liters of water – also treat the affected area with the resulting composition.
 5 liters of water – also treat the affected area with the resulting composition.
How to get rid of black mold permanently?
So that after removing mold from the bathroom you will never meet it again, you need to follow simple rules:
- install a forced exhaust in the ventilation duct – this will help reduce the level of humidity;
- “warm floor” will help surfaces dry quickly;
- do not dry clothes in the bathroom;
- do not arrange a hammam from the bathroom – in the following materials we will tell you how you can make a bath at home;
- regularly clean and treat surfaces with antiseptic compounds.
We have collected for you the most important information on how to remove and get rid of black mold in the bathroom. Specialists of the Lanskoy plumbing stores will advise you on how to avoid excessive waterlogging and avoid the appearance of new colonies of unexpected “guests”.
#Tile
#Shower
#Lifehacks
HOW TO CLEAN A BATH FROM 5 TYPES OF POLLUTION
A smooth, glossy surface looks like new only for the time being. The remnants of washing-shaver, impurities in the tap water do their job – the bath loses its shine, yellow-brown spots, soap stains are visible here and there.
Don’t despair, there are a couple of working ways to clean different types of surfaces without damaging them.
If the washing machine suddenly breaks down: 6 most common malfunctions of washing machines
How to clean an acrylic bathtub
Snow-white and colored, different shapes, light, well retaining heat – there are a lot of advantages of such a product, which determines the popularity of models. But acrylic bowls are quite “capricious” in care. The material is afraid of mechanical damage, scratches and even deep grooves on the surface may appear from cleaning compounds with abrasive particles.
Therefore special products are needed, which are marked “for acrylic baths”. What it can be:
- Spray – applied by spraying, it is convenient because it allows you to process even hard-to-reach corners of the structure, for example, if the model is not oval, but of a complex shape (with protrusions, curly roundings, etc. ).
- Gel is a liquid agent, the consistency may be more or less thick. Allows you to gently, without scratching, clean the surface of contaminants. Foams upon application.
 ).
). Separate products additionally disinfect the surface, fight mold and fungus, various microbes.
The above options are suitable not only for new products, but also for restored bowls coated with liquid acrylic.
Powder type products (including soda, dry bleach) are not used to prevent damage to the top layer of the bath and loss of its original presentable appearance.
You may be interested in: Which sink is better – stainless steel or artificial stone: 5 reasons
How to clean a cast iron bath
Products are made by casting, they are very strong and durable. The cast-iron bowl is resistant to scratches and tolerates chemicals well.
The most budgetary option – universal powder products, also used for cleaning stoves and sinks, various surfaces made of enamel, ceramics. When using them, some care must be taken so that small hard grains do not leave their mark on the surface.
Mild abrasives and mild acids may be present. They will help to remove even the most difficult pollution faster and better.
To whitewash a cast iron bath, you can use:
|
Product type |
Features |
| Paste or cream | Available with and without chlorine. One of the advantages is economical consumption. It is enough to apply a couple of “peas” of a creamy product on a damp surface and rub it well throughout the bathroom, then rinse with water. In addition to cleaning, it gives the bath a shine |
| Nebulizers (aerosols, sprays) | After applying the compound, wait the time specified by the manufacturer for the composition to work, usually within 5-15 minutes |
| Liquid products | There are fairly inexpensive eco-friendly options. For example, which include apple cider vinegar and citric acid. This also includes gels that are easily distributed over the surface, gently cleaning it For example, which include apple cider vinegar and citric acid. This also includes gels that are easily distributed over the surface, gently cleaning it |
In addition to ready-to-use special equipment, you can use homemade “preparations”. For example, mix soda with a small amount of water and clean the cast-iron bowl with the resulting solution.
Cleaning the enameled bathtub
The overall appearance of the bathing tank and its service life depend on the appearance and condition of the enamel layer. Chlorine, abrasive particles, acids leave scratches on the surface, which over time can turn into fairly deep cracks, where mud and soap deposits fall. This is fraught with the appearance of corrosion, the destruction of the material and the final damage to the appearance of the enamelled bath, the impossibility of its further use.
Therefore, we resort to the help of products with a gentle composition (without chlorine, concentrated acids and alkalis). The best choice is professional products for cleaning plumbing from dirt, which with a bang cope with water stains, soap stains, rust and other things. In the characteristics of such detergents, among the permitted surfaces, “enamel” should appear.
From home remedies, you can use a powder that is used for hand washing or in an automatic machine. What to do:
- Pour 2-3 tbsp. powder in a bowl.
- Add ≈1 st. warm water.
- Mix until the mixture is uniform.
- We take a sponge, dip it into the solution and walk along the enameled surface.
The only thing left to do is to rinse the bowl with water.
Article to help: The washing machine does not turn on – what to do
Getting rid of various contaminants
It is not enough to rinse the “font” after each use if there are persistent, hard-to-remove stains and drips on the surface. It happens that universal products make the bath cleaner, but they do not cope well with a specific type of pollution. What is there to help? There is only one way out: to study the options of how and what substances affect one or another type of pollutant.
Yellowness
Tap water looks clear and clean, but in reality it contains many impurities (for example, iron) that can significantly spoil the original color of the bathroom. In addition, after bathing, small “puddles” remain on the surface, which, when dried, turn into yellowish spots.
There are proven options for cleaning the bath from yellowness:
- Dry bleach. It is produced for bleaching fabrics, but there are options marked that they are also suitable for cleaning sanitary ware to a shine: faucets, bathtubs, heated towel rails. We dilute the powdered substance with water 1 to 1. You should get something like a “slurry” of thick consistency, with which we evenly lubricate the entire surface or local spots. Wait for 30 minutes and rinse thoroughly.
- Toothpaste. Given the large surface of the bathing containers, you will need a whole tube of paste to process it all.
Therefore, we use the paste either to eliminate small yellow spots, or we specially buy new packaging for whitening. You can choose the cheapest options. The algorithm of use is simple: apply the paste to the problem area, wait 5-10 minutes, rinse with water.
Check out: Top 5 Towel Racks for Bathroom
Rust
It is unlikely that many people wipe the tub dry after every bath. Remains of water, constant moisture in the room gradually do their job, provoking the appearance of rusty streaks and brown spots.
We share ways “from the people” how to clean the rust from the bath:
- Hydrogen peroxide. We use it together with one of the components: ammonia or sodium salt. We mix the two ingredients in proportions of 1 to 2. We apply the resulting substance to places with rust, wait 10-20 minutes. and wash off.
- Lemon juice. It is enough to take a piece of lemon, bring it to a rusty spot, squeeze out some juice and wait a bit. After that, it remains to wash the problem area and wipe it with a dry cloth.
- Soda. Mix it with a little warm water. We rub the resulting substance over the surface of the bathroom, using a sponge, wash off the remnants with a water jet.
 After that, it remains to wash the problem area and wipe it with a dry cloth.
 Limescale
If cleaning filters are not installed, hard tap water will cloud glossy and shiny surfaces. Whitish smudges gradually cover the faucet, shower.
How to clean the bathtub from old plaque:
- Vinegar. We take a sponge, drip a little vinegar on it and wipe the places where there are whitish marks. It is better to wash off with a water jet not immediately, but to wait a few minutes to “corrode” the plaque.
- Citric acid. Removes plaque not only inside the kettle, but also on the surface of the bathroom. One bag of lemon + water, mix well, achieving maximum dissolution of small grains. We process the surface with the mixture, wait 10-15 minutes and finish cleaning by rinsing the bathroom.
- Soda + peroxide. We mix one with the other and apply a “boiling” substance to places with lime deposits. Then wipe thoroughly with a clean, dry cloth.

Soap scum
Shampoo, powder, shower gel residues invariably leave their mark in the bathroom. Soap streaks and stains do not decorate the surface at all, so we effectively fight them:
- Liquid soap. As a substitute, a washing gel, dishwashing detergent can be used. We apply a liquid product on a washcloth / sponge and wash the surface, do not forget to rinse thoroughly after.
- Soda. We stir a little powder with water and three places with the resulting mixture where there is plaque. For the best effect, you can leave for 20-30 minutes, and then rinse with water.
Stubborn dirt
If, for some reason, regular maintenance of the bathroom has not been carried out, deposits of all kinds of dirt will appear on it. To remove a dense plaque, you will need several components and more time.
How and how to wash the bath from ingrained dirt:
- Soda-acetic solution. First, go over the surface with a damp washcloth with soda, then with vinegar. Or you can fill the bath with warm water, add a glass of vinegar and leave for a couple of hours.
- Lemon + water. Mix 1 to 1. Apply to the surface and wait at least half an hour, then rinse with warm water.
Gels, creams, pastes, foams and the like also work well against old mud deposits. There are concentrated detergents for especially polluted places. The composition (surfactants, acids, auxiliary additives) is selected in such a way as to fight plaque, soap stains, rust, and fungus.
How not to ruin the bath when cleaning?
Stick to the basic principle – do no harm. For this:
- Be sure to consider the type of coating: acrylic, enamel. In ready-made detergents, we check the composition and look for a note that they are allowed to care for a certain type of surface. If the bath is cleaned without chemicals, remember that enamel and acrylic can be damaged by abrasive particles, acids.
- Do not use wire or other hard brushes. No matter how durable the coating is, it will definitely suffer from a metal scraper. Therefore, we use soft napkins and sponges.
- Using concentrates correctly. In undiluted form, such products are suitable for removing strong localized contamination. The potent composition is applied to the entire surface only in a diluted form.
 If the bath is cleaned without chemicals, remember that enamel and acrylic can be damaged by abrasive particles, acids.
 There are a lot of life hacks on how to clean the bathtub at home. Your task is not to experiment, consider the type of coating, how much and how the surface is contaminated. If folk methods do not cope, a huge assortment of ready-made detergents is in the wings.
Useful: How to choose a heated towel rail: 10 options
Maintenance and care | JacobDelafon
MAINTENANCE AND PRECAUTIONS FOR USE
Ceramics
Do not use abrasive or chemically aggressive agents (hydrofluoric acid, rust removers, etc. ). After each use, wipe with a sponge and soapy water (with laundry soap or clear liquid dish detergent). Do not leave the tea bag or coffee filter for a long time.
Ceramic coated cast iron baths
After each use, wipe down the tub with a sponge and liquid detergent. Rinse with clean water and then wipe dry to prevent lime deposits. Do not use acid-based products (toilet scale removers, etc.), abrasive products or hard sponges. To dissolve limescale deposits, wash the bathtub with a cleaning solution, wipe with wine vinegar and rinse thoroughly. To remove stubborn stains, scrub the bathtub surface with a nylon brush and a cleaning cream such as Ajax or Cif. Avoid using a metal sponge or brush. To remove adhesive residue, wipe with acetone with enamel powder or sawdust. To remove detergent stains, use a solution of javelin water.
Acrylic bathtubs and shower trays
After each use, wipe down the tub with a sponge and liquid detergent. Rinse with clean water and then wipe dry to prevent lime deposits. Do not use abrasive or scouring powders, organic agents such as thinners, thinners, pickling agents, hydrocarbon-based agents, acetone, turpentine or industrial alcohol. Avoid contact with lit cigarettes. In case of surface damage in the form of scratches or dull spots, use fine-grained water-based sanding paper and liquid polish. Wipe with a soft cloth.
EVOK bath headrests, BIOVE
Clean only with soapy water and wipe with a soft and clean cloth. Do not use abrasive detergent, chemical or organic agents. Avoid contact with coloring substances (e.g. hair dye, concentrated bath products). In case of contact with one of these substances, rinse thoroughly with clean water. Under no circumstances should scrapers or sharp objects be used as there is a risk of damaging the surface of the cushion. Attention: never place JACOB DELAFON bath cushions near a heat source (eg heater, etc.). Avoid contact with a lit cigarette or open flame.
Hydromassage systems
Regularly clean the system. Once a month, fill the bath with detergent. Turn on the system for a few minutes and then drain. Repeat the operation with clean water for rinsing.
Mixers
In order to eliminate the unpleasant noise that can occur due to too much pressure, it is sometimes recommended to install a pressure reducer. Cleaning the Aerator: The aerator should be removed and cleaned regularly. Faucet maintenance: soapy water and a soft cloth. Do not use abrasive products or products based on hydrochloric acid.
Accessories
Use a mild dish detergent. Rinse and wipe dry immediately. Do not wash in dishwasher. Avoid exposure to high temperatures. Avoid prolonged exposure to moisture.
Countertop/Reconstituted Marble Countertop Washbasins
Material Characteristics
Composite material of polyester resin and a mixture of aluminum hydrate and calcium carbonate for coating plast concrete. The shell is cast from the same material.
Guarantees maximum compliance with hygienic requirements, excludes the reproduction of microorganisms.
The material is waterproof and does not absorb odors.
The following precautions must be observed when using:
• Maximum water temperature – 60°C. Hotter water may damage the surface of the product.
• Do not place hot objects directly on the surface.
• It is necessary to exclude any contact of the product with acids, soda, acetone, hair dye and bleaching agents.
Daily care
Do not use detergents, bleaches, acids or abrasives to avoid damaging the surface of the sink. Washing the sink is recommended with a soft cloth dampened with soapy water.
Stubborn stain removal
If for some reason the surface of the sink has lost its original luster or has scratches, contact the outlet where you purchased the product.
Maintenance and care for bathroom furniture
Information on finishing material – melamine chipboard and laminate
Characteristics of the material
Melamine is a decorative layer that is applied to fiberboard and chipboard (crushed wood fibers pressed into boards).
Laminate is a coating of several (usually three) layers of rough wrapping paper, covered with a decorative layer on top and glued to high-density fiberboard (crushed wood fibers pressed into boards). This material is stronger than melamine due to its thickness.
Melamine and laminate have a hard, non-porous surface. They perfectly meet the requirements of hygiene and are easy to care for. Under the influence of light (ultraviolet radiation), the color of the coating may change slightly over time.
Daily care
Clean regularly with a soft cloth or cloth (dry or damp) or a sponge (if wet, wipe thoroughly dry). After use, remove excess moisture from surfaces with a soft cloth or cloth. Particular attention should be paid to the edges of the product. As a result of the constant use of furniture polishing agents, the appearance of the surface may deteriorate: an unpleasant “greasy” film forms on it.
For general installation and care instructions, please refer to the Installation Guide.
Stubborn stain removal
Minor or recent stains: dry or wet cleaning with a soft cloth, cloth or sponge (if wet, wipe thoroughly dry).
Medium or relatively old stains: Use very hot water in combination with non-abrasive cleaners (bleach or soap). If this does not help, use denatured alcohol, gasoline or mineral spirits. Stubborn or very old stains: Apply bleach or a paste of dampened laundry detergent and leave overnight. If this does not help, solvents or weak acid solutions can be used (this is especially effective for removing lime deposits).
Material information – Lacquered surfaces
Attention!
The product is covered with a protective plastic film to prevent damage to the polished surface during transportation. However, the film does not provide impact protection. Care must be taken when installing the product.
Material data
There are three types of lacquered finish: glossy, matt and structured. It is obtained by applying polyurethane varnishes that are applied to the surfaces and provide a high quality finish. The material is highly resistant to fading, but after a few years there may be a slight change in color due to exposure to ultraviolet rays. Keep in mind that lacquered finishes are easily scratched, so care must be taken, especially when cleaning.
Daily care
It is recommended to wash varnished surfaces only with a sponge, using soapy water or a special glass cleaner, and then wipe with a dry soft cloth. After use, remove excess moisture from surfaces with a soft cloth or cloth. Particular attention should be paid to the edges of the product.
Removing some types of stains
New stains/food stains: Use a soft cloth to wash with mild soapy water. After processing, be sure to wipe with a dry soft cloth.
Nail polish drops: Remove with acetone-free nail polish remover. Before use, test the effect of the nail polish remover on an inconspicuous area of the surface.
Ink stains: Wipe with rubbing alcohol.
Finishing material information – Natural wood veneer
Material characteristics
Natural veneer is made from wood and glued onto a MDF or chipboard base, which is then veneered around the edge. Each panel is covered with a polyurethane protective varnish. Due to the natural origin of the veneer, a color transition between different fragments of the product is possible, and not one fragment exactly repeats the other. This makes each piece of furniture unique. The structure of the wood on different surfaces may also vary slightly, this is not considered a defect. It must be taken into account that veneer is a natural material: over time, under the influence of ultraviolet rays, the color of the product may change, but this, in particular, is the charm of natural wood.
Daily care
• After use, remove excess moisture from surfaces with a soft cloth or cloth. Particular attention should be paid to the edges of the product.
• Do not use strong detergents, bleaches or abrasive cleaners as they may damage the finish of the product. The product may only be cleaned with a soft, damp cloth and mild soapy water. Before use, it is necessary to test the effect of the soap solution on an inconspicuous area of the surface.
• Do not use wax polishes as they may damage the lacquered finish of the product.
• Do not hang damp cloths on the furniture to avoid damage to the surface finish, mold and bacteria growth.
Removing some types of stains
Fresh Stains/Food Stains: Wipe with a soft cloth and mild soapy water. Then be sure to wipe with a clean, dry cloth.
Nail polish: Remove with acetone-free nail polish remover. Before use, test the effect of the nail polish remover on an inconspicuous area of the surface.
Do-it-yourself bath restoration at home
Contents:
- Bath restoration methods
- We are preparing
- Restoration with two-component enamel
- Restoring a bath with liquid acrylic
- Updating with insert
- What is the best bathroom renovation?
Renovation of a bathroom is a long and costly undertaking. That is why we try to install beautiful and reliable equipment in the bathroom, which will serve without fail for many years and will not require replacement or repair. But even the highest quality plumbing loses its appeal over time – subtle, but gradually increasing cracks and dangerous chips may appear on the surface of the bath, the bowl itself darkens, acquiring a dirty yellow tint, and the enamel loses its smoothness. There are two ways out of this situation – to replace the bath with a new one or restore it. The first way will significantly burden your budget and require several weeks to re-equip the bathroom, the second way is a more economical solution, and the restoration of the bowl takes much less time. So, what is the restoration of the bath at home?
Ways to restore bathtubs
If you decide to restore the surface of the bowl yourself, then first you should choose the option that suits you. There are currently three restoration methods in use:
- two-component enamel coating;
- filling with liquid acrylic;
- installation of acrylic liner.
Each solution has its own characteristics that must be taken into account. But before proceeding with the restoration, you need to carefully prepare the surface of the bath. The final result depends on this stage of work: high-quality pre-treatment ensures that the new coating will last a long time, while illiterate preparatory measures will lead to rapid wear of the restored surface.
Preparing
Before starting work, prepare the tools and supplies you will need:
- abrasive scouring powder;
- hard brush;
- sandpaper;
- degreaser or thinner;
- brush with soft bristles;
- towel or lint-free cloth;
- protective materials and accessories (polyethylene for covering nearby objects, masking tape, rubber gloves, preferably a respirator).
If there are spots on the surface of the tub where there is already rust, prepare a rust remover as well.
Now get to work, paying attention to every centimeter of the tub.
- Clean the entire bowl, using powder and brush. Apply a special agent to places with rust, wait a while and wipe the surface well.
- Without rinsing off the cleaning agent, abrade the surface with sandpaper until powder marks appear. If you have a grinder, then use it – this will greatly facilitate the work and allow you to complete this step faster. Do not forget that the entire structure should be sanded, including the outer parts.
- After finishing sanding, rinse the tub. Make sure that even the smallest particles are not left in it. Dry surface of and apply solvent or degreaser.
- After removing the compound, fill the bathtub with hot water for 10-15 minutes, then drain the water and dry well with a towel or non-woven cloth that is lint-free and does not leave marks.
 Apply a special agent to places with rust, wait a while and wipe the surface well.
 At this step you can get rid of visible enamel defects and overgrown cracks. If there are such damages on the bowl, then put putty on them, and after drying, sand them with sandpaper. Again, remove all debris and once again walk over the surface with a solvent.
After you make sure that the bathtub is clean, cover the faucet with plastic wrap, protect all surfaces adjacent to the bowl with masking tape, disassemble the siphon and be sure to place a container under the drain hole where the excess of the new coating will drain. Now your bath is completely ready for restoration.
Restoring with two-component enamel
Restoring a bathtub with enamel is an inexpensive and easy way. It should be borne in mind that enamel preparations are quite caustic and have an unpleasant odor, so should use a respirator. Also don’t forget to wear rubber gloves.
Mix enamel and hardener according to instructions. The finished composition has a consistency like that of paint, so it will not be difficult to act. Cover the entire surface with the prepared mixture, using a brush. First go with horizontal strokes, then vertical. When you finish applying the first layer, pause for 10-15 minutes and start covering the tub a second time without waiting for the previous layer to dry completely. Pay special attention to the bottom of , as this is where the coating experiences the most stress.
The sprayer makes it easier to apply enamel. If you have such a device, then use it, but also be careful and make sure that there are no unenamelled areas.
After the coating is complete, leave the bath for 5-7 days until the enamel has completely hardened. It is advisable to ensure cleanliness in the bathroom at this time, avoid getting any solid particles, drops of water and other liquids on the surface. If these conditions are met, you will get a new smooth bowl, with rich color and a soft sheen. A bathtub restored with two-component enamel will serve you for several years.
Restoring a bath with liquid acrylic
Liquid acrylic (glass) is a convenient way to update your bath. Stacryl – also a two-component composition, the mixture is prepared immediately before application. Unlike enamel , stacryl does not have an unpleasant odor. The material is suitable for the restoration of both acrylic bathtubs and bowls made of other materials, in particular, the restoration of a cast-iron bathtub with liquid acrylic is widespread, which allows not to give up the advantages of traditional cast iron, but to make the bathroom modern and more practical.
A few words should be said about glass itself. Its chemical properties make it possible to create a fairly dense coating 4-6 mm thick on the surface. In the process of application, the composition does not spread, but remains viscous, so it is very easy to distribute it over the bowl. Stakryl hardens slowly, which means that it can be distributed without haste to the corners of the bath, and if shortcomings are revealed, then calmly correct them.
Recall that an already prepared surface is treated with liquid acrylic. After mixing the compositions in accordance with the instructions, you need to pour a small amount of the resulting mixture into a container. Do not forget to put a bucket or jar under the drain hole to collect the excess. Next, part of the mixture must be poured onto the upper edge of the bowl; when the mixture, flowing down, reaches about the middle, you can start moving along the side, pouring it with liquid acrylic. When the mixture in the container runs out, add a new portion and continue. After going through the entire bath along the perimeter, repeat the process, but now start not from the sides, but from the middle of the bowl. Don’t skimp on stacryl – excess amount will drain into the jar under the drain, and the resulting coating will be dense and smooth. If you notice that the mixture has bubbled, then simply go over this area with a spatula. After finishing the treatment, leave the bath to dry completely. As a rule, it takes up to 4 days. This restoration technology allows you to get a beautiful design, and its service life will be 10-15 years.
Upgrade with an inlay
Inserting a new acrylic inlay is a quick and demanding way to get a new bathtub. In this case, it will not be possible to completely restore the bath with your own hands, since the insert is produced only at the factory by individual order. But inserting it yourself is quite within the power of any adult, the main thing is to follow the sequence of actions and be careful.
First, the bath is cleaned and degreased according to the algorithm described above. Then, on the new bowl, the places where the drain and overflow holes will be located are marked. It will be very convenient to do this as follows: on the structure requiring restoration, a coloring material is applied to the drain and overflow points. It can be paint, but you can also use toothpaste, which is always in the bathroom. Then the liner is inserted into the bowl, pressed tightly and then removed. On the reverse side, you will see prints exactly in those places where there should be holes, which are drilled to make new drains and overflows.
Now the old surface should be treated with sealant and foam, and the compositions should be applied to the bottom, and to the walls, and to the sides of the bath. Next, without delay, you need to insert the liner into the old bath and press it well. As a rule, the insert is made in such a size that it can be inserted into the old bowl with little effort, this should be taken into account. Once the liner is in place, you can stand in the tub where the drain is, removing your shoes, and slowly walk sideways across the bottom to ensure a full fit. The walls must be firmly pressed by hand, making sure that they are in place. If you see excess adhesive or foam on the sides, then simply remove them. Design the drain and overflow using old or new equipment, plug the drain and fill the tub with water. This step must not be ignored, otherwise the foam may swell during curing and cause deformation of the liner. After 12-24 hours, the water descends. Your updated bathtub is ready to use. The earbud manufacturers claim that they are retain their properties for 10 years.
What is the best bathtub renovation?
If your bathtub really needs to be refurbished, then you will have to think about the choice of technology. It is impossible to unequivocally answer the question of which bathroom restoration is better. If you have time and can not use the bathroom for a week, then give preference to inexpensive two-component enamel. If you want to get a better coating, then liquid acrylic is your choice. In the event that you do not have time to wait and you are ready to allocate funds for restoration, then stop at the acrylic liner. We add that no matter which method you choose, in the future you will need pay attention to the bathtub, do not wash it with abrasive and aggressive products and carefully care for the coating, removing all dirt in a timely manner.
Separately, it should be added that bath restoration by the described methods is only suitable for cases where the coating does not have significant defects. If your plumbing fixtures already have very noticeable cracks or chips near the drain, or the bowl is deformed, then repair will not help you, in such situations the only way out is to buy a new bathtub.