Painting roller vs spray: Spraying vs. Rolling Paint: Which is the Best Method?
Spraying vs. Rolling Paint: Which is the Best Method?
Photo: depositphotos.com
Whether you’re painting a room or the siding on your house, you have quite a few decisions to make. Color choices, types of paint, and application methods are probably at the top of the list. That’s right, brushes and rollers aren’t the only way for a homeowner to apply paint anymore. Paint sprayers are now options for all skill levels. For the do-it-yourselfer, these spray guns are small, hand-held, and use compressed air to apply a fine mist of paint.
Using a paint sprayer may sound like a faster application method, but that’s not necessarily the case. The surface, its location, and how much time you have are factors to consider when picking your tool for your paint job. Read through all the pros and cons of spraying vs. rolling paint to see which tool and technique best suits your project.
Photo: depositphotos.com
Spraying paint isn’t as easy as you may think.
If you’ve never used a paint sprayer before, the first time may not be as easy as it looks. Achieving an even coat with a paint sprayer takes a lot of trial and error. Beginners often experience drips, runs, uneven coverage, and get paint all over the place. But that doesn’t have to stop you! Sprayers come in affordable models that are easy to use and are perfect for practice. If you can spare a bit of paint to test your spraying skills, by all means, give it a try.
Rolling paint could be just as fast as spraying.
Most DIYers consider spraying vs. rolling paint because they think they’ll get the project done in a fraction of the time. That’s not necessarily true. When you use a sprayer, the time you save in application you’ll spend assembling your tools, carefully masking the area (more on that below), and cleaning up. The prep work with spraying takes so much longer than with rolling paint that the total project time comes out to about the same.
Advertisement
Another thing to consider: If you’re interrupted or tire of rolling, stopping your project and continuing another day isn’t a big deal—you can quickly wash up your roller or stow your paint-covered tools in a zip-lock bag to keep them fresh until you resume. But once you’ve filled a sprayer with paint, you’re committed until you’re done as paint left in the sprayer’s hose or gun will dry and cause clogs.
Consult a paint professional
Get free, no-commitment project estimates from paint experts in your local area.
Find a Pro
+
Photo: depositphotos.com
Rolling paint is the frugal homeowner’s choice.
Affordable, entry-level paint sprayers start at around $100, with most quality brands costing twice that and more. Even renting a paint sprayer could cost you $40 a day. Then, if you choose to use a sprayer anyway, you’ll still need to buy more paint: Sprayers use about 33 percent more paint than rollers do. For a fraction of the cost, rolling paint is the budget-friendly way to go.
Spraying paint reaches where a brush can’t.
With a sprayer, you can apply paint into the narrowest of crevices, something that’s difficult to do with a brush. This comes in handy for all the nooks and crannies of textured surfaces like popcorn ceilings, brick walls, crown molding, cornices, or lap siding, and hard-to-reach places on furniture. Also, because the sprayer aerates the paint, an experienced operator achieves a smoother finish without lap marks. However, sprayed paint won’t adhere to a dirty surface the way rolled paint will. So, if you plan to use a paint sprayer, always take the time to scrub the wall first for the best results.
Photo: depositphotos.com
Both a sprayer and a roller are messy.
Spraying paint not only requires masking off edges and trim, as you do with a roller. You also have to mask off every single thing you don’t want touched by overspray—windows, floors, and ceilings—either with film or a drop cloth. With either method, if you don’t mask properly, you’ll find yourself cleaning up your messes. The difference is that a roller may leave behind drips on the floor and swipes on the trim but a sprayer may cover surfaces in a fine mist.
Paint sprayers are best used outside or in empty houses.
The high risk of overspray involved with the use of a sprayer makes it best suited for outdoor projects or indoors in an emptied, unoccupied space. The time you’ll save in application isn’t worth the heartache if you find your masking wasn’t as thorough as it should have been. Just know that if you’re painting outside, a sprayer isn’t the best option for a windy day.
Advertisement
Photo: depositphotos.com
You can get the best of both worlds.
For textured surfaces like rough wood siding, get the speed of a sprayer and the superior coverage of a brush with back-brushing. For this technique, you’ll need a helper. One person sprays and the other uses a dry brush to immediately go over the paint with long even strokes as it’s applied. This gives you the speed of the sprayer while the brush evens out the coats and works the paint into the surface for better adhesion.
Get a pro to do it for you
Receive free, no-commitment estimates from pro painters near you.
Find local pros
+
Should You Spray On Paint or Roll It?
By
Lee Wallender
Lee Wallender
Lee has over two decades of hands-on experience remodeling, fixing, and improving homes, and has been providing home improvement advice for over 12 years.
Learn more about The Spruce’s
Editorial Process
Updated on 06/08/22
Reviewed by
Deane Biermeier
Reviewed by
Deane Biermeier
Deane Biermeier is an expert contractor with nearly 30 years of experience in all types of home repair, maintenance, and remodeling. He is a certified lead carpenter and also holds a certification from the EPA. Deane is a member of The Spruce’s Home Improvement Review Board.
Learn more about The Spruce’s
Review Board
Fact checked by
Alexandra Kay
Fact checked by
Alexandra Kay
Alexandra Kay is a writer, fact-checker, researcher, and editor who checks The Spruce articles for accuracy and adds source citations. Alex frequently writes for b2b and b2c publications. When she isn’t writing or fact-checking for print or online articles, Alex is an associate professor of English at a community college.
Learn more about The Spruce’s
Editorial Process
The Spruce / Margot Cavin
When you are painting your home’s interior or exterior, should you spray on the paint or roll it out with a paint roller?
It’s a choice that a few do-it-yourselfers face and it can be quite a dilemma. After all, paint spraying is fast, and no one can doubt that. But what about all of that preparation work?
Paint rolling is slower than spraying, but you’re able to lay down a thicker coat. Plus, you’ll have less prep work.
Interiors: Roll Out; Exteriors: Spray or Roll
The short answer is that many do-it-yourselfers find it easiest to roll out paint for house interiors, rather than spraying on the paint. That’s because the house is occupied. The extensive masking and taping required for an occupied house full of stuff just aren’t worth it for most homeowners.
When it comes to house exteriors, though, it can go either way. The lack of a paint sprayer may dissuade some do-it-yourselfers. But the job is usually big enough that it’s worth renting a paint sprayer or purchasing an inexpensive sprayer.
Watch Now: Spraying Paint vs Rolling Paint
When You Should Use a Paint Roller
You Haven’t Used a Sprayer Before
As a do-it-yourselfer, it’s difficult to go wrong with rolling on the paint. Painting professionals agree rolling paint produces a thick paint layer and excellent color consistency. Paint spraying may seem easy at first, but it can be tricky to learn to do well. If you have never used a paint sprayer before, now may not be the best time to learn.
You Don’t Like Masking
While you do need to mask out some areas when paint-rolling, it does not compare to the huge amount of masking you will need to do when spraying.
Consider that with paint spraying, every square inch that you don’t want to be painted must be masked in film or with a drop cloth. Whatever you neglect to mask when spraying will get painted, like it or not. Rolling vastly reduces the amount of masking you will need to do.
You Are Only Painting Walls
Are you painting only the walls and not the ceiling? This factor may tip things in the direction of paint-rolling for you. When you roll on paint, it is relatively easy to exclude the ceiling. There is no need to use masking film on the ceiling when rolling walls.
You Prefer Simplicity
Roller, roller cover, paint tray, and tray liner: these are your four main painting supplies when rolling. Also, with the roller method, it is easy to jump into your painting project for a while, then put it on pause so you can attend to the rest of your life.
With paint spraying, it is an all-or-nothing project that consumes your entire day.
You Need to Stay Within a Budget
Paint spraying wastes an incredible amount of paint when the atomized paint drifts away. When you use a paint roller, nearly every drop ends up on the surface. The only part of the paint that goes away is the water content that evaporates.
Also factor in the cost of tools. All roller items are inexpensive compared to the purchase and maintenance of a paint sprayer. A good roller setup costs less than $50, while even an entry-level paint sprayer will cost several times that amount.
You Need to Cover a Dirty Surface
While it is always best to thoroughly clean the surface before painting, sometimes this doesn’t happen. If so, paint rolling is here to help.
Paint rolling allows you more leeway when the surface isn’t perfectly clean. Rolled paint goes on thick on the initial coat.
Tip
Professional painters have a clever technique that combines the best of spraying and rolling: back-rolling. Paint is sprayed on the wall then is quickly rolled down, fusing the droplets together.
When to Spray On Paint
While rolling has its points, paint sprayers do exist for a good reason: they are fast. You may wish to use a paint sprayer if some of these conditions are met.
When the Interior Is Empty
When the room is in the early phases of building or remodeling, it is a blank canvas. This canvas lends itself well to paint spraying.
You can spray with abandon, masking off only a few key areas such as plumbing stub-outs, electrical boxes, and windows. When a room is at this point of remodeling, it will always be faster to spray than roll the paint.
When Painting an Exterior With a Clear Perimeter
Exteriors with mature landscaping, extensive decking, sunrooms, playsets, garages, and anything else close to the house that will not be painted significantly drags down your preparation time.
A clear perimeter means that you need to mask items on the house and less around the house, though it’s usually expected that you’ll need to lay out a cloth dropcloth directly below the wall.
When You Have Details and Texture of the Same Color
Paint sprayers make short work of complicated textures, such as those found on crown molding, popcorn or cottage cheese ceilings, built-up baseboards, deep exterior textures, cornices, dentils, or masonry.
Paint sprayers have the ability to work into the narrowest crevices, laying down a thin coat. By contrast, brushing or rolling detailed surfaces can result in pooled-up paint and drips.
Keep in mind that all of the detail work needs to be the same color to warrant using the paint sprayer. Otherwise, using a brush is the best way to paint detail work of more than one color.
When the Project Is Masked and Taped
If you don’t mind masking and taping surfaces—and some people may like the precision of it—then spraying on paint is for you. That’s because you will need to do extensive taping and masking if you don’t have a wide-open, empty canvas.
If you’re working with a partner, this is the perfect way to split up the labor: one person tapes and masks, then the second person sprays the paint.
Spray Paint vs. Roll Paint for Walls
You’ve decided to paint your own walls, but have you thought about how? Head to a paint supply shop and they’re likely to suggest a variety of rollers, but that isn’t your only option. For some, using a paint sprayer eliminates many of the annoyances of a roller. On the other hand, it can take more preparation and requires a higher skill level. All of this is to say: you should weigh your options before sealing the deal—and your walls—with a painting technique. To make sense of roll painting vs. spray painting, interior designer and Clare paint founder Nicole Gibbons shares some of her best advice for preparing and achieving results you’ll be truly satisfied with.
Painting With a Roller
“A roller is the best applicator to use for the vast majority of common household paint projects,” says Nicole Gibbons, founder of Clare. “A nine-inch roller is what you’ll want to use for rolling large surface areas such as walls or ceilings, and you don’t need to be highly skilled.” So long as you use a high-quality roller, this method is a foolproof way to insure your walls are evenly-painted and that the layer of paint is thick enough. “Low-quality roller covers will shed hairs, leaving fuzzy lint to dry into your paint and ruin your finish,” Gibbons adds.
“Cheap roller covers also have a weak inner core that will start to dissolve when it comes into contact with your paint, which can also cause it to slide off the roller frame during application.” In addition to a nine-inch roller, Gibbons suggests punching a four-and-a-half inch roller for smaller surface areas and to increase precision.
Andia//Getty Images
PROS:
- Great for beginners: Even with no experience in painting, the roller is simple and easy to use.
- Can be paired with an extension pole: This allows for added reach and a less strained painting experience.
- Minimal clean-up or maintenance: Simply wash the roller with soap and water and you’re good to go.
- Relatively inexpensive: While it is important that you choose a high-quality roller that won’t shed, the tools themselves are inexpensive in comparison to other paint tools.
CONS:
- Hard to use on textured surfaces: With surfaces like a popcorn ceiling, a standard paint roller can be ineffective in filling in small nooks or bumps.

- Time consuming in large spaces: While preparation is quick, you will have to roll over every inch of your walls—usually twice—while being cautious of creating an even finish.
- More meticulous: You don’t want to create any gaps in paint or areas that are thicker than others, so it is important to be meticulous and take your time.
- Can be messy during use: Paint can drip, and the exposed nature of a roller means that you will need to be very careful to not hit into anything you don’t want painted.

SHOP OUR FAVORITE PAINT ROLLER SUPPLIES
Roller Frame
$9 at Clare
Wooster Brush Plastic Paint Tray
Now 31% Off
$5 at Amazon
Roller Cover
$6 at Clare
CCS CHICAGO CANVAS & SUPPLY Cotton Dropcloth
Now 19% Off
$22 at Amazon
Painting With a Sprayer
“Using a paint sprayer is a great option when you are painting a new build or empty space, or covering very large surface areas (ex. all of your ceilings or your home’s exterior),” Gibbons says. “The paint sprays out in a fine even mist which helps you achieve the most pristine finish when painting surfaces like cabinets, doors, or other millwork.” Paint sprayers are very fast, and—once you get the hang of it—very easy. Gibbons suggests getting used to a paint sprayer before painting the desired space. For first-timers, practicing on a wood plank or other scraps is a great way to get adjusted. “Once you get the hang of it, large areas can be painted easier and faster than with a roller and you are left with a beautiful, smooth finish.”
Construction Photography/Avalon//Getty Images
PROS:
- Covers large areas quickly: Because you are using a sprayer, much more ground will be covered with one swipe of a spray. Be sure to know the width of the spray to insure you don’t paint anything unplanned.
- Creates a smooth and pristine finish: Unlike a roller, the device has full control of the evenness of its spray, leaving the guess work out.
- Great for filling the gaps in textured surfaces: Sprayers will tackle complicated textures and small crevices, coating any space with an even and thin layer.
- Gives a better finish on non-flat surfaces: Using a roller on rounded surfaces can be a challenge for non-experiences painters, while a sprayer requires the same technique regardless of the surface shape.

CONS:
- Requires practice before use: A sprayer is a powerful tool, so getting to know how yours works (spray width, thickness, etc.) is extremely important before you begin painting your walls.
- Requires extensive masking and preparation: “Sprayers always have some level of overspray so you have to mask your entire space and cover literally everything inch of your space if you don’t want to risk paint getting on your belongings,” Gibbons says.
- Paint sprayers require cleaning and maintenance after each use: “They can clog and are a pain to clean, she adds. “There are hoses and nozzles and pumps and lots of other parts you have to clean out after every single use. ”
- The actual paint sprayer itself is expensive: They typically range from $40-$200
 ”
”SHOP OUR FAVORITE PAINT SPRAYER SUPPLIES
Wagner Spraytech Paint/Stain Sprayer
$68 at Amazon
VICMORE Large Plastic Drop Cloth
$9 at Amazon
Painter’s Washi Tape
$8 at Clare
California Containers Mesh Paint Strainers
$28 at Amazon
Lucia TonelliAssistant Editor
Lucia Tonelli is an Assistant Editor at Town & Country, where she writes about the royal family, culture, real estate, design, and more.
Paint Sprayer vs. Rolling when to do what!
A common misconception from beginner do it yourself-ers is once you own a paint sprayer the old fashion way of a roller and brush are obsolete. I’m going to be the barer of bad news and tell you that isn’t the case. Many instances, even for professional painters who can mask of ANY space. Choose to roll and brush instead of spray or combine the two techniques. Ok, so why invest in a sprayer if I can’t use it all the time? Well, because when you need to use it, it is WORTH the investment. Well then, when can I use a paint sprayer you might ask. Let me give you some basic guidelines to paint sprayers that will surely help clear up the confusion. Be sure to check out how to use a paint sprayer guide and how to paint cabinet doors guide.
Roller: Interior Walls
Interior walls are one grey area so I figured I would address them first. When a home is being built you will see professional painters using a paint sprayer. Most of the time this is because there is very little to mask off because there’s no furniture and typically no flooring in the space. But in addition to spraying professional painters will also back roll. Backrolling is the act of taking a roller and rolling over the freshly painted area.
Painters do this for two reasons 1. to eliminate potential sprayer drips/lines and most importantly 2. to create a roller texture that is easy to match for touch ups. You see, a roller and a sprayer produce two entirely different paint textures and since the construction process and move in process are SURE to put some dings and scratches in the walls, being able to touch up with a brush and roller instead of whipping out the paint sprayer saves on so much time.
If you SKIP the backrolling process on interior walls and go to touch up with a roller, you are sure to have that touch up spot stick out like a sore thumb.
If your home is existing, it would be in your best interest to go to the old fashion way and use a roller and brush. It will eliminate the need to mask off the entire room, save your flooring from potential overspray, and in the end save a lot of time.
Turn on your JavaScript to view content
Either: Accent walls
Accent walls are all the rage now on Pinterest and instagram. If you don’t have a board and batten, wainscoting, shiplap wall in your house is it even 2020? Accent walls are my other exception when it comes to spraying inside. Since there are typically so many angles and cutting in it can be beneficial to mask off a room and get that glossy silky smooth finish with a sprayer like I did for my bunk room and herringbone wall.
If you are going to mask off your room to spray here are my favorite masking products:
- carpet shield – this is basically Saran Wrap for your carpet but its stickiness is extremely impressive.

- masking tape with plastic attached
Sprayer: Cabinetry or Furniture
It isn’t a MUST, but if you truly want a smooth, glossy, professional looking finish on any type of furniture or cabinetry, you will want to use a paint sprayer. There are several types of paint sprayers on the marker but I will link you to my two favorites, which have very different price points.
First, I will tell you about my all time favorite sprayer, but I will warn you. It comes at a price. The Graco TC Pro is a battery powered (thanks Dewalt), cordless, airless paint sprayer that uses LINERS instead of a container to hold the paint making clean up a breeze. It only has 3 pieces that you need to disconnect and clean and no tiny tips that are inevitably going to end up down the drain. It provides a very smooth, glass like finish even for a beginner DIY-er. There isn’t much of a learning curve and if you are in the market and want to invest in a quality sprayer from the beginning look no further. The TC PRO does have a little brother which is corded. I haven’t used it, but I have heard good things about the Truecoat 360
The next sprayer that is a great beginner, budget friendly option is the Homeright Super Finish Max which is only $100. For most interior latex paint you will want to use the green tip. The instructions indicate that you don’t NEED to thin your paint, but I’ll be honest that I’ve always needed to lightly dilute my paint with water to truly get a smooth finish. This sprayer does have very limited overspray which is nice, but its conservative flow also makes it so you need to do several coats to truly get good coverage. Regardless of its cons, it is easy to clean, doesn’t have a ton of issues with clogging, and for $100, it is way better than any traditional Wagner sprayer I’ve tried as far as even spray.
Turn on your JavaScript to view content
Sprayer: Exteriors
Exteriors you certainly could roller and brush, but time and number of coats, it is in your best interest to use a paint sprayer. There’s only a small portion that you have to mask off (the windows and any soffit). The concern of overspray is very minimal and if you are dealing with texture from stucco or brick, in order for you to truly get in all those cracks and crevices, spraying really is the preferred choice.
Either: Doors and trim
You heard it here first! You DO NOT NEED to spray your doors and trim. While you certainly can if you have a new build, or are installing new doors, but I have a tried and true method to brushing and rolling that is bound to get you a smooth finish!
How to paint baseboards and doors
First you need to gather the best supplies:
- Wooster Short Handle Brush – this brush is under $6 and is the best, budget friendly, smooth, anti-fatigue, easy to cut in brush I’ve used.
- Foam Roller – the golden foam roller allows you to back roll to eliminate brush strokes.
- Emerald Urethane Trim Enamel – the omega of all trim and door paints. It is self leveling, hardens and cures 7 days after painting, easy surface to clean, smooth finish. For trim and doors I will use a satin or semi-gloss. Since you are rolling you can get away with a quart size if you are only doing a few doors, and could get away with a gallon to do almost all the doors in your home.
- Frogtape – the only tape you should be painting with after reading this tutorial. It gives you the cleanest, crisp lines.
 It is self leveling, hardens and cures 7 days after painting, easy surface to clean, smooth finish. For trim and doors I will use a satin or semi-gloss. Since you are rolling you can get away with a quart size if you are only doing a few doors, and could get away with a gallon to do almost all the doors in your home.
 This process is so simple it kills me that most don’t know about it. First, if you have tile or hardwood you will want to tape. With 1/8″ of the tape overlapping the bottom of your baseboards and the rest on the floor. This is going to create a barrier. So drips of paint don’t get under your baseboards and onto your floor in a very difficult spot to clean.
Once you are all taped off, take your brush and get a decent amount of paint. Stroke those baseboards getting the top lip as well. Work a 3-4 foot section with just a brush… and here’s where the magic happens. Take your foam roller. DO NOT DIP IT IN THE PAINT. (say what?) yes, DRY roller, with no paint on it. Take it to the section you just brushed and lightly roll over it to get rid of those brush marks. Then move onto the next section. This back-rolling process will make those baseboards smooth. While eliminating any drips or splatters that a wet roller would inevitably create.
Doors
For doors you will follow this same process. First brush the doors where there are decorative indentations or lips. Then take a wet foam roller and roll the rest. Doors might take 2-3 coats depending on the color. Be sure to allow 4-6 hours between coats for the paint to fully dry. Between coats take a 220 grit sanding block and LIGHTLY swipe over the door. Then take a tack cloth or a microfiber rag and wipe the door off. There you have it. Professionally painted door, with a roller!
For more tips and tricks be sure to follow along on. instagram @honeybuilthome and PIN this article to refer back to later! Pinterest
← Previous Post – Article Outdoor Dining Space
Next Post – Queen Builtin Bunks Reveal →
SIGN UP
CREATED BY
Christine Gummersall
DIY Beginner Basics is here to help get you comfortable with power tools and finishing supplies (such as paint), so you can start tackling your own honey-do list and save thousands, all while getting the satisfaction of saying, “yeah, I built that!”
enroll today
Paint Brushes vs.
 Rollers vs. Sprayers
Choosing the right tools is crucial before launching into any painting project. Your budget, the size of the undertaking and the amount of time you have to complete it are essential factors to consider in your planning.
Choose from a wide range of brushes, rollers and sprayers to get the job done as efficiently as possible. Each tool has advantages and drawbacks when considering the material you are working with and the desired finish.
Brushes Are Ideal for Smaller Paint Jobs
Brushes are small and pliable, making it easier to control the paint you are working with. This makes them ideal for painting details, creating a textured effect and accessing tight corners and recesses.
There are various types of brushes to choose from, depending on the type of paint you will be using:
-
Natural bristles: Brushes made with natural bristles, such as ox hair, are preferred when working with the oil-based paints used on doors and cabinets.
- Artificial bristles: Nylon or polyester brushes are best for jobs requiring water-based paints and when working with thin substances like stain or polyurethane finishes.
- Foam: Foam brushes are a great choice when painting window casings and moldings to achieve a smooth finish.

Roller vs. Brush Painting
Rollers can hold a lot of paint, letting you paint over a larger surface area at once. They also discharge the same volume of paint with each lap, so the paint surface is covered evenly. A roller also lays down a thicker layer of paint with each pass, making roller painting a better choice when coating large, smooth, level surfaces such as walls and ceilings.
Consider the type of paint you’ll be working with when choosing a roller for any job. Plastic rollers are designed for jobs that require water-based paint. Rollers made from natural fibers are intended for solvent-based paints and sponge rollers are ideal for working with oil-based paint.
There are several models of rollers you may want to explore for your next paint job:
- Manual rollers: These are the most commonly used rollers. You can add extensions to the handle to lengthen their reach.
- Pad rollers: These are designed with small wheels along the sides of a flat pad and are excellent for avoiding messy drips and paint splatter.
- Textured rollers: These rollers are etched with decorative patterns for a textured finish on your work.
- Speciality rollers: You may need these if the job requires working with suede paint, light plasters or very thick mediums, such as latex.
-
Power rollers: You might consider using these if you have access to a power supply at the painting site. These have a container that pumps paint into the roller head through the connecting hose, eliminating the need to refill your paint tray. These rollers can thus save you a lot of time when working on large painting projects.

Using a Paint Sprayer vs. Roller
You can use a paint sprayer on many different surfaces, easily handling flat walls, awkward shapes and corners. You will not need a ladder to cover the entire surface area, and you can apply paint to even the narrowest of crevices, covering cracks, bumps and gaps with ease. This makes sprayers ideal for painting textured surfaces such as brick walls, popcorn ceilings and hard-to-reach furniture parts. Sprayers are a highly versatile paint tool that can also be used to apply varnish, stain and lacquer, letting you tackle numerous jobs.
Spray painters require some practice to master the technique to achieve a smooth, even finish. The high risk of overspray when using a sprayer makes it best suited for outdoor projects. You can use a paint sprayer inside in emptied rooms.
There are two categories of sprayers:
-
Airless sprayers: These sprayers use pressure to push paint to your spray gun through a hose. The paint is atomized into droplets as it goes through the tiny opening in the spray tip.
- Air compressor powered sprayers: Air powered sprayers use pressurized air from a compressor to release a finely atomized paint mist. These sprayers minimize waste by reducing overspray.
 The paint is atomized into droplets as it goes through the tiny opening in the spray tip.
 Sprayers need to be dismantled and flushed of any remaining paint before storage to ensure the components are clean for optimal use in the future.
Wearing goggles, a mask and gloves are necessary when using a sprayer to avoid breathing in the paint that’s floating around you as you work. High-pressure sprayers also shoot paint with tremendous force, which could penetrate the skin.
Choosing the Right Tool for Your Budget
Cost is an essential factor when choosing tools. Although sprayers are more expensive than rollers and brushes, their multipurpose nature allows you to derive more use over time. With proper maintenance, this machine can last you for many years.
A sprayers’ versatility could also end up saving you money on future purchases needed to tackle various paint jobs. Additionally, a good paint roller may cost more than a sprayer. These tools are often more expensive than a basic airless paint sprayer.
Sprayers use about 33 percent more paint than rollers do, which could hike up your paint costs in the long run. However, since one person can cover larger areas in a fraction of the time, sprayers could offer significant savings in labor costs compared to using rollers or brushes.
On the other hand, sprayers could increase labor hours for the preparation needed on any spray job. When using a sprayer, the paint surface must be scraped, sanded and cleaned before you can start painting. You also need to mask off any area you don’t want the paint to land on with a good painter’s tape. This process ensures you get the clean lines and look you want.
All three of these painting techniques have unique strengths, and most professionals combine different tools to work on any job. For instance, rollers could be used for large, flat surfaces, while brushes are applied for the finer work on narrow areas such as the trim and window frames.
Choose TapeManBlue for Seamless Paint Jobs
Whether you roll, spray or brush your paint, high-quality taping can ensure precise, even lines. TapeManBlue offers professional-grade painter’s tape for best results every time. Check out our blue painter’s tape for a clean finish. Consider our high tack green painter’s tape if you’re working on an uneven or exterior surface.
Complete our contact form to get in touch with a team member today!
Shop Blue Painter’s Tape
What’s the Difference? Spraying vs. Rolling Paint
Table of Contents
Add a header to begin generating the table of contents
You have made the decision to paint your own walls, but have you given any thought to how you will do it? If you go to a store that sells paint supplies, the employees will probably recommend a few different types of rollers to you, but that isn’t the only choice you have. Some people find that using a paint sprayer gets rid of many of the annoyances that come with using a roller. On the other hand, it may involve a greater amount of preparation and calls for a higher level of skill. All of this is to say that you need to carefully consider your choices before committing to a painting method and making the deal (and your walls) official. It will help you make sense of the debate between roll painting and spray painting.
You have quite a few options to consider whenever you are painting anything, whether it be an entire room or the siding on your house. Choosing a colour scheme, the kind of paint to use, and the best way to apply it are probably at the top of the list. It’s true—brushes and rollers aren’t the only tools available to a homeowner these days when it comes to applying paint. Paint sprayers are now available for users of varying degrees of expertise. These spray guns are designed specifically with the do-it-yourselfer in mind. They are compact, hand-held, and operate by spraying a fine mist of paint through compressed air.
It might seem like applying paint with a paint sprayer is a quicker method, but that’s not always the case. When selecting a tool for the painting job, some factors to take into consideration include the surface, its location, and the amount of time you have available. Examine the benefits and drawbacks of using a paint sprayer versus a paint roller to determine which tool and method will work best for your undertaking.
Are you looking for the best company to maintain your home’s paint in good condition? There’s no need to look any further! When you hire Hitch Property Constructions, you have nothing to worry about.
Spray Paint Walls or Roll Them: Which Is Faster, Easier?
Should you paint the walls of your home with a roller or a sprayer? It’s not an easy call to make. Spray painting is a quick method, but only after you have finished the labor-intensive preparation work. The rolling method is more time-consuming, but it results in a higher-quality finish than the spraying method.
Using a Roller
According to Nicole Gibbons, founder of Clare and one of its employees, the best paint applicator to use for the vast majority of common household painting projects is a roller. You don’t need to have a lot of experience to use a nine-inch roller to roll large surface areas like walls or ceilings. All you need is the right tool. You can rest assured that your walls will be painted evenly and that a sufficient amount of paint will be applied to them if you follow this method and make sure to use a roller of sufficient quality. Gibbons continues by saying, “Low-quality roller covers will shed hairs, leaving fuzzy lint that will dry into your paint and ruin your finish.”
Inexpensive roller covers typically have a flimsy inner core that begins to degrade the moment it comes into contact with your paint. This causes the cover to become loose on the roller frame and makes it more likely that it will fall off while you are using it. Gibbons suggests punching a four-and-a-half inch roller in addition to a nine-inch roller for the purpose of increasing precision and reducing the amount of surface area involved.
If some of the following conditions are met, you might want to consider using the paint roller method:
- Masking is a chore: When you paint roll, you will need to mask out certain areas, but the amount of masking you will need to do does not come close to the amount of masking you will need to do when you spray paint. Think about the fact that when you spray paint, every square inch of the surface that you don’t want painted needs to be masked, either with film or with a drop cloth. Whatever you don’t cover up before you spray paint, whether you like it or not, it will get painted. The amount of masking that needs to be done is drastically cut down when you roll.
- You are painting interior walls only: Are you only painting the walls, or are you also painting the ceiling? Because of this one factor, it’s possible that things will end up going your way in the end. It is relatively simple to avoid painting the ceiling when using a roller to apply the paint. When rolling walls, masking film does not need to be used on the ceiling in any way.
 When rolling walls, masking film does not need to be used on the ceiling in any way.
- You like to keep things simple: When you roll on paint, the four most important painting supplies you’ll need are a roller, a roller cover, a paint tray, and a tray liner. Additionally, when you use the roller method, it is simple to jump into your painting project for a while, then put it on hold so that you can attend to the other aspects of your life. This is a benefit of the method. Spray painting is an all-or-nothing project that requires you to devote your entire day to its completion.
- Painting on a budget: Paint spraying wastes an incredible amount of paint when the atomized paint drifts away. When rolling, practically every drop ends up on the surface. It is estimated that as much as one-third of sprayed paint ends up elsewhere than the intended surface. Also factor in the cost of tools. All roller items are inexpensive compared to the purchase and maintenance of a paint sprayer.

- Covering a dirty surface: Even though it is recommended that the surface be meticulously cleaned before painting, there are times when this does not occur. Paint rolling is here to save the day if this is the case. When the surface you’re working on isn’t completely clean, paint rolling gives you more room for error. Paint that has been rolled on goes on thick on the first coat and bonds to the surface more effectively. Spraying produces much smaller paint droplets, and these droplets do not connect with each other as well as rolled-on paint does. Back-rolling is a clever painting technique that combines the advantages of spraying and rolling into one convenient method for professional painters. On the wall, paint is sprayed, and then, after a brief delay, it is rolled down, which brings the paint droplets together.
Using a Paint Sprayer
When you are painting a new build or an empty space, or when you are covering very large surface areas (for example, all of your ceilings or the exterior of your home), using a paint sprayer is a fantastic option to consider. When painting surfaces such as cabinets, doors, or other millwork, the paint sprays out as a fine and even mist, which makes it easier to achieve the smoothest and most flawless finish possible. Paint sprayers are incredibly quick and, once you’ve gotten the hang of them, incredibly simple to use. Before painting the desired space, Gibbons recommends first getting acclimated to using a painting sprayer. It is a good idea for first-timers to get adjusted by working on a wood plank or other scraps when they are practising for the first time. “Once you get the hang of it, painting large areas can be easier and faster than with a roller, and the finish is left looking beautiful and smooth,”
Rolling certainly has its advantages, but paint sprayers were developed for a specific purpose: they are quicker. If any of the following conditions are met, you might want to consider using a paint sprayer:
- Priming new, large interior spaces: It is like starting with a blank canvas when the remodelling of a room is in its early stages. The paint spraying technique works really well with this canvas. You are free to spray to your heart’s content; the only important areas that require protection are the windows, electrical boxes, and plumbing stub-outs. When a room is at this stage of the renovation process, it is always going to be faster to spray the paint rather than roll it on.
 The paint spraying technique works really well with this canvas. You are free to spray to your heart’s content; the only important areas that require protection are the windows, electrical boxes, and plumbing stub-outs. When a room is at this stage of the renovation process, it is always going to be faster to spray the paint rather than roll it on.
- Painting an exterior with a clear perimeter: Your preparation time will be significantly lengthened for exteriors that have extensive decking, sunrooms, playsets, garages, and mature landscaping. Additionally, anything else close to the house that will not be painted will also significantly increase your preparation time. If you have a clear perimeter, then you will only need to conceal items on the house itself and not the area around it.
- You have lots of detail work or texture: Paint sprayers make quick work of difficult textures, such as those found on crown moulding, popcorn or cottage cheese ceilings, built-up baseboards, deep exterior textures, cornices, dentils, or masonry. Examples of these types of textures include: built-up baseboards, deep exterior textures, cornices, dentils, and masonry. Paint sprayers have the ability to work into the tiniest cracks and crevices, applying a thin coat of paint as they go. On the other hand, applying paint to detailed surfaces with a brush or roller can lead to puddles and drips of colour.
 Examples of these types of textures include: built-up baseboards, deep exterior textures, cornices, dentils, and masonry. Paint sprayers have the ability to work into the tiniest cracks and crevices, applying a thin coat of paint as they go. On the other hand, applying paint to detailed surfaces with a brush or roller can lead to puddles and drips of colour.
Rolling Vs Spraying – Advantage and Disadvantage
Rollers Vs Paint Sprayers Interior
Painting is an excellent way to increase the value of your home as well as the kerb appeal of your property. Nevertheless, selecting the appropriate mode of painting can be a nerve-wracking experience. When it comes to painting the interior of their homes, most homeowners are faced with the difficult decision of whether to roll on the paint or spray it on.
Every one of these strategies for painting an interior space comes with its own set of benefits and drawbacks. In this piece, we will compare and contrast the two different approaches to applying paint: spraying and brushing. Are you planning any major renovations? Check out HP Constructions Melbourne’s extensive range of home renovations.
Paint Spraying
This method involves applying the paint with a sprayer that does not require air. Paint sprayers that are typically utilised by homeowners include airless paint sprayers, high-pressure paint spray guns, and the best models of each.s.
Advantages of Paint Spraying:
- Spraying is advantageous because it allows for a quick application, which is one of its primary benefits. You first need to load some paint into the sprayer, and then you can begin painting. Therefore, using this method of application enables you to work and complete tasks in a significantly shorter amount of time.
- Especially when done properly by a trained professional, it results in a coat that is more uniform and free of imperfections.
- It results in a finish that is more uniform and smooth, free from roller and brush marks.
- It is not as difficult to access areas that are normally inaccessible.
- A less laborious alternative to painting with a brush and roller
- When compared to using rollers or brushes, the labour cost is reduced because only one person is required to cover a larger area in a shorter amount of time.

Disadvantages of Paint Spraying:
- Requires long When spray painting, it is necessary to carefully mask off windows, doors, and outdoor furniture. This takes some time to set up and clean up. Before you can begin painting, the work surface needs to be prepared by scraping, sanding, and cleaning in order for you to be able to start painting. In addition to this, you will need to prepare the paint and eliminate any large particles that could potentially clog the gun.
- It is not cost effective and does not conserve paint because, in comparison to brushing and rolling, spraying uses approximately two to three times as much paint. Spraying paint results in a significant amount of the paint being lost into the atmosphere, which is one of the drawbacks of this method.
- It is impossible to paint when the wind is blowing because so much of the paint will blow away.
- Causes an uneven coverage: When spray painting, the coat may be too thick at times because the spray lines overlap in some areas. This results in an uneven coverage. In addition to that, it does not effectively fill in gaps and seals.
- Can be harmful: High-pressure sprayers shoot paint at a high force, which can cause the paint to penetrate the skin. This can be hazardous. As a result, it is absolutely necessary to wear the appropriate protective gear.
Rolling Paint
Painting with a paint roller is a time-honored technique that is most frequently utilised for painting large surfaces, such as walls and ceilings.
Advantages of Rolling:
- Rolling, as opposed to spraying, requires very little preparation work because masking is not required. This results in less time spent setting up and cleaning up. In order to get the work surface ready, all you have to do is lay a cloth directly below where you will be doing the work. In addition, you are not required to cover outdoor furniture and bushes with plastic like you would have to if you were using a sprayer.
- Produces an outcome of a high quality.
- When compared to spraying, rolling can provide better coverage while also producing a thicker and more lightly textured coat.
- When using a roller, the coating has the ability to sink in and penetrate the surface.
- Because it eliminates the possibility of overspray, it possesses excellent control and makes it simpler to be precise.
 In addition, you are not required to cover outdoor furniture and bushes with plastic like you would have to if you were using a sprayer.
Disadvantages of Rolling:
- The act of rolling can leave marks from the roller, which contributes to an uneven coat.
- The application process is cumbersome and requires an increased number of man-hours.
- Expensive in terms of the labour required
- Paint rollers are intended for use on large surfaces that are uninterrupted, and it can be challenging to manoeuvre a larger roller into the crannies and nooks that are created by siding.
- The application process is made more difficult by the obstructions.

Spraying vs. Rolling for Interior Paint
After going over the benefits and drawbacks of both approaches to applying paint, you are probably wondering which of the two is superior to the other. When painting the interior of a building, using a paint roller is a labor-intensive method that requires additional time as well as additional painters in order to complete the task, whereas using a paint sprayer can effectively streamline the process within a short amount of time.
Spraying paint on shelves and ceilings, both of which are difficult to access, is another effective method for applying paint. Therefore, if saving time and money are the most important considerations for you, a paint sprayer might be an option for you. Spraying is generally considered by most professional contractors to be the method that results in a higher quality job and a better application of paint than rolling. However, there are situations in which the use of a roller is likely to be more effective than other methods.
Benefits of Using Both
The mixed technique is the one that will produce the best results when painting; to begin, paint the corners, difficult-to-reach areas, and edges with the brush, and then cover larger surfaces with the roller. This method is more effective and will save you time; in addition, you will end up using a smaller quantity of paint thanks to how it works.
After you have completed the painting project, you will need to give all of the painting tools that you used a thorough cleaning with water. After they have been dried, you will be able to use them again.
At Home One Service, we are here to help you improve the look and feel of your home as well as the comfort and safety it provides, whether you need major remodelling done or just want to revamp your walls. At Hitch Property Constructions, we offer a comprehensive selection of home maintenance services.
Tips for Making the Work Faster and Easier
- Perform your tasks in stages. Divide the larger project into more manageable chunks that you can work on independently. When tackling large wall surfaces in their homes, some homeowners find it helpful to approach each one as a separate project. You could even paint each large wall surface during a different season; for instance, you could paint one side of the house each summer. You can also divide each “wall project” that you are working on in your head into smaller sections that can be finished in the span of two hours.
- Only the special sections should be hand-painted. Some areas require significantly more attention and a more substantial application of paint than others. Manually painting areas such as exterior corners and drain pipes, which are prone to wear and tear as a result of exposure to the elements, can be beneficial. If painting the entire house by hand seems like more of a challenge than you are up for, at least give the special areas the extra attention that comes with hand brushing.
- Thoroughly wash your paintbrushes. Educate yourself on the correct way to clean paintbrushes. A paintbrush of good quality is an excellent tool; you can make your brushes last longer if you take better care of them. This gives you the opportunity to purchase brushes of a higher quality, which, in turn, makes the painting process go more smoothly.
- Use bigger brushes. Purchase a brush with a length of at least 4 inches. If you are going to be painting large areas, it stands to reason that you will require a brush with a wider surface area.
Make sure you choose the right paint sheens. When you use a paint finish that is flat or matte, you can pick up where you left off on your painting without worrying about leaving visible lap marks. Flat paint hides overlap marks better. Be aware, however, that surfaces painted with a satin or semi-gloss finish will be easier to clean than those painted with a matte finish.

What to choose? Airbrush (spray gun) against roller
by Alexey
|
Tools Tips Decor Workshop
|
Wednesday, April 22, 2020
Follow Make-Self. net on Facebook or Telegram and be the first to read our articles.
🇺🇦 Help for the army, volunteers and doctors.
Learn the main differences between these two painting methods so you know exactly when and where to use each.
If you are painting a room or siding, you have quite a few decisions to make. Choice of color, paint type and application method are probably at the top of the list. That’s right, brushes and rollers aren’t the only way for a homeowner to apply paint. It is worth paying attention to the airbrush – this tool is small in size, convenient and uses compressed air to apply paint.
See also: 18 tricks that will make the painting process much easier
Using a spray gun may seem like a faster way to apply paint, but this is not always the case. The surface, its location, and the amount of time you have are factors to consider when choosing a painting tool. Read all the pros and cons of the two types of paint application to see which tool and technique is best for your project.
Spraying paint is not as easy as you might think
If you have never used a spray gun before, it may not seem like such a simple tool at first. It takes a lot of trial and error to achieve uniform coverage with a spray gun. Beginning masters often experience problems with the appearance of drops, smudges and an uneven layer. But that shouldn’t stop you! Sprayers come in affordable models that are easy to use and ideal for beginners. If you can spend some paint to test your skills, be sure to give it a try.
Photography – unsplash
Painting with a roller can be as fast as a spray gun
Most DIYers consider a spray gun because they think they can finish a project in the minimum amount of time. It is not always so. When you use a spray gun, the time you save when applying paint is spent assembling the tools and cleaning them thoroughly. The preparation work takes much longer than with the roller, so the total project time is about the same.
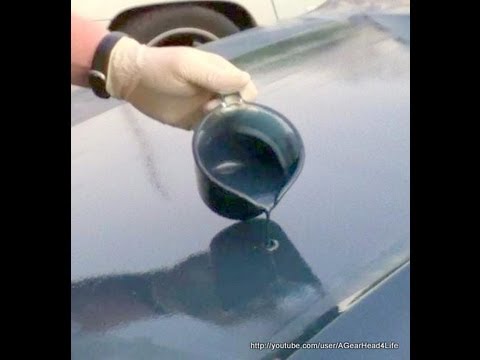
One more thing to consider: if you get interrupted or get tired of painting, you can safely stop the process and continue the next day. You can quickly wash the roller or place the tools in a zippered bag to keep the paint from drying out until you resume work. But once you’ve filled your gun with paint, you work until you’re done because paint left in the spray hose or gun will dry and clog.
See also: How to properly clean brushes from paint?
Photography – unsplash
Roller – the choice of the economical homeowner
Affordable entry-level spray guns start at $100, and most quality brands cost double your hard-earned money. Even renting an atomizer can cost good money. If you decide to use a spray gun anyway, you’ll have to buy more paint: Spray guns use about 33 percent more paint than a roller. Therefore, the roller is a more budgetary way of painting.
Photography – unsplash
The spray gun reaches where the roller cannot reach
With a sprayer you can paint the narrowest gaps, which is difficult to do with a brush or roller. Suitable for all the nooks and crannies of textured surfaces such as decorative plaster on ceilings, brick walls, cornices or siding, and hard to reach places on furniture. Also, because the gun aerates the paint, a skilled craftsman achieves a smoother surface without roller marks.
See also: Resolved. The best paint for metal
Interior and furniture protection
The use of a spray gun requires more than just protecting the edges with masking tape, as is done with a roller. You must also protect with film every thing that you do not want to stain with paint – windows, floors, ceilings and furniture. The time you save by spray painting is not worth the heartache when you find that the protection wasn’t as thorough. Just be aware that if you are painting outside, a spray gun is not the best option for a windy day.
Photography – unsplash
You can get the best result by joining forces
For textured surfaces such as rough wood planking, take advantage of the spray gun’s speed and superior brush coverage. You will need an assistant for this technique. One person sprays and another uses a dry brush to immediately go over the paint in long, even strokes as it is applied. This gives you faster painting speed while the brush evens out layers and improves paint adhesion.
Follow us on Pinterest for more interesting articles.
Useful short videos from Make-Self.net
Subscribe to our cozy Telegram channel
FRESH ARTICLES
-
14 Cool Bamboo Furniture Ideas and Ways to Join Trunks
by Aleksey
Decor Workshop Furniture,
Thursday, September 15, 2022 -
15 Best Workbench Projects for Small Workshops
by Aleksey
Tools Decor Workshop Furniture,
Tuesday, September 06, 2022 -
How to remove and prevent rust from tools
by Aleksey
Cleaning Tools,
Friday, 02 September 2022 -
Take a dip in the top 15 outdoor baths
by Aleksey
Decor Workshop Garden and vegetable garden,
Monday 29August 2022 -
15 Cozy and bright glazed terraces in boho style
by Aleksey
Decor Workshop Garden and vegetable garden Interior,
Tuesday, August 23, 2022 -
How to clean concrete in 4 easy steps
by Aleksey
Tools Tips Decor Workshop,
Friday, August 12, 2022 -
30 Gorgeous Uses of Concrete in the Garden that Will Make a Difference
by Aleksey
Decor Workshop Garden and vegetable garden,
Thursday, 11 August 2022 -
9 Best ways to create imitation brickwork in the interior
by Aleksey
DIY Tips Decor Workshop Interior,
Wednesday, 03 August 2022 -
20 Fire bowls that everyone dreams of having on their plot
by Aleksey
Decor Workshop Garden and vegetable garden,
Monday, 25 July 2022 -
How to repair and maintain your lawnmower, what all homeowners should know
by Aleksey
Tools,
Friday, July 22, 2022
POPULAR ARTICLES
-
33 Incredible DIY Cat Houses
by Aleksey
For Pets Crafts Gifts Decor Workshop Furniture,
Friday, 12 November 2021 -
50 Incredible wood and epoxy creations
by Aleksey
DIY Decor Workshop Furniture Cheap,
Wednesday, December 29, 2021 -
What can be done from the remains of the skin.
30 Ideas by Aleksey
DIY Decor Workshop Furniture Cheap Accessories,
Friday, July 07, 2017 -
30 elements that can transform a garden into a paradise
by Aleksey
Decor Workshop Garden and vegetable garden,
Thursday, March 28, 2019 -
25 Excellent coffee tables you can make yourself
by Aleksey
DIY Decor Workshop Furniture,
Saturday, February 17, 2018 -
30+ Ways to Use Leftover Paint Wisely
by Aleksey
Decor Workshop Accessories Interior,
Thursday, 07 September 2017 -
10+ backyard offices that inspire productive work
by Aleksey
Architecture Decor Workshop,
Wednesday, 09 May 2018 -
24 Unparalleled plywood furniture options
by Aleksey
DIY Decor Workshop Furniture Cheap Accessories,
Monday, July 02, 2018 -
70 Easy Ways to Join Wooden Parts
by Aleksey
DIY Tips Decor Workshop Furniture Cheap Accessories,
Friday, April 06, 2018 -
99 Amazing ways to update an old chest of drawers
by Aleksey
DIY Vintage Decor Workshop Furniture Cheap Before and After,
Wednesday, September 27, 2017 -
12 Easy Ways to Texture Wood
by Aleksey
DIY Decor Workshop Furniture Cheap Accessories,
Saturday, 23 September 2017 -
7 examples – how to make a leather wallet
by Aleksey
Crafts For Friends Gifts For Lovers For Men For Women Workshop,
Friday, 05 January 2018 -
92 Useful tips for DIYers
by Aleksey
Tips Decor Interesting Workshop,
Friday, 05 January 2018 -
480 Examples of furniture you can make yourself
by Aleksey
DIY Decor Workshop Furniture Cheap,
Friday, April 22, 2022 -
40 Unusual wood products
by Aleksey
DIY Decor Interesting Workshop Furniture Lighting Accessories,
Saturday, July 22, 2017 -
40 Simple sofas you can make yourself
by Aleksey
DIY Vintage Decor Workshop Furniture,
Wednesday, 07 February 2018 -
40 Amazing DIY Photo Frames
by Aleksey
For Kids Crafts Vintage For Friends Gifts For Lovers Decor For Men For Women Workshop Accessories,
Wednesday, April 15, 2020 -
20+ Toys for children from cardboard boxes
by Aleksey
For Kids Paper Crafts Other Models Gifts Decor Workshop Furniture Cheap,
Monday, 06 November 2017 -
45 ways to update your closet with wallpaper
by Aleksey
DIY Vintage Decor Tips Workshop Furniture Cheap Before and After Interior,
Tuesday, 06 June 2017
 30 Ideas
 paint rollers, types and dimensions, paint roller, wall paint roller, types of paint rollers
As they say, repairs cannot be completed, but can only be temporarily suspended. The holiday season is just around the corner, and at this time, many people do not go to rest on the sea, but are engaged in improving their living space. And of course, during the repair can not do without painting work. To do this, you can use brushes, an aerosol spray or a special roller. At the same time, many experts recommend using a roller, since it can be used to spread a fairly thick layer of paint and do it evenly. And even a person who does not have experience in painting work can cope with the task.
Choosing a paint roller
Wall paint rollers are used more often than brushes and sprayers when carrying out paintwork.
To make the right choice among the abundance of paint rollers, you need to consider a lot of factors. It is important to take into account the location of the painting work (inside or outside), the type of paint used, the desired result. Paint rollers differ in size, pile type and length. Different models are used for various types of coatings. To choose the right tool, you should take into account all the nuances.
General characteristics
Paint rollers have a common design. The main components are:
- The handle has different shapes. Manufacturers achieve ergonomics, so they improve the structure of the element. The part can be wooden, plastic or rubberized.
- Bugel – curved metal element. This is the basis for the painting part.
- A roller with a fur coat is put on the clasp. The roller rotates, resulting in painting.
The last part is detachable and can therefore be replaced. This allows you to reduce the cost of purchasing painting tools.
Purpose and principle of operation of rollers
Painters differ in material and type of coat. The purpose of the tool depends on the type of this part:
- Most of the rollers are intended for painting. Their working part is made of a material that absorbs and retains paint for applying it to the base.
- Textured models have a three-dimensional pattern on the fur coat. Used on plaster for maximum decorative effect. By pressing, the pattern is reprinted onto the surface.
- The screed roller has a special coat that helps to remove air bubbles from the fresh mortar.

All types of rollers work in the same way. By pressing on the working surface and moving the handle, the roller and, accordingly, the fur coat rotate.
The result of use is the application of paint or pattern to the surface.
Surface preparation
Surface preparation for painting is a process, often longer than painting itself, but very important. It is worth following all the technology, without excluding any steps.
- Remove previous surface coating. Peeling loose parts of the old paint will degrade the overall look of the job and cause the new paint to peel off. Whitewash or water-based paint can be removed without much difficulty – moisten the surface to be treated with plenty of water, then pass with a spatula. Remove any residue with a damp cloth. Waterproof paint is capricious, you will have to work with a metal brush to remove it.
- Next, wet the surface and, after a short wait, open the windows for drafts. The coating should peel off and can be removed with a spatula. Another way: apply wallpaper paste or paste to the old paint, stick newspapers on it, let it dry. By removing a layer of paper, you can remove the previous coating along with it. The third way is to remove it with a drill, but then a huge layer of dust on the surface cannot be avoided.
 Remove any residue with a damp cloth. Waterproof paint is capricious, you will have to work with a metal brush to remove it.
 Attaching coats
How the coats are attached to the roller determines the performance of the roller:
- Glued method. The fur coat is fastened by wrapping the material around the roller treated with glue. The fleecy part is overlapped, due to which the coating is seamless, which contributes to uniform application. The glued method involves the complete replacement of the paint roller, since replacing the fur coat will not work.
- The hot-melt method involves gluing a fur coat onto a heated roller. There are no seams in the coating, so the coating is applied evenly. The service life of such a roller is long.
- Replaceable fur coats have special plugs responsible for fastening. Such tools are replaceable, which makes the device economical.

It is recommended to choose a tool according to the mounting method, taking into account the scale of the painting work being carried out. For painting walls of a large area, it is better to purchase a paint roller with a replaceable fur coat. This will allow you to paint the surface with minimal financial costs for the tool.
Advantages
The use of paint rollers greatly simplifies the process of painting large surfaces, allowing you to apply paint mixtures evenly. Among the other advantages of the roller over brushes:
- high processing speed and quality;
- absence of villi on the painted surface;
- the ability to create relief and texture effects;
- large assortment.

Manufacturers
The construction market offers a wide variety of painting tools and accessories. The products of the following manufacturers are considered the most popular:
- Santool;
- Master Color;
- Stayer;
- Matrix;
- Sibtech;
- Bison.
The rollers of these manufacturers have received positive feedback from consumers due to their high technical characteristics. The products of the companies Biber, Topex, Craftool, Sigma, Akor are popular. The products of these brands have fewer reviews, while the quality of the products is on top.
Extra tools
To get the most out of your roller, you need to get extra tools. The most popular of them is the pallet. Now you can even find sets of a pallet and a roller for sale.
Paint roller tray
Roller trays and cleaning tools are also available. The pallet is convenient in that you can pour a fairly large amount of substance into it, and then evenly saturate the roller with it by rolling it along a special plane.
Back to Contents
Types of rollers and applications
Rollers of various types and sizes are selected for different conditions. When choosing a device, it is necessary to carefully study the technical parameters and scope of use.
Universal
This tool is considered the most common. The roller is suitable for painting walls and other bases with a slightly pronounced relief. The versatility of the device lies in its compatibility with various coatings: paints, enamels, varnishes. It is comfortable to apply dyes with such a roller, which makes it popular among non-professional craftsmen.
For radiators
This roller with a thin long handle is used for painting pipes and radiators. Its design differs from the standard clasp options, making it convenient for them to paint hard-to-reach places. The size of the fur coat itself is smaller than that of other types, which simplifies the work and reduces the waste of paintwork materials when painting.
Façade roller
The facade roller differs from others in its dimensions and the presence of a telescopic handle. It is extended, which allows you to process the surface at any height. Due to the increased diameter of the fur coat, it is possible to reduce the time for painting facade walls. The pile of the tool is long, which speeds up the coloring and makes it more convenient. Such a roller for painting walls is equipped with a bearing that allows you to adjust the speed of work.
For corners
This variant has a small wheeled roller that allows you to paint corners and hard to reach places. The width of the roller is small, which helps to reduce consumption and ease of operation.
Pressure roller (smooth)
Wall roller, made of rubber or polyurethane, used for applying adhesive mixtures or removing air bubbles when wallpapering. The stitching tool is equipped with a conical or barrel-shaped roller. Allocate tools directly for wallpaper and for joints.
Needle
This type of construction tool can have soft or hard spikes. Rollers with soft needles are used when pouring floors. In this process, it is important to remove air bubbles from the coating, which a needle tool does an excellent job of. Devices with hard spikes are used when working with drywall. By piercing the material, it is possible to saturate it with moisture deeper and give it the necessary shape.
Textured
The device is used to obtain original decor. The structural roller is used for various purposes. There is a tool for applying paint. There are also varieties for working with plastered bases. The scope of use depends on the choice of the type of nozzle for the structural roller. For plastered bases, a wooden textured roller is more often used. Sponge, leather and rubber types are suitable for working with smooth substrates. When pressed on the work surface, the pattern is imprinted.
Paneled (patterned)
A type of textured tool used to apply a panel.

The roller is less common than others. There are options for direct contact with the paint. There are also varieties with a filling function.
Marking
When choosing a device, pay attention to its marking. Domestic rollers are marked according to GOST 10831. The first letter “B” says that we have a roller. And under the second letter hides the material of the fur coat:
- M – fur;
- MP – fur for painting floors;
- MU – fur for processing corners;
- P – with polyurethane foam.
Imported instruments have a much higher gradation. Their description may contain information about dimensions and material (PE – polyester, PC – polyacrylic, etc.).
Selection criteria
When buying a roller, the dimensions of the working surface, the material of manufacture, the length of the fleecy part should be taken into account. It is necessary to select a fixture specifically for the paintwork material in order to exclude poor-quality staining, excessive consumption of paintwork materials.
Dimensions
There are 3 groups of tools by size:
- The mini-roller is used when painting surfaces of small areas or hard-to-reach places. Its width does not exceed 15 cm, and its diameter is less than 15 mm.
- Standard size midi bolsters. This is a universal option suitable for most cases. Suitable for painting and wallpapering. Width of the working part – up to 25 cm, diameter – 5-9 cm.
- Professionals use maxi rollers more often. This type of tool allows you to paint large surfaces. When carrying out outdoor work on painting facade walls, such a roller is indispensable. Requires skills to perform well. The width of the roller is more than 25 cm, the diameter is more than 8 cm.
Tools vary in shaft diameter and handle length. These parameters affect the weight of the roller. The mass of the working tool affects the ease of use.
Foam
Foam models designed to work with water-based paints. Foam rubber has the ability to restore shape, which is important when working with colorants. At the same time, the fur coat absorbs a lot of paintwork materials, which increases costs. When used, air bubbles remain on the surface, which makes the coating look uneven. Professionals do not recommend using a foam roller for painting. They are convenient and effective in applying the primer.
Velor
Velor models allow you to apply paint with the least loss, since the pile holds the paint well and does not splatter it. The roller is used when working with alkyd, oil and water-dispersion compositions. It is solvent resistant, allowing it to be cleaned and reused. Mostly smooth surfaces are processed with a velor roller.
Fur
Fur options can be made on the basis of natural or artificial fur. The latter are more versatile, as they are suitable for working with any paintwork materials. Rollers made of natural pile are not recommended for use when working with lime compositions. The degree of dressing of fur also affects the characteristics. With insufficient dressing, a pile will remain on the surface.
Polyamide thread
Water-based paints are often used with polyamide rollers. They are wear resistant. Chemical resistant tool. Fur coats with long pile are used more often because they are easy to use.
Tips for the beginner painter
- Do not use an oversized roller. On the one hand, this way you will cover a large surface area in one movement, but on the other hand, such a roller is extremely impractical to use. As a result, the surface may turn out to be painted unevenly.
- To avoid streaks and to achieve a uniform color, thoroughly saturate the tool with paint, using a special tray surface. If it was not at hand, you can use a perforated metal sheet. In the most extreme case, cardboard will do.
- If it becomes necessary to use a tool for a composition that differs in color from the previous one, the old composition must be completely discarded. First, you need to finish painting the element to be processed, and then carefully roll the roller over a sheet of cardboard or plywood. You need to do this until the tool stops leaving marks on the plane and all inclusions disappear in its fur coat. Then you can saturate the roller with new paint and continue working.
- Do not use the same product to transfer different types of paints and varnishes to the plane. Even if the tool visually looks clean and perfectly washed, it simply may not be suitable for using a different substance.
- If painting work is intermittent and it becomes necessary to leave the tool for a while, wrap the plastic bag tightly around it and tie it tightly.
- If you need to store the roller for a long time, then it is better to place it in a container of a suitable size, fill it with paint and wrap it tightly with a plastic bag.
 You need to do this until the tool stops leaving marks on the plane and all inclusions disappear in its fur coat. Then you can saturate the roller with new paint and continue working.
 Helpful? Save yourself to the wall! Thank you for like!
Tweet
How to choose a paint roller for the type of paint
The choice of a paint roller is based not only on the comfort of use, but also on the compatibility of the material of manufacture with the type of paint and varnish material. Efficiency depends on this when working with compositions based on water, drying oil, polymers.
Water-based paints
There are many paint products for water-based paints on the market. Apply for coloring tools with terry, foam rubber, polyacrylic coats. Polyamide rollers are considered the recommended device for applying these compositions. This is due to the following qualities of polyamide fibers:
- economical consumption;
- effective wicking to prevent splashing and dripping;
- absence of lint on the painted surface;
- washable, so that the roller can be used repeatedly.
Rollers with polyamide fiber coats are often used by professionals.
At the same time, the tool is easy to use, thanks to which even inexperienced masters can produce effective coloring.
Solvent-based paints
For the application of organic solvent-based paints, it is recommended to use natural fur rollers, since synthetic materials are not always resistant to chemicals contained in paints. For two-component compositions, tools made of velor, nylon, microfiber are used. The disadvantage of such rollers is the high price. In addition, they need to be thoroughly rinsed in a large amount of solvent after painting is completed, otherwise the fixture will not be suitable for the next painting.
There are many options for paint rollers on the market. In order for the staining result to be perfect, it is necessary to responsibly choose a tool, study consumer reviews and technical parameters. With a properly selected fixture, you can even carry out high-quality and beautiful painting of any surface with your own hands.
Care
You can prolong the life of your tool if you take good care of it. After applying water-soluble formulations, rinse the roller under running water, wipe the handle dry.
If painting was carried out with solvent-based coatings, then the roller will have to be soaked in a solvent, followed by washing in soapy water. Drying is carried out in a vertical position to avoid damage to the coat.
-
Unscented Quick Dry Interior Paint – Key Types, Selection Tips & Benefits
-
Best Spray Paint in a Can – Key Types, Application Features and Benefits
-
The best water-based paint – the rating of the best manufacturers of 2018
A few words about quality Therefore, special attention should be paid to quality. Don’t skimp on this. Otherwise, unjustified savings can turn into much more expensive expenses, for example, for the purchase of a new roller or for re-painting a surface that is unevenly covered with a working composition.
To determine the degree of quality of a new instrument, it is worth subjecting it to a simple express test:
- Pull the ends of the roller bristles. If, after this procedure, there is no piece of pile left in the hand, or at least a dozen of piles, the quality of the “fur coat” is quite acceptable.
- Hold the roller in your hands and squeeze it firmly. A quality tool will not deform under pressure and immediately return to its original shape.
- It is important to pay attention to the presence of a seam on the fur coat. A quality product should not have a seam, otherwise, on the painted surface, it will leave unaesthetic traces.

EvenFlow Ink Roller
Graco
P/N: 244279
Graco
Code: 244279
Roller painting has never been so easy! The EvenFlow Internal Ink Roller eliminates the need to constantly dip it into a dirty ink tray. Includes everything you need to move your airless sprayer with ease.
Features
Product Brochure
Roller painting has never been so easy! The EvenFlow Internal Ink Roller eliminates the need to constantly dip it into a dirty ink tray. Includes everything you need to move your airless sprayer with ease.
Product Brochure
Specifications and documents
Convert to imperial units. rev.
| Includes | 9″ (229 mm) EvenFlow Roller Frame, 1/2″ (12.7 mm) Pile Cloth Roller Shell, 20″ (50.8 mm) Fixed Extension, 45° Adapter |
|---|---|
| Maximum leg length (inch) | 20 |
| Maximum working pressure (MPa) |
24. 8 8
|
| Maximum working pressure (psi) | 3600 |
| Model | Graco |
| Compatible | Airless sprayers |
| Type | Internal Roller Kit |
| Kit type | Roller kit with internal paint supply |
| Includes |
9″ (229 mm) EvenFlow Roller Frame, 1/2″ (12. 7 mm) Pile Cloth Roller Shell, 20″ (50.8 mm) Fixed Extension, 45° Adapter 7 mm) Pile Cloth Roller Shell, 20″ (50.8 mm) Fixed Extension, 45° Adapter
|
| Maximum working pressure (MPa) | 24.8 |
| Maximum working pressure (bar) | 248 |
| Maximum working pressure (kPa) | 24800 |
| Maximum working pressure (psi) | 3600 |
| Model | Graco |
| Compatible | Airless sprayers |
| Type | Internal Roller Kit |
| Kit type | Internal Roller Kit |
Product manual
309323F, Manual, Pressure Roller with 20″ Fixed Extension, Instructions, Parts, English
(843 KB)
(English only)
Promotional literature
300672EN ACCESSORIES AND PARTS
(2MB)
Related Products
Previous slide
Next slide
paint rollers, types and sizes, paint roller, wall paint roller, types of paint rollers
Contents
- 1 Choosing a paint roller
- 1. 1 General characteristics
- 1.2 Purpose and principle of operation of rollers
- 2 Coat fastening
- 3 Manufacturers
- 4 Types of rollers and application
- 4.1 Universal
- 4.2 For radiators
- 4.3 Front
Wall paint rollers are used more often than brushes and sprayers when painting. With their help, the coloring is carried out evenly, the paintwork material is not overused. There are various types of roller tools on the market, the characteristics of which differ, so it is important to choose the right type of roller in order to achieve the desired result when painting.
Choosing a paint roller
Wall paint rollers are used more often than brushes and sprayers when carrying out paintwork.
To make the right choice among the abundance of paint rollers, it is necessary to take into account a lot of factors. It is important to take into account the location of the painting work (inside or outside), the type of paint used, the desired result.
Paint rollers differ in size, pile type and length. Different models are used for various types of coatings. To choose the right tool, you should take into account all the nuances. General characteristics
Paint rollers have a general design. The main components are:
- The handle has different shapes. Manufacturers achieve ergonomics, so they improve the structure of the element. The part can be wooden, plastic or rubberized.
- Bugel – curved metal element. This is the basis for the painting part.
- A roller with a fur coat is put on the clasp. The roller rotates, resulting in painting.
The last part is detachable, therefore replaceable.
This allows you to reduce the cost of purchasing painting tools. Purpose and principle of operation of rollers
Painters differ in material and type of coat. The purpose of the tool depends on the type of this part:
- Most of the rollers are intended for painting. Their working part is made of a material that absorbs and retains paint for applying it to the base.
- Textured models have a three-dimensional pattern on the fur coat. Used on plaster for maximum decorative effect. By pressing, the pattern is reprinted onto the surface.
- The screed roller has a special coat that helps to remove air bubbles from the fresh mortar.
All types of rollers work in the same way. By pressing on the working surface and moving the handle, the roller and, accordingly, the fur coat rotate.
The result of use is the application of a paint coating or pattern to the surface.
Attaching coats
How the coats are attached to the roller determines the performance of the roller:
- Glued method. The fur coat is fastened by wrapping the material around the roller treated with glue. The fleecy part is overlapped, due to which the coating is seamless, which contributes to uniform application. The glued method involves the complete replacement of the paint roller, since replacing the fur coat will not work.
- The hot-melt method involves gluing a fur coat onto a heated roller. There are no seams in the coating, so the coating is applied evenly. The service life of such a roller is long.
- Replaceable fur coats have special plugs responsible for fastening. Such tools are replaceable, which makes the device economical.
It is recommended to choose a tool according to the mounting method, taking into account the scale of the painting work being carried out. For painting walls of a large area, it is better to purchase a paint roller with a replaceable fur coat. This will allow you to paint the surface with minimal financial costs for the tool.
Manufacturers
The construction market offers a wide variety of painting tools and accessories.
The products of the following manufacturers are considered the most popular: - Santool;
- Master Color;
- Stayer;
- Matrix;
- Sibtech;
- Bison.
The rollers of these manufacturers have received positive feedback from consumers due to their high technical characteristics. The products of the companies Biber, Topex, Craftool, Sigma, Akor are popular. The products of these brands have fewer reviews, while the quality of the products is on top.
Types of rollers and application
Rollers of various types and sizes are selected for different conditions. When choosing a device, it is necessary to carefully study the technical parameters and scope of use.
Universal
This tool is considered the most common. The roller is suitable for painting walls and other bases with a slightly pronounced relief. The versatility of the device lies in its compatibility with various coatings: paints, enamels, varnishes.
It is comfortable to apply dyes with such a roller, which makes it popular among non-professional craftsmen. For radiators
This roller with a thin long handle is used for painting pipes and radiators. Its design differs from the standard clasp options, making it convenient for them to paint hard-to-reach places. The size of the fur coat itself is smaller than that of other types, which simplifies the work and reduces the waste of paintwork materials when painting.
Façade roller
The facade roller differs from others in its dimensions and the presence of a telescopic handle. It is extended, which allows you to process the surface at any height. Due to the increased diameter of the fur coat, it is possible to reduce the time for painting facade walls. The pile of the tool is long, which speeds up the coloring and makes it more convenient. Such a roller for painting walls is equipped with a bearing that allows you to adjust the speed of work.
For corners
This variant has a small wheeled roller that allows you to paint corners and hard to reach places.
The width of the roller is small, which helps to reduce consumption and ease of operation. Pressure roller (smooth)
Wall roller, made of rubber or polyurethane, used for applying adhesive mixtures or removing air bubbles when wallpapering. The stitching tool is equipped with a conical or barrel-shaped roller. Allocate tools directly for wallpaper and for joints.
Needle
This type of construction tool can have soft or hard spikes. Rollers with soft needles are used when pouring floors. In this process, it is important to remove air bubbles from the coating, which a needle tool does an excellent job of. Devices with hard spikes are used when working with drywall. By piercing the material, it is possible to saturate it with moisture deeper and give it the necessary shape.
Textured
The fixture is used to obtain original decor.
The structural roller is used for various purposes. There is a tool for applying paint. There are also varieties for working with plastered bases. The scope of use depends on the choice of the type of nozzle for the structural roller. For plastered bases, a wooden textured roller is more often used. Sponge, leather and rubber types are suitable for working with smooth substrates. When pressed on the work surface, the pattern is imprinted. Paneled (patterned)
A type of textured tool used to apply a panel.
The roller is less common than others. There are options for direct contact with the paint. There are also varieties with a filling function.
Selection criteria
When buying a roller, the dimensions of the working surface, the material of manufacture, the length of the fleecy part should be taken into account. It is necessary to select a fixture specifically for the paintwork material in order to exclude poor-quality staining, excessive consumption of paintwork materials.
Dimensions
There are 3 groups of tools by size:
- The mini-roller is used when painting surfaces of small areas or hard-to-reach places. Its width does not exceed 15 cm, and its diameter is less than 15 mm.
- Standard size midi bolsters. This is a universal option suitable for most cases. Suitable for painting and wallpapering. The width of the working part is up to 25 cm, the diameter is 5-9 cm.
- Professionals use maxi rollers more often. This type of tool allows you to paint large surfaces. When carrying out outdoor work on painting facade walls, such a roller is indispensable. Requires skills to perform well. The width of the roller is more than 25 cm, the diameter is more than 8 cm.
Tools vary in shaft diameter and handle length. These parameters affect the weight of the roller. The mass of the working tool affects the ease of use.
Foam
Foam models designed to work with water-based paints. Foam rubber has the ability to restore shape, which is important when working with colorants.
At the same time, the fur coat absorbs a lot of paintwork materials, which increases costs. When used, air bubbles remain on the surface, which makes the coating look uneven. Professionals do not recommend using a foam roller for painting. They are convenient and effective in applying the primer.
Velor
Velor models allow you to apply paint with the least loss, since the pile holds the paint well and does not splatter it. The roller is used when working with alkyd, oil and water-dispersion compositions. It is solvent resistant, allowing it to be cleaned and reused. Mostly smooth surfaces are processed with a velor roller.
Fur
Fur options can be made on the basis of natural or artificial fur. The latter are more versatile, as they are suitable for working with any paintwork materials. Rollers made of natural pile are not recommended for use when working with lime compositions. The degree of dressing of fur also affects the characteristics. With insufficient dressing, a pile will remain on the surface.
Polyamide thread
Water-based paints are often used with polyamide rollers. They are wear resistant. Chemical resistant tool. Fur coats with long pile are used more often because they are easy to use.
How to choose a paint roller for the type of paint
The choice of a paint roller is based not only on the comfort of use, but also on the compatibility of the material of manufacture with the type of paint and varnish material. Efficiency depends on this when working with compositions based on water, drying oil, polymers.
Water-based paints
There are many water-based paint products on the market. Apply for coloring tools with terry, foam rubber, polyacrylic coats.
Polyamide rollers are considered the recommended device for applying these compositions. This is due to the following qualities of polyamide fibers:
- economical consumption;
- effective wicking to prevent splashing and dripping;
- absence of lint on the painted surface;
- washable, so that the roller can be used repeatedly.
Rollers with polyamide fiber coats are often used by professionals.
At the same time, the tool is easy to use, thanks to which even inexperienced masters can produce effective coloring.
Solvent-based paints
For the application of organic solvent-based paints, it is recommended to use natural fur rollers, since synthetic materials are not always resistant to chemicals contained in paints. For two-component compositions, tools made of velor, nylon, microfiber are used. The disadvantage of such rollers is the high price. In addition, they need to be thoroughly rinsed in a large amount of solvent after painting is completed, otherwise the fixture will not be suitable for the next painting.
There are many paint rollers on the market. In order for the staining result to be perfect, it is necessary to responsibly choose a tool, study consumer reviews and technical parameters. With a properly selected fixture, you can even carry out high-quality and beautiful painting of any surface with your own hands.
Painting part 2
Roller painting
Roller works well on large and flat surfaces. They apply paint easily, but its consumption is slightly higher, and on profiled and other uneven surfaces, the roller is inferior in efficiency to a brush.
Preparing the roller
Before starting work, immerse the roller in clean water (for latex paint) or impregnate the pile with a solvent, such as white spirit (for alkyd) and roll it dry on a clean towel, thus removing dust from the pile. In order for the pile to be saturated with paint, the roller is dipped into a paint tray filled with paint, and then rolled along the edge of the tray or along some auxiliary surface, for example, on a sheet of plywood.
When working, the roller should be saturated with paint, but without droplets. To do this, moistening it, squeeze out excess paint on the grid of the tray.
Rolling paint
Large surfaces are best painted in 1.5-2 m wide sections. Walls are painted from the baseboard to the ceiling, ceilings from wall to wall in width, not in length. All sections are painted with a slight mutual overlap, moving the roller in the shape of the letter “M”. With medium pressure, the roller is slowly and evenly rolled along the wall, this type of movement contributes to the formation of an even coating and minimizes possible splashes. As the paint is used up, the pressure is increased.
Start painting from the plinth of the leftmost section. Standing opposite the area to be painted, roll the roller in one uniform motion to the ceiling. Such a one-time pass will help to avoid paint splashes. Then immediately move the roller obliquely downwards and obliquely upwards, “drawing” the central part of the letter “M”.
And, finally, they roll the roller from the ceiling to the plinth, completing the letter. Working from left to right, continue to “draw” overlapping “Ms” up to the right edge of the section. In the same way, pass the section from right to left. Lefties can work in reverse. After going back and forth, the section must be painted. During the entire operation, the roller is moistened with paint 3-4 times. In conclusion, with light movements, the entire section is rolled from top to bottom, rolling strips with an overlap of 3-5 cm, each time smoothly tearing off the roller from the wall at the end of the stroke.
Painting with a pad
Do not glaze the edges with a pad as it is done with a brush or roller, therefore, in order to avoid obvious overlaps, proceed as follows:
1. Lightly moisten the pad with water or white spirit according to the type of paint and dry it with a towel.
2. Dip the pad into the paint, being careful not to stain the foam backing. Excess paint is removed on the edge of the tray.
3. Skirting boards and layouts are painted with long, straight strokes in one direction. They also make stripes bordering large surfaces. On large flat areas, the paint is applied in overlapping crossed horizontal and vertical strokes, without going through the same strip twice. If the paint starts to drain, then there is too much of it on the pad.
4. “Tails” at the ends of the strokes are made by gradually reducing the pressure on the pad as you approach the end of the stroke.
5. Even out the applied coating with light strokes by lightly rubbing a practically dry pad over the freshly painted area in one direction, for example, from top to bottom.
Spray painting
Modern low-pressure sprayers do not have the main disadvantage of their predecessors – excessive paint spatter. Sprayers of early designs operated at pressures over 17 MPa, while the current ones supply paint at 0.3-0.4 MPa. Older spray systems are more suitable for painting outdoor surfaces, while modern ones are able to create a solid coating on small surfaces of wood parts and furniture.
A uniform layer of paint can be applied with their help in places that cannot be reached with a brush or roller.
At the preliminary stage of work, the paint is diluted so that it is well sprayed. To avoid clogging of the nozzle, the paint is filtered after dilution through four layers of gauze or nylon hosiery, or through filter paper and poured into the spray gun container. The shape of the spray jet is adjusted according to the shape and width of the surface to be painted. Remember that a wide round jet leads to increased paint consumption. If you are using the sprayer for the first time, practice on a piece of plywood or board scraps. The paint should come out of the nozzle evenly, without splashing. With the correct ratio between the amounts of incoming air and paint, the sprayed composition falls on the surface to be painted as a spot that does not have sharp boundaries and disappears along the edges. With this spraying, the painted strips are combined without streaks and uneven coating thickness.
A small spatter of paint is present in all models of sprayers, so the surfaces adjacent to the paint being painted are covered with a protective tape, film, etc.
Start painting by holding the sprayer at a distance of 27-35 cm from the surface, the direction of the spray jet should be perpendicular to it. The amount of removal of the sprayer from the
surface to be painted depends on the viscosity of the paint and the desired size of the sprayed spot, the farther from the wall, the larger it is. The paint sprayer is moved by movements of the body and arm (but not the hand) only in horizontal or vertical directions. Wave-like, loop-like, and oscillatory movements will lead to uneven coloring. It is best to spray the paint in 50 cm passes. When painting in two layers, the first layer of paint should always be thin. The second layer is applied after the first is completely dry. Light overlapping of passes ensures professional quality coating. If the sprayer starts to splatter, turn it off, unplug the power cord and clean the nozzle.
Spray gun safety:
- use a respirator when handling paints containing hazardous substances;
- the room must be well ventilated;
- the compressor should be located as far as possible from the area to be painted;
- connect the compressor only to earthed circuits;
- do not smoke during operation, do not turn on the sprayer near an open flame;
- do not attempt to clean the nozzle or adjust the sprayer without turning it off;
- do not point the sprayer at people or at yourself.
Aerosol paints
Aerosol paints are easy to work with. They are especially good for painting small objects and hard-to-reach places. Aerosol paints do not require any additional tools or equipment and give excellent finishes when sprayed correctly. Techniques for working with aerosol cans are similar to painting with paint sprayers. Store them in the same way as other paints. Shake the can vigorously for a minute before starting work.
When spraying, the valve is pressed all the way. To prevent clogging of the nozzle, turn the valve a quarter of a turn after each pass. If this does not help, remove it and clean the slot in its base with a fingernail.
When finished, turn the can upside down and press the head for a few seconds to let the compressed gas flow clear the nozzle. Before throwing away the used cartridge, the pressure is completely released (until the hissing stops).
Painting a room in the recommended sequence will produce high quality finishes. In addition, it is easy to maintain exemplary order at the workplace, and painted surfaces will not be damaged during further work. Ideally, the room is painted by two people: one begins to paint with a brush, the second follows him with a paint roller.
Preparing the room for painting mainly consists in protecting various surfaces and individual parts from possible splashes and drips of paint. Furniture, if possible, is taken out to other rooms, and the remaining furnishings are covered with plastic wrap.
The floor is covered with film or cardboard.
The walls along the upper perimeter are pasted over with protective masking tape 4 cm wide. The upper edge (close to the ceiling) is glued to the wall for about half the width. Then a polyethylene film is glued to the bottom half of the tape. The film should cover all walls and baseboards (remove it after the paint has dried on the ceiling).
When painting walls, wooden parts are protected from splashes and drips with the same adhesive tape 4 cm wide or special for painting work, which has a microbarrier that prevents paint from leaking. The tape is pasted over the side faces of door and window frames, frames, trim in such a way that it is located close to the wall. If the work includes painting windows, then the glass is sealed. The glasses are pasted over with a protective tape along the perimeter of the binding, leaving a gap as wide as a hair between its planks and the tape. First, each glass is glued on top, then on one side, then on the bottom, and finally on the other side.
This sequence of pasting will facilitate the subsequent removal of the tape. The ends of the strips are overlapped and the tape is pressed tightly so that the paint cannot flow under it. Remove the tape when the paint dries.
Painting the ceiling
It is done with a flat brush or hand brush and a roller 25-30 cm wide. The length of the pile of the roller should be 1 cm for a flat ceiling surface and 1.5-2 cm for a textured surface. The roller is mounted on a 1.2-1.5 m extension to paint from the floor; scaffolding can also be used. Remember to wear safety goggles and a cap while working. Try to paint the entire ceiling in one go. Otherwise, overlaps at the boundaries of non-simultaneously dried areas will be noticeable, which indicates a low quality of work. To avoid such defects, always make the first strokes on a new area with an overlap on the wet edge of the newly painted section. Also, do not forget to roll the edge for the next section.
Start work from the corner farthest from the front door.
They mentally divide the ceiling into sections 1.5-2 m wide and paint it section by section, rolling strips across the width of the room, moving towards the front door. The paint is applied first with a brush and then with a roller. With a brush, paint stripes 10 cm wide along the perimeter of the ceiling and around all protruding parts like lighting fittings. First, the bristles of the brush must be kneaded so that it gives a smooth edge. If they work alone, they paint a strip about 1.5-2 m long in one pass to prepare the edge for roller work. The entire ceiling is painted, working alternately with a brush and roller. With M-shaped movements of the roller, the surface is painted, overlapping strokes of the roller with stripes applied with a brush around the perimeter. At the end of the stroke, the pressure is gradually reduced and the roller is removed from the surface.
Wall painting
Similar to ceiling painting. They start painting when the ceiling is already dry and paint in sections 1.
5-2 m wide and 2.5 m high. Each of the walls is painted in one run so that the boundaries between the sections are not visible. On the other hand, different walls can be left to dry out of sync. First, with a brush, starting from the selected corner, paint strips 10 cm wide along the upper edge of the wall, then in the corner, along the plinth, and also around all openings and holes in the area to be painted. After that, the paint is rolled with an overlapping roller onto the stripes applied with a brush. The roller moves smoothly and evenly.
Painting of wooden parts and details
The order of painting of wooden parts is as follows: window frames, doors, door and window frames, wall panels (if any), cornices and decorative layouts, except skirting boards and, finally, skirting boards.
It is advisable to paint window casings early in the morning so that they are sufficiently dry by night. Windows open and remove all window fittings. Following the “inside-out” rule, wooden parts, including mullions, are first painted near the glass, applying paint with strokes in the direction of the fibers: horizontal strips – with horizontal strokes, vertical – with vertical strokes from top to bottom.
The order of coloring the bindings depends on the type of window.
Windows with sliding sashes. Raise the lower sash, not bringing it to the top by 5 cm, and lower the upper sash, stopping it 5 cm from the window sill. Starting from the top sash, both bindings are painted where they can be reached with a brush, from the glass outwards. The lower edge of the lower horizontal trim of the upper binding is not painted – it should match the color of the outer side of the window. Binding guides, vertical strapping, stops and decorative trims are also not painted – their time has not come yet. Without waiting for the sashes to dry, move them to the closed position, not bringing them to the end by 5 cm. Finish painting the bindings, starting from the bottom sash. Leave the sashes in a slightly ajar position and, while they dry, move them up and down several times to prevent paint from sticking. When the bindings are completely dry, use a razor blade to scrape off accidental drops of paint from the glass.
Hinged and top-hung windows for painting are opened and the sliding window sashes are removed from the rails. They start painting with mullions and bindings, and finish with the edges where the hinges are installed. The edge on which the latches are located, as well as the upper and lower edges of the strapping bars, are coated with paint for outdoor use. Leave the windows open while drying. When the paint is completely dry, remove its drops from the glass.
painting tools: brush, roller, spray gun
To maximize the effect of using high quality paint, it is important to do the job with a good tool. Good quality brushes and rollers help to apply the paint in a more even and thicker layer, which ensures a great appearance and long life of the coating.
You can learn from the article which specific tools should be chosen depending on the planned work and how best to use them.
Brushes
Brushes are made from natural bristles or artificial fibres, such as nylon or polyester.
For work with oil and alkyd paints, it is better to use natural hair brushes, but artificial hair brushes are also suitable, but it is recommended to apply latex and acrylic paints only with artificial fiber brushes. They hold their shape much better and retain their elasticity, regardless of the amount of water in the paint.
- For a smooth finish, choose a brush with bristles that are split-ended, fairly resilient, longer in the center and shorter at the edges. The bristles on such a brush should be at least 1.5 times longer than its width.
- A new brush always contains broken hairs and dust. Before starting work, wash new brushes with soapy water and dry thoroughly.
- To spread the paint evenly over the brush, dip the brush into the paint and wipe it on the inside of the can. Repeat this procedure several times, turning the brush from time to time until all the bristles are wetted for half of its length.
- While working, dip the brush not very deep into the paint, tap it (do not wipe) on the edge of the can to evenly distribute the paint through the hair.
- If you are painting wood, do the finishing touches along the grain and paint the ceilings towards the light, then the brush marks will not be so noticeable.
- After completion of work, scrape off the remaining paint on the brush with a scraper or putty knife, wipe off, rinse in solvent and dry in the open air.
Rollers
The paint roller is one of the most convenient tools for painting and plastering. It is easy to use, you can quickly paint over a large area, apply wallpaper paste or cover the walls with decorative plaster. Due to the simplicity of the roller device, high qualifications are not required when working with it. The cylindrical part of the tool is made of aluminum, plastic or wood. On top of the frame on the roller is a soft working surface – a fur coat designed to absorb paint and apply it to the surface to be painted.
Rollers are used, as a rule, for painting large areas – ceilings, walls and other surfaces, as this significantly reduces the time for applying paint and facilitates the process itself.
But when working with a roller, one difficulty arises – it is inconvenient for them to paint small and narrow areas, so you need to have rollers of several sizes on hand, plus one or even several brushes.
Rollers of different types and sizes are used for different types of work: mini, midi, frame, facade, professional, universal and special. In addition, there are rollers for wavy surfaces, floors, structural and aggressive materials, for laminating and rolling wallpaper and seams. When choosing a roller, pay attention to the material from which the fur coat is made. It can be made from natural materials, such as llama, sheep, goat, rubber, velour, mohair, felt, or synthetic materials: foam rubber, polyester, polyacryl, faux fur (vestan), polyamide.
Plastic rollers are suitable for acrylic and latex paints. But for oil and alkyd paints, a tool made of both synthetic fiber and natural fiber is suitable. Most types of paints can be applied by roller with a velor coat, as it is resistant to aggressive solvents.
In this case, the composition is applied to the surface fairly evenly, although the consumption of paint increases.
When using a natural fur roller, you can pick up more paint in one dunk. However, the service life of such a tool is short, in addition, it must be rolled out before use, otherwise the hairs will remain on the surface. The most reliable are rollers made of polyamide. They can be used to work with all known paints, they have high wear resistance.
- When choosing, consider the length of the pile. A short pile means that such a roller can be used to paint mostly smooth surfaces: wood, plastic, metal. For rough surfaces, you need to take a roller with a long nap.
- In order for the paint to lie evenly on the surface, without the formation of streaks, before applying it, roll the roller well on a special pallet, and if it is not there, then on a sheet of plywood or cardboard. This technique leaves the required amount of paint on the roller. If you need to change the color of the paint, then gently roll the roller on plywood or cardboard until the blotches of the previous color disappear completely.
Only then can you move on to painting with a new color.
- It is not recommended to use the same roller for different types of paint, even if you clean it well with solvent.
Paint guns
A paint gun or airbrush is an apparatus for painting surfaces by spraying paint or varnish. With it, you can easily achieve an even and smooth coat of paint, which, in turn, is quite difficult to do with a brush or roller. Also, almost no tool is able to compete in terms of speed of painting large areas compared to a spray gun.
There are two types of spray guns: pneumatic, which work with compressed air, and airless. Preparation for work, operation and care of airless and pneumatic sprayers is the topic of a separate article. We will focus on the most important points of using paint sprayers:
- Before use, check the paint sprayer for cleanliness. Clean it with a solvent such as white spirit. But it is forbidden to do the mechanical cleaning of the paint sprayer units on your own.
- Dilute paints to working consistency and filter. For each sprayer, the consistency is set individually and is indicated in the attached documentation.
- Spray nozzle diameter of 1 – 1.5 mm provides a misty uniform spray pattern. The shape of the spray cloud is determined by the design of the spray head.
- The distance from the paint sprayer to the object to be painted is maintained within 20 – 30 centimeters and does not change during the painting process. If the distance is reduced, streaks will occur, and if the distance is increased, the paint will dry before reaching the surface. This will form a rough film.
- Move the gun smoothly, evenly, without jerking. Apply the first strip from top to bottom to the very end of the surface. The second – from the bottom up, etc. If there are sags and streaks at the corners and joints, remove them with a brush.
- When painting horizontal surfaces, try to tilt the gun as little as possible.
- 1.
 1 General characteristics
  Paint rollers differ in size, pile type and length. Different models are used for various types of coatings. To choose the right tool, you should take into account all the nuances.
  This allows you to reduce the cost of purchasing painting tools.
  The fur coat is fastened by wrapping the material around the roller treated with glue. The fleecy part is overlapped, due to which the coating is seamless, which contributes to uniform application. The glued method involves the complete replacement of the paint roller, since replacing the fur coat will not work.
  The products of the following manufacturers are considered the most popular:
  It is comfortable to apply dyes with such a roller, which makes it popular among non-professional craftsmen.
  The width of the roller is small, which helps to reduce consumption and ease of operation.
  The structural roller is used for various purposes. There is a tool for applying paint. There are also varieties for working with plastered bases. The scope of use depends on the choice of the type of nozzle for the structural roller. For plastered bases, a wooden textured roller is more often used. Sponge, leather and rubber types are suitable for working with smooth substrates. When pressed on the work surface, the pattern is imprinted.