Lean on shed: 6 Important Things to Know
6 Important Things to Know
Photo: istockphoto.com
The lean-to shed is the classic backyard garden shed design. These sheds are less expensive than other shed styles, yet they can offer the same amount of interior storage for tools and equipment. Plus, their simple design makes them easy to build. It’s no wonder they’re so popular.
But there are six things you need to know before installing a lean-to shed at your home, and they will help you make a solid choice about location, design, and site prep. Keep reading so you will be ready to install the perfect lean-to shed in your backyard.
Need a Hand?
Get free, no-commitment project estimates from professionals near you.
Find a Pro
+
1. Lean-to sheds come in a variety of sizes but feature a similar shape.
The lean-to shed is an incredibly versatile design. At its core, the lean-to is a shed with four walls and just one slanted roof surface (instead of a gable roof with a centerline peak). They’re typically made from wood with large plywood doors, and they rarely have windows or many embellishments.
Because they’re so simple to construct, lean-to sheds are very easy to adapt to nearly any desired size. They can be as small as a 3-foot-by-3-foot garden shed that stands only a few feet tall or as large as necessary to house lawn mowers, snowblowers, and other large power equipment.
Regardless of the size and design, the distinguishing feature of any lean-to shed is the slanted roof. They can slope from side to side, front to back, or back to front.
RELATED: How to Build a Shed
istockphoto.com
2. You can save on materials if the shed abuts an existing exterior wall.
Not only does the lean-to’s design make it a simpler and more affordable option than other shed types, it also allows the builder to make use of an exterior wall that’s available.
Many lean-to sheds are built because the room inside of a garage or barn is running low. Instead of building a completely new standalone structure, the builder can actually use the existing garage, barn, or home as the back wall of a lean-to shed, saving money on materials.
When a builder installs a lean-to against an existing wall, the roof always peaks on the existing wall and slants down toward the shed wall that runs parallel. With a bit of flashing at the roof-to-wall joint, this design allows rain and snow to run off the wall and down the shed roof, keeping it from working its way into either the shed or the existing structure.
Advertisement
istockphoto.com
3. It should complement or accent your home’s exterior.
Lean-to sheds aren’t inherently attractive on their own. Most are simply plywood, roofing shingles, and some hardware. For that reason, consider dressing a shed up to complement or accent your home’s exterior.
The easiest way to blend a lean-to shed into your home’s exterior is to add similar trim and paint the plywood siding, as close to the home’s exterior as possible.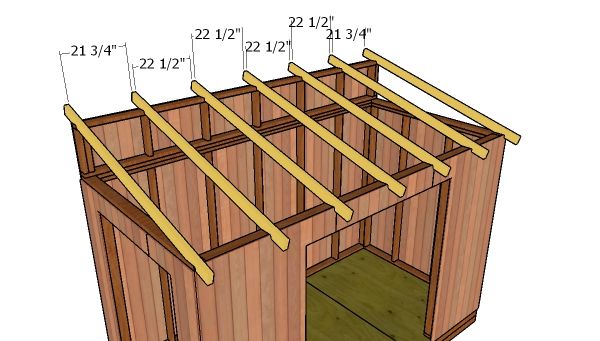 It’s also entirely possible to use siding that matches your home’s current siding. However, if the lean-to shed abuts an existing wall, the color difference between faded and new siding might be more apparent.
You also can upgrade the shed a bit by matching the landscaping around it to the plants, flowers, and trees around your home.
Want to Build a Lean-To Shed?
Get free, no-commitment project estimates from professionals near you.
Find a Pro
+
4. Location is important.
As with any shed, finding the right location is important. While a lean-to’s design is flexible, and there are ways to blend it in with your existing home, there also are spots throughout the yard that won’t make a great location.
First, unless you’re okay with building a complicated foundation platform or pouring a large concrete pad, it’s better to find a flat surface than a sloped one. Also, avoid any areas in the yard that might remain wet and soggy longer than others after a rainstorm. When it comes to building against a structure, be sure to avoid blocking any utilities like electrical meters, gas lines, or water lines for both safety while digging and convenience for meter readers.
If you’re using an existing structure as a wall, consider the roofline. Aesthetically, lean-to sheds look best when the shed’s roof peak runs parallel to the existing roof’s peak. If it’s not possible, don’t consider it a deal-breaker.
RELATED: How to Move a Shed
5. There’s flexibility with the foundation.
The foundation is important, but luckily, there is quite a bit of flexibility. Shed builders can choose between concrete slabs (which are excellent for lean-tos attached to homes), or wood flooring structures laid on gravel, concrete blocks, or even footings dug into the ground.
Advertisement
The simplest option is to find a level section of the yard, lay some landscaping paper, and pour a bed of gravel. Once compacted with a tamper, the gravel makes a solid surface for building a pressure-treated wood frame. Another option is using a level to place a series of concrete blocks (how many depends on the size of the shed). If the ground is particularly uneven, a combination of gravel and concrete pads can do the trick.
If the lean-to will abut a home or garage, a concrete pad is a more permanent option. This method involves building forms, mixing concrete, pouring the pad, and then attaching the walls directly to the pad’s surface with concrete anchors or screws. Concrete footings can be necessary for large sheds where a pad might not be feasible.
istockphoto.com
6. Local building codes can vary.
One of the most important and impactful considerations that shed-builders will have to navigate is local building codes. In general, most local building codes overlook sheds built on temporary foundations like gravel or concrete pads. On occasion, the addition of a concrete pad or footings will require the approval of building codes. Lean-to sheds built onto existing permanent structures almost invariably require permits.
The one code for which almost all municipalities require adherence has to do with the shed’s positioning on the property. Most towns and cities have “setback” requirements, which dictate how close to the property line you can build a structure. In some areas, the setback requirement might be just a few feet, while others might require 10 to 15 feet of space between the structure and the property line.
In some cases, an existing fence can alter the setback, so it’s essential to speak with the local building department before building a shed.
Advertisement
istockphoto.com
Find trusted local pros for any home project
Find Pros Now
+
How to Build a Lean-To Shed
Free plans, diagrams, and step-by-step instructions for building a simple 4-by-6-foot outdoor shed. Step-by-step instructions, too!
In This Article:
Storage Shed Design
Plan Modifications
Building the Shed
Have you been longing for a shed where you can store lawn and garden equipment, sports equipment, compact outdoor furniture, and miscellaneous tools and supplies? When inconspicuous, functional storage is all you’re looking for, a lean-to shed is the perfect solution.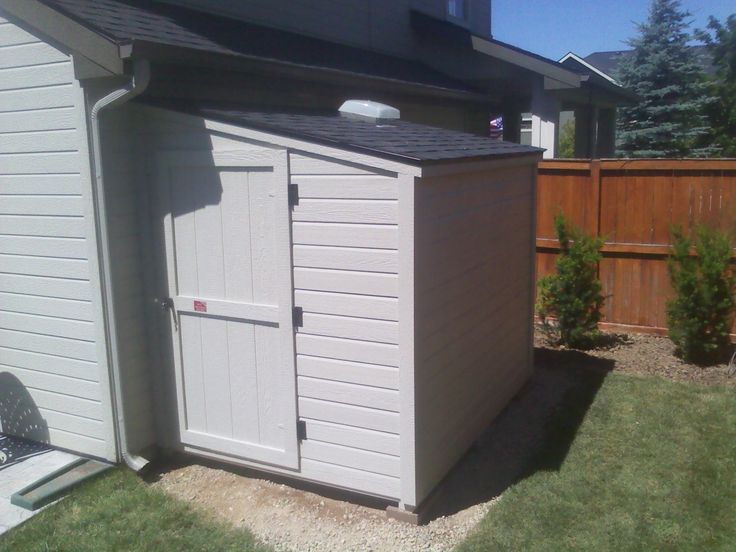
Per its name, the structure simply leans against the house or garage for additional support and provides a water-safe haven for shielding gear from the elements. If you have moderate do-it-yourself skills and tools, this is a weekend project. If you decide it’s more than you bargained for, check out these convenient lean-to shed kits on Amazon.Lean-to shed provides simple shelter for yard gear and more.
Browse Tools for This Project on Amazon
• Combination Squares
• Power Circular Saws
• 4-Foot Levels
• 16-Foot Tape Measures
• Framing Nailers
• Pancake Air Compressors
Storage Shed Design
Because the shed is designed to abut to another structure, the foundation need only be pressure-treated skids, the roof pitched in only one direction to shed water, and the back wall sheathed with 1/2-inch CDX plywood, which withstands indirect exposure to moisture. See Anatomy of an Outdoor Shed or Playhouse for more about typical shed construction. Sunset’s Sheds & Garages offers many plans for many types of outdoor structures. Just click to order at Amazon.
Plan Modifications
It isn’t a requirement that this shed be built against a wall—but the structure is designed to take advantage of the wall for strength. So if you modify it to be a freestanding shed, you’ll need to build a conventional stud wall across the back and face it with the same type of plywood siding used on the rest of the shed. For information on how to mark, cut, and fasten wall studs, see How to Frame an Interior Wall (ignore the part about working with drywall because you’ll be using exterior-rated T1-11 siding instead).
For a freestanding shed, you can build the shed on top of a concrete slab (see Pouring a Concrete Slab) instead of the pressure-treated skids and floor joists; this will actually result in a sturdier—more permanent— structure. Otherwise, for a freestanding shed, the foundation should be constructed on concrete piers or poured footings (see Pouring Concrete Footings & Piers). Be aware that building on footings will raise the height of the shed up from the ground.
Materials Required
To build the shed shown here, you’ll need:
• Pressure-treated 4x4s for skids
• Pressure-treated 2x4s for floor joists
• 3/4″ Tongue-and-groove plywood for flooring
• 2x4s For studs, header, rafters, top plate nailers, etc.
• T1-11 Plywood siding
• 1/2″ CDX plywood for roof sheathing
• 1×3 Door trim
• 1×4 Fascia and rake trim
• Asphalt shingle roofing, 15-pound felt, metal framing brackets, door hinges and latch, miscellaneous galvanized nails and outdoor screws, and paint, stain, or preservative.Basic Lean-To Shed Construction Diagram
Building the Shed
The shed shown here is 6 feet long by 4 feet wide. You can easily expand its dimensions in increments of 2 or 4 feet.
1 To construct the framing for the shed’s floor, cut two pressure-treated 2 by 4s to a length of 6 feet for the rim joists. Then position six 45-inch-long floor joists between the rim joists 16 inches on center (with the exception of the last one, as shown in the floor joist detail at right). Attach them with 16d nails.Shed Floor Joist Detail
Cut two pressure-treated 4 by 4s to a length of 6 feet for the skids. Position the frame on the skids, and, when square, toenail the floor joists to the skids.
Attach 3/4-inch tongue-and-groove plywood flooring onto the frame.
2 The walls for the shed are constructed separately and then raised onto the frame.Shed Wall Framing Diagram: Front
Start with the back wall, which is 8 feet high with 6-foot-long top and bottom plates and four studs placed 18 inches on center. The tops of the wall studs are mitered at 18 degrees. Attach the wall to the floor frame and temporarily brace it.
The front wall has a 6-foot-long top plate and two 1-foot-long bottom plates, leaving space for a 4-foot-wide door. The four wall studs are 81 1/4 inches long; install them as shown in the front framing detail at left. Next, install the 73-inch-long jack studs, and then attach the 51-inch-long doubled header. Finally, attach the 6 1/4-inch-long cripple studs.
Raise the front wall, attach it to the floor, and temporarily brace it.
The side walls have top and bottom plates 41 inches long and studs 81 1/4 inches tall. Raise them, attach them to the floor, and temporarily brace them if needed. When all wall sections are square, attach them at the corners with screws.Lean-To Shed Rafter Dimensions
3 The frame of the roof consists of four 2-by-4 rafters cut so that they rest on the front- and rear-wall top plates, as shown in the rafter detail at right. Install a gable stud directly over the center studs on both side walls to fit between the end rafter and the top plate. Install the sub-fascia and then the fascia to the front ends of the rafters.
4 Position pieces of T1-11 siding on the front and sides of the shed so that they are flush with the bottom of the rim joists. Attach the siding with 8d galvanized nails spaced every 8 inches.
Cover the rear wall with 1/2-inch CDX plywood from the bottom of the rim joists to the tops of the rafter ends.
5 Sheath the rafters with 1/2-inch CDX plywood; stagger the joints so that none end up on a rafter. Nail them in place with 6d nails. Attach rake trim to cover the exposed edges of the roof sheathing, and install drip edging. Roll out 15-pound roofing felt, and apply the shingles (see Asphalt Roof Installation).
6 Construct the doors from T1-11 siding, and trim them out with 1 by 3s. Add cross trim in the centers of both doors, and install the door latches. Use strap hinges to attach the doors.
Featured Resource: Find a Pre-Screened Local Shed Builder
NEXT SEE:
• Anatomy of an Outdoor Shed or Playhouse
• Building a Shed or Playhouse
• Fastening a Patio Roof to the House
• How to Build a Horse Barn
Tagged lean to shedshedsheds
How to build a lean to shed
In this tutorial we will walk through the overall process of how to build a lean to shed. Building a lean to shed is fun and the project will teach you all sorts of new skills that you can use to build other structures like man caves, she sheds, backyard offices, storage sheds, and other outbuildings. This is a 10×10 shed with a single pitch roof. Let’s dive into more details about the shed build below. If you are interested in getting the plans, they can be purchased here.
Shed Building Video
DIY Pete’s 10×10 Shed Plans
If you would like to purchase plans to help guide you through the process, they can be downloaded here. The plans come with a materials list and editable spreadsheet to help you calculate up to date costs.
Plan your shed
Determine how large you want to build your shed. Check with your homeowners association or city to see if there are permits or size restrictions prior to building. Oftentimes if you build it on skids it will be classified as a temporary structure. If built on skids, I’d recommend placing it on a 4 inch gravel pad once complete so it is level and has proper drainage. You could do a concrete pad, concrete blocks, or sono tubes if you’d prefer.
Sheds come in all shapes and sizes. One of the first sheds I ever built was about 6 years ago at my first house. Here is a link with more information about the lean to shed which was about 7 feet wide by 4 feet deep.
Purchase materials
The first step of the project was to come up with a design and then to purchase materials. I chose to build a 10 foot by 10 foot shed with a single pitch slope. This is often referred to as a lean to style shed. This style of shed has a modern look and is pretty straightforward to build. I purchased most of the lumber at either Home Depot or Kenyon Noble in my town.
How much does it cost to build a 10×10 lean to shed?
There are many variables that will affect the cost to build a shed. At the time I built my shed in September of 2021 the cost for the wood was about $1850. The cost for the supplies ( shingles, window, nails, hardware, etc ) came to $760. The total cost to build my 10×10 lean to shed was $2610. This does not include labor.
How long does it take to build a 10×10 lean to shed?
Great question. This will vary depending on your skill level, amount of help, and time you are able to work on it. I would say it should take about 7-12 work days if you keep at it. Otherwise it could be done on the weekends over the course of a month or two. If you are a well skilled DIY’er and have plans, I think it could be built faster. If you are more of a beginner, the project could obviously take more time. The great thing is that you will learn so much from this project and your new skills can be used to build other structures!
Building the skid foundation and platform
I chose to build the shed using pressure treated 2×6 boards for the joists. The joists are spaced every 16 inches on center. Underneath the joists are five 4×4 pressure treated boards. These are used as skids. Skids give you the ability to move the shed. I tacked the joists to the skid at each location and then used metal brackets for additional strength. I also used some 6 inch long structural leg screws from the bottom of the 4×4 and through the joist.
The platform or shed floor
The shed floor is made of plywood. A 3/4 inch thick tongue and groove plywood is best for a floor, but due to a pandemic the price of most plywoods was way too expensive. So I opted for 23/32 CDX plywood which was half the cost at the time. I used a chalk line to mark joists and to make straight lines for cutting.
The lean to shed floor is 10 feet by 10 feet. The plywood is attached to the joists using nails.
Walls for a lean to shed
Framing walls for a shed goes fairly quickly and is a lot of fun. The rear wall measured about 7 1/2 feet in height.
After being built, the walls are stood up and then secured in place using framing nails. Make sure to nail into the outer joist.
Double top plates add additional strength and also provide a way to tie each wall together.
Framing for the rough opening of a window or door is easier than you may think. If you look at framing diagrams online you’ll be able to figure out how to do it. I used 2×6 boards for the header.
For my shed, the walls were all built to the same height. As you can see, I used 2 jack studs ( trimmers ) on each side under the header for the doors.
Next, I added a smaller wall to create more height at the front of the shed. I wasn’t originally sure what would look nice for the pitch, so I built the smaller wall and then laid a rafter up top to get a look. Next time I would simply build the front wall with 2x4x10 boards so it wasn’t two separate walls to tie together. This actually was super easy to do, but using just one wall is probably a better way to do it. I ended up going with about a 1.5/12 pitch.
Rafters for a lean to shed
The rafters are made out of 2×6 boards. They overhang the front a couple feet and the back about 10 inches. A birds mouth cut was made at the front and back of each rafter so the rafter rests flat on the top plate. The rafters were secured every 24 inches on center using hurricane clips.
Sub facia was added to the front, back, and sides. This ties the rafters together.
Siding
An angled sidewall and blocking was added beneath the rafters so the siding would be able to secure to the upper part of the wall. In the photo below, Pete is adding 4×8 sheets of siding to the shed. 2 inch long nails in a coil nailer are used to secure it to the studs.
Roofing
I used 7/16 inch plywood for the roofing material. OSB is another material that could be used.
Paint the shed
I rolled on the first coat of paint. I’d recommend using a roller with longer than 1/2 inch or more nap so the paint goes into the grooves of the siding. I used a dark grey or charcoal color to match my other shed. It took 2 coats total which was about 1 1/2 gallons of paint.
DIY Pete Stain and Paint Colors
I’ve had a lot of DIY’ers ask about the colors I used. So I’ve added these photos of the cans to the post. For the paint, I used the Sherwin Williams paint on the left. It is an Iron Gray color, but they don’t have it in their system so they did a custom match. If you don’t want to go to Sherwin Williams you can simply look for a charcoal colored paint.
For the stain I used Olympic Elite in the Atlas Cedar color. I used semi-transparent. You can take a photo of the paint code or print off the picture if you want to have Sherwin Williams match it perfectly.
Facia board
1×8 boards were used for the facia. I stained all sides prior to installing it.
Shingles and underlayment
Drip edge was first nailed to the back side of the shed, then an underlayment was rolled out and nailed to the plywood with capped nails. I used a synthetic underlayment, but tar paper is another option and it is cheaper. Drip edge was then installed on the sides as seen in the photo below.
I used a starter roll of shingles and then started nailing down the shingles. It took 5 boxes to do the entire roof.
Shed doors
The doors were framed out of 2×4 boards. I used pocket holes and screws to connect the boards. Next, I attached OSB to the backside of the doors to increase strength and prevent warping. Finally, siding was attached to the frontside.
Shed window
I had an old white vinyl window left over from another project and decided to paint it black. To do this, I first took the glass panes out of the window frame. Next, I sanded the white vinyl with 400 grit sandpaper so paint would bond better to it. I then used rubbing alcohol to clean the window prior to applying a black exterior grade spray paint meant to be used on plastic and vinyl. Once dry, I reinstalled the window panes using a clear silicone. You could also use glazing tape.
Trim for a lean to shed
Oftentimes an engineered trim with a wood pattern is used on sheds. There was a shortage of it at the time the shed was built, so I decided to use 1×4 pine boards and to use an oil based exterior stain on them. I used a large brush to stain all sides of each board. I used 1/2 inch thick plywood for the soffit. You may need to add some additional blocking prior to putting up the soffit.
Paint was applied to the doors and the trim was laid out.
Install doors and hardware
I used three six inch hinges to install each shed door. Additional hardware including handles, latches, and barrel bolts were also added.
How to organize a shed and build shelves
The next step before loading the shed with stuff is to build shelves and install shed organization items. Here is a link to a youtube video I made showing how to build a shelf loft, shelves, and racks for tools https://youtu.be/Ddrg6zPl2Q8. It can also be watched below.
Start using your new shed!
I hope the How to Build a Lean To Shed tutorial was helpful and that the video helps guide you through the basic process. If you have questions or need help please comment below or reach out on instagram.
Other shed projects and warming house
A big reason I built this shed was to practice my skills and to see what I liked and disliked about the design. My plan is to build a 12×20 foot ice rink warming house for our backyard hockey rink next! You can learn more about the rink in my hockey rink post and there is a video showing how it was built as well. I will be documenting the warming house build this fall!
Please share your projects below in the comments!
I’d love to see what you come up with. Please share photos of your shed, man cave, she shed, backyard office, or other building you built below! Cheers and have fun with the project.
How To Build A Lean To Shed [Complete Step-by-Step Guide]
25282shares
- Share
- Pin
Last updated November 17, 2021
Recently I was doing some research on how to build a Lean To shed and what the best practices are. If you’ve already read my post about how I built my first shed, you may inquire why I need another one.
Well, over the last few years the original shed slowly filled up not only with my wife’s garden tools but also with the snow blower, generator, winter/summer tires for two cars, and some building supplies.
My wife says it’s her garden shed and my stuff is in her way! She showed me a picture of a plastic shed at a box store and told me it would be perfect if I got it for her, and it would be only for her gardening supplies and tools!
What an insult to me as a DIYer! To keep peace in the house and uphold my status as a handyman, I decided to build my wife a much better 4×8 Lean-to shed than any plastic one could be.
This post will guide you through the main steps of building this type of shed from scratch.
Quick Navigation
- Lean To Shed Requirements and Design
- Considerations for Building Lean To Sheds
- How To Build A Lean To Shed: Step by Step
- Step 1: Build Shed Foundation
- Step 2: Building Floor Frame
- Step 3: Wall Framing
- Step 4: Building Lean To Roof
- Step 5: Install Roof Sheathing
- Step 6: Install Siding
- Step 7: Install Shingles
- Step 8: Install Trim
- Step 9: Caulking
- Step 10: Paint Siding and Trim
- Step 11: Building Double Door
- Step 12: Install Shed Doors
Lean To Shed Requirements and Design
I began looking at our property and working out a building plan. I didn’t want it taking space that the kids and we use, nor could I put it in the far back corner and keep the peace. I looked at the existing 12×14 shed and the space around it.
The location was awesome, but I couldn’t build a stand-alone without cutting down a tree or messing with gardens and sight lines. Adding a lean-to to existing shed would be perfect! I could tuck it against the side wall, the only accessible wall.
The slope of the original shed, however, put some constraints on the Lean-to height, which would also impact the other dimensions. To get a usable height, the shed could only be 8-feet long. If I came out 4-feet, the slope would be about 2/12 – the minimum for low slope asphalt shingles.
The highest the Lean To roof could be against the existing wall was 83-inches. On a 4-foot run that would take 8-inches off at the outside wall, which impacts the door height (I’m 6’-2”…ummm… but my wife is 5’-3”J).
If I made it 4×8, I could use standard dimension materials and reduce the cost. The size would hold all the gardening tools, pots and planters, fertilizers, and maybe even a potting bench! Peace was just a saw-cut away!
Considerations for Building Lean To Sheds
Once I decided what and where to build, it was time to consider other factors affecting the design and placement of the Lean-to. The location of trees, bushes, and gardens I’d already considered, but the effect of frost on attached vs. unattached was equally important. My next decision was attached or free-standing, and did I need a permit.
According to our local regulations we can build 2 sheds less than 144 sq.ft. each on the property without a permit. So if I attach the lean-to shed to the existing 12×14 shed (which I had a permit for) a permit would be required. Check with your local building department; they can be quite helpful.
Local Restrictions:
- Permanent foundation – a permanent foundation has tax implications in many locations
- Auxiliary buildings – some areas may restrict the number of structures allowed on a property
- Size and style – different locations have different requirements regarding the size of outbuildings, the style acceptable in neighborhoods, even color and finishes permitted
- Clearances – some local ordinances dictate the clearances between buildings, property lines, and utilities
Attached to Another Building:
- Hangs on existing wall
- Adds extra space to the lean-to as you don’t need to build the back wall, removing existing siding also adds some space
- Only building 3 walls, reduced cost of building a separate back wall
- May be insurance and tax implications as it becomes a more permanent structure
- Frost heave in cold-climates may be an issue *Most house foundations are warm (heated) foundations reaching below frost levels.
 An unheated foundation may have to be even deeper to prevent frost heave or risk damage to both structures.
 An unheated foundation may have to be even deeper to prevent frost heave or risk damage to both structures.
Free-standing:
- Easier to move or remove
- Separate foundation so fewer issues with frost heave
- How to water and bug proof a wall built flush to another building, but not attached, if not far enough away to allow air movement
- Building 4 walls increase the cost
- Separate foundation so more building freedom
Foundation Options:
- Concrete slab – a concrete slab is permanent, and makes a great shed floor, but could affect taxes. The structure could just sit on the level slab and still be moveable, so not taxable
- Deck blocks – inexpensive and easy to install, allow airflow under the shed to reduce moisture and rot
- Skid – easier to relocate shed, airflow under the shed, quick and easy to build
- Gravel pad – easy to build, still need to build a floor and lift it off the gravel
How To Build A Lean To Shed: Step by Step
What You’ll Need :
- Tape Measure
- 48-Inch Level
- Circular Saw or Miter Saw
- Nail Gun
- Drill Driver/Impact Kit
Step 1: Build Shed Foundation
I decided to go with my favorite deck blocks. I’d used them for the original shed, but had cemented in adjustable 4×4 deck supports to offset any settling issues. This time I’d do it the classic way – without adjustable inserts! It would keep the cost down.
I decided I would only need 2 rows of 3 blocks each to support the floor. The shed wouldn’t be very heavy, and nothing heavy would be stored in it, so additional support wasn’t needed.
I planned to use crushed gravel under the blocks to help with drainage and leveling. Use a crushed stone that has pieces 3/4” and smaller mixed with gravel dust, it compacts better, is easier to level, and drains well.
Start with the row closest to existing shed:
- Start with a corner block. Dig out the first hole, set in the block and check the elevation of the floor using a 2×6. Make sure the block is deep enough to give the desired finished floor height. Remove the block and dig down a couple of inches deeper. Add gravel to bring it back up to level and replace the corner block, check elevation, and level it side to side and front to back.

- Use the 2×6 to mark the placement of the holes for the next blocks. Dig the next hole in the row, add in the gravel, and place the block. Use the 2×6 to level with corner block and make sure the location is correct. Level it side-to-side and front to back, add or remove gravel to adjust the level.
- Repeat the process for the last block in the row. Once it is set, use the 2×6 to ensure the row is level and where you want it.
The second row:
- Place a corner block, use the 2×6 on the corner block of the first row and locate and check for square. The 3-4-5 rule works well for this size (3-feet along the back row, 4-feet from back to the front row, and 5-feet diagonally connecting the 3’ and 4’ marks).
- Dig out the hole, set in the block and check the floor elevation using the 2×6. Remove the block and dig down a couple of inches deeper. Add gravel to bring it back up to level and replace the block, check elevation and level with first-row corner block, and level it side to side and front to back.
 Add gravel to bring it back up to level and replace the block, check elevation and level with first-row corner block, and level it side to side and front to back.
- Repeat the process for the remaining blocks, checking for location and level from second-row corner block and first row blocks.
- You could do all 4 corner blocks first, then the middle blocks.
I dug the hole, filled it with a couple of inches of gravel, and placed deck block.
I checked the level between blocks and between rows.
I laid out the two beams and checked for level…again.
Here’s the video:
Step 2: Building Floor Frame
I choose to build the floor frame using 2×6 single ply beams resting on each row of 3 deck blocks. I’d use Simpson Strong-Tie LUS26 joist hangers to attach the joists to the beams. The hangers would be attached to the beams using 4 Simpson SD9212 screws in each. The Simpson SD9212 screws are code rated for shear-force use.
Pro Tip: Never use roofing nails! The heads often separate when driven against metal. Additionally, they are not shear-force rated for this use!
Source: Strongtie.com
Step by step process:
- Install the two beams and check for level, adjust if needed.
- Cut and install the two side/end joists.
- Cut and install the middle joist ant the middle deck blocks.
- Mark beams going from left to right – 16-¾, 32-¾, 48-¾… Place an X on the left side of the mark – this is where the joists will be located, at 16-inch centers.
- Fasten the end and middle joists to the beams using galvanized 3”-10d nails.
- Square the frame using the 3-4-5 rule, and check and adjust level if needed.
-

*This is where I decided to lay out some ground cloth to prevent weeds from growing. I covered the cloth with a thin layer of gravel. I wanted to make sure there was space for air to flow under the shed floor to help keep moisture down. I could have done it before building the frame, but making square and level adjustments would have been more difficult.
- Install the joist hangers at the marks on the beams using 4 Simpson SD9212 screws in each (not roofing nails!).
- Cut the joists and place into the hangers.
- Toe-nail the joists through the joist hangers into the beams with 4 galvanized 3”-10d nails.
- Check for square and level…again!
-
-
Source: Strongtie.com
Pro Tip: Use an End Cut preservative to seal all cuts before assembling the frame.
I seal all saw cuts with a wood preservative.
I laid out the garden cloth and covered it with a thin layer of gravel.
Use 4 Simpson SD9212 screws in each (not roofing nails!) and toe-nail using four 3” 10d galvanized nails.
Once the frame is together, I checked for square and level, and made sure there was space for airflow between the joists and gravel.
Shed Floor
For the floor of the shed, I followed the advice I wrote in the article about shed floor plywood thickness. Pressure treated ¾” exterior grade (CDX) plywood is rot and moisture resistant. The heavier thickness won’t sag, and surface defects have been removed and replaced with football shaped plugs giving a smooth surface too.
The single sheet needed for the floor was simple to place and made squaring the frame easy. Use 2-1/2” galvanized nails or treated deck screws – I made sure they were rated for pressure treated use or they would quickly corrode. The nails or screws should be spaced 12-inches apart on the joists and beams. Be careful not to hit the nails attaching the joists to the beams.
Pro Tip: To learn more about what type of fasteners to use for shed building read my post here.
Step 3: Wall Framing
With the floor built it was time to plan, layout, and build the walls. I decided to use the floor deck as a level space to assemble all the wall sections; much easier than on uneven ground. As part of the planning, I lay out the walls on paper so I can also do up a materials list. I hate having to drop what I’m doing and go to the lumber store because I’m a 2×4 short!
I was struggling with the 8-foot front wall layout and trying to limit waste and cost. I planned to use LP SmartSide panel siding which comes in 4×8 sheets. If I framed for a standard 36” door, I’d need 1 full sheet plus a 1-foot strip off a third, leaving almost a full sheet as waste or to store.
To save $45 on a full sheet, I’d need to build a 4-foot door. I could live with that! If I moved the door opening to be off center, with the door closer to one end, and if it was trimmed it could even be narrower, increasing storage potential inside.
In the end:
A 96-inch long wall, less 48” for the 4×8 SmartSide, less door trim – 2 planks 1×4 (3.5”) = 7” + ¼ space between doors, leaves a 40-3/4” wide door.
Using 16o.c. framing I’d need 3 2x4s (including the trimmer stud) on each side of the door opening to attach the SmartSide and trim to; that was doable!
Back Wall
The back wall was straightforward framing. Place the top and bottom plate together, mark both plates going from left to right – 16-¾, 32-¾, 48-¾, and place an X on the left side of the mark – this is where studs will be located.
Cut the studs and place them between the bottom and top plates. Fasten the outside studs to form the frame, and then fasten all studs. Square the wall and screw a 2x4x10 diagonally to keep the wall frame square and rigid. I then leaned it out of the way against the existing shed.
Side Walls
The two side walls were also straightforward framing. I just repeated the same steps as used to construct for back wall frame. Place them out of the way.
The side walls were straightforward framing.
Lean the walls where they are easy to get, and so they can’t fall and be damaged or injure someone.
Front Wall
Having planned the front wall layout, I placed the top and bottom plates together. Marked where the king studs for the door would go, remembering not to mark for studs between them. Then I marked both plates going from left to right – 16-¾, 32-¾, 48-¾, and place an X on the left side of the mark – again this is where studs will be located.
Assemble the wall frame the same as the other three walls. I added an extra stud beside each king stud. I used two 2x4s with a 7/16” strip of OSB to flesh it out to 3-½” thick for the header. The header for the door goes between the two king studs, and then the trimmer studs get nailed into place. With everything nailed together, move the wall out of the way.
The front wall before the double stud and trimmer stud were added.
The header is two 2x4s with a 7/16” strip of OSB to flesh it out to 3-½” thick.
With the walls all framed, it was time to put them all together. The back wall would be impossible to finish once it was in place, so I had to sheath and waterproof it before raising it into place. LI laid the back wall on the floor platform. Removed the diagonal brace, and placed the 7/16” OSB sheathing so it goes past the bottom plate by 1-inch. I also used the OSB to help square the wall before nailing it on.
The 7/16”OSB was attached to the stud frame (including the bottom and top plate) using 3-inch 10d galvanized nails or screws.
Attach Tar Paper
To protect the “exterior” of the wall, I chose to use tar paper as a barrier against weather and moisture damage. I unrolled the 1st or bottom row and stapled it to the OSB. I left enough of an overhang at both ends to wrap over the 2×4 stud.
I unrolled the 2nd or middle row of tar paper and overlapped the lower layer by about 6-inches. Stapled it down and rolled out the last row. I let it overlap the middle row, so it was flush with the top edge of the OSB and stapled it down. Both rows should be as long as the first row too. Curl the ends down over the end 2×4 studs, and staple to hold.
Walls Assembly
I began assembling the walls with the sheathed and protected back wall. Lifted the wall and used a 2×4 to brace it upright. Aligned it with the floor edges, and used 3-1/2” 16d galvanized nails or coated (green) screws to secure the bottom plate to the floor and beam.
With the back wall nailed and braced into position, I placed the left wall onto the floor. Aligned it with the floor edge and back wall, and fastened it to the floor and joist using 3-1/2” galvanized nails or green screws. I used the same fasteners to connect the end studs of the two walls. Plumbed and braced the walls.
I moved the right wall into place. Aligned the bottom edge and the back, and used 3-1/2” galvanized nails or green screws to fasten it to the joist and the back wall. Plumbed and braced as with the left wall.
I lifted the front wall into position; aligned it with the floor edge and side walls. Fastened the bottom plate to the front beam, and then to the side walls using 3-1/2” galvanized nails or green screws.
I cut the top plates for the two side walls so they overlap the front wall. Used 3-inch nails to secure the top plates into place. The overlap ties the side wall more securely to the front wall.
Step 4: Building Lean To Roof
I live in a snowy climate, and the lean-to roof slope gave me some concerns. The ideal roof slope for the climate is 5/12, or better. That means for every 12-inches (or foot) the roof runs; it goes up 5-inches. The steeper the slope, the faster it sheds snow, ice, and leaves, so less build-up.
The best I could do was a 2/12 slope. Any greater and even my wife would have to duck going in! The roof is narrow enough, and close enough to the ground, that if snow build-up got too great, I could use a snow rake to remove it. Plus, it wasn’t a big roof with the trusses/rafters unsupported for a long distance.
I checked the options for finishing the roof. The house and original shed had asphalt shingles, and I planned to use matching shingles if I could.
Material options:
- Asphalt shingles: manufacturers recommend a 4/12 slope or greater for asphalt shingles. The minimum rating is 2/12, and the shingle should be labeled “Low Slope”. The least expensive option, but only warrantied for 10 to 15 years.
- Metal: low slope metal roofing is usually sheets of ribbed metal, known as standing seam, that are rated for slopes as low as ½”/12. It’s more expensive than asphalt shingles (between 2 and 8 times the cost) but longer lasting and is warrantied for 25 or more years.
 It’s more expensive than asphalt shingles (between 2 and 8 times the cost) but longer lasting and is warrantied for 25 or more years.
- Composite: composite shingles are more durable than asphalt shingles and are resistant to UV, mold, moss and algae damage. They are often made partly with recycled materials, and are even fire resistant!
More expensive than the cost of steel roofing, and depending on the grade of composite shingle 8 to 32 times the cost of asphalt shingles. However, it is warrantied for 30 to 50 years.
Source: BP Canada
Warning: Never use asphalt shingles on a slope less than 2/12!
It’s recommended that galvanized 10 to 12 gauge nails with a 3/8” head be used. The nails should be long enough to go 3/4” into the wood of the roof deck too. The nail head should sit flat and flush with the shingle when driven in.
Source: BP Canada
Lean To Roof Framing
To maximize the back wall height, and due to the roof overhang of the existing shed the lean-to butts against, I decided to attach the rafters to the double top plate using Simpson Strong-Tie ridge rafter connectors. The 2×4 rafters would be sheathed with 19/32 tongue and groove OSB, and then I’d use asphalt shingles to finish the roof.
The ridge rafter hangers may be secured with the Simpson Strong-Drive SD Structural Connector screws or galvanized 1-1/2” and 2-1/2” 8d nails.
The rafters were attached to front wall top plate with Simpson Hurricane Ties and secured with the Simpson Strong-Drive SD Structural Connector screws or galvanized 1-1/2” and 2-1/2” 8d nails.
Source: Strongtie.com
Step-by-Step process
I used the practices laid out in my article about shed roof framing to calculate the length of the rafters and to layout and cut the angles of the birdsmouth. Once a pattern rafter was cut, it was used to mark all the remaining common rafters. For short rafters, it may be easier to set one in place and use a square to mark the cuts, and then use it as a pattern after making all the cuts.
Select the Lumber
To select the lumber for the rafters I use a Rafter Span Table to determine the spacing and dimension lumber for your rafters. The dimension lumber needed for the rafter is determined by the span or unsupported distance the rafter must run. For my lean-to 2×4 lumber at 16”-centers are acceptable as the distance is less than 5-feet.
Determine Length and Spacing
The length of the rafter from the front edge of the back wall double plate to the front edge of the double plate of the front wall I calculated using the total rise and the total run it traverses. A bit of middle school math called the Pythagorean Theorem and a calculator, or use a construction calculator, or a free one online rafter calculator, to help determine the length. This also identifies where the notch or back of the birdsmouth begins.
To calculate the length of the rafter I multiply the (rise x rise) + (run x run), find the square root, and I have the distance the rafter must span – remember to use the same units! For my rafter it was (8”x8”) + (48”x48”) = 2368”, find the square root and the span is 48.66” or 48-21/32”+/-. This is rafter length before adding the extra distance for the eave overhang.
The acceptable spacing according to the Rafter Span Tables can be 12” or 16” with 2x4s. I chose 16” centers so the rafters would sit over top of each of the studs, improving the load transfer and increasing the roof support.
Cut Plumb Angles
To calculate the plumb angle for the rafter ends and the birdsmouth I use a framing square.I layout the cut for the ridge end of the rafter first, and then mark where the birdsmouth begins. I set the long arm of the square against the bottom side of the rafter at 12”, and align the short arm with the top corner of the rafter end. Keeping the 12” and corner reference, I gently slide the short arm down until it sits at the bottom edge of the rafter at the desired rise of the roof – 2”s for my roof. I double check the 12” and corner reference and the rise reference and draw a line from the upper corner down the short arm. That is the plumb line for the rafter cut.
Mark and Cut a Birdsmouth
The location of the back of the birdsmouth that hooks over the top plate of the outer wall is where the mark for the length of the rafter is. I draw a plumb line on the rafter at that mark similar to the ridge end of the rafter.
The minimum thickness of the rafter sitting on the top plate according to most building codes is 1-1/2”s. However, the rule of thumb is that the cut should not be deeper than a third of the thickness of the rafter. For a 2×4 rafter that would be 1-3/16”s deep.
I use the building square on the underside of the rafter with the short arm down. I move the inside of the short arm up the plumb line from the rafter bottom to the desired depth – checking the square is aligned on the plumb line. I mark a line along the rafter where the underside of the long arm of the square sits. The two lines form the cut out for the birdsmouth.
I determine the length of the overhang or eves, and align the square to similar to cutting the ridge end of the rafter and mark the cut for the tail of the rafter.
The rafters cut, notched, and ready to install.
The two end clips for the side rafters have one wing cut off – make sure to cut off the left from one clip and the right from another clip.
I installed the rafter clips at 16-inch centers, above each of the studs. Securing the rafter hangers with 2-1/2” 8d or 10d galvanized nails or 2-1/2” Simpson SD Structural Connector screws.
I placed the rafters into the clips and fastened them with 1-1/2” 8d galvanized nails or 1-1/2” SD Connector screws.
I could have attached the rafters to the front wall plate using 16d (3-1/2”) nails to toenail them into place. Instead, I used Hurricane Ties to secure them and to prevent any wind lift, also less chance of splitting the rafter. 2-1/2” and 1-1/2” SD Structural Connector screws fastened the Ties to the top plate and the rafters respectively.
To secure the two end rafters I used “L” brackets with 1-1/2” SD connector screws.
Step 5: Install Roof Sheathing
For sheathing a roof either plywood or OSB are fine. The building code sets minimum thicknesses based on snow load and rafter spacing. I used 19/32” T&G OSB, it’s less expensive than plywood, plus I had half a sheet left over from another job! (I never throw out wood that could be used someday!)
I tacked the fascia into place and used clamps to hold the bottom sheet of sheathing in place after aligning it. I measure the next piece, cut and slid it into place. Because the lean too was tight to the existing shed and its roof overhang, I secured the upper piece first. The lower piece was easier to slide up into the groove channel from below. I removed the fascia so it wouldn’t be damaged if I needed to persuade the lower piece into the groove. Use 2-1/2” (8d) galvanized nails to fasten the OSB to the rafters.
I cut the roof felt on the ground, ensuring it had about 4 to 6 inches extra at both ends. Rolled out the first row, stapled (use stainless steel staples) it into place. The second row I rolled out, so it overlapped the first and stapled too.
I could have used a self-adhering roofing membrane, but size and cost were determining factors.
Step 6: Install Siding
LP SmartSide panels or T1-11 panels? What’s the difference?
T1-11 panels came out in the 1960s and are plywood based panels that have grooves cut into them. They look like board and batten siding on a vertical application, or shiplap siding on the horizontal.
LP SmartSide panels look like T1-11 panels but are made of OSB based material. However, the OSB strands are coated with zinc borate and then fused together with a resin mixed with marine wax. The panel more water and insect resistant than T1-11. The panel is then given a resin-saturated Smart Guard overlay for painting and protection.
The SmartSide panels are also less likely to develop cracks or layer separation than the T1-11. One other side issue, porcupines like the glue in the plywood T1-11 panels, but don’t like the resin in SmartSide panels.
I decided to use LP SmartSide panels which are 3/8-inch 4×8 sheets. I could have used vinyl siding, but time and cost were determining factors. I needed 3 SmartSide panels which cost $45 in my local store, vinyl would cost $220 -$280, and I’d still need to sheath it! Time and money!
To make installation easier, I attached support for the side panels 1-1/2” below the bottom plate. I stood the side sheets up and used claps to hold them in position while I marked them for cutting.
The manufacturer suggests applying glue to the studs for added adhesion strength. They recommend that 1-1/2” screws or 2” galvanized nails be used and spaced every 12-inches. All cuts should also be painted, and all openings sealed or flashed to prevent moisture damage.
I used construction grade adhesive to add strength to the SmartSide panel fastening.
With the SmartSiding attached, I installed the wall-roof trim on the side walls flush to the roof sheathing and fastened the fascia board into place. I then trimmed the roofing felt so the flashing and drip edge could be installed.
Fascia and Rake Fascia
Before installing the flashing, the rake fascia (gable end fascia) had to be fitted and cut. I marked the angles with a speed square and cut the back end. I held the rake board flush with the roof deck, verified the front angle and length for both ends, and then cut both rake fascia boards. I use 8d galvanized nails to secure both rake fascia boards into place, and the fascia board to the front of the rafters.
I installed the drip edge on the front side first and used aluminum nails to fasten it. It should go under roofing felt to allow the roof to shed moisture properly.
The drip edge on the side walls goes over the roofing felt and is fastened using aluminum nails.
Trim or bend the drip edge at the corners for a more weatherproof finish.
The roof is now ready for shingling!
Step 7: Install Shingles
I choose architectural roofing shingles to match the other buildings on my property. Using a scrap piece of sheathing as a cutting board, I trimmed the tabs off three shingles – enough to do the first row at the drip edge. The trimmed strips were installed upside down, so the sticky side was up, and secured with 1-1/4” roofing nails so 3/8” overlapped the front of the drip edge.
I trimmed the tabs off another 3 shingles and nailed them upside right on top of the upside down shingles as a starter strip. Offset the next row by 1/3 of a shingle to protect the seams and nail the next row into place, keeping it aligned with the chalk line. I continued shingling the roof using a chalk line to keep the rows straight.
The tools for shingling a roof are fairly simple, a hammer, a metal speed square, chalk line, knife, and shingle nails.
Trim the tabs off enough shingles to do the first row twice. One set goes upside down, and the other set goes upside right on top of the first set as the starter strip. The first full shingle is offset by a 1/3rd and nail into place.
Install the second set of tab-less shingles upside right on top of the first set.
Finish shingling the roof, off-setting each row from the previous row by 1/3rd of a shingle.
Seal the gap between the roof and back wall with a polyurethane sealant.
Step 8: Install Trim
I sanded 1x4x8 lumber to use for the trim, the same as I’d used for the fascia and rake fascia. I cut the pieces for the front corner trim first so the front board would overlap the side board. Angle cut the top of the side trim boards, then marked and cut the length. I used 8d galvanized nails to attach the trim through the SmartSide and into the studs. One nail every 12-inches beginning 2-inches from the ends to avoid splitting.
The back two corners I trimmed and nailed the same as the side of the front corner. The trim on the door opening was straightforward. I installed the header trim 1-inch above the door opening and made it long enough to overlap the top of the side casing trim. I measured and cut the casing trim, butted them under the header trim, and nailed the door trim the same way the rest of the trim was installed.
Prime the Trim
With all the trim attached, it was time to prime it for painting. A brush for edging and a roller for the face make quick work of the task.
Step 9: Caulking
To better weatherproof the trim and shed, I caulked the trim seams with a good outdoor paintable caulking.
Step 10: Paint Siding and Trim
With the trim primed and caulked, it was time to figure out what kind of paint to use. The siding was prefinished, but it could also be painted any color you choose. An acrylic latex paint designed for wood composites is highly recommended if painting the SmartSide panels. It worked great on the primed trim too.
Step 11: Building Double Door
The finishing touch was the double shed door. Having built them for two previous sheds, I decided the tried and true would be best. I’ll give a brief explanation and save the detailed explanation for a separate article on how to build double shed doors.
I used tongue-and-groove 9/16”x6”x8’ pine boards to make the two 20-1/4”x168” door panels for the 40-3/4” door opening. Each board was glued at the groove, and the panel reinforced with 3 horizontal and two diagonal battens on the back side of the door, making the outer face nice and clean. I made sure the diagonal braces pointed down and into the hanging jamb.
Once the door panels were built, I sanded, primed and painted them the same color as the shed siding.
Step 12: Install Shed Doors
The hardware is common spring-loaded gate hinges. For added security, I use 2 galvanized bolts per hinge, one in the hinge plate and one in the tee arm. I also add a hasp and lock to keep it closed so little hands can’t get at something that could harm them.
I hope you enjoyed this article and it was informative and interesting. If you know someone who is planning to build a lean-to shed, please share with them. Your feedback and comments are greatly appreciated. Remember to check back soon for our article on how to build shed doors.
Eugene Sokol
Eugene has been a DIY enthusiast for most of his life and loves being creative while inspiring creativity in others. He is passionately interested in home improvement, renovation and woodworking.
Lean To Shed Plans – Easy to Build DIY Shed Designs
4’x8′ With 6′ Double Doors
4’x8′ With 4′ Door and Window
4’x8′ With 3′ Door on End
4’x8′ With 6′ Doors on High Side
4×8 Lean To Shed with Under 6 foot overall height
4’x8′ Short Wall Lean To
10′ Deep Lean To Shed Plans
10’x10′
10’x12′ Lean To Shed Plans
12’x10′ Lean To Shed Plans
10’x14′ With 6′ Pre-Hung Doors
10’x16′ With 6′ Pre-Hung Doors
10’x20′ Lean To Shed
10’x24′ Lean To Shed
10’x30′ Lean To Shed
12′ Deep Lean To Shed Plans
12’x12′ With 6′ Pre-Hung Doors
12×12 Lean To Shed With A Storage Loft
12’x10′ Lean To Shed Plans
12’x14′
12’x16′
12×16 Lean To Shed With A Storage Loft
12×16 Lean To Shed With A Storage Loft
12’x18′ Lean To Shed
12’x20′ Lean To Shed Plans
12’x24′ Lean To Shed Plans
12’x24′ Modern Shed Center Doors
12×16 Lean To Shed With A Storage Loft
14′ Deep Lean To Shed Plans
14’x20′ Lean To Shed Plans
14’x14′ Lean To Garage Door Shed Plans
14×20 Lean To Shed With A Storage Loft
16′ Deep Lean To Shed Plans
16’x20′ Lean To Shed Plans
16’x24′ Lean To Shed Plans
16’x32′ Lean To Shed Plans
Studio | Office | Modern | Firewood Shed
Check out our modern and studio plan library
Lean To Firewood Shed Plans
12×16 Run In Shed for Horses
BUILDING THE LEAN TO SHED
Step by step instructions to build the 4×8 lean to shed! You can see more details about building the different parts of the shed by visiting our How To Build A Shed Tutorials and Videos here.
ABOUT THIS PROJECT
This shed building project is very similar to all of our lean to sheds. The only major difference is the size. All the steps shown below will be used to build all of our lean to sheds.
The 4×8 lean to shed is one of our most popular shed sizes and styles. It is the perfect sized storage closet for yard and garden tools. It will even fit a lawn mower which can easily fit inside thanks to the large 5′ wide double doors.
This lean to shed was built by one of our shed builders who was kind enough to send us a bunch of great pictures of every step he used to build the shed.
We thought we would share the project with you to give you ideas about your shed build and teach you how to build a lean to shed!
Shed materials, especially 4×8 sheets of floor decking, roof sheeting and grooved siding are large. If you do not have a truck or trailer to haul them you can always rent a truck to bring the materials home. Most lumber yards offer delivery too.
It does not look like much lumber in the van.
Start by leveling the ground and then setting the redwood or treated skids. Use a level and tape measure to get the skids level with each other and square.
The floor framing is set directly on top of the wood foundation skids. The floor joists are spaced at 16 inches on center to make the floor strong. Our 4×8 shed designs use 2×6 lumber for the floor framing to make the floor strong and rigid.
A 4x8x3/4″ piece of Oriented Strand Board, O.S.B., fits perfectly for the 4×8 shed floor. With a 4×8 shed you do not need to use tongue and groove floor decking because there is only one piece and it does not connect to other pieces.
The rear wall is the first to be framed. With smaller sheds it is usually easier to build the walls on a large flat surface like a driveway or garage floor. But if you want you can build it on the shed floor! You can view a How to frame walls tutorial here.
The end walls are a little easier to build on the shed floor!
The walls are ready to stand and attach to the shed floor.
Start by standing the rear wall first and then stand and attach the side walls. The front wall is installed last.
Standing the front wall. Our design puts the header up against the wall top plates so there is no need to add additional blocking above the header. The door fits perfectly under the header. You can see how the double top plate on the end walls overlaps the front wall top plates to tie them together. The rear wall is secured to the end walls by nailing the end walls to the rear wall and then nailing on both sides of the siding overlap from the side walls to the rear wall.
The design of our lean to shed uses 3 walls that are the same height. The rafter spans from the lower wall to the taller wall. The end walls do not need to be angled with the rafters. The siding should be installed before the rafters are installed to make it easier to square up the walls.
The builder used boards angled to the ground to hold the shed square. This does not need to be done if the siding is installed before the rafters are installed.
Another view of the roof rafter sitting on the wall top plates.
Close up of the rafter seat sitting on the top plates. The clips are not necessary for smaller sheds with a small roof area. Building codes specify using 3-8d nails at each rafter end to attach the rafter to the top plates.
The siding on the end walls will cover the opening betwen the rafter and the wall top plates just like it covers the openings between the wall studs.
The fascia board is attached to all the rafter ends. It will hold the roof sheeting edge and provide a backing for the exterior trim. Make sure that the top of the fascia board does not sit above the plane line of the top of the rafters.
Roof sheeting is installed on top of the roof rafters. This shed has a narrow rake detail on the end rake walls so the sheeting stops at the siding
The front and rear overhangs of the shed help keep the water dripping. The overhang of the roof sheeting is typically held flush with the face of the fascia and end rafters and the trim boards are installed with the tops flush with the top of the roof sheeting.
Front wall siding is installed around the door. Our door plan calls for the siding to be held back from the door opening 1 1/4″ to allow the door face to overlap the door framing.
The trim is installed on the fascia first to allow the roofing to be installed over it. The corner trim is installed after the roof eves and rake walls fascia. The corner trim butts up against the bottom of the fascia boards.
The roofing is installed using asphalt shingles. Check out our How To Install Asphalt Shingles Tutorial. It shows all the steps to install roofing on your shed. We also have a video that shows every step to installing asphalt shingles.
This is the shed before the doors were installed. It was painted before the doors were installed.
The door rear panel and inner sandwich construction frame. This type of door construction makes the door very rigid. The sandwich construction technique keeps the door from warping.
The front of the door uses the same T1-11 siding plywood that is used on the rest of the shed. The trim matches the rest of the shed and provides a solid base for the door hinges to attach to. This is the door that stays closed using the spring bolt latch. You can see the door stop for the other door.
This is the main operable shed door. The left side of this door will overlap the door stop that sticks out on the side of the other door to provide a solid stop for the door.
Hanging the doors is done by:
- Putting a shim on the shed floor that is the same thickness as the reveal around the door and then resting the door on it.
- Set the door on the shim
- Make the reveal around the door even on all sides.
- Attach the hinges to the door and the trim on the shed.
- Tip: Make sure to angle the screws to hit the inner door frame and the door trimmer when necessary.
This is what the shed looks like with both doors hung. The door locking hardware has not yet been installed. The left hand door will get a spring bolt latch on the top and bottom on the inside of the door. The right side door is the one that opens and closes when you just want to reach in and grab something. It will get a locking latch.
Painting the shed floor makes the floor easier to clean and gives the shed a clean looking interior.
The finished lean to shed. Ready to be stocked with yard and garden tools.
Storing Stuff in a Lean To Shed:
The lean to shed is the perfect solution for storing things. It is simple to build and very functional. The single plane sloping roof allows you to build next to a fence and have the roof line at the top of the fence level or next to your house and have the entire roof sloping away from the house keeping moisture away from the house. Our lean to sheds can be build immediately next to an existing structure with the roof sloping away.
They can also be build attached to an adjacent structure and have the tall wall removed. You can email us for details showing the connection of the lean to shed to an existing wall. You should also check with a local structural engineer to make sure that the wall you are attaching the lean to shed roof to is sufficiently strong to hold the new roof.
The roof is easy to build because each rafter is one board that slopes from one side of the shed to the other. Is all you need to do is cut a birdsmouth on each end of the rafter so it can sit flat on the top of the shed wall and cut the rafter ends so they are vertical and your rafter is ready to install on the wall plates.
Lean To Shed Plans
The lean to shed style is one of our most popular designs. Our plans are designed to aid both the beginning builder and the seasoned professional to successfully build a lean to shed. Our plans show detailed information like the location of every board in all the shed walls and shed floor. By using the shed plans and the How To Build a Shed instructions together you will have the informational resources you need to plan, determine costs, and build your shed.
You can view an example of the type of information shown on our plans by viewing our shed plans example page.
Every set of plans comes with How To Build A Shed eBook that walks you through the steps cutting and installing the roof rafters for a lean to shed roof. It also covers all the other aspects of shed building like framing the shed floor, framing the shed walls, installing siding and installing trim.
Lean To Shed Doors:
Most of our designs allow you to build the lean to storage shed with doors on any of the 4 walls. This allows you to orient the sloping roof and the foot print of the shed in the best way for your needs. Lean to sheds are often built on the side of a home with the shed roof sloping away from the house. In this configuration placing the door on the end of the shed allows you to easily access the shed while still using all available space between the house and fence.
Our larger lean to sheds, 8×8 and larger, come with the option of a home built door or a pre-hung door. The plans are included for the home built door and materials list. Pre-hung doors are available from local home stores, lumber yards or door shops. You can have a door built with options like deadbolts, different jamb thicknesses, door threshold and swing direction. A pre-hung door for your shed also gives you the option of having a door style that is hard to build at home.
Lean To Shed Roof:
The larger lean to sheds us a roof slope of 2 in 12. This keeps the slope of the roof lower and material costs down. You can use either asphalt shingles or metal roofing. When using asphalt shingles you will need to check with your roofing manufacturers specifications to verify the process for installing shingles on a low slope roof. The most common solution is to install a 36 inch wide roll roofing or Ice and Water shield before the shingles are installed. When installing metal roofs you will need to use a metal roof shape that is called PBR. It is a 36 inch wide metal that is designed to be installed on low slope roofs. You can order it cut to the lenght needed for your shed roof from a local roofing supplier, home store or lumber yard that sales metal roofing supplies.
Modern Office or Studio:
Many times when building a home office or studio you might want a plan that is contemporary looking to give you a more professional atmosphere. The single plane roof creates a contemporary or modern looking space. The clean lines of the single sloping roof and addition of windows to bring natural light inside make the lean to style of shed perfect for creating a home office. View our complete modern shed plan library.
Having a home office or studio is a great way to shorten your commute to work and reduce the cost of renting office space. All of our modern sheds use the basic lean to design. With the addition of windows, upgraded siding and pre hung doors you can transform the out side of your lean to shed into a first class work space.
Firewood Shed Plans storage:
The lean to style of shed is popular for storing firewood. Using open walls allows air to flow around the wood, seasoning it so it is ready for burning. The roof sloping away from the front opening keeps moisture and piles of snow away from the main firewood access.
Horse Barn:
The lean to works well to provide protection from horses while still allowing them to move freely in and out of the covered area. Using the lean to design on the farm is popular because it is often built on the side of a raised center aisle barn or on the front of horse Run In Sheds to provide additional covered space. The lean to shed design is also one of the least expensive ways to add additional covered space to protect livestock, feed and equipment.
Pick Your Plan and Start Building Your Backyard Lean To Shed Today!
With so many shed sizes to choose from it may be hard to decide on just one. The size and style you end up building will be affected by your local zoning requirements, storage needs, how much space you have to build on and your budget. After considering these items separately and together you will have a good idea of the style and size you need to build.
Modern Shed Built as a Garden Lean To
6×10 Lean to Shed Plans | PDF Download
This step by step diy project is about 6×10 storage shed plans. I have designed this small shed with a lean to roof, so you can store all your garden tools in one place. This shed features double front doors for an easy access. Take a look over the rest of my woodworking plans, if you want to get more building inspiration. Remember that you need to select the site for the shed with attention and that you have to comply with a few legal regulations.
When buying the lumber, you should select the planks with great care, making sure they are straight and without any visible flaws (cracks, knots, twists, decay). Investing in cedar or other weather resistant lumber is a good idea, as it will pay off on the long run. Use a spirit level to plumb and align the components, before inserting the galvanized screws, otherwise the project won’t have a symmetrical look. If you have all the materials and tools required for the project, you could get the job done in about a day. See all my Premium Plans HERE.
Projects made from these plans
6×10 Lean to Shed Plans
How-to-build-a-6×10-lean-to-shed
[tabs tab1=”Materials” tab2=”Tools” tab3=”Time” tab4=”Related Plans”] [tab id=1]
- A – 2 pieces of 4×4 lumber – 120″ long SKIDS
- B – 2 pieces of 2×6 lumber – 120″ long, 8 pieces – 69″ long FLOOR FRAME
- C – 2 piece of 3/4″ plywood – 48″x72″ long, 1 piece – 24″x72″ long FLOOR
- D – 2 pieces of 2×4 lumber – 120″ long, 1 piece – 113″ long, 11 pieces – 75 1/2″ long BACK WALL
- D – 2 pieces of 2×4 lumber – 120″ long, 11 pieces – 19 1/2″ long BACK WALL
- E – 2 pieces of 2×4 lumber – 65″ long, 1 piece – 72″ long, 6 pieces – 75 1/2″ long 2xSIDE WALL
- F – 2 pieces of 2×4 lumber – 24″ long, 1 piece – 120″ long, 1 piece – 113″ long, 2 pieces – 75″ long, 8 pieces – 75 1/2″ long, 2 pieces – 72″ long FRONT WALL
- 2 pieces of 4×4 lumber – 10′
- 7 pieces of 2×6 lumber – 12′
- 2 pieces of 3/4″ plywood – 48″x96″
- 6 pieces of 2×4 lumber – 10′
- 42 pieces of 2×4 lumber – 8′
- 2 1/2″ screws, 3 1/2″ screws, 1 5/8″ screws
- 4d nails, 16d nails
- wood filler , wood glue, stain/paint
[/tab] [tab id=2]
Hammer, Tape measure, Framing square, Level
Miter saw, Drill machinery, Screwdriver, Sander
Safety Gloves, Safety Glasses
[/tab] [tab id=3]
One weekend
[/tab][tab id=4]
- PART 1: 6×10 Shed Plans
- PART 2: 6×10 Shed Roof Plans
- PART 3: 6×10 Shed Doors Plans
[/tab][/tabs]
Make sure you follow me on Facebook to be the first that gets our latest plans and for some other exclusive content. Also, follow me on Pinterest to get many ideas for your backyard from all the internet! Check out our YouTube channel! See how you can Support Me with no extra costs to you.
Building a 6×10 lean to storage shed
Assembling the floor frame
The first step of the project is to build the floor frame for the shed. You can use 2×6 lumber or even 2×4 lumber if you are not going to store heavy items. Cut the components at the right dimensions and then drill pilot holes through the rim joists. Insert 3 1/2″ screws to lock the joists together. Align the edges flush and make sure the corners are square.
Fitting the skids
The next step if to attach 4×4 skids to the floor frame. The wood skids will lift the floor frame from the ground for a few inches and thus, protect it from the elements. Attach the skids to the floor frame using metal connectors or by inserting screws through the frame into the skids.
Fitting the floor sheets
Lay the 3/4″ plywood sheets to the floor frame. Cut the sheets at the right dimensions, as shown in the plans. Align the edges flush, leave no gaps between the components and then insert 1 5/8″ screws to lock them into place tightly.
Building the shed wall frames
Side-wall-frames
Continue the project by assembling the side walls. Cut the plates and the studs from 2×4 lumber. Drill pilot holes through the plates and insert 3 1/2″ screws or 16d nails into the studs. Place the studs every 16″. Make sure the edges are flush and check if the corners are square for a neat result.
Front-wall-frame
Assemble the front wall for the 6×10 storage shed using the above instructions. Make sure you leave enough space for the door opening. You can make adjustments to suit your needs. Check if the corners are square and align the edges with attention.
Back-wall-frame
Build the back wall for the shed. Cut the components at the right dimensions and then assemble the wall frame together using 3 1/2″ screws or 16d nails.
Assembling the frame of the shed
Fit the walls to the floor frame of the storage shed and align the edges flush. Use a spirit level to plumb the walls and drill pilot holes through the bottom plates. Insert 3 1/2″ screws into the floor of the shed for a neat result. In addition, lock the adjacent walls together using 2 1/2″ screws.
Top back wall frame
Use 2×4 lumber for the top back walls. Cut the components at the dimensions shown in the diagram. Drill pilot holes and insert 3 1/2″ screws through the plates into the studs. Place the studs every 16″ on center and make sure the corners are square.
Fitting the top back wall frame
Fit the frame to the top of the back wall. Align the edges with attention, drill pilot holes and insert 3 1/2″ screws to lock them into place tightly. Use a spirit level to plumb the wall frame.
Finishing touches
Building a 6×10 lean to shed
Check out the rest of the plan, so you learn how to build the door and the roof for the 6×10 lean to shed.
6×10 Lean to Shed Plans
Last but not least, you need to take care of the finishing touches. Therefore, fill the holes with wood putty and then smooth the surface with 120-220 grit sandpaper. Apply a few coats of paint or stain so you enhance the look of the shed and you protect the components from decay. Don’t forget to take a look over PART 2 to learn how to build the roof for the shed, as well as PART 3 to see how to frame the front door. If you want to get this project as a PDF file, with 1 full Cut list and 1 full Shopping list, please take a look over the GET PDF PLANS button bellow.
Get PDF Plans
This woodworking project was about 6×10 shed plans free. If you want to see more outdoor plans, check out the rest of our step by step projects and follow the instructions to obtain a professional result.
which one is better to choose and how to do it? © Geostart
Heading:
Shed
Foundation for a shed: which is better to choose and how to make?
The foundation is needed not only for houses and cottages, but also for outbuildings, which include sheds. Such structures are often erected on a solid foundation. With this addition, buildings become taller and stronger. It is worth figuring out which foundation is more suitable for a barn and how to install it yourself.
Features of choosing a foundation
Today, there are several varieties of foundation foundations. Each of them has its positive and negative sides. For the barn, you need to select the foundation as carefully as for the main structures on the site.
To decide on one option, you should rely on the characteristics of the soil.
- Loose, sandy soil is characterized by one serious problem: after melting snow or heavy precipitation, such soil is saturated with moisture. This can lead to the fact that he just “floats”. Under these conditions, professionals advise to build a monolithic or tape base.
- As for clay soil, it must be taken into account that it is subject to freezing at a considerable depth. Under such conditions, quicksands also form.
For such soil, a pile foundation is more suitable.
- The negative aspects of frozen soil and quicksand are unfamiliar to gravel soils. In such conditions, it is possible to safely mount a columnar foundation.
- There is also a special rock type of soil. On it you can build any kind of foundation. The only exceptions are screw bases.
To select the optimal type of foundation, it is important to take into account the topography of the soil, as well as the level of groundwater. To find out all the necessary data about the site, you should contact the specialists. However, it is worth considering that such geological surveys can be quite expensive, so most homeowners rely on the experience and advice of neighbors. There is a way to independently study the soil to select the optimal foundation. For this, a test screwing of the screw pile is done. At the same time, this part is deepened into the ground manually so that it is possible to determine the level of groundwater, as well as the depth of the bearing layer at the moment of screeding.
Preparatory work
Before proceeding with the construction of the foundation for the barn, it is necessary to carefully prepare the site in the place where the outbuilding will be located.
At this stage, the following work should be carried out:
- it is necessary to properly level the place where the foundation with the barn will stand;
- remove everything superfluous from the ground: hemp, knots, dirt, trees, bushes and other similar objects.
After clearing the land for each type of foundation, their own work is carried out. For example, a large hole is dug for a monolithic foundation, and a trench needs to be prepared for a linear foundation. If the site has too uneven ground or soil with a large slope, then leveling it will not be so easy. In this case, experts recommend installing foundation structures on piles.
The subtleties of manufacturing
You can make the foundation for the barn with your own hands. You should consider in more detail a few simple instructions with a step-by-step description of the installation of the foundations for this outbuilding.
Screwed
Screwed foundations are erected as follows:
- first, markings for screw piles must be set along the perimeter of the walls;
- then you need to dig small recesses, leaving about 1.5–2 m between them; it is necessary to put piles in the prepared pits, which should be located at the corners; if the structure has internal partitions, then the piles must be fixed along the line of their construction.
- if you plan to lay a floor of boards in the barn, then the piles need to be placed under the beams;
- it is necessary to screw in large piles that have a diameter of more than 100 mm and a length of more than 150 mm, it should be borne in mind that such installation work is carried out by special equipment;
- piles, which are more modest in size, are screwed into the soil manually using levers, while making sure that the foundation structures are in an even vertical position;
- fixed piles need to be cut to height, for this it is recommended to use a bubble or laser level;
- cement mortar must be poured into the pipes;
- caps must be attached to the top of the piles; in one structure, the foundation base is assembled by a channel welded around the perimeter or an I-beam.
Columnar
To build a similar base for a farm building, you may need the following materials:
- concrete mortar to be poured into the formwork;
- reinforced metal or asbestos pipes, grouted with concrete;
- brickwork;
- but;
- concrete blocks.
The foundation with pillars for the shed is built in a different way than the screw one, and includes the following steps:
- to install the pillars, you need to dig recesses of a suitable depth, based on the markup drawn up before;
- the gap between the supporting parts should be left in the range from 1.5 to 2 m;
- the depth of the foundation structure for the outhouse must be at least 150 mm below the freezing point of the soil;
- at the bottom of the pits it is necessary to sprinkle large gravel (about 100 mm), in addition, pour the same amount of sand; these materials should be compacted, and then roofing material should be laid on top;
- supports should be placed at the same level, they should be located about 150-200 mm above the ground;
- on top of the supports, you need to put several layers of waterproofing;
- pillars must be surrounded by a blind area so that the soil is not washed out.
Tape
Tape foundations are the most popular because they are inexpensive, easily withstand impressive loads and are versatile.
To prepare a similar base for a barn, proceed as follows:
- along the perimeter of the outbuilding, they dig a trench having a depth of 200–300 mm below the freezing level of the soil;
- the trench width indicator depends on the dimensions of the base, free space should be allocated for mounting the formwork;
- , it is necessary to equip a crushed stone pillow with a thickness of 100 mm, and then tamp it well;
- sand should be poured into the bottom of the trench and also compacted;
- it is now necessary to prepare the formwork with the top edge rising 200–300 mm above the ground;
- the formwork must be strengthened with struts, while the upper extreme part is knocked down with transverse bars in increments of 1.5–2 m;
- roofing material or polyethylene should be placed inside the formwork on the walls;
- it is necessary to carry out reinforcement, for which steel bars with a diameter of 8–12 mm are useful; the reinforcement must be laid and connected so that a lattice with cells of 40–50 mm is obtained;
- must be poured with concrete; to get rid of air bubbles, reinforcement must be stuck into the concrete several times over the entire surface of the pour;
- , cover the setting concrete with polyethylene film and moisten it from time to time to prevent the material from cracking;
- after 28 days, when the concrete hardens to the end, the formwork must be removed and the trench backfilled with earth;
- two layers of waterproofing should be applied to the concrete pour.
According to home builders, this foundation is quite simple. Its construction is not difficult.
From foam blocks
The foundation from blocks (foam or cinder blocks) is strong and reliable.
It is mounted in several stages, namely:
- first you need to mark the site and dig trenches of the required depth;
- the bottom of the trench must be leveled and compacted;
- the next step is to build a bed of gravel and sand;
- after that, the blocks can be laid out in a trench; for this, you should contact the services of special lifting equipment;
- a cement-sand mixture should be applied to the side walls;
- each next block row must be laid with a slight offset of half the length compared to the previous one;
- in the space separating the rows, a solution of sand and cement must be applied;
- at least 1 row of foam blocks must be laid above the ground;
- bituminous mastic must be applied at the top and side using rags and kwach;
- in the end, you need to backfill the trench with earth.
Monolithic
The monolithic base is reliable and strong. It can be used on almost any soil. On this basis, a barn of any size will stand for many years, from very small to large (for example, with dimensions of 6×4 m).
The technology for constructing this type of foundation includes the following steps:
- a hole must be dug under the entire pouring area, while its depth should be only 0.5 m; after compacting, sand (200 mm) must be poured onto the bottom, in addition, the sand must be slightly moistened and compacted;
- crushed stone is laid on the sandy layer (200 mm layer) and also compacted;
- floor slabs are laid on the resulting sand and gravel cushion and prepared for pouring; for this, formwork is assembled and reinforcement is made; in this case, the cells in the lattice should be 20×20 m, then the formwork is poured with concrete;
- you need to expel air bubbles from the solution, which should be done using a special vibropress;
- put a polyethylene layer on the hardened solution;
- formwork can only be removed after 28 days.
Helpful Hints
Experts recommend that follow some tips when building a barn foundation.
- A large outbuilding will require sectional planning. In this case, the foundation base is poured not only along the edges of the building, but also under it, so that the bottom of the shed does not subside over time, but simply lies on the concrete.
- Cement dries completely on average in 24-28 days, however, the construction of an outbuilding can be started earlier – after a few weeks, when the strength of the pour has been achieved by more than half.
- If a columnar structure is mounted on heaving ground, then it should be borne in mind that it must lie deeper than the ground freezing.
- If you want to save money, then instead of asbestos pipes and roofing felt, you can use simple car tires. In conditions of non-rocky soil, they do not need to be deepened much. The cavity of these objects should be covered with sand, and then poured with cement.
- Do not forget that the column foundation under the barn must be waterproofed and drained without fail.
- Experts recommend making the required calculations and measurements in advance, as well as preparing all the necessary recesses on the site. And also you need to decide on the number of foundation pillars. Otherwise, you may run into serious problems. For example, in the midst of work, it may turn out that there are non-digging rubble nodes in the ground.
- Screw piles can be made slightly longer if required. To do this, the ends at the top are complemented by threads and grooves.
- It must be remembered that heaving does not affect the piles, since their outer surfaces are treated with an anti-corrosion agent. However, the building at the same time receives an underground, the perimeter of which must be covered with decorative material, for example, siding, tiles or corrugated board. In order for the underground to be ventilated, the intake is equipped with ventilation products.
- The barn must be built immediately after the completion of the work related to the foundation. Otherwise, the heaving of the soil, which occurs in the spring, may slightly move the pillars from their original point.
- For outbuildings, it is permissible to erect combined types of foundation foundations, for example, a columnar foundation with a grillage. To make it, you need to fill in a shallow strip foundation with recesses intended for supporting parts, located in the corners with a step of 2 m.
- Block foundations are made from different types of blocks. The most common structures are made of cinder blocks and foam blocks. If it is decided to make the base from the first, then you need to know that such materials have a porous structure, which contributes to their rapid destruction under the influence of moisture.
- When making a foundation with your own hands, you should rely on the instructions. Do not neglect any of the stages of work.
- When building a foundation for a farm building, you should not make any mistakes, as this may affect the reliability of the entire structure as a whole. If there are doubts about your abilities, then it is better to turn to professionals who, for a fee, will make a high-quality and strong foundation for any outbuilding.
|
author Kovalev Mikhail |
DIY shed
Geodetic measurements: types, classification and characteristics.
An example of filling out the page of the journal for measuring directions
Geodetic networks, classification and methods of their development
Calculator
prices for cadastral works
Calculate
Floor insulation in a wooden house: work procedure + popular heaters
Foundation concrete: composition, grades, guidance technology
Foundation for a shed
A barn in the country is perhaps the first necessary building.
While the residential building will only be built, it will serve as a place to store the necessary equipment. And after the construction is completed, the barn can be a pantry, a place to store firewood, or, for example, a chicken coop.
How to choose a shed for a dacha: considering options
Often, along with the construction of the barn, the development of the site begins, so by this time it is necessary to already have a detailed plan, which will indicate the location of all planned buildings: a residential building, a bathhouse, a gazebo, a garage, a barn, etc.
Since the summer cottage usually does not have a large area, it is better to combine all outbuildings to save space – to build a shed that will combine the functions of a pantry, toilet and shower room. This decision is especially justified at the initial stage of site development.
The barn can be placed, for example, near the border of the plot, behind the house, to hide the hozblok from prying eyes. In addition to the house, additional camouflage to the barn can be provided with the help of vertical gardening of the site. Another option is to place a barn near the house so that you do not have to run through the entire plot for every little thing. Very often, a place is allocated for a barn, which, for various reasons (shading, north side, poor soil), is the worst for planting trees or growing horticultural crops.
Consider some of the most popular options for sheds for summer cottages.
Ready-made container utility block
The fastest and least labor-intensive option is to purchase a ready-made barn (change house) in the form of a collapsible utility block. This is a monoblock structure (usually of a container type), which is based on a rigid metal frame, which is sheathed on the sides with metal, with insulated walls, and electrical wiring has already been laid in it. There are many options – it can be either just a small storage shed or a multifunctional utility block, which includes a toilet, a shower room and even a place to relax, and some models have a removable canopy, which makes it possible to make a small veranda.
To install such a container hozblok, no foundation is required; a columnar foundation or simple concrete blocks will be enough. In a ready-made form (however, a minimal assembly of internal communications may be required, for example, connecting hoses to water collectors, which can be done independently), it is delivered to the site, a truck crane is required for installation. Outwardly, such a barn does not look very attractive, but it can be sold after the construction of a residential building is completed.
Shed from unedged boards (slab)
This option is the cheapest and fastest for self-assembly, for its installation you don’t even need to fill the foundation. To protect the building from moisture and decay, it is installed on pallets or wide bars. The optimal size is about 2 m wide, 3 m long and 2.4-2.5 m high. For the manufacture of the frame, a wooden beam is used, which is then sheathed with an unedged board (croaker). The roof is shed, roofing felt (roofing material) is used as a roof. To make such a barn more attractive, climbing plants can be planted along the walls, and the house itself can be decorated with graffiti. Even a simple painting will make it prettier and additionally protect the tree from rotting.
Such a shed is a temporary option, after 3-5 years it will need to be replaced with something more permanent.
Frame shed
Also not very expensive and quickly erected option. But unlike the previous example, the main thing is to create a strong supporting frame from a high-quality durable timber. Over time, when repairs are needed, it will simply be necessary to replace the skin, installing, for example, attractive siding. And replace the shed roof with a gable roof, laying bituminous tiles instead of roofing felts (roofing material). And a nondescript barn will immediately become an original and attractive part of landscape design. For such a barn, a columnar foundation will already be required.
Foam block shed
An option that combines high durability and reasonable cost, while foam concrete has very good thermal insulation performance, which will help to avoid the work of insulating the shed. Using siding or decorative plaster for finishing will add attractiveness and presentability to the barn.
Brick shed
A durable and solid option for those who need a safe and fireproof building, for example for raising small animals or poultry. Most often, a brick shed is erected after the construction of a residential building is completed in order to create a single and harmonious architectural ensemble. A brick shed can be combined, for example, with an attached gazebo or bathhouse. The disadvantages include the large weight of the building (a solid foundation will be required), the difficulty in carrying out the work and, as a general consequence, the high final cost.
We build a shed for a summer residence with our own hands
The best option that combines durability and attractiveness, which we can do with our own hands, is a frame shed. Consider step-by-step instructions on how to independently build a wooden hozblok in the country.
- Foundation laying
At the selected place, we mark and clean the place. A frame shed can be installed on a solid slab or strip foundation, but a columnar or pile-screw foundation will be enough. To do this, at the corners of the site, at the intersection of the internal walls (or after 1.5 m), we install asbestos pipes and fill them with crushed stone-concrete mixture (option – we lay out brick columns deepened into the soil by 70 cm). After that, you need to give the foundation a couple of weeks to settle.
Laying the foundation
In order for the foundation to last for a long time, the posts (asbestos pipes) must be treated with a special mastic before backfilling in order to improve their waterproofing.
- Frame mounting
Before installing the frame, the wooden beam must be treated with an antiseptic and a special protective impregnation. We lay the base from the beam already on an established foundation, while a layer of roofing material (roofing felt) is needed between the posts and the beam. The floor can be laid both immediately and during finishing work – this option is preferable, because it will be easier to install vertical racks.
We fix vertical posts to the bottom trim – we determine their number and location based on the number of corners and places for installing door and window openings. Before the final fixing of the racks, it is necessary to check that they are located strictly vertically.
Mounting the racks
After fixing the vertical racks, we attach the upper trim (the upper part of the frame) to them, while on the bars it is necessary to first prepare cuts on the sides and in the middle. All connections are made using steel corners and self-tapping screws.
- Roof fittings
To equip a shed roof, it is necessary to provide that the vertical posts on one side are higher – this will give the roof the necessary slope and ensure good water and snow removal. For rafters we use a board 40 mm thick, while the length of the rafters should be 50-60 cm more than the width of the frame. Placement of rafters – approximately at a distance of 0.5 m from each other.
At the points where the rafters will rest on the beam, to increase the strength of the installation, we make cuttings. After laying the rafters on the rafter frame, we fix them with self-tapping screws.
Assembling the roof of the barn
For sheathing the walls and roof of the barn, you can use a board measuring 25×150 mm. We lay waterproofing on a wooden roof – roofing felt (roofing material). However, to give the shed a more presentable and attractive look, you can use corrugated board or shingles as a finishing roofing. Placing the boards close to each other, first we sheathe the front side of the shed, and then the side and back parts.
Having sheathed the walls of the barn with boards, their outer side must be further polished with an electric planer. This will not only add to the attractiveness of the design, but also allow rainwater, without lingering on the walls, to easily and quickly slide down the smooth board.
Do-it-yourself construction process of a frame-type shed in the country
Papa Master! > In the summer cottage > The process of building a frame-type barn in the country with your own hands
Outside the city, some kind of vigorous activity is always in full swing on its site, for the qualitative implementation of which inventory and various accessories are needed. You can’t bring so many things into the house, which means you need a place to store them. There is no need to build something monolithic to stand for centuries, an ordinary frame building will serve faithfully for more than one year. And its construction takes much less time, money and effort, in comparison with other options.
Starting work on the construction of the barn: pouring the foundation and erecting the frame
Do-it-yourself construction of a barn in the country house begins, just like the construction of any other structure. With the provision of a quality support platform.
In this case, it is not necessary to avoid subsidence of the structure (its weight is too low). It is needed to protect the building: it prevents rotting and fungal infection of the lower beams from contact with the ground, and also reduces the risk of possible flooding and damage to the inventory stored inside. Consider the most a simple version of the foundation – tape shallow:
we expose the reinforcement of a small diameter (according to calculations, approximately 8 mm) with the provision of a protective layer.
3. Building the formwork. Pouring concrete mix.
- barn exterior
- frame diagram
4. The mixture is compacted by hand to avoid voids. Next, the surface is covered with a film.
5. Moisten the tape periodically to avoid cracking the surface. Periodicity – 2-3 days, until the final solidification.
READ ABOUT
Use of a pile-strip foundation depending on the soil and structure.
Now let’s move on to the actual construction of the shed in the country with our own hands – we are building its frame. It is advisable to prepare and adjust the parts in advance so that the assembly process itself takes only a few hours:
1. Coat the surface of the foundation with bitumen and let dry. We lay four horizontal support elements around the perimeter, connect them to each other using a tongue-and-groove system (this way all the main support elements will be connected).
- shed frame diagram
- shed frame diagram pic 3
2. At the corners of the laid rectangle, drill four holes for the spikes of the vertical supports. We insert the bars into these grooves. And also in the places marked under the doors and windows, additional supports are installed.
3. In the same way, the upper support beams along the perimeter of the structure are fixed to the vertical supports.
4. Corner vertical bars must be properly fixed with inclined stop elements. Boards are placed from the middle of the vertical beam to the middle of the horizontal one and fixed with self-tapping screws.
- fasteners in frame construction
- diagram of the external corners of the frame
5. On the upper horizontal elements are mounted supports 30-40 cm long protruding beyond the perimeter. The rafters will rest on them.
We complete the construction of a barn in the country with our own hands: installation of the roof and sheathing of the frame
Now the construction of a barn in the country with our own hands is being completed and such work is being carried out:
1. Cross beams are mounted on the upper horizontal elements. Please note that one side of them should be slightly higher than the other, so we attach them not strictly horizontally, but with a slight slope. This is done so that water from precipitation does not accumulate on the surface of the roof, but flows down.
- doorway
- lintel over doorway
- tenon-groove connection
- jibs
2. Grooves are made at the intersections with the rafters. The rafters are laid in grooves with a step of 50-70 cm.
3. The upper part of the structure is covered with roofing material and sheathed with boards. Then the installation of roofing material is carried out on the constructed shed roof.
4. Sheathing is carried out either with wooden slats, or chipboard sheets, or any other material convenient for you.
- roofing
- top framing with fixing brackets
5. Install door and window frames. We mount the front door and window frames. If wood is used as a skin, be sure to sand its surface. Firstly, water flows better from a smooth wall and does not linger anywhere. Secondly, the consumption of paint material will be significantly reduced. Also, be sure to treat the wood with special compounds to protect it from rotting and the formation of fungus.
It is not at all difficult and not expensive to build such a structure compared to brick structures. And the time saved on the construction of such an option can be spent on more important things, which are more than enough on a suburban area.
Similar posts
Interesting ideas for do-it-yourself dacha renovation are not an illusion, but an embodied reality!
For most summer residents, a plot of land with buildings is a place for farming, …
Home craftsmen who want to build storage for vegetables and fruits need to know how to build a cellar
Cellars have long been built in Russia. They served as a pantry and, in a way,…
The main ways to solve the problem of getting rid of the bark beetle in the house
A house made of wood attracts people with its greatness, practicality and environmental friendliness,. ..
Choose a simple children’s house made of wood with your own hands!
Children love to play building their own house out of boxes, stools, sofas…
Interesting on the site
-
Technology of laying walls from aerated concrete blocks
In terms of performance, gas blocks are many times better than bricks. The process of laying them is so simple that even a person who is completely far from the construction site can handle it. They are not …more… »
-
Transformation in a week or is it possible to use drywall in the bathroom
kitchen …more… »
-
Advantages of houses made of SIP panels
Houses built according to Canadian technology are comfortable for living in winter and summer. They are warm, practical and suitable even for harsh climates. This is due to the nature of the technology. With …more… »
-
Alternative to power supplies for 12v and 18v screwdrivers. Do-it-yourself replacement
A screwdriver is considered an indispensable device for professionals who work with it all the time and for an amateur who performs certain types of work.
This tool has become the best alternative for a screwdriver, which is very …more… »
-
Do-it-yourself block machine – simple equipment for the manufacture of ceramic blocks, cinder blocks, wood concrete, gas silicate and other building blocks An interesting fact is that some building materials can be …more… »
|
Razumny leafed through the file and continued: – The identity of the deceased could not be established, since no documents were found with him. There was a version that the death of an unknown person occurred on the territory of TashMI, in one of his clinics, where he was poisoned, or was poisoned, after which the corpse was thrown into the Salar. Having sailed along the river past the Caravanserai, the body got stuck under the bridge. This version in various versions was carefully worked out, but did not advance the matter a single step. – Were there other versions? — We suggested to the workers of the criminal investigation department of the city that it was necessary to work out the version about the possible killing of an unknown person on the territory of the Caravanserai. — So what? The sensible one shrugged his shoulders. — Rejected. Say, where do the local vagrants get potassium cyanide from? .. “I see…” Bulatov said thoughtfully. – But in vain. In my opinion, the version deserves attention. Well, what about the second murder? – It is also connected with the Caravanserai. The corpse, again of an unknown man, according to the appearance and clothes of a typical tramp, was discovered in the early summer of 1948 years on Figelskogo Street at the very gates of the Caravanserai. Death came from a blow to the head with a hard object. – Understood. Leave me these observant affairs as well. I read them and think. Tomorrow we will continue the conversation. Razumny stood up, put the two folders he had left on the table in front of Bulatov, and said: — In my opinion, Boris Ilyich, the main trouble is that the criminal investigation department of the city does not have a reliable person in Caravanserai who can be attacked. it would be leaning… – You are probably right, there is something to think about. Until then, goodbye. Till tomorrow. The next morning, having warned the duty officer that he would be delayed for an hour, Bulatov drove along Karl Marx Street to TashMI, then to the right along Figelsky Street along Salar, and then across the bridge along Kuibyshev Street. Having passed the distillery, he asked to stop and wait for his return. None of the passersby paid attention to a citizen of about forty, in a gray suit, who was walking along the sidewalk, carefully looking at the factory buildings, the solid brick fence that surrounded the factory area from the Salar side. Stopping on the bridge, for some time he absentmindedly examined the opposite bank, haphazardly built up with many huts, and heating pipes with a diameter of about 20-25 centimeters, stretched over the river. Even the most insightful person would never have guessed in this complacent citizen, lazily leaning on the railing, the head of the criminal investigation department of the republic. In the meantime, some of the inhabitants of these slums, not without reason, would prefer to stay away from him. After standing for some time on the bridge, Bulatov slowly walked down Figelskogo Street, peered through the gates left over from the time when the Caravanserai really was located here, and turned back. In his office, after reading, as usual, a report on criminal offenses in the republic and separately in the city of Tashkent, Bulatov thought about it… The places he had just visited were memorable to him. During the war years, he had a chance to participate in the elimination of a gang created in Tashkent by a traitor to the Motherland, a German agent Semenchenko, who organized robberies and robberies in order to create uncertainty and anxiety among the population. Caravanserai… Once upon a time, caravans really stopped here. This is reminiscent of the ancient, a thousand times repaired and converted gates. At the end of the last century, an abandoned wasteland on the distant approaches to the city began to be gradually built up. Here, mostly newcomers found shelter, who for various reasons could not settle in the city. These were ruined farmers, mardikers, homeless vagrants, individuals with a dark past. The wasteland was built up haphazardly, everyone built as best they could and what they could, and the Caravanserai, as the village was called from old memory, was a collection of huts and shacks, an unthinkable labyrinth of narrow streets, alleys and dead ends, in which the natives themselves sometimes got confused. The devastation and famine caused by the civil war increased the influx of migrants to the “grain city”, the number of people living in the Caravanserai, which pushed its borders even further. By the end of the forties, the Caravanserai had up to three hundred residential buildings built without any plan, in which more than one and a half thousand people lived. In the relevant authorities, the question of the need to eliminate this hotbed of unsanitary conditions and crime has already been raised more than once. But for this it was necessary to provide housing for about seven hundred families, which at that time was an impossible task. Bulatov exhaled and pushed the folders with observation files towards him. Sooner or later, the Caravanserai, of course, will be demolished, but this is a matter for the future, but for now … For now, we have to put up with its existence and build our work based on the real state of affairs. In the afternoon, Bulatov finished studying the surveillance files on two unsolved murders connected with the Caravanserai, and summoned Reasonable. “You are right,” said Boris Ilyich. – To solve these crimes, you need to introduce your own person there. And it is in the midst of the population of the Caravanserai. “I’m glad that our opinions coincide, Boris Ilyich,” Reasonable smiled. The threads of many thefts and robberies stretch in the Caravanserai. It’s time to take decisive action. Bulatov picked up the receiver. – Nabi Khodzhaevich, if you are not busy with urgent business, come to me. Lieutenant Colonel Khodzhaev did not keep himself waiting. “We would like to consult with you,” Bulatov immediately connected him to the conversation. “Here we are discussing with Reasonable measures to solve the murders, one way or another connected with the inhabitants of the Caravanserai … – Don’t believe in telepathy after that! Khodjaev chuckled. And I, imagine, think about the same thing. Several unsolved thefts around the city – and they all end up in the Caravanserai! — What if we accept both unsolved murder cases? Bulatov suggested. – That will be right! Khodzhaev nodded. — I agree with the opinion of Comrade Lieutenant Colonel, — Rational supported. – Well, that’s great. Boris Ilyich was silent for a while, got up from his chair, went over to a map of the city hanging on the wall, parted the curtains. – And we will have to start, as we have already agreed, with the introduction of a worker into the Caravanserai itself. It is necessary to select an experienced operative, whom no one in Tashkent knows. Of course, we will bring him up to date, provide the appropriate legend. Take a look here. Once the Caravanserai area was the most remote outskirts of the city. Now the city was closing in on him from all sides. Wide avenues, bright well-maintained residential areas. It’s no coincidence that traces of unsolved crimes lead exactly to Karavay-Saray. We are taking a risk by sending our comrade to this snake’s nest. Bulatov paused, looking thoughtfully at the map, and when he spoke again, his voice sounded calm. — The time will come when there will be no trace left of the Caravanserai. I don’t know what will be in its place – a microdistrict, a boulevard, a green zone. Yes, it doesn’t matter. This will. In the meantime, we must clean the Caravanserai from the inside. Bulatov returned to the table, poured water from a carafe, drank half a glass. – I also think that this is the only right decision. And its successful implementation will depend only on us! The wise man said softly. “Yes, that’s right…” Khodjaev agreed. – Well, then. Prepare, Alexander Alexandrovich, an instruction from the city’s CID to transfer the cases under consideration to our proceedings. |
actually built a barn. Sakhalin.Info
12:31 21 May 2020.
Alexander Kilimov
Construction, Business, Yuzhno-Sakhalinsk
After the publication of Sakh.com news agency about the improvement problems on the territory of the new Green Palace residential complex, located at the Mir-Purkaeva crossroads in Yuzhno-Sakhalinsk, an initiative group of entrepreneurs turned to the editorial office. Businessmen do business in a shopping center at a residential complex and presented a whole bunch of problems that they have been struggling with for two years since the opening.
The biggest problem, says one of the members of the initiative group, is that in the complex the Sahinstroy developer and the Satellite management company are practically the same people. According to him, the Criminal Code acts under the leadership of the developer in his interests.
– One of the tenants in the last publication announced that the warranty period was coming to an end. The same situation in the shopping center. For two years of struggle, we could not do anything. We contact the management company, the management company sends us to the developer. The developer sends us back to the management company. That is, we believe that they have a certain conspiracy not to fulfill their obligations, and this “football” takes place over the course of two years. We write letters, ask for reports. You dig one thing – another pops up. There is a lot of work, a lot of problems, – the source of the agency complains.
The very first problem that entrepreneurs faced was the huge utility bills issued by the management company and the developer. Questions about what tariff is charged are ignored, and this whole story is still shrouded in darkness.
– At first we did not understand all this, the bills came, and we paid them regularly, but at the same time we asked questions. Transparency in this matter was not achieved, so some owners of commercial premises began to refuse to pay. We generally had speculation that we are paying for this construction site, which is located nearby, because the utility bills are huge. Then they threatened us that they would turn off the electricity if we refused to pay. And how can we save employees if everything is turned off for us? Many people paid for these reasons,” says the co-author. – At the moment, we still cannot conclude direct contracts with resource supply organizations – neither with Energosbyt, nor with SKK, nor with City Vodokanal. Many will say that it was in our hands to change the management company. But can you imagine what was done? They took ownership of four premises where there is a heating unit, an electric meter, a water metering unit and some other technical room. The Criminal Code allegedly bought them from the developer as property. This means that we cannot re-elect the management company. Even if we re-elect another management company, it will not be able to enter these premises, because there is an owner there.
But recently we got justice through the court – they had to give up these premises, because in fact it was illegal. For two years they did not admit it.
Today, in order to change the management company, it is necessary to hold a meeting of the owners of commercial premises, at which more than half must vote in favor of changing the company. But the initiative group believes that this option will not work. They are sure that many of the premises belong to relatives of the leaders of Sahinstroy and Satellite. The interlocutor of the agency also noted that entrepreneurs cannot complain anywhere, since the shopping center sells commercial premises to the property, that is, one cannot rely on either the Civil Code or the Housing Code.
The mall also has fire safety issues. An inspection came and found violations. In addition, in May last year, the Management Company posted announcements that the fire extinguishing system would be filled in the shopping center with water, although the building has been operating since May 2018. According to the entrepreneurs, the alarm system often goes off in the building, and visitors do not understand how to behave.
— The developer has a restaurant, it is located on the fourth floor. There is also access to the terrace, which is a common area, that is, a common place for all owners to use. What does a builder do? He arranges his own terrace there, sets up tables, puts up a greenhouse, last year they used to dry flounder on it – they do what they want. We are told: “Yes, please use this area”, that is, the developer agrees that this is the total area. But there is no passage to the terrace. You can get to it either through a restaurant or through a corridor that was sold to one of the owners,” the co-author comments.
The entrepreneurs also identified problems with a roof leak, an unpleasant sewer smell on the basement floor and a parking lot, which, according to the project, is not such, according to the businessmen. Now it is a street unguarded parking lot for residents of the residential complex and visitors to the shopping center, as well as for those who live in neighboring nine- and five-story buildings.
– According to the project, it turns out that this is a place for temporary parking, some kind of through passage to the building under construction. If we knew about it, we would think about it. How can you build a shopping center without parking? That is, there are disagreements with the project in the contract,” says the interlocutor of Sakh.com. – Some cars just wintered here, some were in emergency condition, and we don’t know whose they are. In addition, no one cleared the territory from snow in winter, because it is not clear who owns it. We applied to the management company, we were ready to chip in for clearing, but the management company does not take up this. We really need to put up a barrier, we are ready to pay for it, but the Criminal Code apparently does not want to deal with this and take responsibility.
An initiative group of entrepreneurs was also horrified by the situation with the walls. According to the contract, they are reinforced concrete, but in reality they are GVL, cotton wool and facade tiles.
– We quickly made repairs in order to start up faster, we wanted to work. And recently, one of the owners decided to make repairs, began to open the walls and was simply horrified. It is impossible to beat out some truth, they are not going to redo anything. And the building is cold, and what huge heat losses we bear. Everywhere the floors swell. We are already worried that this building will not fall apart. They feel like masters, but they don’t behave like a master. There is neither an electrician, nor a plumber, nor an engineer on a permanent basis. Only one janitor for the entire residential complex. And if there is any problem, then they say, they say, solve the problem yourself, there is no electrician now. That’s how much they messed with our eyes that everything will be beautiful and wonderful, but in fact they built a barn, – summed up the businessmen.
As the lawyer of the Sahinstroy company commented, the developer charges for electricity, since the networks still belong to the residential complex, therefore, direct contracts with resource supply organizations have not been concluded. As of today, the last facility is being commissioned, and together with its commissioning, the networks will be transferred to all owners.
– As for the tariff, Sahinstroy, on the contrary, calculated it for entrepreneurs (owners of premises in the shopping center) not as legal entities, but as individuals minus VAT. Therefore, they cannot in any way claim that our tariffs are inflated. As for the losses for which Sakhalinenergo charges them, in principle they can eliminate this shortcoming by directly contacting Sakhalinenergo and finding out where the losses are and who will be responsible for them. We don’t earn anything, we even pay 40% of the resource supply organization in advance, and then we can’t receive additional income from these owners, that is, we don’t even receive income for mediation, all because the power grids that belong to the complex still belong to us. Accordingly, we entered into an agreement with Sakhalinenergo. With the commissioning of the last house, all networks will be registered as real estate and transferred by law to all owners from the entire residential complex.
He also confirmed that the four premises, which the initiative group of citizens told about, were actually registered by Sahinstroy. Since the owners did not agree among themselves on how utilities would be provided, the company registered these premises at its own expense. In no case in order to make a profit, but to ensure that resource supply organizations enter into an agreement not with each owner separately, but with the one who owns the premises with the node. For example, “SKK” works according to this principle.
— We took over the technical premises for ourselves so that the building would not freeze and to conclude contracts for the supply of utilities with resource-supplying organizations. What is the initiative group of businessmen doing, who, by the way, are in the minority? They sue. We, in principle, do not refuse. We say that we do not need these premises, we do not earn money on them, there is no economic sense in this deal. We agreed with their claim. As the owner of these premises, Satellite Management Company has already made changes to Rosreestr, that is, it has transferred these technical premises from the category of private property to the category of common property, so there are no more problems with this, – said the representative of Sahinstroy.
“Most of the premises cannot be sold to the relatives of Satellit and Sahinstroy,” the lawyer comments on the arguments of the entrepreneurs. – If they are talking about a restaurant, then this is a completely different legal entity, it has nothing to do with us. By the way, they repeatedly wrote to the antimonopoly service, which did not find any violations. Sahinstroy owns about 6-7 premises in a four-story shopping center – this is a meager percentage.
Regarding the walls, the developer said that according to the project, the building has both reinforced concrete walls and those made of the material that the owners of the premises are talking about:
— We told them this and showed the project documentation. The most interesting thing is that they accepted the premises in 2017, and began to write complaints in 2019, that is, much later. This happens because one owner is always dissatisfied with something, although this entrepreneur successfully rents out four premises in a shopping center. They want to put their problems on the developer. The developer has no relation to the building since 2017, except for the warranty. They themselves cannot get together, solve their problems and write to Sakh.com.
– We are also aware of parking, this is the subject of litigation. It is always open, accessible, there is no barrier. The land on which the parking is located belongs to the city administration. Nobody prevents their initiative group from getting together and solving this problem – contacting the mayor’s office and putting up a barrier. We have done our work according to the project. They seem to be ready for something, but this has been going on for more than a year – they do not gather and do not decide anything, because they are a minority in this initiative group. Sahinstroy is also the owner of some premises, and the company has never received an official invitation to a meeting. According to the project, this is a parking lot that is intended for a temporary stop,” the lawyer said.
The developer also repaired the terrace at his own expense, and, as a representative of Sahinstroy said, access there is always open to all owners of the premises. There are two entrances and both of them are open, no one restricts anyone.
IA Sakh.com
how to do it yourself? Instructions, photos, diagrams and examples of barn layouts, made of wood, frame structures
Reviewed by: Terrari Design School
Over time, in a country house or a country house, it becomes necessary to store various tools, consumables, fertilizers, bags, buckets and other useful things.
There is a lot of everything and the entrance hall of a residential building is becoming small. It can be folded in the cellar in the attic, but it is not convenient to use the contents of such premises every day. Therefore, a special building is required for storing useful goods – a barn.
It’s usually more cost effective to build your own barn as you can save money and keep yourself occupied for a few weekends, but the duration depends on skill and health.
By the way, if the latter is not very good, then it is wiser to ask relatives for help. Son, younger brother, brother-in-law, godfather will not take expensive. But still, let’s figure out how this is done in a balanced, fast, reliable and, if possible, cheap way.
Review content
- Decide on the purpose of the outbuilding
- Consider the legality of building a barn
- What to build a barn from?
- Scheme and layout
- Do-it-yourself barn construction stages
- Photo of a barn at their summer cottage
Decide on the purpose of the outbuilding
If you study a lot of photos of sheds for a summer residence or a country house, you can see various shapes and sizes. Therefore, they are divided into many categories:
- Building for storage of gardening or garden tools. Usually this is a simple room made of wood covered with slate with an area of 6-12 square meters;
- Multifunctional version designed for storage, used as a pergola and offers access to the cellar through the interior;
- There is a modification for keeping birds, rabbits, pigs with a corner for various useful things;
- Annex for summer kitchen and barbecue.
But most often this building is used to store household tools: choppers, scythes, pitchforks, axes, hacksaws, hammers and other things.
We take into account the legality of the construction of a barn
Unfortunately, it is illegal to create a barn on the site without the permission of the sanitary and epidemiological service. In addition, if the place is chosen unsuccessfully, a conflict situation with neighbors may arise.
They may complain about the shade in the direction of their beds, regular noise, unpleasant smell.
Based on common sense, the distance from the borders of the barn to the beginning of the street should be at least 5, to residential buildings 3 and other buildings 1 meter. The legislation clearly states that an outbuilding should not infringe on the rights of neighbors. Therefore, the barn cannot interfere with anyone.
If everything is taken into account, then you can get approval from the fire department of the Ministry of Emergency Situations, the employees will check the plan or schemes of the upcoming construction. After that, a weighted verdict will be issued. Now you can submit all the documents, get approval and the way to start legal construction opens.
What to build a barn from?
If the plot is designed according to one of the styles, then the barn must be created in the same direction, based on identical material.
Many are so scrupulous about this that even the doors for the barn are made like in a residential building, but with a beautiful letter designation – “Shed”.
But some save money and create a barn finish thanks to siding. This material allows you to imitate expensive finishing materials at home or is used as a base, on which the corresponding texture is superimposed, identical to a residential building.
Scheme and layout
We have understood that a plan or scheme is necessary for the approval of the building from the relevant services. Therefore, you will have to create a drawing of a barn on paper or a PC, thanks to a suitable program, it is considered the easiest way. When planning, it is worth considering some points:
- It is more profitable to create a building on the back of the site in order to hide from the eyes of guests and not disturb neighbors;
- The building must not block access to the garden, garden, create a shadow on the beds of neighbors;
- To protect against spring or melt water, it is better to use a hill or foundation;
- It is better to decide in advance on the purpose and additional extensions;
- It is worth considering the design of the roof. Single-sided on one side or double-sided on two. It is important that the precipitation does not flow towards the exit or onto the site of the neighbors. In particularly difficult cases, a rain system is mounted on the roof and walls of the shed to drain water to the right place.
Stages of building a barn with your own hands
If a site is selected, permission is obtained, four vertical metal bases are left to be excavated for marking and creating a foundation.
Wood sheds are more commonly made, but even these need a foundation to extend their lifespan without repair.
But the supporting structure for creating the frame of the barn should not be made too high, since this can be the main reason for the rapid damage to the structure, wind, precipitation, under pressure from the roof. Next steps:
- We continue to fix the base. Four metal poles are diligently connected and the corresponding upper beam is added, it is mounted carefully, since it will take on the main load;
- The upper part is covered with several layers of roofing felt, slate based on battens, but it is worth adding an iron roof layer to increase resistance to changing weather conditions;
- It is more advantageous to sheathe the inner part with clapboard or similar material;
- Floor covering, doors are made of wood, since it is a cheap material and reliably protects the contents of the outbuilding from moisture and the sun.
We have considered a simple example based on cheap material. However, to extend the life of the barn, it is worth treating the tree with an appropriate solution. The interior spaces are regularly ventilated.
If necessary, you can create a completely metal shed. This will require the skill of working with welding, which may turn out to be too difficult.
Therefore, it is more profitable to rely on the prefabricated version purchased in a specialized store. Such a structure is mounted with bolts.
The installation process will take no more than 2 hours. Typically, such an outbuilding is used during the season, then dismantled and reassembled a year later.
It is considered an excellent option for unguarded summer cottages, but it can be left and used for a long time, since this version is not more expensive than a wooden utility block and stands out with many advantages, first of all, it attracts with its mobility.