How to do external rendering: 3 Ways to Render a Wall
How to render walls: a beginner’s guide to rendering
Real Homes is supported by its audience. When you purchase through links on our site, we may earn an affiliate commission. Here’s why you can trust us.
(Image credit: Martin Gardner)
Join our newsletter
Get the best home decor ideas, DIY advice and project inspiration straight to your inbox!
Thank you for signing up to Realhomes. You will receive a verification email shortly.
There was a problem. Please refresh the page and try again.
By submitting your information you agree to the Terms & Conditions and Privacy Policy and are aged 16 or over.
Knowing how to render walls is a useful skill. Even more useful is knowing when your home needs rendering, and how much it will cost to get it done.
Changing and improving the exterior of your home is actually one of the most effective ways of adding value to your property, and new render is one of the cheapest ways of achieving this. You home’s exterior is the first thing that any visitors or potential buyers might see, so making sure it has got as much kerb appeal as possible is important, especially if the current exterior is in poor condition, or a mixture of different mismatched materials. Plus, it’s always much nicer to see a properly finished home when you’re sitting on some of the best garden furniture.
Render can be sand and cement or a flexible, breathable polymer modified render for homes with solid walls. It can hide poor-quality or mismatched brickwork on period properties, and create a sleek finish on modern homes. It can come self-coloured or be painted later. Render works well with masonry or timber cladding, to add architectural interest, and can be matched with external insulation to warm up a draughty home.
Find out how to render walls in this guide, and discover more ways to improve the exterior of your home with our essential guide.
How much does it cost to render your home?
External rendering using a sand and cement ‘scratch coat’ and a finer render topcoat, followed by two coats of external masonry paint will cost in the region of £40–£60 per m². Rendering and painting a typical three-bedroom semi-detached house with 80m² of walls would therefore cost £3,200–£4,800.
For a solid walled house or where the cavity is too narrow to apply sufficient levels of insulation you may wish to take this chance to add insulation. In this case an external wall insulation system is usually a better option than insulating internally, as no space or architectural detail is lost within the property.
There are many different external wall insulation systems, but most of them are promoted on a supply and fix basis by specialists, so they’re not available to the DIY market.
Applying external insulation with a render finish typically costs £70–£90 per m². A typical three-bedroom semidetached house would require 80m², so it would cost £5,600–£7,200.
This house didn’t fit well with the period properties in its south-west London street. Render, painted cream, was an affordable solution
- Use our guide to choosing and using lime mortar and render for a period home to find out more.
Which type of render finish?
Render can be applied to create a smooth, textured or patterned finish, and comes in a wide range of colours. Consider the type of render you use carefully – lime render with a textured or patterned finish will suit old, historic buildings, while new, silicone-based renders that are flexible, breathable, low-maintenance and smooth in their finish will suit contemporary homes.
Modern renders are a big improvement on the concrete renders widely used until recently. Prices typically start at just under £60 per square metre.
- Lime render: Lime render is the best option for old homes. It is flexible and breathable, so suited to period properties to alleviate damp problems.
- Cement render: This is the standard choice on external walls.
 It can be mixed on site and the materials used are cheap – but as it takes two to three coats, labour costs soon add up. It does need frequent repainting to look fresh too.
 - Polymer render: Usually cement or lime-based, they have polymers and other plastics added to them to help prevent cracking. They can be through-coloured, meaning they don’t need painting.
- Acrylic render: This is often used as a top coat over existing finishes. Silicone may be added for longevity and to prevent the need for cleaning.
- Monocouche render: Monocouche means ‘single bed’ or single coat in French, and as expected this means only one coat is required. The product is based on cement render and comes ready to be mixed with water, then trowelled or sprayed on. Expensive to buy, but easy to apply, you can recoup the material costs with reduced labour and maintenance fees. They are self-cleaning, won’t crack, and self-coloured so no need for painting.
 It can be mixed on site and the materials used are cheap – but as it takes two to three coats, labour costs soon add up. It does need frequent repainting to look fresh too.
Office S&M were the architects for Salmen House in East London, which took just six months to build and cost £205,000. Stippled render and textured terrazzo was chosen to create the eye-catching facade
(Image credit: French + Tye)
How to render walls: a step-by-step guide
Whether you attempt to do the work yourself, or hire a contractor, you need to understand the process so that you can plan it around the rest of your project.
1. Preparing the walls
Before a building is rendered, the walls should be surveyed, with repairs made to structural defects and any movement stabilised – otherwise the render finish is likely to fail. Any new finish is only as good as the wall behind it.
2. External details
External details such as bargeboards will often have to be removed, along with rainwater and soil pipes and other external details such as alarm boxes. Any vents will need to be extended, and sometimes window sills must be extended too. Metal stop and angle beads are then applied around the window and door openings and corners (or the edges of a terraced property) to provide clean edges for the render. The render system can then be applied.
Where external wall insulation is being applied before the render coat, this is usually in the form of rigid boards or slabs. The type of fixing needs to be selected depending on the type of wall – which is either mechanically fixed or glued to the walls.
4. Creating a foundation for the render to fix to
A fabric render mesh is then applied over the insulation, bedded into the first base coat layer of render. This mesh acts as a reinforcement against cracking. This is followed by one or two more thin coats of render, usually a primer and a topcoat.
5. Building up the render
Different proprietary systems are built up of different layers, using various forms of insulation, including expanded polystyrene (EPS), mineral fibre (Rock Fibre) and phenolic foam (more expensive but superior performance). Different types of render are also used with external wall insulation systems, depending on the application and the desired finish, including polymer cement, silicone and acrylic.
6. Render finishes
Thin coat render systems are designed to be self-coloured so that they don’t need painting. As well as a choice of colours, different finishes are also available, from very smooth to textured. If you have chosen rendering that needs painting, make sure you choose a weatherproof external paint.
Sandtex Ultra Smooth Masonry Paint in Pure Brilliant White, from £20 for 2.5L, used on this porch, is ideal for painting rendered surfaces as well as pebbledash, concrete and brickwork and if white’s not right for your home, there are 26 colours, too. The door is painted in Sandtex Exterior 10 Year Satin Paint in Seclusion, from £22 for 750ml.
(Image credit: Sandtex)
7. Final finishes
Finally, the external rainwater and soil pipes etc. can be reapplied. You can expect the total process to take around three to four weeks.
Back to Front Exterior Design transformed the exterior with the removal, resizing and addition of windows, and by applying render and new roof tiles
Do you need planning permission to render your home?
Planning permission isn’t usually required to apply render, providing the house isn’t listed or in a conservation area, and permitted development rights haven’t been removed (visit planningportal.co.uk and check with your local authority).
Rendering work on a substantial part of a house must comply with building regulations. In an older house it is likely that the walls will have to be insulated. This will mean adding insulation within the cavity or, in the case of solid walls, by applying insulation on the inside or outside face of the external walls. It adds to the cost but reduces fuel bills by up to 40 per cent.
Dos and don’ts of transforming your home’s exterior
- DO ensure the changes you make are in keeping with your home’s age and proportions. ‘Rendered walls on period properties can be painted in pastel hues, with architectural features picked out in white,’ says Michael Zucker, a chartered surveyor for estate agents Jeremy Leaf & Co. ‘Pebble-dashed or badly painted walls can be taken back to the brick, clad or rendered. Damaged brickwork can be insulated and rendered.’
- DO consider how the changes you’re planning will fit with surrounding properties. ‘In a terraced or semi-detached house, you need to picture how your house relates to its neighbours,’ adds Michael. ‘In a detached house, more radical treatments can be possible – including alteration of windows, a partial render, tile-hanging or cladding. A design consultant or architect will help you maximise its potential.’
- DO check with a local estate agent that your plans will improve, rather than detract from, your home’s value.
- DON’T miss the opportunity to improve your property’s energy efficiency if you’re rendering your home.
- DON’T forget to keep some of your budget back in case you need to revamp the garden, or surrounding area, once the makeover is finished.
 ‘Rendered walls on period properties can be painted in pastel hues, with architectural features picked out in white,’ says Michael Zucker, a chartered surveyor for estate agents Jeremy Leaf & Co. ‘Pebble-dashed or badly painted walls can be taken back to the brick, clad or rendered. Damaged brickwork can be insulated and rendered.’
This detached house was transformed by VC Design using Sto render – an insulated panel with the render applied on top. It improved the insulation on the property and its energy efficiency
More on renovating:
- Permitted development rights explained
- The ultimate guide to extending your home
- Single storey extensions: how to plan and cost your build
Michael is Director of Content & Product Development for Future Homes. Prior to this he was Editor in Chief of Real Homes magazine, Period Living and Homebuilding & Renovating and he also served as Editor of Homebuiling & Renovating for several years. As well as being an expert in renovation, having presented multiple property TV shows and authoring Renovating for Profit (Ebury, 2008), Michael has a personal and professional interest in self build and helps others achieve their dreams of building a unique home. He is also Deputy Chair of NaCSBA and has campaigned for the self-build sector for many years, regularly sitting with government parties to advise on the industry.
How to Render Exterior Walls
In this DIY guide you will learn how to render exterior walls and about the different types of render such as sand and cement and lime, how to get the correct mix for your render, how to apply the first coat and then subsequent second coat and get them flat and level and also why you should then sponge the render over. We will also tell you how long you should leave between coats and what you need to do to ensure a strong and lasting bond to the wall beneath. In some situations, your wall may need to comply with Building Regulations in terms of the thermal qualities of the finished job so this is an important point to be aware of.
Like plastering, rendering is a job that requires some skill and plenty of practice. We don’t advise you to start on rendering house walls without some experience, but there’s no reason why you shouldn’t have a go at a garden or garage wall to start with.
Preparing Surfaces for Rendering
Unless the wall has been recently built, you will need to clean it well – remove any loose paint, and dust or loose debris, plants growing up it, scrub off any mould with a bleach, or fungicide solution, and hose down the wall to remove any dust and dirt that could stop the render from adhering.
After washing down It will be Okay to render the wall if it is still damp but do not try and render while it is still running with water.
Try to make sure you have a couple of fine days to do the job in – if it rains too soon after you apply the render, it will be washed off the wall. A little forethought here could be handy so think about fixing a tarpaulin or strong polythene sheeting to the top of the wall you are working on so if the rain does come down you can simply drop the protection to keep it dry.
Getting the Correct Mix for Your Render
For detailed information on how to correctly mix your mortar see our project on Mortar Mixes. Your equipment, including mixer, water, soft sand, sharp sand and cement should be as close to the work as possible to save on time running backwards and forwards. Also remember to clean your tools thoroughly after and between usage.
Generally speaking, the render you are applying is there to form a solid, strong, waterproof surface to cover the layer below, be that brick, block, stone or even old render. As such the mix needs to be strong and wherever possible, this strength is increased by adding some sharp sand (or grit) to the mix.
The sharp or coarse sand is a lot grittier than soft sand or builders sand. Soft sand contains more clay than sharp sand and is a lot more flexible. The sharp sand is added to reduce the flexibility of the render and to give it greater strength against both cracking, shrinkage and erosion.
The video at teh base of this page shows the correct proportions of soft to sharp sand and the mix used on the wall is a top quality strength mix which will protect most external walls very well.
When rendering a chimney stack the mix should be a little stronger as the weather erosion is greater so follow the mix guidelines on the link above to our mortar mixes project.
If it is likely to be very cold in the evening with even a hint of frost or ice, then the work must be covered (preferably by hessian sacking or even a old blanket) to stop the water in the render freezing.
If it is allowed to freeze it will expand and on thawing it will leave a void which will again fill with water when it rains. This will also freeze and so the process goes on. See our project on Freeze-Thaw action for more information.
The best way to mix the render is with a cement mixer as this ensures that the mix is even and that the correct amount of water is added. Mixing in a wheelbarrow is fine but almost always there is a little unmixed sand and cement at the bottom which does not become apparent until emptying out the barrow.
A mixer is the best way to mix sand and cement render
How to Apply Render to Your ExteriorWalls
Applying the First Coat of Render
If you have a wide wall to render, setting up screed battens can be very helpful. These are 15mm thick wooden battens, which you fix to the wall. See our project on fixing to masonry to accomplish this.
Screed battens fixed to wall to help level render
Use a straight edge to level up render
Place them about 900mm apart and make sure the screws are flush with the face of the timber because you will be using these battens to help you level the render as you can see in the image above.
These battens serve to divide the wall up into more manageable portions, and also gives you a starting point so that you know how thickly to apply the render. Dampen the wall before you start if it is not already damp after cleaning down.
The first coat of render is also called the scratch coat
Apply the render with a steel plastering trowel using a firm hand to press and ensure it sticks to the damp wall. The first coat of render should be a very thin coat of about 5mm thick. This coat is pushed well into the wall.
The thickness is important because we are asking the wall to start “sucking” the render in for it to adhere properly to the wall. It can only do this effectively if there is little weight being applied as, if we try and get too much on the wall in one go, gravity will start to pull it off.
5mm of render is about the thickness that the wall can start to absorb and which will “stick” almost immediately. Once the 5mm is on all over the wall, we can return to the second coat after “scratching” the first coat.
Scratching comb for keying first coat for better bond to second coat
Scratch the surface of the first coat to enable the second coat to bond. Professional plasterers use an over-sized comb type tool for this (senn in teh image above). You could make your own by hammering four or five nails into a piece of wood or simply running over the surface with a screwdriver.
There is no need to scratch right down to the original wall surface, just deep enough to provide a key for the second coat.
Applying the Second Coat of Render
The second coat can be applied within half and hour or so of the first, just long enough for the first 5mm coat to become well adhered to the wall.
For the second coat, which should be about 10mm thick, build up the coat to the thickness of the batten and even a little beyond as it can then be levelled it by using a straight-edge as shown above. Work up the wall from the bottom, moving the straight-edge from side to side as you move upwards.
As you drag the straight edge up the wall it is inevitable that you will leave some holes as the render clings together. Fill in any holes with the trowel and repeat the straight edge levelling process using the battens as guides.
When the render has been on the wall for an hour or so, remove the battens carefully and fill in the holes left by them. This is often best done by using a pointing or a gauging trowel. Scrape the surplus render from the straight edge back onto your spot-board.
See our project on base coat plastering as the principle here is exactly the same.
Polyurethane rendering float – Get one here in our online store
Floating up the Render
Once the battens have been removed and the voids filled to be level with the rest of the wall, the wall should be left for another hour or so to start the drying out process. Once it is hard enough to push a rendering float onto the surface without render bulging out around the float, you can begin to float the surface up.
Floating has the effect of closing up the render. All the little air holes are filled and the render becomes smoother and more waterproof.
Use a wooden or polyurethane float to get a good render finish
The float should be pushed fairly firmly (only practice will show you the pressure required) onto the surface then moved in a circular motion as you can see in the below video. Cover the whole wall and then go back and start again. You will end up with a lovely smooth, closed surface.
It sounds simple but you’ll find that the technique takes a bit of practice to get used to it and it may take you a while before you can manage a nice smooth finish.
The battens fixed to the wall will make your first couple of attempts a lot easier as the wall (providing it was fairly flat in the first place) should be flat. If you try to apply the render free-hand and you do not have the experience of getting a uniform thickness on the wall, then the difference in thickness will not only lead to a difference in surface level (leaving it almost impossible to trowel smooth) but could leave it prone to cracking where thick render meets render of a different depth.
Sponging Down the Rendered Wall
Many plasterers (Renderers) will use a large ordinary car sponge which is very slightly damp, to give a final pass to the wall. By rubbing very gently, as you can see from the video, the wall surface becomes completely closed, with no holes making it very smooth, very waterproof and easy to paint.
A sponge finish on render makes it really smooth and waterproof
Delay Time Between Coats of Render
The guidelines given in this render tutorial are exactly that – guidelines! It does not matter if you leave the wall a week or even a month, between cleaning it down and rendering it. Just make sure that the wall is slightly damp when you start and that you have brushed it over to remove any new dust that may have accumulated.
Similarly, it does not matter if there is a week or two between the first coat and the second coat as long as the same dampness is applied to the wall before the second coat is applied.
Damping the render down gives better adhesion
The reason for the surfaces needing to be damp before applying any render so the wall does not suck out the moisture from the render mix too quickly. If this happens, the wal simply absorbs the water from the render leaving effectively a dry mix on the surface which will soon crumble and fall off.
If the render is allowed to dry out slowly (achieved by a slightly damp wall underneath) the render dries while soaking slowly into the wall forming a much stronger layer which is firmly fixed to the wall.
Using Lime Mortar for Rendering
If you live in a listed building or your walls were originally built in lime mortar, you will be expected to complete any rendering in lime.
Lime does the same job as cement in that it holds the particles of sand together while setting (albeit much more slowly) but its real value is that it allows any moisture trapped in the surface of the building to evaporate out.
This evaporation is called “breathing” so when you her the phrase “The walls must be allowed to breathe” this is what it means.
Lime mortar is also much more flexible than cement mortar and given that older walls move more than their newer counterparts, the lime allows the walls to move more without cracking.
Lime is normally mixed with the sand at a 3 to 1 ratio. Some builders merchants sell bags of lime which is especially designed to work with cement so a mix could be used which incorporates both. This gives some breathability while setting harder more quickly but advice should be sought when considering using lime mixes of any kind at home.
Notes about Rendering and the Building Regulations
If you do plan to render a house wall you should be aware that changes to the Building Regulations dictate that you must check with your local Building Control Department of your council as to whether your changes (i.e. the render) will mean that your wall must be upgraded to comply with the current “Thermal Element” regulations.
A Thermal Element is a wall, roof or floor which separates any heated part of a building from and space which is unheated, e.g. outside.
If your proposed rendering will cover more than 25% of the wall you may have to upgrade the wall to comply with current insulation requirements if this is possible. For a cavity wall for example, this may mean you need to insert cavity insulation.
More information can be found in Part L1B (Appendix A) of the Building Regulations Document on The Conservation of Heat and Power in Existing Dwellings. For more information see our project on Building Regulations Approved Document L.
Additionally, if you are considering rendering a wall or walls then check out our project on the different options for rendering found here.
All project content written and produced by Mike Edwards, founder of DIY Doctor and industry expert in building technology.
Rendering A Wall (The Beginners Guide)
Plastering is a huge subject but one part that is essential is the art of rendering a wall. Learning to render is one skill that is totally different to internal plastering and it plays by different rules. However, it can be extremely rewarding if you stick to this guide
In this article we’re going to walk you through the whole process and show you how to render. This is a beast of an article because there is s lot discuss by the here’s the main sections:
- The process behind rendering a wall
- The mix and materials you’ll need for the job
- A list of tools and equipment you will need to use
So here’s what you’ll learn in this article but first let’s discuss the tools you’ll need to start rendering.
Tools You’ll Need For Rendering
Before you start anything we need to make sure you have the right tools. You don’t see artists playing with Crayons and it’s the exact same with Plasterers. We need the right tools!
So here’s a list of tools you’ll need for the job:
- Trowel
- Hawk
- Scratcher
- Straight Edge (I prefer the Featheredges)
- Mixer
- Buckets
- Urethene Float
These are the tools you will need! You could use more but this is the essential list of tools and you can’t miss any of these. You’ll need them all. Next up is making sure you have the correct mix!
Mixing Your Render
The most crucial part of rendering is making sure you get the mix right. This is essential! It’s never hard to achieve but ratios are critical and If you get the mix’s wrong then you risk ruining your wall.
For example if your finish coat is stronger than your top (more cement than the scratch), then the finish coat will actually crack. We’ll go into this in detail but what you need to understand is that your mix affects everything.
But before we start we have 2 main stages to rendering. We have:
- Scratch Coat
- Finish Coat
You always have 2 coats of render.
The scratch coat is the foundation of the render and the base to the whole product. This provides strength to the wall but also has the most amount of waterproofing. This is what keeps your building water tight and stops any moisture from getting through into your house.
The finish coat adds thickness to the render but is purely aesthetic. This is where you need to focus on getting your wall flat, straight and looking good. This is where skill comes in.
The scratch coat is easy.
The tough part is making sure that your house looks lovely and desirable from the outside. People are very materialistic so our job is to make the render look like a million dollars. But before that we need to get the mix right!
So here goes. The materials we’ll need are below and then I’ll list the exact measurements we need for each coat.
Materials For Rendering A Wall
We’ll need the following:
- Plastering Sand (make sure it’s plastering sand and nothing else)
- Cement
- Water Proofers
- Feb Render Mix
- Hydrogenated Lime
- Water
This is what you’ll need for the job. It’s quite a cheap process compared to these other products like K-Rend and Stow’s Acrylic render but you need to get the mix’s right.
When Im working, I gauge everything from a standard 12L bucket. I pour everything into the bucket and use this to measure the exact mix I need. And as we mentioned we need to make sure that the scratch coat is stronger than the finish coat and not the other way round.
However, you don’t need to worry about that as long as you follow the measurements then everything will be fine! Here it is:
Materials For Scratch Coat
- 4 buckets of plastering sand
- 1 bucket of cement
- Waterproofers (instructions on the back. They all vary for different companies but just make sure you put enough in)
- Roughly 3 quarters a bucket of water
That’s literally all you need for the scratch coat. The only thing that isn’t a constant is the water. If your sand is wet than it will need less yet if your sand is dry then it may need more.
This is why rendering can be tough because it’s never constant. What I suggest is that you add your water to the mix slowly. Here’s the process I follow when I’m mixing.
- Alway start with some water in your mixer
- Add one bucket of sand
- If it’s dry add more water
- Add your second bucket of sand
- Check for water (you want it quite runny at this stage)
- Add Cement and leave it to mix for a while.
- Check for water. Add more if you need
- Add your third bucket of sand and let it mix
- Check for water (don’t have to too wet now)
- Add final bucket of sand and slowly add water until the mix is just right

This is the process you want to follow. The video below shows what you mix wants to look like. You don’t want it too thick yet you don’t want it too runny either. With time you’ll find your preference but it just takes practice.
The video below shows the perfect mix consistency:
Perfect mix for rendering a wall
Now here’s the mix for your Finish coat
Materials For Top Coat
- 5 buckets of sand
- 1 bucket of cement
- Half a bucket of Lime
- Water
- Feb Rendermix
As you can see there’s more sand which makes the mix weaker. We’ve also added Lime which makes the mix creamier and gives the render flexibility which helps it deal with movement in the building. It also helps with the sea air if you live near the coast.
Finally we have the Feb Render mix. This is a great product. It has water proofers engrained in the product but it also has plasticiser which makes the mix creamy and nice to flatten later down the line.
It’s a gem.
So that’s the mix; that’s one thing you need to follow with strict accuracy. However, if you follow these instructions you can’t go wrong. So we have our tools and we know how to mix the render. Now it’s time for the process
The Process Behind Rendering A Wall
There is a process you need to follow when you’re rendering a wall. It has a specific order and you need to make sure that you follow each step. It’s not complicated but its essential all the same.
So here’s the full breakdown on how to render.
- Apply the first coat of render
- Scratch the first coat
- Wait a day to allow the scratch coat to dry
- Apply the top coat of render
- Float it when it’s gone touch dry
- Sponge finish shortly after floating
This is what you need to do when your rendering a wall. Now here’ s a brief summery but if it makes no sense then that’s absolutely fine because I’m going to break down each section and explain it all in detail.
And it all starts with applying your render but to help you visualise the whole process here’s a video where I walk you through the whole thing. Watch it below:
Learn how to render a wallApplying 1st Coat Of Render
The aim of this stage is to get the 1st coat of render onto your wall. It isn’t rocket science but there are a few things to consider. For example, the first thing I do before I apply the render is to give the wall a light spray with water.
This creates a bit of a key for the render to stick to. If you render directly onto a dry masonry background then the render may not stick and eventually weaken due to a soft grip. So always give your wall a light spray of water.
The other thing you need to consider is how you apply the render. Obviously, you want to take the plaster from your Hawk onto your trowel and from there you can proceed to apply the render to the wall.
However, you need to make sure that you’re applying enough pressure to the render as you spread it. You can’t just trowel it onto the wall. you need to really push the render into the surface with a firm amount of pressure. This provides a strong bond making your render tough and solid.
The final thing to consider when you applying your render is to avoid playing with it. You simply want to apply your render, flatten it a little bit and then leave it. If you overtrowel the render then something sinister can happen.
You can actually weaken the strength of your wall. When you trowel sand cement/ render you bring the moisture from the back of the render to the front which makes the surface shiny. This doesn’t seem like a massive problem but unfortunately it is.
This takes all the moisture from the back which makes the render pull from your wall. It weakens the grip and makes the render “Drummy”. This basically means that your wall will sound hollow when it’s finished.
This isn’t good. This compromises the strength of your render which will eventually crack. So apply your render, flatten it a little bit and then leave it. Don’t play with it!
Just let it dry and do it’s thing! I usually render a a small section at a time ready for the next step which is…
Scratching Your Base Coat Of Render
This is a very simple process but critical all the same. When you’ve applied your first coat of render you need to scratch it with a tool called a Plastering Scratcher. This is very simple and extremely easy.
We are basically providing a mechanical key for your 2nd coat of render. If we didn’t do this then the top coat of render wouldn’t stick and would slide down your wall. This key allows your render to stick and gives the render something to grip to.
It’s very easy but I would recommend to render a section at a time and scratch it as you go. If you wait too long then the render will dry and it will be tougher to get a decent key into your scratch coat.
That’s why we always called the first coat of render a scratch coat because we scratch it (pretty obvious ay!). I’ve created a quick video showing you how to do it:
Now we let the scratch coat dry and usually leave it for at least one day. Then it’s time to move onto the next step which is applying your top coat of render.
Applying Your Top Coat Of Render
This isn’t to much dissimilar to applying your scratch coat. Actually it’s the exact same process. Give your wall a light mist of water, apply your render with lots of pressure and make sure you don’t play with it.
This is the general rule of thumb and there’s not much difference from stage 1. The one thing I will say is that if your working to corner beads then I often apply the render slightly thicker than the beads.
This is because when it comes to the next stage of rendering (ruling the render), then you won’t have to constantly be reapplying render to the low spots. If you add a slightly thicker coat then it’s going to be a lot easier for the next stages.
Trust me, its saves a lottt of time and effort.
And that’s what its all about. So keeping to the same rules as stage 1 but just make sure you add a bit more render than you would usually. The other thing to reinforce is that your not expected to apply the render flat.
You won’t do it! Thats where the next stage comes in which is ruling your work.
Ruling Off When Rendering A Wall
This is the part where we start getting the render flat. This part is crucial and this is where we start using the trusty Featheredge. This is basically a lot, straight piece of metal designed to flatten plaster and render.
The way it works is that you scrape the excess render off the wall using your straight edge. This takes the render that isn’t needed and makes the remaining render nice and flat. It’s quite a skill but with time you can get your walls perfectly flat using this process.
So here’s how it works
- Apply your top coat in sections
- Whilst it’s still wet, deploy your Featheredge
- holding the Featheredge flat to the render scrape any high spots.
- Starting from the bottom, pull the straight edge up your rendered wall
- You will notice sections that haven’t been effected
- Apply more render to the low spots and fill any missed areas.
- Deploy the Featheredge again and continue to flatten the wall
- Repeat until the whole area has been flattened

If you follow this process then you will have a flat rendered wall. However, you will notice that the render will look extremely grainy and it may even have a few lines where the render has dragged due to the process of ruling.
This is normal. Don’t panic! The main aim of this stage is to get the wall flat and as I said, it does take practice. But it is a skill that can be perfected.
Once its flat and the whole area has been ruled continue onto the next section of your wall and repeat the whole process until your wall has been covered.
Then make yourself a brew and wait. You’ll need the render to dry slightly ready for the next stage:
Floating The Render
This is one of the most important stages to rendering because this is the time where you fill any holes whiles getting your render FLAT. It’s quite a dark art and it does take some practice. however, if you follow our guidelines there’s no reason you can’t master the art of floating.
The principle is simple. The float flattens the render by removing any high spots whilst filling in any areas that have little to no render. It’s ingenious really and whoever came up with this trick is a living legend.
First off, let’s talk about your weapon of choice which is the float itself. I recommend you buy yourself a Plastic Float at 11IN X 4.5/16IN which you can buy from the link here. This size is perfect, (especially for beginners) because they are so much easier to use compared to the bigger sizes.
I also find they provide better results.
However, before you start I recommend that you rub the new float up and down a concrete block until the texture has worn down. This helps to “break in” the float before use which makes it 10 times easier. Trust me, you’ll thank me because this makes a HUGE difference when you’re using it.
So thats the tools and the prep but how do we do it?
How To Use A Float When Rendering A Wall
This is where the funs starts and where the skill lies when you’re rendering a wall. Before we begin, you need to make sure that the wall has dried. You will never be able to render a wall whilst it’s still wet – it needs to be solid before you can start floating.
So make sure that its tough to the touch. You don’t want it to be completely dry but you do need it to firm. If you push it still holds it shape then your good to go.
The best thing is to test it. So if you feel it’s a good time to start then give it a try. You’ll find 2 things will happen:
If it’s too soon you will notice the render move and you may even pull some render off the wall as you’re floating. This is a big no go. If this happens leave it to dry and try again later.
The second scenario is that the render will move with the float but in a more positive motion. You’ll be able to apply pressure without worrying about pulling the render off and any areas that have little holes will start to fill with your movement. This is what we want!
The low spots will start to fill and the rough texture will become uninformed.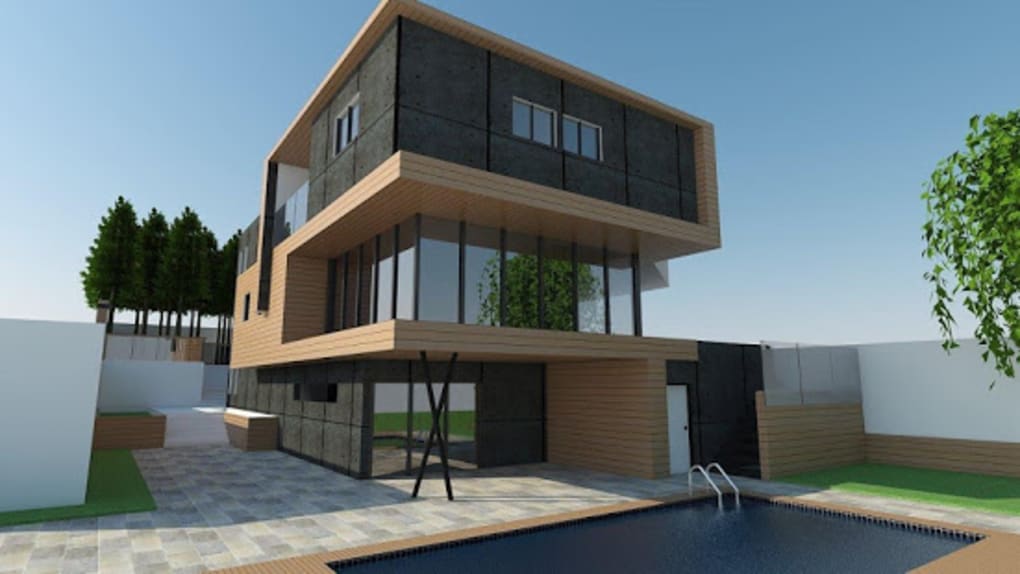 This is where the render takes shape and one of the biggest things is getting your timings right. The process is simple.
All you have to do is hold your float flat to the render. Don’t tilt it, just hold it flat to the render and slowly start to move the render in small circular motions. If you time it right you’ll find that you can apply pressure and you can almost srub the render into shape.
This is what we want. You’ll notice you wall start to look consistent and this is where the wall starts to take shape.
*Quick Tip
If it feels like the render has dried too much, don’t panic. You can give the wall a light spray with water and when it comes to floating you’ll find the sand cement come back to life. It’s amazing because unlike our tradition finish plaster, this can be sprayed and reignited.
It’s magic really! SO if it is too dry to threat because you can always bring it back!
Follow this whole process until the wall in floated. Then we are ready for the final stage of rendering…
Finishing The Render – Sponging!
This is the last and final stage to rendering and this is where we get our finished texture. All you’ll need is a fresh bucket of water and a sponge. I like to use the big sponges that people buy to clean their cars with. I always find they give the best results when you’re rendering a wall.
Take your sponge, dunk it in the clean water and drain all the water out until it’s damp. We don’t want it soaking, we just need it damp. Otherwise, you’ll bring the sand cement back and the water will foam the render.
Then you take your damp sponge and gently rub it in circular motions. Again, hold the sponge flat to the wall and gently rub the render until the sand comes to the surface. If you’re doing it right, you’ll see the aggregate in the sand form a lovely texture.
This is what your typical sand cement render will look like. When you sponge starts to leave little lines clean it off in the clean water and start again. The is probably the easiest part of rendering because all your doing is rubbing the wall to get a lovely soft finish.
The trick here is to always keep your sponge clean!
The softer your touch, the smoother the finish. The trick is to be really soft with your grip. If you’re heavy handed you’ll notice lines in the render. this is where you’re pulling the sand on the surface – if you’re soft handed you’ll only see the aggregate rather than lines following behind.
This is where you truly master sponging. And if you’ve come to this stage you have officially rendered a wall!
Conclusion
This is a lot to take in and I understand that there’s a lot to learn. It’s a huge subject to follow and I know that some of this might not make much sense to you. However, knowing the process is one of the biggest things in rendering a wall.
Most people wouldn’t know where to start! At least you can officially say that you know the process and if it came to testing, you’d know where to begin.
So thats that!
If you want to find out more about plastering visit this link and discover the ultimate guide to plastering a wall.
Otherwise have a look around our site for more information on plastering. Thanks for reading!
Enjoy!
How to Render a Wall | 5 Easy Steps for DIY
For the first time, novice DIY enthusiasts, rendering a wall might seem like a fairly complex task. However, rendering a wall follows a fairly similar process to plastering a wall, so if this is something you’ve done before, rendering should be no problem.
The Guild of Master Craftsmen has created a simple, easy-to-follow guide on how to render a house wall, whether it’s external or internal. In our guide, we address a range of different types of render; such as cement, lime, and sand, and how to achieve the correct mix to create a durable and professional-looking rendered wall.
We will teach you how to:
- Apply the first coat and the second
- How long to leave between coats
- How to flatten and level them once dry
- The importance of sponging the render and how to do this
- How and why you may need to conform to Building Regulations
Step 1: Preparing the Wall for Rendering
First, take a look at the width of the wall you want to render. If it’s a particularly wide wall, you may want to install a flat, rectangular piece of wood (a batten) at about 900mm apart and ensure the screws, when drilled in, are flush to the wood (flat). The battens are usually around 15mm thick and help you divide up the wall into segments for easier lime, sand or cement rendering. It’s also strongly recommended you use battens if this is your first time rendering, as once you can treat the first segment as a tester to see how much render you need for the rest. You will also need to dampen the wall before you apply the render.
- Top tip: Make sure that the screws are flush when drilled in. If they aren’t, you will run into trouble when it comes to rendering the wall (below).
Step 2: Applying the render
Now you can apply the render. To do this, you’ll need a plastering trowel to apply the render. Using your hand, scoop the render and firmly press the render to the damp wall. Make sure your first application is a thinned coat of render (approx 5mm) and that it sticks to the wall.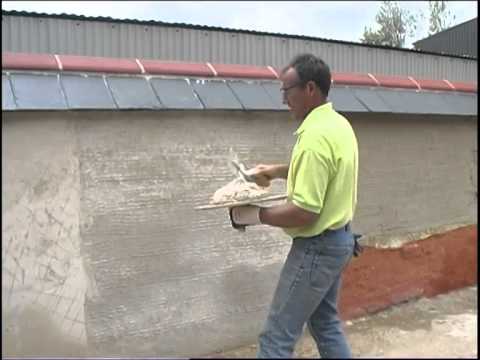 Be sure to work up from the bottom.
It’s important to stick to around 5mm because the wall won’t be able to absorb, or “suck” the render into it if it’s too thick. If you apply too much render to the wall, it will just drop off due to gravity.
You should see your 5mm of render begin to stick almost instantly. You then want to scratch the surface of the first coat to help the second coat bond. You can do this using a professional; scratching tool, or make your own DIY one. For the latter, simply get an old piece of wood (about 10 inches long) and hammer four or five nails at it. The finished product should resemble an oversized comb.
- Top tip: you don’t need to scratch down to the original wall, just a light combing should be enough for the second coat to stick.
Step 3: Applying the Second Coat
The first coat will take around 30 minutes to dry before you can apply the second (this counts for both internal walls and external walls). Your second coat should be double the thickness of the first (10mm). This should bring the coat thickness level to match the battens, maybe even a little over the battens. This overspill won’t matter because you will be levelling it off using a straight edge. Again, be sure to work up from the bottom and move the straight edge from side to side as you move higher.
There will undoubtedly be some holes in your render as you glaze over it with the straight-edge. This is normal and can be fixed by grabbing a trowel and filling in any holes, then using the straight edge to smooth them over.
Once completed, leave on the wall for about an hour to dry. Once dry, carefully remove the battens and then fill in the holes left by them using a gauging trowel.
Step 4: Floating up the Render
After removing the battens and rendering the gaps, your house wall, garden wall (or any other brick wall) should be a level and fairly smooth finish. Your cement rendered wall should now be hard enough to withstand a float being pushed into it without the cement render bulging out from the brick wall.
Floating involves essentially closing the render, filling in any tiny air holes to ensure the brick wall becomes completely smooth and more waterproof. When using the float, be sure to be firm with it and move it in gentle, circular motion. You will need to cover the entire wall. Once finished, go back and do this again until your finishing coat looks smooth and without holes.
- Top tip: the technique for floating requires a bit of practice – you won’t be an expert on your first attempt! Take as many attempts as you like, it won’t negatively affect your internal or outside block wall.
Step 5: Sponging Down the Rendered Wall
Whether you’re plastering or rendering an internal wall or an outside wall, you will need to sponge the wall after the last layer of render has dried. By gently sponging the entire wall, you will be smoothing out the surface and closing any final gaps you may have missed. This way, you close any gaps that may have otherwise encouraged water to leak through.
Once done, you should have a professional-looking rendered wall.
Want to Hand it Over to the Professionals?
If you would rather have a professional renderer undertake the task, that’s where we can help. With hundreds of highly skilled and qualified tradesmen featured on our website, we’re confident you’ll be able to find an affordable renderer to tend to your internal and external walls. Whether you’re looking for coloured rendering for a large garden wall or internal rendering for an indoor conversion or extension, you’ll find the right tradesmen with us.
Explore our range of hand-selected renders on our website; all of which have been chosen based on their experience and customer service across the UK.
rendering-a-house-everything-you-need-to-know | Ideal Home
(Image credit: Future PLC/ Robert Sanderson)
Ideal Home Newsletter
The Home Of Great Ideas For More Than 100 Years
Thank you for signing up to . You will receive a verification email shortly.
There was a problem. Please refresh the page and try again.
By submitting your information you agree to the Terms & Conditions and Privacy Policy and are aged 16 or over.
The exterior of a property forms part of its kerb appeal. It’s why rendering a house is so popular. Yet this type of exterior cladding has more benefits than just aesthetics. It can protect the exterior of your home, too.
From the smart stucco on Georgian townhouses to post-war pebble-dash, colourful monocouche, modern silicone and traditional lime, there are various types of renders. These different materials, not only provide different looks, they’re generally suitable for certain types of properties too.
‘The render choice and its application method need to match the property and its location,’ says Sam Piplica, MRICS, RICS Senior Specialist, Building Standards, Royal Institute of Chartered Surveyors . ‘For example, the west side of Britain is more exposed to extremes of weather and storms. So the correct type of render can improve the resistance of the wall to rain penetration, if it’s kept in good condition.’
Rendering a house – the lowdown
(Image credit: Future PLC/Robert Sanderson)
The purpose of render is typically to improve external appearance, keep water out and increase resistance to weather. So render should only be applied to an existing building if the walls are sound and free of damp.
‘Firstly, consider the type of construction of the wall and in particular, how does the existing construction manage water,’ says Sam Piplica, MRICS, RICS Senior Specialist, Building Standards.
‘Before rendering, somebody needs to identify and understand any defects, assess the exposure of the property, specify a suitable product and think about the tricky details. This is so that important decisions aren’t made on the fly on site. Homeowners can do this but if they lack the time or expertise, a chartered building surveyor can help.’
What are the different types of render?
(Image credit: Future PLC/ Oliver Beamish)
Cement render
This is one of the cheaper options and gives a smooth finish but it’s not appropriate for older buildings with solid (non-cavity) walls. It’s prone to cracking, so needs to be kept in impeccable condition. It also requires repainting every few years.
‘Cement based render applied to a solid wall will prevent water evaporation on the outside of the structure,’ says Sam Piplica, Building Standards Specialist. ‘This means if the water can’t go outside, it will go inside. Even when used appropriately it needs to be well maintained. If it’s allowed to crack and rainwater gets behind it, the water cannot evaporate through it. This will cause problems inside and outside.’
Lime render
This is more expensive than cement render and is usually used on traditional timber-framed homes. ‘Lime renders would normally be used on older properties that are damp or properties where the airflow needs to be increased,’ says plasterer Graeme Rudd.
Silicone render
‘Silicone renders are excellent for low maintenance, longevity and crack resistance,’ says Rated People’s Kastriot Reka of First Renderers. ‘They’re lightweight and breathable, good water repellents, and are available in a choice of colours. They can also be installed with exterior insulation.’
Monocouche (through-coloured) render
This is a cement-based render with colour embedded within, so there is no need to paint it. It can be applied to most brickwork, stonework and masonry construction with a polymer base. It has the flexibility of traditional lime render and is a low maintenance option.
Acrylic render
This type of render has an acrylic resin added to the mix to make it more water-resistant and flexible. They’re also available in different colours, however they’re the least breathable.
Cork-based render
(Image credit: CorkSol UK)
This is a relatively new material in the UK and more eco-friendly than other types of render. It can be applied to brick and cavity walls, over existing (undamaged) render and used for patch repairs. It’s resistant to sea salt too, so it’s great for coastal properties.
‘Flexibility and elasticity are two of cork’s properties, so it’s highly durable,’ says Joff Ward, managing director, CorkSol UK . ‘Spray cork render has been proven to reduce heat loss through solid walls by 30%, and has noise reduction qualities. It has a lower carbon footprint and stays cleaner longer than the alternatives.’
Can I mix materials?
(Image credit: TBC)
It’s increasingly on trend to cover a house in more than one type of material. Combinations of render and timber cladding are especially popular, and you can see why!
But if you are planning to mix finishes, bear in mind the added cost to your renovations. Using smaller quantities of more materials will be expensive, as will employing the different tradespeople to apply them. You’ll also need to ensure that the materials are installed in the right order, with a clean junction between them.
Rendering a brick house
‘If a house has not previously been rendered, the first question to ask is, why render it now? Why not carry out suitable repairs to the existing materials?,’ says Sam Piplica, Building Standards Specialist. ‘Render is not as hard-wearing as traditional masonry bricks. So if it’s for aesthetic reasons, say to cover damaged brickwork, be aware that render also requires maintenance to keep it in good condition. Just as brickwork should also be maintained.
Determining whether existing render can be patched is more eco-friendly than replacing it. Lime and cement-based products have large carbon footprints due to the manufacturing process, so maintaining a building uses less materials than new work over its lifecycle.’
Rendering a timber-framed house
Avoid any renders that are not breathable. Silicone or cork offer breathability and resist the growth of algae or mould, so are suitable. However, historic properties need careful assessment. ‘Always seek specialist advice before undertaking restoration or repairs to a traditionally-built timber framed house, ideally someone with the RICS Building Conservation Accreditation who’s a certified historic building professional,’ says Sam Piplica.
Rendering a terraced house
(Image credit: Future PLC/ Jamie Mason)
If you live in a row of terraces, consider how a rendered facade on your home will look in relation to your neighbours. Prevent any potential disputes, by letting them know what you’re planning in advance.
Rendering a pebble dash house
Pebble dash can be rendered over, as long as it is in good condition. ‘If you’re adding to the wall thickness, there may be details around guttering and downpipes, boiler flues and drainage pipes which have to be addressed,’ says Mark Brinkley, author of the Housebuilders Bible.
‘An experienced crew will know how to handle these, but rushed jobs done for a cheap price can lead to disappointment. Also check that the added depth of your proposed new wall covering won’t impinge on access arrangements or neighbour’s property.’
How much to render a house?
This will depend on various factors including the type of property and location. ‘In general it depends on the prep work needed and the condition of the existing house,’ says Rated People’s Michael Van Vilet of DPR. ‘Prices would likely start around £5,000 but could go much higher depending on the size and condition of the property.’
Does rendering a house add value?
‘If it’s tired looking and the existing exterior is in poor repair, then a fresh coat of render will almost certainly lift the value of the home,’ says Mark Brinkley, author of the Housebuilders Bible. ‘But if the house has attractive detailing, such as fine brickwork, which matches the neighbouring properties, then new render can detract from the overall appearance.’
Can I render walls myself?
(Image credit: RatedPeople)
To ensure the render does its job, we recommend employing a professional to do it properly. In addition, thermal insulation requires specialist knowledge and compliance with Building Regulations.
‘Rendering is normally a 2-3 person job, and large areas need to be done in one set, so it’s not advisable to do it yourself,’ says Rated People ‘s Graeme Rudd of Graeme Rudd Plastering. ‘Insulation can also be added and rendered over to increase your home’s energy efficiency and increase its value.”
‘Rendering is something of an art and it takes years to master,’ says Mark Brinkley, author of the Housebuilders Bible . ‘Badly applied render can look dreadful. Do check the standards of the people you imply and ask to see their previous work.’
Do you need planning permission for rendering a house?
Planning permission is not usually necessary, unless you live in a conservation area or AONB.
If you want to re-render external walls, building regulations may apply, depending on the extent of the work. So check with your local planning department.
If your property is listed and part of a group of properties, it may be the case that your render will need to be a specific RAL or British Standard (BS) colour. Check your deeds and paperwork carefully before you start.
Amy Cutmore is Editor-in-Chief, Homes Audience, working across the Future Homes portfolio. She works on titles including Ideal Home, Homes & Gardens, Livingetc, Real Homes, Gardeningetc, Top Ten Reviews and Country Life. And she’s a winner of the PPA’s Digital Content Leader of the Year. A homes journalist for two decades, she has a strong background in technology and appliances, and has a small portfolio of rental properties, so can offer advice to renters and rentees, alike.
Rendering a house: before and after photos
-
Home
-
Renovating
Increase your resell value and breathe life back into an aging home.
– by
Rhys McKay
It’s no secret that your home will naturally degrade over time, due to weather and regular wear and tear. Thankfully, there are steps you can take to protect your home from the elements, improve your house front design, and raise its property value at the same time.
House rendering is a great way to help you make a lasting first impression on visitors, neighbours, and potential buyers.
What is house rendering?
Rendering—in the context of home improvements—is the process of covering an exterior wall with cement, lime, acrylic, or some other kind of mixture. This protects exposed brick and other construction materials from erosion and cracking; preventing expensive maintenance or repairs down the line.
Rendered brick extends your wall’s lifespan by ten or even twenty years. It stops dampness and moisture from seeping into and damaging your walls, adding a layer of insulation. This keeps your house dry and warm, even in cold or rainy weather.
Choosing to render your exteriors can also completely transform your house’s aesthetic. It hides imperfect brickwork and lends a sleek, modern façade to any home.
Rendering versus plastering versus bagging
Rendering is sometimes used interchangeably with “plastering” and “bagging”, but while they are very similar, these terms refer to different processes.
One Flare states that the main difference between plastering and rendering is that plastering is used mainly for interior walls to prepare it for wallpapering or painting. It uses less cement and fewer coats.
The difference between rendering and bagging is that the latter allows the original textures of the brick wall to still come through. It uses fewer materials and is lighter, cheaper, and easier to DIY. But it is also less smooth and less durable than plastering.
Render My Home advises “your decision will always be based on what factors you value as the home builder or owner”.
Getty
How much does it cost to render a house?
When it comes to rendering costs The biggest deciding factor is the size of the wall. The more surface area you have to cover, the more materials you need, and the more money you will spend.
Next is the type of render. Cement rendered homes are standard in the industry. These are tough, affordable, and versatile. You may need to factor in the costs of labour (as cement render is mixed onsite by a professional) as well as the cost of the weatherproof exterior paint.
Acrylic render is slightly more expensive, and according to Perth Bricklaying is rapidly growing in popularity. It comes in pre-mixed formulas that are easy to apply, it is also less likely to crack when temperatures and humidity fluctuate, making it a great option for areas where the climates change drastically throughout the year.
No matter which material you use, rendering is a relatively low-budget way to modernize and improve your home. Hi Pages states the average cost of home rendering ranges from $30-50 per m2.
Can you do it yourself?
Technically, you can render your exterior walls on your own. DIY rendering can be difficult, time-consuming, and expensive in the long run, especially if you don’t have the training or equipment necessary to do a good job. While you may spend more off the bat, hiring a professional contractor saves you from costly mistakes.
What colours can you use?
Traditional house render colours include white, grey, and black, but you don’t have to limit yourself to these options. Pigments can be added to the mix, or you can buy pre-mixed coloured acrylic renders.
Real Estate recommends that you stick to contemporary rendered house colour schemes so that you have a balance of being both modern and classic. You may also need to consider how your exteriors will contrast with your surroundings and neighbouring houses.
You can also combine traditional rendering with timber or brick finishes to create an interesting, textured aesthetic.
House rendering before and after photos
Most contemporary and modern houses are now rendered. As you can imagine, this grand property would look signifigantly more dated in brick or weatherboard than it does with rendering.
Getty
In this image you can clearly see the difference between a before and after rendering of a house. It can change the entire look of the property, make it stand out from the rest of the properties on the street and offer your property additional structural support.
Getty
You don’t need to render the entire house to give it a new look. Here, you can see part of the house has been rendered while the timber weatherboard acts as a chic design feature. You render over both brick and weatherboard, so this image offers a nice juxtaposition between old and new.
Getty
If you want to renovate your home, improve its aesthetic quality, add insulation, and make your exteriors more weather-resistant, then home rendering could be the all-in-one solution you’re looking for.
You might also like:
How to update your home’s exterior for under $20K
The pros and cons of building a new home
How to future-proof your reno
Treat yourself to a subscription-Save up to 25%
Plus, your chance to win
Subscribe Now
Treat yourself to a subscription-Save up to 25%
Plus, your chance to win
Subscribe Now
Scene Rendering and Preview
User Manual
Cancel
Search
Last update
May 21, 2021 07:18:15 AM GMT
- Adobe Premiere Pro
- Beta Releases
- Beta Program Overview
- Premiere Pro
Beta homepage
- Getting started
- Getting started with Adobe Premiere Pro
- What’s new in Premiere Pro
- Release notes | Premiere Pro
- Keyboard shortcuts in Premiere Pro
- Accessibility in Premiere Pro
- Long format and episode workflow guide
- Hardware and operating system requirements
- Hardware recommendations
- System requirements
- GPU and driver requirements
- GPU accelerated rendering and hardware encode/decode
- Create projects
- Create project
- Opening projects
- Moving and deleting projects
- Working with multiple open projects
- Working with project references
- Premiere Pro
- How to open and edit Premiere Rush projects in Premiere Pro
- Best Practice: Creating Your Own Project Templates
Project Backward Compatibility
- Work environments and workflows
- Media
- Questions and answers | Import and export in Premiere Pro
- Working with panels
- Windows touch and gesture control
- Using Premiere Pro in a dual monitor configuration
- Capture and Import
- Capture
- Capture and Digitize Video
- HD, DV or HDV video capture
- Packet capture and recapture
- Setting up the system to capture HD, DV, or HDV media
- Import
- File transfer
- Import still images
- Digital audio import
- Import from Avid or Final Cut
- Import AAF project files from Avid Media Composer
- Import project XML files from Final Cut Pro 7 and Final Cut Pro X
- Supported file formats
- Analog video digitization
- Working with time code
- Capture
- Editing
- Episodes
- Creating and editing sequences
- Add clips in sequence
- Changing the order of clips in sequences
- Search, select and group clips in sequences
- Editing scenes downloaded to source monitor
- Simplify sequences
- Rendering and previewing sequences
- Working with markers
- Correcting the source and determining the target tracks
- Scene editing definition
- Video
- Creating and playing clips
- Trim clips
- Synchronizing audio and video using the Merge Clips function
- Rendering and media replacement
- Cancellation, history and events
- Freeze and Hold Frames
- Working with aspect ratio
- Audio
- Audio overview in Premiere Pro
- Audio track mixer
- Adjusting volume levels
- Editing, restoring and enhancing sound with the Essential Sound panel
- Automatic audio volume reduction
- Audio remix
- Controlling clip volume and panning with audio clip mixing
- Audio balancing and panning
- Advanced Audio – Phonograms, Downmixing and Routing
- Audio effects and transitions
- Working with audio transitions
- Applying audio effects
- Measuring the sound level with the Acoustic Locator effect
- Audio mix recording
- Editing audio in the timeline
- Audio channel mapping in Premiere Pro
- Using an Adobe Stock audio track in Premiere Pro
- Additional editing functions
- Multi-camera editing
- Setting up and using a head-mounted display for immersive video in Premiere Pro
- Editing VR Content
- Best Practice
- Best Practice: Speeding Up Audio Mixing
- Best Practice: Efficient Editing
- Editing workflows for feature films
- Episodes
- Video effects and transitions
- Overview of video effects and transitions
- Effects
- Effect types in Premiere Pro
- Applying and removing effects
- Effect presets
- Automatic video reformatting for various social media channels
- Color Correction Effects
- Change duration and speed of clips
- Adjustment layers
- Video stabilization
- Transitions
- Applying transitions in Premiere Pro
- Changing and setting transitions
- Morpho cut
- Titles, graphics, and captions
- Essential Graphics panel overview
- Headers
- Creating a header
- Graphics
- Shape Creation
- Align and distribute objects
- Application of gradients
- Adding responsive design features to graphics
- Installing and using Motion Graphics Templates
- Replacing images or videos in Motion Graphics templates
- Use Motion Graphics templates based on data
- Signatures
- Speech-to-text translation
- Working with signatures
- Spell check, find and replace
- Text export
- Translate speech to text in Premiere Pro | Questions and answers
- Recommendation: Acceleration of graphics processing
- Removing the Legacy Title Builder in Premiere Pro | Questions and answers
- Upgrading legacy titles to source graphics
- Animation and keyframing
- Adding, navigating and keyframing
- Animation effects
- Use the motion effect to edit and animate clips
- Keyframe Automation Optimization
- Moving and copying keyframes
- Viewing and adjusting effects and keyframes
- Compose
- Compose, alpha channels and clip opacity control
- Masking and tracking
- Blend modes
- Color Correction and Grading
- Overview: Color Correction Workflows in Premiere Pro
- Automatic color correction
- Creative color experiments with Lumetri Styles
- Adjusting colors with RGB and hue/saturation curves
- Correction and color matching of different frames
- Using secondary HSL controls in the Lumetri Color panel
- Create vignettes
- Looks and LUTs
- Lumetri areas
- Display color management
- Broadcast HDR
- Enable DirectX HDR
support
- Media export
- Video export
- Export Set Management
- Workflow and export overview
- Quick export
- Mobile export and web publishing
- Still image export
- Export projects for other applications
- Export OMF files for Pro Tools
- Export to Panasonic P2 format
- Export settings
- Link to export settings
- Basic video settings
- Coding parameters
- Recommendations: Export acceleration
- Collaborate: Frame. io, team products and projects
- Collaborate in Premiere Pro
- Frame.io
- Installing and activating Frame.io
- Using Frame.io with Premiere Pro and After Effects
- Questions and answers
- Products
- Using Products
- Working with clips in product projects
- Best Practice: Working with
Products
- Team projects
- Getting started with team projects
- Create group project
- Adding and managing media in team projects
- Collaborate with Team Projects
- Share and manage changes with team project co-authors
- Archiving, restoring and deleting team projects
- Working with other Adobe applications
- After Effects and Photoshop
- Dynamic Link
- Audition
- Prelude
- Organizing and managing resources
- Working with the Project panel
- Organize resources in the Project panel
- Reproduction of resources
- Search for resources
- Creative Cloud Libraries
- Synchronizing settings in Premiere Pro
- Merging, converting and archiving projects
- Metadata management
- Recommendations
- Best Practices: Lessons from TV Broadcasting
- Best Practices: Working with native formats
- Performance improvement and troubleshooting
- Parameter setting
- Reset settings
- Working with proxy
- Proxy overview
- Takeover and Proxy Process
- Check if your system is compatible with Premiere Pro
- Premiere Pro for Apple
- Flicker removal
- Interlacing and field order
- Smart Rendering
- Control panel support
- Best practices: working with native formats
- Knowledge base
- Known issues
- Fixed bugs
- Troubleshooting Premiere Pro
- Green and pink video in Premiere Pro or Premiere Rush
- How to manage media cache in Premiere Pro
- Fix rendering or export errors
- Troubleshoot playback and performance issues in Premiere Pro
crashes
processors
- Resource Monitor and Offline Media
- Resource Monitor
- Using Source Monitor and Program Monitor
- Using the reference monitor
- Offline media
- Working with offline clips
- Create clips for offline editing
- Relinking offline media
- Resource Monitor
User Guide
 io, team products and projects
This help article describes how to render, preview, and play sequences in Premiere Pro.
Premiere Pro attempts to play all sequences in real time at full frame rate. Premiere Pro tends to take this approach for all sections that don’t need to be rendered or for which Premiere Pro has already rendered preview files. However, real-time playback of composite sections at full frame rate is not always possible without preview files: unrendered sections.
Real-time multi-section playback at full frame rate may require pre-rendering of preview files for those sections. Premiere Pro marks the unrendered sections in a sequence with a colored render bar. A red render bar on the sequence timeline indicates a section that has not been rendered but would like to be rendered in real time and at full frame rate. A yellow render bar indicates a section that has not been rendered and does not require rendering in real time and at full frame rate. Regardless of the quality of the preview, sections marked with a red or yellow render bar must be rendered before being exported to tape. The green render bar indicates a section that has already rendered the preview files associated with it.
Episodes refer to preview files in much the same way as they do to source media. If you move or delete preview files from the Windows or Mac file browser instead of the Project panel, the next time you open the project, you will be prompted to search or skip preview files.
To allow uncompressed preview of 10-bit or 8-bit footage, you can customize the sequence settings template. For more information, see Create a sequence with uncompressed video playback.
This collection of frequently asked questions on the Adobe forums describes what a red or yellow bar can mean in an episode.
-
Do one of the following.
-
Drag the stage bar over the section you want to preview. Make sure the stage bar is being dragged from the textured center section. Otherwise, a playhead mark will be created.
-
Drag the work area handles (at either end of the work area bar) to set the start and end of the work area.
-
Position the playhead and press Alt+[ (Windows) or Option+[ (Mac OS) to set the start area.
-
Position the playhead and press Alt+] (Windows) or Option+] (Mac OS) to end the stage.
-
Double-click the stage bar to resize it and select either the Time Ruler Width or the Full Sequence Length, whichever is smaller. To define an entire sequence in the Stage, the entire sequence must be visible in the Timeline panel.
When setting the stage bar to define the area to render, the corresponding options are displayed in the Sequence menu: Stage Effects Render and Entire Stage Render. A command is also available to remove stage render files. These options do not appear in the Sequence menu unless the stage bar is enabled.
Hover over the work area bar to display a tooltip that shows the start and end timecode of the work area bar and its duration.
-
-
You can mark in and out points to define the area to render:
-
Mark in and out points for the area of the sequence that you plan to render.
Selecting In and Out points to define a render area in the Sequence menu displays the appropriate options: Effects In and Out Point Rendering and Effects In and Out Point Rendering. A command is also available to remove the entry and exit points of render files. These options do not appear in the Sequence menu if Stage Strip is enabled.
-
Rendering of any part of the sequence within the red render bar is available. You can also define the section of the sequence that needs to be rendered by specifying in and out points.
Render file preview for in and out section of scene setup:
-
Set in and out points to mark the preview area.
-
Select “Episode” and select one of the following options:
Effect In and Out Point Rendering
Renders the sections of video tracks that are within the interval between In and Out points that contains a red render bar.
You can also press Enter.
Rendering entry and exit points
Renders the sections of video tracks that are within the interval between the In and Out points, which contains a red or yellow render bar.
Audio rendering
Renders a preview file for audio track sections within the Stage.
You can set Premiere Pro to render audio tracks every time video tracks are rendered. For more information, see Rendering audio when rendering video.
Render time depends on system resources and segment complexity.
These options are not available if the workspace is enabled.
To ensure maximum motion quality in rendered preview files, select the Maximum Render Quality check box in the sequence settings section. For more information, see Settings.
By default, Premiere Pro does not render audio tracks when you select Sequence > Render Effects on Stage or Sequence > Render Entire Stage. However, playback quality may be reduced if the drive does not support the streaming bandwidth when you mix multiple channels of audio and audio in a composite sequence when transferring data. You can change this default value so that Premiere Pro automatically renders audio preview images each time video preview images are rendered.
-
Choose Edit > Preferences > General (Windows) or Premiere Pro > Preferences > General (Mac OS).
-
Select or deselect Render Audio When Rendering Video.
-
Press the OK button.
When preview images are rendered, Premiere Pro creates files on the hard drive. These preview files contain the results of all effects rendered by Premiere Pro during the preview. When you preview the same stage multiple times without making any changes, Premiere Pro instantly plays the preview files without re-rendering the sequence. Premiere Pro saves preview files in a folder that you can choose. Using preview files can also save time when exporting the final video program using previously saved processed effects.
Adobe Media Encoder does not use Premiere Pro preview files for encoding. To use Premiere Pro preview files, you must select the Use Preview Images option in Adobe Media Encoder for all encodings.
To further save time, Premiere Pro saves existing preview files whenever possible. Preview files move with the associated episode segment as the project is edited. When you change a segment in a sequence, Premiere Pro automatically trims the corresponding preview file, keeping the remaining unmodified segment.
After the project is finished, the preview files must be deleted to free up disk space.
Using preview files during rendering
-
In the Export Settings dialog box, select the Use Preview Images check box.
Deleting preview files
-
Activate the Timeline panel and do one of the following:
-
To remove render files for only the selected range of clips, set the stage bar to cover only the selected range.
Then choose Episode > Delete Stage Render Files. Preview files that contain any part of the linked clip in the Stage will be deleted.
-
To delete all render files for a sequence, choose Episode > Delete Render Files.
You can set the keyboard shortcut for the Delete Render Files and Delete Stage Render Files commands.
-
-
When prompted, click OK.
-
In the Program Monitor, click the Play Snippet button .
You can set the sequence to automatically scroll if its width exceeds the width of the visible area in the timeline.
-
Choose Edit > Preferences > General (Windows) or Premiere Pro > Preferences > General (Mac OS). Enter the desired lengths in the “Rewind at start” and “Rewind at end” fields.
-
Select an option from the Timeline Playback Autoscroll menu:
no scroll
Episode scrolling is not performed.
Page scrolling
Sequence scrolls through the visible area of the Timeline panel one page at a time. This setting is used by default.
Smooth scrolling
The playhead remains in the center of the viewable area and the sequence scrolls below it.
You can use any monitor connected to your computer to display the sequence. Previewing on a TV requires video equipment with an appropriate monitor port.
Preview on a TV using a video card
Some video cards and operating system software support connecting a TV without using a computer. Others support connecting a second monitor that is compatible with the computer, which can also be used as additional space for the program. See the documentation for your video card and operating system.
TV preview via camcorder or deck
When editing a DV project, you can use a TV monitor to preview the scene by connecting a camcorder or deck via the IEEE 1394 port.
In HDV mode, TV preview with camcorders or decks may not be available. Instead, it is recommended to select DV mode or Auto mode.
-
Make sure the monitor is connected to the DV camcorder or deck, and that the camcorder or deck is connected to the computer.
-
(Camera setting only) Set the camcorder to display the image on the monitor. Some devices are able to detect automatically, others require you to select the appropriate option from the menu.
-
On the source or program monitors, click the menu button at the top right of the panel, select Playback Settings, and select your desired options from the next menu.
Displaying video on a computer during playback
Specifies whether playback will be performed in the Program Monitor. Deselect this option to play only on the external monitor specified in the External Device option. If External Device is set to No, Computer Video will be selected, which allows playback on the Program Monitor.
External device
Specifies the external device that will play the video.
Proportion Correction
Specifies how pixel aspect ratio is converted for DV projects.
Audio on computer
Specifies audio playback on the computer.
Audio on external device
Sets audio playback on the connected external audio device.
Export: external device
Enables export to film for the specified device. This setting does not affect playback on an external device during export.
Turn off Premiere Pro video output in the background
Disables video output to an external monitor when Premiere Pro is not the active program on the computer.
24p conversion method
Sets the conversion method for the 24p material.
See Setting 24p playback options.
There may be a slight delay between playback on a computer and playback on a TV via camcorder/VCR. If video and audio are out of sync, try previewing video and audio on the same device.
Adobe video software has a feature to automatically insert unique document IDs into each imported file. These identifiers ensure that each program has access to the same cached view files and associated audio files, which prevents redundant rendering and mapping operations.
-
In the Media section of the Preferences dialog box (or Metadata section in Soundbooth), select Write XMP ID to files on import.
This setting is global: changing it in one Adobe video program will affect others. It also adds the modification date of the file when the ID was originally inserted.
To avoid wasting rendering time when transferring a project to another computer, transfer both cached and original files.
Help for other products
- Changing scene settings
- Optimizing rendering for available memory
- Changing resolution settings for scene preview
- Specifying scratch drives to improve system performance
- Setting up a DV or HDV system in an account
- 6
-
At the top of the 3D panel, click the Scene button.
-
At the bottom of the panel, select one of the options from the Dial menu.
-
At the top of the 3D panel, click the Scene button.
-
To the right of the Render Settings menu, click Edit.
-
(Optional) To see the changes, click Preview. You can disable this option to improve performance.
To set unique settings for each half of the cross section, click the cross section control buttons at the top of the dialog box.
-
By checking the appropriate boxes on the left side of the dialog box, you can use such rendering modes as Edge, Edge, Vertex, Volume, and Stereo. Then make changes to the appropriate settings at the bottom.
-
At the top of the 3D panel, click the Scene button.
-
Select Render Settings.
-
Do one of the following.
-
Click the Save button to save the set.
-
To delete a set, select it from the Set menu and click the Delete button.
-
-
Image based highlighting and global lighting color.
-
Light reflected from an object.
-
Noise reduction in soft shadows.
-
Make any necessary changes to your model, including lighting and shadow effects.
There is no need to change anti-aliasing settings before rendering. By default, the settings corresponding to the best quality are selected.
-
At the top of the 3D panel, click the Scene button , and then select an item from the list below.
-
From the Quality menu in the bottom half of the panel, select Final Ray Trace.
-
Choose 3D > Export 3D Layer
-
Select the texture export format:
-
(Optional) When exporting to U3D, you must select an encoding option. ECMA 1 is compatible with Acrobat 7.0; ECMA 3 is compatible with Acrobat 8.0 or later and also slightly reduces the size of grids through compression algorithms.
-
Click OK to continue exporting.
- Higher level primitives such as NURBS, splines, and curves are not supported.
- Texture matching is limited to only one diffuse map per material. Environment, specular, light, or opacity texture maps are not supported.
- Material animation is not supported.
-
Call the menu command “File” > “Save” or “File” > “Save As …”, select the format of the saved file (Photoshop (PSD), Photoshop PDF or TIFF) and click the “OK” button.
- Computer store
- Blog
- Articles on the topic: Workstation (workstation)
([email protected])Published: 23 August 2021
In recent years, not only the need of users for visual content has been actively growing, but also the requirements for its quality. The category of visual content includes graphics for games, films and animations, as well as more specific requests – architectural and design projects, visualization and animation of various technical solutions and business projects.
To create all this, render farms are used.
Rendering – what is it and how does it work?
Rendering or visualization is the process of creating two- and three-dimensional images, which, depending on the requirements, can be either independent projects or part of future videos – frames. They are created by many complex mathematical calculations that occur mainly in the CPU.
For rendering, various computer programs are used that allow you to convert a sketch into a realistic picture with textures, shadows, lighting and detail that complies with the laws of physics. The sketch in this case is called a scene.
The complexity of the rendering process depends on the task and is determined by the quality of the final image, so the procedure can take from several minutes to several hours or even days.
For rendering you need:
- Programs for working with 3D graphics.
- Programs for visualization.
- Powerful computing equipment.
As computing equipment for rendering can be used:
- Computer of appropriate capacity.
- Computer group because rendering tasks are being successfully parallelized.
What is a render farm?
A render farm is a group of computers for rendering calculations, assembled into a single network. Depending on the capacity of the system, it can have several thousand individual nodes. Typically, such capacities are required by large studios that work with video content and 3D graphics or services that lease computing power.
Render farms are divided into two groups by access level:
- Service or local – created by individuals or companies for personal needs.
- Public or commercial – created for leasing computing power on a commercial basis to anyone.
If we take into account the type of execution, then we can distinguish:
- Computer farms are small systems consisting of several devices with a uniform distribution of tasks.
- Server farms are professional large centers organized using special equipment, redundant power supplies and cooling systems.
Since the rendering process can proceed according to various algorithms and be performed both by central processors and graphics adapters, render farms are further divided into 2 categories:
CPU-rendering – the performance of the central processor is used for calculations.
GPU rendering – calculations are carried out by the GPU.
In this case, the choice is determined by the program that is used for visualization.
Render station – how it differs from a farm
Unlike a farm, a render station is a separate device designed to work with graphic content. It differs from a conventional PC in more powerful components that have a narrow specialization. In particular, the stations are equipped with professional graphics adapters, such as the Nvidia Quadro line.
The render station can be installed in an apartment or small office.
Its purchase is justified for the regular implementation of projects of moderate complexity.
Render farm rental
Commercial farms, by analogy with storages, are called cloud farms. They offer computing and visualization services to anyone for a fee.
Using the services of a cloud render farm is quite profitable. Your task can be calculated simultaneously on several dozen nodes, which significantly reduces its execution time. Thus, for a moderate fee, the user temporarily gets access to powerful equipment and solves his problems.
Payment can be a subscription if services are needed on an ongoing basis. You can also use the computing power of cloud farms one-time. In this case, for an approximate calculation of the cost and deadline for the execution of the application, online calculators are used, which each service offers.
Before you start rendering, you should pay attention to compatibility. The software used to create the project must match the farm software.
Most services keep track of application versions and regularly update versions and even download plug-ins for users, so for the most part there are no problems.
Another important point is the data storage period. Be sure to specify how long the service stores projects so as not to lose already paid work.
In any case, before you start working on any of the render farms, read the terms of cooperation and pay attention to the possibility of a refund and a dispute resolution scheme. Usually, answers to these questions can be obtained from the customer support service, which is available around the clock.
- All posts
- KVM equipment (equipment)
- Powerline adapters
- security
- Wireless adapters
- Power supplies
- Video cards (videocard)
- Video surveillance (CCTV)
- HDDs and Solid State SSDs
- Disk shelves (JBOD)
- Sound cards
- Instruments
- Uninterruptible power supplies (UPS, UPS)
- Cables and patch cords
- Switches
- Computer peripherals (computer peripherals)
- Computers (PC)
- Controllers (RAID, HBA, Expander)
- PC Cases
- PC Motherboards
- Multifunction devices (MFPs)
- Memory modules for PCs, laptops and servers
- Monitors
- Monoblocks (All-in-one PC)
- Desktop storage systems (NAS)
- Notebooks (notebook, laptop)
- General help
- Cooling
- Tablets
- Plotters
- Printers
- Software
- Software for corporate consumer
- Projectors
- Processors for PCs and servers
- Workstations (workstation)
- Power Distribution Unit (PDU)
- Consumables for office equipment
- Wi-Fi extenders (repeaters, repeaters)
- Routers (routers)
- Servers and server hardware
- Network cards
- Scanners
- Telecommunication cabinets and racks
- Telephony (phone)
- Thin Clients
- Transceivers
- Smart watch
House Exterior Rendering – 3D Architectural Visualization Studio.
Rendering of exterior and interior.
House Exterior Rendering – 3D Architectural Visualization Studio. Rendering of exterior and interior.
Contact us
Exterior view of the building
Before erecting a house, the designers read the engineering plans and discuss all the details with the customer.It happens that in the course of work, builders may miss something. You will invest your money in a project that will not exceed expectations. External rendering of the house will avoid this. It is enough to contact the architect to work out the visualization.
Imaging technologies
The software uses several options to obtain the perfect image. The following are considered effective:
Rasterization – projecting a scene object onto the screen without considering the effect of perspective relative to the observer;
Ray casting: the scene is viewed from one point. Rays are sent from this point, which determine the color of a pixel on a two-dimensional screen. The rays stop their propagation when they reach the scene object.
Ray tracing: Rays are directed from the vantage point towards the object. Unlike the ray casting method, they do not stop their propagation, but are refracted into three separate beams. Their number affects the depth of tracing and the realism of the image.
Path tracing: this method is as close as possible to the laws of light propagation.
Most often, several methods are used simultaneously. This reduces time costs and ensures high quality.What is rendering for? With the help of a large number of computer programs, designers can create realistic photos of future apartments. Rendering allows you to see the appearance of the house before the start of construction and reconstruction. Creating photorealistic images of the facades of a house takes more time than conventional visualization.
Distinguishing features of rendering
a lot of work going on during this period:
- Coloring
- Small detail work
- Creating lighting effects
- Display of climatic conditions
- Realism enhancement
As a result, the sketch should be perfect, this
will require a large amount of temporary resource.Imaging technologies
The software uses several options to create the perfect image.
The following are considered effective: Rasterization: projecting a scene object onto the screen without taking into account the effect of perspective relative to the observer; Ray Overlay: View the scene from a single point, projecting rays that define the color of a pixel on a 2D screen. Rays stop spreading when they reach the scene object.
Ray tracing: rays are directed from the point of view to the object. Unlike the beam casting method, they do not stop spreading, but are refracted into three separate beams. Their number affects the depth of drawing and the realism of the image. Path Tracing: This method fully respects the laws of light propagation. Most often, we use several methods at the same time to save time and ensure high quality.
Stages of developing a building visualization
Rendering is the final stage of processing the scenes resulting from the creation of a 3D visualization.
The process consists of two steps:
1. Real-time rendering;
2. Pre-rendering. Real-time rendering is used in the development of computer games. Pre-rendering is well applied in real estate presentation. The time required to create a realistic image depends on the complexity of the project. The whole process consists of imposing effects, light, shadows. The main task is to achieve a realistic result. To do this, the designer needs to know the basic laws of physics and understand optics. A professional rendering of the exterior of the building will allow you to watch your dream come true.Visualization of the appearance of the building implies the study of all the details of the facades in the design: drawing the sky, greenery in the garden, ponds, fountains. At this stage, the customer can make adjustments before starting construction work. It turns out that you can save a lot of money and achieve the highest quality result. Visual presentation allows the owner of the house to plunge into the atmosphere and check whether the picture corresponds to reality.
External rendering helps to meet the needs of each client.
Do you have a question?
Fill out the form and get expert advice
Your name
Your e-mail
Your question
I consent to esteticvision.
com using and storing the personal data provided in this contact form in order to answer my question.
90,000 training on the 3D artist online-Skillbox
Officially-Prices will increase from October 1, Discount 30%
ATS days 00:00Course
Isnae any engine. Learn to work with camera, light, materials. Expand your portfolio and become a sought-after 3D specialist.
- Duration 2 months
- online at a convenient time
- Speaker of the course artist T-34
- Course access to the course forever
Who is suitable for this course
- 3D artists
Learn how to make attractive personnel and impressive visualizations . You will be able to effectively present your work to the client.
- Freelancers in CG
Master rendering and expand your portfolio in a couple of months.
You can take on a new type of visualization task and increase your income.
What will you learn to
- Work with Arnold and other engines
- Exhibition rendering parameters for different tasks
- Optimize rendering
- Prepare a project
- Create a shader 900
- camera in the scene
- Work with different materials
Your future work
GameBox Member Games The authors of the game are winners of several game dev events: Unreal Engine dev contest 2021 from Epic Games, GameBox 2021 showcase and game design festival from the Higher School of Economics.
Steam game
-
Blocks and Rows
A spatial thinking puzzle game from the Gray Guys.
Game on Google Play
Game on the App Store -
Daldos
A game about Vikings fighting on board a longship.
The project was presented by GameBox participants as a practical assignment from experts. And after the official release, the team made money on sales.
Steam game
-
Lucky Shot
Memory and reaction roguelike from the Nocscab Games team. This is already the 4th project of the guys in GameBox.
Playing in the App Store
-
Crush link
Your task is to protect your base by preventing spam from entering your mailbox. Build towers in marked locations to stop spam.
Game site
-
Scary Tales
Scary Tales is a first-person tactical arena-action game in a mystical setting of Slavic folk tales.
Playing on Steam
- method of accelerated memorization of words and grammar;
- personal language learning program to help you start speaking from scratch;
- the possibility of individual sessions with curators.
- Registration
Get to know the platform
The Skillbox platform is a proprietary development of the company, which we are constantly improving. Videos, practical tasks and communication with curators are waiting for you. Access to the materials will open immediately after the purchase of the course.
- Theory
Gain knowledge
The courses consist of thematic videos of different duration. Watch them anytime, anywhere. Access is perpetual, so you can always come back and repeat the theory.
- Practice
Complete tasks
We believe that skills are developed only through practice. Therefore, after the theory, practical work or a test awaits you. All tasks are close to real – they can be proudly put in the portfolio.
- Feedback
Working with a curator
Curators check assignments. These are experts on the topic of the course. They will help with difficult tasks and suggest how to improve your projects. You can communicate with checking curators directly on the platform.
-
Selecting a render engine
Familiarize yourself with the different types of renderers and understand which one is right for your purposes.
-
Preparing for rendering
Understand the formats of the “input files”. Learn how to collect the necessary data and assets before starting to render.
-
Light setting.
Part 1
Find out which light sources are used in the render and how they differ. Learn how to use basic lighting tools and how to arrange light in a scene. You will be able to adjust the physically correct sky.
-
Light setting. Part 2
You will be able to adjust the lighting for the interior. Learn how to work with dome and flat light sources.
-
Camera setup
Understand the different types of cameras and how to set their parameters. Understand how to work with depth of field and motion blur.
-
Basic parameters and rendering properties
You can set the settings for correct rendering for different tasks. Learn what AOVs are, what they are for and how to work with them.
-
Material setting. Basic level
Learn how to create simple shaders and connect basic light. You can adjust the parameters and size of the textures.
-
Material setting. Advanced level
Understand advanced render settings and be able to create complex shaders.
Learn how to connect various materials and customize them. Understand how to use gradient maps.
-
Material setting. Technical and Helper Functions
Get to know the shader tuning helper functions. You can create complex materials. Learn what nodes are and how to work with them.
-
Material setting. Volumes: smoke, fire
Learn how to set up smoke and fire materials. Get familiar with the VDB format and learn how to import VDB files.
-
Render optimization
Learn how to adjust and optimize sampling. Learn how to calculate retraced rendering, set up reflection rays and work with the ASS format.
-
Octane render example
Learn how to work with other programs and render engines.
-
Render farm
Learn how to calculate the cost of renting render farms and send scenes to an external renderer.
-
Do I need to know how to work with CG to take the course?
Yes, the course is designed for junior or middle level 3D specialists. If you want to learn CGI from scratch, check out 3D Modeling for Beginners and Autodesk Maya from Zero to PRO courses.
-
What software do I need to complete the course?
You will be working in Maya with the built-in Arnold engine. System requirements can be found on the official Autodesk website.
-
What is the training schedule on the platform? Can you combine it with work?
You can study the course materials in a mode convenient for you, combine learning on the platform with work and personal life.
Moreover, all videos will be available at the end of the course, so you can brush up on your knowledge at any time.
-
How many hours per week will I need to spend on the platform?
It all depends on you. On average, platform users work from 3 to 5 hours a week.
-
Who will help me learn on the platform?
You will have reviewing experts and a curator in the course’s Telegram chat. They will comment on practical work, give useful advice and answer any questions. You can adopt their experience, professional knowledge and life hacks.
-
Are there any installment plans?
Yes, you can buy the course in installments and plan your budget by splitting the entire amount into small monthly payments.
- Ufa
- Chelyabinsk
To come in
Account Management
Rendering and Saving 3D Objects
In Photoshop CS5 and Photoshop CS6, 3D painting functionality was available in Photoshop Extended. All the features of Photoshop Extended are available in Photoshop CC. Photoshop CC does not have a special Extended edition.
Render settings determine how 3D models are rendered. Together with Photoshop, several sets with common settings are installed. You can modify these presets as needed and create your own.
Rendering settings are individual for each layer.
If the document contains several 3D layers, then for each of them you should set their own rendering settings.
Preset render mode selection
The default render mode is Default, which displays the visible surfaces of models. Vertices and Wireframe modes display the basic structure. To use the Solid and Wireframe modes together, select a preset with a combination of the two modes. To display the model as an elementary cube, the dimensions of which correspond to the dimensions of the original model, select the Bounding Box preset.
Installed render sets
A. Default (with Interactive quality) B. Default (with Ray-traced quality and base plane visible) C. Bounding box D. Depth map E. Hidden frame F.
Shtrichov illustration G. Normal H. Drawing mask I. bounding box N. Transparent bounding box O. Double-sided P. Tops Q. Frame
The “Double Sided” preset applies to cross sections only. In this case, the whole model is displayed on one side, and its wireframe on the other.
Custom render settings
For Volume options used primarily with DICOM images, see Viewing 3D Volume in Different Rendering Modes.
Face Parameters
Determine how model surfaces are drawn.
Edge style
Displays surfaces using one of the following methods:
Solid
Renders without shadows or reflections using the processor of a graphics card that supports the OpenGL standard.
Unlit textures
Renders without lighting, taking into account only the parameters of the selected texture. (Default selection is Diffusion.)
Flat
Uses the same surface normal for all vertices, making objects look faceted.
Constant
Replaces all textures with the selected color.
You can change the color for a face, edge, or vertex.
bounding box
Displays frames that are sized to match the dimensions of each component.
Normals
Displays the X, Y, and Z components of surface normals in various RGB color tints.
Depth Map
Displays the model in grayscale, using the lighting settings to detect depressions and bumps.
drawing mask
White indicates areas suitable for painting, red indicates areas where paint will be overdrawn, and blue indicates areas where paint will not be applied. (See Defining areas to draw.)
Texture
If “Gnawing Style” is set to “Unlit Textures”, then it determines the texture map. (See 3D Material Options.)
Rendering to final output
Provides smoother shadow outlines and better rendering of reflections in objects and environments when exporting video animations.
However, this is achieved at the cost of increased processing time.
Reflections, refractions, shadows
Shows or hides these items available in Ray Trace mode.
Remove Hidden Surfaces
Hides the surfaces on the back of reversible components.
Edge options
The edge options determine how the wireframe lines are displayed.
Edge style
The same options are used here as for the face style described above (Constant, Uniform, and Bounding Box).
Fold Threshold
Specifies the number of breaklines that make up the wireframe of the model. Wrinkles or lines are formed when two model polygons touch each other at a certain angle. If the edges touch at an angle less than the Crease Threshold setting (0 – 180), the resulting line is removed. With a setting value of 0, the entire wireframe is displayed.
Line thickness
Width value in pixels.
Remove Hidden Surfaces
Hides the corners on the back of reversible components.
Remove hidden lines
Removes lines overlapped by lines in the foreground.
Vertex parameters
Vertex parameters affect the appearance of vertices (Points of intersection of the polygons that make up the wireframe model).
Top style
The same options are used here as for the face style described above (Constant, Evenly, and Bounding Box).
Radius
Specifies the pixel radius for each vertex.
Remove Hidden Surfaces
Hides the vertices on the back of two-sided components.
Delete Hidden Vertices
Removes vertices that are overlapped by vertices in the foreground.
Stereo options
The stereo options determine the settings for images that will be viewed with red/blue glasses or superimposed on objects that include biconvex lenses.
stereo type
“Red/Blue” for images to be viewed with special glasses, “Vertical Interlace” for lenticular prints.
Parallax
Sets the distance between two stereo cameras. Increasing the value increases the 3D depth and decreases the depth of field, pushing elements in front of or behind the focus field out of focus.
Lens Density
In Vertical Interlaced mode, specifies the number of lines per inch for a biconvex lens.
Information plane
Specifies the position of the information plane relative to the center of the model’s bounding box. Specify a negative value to move the information plane forward and a positive value to move the information plane back.
Saving and deleting a preset render mode
Once you’ve completed your 3D file, you’re ready to create a high-quality final file for web, print, or animation. To provide more realistic lighting and shading, ray tracing is used in the final rendering and an increased sample rate is applied.
Use this mode to enhance the following effects in a 3D scene:
The final render can take a long time depending on the model, lighting and maps in the 3D scene.
After the rendering process is complete, you can flatten the 3D scene for export to another format, create a combined print of 3D and 2D content, or print the 3D layer itself.
For exported video animations, the 3D Render Settings dialog has a Render for Fin. conclusion.” See the “Setting Rendering Options” section.
To save 3D content as a file, save it in Photoshop format or any other supported format. A similar operation can be done with the whole 3D layer.
Export 3D layer
3D layers can be exported to any of the supported 3D formats: Collada DAE, Wavefront/OBJ, U3D and Google Earth 4 KMZ.
Consider the following when choosing a file format:
To export a 3D layer, do the following:
U3D Export Restrictions
Ensure that all 3D layers export to U3D only have triangular feature geometry. Also, when exporting 3D layers to U3D format, be aware of the following restrictions:
Saving a 3D file
To save the position of the 3D model, light parameters, rendering mode, and cross sections, files with 3D layers should be saved in PSD, PSB, TIFF, or PDF format.
Render farm: what it is and what it is for
Free Year of English
Skillbox launched an online platform for learning English. Sign up for the course and get one year free access to project materials.
Offer valid for users who have purchased any course since December 22, 2021.
Waiting for you:
About Skillbox
Skillbox is the No. 1 learning provider among EdTech companies in the CPE segment.
Rating from Smart Ranking. by the quality of education. The whole theory is recorded with top market experts,
and practice is as close as possible to real work tasks.
Hear what those who have already achieved their goals with Skillbox have to say.How is training on the platform
Scene setup
Arnold rendering in Maya
Bonus modules: rendering in Houdini (Octane)
Get a course presentation and expert advice
Your application has been successfully sent
Our manager will contact you as soon as possible
Speaker
Speaker Works
Frequently Asked Questions
Critical Rendering Paths – Web Performance
Critical Rendering Paths are the sequence of steps that the browser takes when it converts HTML, CSS and JavaScript into the pixels you see on the screen.
Optimizing these steps improves render performance. These steps include working with the Document Object Model (DOM), CSS Object Model (CSSOM), render tree, and layout
The DOM Document Object Model is created when the browser parses HTML. This HTML can request JavaScript, which can modify the DOM. HTML can request styles that are involved in the creation of the CSS Object Model. The browser engine combines these two object models to create a render tree. The layout determines the size and position of each element on the page. Once the layout is determined, the pixels are drawn on the screen.
Optimization of critical rendering steps improves time to first render. Understanding and optimizing these steps is extremely important in order to render the application at the desired frame rate (60 frames per second, fps) and provide the user with a comfortable, smooth interface.
Web application performance includes server requests, responses, loading, parsing and scripting, rendering, compositing, and pixel rendering.
Loading a web page or application starts with an HTML request. The server returns an HTTP response consisting of headers and a request body. The body of the request contains the HTML document. The browser starts parsing the downloaded HTML, converting the received document bytes into a DOM tree. The browser creates a new request each time it finds links to external resources, be it stylesheets, script files, or image links. Some requests are blocking. This means that while such requests are running, other requests are suspended. The browser continues to parse the HTML and build the DOM until the request to get the HTML ends. After DOM parsing is complete, the browser constructs a CSS model. Once these models are formed, the browser builds a render tree in which it calculates the styles for each visible element on the page. After the tree is formed, the layout (layout) occurs, which determines the position and size of the elements of this tree. As soon as the stage is completed, the page is rendered.
Or “drawn” (paint) on the screen.
Document Object Model
Building the DOM incrementally. The HTML response is turned into tokens, which turn into nodes (nodes) that form the DOM tree. The simplest node starts with the startTag token and ends with the endTag token. Nodes contain all the necessary information about the HTML element corresponding to that node. Nodes (nodes) are connected to the Render Tree using a hierarchy of tokens: if some set of startTag and endTag tokens appears between an already existing set of tokens, we get a node (node) inside the node (node), that is, we get the hierarchy of the DOM tree.
The greater the number of nodes (node) an application has, the longer the DOM tree is formed, which means that the processing of critical rendering steps takes longer. Measure! A few extra nodes (node) will not make the weather, but divitis will definitely lead to freezes.
The CSS Object Model
The DOM contains the entire content of the page.
The CSSOM contains all the page styles, i.e. the data on how to style the DOM. CSSOM is similar to DOM, yet different. If DOM generation is incremental, CSSOM is not. CSS Render Block: The browser blocks rendering of the page until it has received and processed all CSS rules. CSS blocks rendering because the rules can be overwritten, which means you have to wait until the CSSOM is built to make sure there are no more overrides.
CSS has its own token validation rules. Remember that the C in CSS stands for “Cascade”. CSS rules cascade down. In other words, when the parser converts tokens into nodes (nodes), nested nodes inherit styles from parent nodes. Incremental processing is not available for CSS because the set of next rules can overwrite previous ones. A CSS Object Model (CSSOM) is built as CSS is parsed, but it cannot be used to build a render tree because it could happen that the following set of rules could make any of the tree nodes invisible on the screen. This can lead to an extra call to layout and recalculation of styles.
Speaking of selector performance, the least specific selectors perform faster. For example,
.foo {}will work faster than.bar .foo {}. In the first case, conditionally, one operation is needed to find the element.foo, in the second case, all.foowill be found first, and then the browser will go up the tree in search of the parent element.bar. More specific selectors require more work from the browser, but these issues are probably not worth optimizing them for.If you measure the time it takes to parse CSS, you’ll be surprised at how fast browsers are. More specific rules are more expensive because they require more nodes in the DOM tree to be traversed, but this cost comes at a fairly low cost, especially compared to other performance bottlenecks. Measure first. Then optimize if it’s really necessary. Selector specificity is probably not what really slows down your application.
When it comes to CSS optimization, improving selector performance only speeds up rendering by microseconds. There are other ways to optimize CSS such as unification, splitting CSS files into different files based on media expressions.
Render Tree
The render tree spans both page content and styles: this is where the DOM and CSSOM trees are combined into one tree. To build a render tree, the browser examines each node (node) DOM, starting from the root (root) and determines which CSS rules to attach to this node.
The render tree only covers the visible content. For example, the head section (mostly) does not contain any visible information, and therefore may not be included in the tree. In addition, if some node has property
display: none, it is also not included in the tree (as well as the descendants of this node).Layout
The moment the render tree is built, the layout step becomes possible. The layout depends on the screen dimensions.
This stage determines where and how the elements will be positioned on the page and what are the relationships between the elements.
What about the width of the element? Block-level elements, by definition, have a width of 100% of the width of their parent. An element with a width of 50% will have half the width of the parent element. Unless otherwise specified, the body element has a width of 100%, that is, 100% of the width of the parent, the visible area of the viewport (document window).
The viewport meta tag, which you can specify in the Head of a page, defines the width of the viewport and affects the layout. Without this tag, browsers use the “default” width, which is typically 960px. In browsers that open in full screen mode by default, such as the phone browser, setting the tag
device-width)changes every time the user rotates the phone.This causes the link phase to start. As well as when resizing the window in a regular browser.
Layout performance is directly affected by the DOM – the more nodes (nodes) in your document, the more time it will take to recalculate the positions and sizes of all elements. Layout can become a bottleneck leading to freezes, especially if it’s running at the same time as a scroll or other animation. While a 20ms delay when loading or reorienting the screen may be acceptable, it can still lead to stuttering on animations and scrolling. Each time the render tree is modified, such as by adding a node, modifying it, or changing the styles of the box model, layout is triggered.
To reduce the frequency and duration of this step, group screen updates and avoid animating box-related properties of elements.
Paint
The last step on our list is painting pixels on the screen. Once the render tree has been created, the layout has taken place, the pixels can be drawn.
When the document is first loaded (onload), the entire screen will be rendered. After that, only the parts of the screen that need to be updated will be redrawn, as the browser tries to optimize the rendering process, avoiding unnecessary work. So, if you have two elements in your document, only the one you changed will be redrawn. The rendering time depends on what type of update was applied to the render tree. While rendering is a very fast process and probably has little impact on performance, it’s important to remember that both the layout and paint steps must work together and fit within the frame rate. Every CSS property applied to any node increases rendering time, but completely removing the style, which can save you 0.001ms, is unlikely to give you the desired result, but it will easily worsen the user experience. Remember – first you need to measure, and then optimize only what is necessary!
Improve page loading by prioritizing resources, by controlling the order in which they are loaded, and by reducing file sizes.
-