Displaying photography: 10 Creative Ways to Display Photos in Your Home
10 Creative Ways to Display Photos in Your Home
Skip to content
10 Creative Ways to Display Photos in Your HomeAnthony2022-09-09T18:54:26+00:00
04/26/2021
by Laura Gardiner
Studio Manager, Tribeca Printworks
You’ve just gotten your hands on a beautiful piece of photographic art. While you’re probably ecstatic about how it will look in your home, that sentiment can be quickly thwarted by the dreaded question: How will you hang it up?
Ideally, your mounting and framing choice will perfectly match the tone and aesthetic of the art. But that ideal can lead to a lot of second-guessing yourself.
Here are 10 creative ways to display photos and paintings in your home:
1. Install a Picture Ledge
Frame your prints and place them along a shelf or ledge to create a picture ledge. Use different frame sizes and colors and overlap some of them to create even more visual interest. You can swap your pictures out at any time to keep your display fresh.
2. Get a Huge Canvas Print
Choose a large painting on canvas or get a huge custom canvas print and make it the centerpiece of your space. Canvases have their own structure, so there’s no need for a frame.
It’s best to use a giclee printing process, which maintains the sharp image quality of your picture no matter the size.
3. Create a Gallery Wall
Transform an empty wall with a collection of prints or paintings. Mix and match, or make your images more cohesive with matching frames. Arrange your gallery however it fits best.
4. Frame Something Different
Artwork can be anything! Try framing something different—like maps, tapestries, book covers, advertisements, or dried flowers—to create unexpected pieces of art for your walls.
5. Use Print Hangers
Print hangers are a great way to display art prints without frames. Their sleek design creates a minimalist look and retains the refinement associated with a frame.
6. Opt for a Frameless Treatment
Consider a frameless option like an Acrylic Face Mount or print on Aluminum for a sleek, no-hassle hanging arrangement.
7. Create a Grid
Print a bunch of photos in small squares of the same size and arrange them in a grid to create a larger, more impactful display. Leave them unframed or place them in identical frames for a more dramatic look.
8. Choose Colored Matting
Most prints are matted with white or neutral mats, but colored matting can make a big impact. Choose a color that ties together the room and the print and a neutral, light-colored frame to create an eye-catching visual.
9. Display in Pairs
Choose two pieces that look like they belong together, and have them printed at the same size. Mount them in identical frames and hang them side by side for a lovely pair. To mix it up, you could stack them vertically in a narrow space.
10. String Them Up
Run strings along your walls and use clothespins to pin frameless prints in various places. To add some ambient lighting to the room, you can use string lights instead of normal strings. The clothespins make it easy to swap out photos whenever the mood strikes.
How Do I Display a Lot of Photos?
The go-to for many people is to create a gallery wall (as we mentioned earlier). But that’s not the only way.
Multi-Picture Frames
Some frames are large enough to include dozens and even hundreds of pictures. The pictures will be smaller than usual, but the result is a colorful collage of your favorite images.
The catch here is that you’ll need to get a custom print to fit the size of your frame. Fortunately, experts know the best ways to print your photos at any size.
Mix and Match Frames
If you choose to do a gallery wall, have some fun with your frames! Mix some wooden materials with gold-painted or metallic material so your gallery wall is as eclectic as your tastes.
Matching Frames
If you prefer minimalism, keeping your frames the same is probably in your best interest. Find a frame you like and use the same image dimensions to maintain a sense of classy uniformity.
What Can I Use Instead of a Picture Frame?
How you display photos in your home says as much about you as the artwork you buy. If you’re tired of old-fashioned frames, there are dozens of creative ways to display your photos and art without a frame.
Clipboards
Attaching a clipboard to your wall is a simple way to display and swap out art as you please. Mount the clipboard with hanging strips or other adhesive and play around with how you arrange your art.
Hangers
Skirt hangers, which include clips on the bottom bar, can just as easily display your artwork. You may mount these hangers using a nail, or use the same string trick we mentioned above.
Tape
There’s nothing wrong with a simple adhesive—tape on the back of your photos is an effective way to keep art on your wall. Make sure the tape is low-tack so it won’t damage the artwork or your wall.
You may also want your tape to be a part of the decor—washi tape comes in decorative colors and patterns, which you can use to create handmade frames.
Should You Put Pictures on Every Wall?
No, you don’t need to fill every empty space with pictures. Leaving some space can be a fantastic design choice. This taps into the idea of “negative space,” a design practice that uses empty or blank space to accent the art it surrounds.
Where Should Pictures Be Placed in a House?
If you don’t need to cover every wall with art, which ones should have art on them? Here are a few tried-and-true places to hang your art:
- Above your bed’s headboard
- Behind your couch
- Along your staircase
- Behind (or on) bookshelves
- Above a fireplace
- On nightstands
- Near the front door
- In hallways
How Do You Frame Something Without a Frame?
If your artwork came without a frame, it’s pretty simple to get one for it. Many art pieces are already sized for standard frame dimensions, like 11”x14” or 16”x20”. Custom framing is the best solution if your art is outside the conventional frame sizes.
This option will guarantee your art is appropriately displayed at the center of your frame, without wrinkles or blemishes of any kind.
Add Custom Prints and Frames to Your Space
At Tribeca Printworks, we can help make your vision a reality with large, museum-quality prints and custom framing options. We love helping customers complete projects and find creative new ways to display photos and paintings.
Order online or schedule a one-on-one consultation with our team to discuss your ideas and get a free estimate. Drop by our studio anytime to chat, or use our online contact form to set up a chat through phone or email.
Page load link
Go to Top
12 Fun Photo Display Ideas
Type keyword(s) to search
Today’s Top Stories
1
The 33 Coziest Designer Bedrooms Ever
2
Why You Need This All-Access Design Program
3
The Best Celebrity Furniture and Home Decor Lines
4
60 Backyard Ideas to Turn Your Space Into Paradise
5
The Best Design Books to Buy Now
Every item on this page was hand-picked by a House Beautiful editor. We may earn commission on some of the items you choose to buy.
Put some use to the zillion photos on your smartphone.
By
Korin Miller
Getty Images
Once upon a time, you displayed your photos in picture frames and called it a day. While basic frames are still a great way to go, there are now so many other photo display options to morph your pictures into cool statement pieces. Still, it can be hard to think of creative and fun ways to show off your prints on the fly. Steal these photo display ideas for right now—or save them for the next time you’re ready to show off your favorite pictures.
1
Make a photo wall
View this post on Instagram
Gallery walls are always a great way to display family photos and capture memories in your home.
I love this gallery wall I did! I always always keep the frames consistent and the mats oversized. I love square frames that have rectangle photo openings- they can be turned vertical or horizontal. Keep it clean and simple to allow the photos should to be the focus. Let’s do this! @seweyandt @ruthiedean @kcave87 #gallerywall #familyphotos #photodisplay #cb2 #sarahvirginiahome #brassframes #oversizemats #gallerywallinspo #homedecor #hallway #hallwaydecor #walldecor #brass #brushedgold #satingold #squareframes #frames #homeinspo
A post shared by Sarah Virginia Home (@sarahvirginiahome) on
 I love this gallery wall I did! I always always keep the frames consistent and the mats oversized. I love square frames that have rectangle photo openings- they can be turned vertical or horizontal. Keep it clean and simple to allow the photos should to be the focus. Let’s do this! @seweyandt @ruthiedean @kcave87 #gallerywall #familyphotos #photodisplay #cb2 #sarahvirginiahome #brassframes #oversizemats #gallerywallinspo #homedecor #hallway #hallwaydecor #walldecor #brass #brushedgold #satingold #squareframes #frames #homeinspo
Got a plain wall that needs jazzing up? Try a bevy of your favorite photos, all sized the same, in identical frames. It’ll immediately make a room or hallway next-level.
2
Invest in standing frames

instagram.com/p/Byz69sKBTgr/?utm_source=ig_embed&utm_campaign=loading” data-instgrm-version=”12″>
View this post on Instagram
These copper frames are such a Sweet way to display your photos at your event! Plus-a lot cheaper than buying a bunch of huge picture frames☺️ Use my free frame tutorial (in highlights) to make your own for under $10 😍 Who has made your own?!🙋♀️ . . . . . . . #photodisplay #weddingdecor #weddingreception #diyweddingdecor #partyideas #partyinspo #partyplanningideas #partyplanning #diytutorials #freetutorial #babyshower #events #birthdayparty #partydecorations #love #eventplanning #event #handmade #partydecor #eventdecor #bridalshowerdecor #bridalshower #babyshowerdecor #weddingshower #weddingshowerdecor
A post shared by HOME + PARTY (@calliandoak) on
Who says your photos have to be on a wall? These standing copper frames are a completely different—and unforgettable—way to show off your pictures.
3
PrintsFactoryUS
Turn your Instagrams into magnets
Etsy
$2 AT ETSY
4
Mix art and interior design
View this post on Instagram
So excited about this find @hpmkt. So many possibilities for Residential and Commercial uses! Whether your’re in need of displaying some of the kiddos art masterpieces, display work at your studio or frame family photos, the options are endless!! 🙌🏻 contact Blush Interior Designs, Inc. for creative interior ideas for your space! #interiordesign #interiordesigner #residentialartdisplay #commercialartdisplay #artdisplay #wexelart #photodisplay
A post shared by Blush Interior Designs, Inc.
 (@blushinteriordesigns) on
 Your photos don’t have to be the ~only~ thing on your display. Mix in colored acrylic shapes to make your pictures really pop on a wall.
5
Get a heart snapshot
Minted
$31 AT MINTED
6
Put dozens of photos in one print
View this post on Instagram
I don’t know about you but my team and I are at a point in life where we want everything to be velvet. It’s an A-celebrity type of fabric that could easily make “the sexiest fabric alive” list. But it’s not just easy on the eye, guys, it’s so much more.
A post shared by Emily Henderson (@em_henderson) on
 Did you know velvet is actually ridiculously durable and family-friendly? Today on the blog we’re chatting all about how it can be any spill-prone person’s secret weapon. Link in bio.
Try this idea from Emily Henderson: Gather dozens of your favorite photos, size them the same, and arrange them block-style in one print. Hang it up over your sofa or in a bare hallway for instant art.
7
Get inspired by nature
View this post on Instagram
No room for a Christmas tree? Want something a bit more minimalist? No problem! Make your own simple decorations using photos, a few baubles, a stick and some string! Order any product all this week for pre Xmas delivery throughout Australia.
A post shared by PosterCandy.photos.photoposter (@postercandy) on
 #postercandy #postercandymoments #printwhatyoulove #photos #photodisplay #diyxmas #makeyourowndecorations #christmasdecorations #photocollage
Bring a little of the outdoors inside with this rustic display. Simply get a stick or piece of wood you like, attach pieces of rope or twine, fasten on mini clothespins, and add some cool balls or ornaments between. Just keep the photos the same size for a cohesive look.
8
Put your pics on canvas
Shutterfly
$290 AT SHUTTERFLY
9
Re-use existing art
View this post on Instagram
A vintage pink tassel photo display, how adorable is it? 😍💕 .
A post shared by She Aquarii || Rita R. (@she.aquarii) on
 We have much more colors. Dm to know more and buy 💌✨ . #macramecord #macrame #macramemakers #madewithlove #photodisplay #wallhanging #tassels #wood #woodbeads #macramedesign #diy #handmade #handmademacrame #macramelovers #portugal #christmas #christmasgift #gift #wool #woodwork
Find pretty wall art you admire and simply attach your favorite photos over it using mini clothes pins. This macrame hanging gets new life thanks to a collection of fun Polaroids.
10
Create a gallery vibe
West Elm
$24 AT WEST ELM
11
Use hanging flip books

com/p/B5LO-dYDs27/?utm_source=ig_embed&utm_campaign=loading” data-instgrm-version=”12″>
View this post on Instagram
Displaying #photographictime #questioncuration #alternativecurating #photodisplay
A post shared by the photo curator (@thephotocurator_) on
This option makes a perfect interactive display. If you have more photos than you know what to do with, group them by loved one or moment in time and arrange them in a hanging line. Visiting friends and family can flip through them while you’re otherwise occupied.
12
Turn your staircase into a statement
View this post on Instagram
Display your favorite photos in an eye-catching fashion using the new Exhibit Photo Display.
A post shared by Umbra (@umbra_design) on
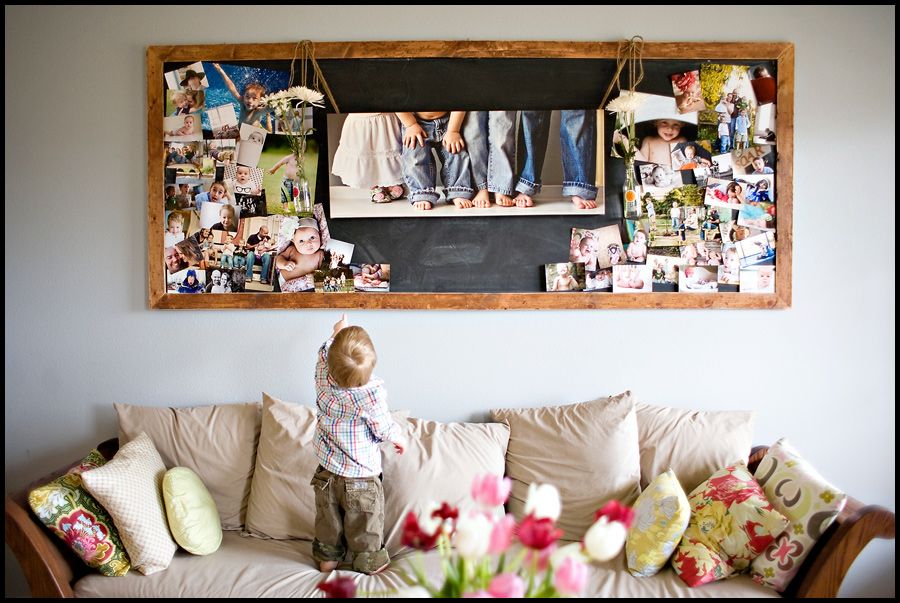 Exhibit features five hanging, gallery-style frames suspended from a modern and sleek beam which can be mounted on an angle or horizontal using only two screws. Designed with versatility in mind, each picture frame and hanging rod can be interchanged to create multiple configurations to best fit your space. Available now on umbra.com! Designed by: @sungwook_hanna #Umbra #Umbradesign #canadiandesign #homedecor #roomdecor #photodisplay #photogallery #gallerywall #galleryframes #gallerywallinspo
Finding ways to display photos on a staircase can be tricky, which is why this idea is so cool. Umbra’s Exhibit Photo Display showcases five hanging picture frames—some horizontal, some vertical—so you can get a little of everything into the mix.
Korin Miller
Korin Miller is a freelance writer specializing in general wellness, sexual health and relationships, and lifestyle trends, with work appearing in Men’s Health, Women’s Health, Self, Glamour, and more.
Everything You Need to Know About Modern Design
This Home Makeover Is Full of Art You Can Shop Now
A New England Farmhouse Gone Grandmillennial
Seashell Decor Is Everywhere Right Now
20 Elevated Ways To Decorate Your Door For Fall
A History of Balmoral Castle
What Is Scandinavian Design?
There’s SO Much Functionality in This Tiny Kitchen
A Serene Bedroom, Layout Issues and All
Inside a California Home With Incredible Murals
How to display photos: 11 inspiring ideas for displaying pictures on walls
Real Homes is supported by its audience. When you purchase through links on our site, we may earn an affiliate commission. Here’s why you can trust us.
(Image credit: Katie Lee)
Join our newsletter
Get the best home decor ideas, DIY advice and project inspiration straight to your inbox!
Thank you for signing up to Realhomes. You will receive a verification email shortly.
There was a problem. Please refresh the page and try again.
By submitting your information you agree to the Terms & Conditions and Privacy Policy and are aged 16 or over.
Looking for tips on how to display photos to update your room really quickly and easily? Well, you are in the right place because we just happen to be pros in displaying pictures, photos and curating the most beautiful gallery walls (we don’t mean to brag we have just had ALOT of practice).
So we are going to share our rather niche knowledge with you in this guide to how to basically just hang pictures on the wall but just in a very stylish way. Keep scrolling for loads of inspiring pics and ideas and head over to our design hub page for more ideas to bring character into your home.
1. Achieve a balanced display
(Image credit: Desenio)
When displaying pics, it’s best to hang the larger, more heavily framed or more imposing pieces to the left, which is where the eye will naturally look first, and the lighter, smaller pictures to the right.
Want to display your pictures as a gallery wall? Follow our step by step guide to hanging a gallery wall to get a perfect result.
2. Take what’s beneath the artwork into account
(Image credit: Junckers solid wood flooring)
Don’t forget that if you’re displaying pictures over a piece of furniture on which you will be displaying accessories, you’ll need to factor in these objects when creating an arrangement. Working the shape of the gallery around these objects artfully will give the two cohesion.
3. Create a grid with your picture displays
(Image credit: Roger Oates)
If you have lots of different pictures with a similar colour theme – even if the frames don’t match – create the effect of one large picture by grouping artwork in a tight grid that forms a square or rectangle.
3. Think of a colour scheme when displaying photos
(Image credit: Desenio)
Choosing accessories that pick out the shades in your artwork will help you draw your room’s scheme together and will also intensify the picture’s colours. Consider the colour of the wall your artwork is displayed against, too – it may be that a colour that will highlight one of the accent tones in the picture can show it off to greater effect. A group of photographs featuring similar colours will also work better together, such as all black-and-white images.
4. Ensure the scale of your gallery wall works
(Image credit: Malcolm Menzies)
If you’re hanging a single picture or group of pictures above an item of furniture – whether a sideboard, bed or sofa – try to match the artwork’s proportions with what sits below. Exactly the same size is ideal, but up to two-thirds of its width will work, too.
5. Display pictures in a surprising place
(Image credit: Clarissa Hulse)
Sometimes displaying pictures will have greater impact in a room if it’s placed in a position you might not have considered at first. This could be behind the head of a bed…
Or on a staircase…
(Image credit: Katie Lee)
Or at the end of a hallway…
(Image credit: Katie Lee)
6. Layer your frames to create a textured picture display
(Image credit: Oliver Bonas)
Ideal over a shelf, fireplace or above a piece of furniture, layering artwork is simple – but remember that it won’t work on a blank wall with nothing below it but floor space. Use a variety of frames of different sizes and finishes, hanging the largest frame first and working the others around it until you find an arrangement you like.
7. Check the proportions
(Image credit: Desenio )
Before you choose to hang pictures on the wall, work out whether the size and shape of the wall space you have complements the proportions of the artwork. Tall, rectangular pictures or groups look better on walls with nothing but skirting beneath, while wide, rectangular pictures or groups look best above a sofa or sideboard; small pictures hung in vertical groups suit the space between windows or door frames, or in a horizontal line so as to lead the eye along the length of a hallway.
8. Hang photos in odd numbers
(Image credit: Ikea)
If you have just a few pictures to hang, an odd number of pieces grouped together can be more pleasing to the eye than an even number. You could use the middle picture to fix the wall’s centre-point, but don’t be afraid to display them off-centre, too. Group small pictures so the gaps between are no larger than 5cm, while allowing up to 10cm between larger pictures.
9. Unify a group of photos
(Image credit: malcolm menzies)
If you have a disparate group of frames, image sizes and subjects, you can easily unite them by creating a false frame on the wall behind with a simple, painted panel (think colour blocking).
Want to display more than just pictures on a wall, perhaps plants or a 3D sculptural pieces, as on this wall below? Check out more of these inspiring gallery wall ideas for inspiration.
10. Consider the whole room
(Image credit: Loaf.com sofa)
Pictures are usually displayed all around a room, rather than on just one wall, and rarely match in size and shape. To unify the group, use similar frames or a colour theme that runs through it. When hanging pictures, don’t try to line up the tops or bottoms of the frames. Instead, use the mid-point of each picture or grouping as a guide.
11. Get the height of your photo display right
(Image credit: Lisa Piddington)
Positioning a picture at the right level in a room is key to its success – they are often hung too high, creating a disconnect between the image and the furniture below. Ideally, the centre of the picture should be at eye-level, although in a living room, bear in mind that you’ll mostly be seated, so the picture might need to be a little lower – aim to hang the bottom of the first frame of a group at around 10cm above the back of the sofa.
More ideas to add personality to your space:
- Pink room ideas: 22 ways to use this rosy hue
- Living room paint ideas: 18 beautiful colour schemes to try
- Maximalism: 11 ways to get the look
Hebe joined the Real Homes team in early 2018 as Staff Writer before moving to the Livingetc team in 2021 where she took on a role as Digital Editor. She loves boho and 70’s style and is a big fan of Instagram as a source of interiors inspiration. When she isn’t writing about interiors, she is renovating her own spaces – be it wallpapering a hallway, painting kitchen cupboards or converting a van.
20 Creative Ways to Display Photos
If you’re tired of tabletop frames, today’s post is for you. When it comes to displaying photos, there are many interesting ways to showcase your favorite snapshots. From DIY wall hanging options to unique purchases that will add personality to your grouping of pictures, the possibilities are endless. Below you will find 20 of our favorite techniques for getting creative as you display photos. Enjoy…
Wall Frame Options
We may be starting with wall frames (which seem to be the gold standard for photo displays), yet the selections below are anything but ordinary! This Picture Frame Set from Urban Outfitters features ten frames in various sizes. Choose from white, wood or black, and take the guesswork out of coordinating your own set of frames. One purchase, and you have the ingredients for an instant gallery wall. For a true gallery feel, mix in photos of places or nature rather than displaying only family shots.
Picture frame set from Urban Outfitters
Why not select a handful of your favorite Instagram photos and place them in record frames? Bonus points for colorful snapshots. This Record Frame Instagram Photo Wall from A Beautiful Mess features iPhone photos and plenty of creativity! In fact, Elsie and Emma of A Beautiful Mess are experts when it comes to taking and displaying photos. Stay tuned for a few more of their ideas in the post…
Record frame photo wall from A Beautiful Mess
A picture ledge provides a stylish resting spot for framed photos. Mix in some objets d’art, and you have a high-end look that’s as interesting as it is sophisticated. [from Home Portfolio]
Ledge shelving for photos
Grids are in, and this Umbra Gridart Frame from Urban Outfitters is perfect for displaying your favorite Instagram shots. Not to mention, this wooden frame will certainly become a conversation piece for the room of your choice:
Grid frame from Urban Outfitters
For a casual, colorful approach that’s ideal for home offices, dorm rooms and kids’ bedrooms, check out this Hanging Photo Sleeve from PB Teen. Choose from Grey, Royal Navy or Pool, shown below:
Hanging photo sleeve from PB Teen
Wall Installations
Next up: wall installations that integrate a large number of photos. Make your own for under $20 with ingredients such as Mod Podge and foam core boards. Learn more about this Wall Picture Collage at Bits of Everything:
Wall picture collage from Bits of Everything
If you’re not up for securing each photo to a collage, order a photo poster from Social Print Studio. You get to choose 50-200 Instagram photos, and Social Print Studio will do the rest. Once again, it’s all about the grid! For an additional fee, you can even get the poster framed.
Photo poster from Social Print Studio
Wowie zowie! We’re loving this large grid display above the mantel of A Beautiful Mess blogger Elsie Larson. Secured with painter’s tape, the photos are added to the wall in a way that also makes them easy to remove. Plus, the black and white approach creates a unified look:
Grid photo wall display from A Beautiful Mess
Give a dull corner some pizzazz with this corner heart display featured at PostalPix Blog. The color really brings the wall to life, don’t you think?!
Corner heart display from PostalPix
For an unexpected display of pictures, Emma from A Beautiful Mess created a border around a doorway, integrating patterned paper as a special touch:
Line a door frame with photos
For a wall installation that combines photo display fun with the current grid trend, this Metal Grid Photo Display from RH Teen makes a modern statement that can be packed with pictures or left empty in sections to emphasize the grid itself:
Metal grid photo display from RH Teen
Hanging by a String
When you display photos along a string, the look is casual, impromptu, and fabulously creative. This Copper Photo Clip Banner from Urban Outfitters is accompanied by 5 metal geo clips:
Copper photo clip banner from Urban Outfitters
Or you can go bold with a whole wall of photo string displays! Also from Urban Outfitters, this Metal Photo Clip String Set comes with 12 clips and one string. But as you can see below, there is power in numbers, so don’t hesitate to order several to give your wall new life.
Metal photo clip string from Urban Outfitters
Urban Outfitters’ Magnetic Cable Photo Holder creates a vertical photo display with the help of a cable and magnets. Display up to 8 photographs for a linear statement that showcases memories and plenty of style:
Magnetic photo holder from Urban Outfitters
Choose a string display with a zigzag form! This Cast-Metal Wire Photo Display from RH Teen works well with the brand’s metal photo clips, as shown below:
Wire photo display from RH Teen
There’s a lot of inspiration enjoy in this photo from Dutch magazine VT Wonen. It certainly proves that you can get crafty with a DIY photo display option that utilizes wire and binder clips. So whimsical! [via Emmas Design Blogg]
Binder clip photo display
For a DIY project that combines a photo display with a wall hanging (and a dash of Memphis-Milano style), check out this DIY Photo Wall Hanging from Homey Oh My!, crafted from supplies such as a wooden dowel, clay and a paint pen:
Photo wall hanging from Homey Oh My!
Tabletop Solutions
We end today’s post with a trio of tabletop photo display options that are anything but ordinary. The Tabletop Photo Carousel from Pottery Barn has a vintage look that works well in traditional and modern spaces alike:
Photo carousels from Pottery Barn
Craft a DIY Mini Photo Christmas Tree from Homey Oh My!, or make this tree work year-round in your home, thanks to fotobit frames that can be connected in any configuration!
Photo tree from Homey Oh My!
Last but not least, you can use crystals and craft wire to create a Mineral Photo Display that holds your favorite snapshots. Emma from A Beautiful Mess shares tips for working with wire in the tutorial.
Mineral photo display from A Beautiful Mess
Will you be incorporating any of today’s featured photo displays into your home?
Kate Simmons is a freelance writer and design blogger with a love of all things decor. She spent her childhood writing stories and working on interior design-themed DIY projects. Kate’s published writing reflects her special interest in how design has changed through the decades. Her blog Mirror80 ( http://mirror80.com/) explores the fashion and […]
Next Post
40 Stylish ways of displaying your family photos
By Simona Ganea | Published on
Buy Now
We all have family photos that we love. These usually constitute very personal decorations that can be displayed throughout the house. They make your home feel cozier and they give it character. Let’s take a look at some photo wall ideas for creative ways of taking advantage of these beautiful items.
1. Neck Down Family Portrait
View in gallery
This one is a rather unusual and untraditional family portrait. The family members are only immortalized from their neck down. But, even though their faces remain unseen, they are very well represented by everything else.
2. Family Desk Photos
View in gallery
A few family photos displayed on the wall, above your desk or work area, can make this space feel more personalized. They can be made in black and white for a more artistic touch.
3. Small Tile Photo Collage
View in gallery
In this case, we have a bunch of small photos organized beautifully in a large frame. This method is nice in the case of travel photos. When organized like this they look like a giant negative. It’s unusual and original.
4. Black and White Mixed with Color
View in gallery
View in gallery
Another interesting idea is to alternate black and white photos with color photos. Print them with the same dimensions and shape and create a symmetrical display on a wall of the living room. A wall adjacent to the windows would be great.
5. Rainbow Frames
View in gallery
Here’s another idea: create a few identical picture frames, larger than the photos you wish to display and use a background in different colors. The effect will be a little dramatic but still playful and casual.
6. Bottle Portrait Collection
View in gallery
This is a very clever and original way of displaying old family photos. Find some simple glass bottles and insert the photos inside the bottles. The idea is similar to the classical ship in a bottle. They would look great on the mantel.
7. Bulletin Board Photos
View in gallery
Another interesting method would be to make some pin boards or bulletin boards and to use clothespins to hang the photos. It would work best with black and white photos.
8. Wire Mount Photo Bulletin
View in gallery
A similar idea is to use metal wires. Simply attach them to a wall and make sure they’re parallel. Then use some clips to hang the photos. It’s a very sleek and simple way of displaying your favorite family photos and it could also be applied to something else.
9. Pallet Photo Collection
View in gallery
Of course, we could never ignore the pallets. They can be used for anything, including displaying photos. Simply remove a few boards from one side of the pallet and a small shelf should be created. To complete this rustic image, add a few floral decorations as well.
10. Simple Wire Photo Mount
View in gallery
This is a very reduced and simplified version of the bulletin board we described earlier. The idea is to use a wire, rope, or anything similar and attach it from two screws inserted in the wall and attach the photos using clothespins.
11. Modern Photo Shelf
View in gallery
This is a modern photo display. Notice that the shelf is long, sleek, and simple. Also, the edges are high so that the photos can’t fall down. This method works best with large photos. Try to use black frames or no frames at all.
12. Photo Wall
View in gallery
If you really treasure your family photos and if you have many of them, you could create a photo wall. If the wall is white then the shelves should be white as well. This way the photos are the only ones to stand out.
13. Asymmetrical Photo Display
View in gallery
In a living room or dining room, a few family photos would make really beautiful decorations. They would make the atmosphere more intimate and the room cozier. For a modern display, use sleek wall shelves and place them asymmetrically, at different heights.
14. Picket Fence Gallery
View in gallery
This is a picket fence wall gallery. The photos are attached to wooden pieces that form a fence. It’s an unusual and creative idea and a way of making the room feel even cozier.
15. Dining Room Photo Display
View in gallery
In the dining room, a few photos displayed on the wall adjacent to the dining table would make beautiful accent decorations. They would complete the intimate atmosphere that is created when the whole family gathers to have dinner together.
16. Black and White Photo Wall
View in gallery
Black and white photos are very artistic. They make wonderful decorations for any room. Use different shapes and sizes and mix them to create an interesting composition. Choose a wall that you wish to turn into a focal point.
17. Colored Wall Photo Display
View in gallery
If you choose a vibrant color for an accent wall, then a few photos would create beautiful color contrasts. Create an organized display and use photos that share the same typology. They would look better in black and white.
18. Hallway Photo Gallery
View in gallery
Some photos could really change the look of a hallway. In such a narrow space, there’s not much you can do to make the décor stand out. But photos take little space and the best part is that you can hang them anywhere you want.
19. Sepia Photo Display
View in gallery
In the dining room or in any other room for that matter, you can print your photos using special effects such as sepia if you wish to maintain the same color palette. The photos would also look vintage this way and they would blend in more easily.
20. Staircase Photo Gallery
View in gallery
The staircase is a classical area for displaying family photos. That’s because it’s a space where you can’t use many other types of decorations. A large collection of family photos would look beautiful if you use the same type of frames but with different sizes.
21. Bedroom Door Frame Photos
View in gallery
An ingenious and inspiring idea is to decorate your bedroom’s door frame with photos. Display them using tape. It should be a casual décor, not elegant or sophisticated. It’s nice to see your loved one when you enter a room and it’s also a way of using a space that couldn’t be used for anything else.
22. Pendant Wire Photo Display
View in gallery
This method is similar to the one that uses metal wires and clips. The difference is that, in this case, only one wire is used. The rest of the photos are attached to the ones above them. The same backgrounds were used for the photos and this way a symmetrical look was created.
23. Workspace Wall Collage
View in gallery
This is a rather traditional way of displaying photos. This is a home office and it features a portion of the wall that was covered with photos of the same size, shape, and type. It’s a nice way of adding a personal touch to your working space.
24. Horizontal and Vertical Photos
View in gallery
Picture frames of the same size and shape could be used to create an original and stylish décor. If you use rectangular photo frames you can alternate horizontal and vertical positions. It’s an interesting way of adding a modern touch to a rather traditional method.
25. Snapshot Display
View in gallery
Snapshots are very interesting. They immortalize natural and real moments and expressions. You can use them to create large collections of photos and you can display them on a wall in areas such as the entrance, the hallway, the staircase, etc.
Picture sources:1,2,3,4,5,6,7,8,9,10,11,12,13,14,15,16,17,18,19,20,21,22,23,24 and 25}.
26. Eclectic Nature-Themed Gallery Wall
View in gallery
While some family photo displays look better with a consistent theme across the frames, some interior designs are better served with a more eclectic and varied look. The nature-themed gallery wall featured at Homemade Modern can be used to incorporate family photos alongside nature-themed prints or artwork to add both a cozy vibe and a natural element to your space. This type of gallery wall is easy to compose since you can mix and match frames and photos instead of having to conform to a single look.
27. Boho Macrame Picture Frames
View in gallery
Macrame may be considered old-fashioned by some since it first gained popularity more than fifty years ago, but this fiber craft is still going strong decade after decade. These boho macrame picture frames from A Kailo Chic Life are great for adding a fanciful and organic look to your photo display. Macrame can be used in its raw off-white form. It can also be dyed in any number of colors to match your decor.
28. DIY Rustic Photo Frame
View in gallery
For those who want a more frontier or rustic look for their family photos than a bohemian one, look no further than these DIY rustic photo frames from Easy Peasy Creative Ideas. Twig frames can be crafted from simple materials, with the base material of twigs being a material you can source right from your own backyard. These twig picture frames are also a good idea if you’re considering a bulk craft for sale since the supplies are either free or cost next to nothing.
30. Chain Gallery Wall
View in gallery
This photo display is better for light picture frames since the weight of the picture puts a lot of strain on the fine gold chains used in it, but this chain gallery wall from Remington Avenue is perfect for a more sophisticated family photo display. Gold frames and chains are used in the example craft, but you could get silver, copper, or even fine black iron to match different interior designs or to create a more industrial look.
31. Family Picture Collage Coffee Table
View in gallery
A coffee table collage is a bit more of an intensive project than some of these other family photo displays and galleries, but the end result is worth the effort. In this project from One Mom with a Mission, a glass top on a coffee table is arranged over an eclectic group of family photographs on a coffee tabletop to form a collage. The glass top on the coffee table is an effective way of protecting the photos so that they don’t become damaged over time in a shoebox or stuffed in a corner somewhere.
32. DIY Photo Ledges
View in gallery
Similar to floating shelves, these photo ledges help make the family photos the most visually important part of the display. While photo ledges are too short to hold many wider items, they’re an interesting way of arranging a family photo display in a straight line. For a large number of family photos, consider building several DIY photo ledges one on top of the other to create a block of photos on the wall. To learn how, check out this tutorial at The Idea Room.
33. Wood Plank Photo Display
View in gallery
This is another family photo display that fits in better with a more rustic or Western style of interior design. A wood plank display is a good choice for long hallway photo galleries or other areas where the length of the plank can create a visible divide on the wall. Using photographs of all one type, such as all black-and-white photographs or photographs that are all the same size, can help add some visual symmetry across the entire row. Learn more about how to make your own wood plank photo display at Crunchy Casa.
34. Wire Wall Grid Photo Display
View in gallery
In photo displays, wood creates a more rustic and natural look, while geometric shapes and metal can create a more modern vibe. These wire wall grid photo displays from StyleCaster provide a rigid structure to arrange your family photos on. The inorganic lines of the wall grid mean that you can mount your photos a little bit more haphazardly on them without losing a sense of contemporary lines in your display.
35. Vintage Gallery Wall
View in gallery
For those who have more of a retro flair, setting up a vintage gallery wall and filling it full of family photos instead of artwork can help you find a home for all your photos while also putting your artistic side on full display. With an eclectic arrangement of different frames, just the display itself will qualify as art. Check out Chris Loves Julia for more tips on how to hang a gallery wall with a vintage look.
36. Washi Tape Gallery Wall
View in gallery
So what is washi tape exactly? Washi tape is a cheap masking tape for crafters that comes in a wide variety of colors, patterns, and sizes. This makes it a great option for jazzing up photo displays on the wall or any other wall decor. Another advantage of washi tape is that it can be easily removed from the wall when you want to move the photo display, unlike paint or other materials. Here’s a tutorial for making your own DIY washi tape gallery wall over at Honestly WTF.
37. Hallway Gallery with Mismatched Frames
View in gallery
Mismatched frames may not be your first go-to when it comes to setting up a cohesive family photo display, but the benefit of using up these frames is that most people end up with a stack of old photo frames at one point or another with no idea how to mount them in a way that looks good. If you want to lessen the mismatched look, you can always spray all of the frames the same color to add some monochromatic symmetry across the display. However, leaving frames mismatched like this display by House Mix has its own easy charm too.
38. DIY Photo Canvas
View in gallery
Photo canvases can be an awesome way to display family photographs, but the downside is that printing out photos onto canvas at a print shop can be costly, depending on where you have it done. Luckily, this crafting tutorial over at Lovely Etc. teaches you how to create your own family photo canvas without having to pay a professional to do it. It’s a good idea to do this type of project with photo duplicates rather than the originals in case you make a mistake.
39. Corner Gallery Walls
View in gallery
Have an awkward corner in your house and you’re not sure what to do with it? Corner gallery walls to display your family photos are the way to go. These galleries are mounted half on one wall and half on the adjacent wall so that the display hugs the corner of the room, creating an intimate feel. If you have a corner wall that is too short to fit shelves or other mounted decor, a corner gallery wall such as this black-and-white display from House Beautiful can be the perfect option.
40. Instagram Wall
View in gallery
Instagram photo displays are created by taking a large number of same-shaped photographs (usually square instant photos like Polaroids) and arranging them in a grid pattern across a large rectangular or square wall display. These walls can be just as individual as the people who make them, and the look of the wall is greatly influenced by the color and composition of the photos you decide to put in it and how you order them. Check out these tips on making your own Instagram wall for family photos at A Beautiful Mess.
Family photo collections are as individual as the families who build them, and that’s one of the major reasons why there are so many different types of photo display designs out there. The above photo wall ideas range in the amount of skill and effort you’ll need to put them up, but there’s no question that using them will help you incorporate them into your home’s design and put up your photos in a more refined way at the same time. If you have some bare walls and a big stack of photos languishing on your digital camera or in storage, it’s time to get cracking on the family photo display of your dreams.
16 Photo Display Ideas for Family Pictures
Decorating
Turn your memories into an artful photo display. Discover inspiring ideas that will make your family photos and artwork stand out
Personal touches are what makes a house a home, and nothing does that quite as well as family photos and artworks. But finding ways to incorporate a photo display into an interior design can sometimes prove challenging. Color schemes, other art pieces, and overall atmosphere must be considered, not to mention the images themselves. Here, we take a look through the AD archives to see some of the best options for displaying family memories, from a gallery wall in Michael J. Fox’s home, to an artfully arrayed bookshelf in Tory Burch’s Manhattan office. From the mats to the frames, or lack thereof, and the possibilities for creative arrangement, there is endless opportunity to exhibit the truly priceless artworks in your collection. Once you learn how to hang a picture, you’ll be ready to start bringing these ideas to life.
-
Photo: Simon Upton
A Pair of Portraits
In accessories designer Fiona Kotur’s Hong Kong home, James, left, and Rex do homework at the kitchen’s Saarinen table, under the gaze of bold and bright Simon Birch oil portraits of their younger brothers.
-
Photo: Pieter Estersohn
An Over-the-Top Photo Display
Cherry-red picture frames, balanced by more classic black ones, bring a sense of ordered chaos to an otherwise spare stairwell in this Brooklyn home. The bright frames both heighten the vibrant hues in the brighter photos and complement the softer, more faded tones of others. Smartly, designer Nick Olsen left the walls white to let this visual dynamic play out.
-
Photo: Gieves Anderson
A Kitchen Gallery
Family photos aren’t limited to living rooms. Why not put reminders of your loved ones in the kitchen? Family photos decorate the wall above a bar cart just beside the kitchen in Spencer Gervasoni and Austin Mill’s Hell’s Kitchen studio apartment.
-
Photo: William Abranowicz
A Gallery Wall of Family and Friends
A gallery-style wall of family pictures is the focal point of this minimalist hallway in the Manhattan home of Michael J. Fox and Tracy Pollan.
Using warm wood frames and clean white mats—an effective way to visually unify a wall of photos—showcases their collection of full-color and black-and-white images with elegance.
-
Photo: Nikolas Koenig
A Family-Filled Dining Area
The breakfast nook of magazine editor Darcy Miller Nussbaum’s Manhattan duplex comes alive with family memories set in tones of sepia and grayscale. The mix of frames in black, white, and gold not only integrates seamlessly with the room’s decor but adds a sense that the pictures have been collected over time.
-
Photo: Pieter Estersohn
A Color-Coordinated Showcase
Ruby-red frames instantly pop against the teal walls of the top-floor office in music consultant Andrea Anson’s Manhattan townhouse. Family photos, set in monochromatic sepia hues, are saved from being mere wallflowers by the interplay of the two vibrant colors, as well as the absence of mats, which brings each picture’s subject that much closer to the bold chromatic the interplay of the two vibrant colors.
Most Popular
-
Photo: Björn Wallander
A Simple Grid Arrangement
No strangers to portraits, models Cindy Crawford and Rande Gerber hung four pictures—one of each family member—in a simple, equilateral grid on the wall of the sitting area of the master bedroom in their Baja, Mexico, home. Taken by Brian Bowen Smith, the black-and-white portraits are visually set off by strong black frames, a classic choice for grayscale images.
-
Photo: Björn Wallander
A Floor-to-Ceiling Display
Full-color images immediately take center stage in this otherwise white stairwell in the Miami home of fashion designer Naeem Khan. Styling this gallery setup with larger-scale images, frames that disappear into the walls, and a floor-to-ceiling arrangement gives viewers plenty to look at as they ascend the spiral staircase.
-
Photo: William Abranowicz
A Hallway Gallery
In keeping with the aesthetics of this hallway in the Manhattan home of actress Julianna Margulies, the black-and-white family pictures are first given breathing room with clean white mats, then warmed up with dark wood frames.
The gallery-style arrangement, usually prone to visual inconsistency, is unified by a single ledge shelf below, accented with soft pink flowers.
Most Popular
-
Photo: Nikolas Koenig
An Asymmetrical Display
The irregular arrangement of family photos in this living space mimics the lines of the rugged stonework to their left. This home, a farmhouse on Martha’s Vineyard, was designed to foster a light and airy feeling, an aesthetic mirrored by the wide, white mats on the photos.
-
Photo: William Waldron
A Curated Photo Collection
Fashion tycoon Tory Burch displays family pictures on bookshelves in her Manhattan office using her signature sense of style, a mixture of playful eccentricity and tasteful restraint. Images of family members mingle easily with books, artful objets, and natural materials, all creating a dynamic that speaks volumes about her loves and interests.
-
Photo: William Waldron
A Photo Ledge
In the family room of her Manhattan home, actress and model Brooke Shields displays photos of herself and her children, taken by photographers Annie Leibovitz and Robert Mapplethorpe, next to fine art photographs by the likes of Richard Avedon.
The cabinets beneath the arrangement provide a wide ledge perfect for creating visual depth by overlapping frames of different sizes.
Most Popular
-
Photo: Scott Frances
A Desk Photo Display
A desk in the library of George Stephanopoulos and Ali Wentworth’s New York apartment displays family photos next to an Emmy awarded to Stephanopoulos for his 2009 election coverage. This careful mix of items, including books, pens, and a zebra-print box, sits in front of a window with a view of Central Park.
-
Photo by William Waldron
A Pair of Fireside Portraits
Brooke Shields commissioned portraits of her daughters by the artist Will Cotton. The paintings hang on either side of the fireplace in the living room of her Manhattan home.
-
Photo Mural
Make your memories stand out with a wall-size display. In a Tiburon, California, home designed by Ann Lowengart, a black-and-white photo of the client’s children was blown up and used as wallpaper in the media room.
Most Popular
-
François Halard
A Windowsill Display
A Joan Miró etching, a Francesco Clemente painting, and plenty of family photographs are displayed on the windowsill of Diane Von Furstenberg’s New York penthouse. The unframed grouping feels fun and adds a casual vibe to the display of blue-chip art.
ExploreHome Decordecorating ideasArt
Read More
Reduce the frequency of showing a person or place in the Photos app on iPhone
iOS 15
Search this guide
iPhone user manual
-
Welcome!
-
-
Supported Models
-
iPhone 13 mini
-
iPhone 13
-
iPhone 13 Pro
-
iPhone 13 Pro Max
-
iPhone 12 mini
-
iPhone 12
-
iPhone 12 Pro
-
iPhone 12 Pro Max
-
iPhone 11
-
iPhone 11 Pro
-
iPhone 11 Pro Max
-
iPhone X R
-
iPhone X S
-
iPhone X S Max
-
iPhone X
-
iPhone SE (3rd generation)
-
iPhone SE (2nd generation)
-
iPhone SE (1st generation)
-
iPhone 8
-
iPhone 8 Plus
-
iPhone 7
-
iPhone 7 Plus
-
iPhone 6s
-
iPhone 6s Plus
-
-
What’s new in iOS 15
-
-
Turning on and setting up iPhone
-
Wake up from sleep mode and unlock
-
Cellular setup
-
Internet connection
-
-
Apple ID settings
-
Turn iCloud on or off
-
iCloud+ subscription
-
-
Search Settings
-
Create email, contacts, and calendar accounts
-
Meaning of status icons
-
-
Accumulator charging
-
Battery percentage display
-
Checking battery health and performance
-
-
Downloading or Bookmarking the User Guide
-
-
-
-
Learning Basic Gestures
-
Gestures on iPhone with Face ID
-
-
Volume setting
-
-
Opening apps
-
Finding Apps in the App Library
-
Switch between open applications
-
Closing and opening an application
-
-
-
Dictation
-
Entering with the on-screen keyboard
-
Selecting and editing text
-
Using predictive text
-
Using text replacement
-
Add or change keyboards
-
-
Multitasking with Picture-in-Picture
-
Accessing features on the lock screen
-
Performing Quick Actions
-
Search on iPhone
-
Using AirDrop to Send Items
-
How to take a screenshot or screen recording
-
-
Drawing in apps
-
Add text, shapes, and captions
-
Zoom in and use magnifying glass in Stakeout
-
-
View information about iPhone
-
View or change cellular data settings
-
Traveling with iPhone
-
-
-
Change sounds and vibrations on iPhone
-
Wallpaper change
-
Setting Live Photo as Wallpaper
-
Screen brightness and color balance adjustment
-
Zooming in on the screen
-
Change iPhone name
-
Changing the date and time
-
Change language and region
-
-
Organize apps into folders
-
Adding Widgets
-
Moving apps and widgets on the Home screen
-
Removing apps
-
-
Using and configuring Control Center
-
Change or lock screen orientation
-
-
View notifications and reply to them
-
Change notification settings
-
Focus adjustment
-
Turn focus mode on or off
-
Focusing while driving
-
-
-
-
-
Application downloads
-
Games
-
Subscribing to Apple Arcade
-
Using blitz apps
- Manage purchases, subscriptions, settings and restrictions
-
Installing and Managing Fonts
-
-
-
Buying books and audiobooks
-
Reading books
-
Listening to audiobooks
-
Setting Reading Goals
-
Book ordering
-
Reading PDF
-
-
Calculator
-
-
Creating and editing events
-
Sending and receiving invitations
-
Change how events are displayed
-
Event search
-
Calendar setting
-
Event Tracking
-
Using multiple calendars
-
Using the holiday calendar
-
Sharing iCloud calendars
-
-
-
-
Basic information about using the camera
-
Shooting setup
-
Applying Photo Styles
-
Taking a Live Photo
-
Taking Pictures in Burst Mode
-
Taking a selfie
-
Taking a photo in Portrait mode
-
Taking photos in night mode
-
Taking photos in Apple ProRAW format
-
-
Adjusting the shutter sound volume
-
Changing the HDR settings for the camera
-
Shooting video
-
Shooting ProRes video
-
Changing video recording settings
-
Saving camera settings
-
Changing advanced camera settings
-
View, export and print photos
- Using the Text Scanner
-
Scanning QR codes
-
-
-
View time in different cities
-
Setting an alarm
-
Using a timer or stopwatch
-
-
Compass
-
-
Adding and using contact information
-
Editing contacts
-
Adding your contact information
-
Using other contact accounts
-
Using contacts from the Phone app
-
Hide duplicate contacts
-
-
-
Setting up FaceTime
-
Making and receiving calls
-
Create a FaceTime link
-
Taking a Live Photo
-
Using other applications during a call
-
Making a group FaceTime call
-
View Participants in a Grid View
-
Sharing and listening to content via SharePlay
-
Share your screen
-
Change video settings
-
Changing audio settings
-
Adding Camera Effects
-
Leave a conversation or go to Messages
-
Blocking unwanted callers
-
-
-
Connecting external devices or servers
-
Viewing and editing files and folders
-
Distribution of files and folders
-
Sending files
-
Setting up iCloud Drive
-
Sharing files and folders in iCloud Drive
-
-
-
-
Sending your location
-
Adding or removing a friend
-
Looking for a friend
-
Get notified when friends change their location
-
Notifying a friend about your location change
-
-
-
Adding an iPhone
-
Adding an iPhone leather case
-
Receive notifications if you forget your device
-
Device search
-
How to mark a device as missing
-
Erase device
-
Removing a device
-
-
-
Adding AirTag
-
Adding a Third Party Item
-
Receive notifications if you left an item somewhere
-
Searching for a thing
-
Marking an item as lost
-
Deleting a thing
-
-
Setting map options
-
-
-
Completing health and medical information
-
-
Automatic data collection
-
Adding data manually
-
View health data
-
Providing access to medical data
-
Viewing Other Users’ Health Information
-
-
-
Downloading health records
-
Downloading verifiable COVID‑19 records
-
View health records in the Health app on iPhone
-
-
Walking stability control
-
Tracking your menstrual cycle
-
-
Using the headphone sound exposure level features
-
Headphone Level Check
-
-
-
Introduction to sleep schedules
-
Setting up your first sleep schedule
-
Turn off alarms and delete sleep schedules
-
Add or change sleep schedules
-
Using iPhone with Sleep Focus Active
-
Quick turn on and off focus “Sleep”
-
Changing the Sleep focus and other options
-
Viewing your sleep history
-
-
Registration as an organ donor
-
Backing up your Health app data
-
-
-
Introduction to the Home app
-
Accessory setup
-
Accessory Management
-
Adding other houses
-
HomePod setup
-
Camera setup
-
Face recognition
-
Unlocking the door with a house key
-
Router setup
-
Creating and using scripts
-
Home control with Siri
-
Remote control of home accessories
-
Create Automation
-
Giving control to other users
-
-
-
Download music, movies and TV shows
-
Ringtones
-
Manage purchases and settings
-
-
-
Zoom objects nearby
-
Change settings
-
Detect people nearby
-
-
-
-
Adding and removing email accounts
-
Setting up a custom email domain
-
-
Email Checker
-
-
Sending an email
-
Replying to and forwarding emails
-
Save a draft email
-
-
-
Add attachments to emails
-
Download attachments from emails
-
Marking attachments in emails
-
-
Setting up email notifications
-
Email search
-
Organizing emails in mailboxes
-
Using the Hide Email Feature
-
-
Flagging emails
-
Email filtering
-
-
Change email settings
-
Use the privacy protection feature in Mail
-
Deleting and restoring emails
-
Adding the Mail Widget to the Home Screen
-
Printing emails
-
-
-
View maps
-
-
Place search
-
Search for attractions, restaurants and services nearby
-
Getting information about places
-
Assigning marks to places
-
Sending places
-
Place rating
-
Saving favorite places
-
Explore new places with Travel Guides
-
Organizing places in My Travel Guides
-
Get traffic and weather data
-
Deleting Important Locations
-
Quick view of Maps app settings
-
-
-
Get directions with Siri, Maps, and the Maps widget
-
Choosing other route options
-
Available actions while following a route
-
Setting up an EV route
-
Route planning
-
Route planning to the parking lot
-
Report traffic obstacles in the Maps app on iPhone
-
Laying a bike route
-
Laying a walking route
-
Routing on public transport
-
Deleting Recent Routes
-
Use the Maps app on your Mac to get directions
-
-
-
street view
-
Flyover tours
-
-
Booking trips
-
-
-
Roulette
-
Viewing and saving measurements
-
Measuring a person’s height
-
Level measurement
-
-
-
Setting up the Messages app
-
Sending and receiving messages
-
Sending a message to a group of users
-
Sending and receiving photos, audio and video recordings
-
Receiving and sending content
-
Message animation
-
Using apps for iMessage
-
Using Memoji
-
Sending a Digital Touch effect
-
Send, receive, and request money with Apple Cash
-
Change notification settings
-
Blocking and filtering messages, and reporting messages
-
Deleting messages
-
-
-
Access to music
-
Browse albums, playlists and other content
-
Music playback
-
Queuing music
-
Listening to live radio
-
-
Subscribing to Apple Music
-
Lossless music playback
-
Dolby Atmos music playback
-
Search for new music
-
Add music and listen offline
-
Personalized recommendations
-
Listening to the radio
-
Music search
-
Playlist creation
-
What are your friends listening to?
-
Using Siri to play music
-
-
Listen to music with an Apple Music Voice subscription
-
Changing music playback settings
-
-
-
Getting Started in the News App
-
Using the News Widget
-
Browse news articles selected for you
-
Reading articles
-
Listen to Apple News Today
-
-
Subscribe to Apple News+
-
Find and read Apple News+ articles and issues
-
Download Apple News+ episodes
-
Listening to audio versions of articles
-
-
Search news articles
-
Save news articles to read later
-
Subscribe to news channels
-
-
-
Create notes
-
Drawing or text
-
Scanning text and documents
-
Adding photos, videos and other objects
-
Search and organize notes
-
Using tags and smart folders
-
Sharing and Collaboration
-
Notes lock
-
Change settings
-
-
-
Call
-
Making emergency calls
-
Answer or reject an incoming call
-
During a call
-
Checking voicemail
-
Choice of ringtones and vibrations
-
Calling over Wi‑Fi
-
Setting up call forwarding and call waiting
-
Blocking unwanted calls
-
-
- Viewing photos
-
Video and slideshow playback
-
Deleting and hiding photos and videos
-
Editing photos and videos
-
Trimming video and adjusting slow motion playback
-
Cinematic Video Editing
-
Editing Live Photos
-
Editing pictures taken in Portrait mode
-
Create photo albums
-
Editing and organizing albums
-
Filtering and sorting photos in an album
-
Search in the Photos app
-
Sending photos and videos
-
View photos and videos sent to you
-
Photo interaction with Text Scanner and What’s in the picture?
-
Viewing memories
-
Personalization of memories
-
Find people in the Photos app
-
Reduce the frequency of showing a person or place
-
Viewing photos by location
-
Using iCloud Photos
-
How to Share Photos with Shared Albums in iCloud
-
Import photos and videos
-
Printing photos
-
-
Search for podcasts
-
Listening to podcasts
-
Subscribe to your favorite podcasts
-
Organize your podcast library
-
Download, save and share podcasts
-
Subscription to podcasts
-
Changing download settings
-
-
-
Adding Reminders
-
List ordering
-
Using tags and smart lists
-
Setting up accounts
-
Sharing reminders and assigning reminders
-
Print reminders
-
-
-
Web browsing
-
Customizing Safari Options
-
Change in appearance
-
Website search
-
Using tabs in Safari
-
Bookmarking web pages
-
Saving pages to a reading list
-
View links sent to you
-
Autocomplete Forms
-
Get extensions
-
How to hide ads and unnecessary elements
-
Web browsing with private access
-
Clearing the cache
-
Using the Hide Email Feature
-
-
Quick Commands
-
Stock
-
Tips
-
-
Translation of text, speech and conversations
-
Translation of text in applications and use of the camera
-
-
-
Linking Applications and Adding a TV Provider
-
Subscribe to Apple TV+ and Apple TV channels
-
Download TV shows, movies and more
-
Watching sports
-
Playback control
-
Shared viewing via SharePlay
-
Library management
-
Change settings
-
-
-
Sound recording
-
Playback
-
Editing or deleting an entry
-
Synchronization of voice recordings
-
Grouping records
-
Find or rename an entry
-
Sending an entry
-
Duplicate entry
-
-
-
Storing cards in Wallet
-
Set up Apple Pay
-
Using Apple Pay for contactless payments
-
Using Apple Pay in Apps, App Flash, and Safari
-
Using Apple Cash
-
Using an Apple Card
-
Card and transaction management
-
Fare payment
-
Using Digital Keys
-
Use of student cards
-
Use of driver’s license or ID card
-
Adding and using maps
-
Card Management
-
Use of COVID‑19 vaccination cards
-
-
-
Weather forecast
- Overview of weather icons
-
-
-
-
Ask Siri
-
Learn what Siri can do
-
Entering user information in the Siri app
-
Set Siri to announce calls and notifications
-
Adding Siri Shortcuts
-
About Siri Suggestions
-
Using Siri in the car
-
Change Siri settings
-
-
-
Setting up Family Sharing
-
Add or remove family group members
-
Sharing Subscriptions
-
Downloading family members’ purchases
-
Closing access to purchases
-
Share your location with family members and find lost devices
-
Set up an Apple Cash Family account and Apple Card for a family
-
Setting up parental controls
-
-
-
Viewing a Screen Time report
-
How to set up Screen Time for yourself
-
How to set up Screen Time for a family member
-
Viewing a device usage report
-
-
-
Charging cable
-
Power adapters
-
MagSafe chargers and batteries
-
MagSafe Cases and Envelopes
-
Qi wireless chargers
-
-
Using AirPods
-
Using EarPods
-
-
Apple Watch
-
-
Wirelessly stream photos and videos to your Apple TV or smart TV
-
Connecting to a display with a cable
-
-
HomePod and AirPlay 2 speakers
-
-
Pairing with the Magic Keyboard
-
Entering characters with diacritics
-
Switching between keyboards
-
Dictation
- Using shortcuts
-
Choosing an alternate keyboard layout
-
Changing text input assistance options
-
-
External storage devices
-
Bluetooth accessories
-
Printers
-
-
-
Internet distribution
-
Calls on iPad, iPod touch, or Mac
-
Switching between devices while working
-
Wirelessly stream video, photo, and audio on Mac
-
Transfer copied, cut and pasted content between iPhone and other devices
-
Connecting iPhone to a Computer Using a Cable
-
Sync iPhone with Computer
-
Transfer files between iPhone and computer
-
-
-
General information about CarPlay
-
Connecting to CarPlay
-
Use Siri
-
Using the vehicle’s built-in controls
-
View step by step instructions
-
Traffic alert
-
Changing the map mode
-
Phone calls
-
Music playback
-
Viewing the calendar
-
Sending and receiving text messages
-
Announcement of incoming text messages
-
Podcast playback
-
Playing audiobooks
-
Listening to articles
-
Manage accessories in the home
-
Using other apps via CarPlay
-
Changing the order of icons on the CarPlay home screen
-
Changing CarPlay settings
-
-
-
Getting started with accessibility features
-
-
-
Turn on and practice VoiceOver
-
Change VoiceOver settings
-
Learning VoiceOver gestures
-
Using iPhone with VoiceOver gestures
-
Controlling VoiceOver with the Rotor
-
Using the on-screen keyboard
-
Write with your fingers
-
Using VoiceOver with an external Apple keyboard
-
Using a braille display
-
Braille on screen
-
Customize gestures and keyboard shortcuts
-
Using VoiceOver with an assistive pointing device
-
Using VoiceOver with pictures and videos
-
Using VoiceOver in apps
-
-
Increase
-
Display and text size
-
Traffic
-
oral content
-
Audio description
-
-
-
AssistiveTouch
-
Touch adaptation
-
Back panel touch
-
Convenient access
-
Sound source
-
Vibration
-
Face ID and attention
-
-
Switch Control Setting
-
Using Switch Control
-
-
Voice control
-
Side button or home button
-
Apple TV Remote
-
Pointer control
-
Keyboards
-
AirPods
-
-
-
Hearing devices
-
Live listening
-
Sound recognition
-
Teletype and text broadcast
-
Mono audio, balance, phone noise reduction
-
LED flash for warnings
- Headphone audio
-
Background sounds
-
Subtitles and closed captioning
-
Intercom message decryption
-
-
-
Guided Access
-
Siri
-
Commands for Accessibility
-
Application Settings
-
-
-
-
Using built-in security and privacy protections
-
-
Setting a passcode
-
Set up Face ID
-
Setting up Touch ID
-
Control access to information on the lock screen
-
-
-
Keeping your Apple ID safe
-
Sign in with Apple
-
Automatic entry of a strong password
-
Change weak or stolen passwords
-
View passwords and related information
-
Send passwords securely via AirDrop
-
Access to passwords on all your devices
-
Automatic entry of verification codes
-
Autofill password codes from SMS messages
-
Manage Two-Factor Authentication for Apple ID
-
-
-
Controlling access to information in applications
-
Control access to hardware features
-
Managing Tracking in Apps on iPhone
-
Location information management
-
Turn on iCloud Private Host
-
Creating and Managing Hide Email Addresses
-
Using a private network address
-
Apple Ads Management
-
-
-
-
Turn iPhone on or off
-
Force restart iPhone
-
iOS update
-
iPhone backup
-
Return to default settings on iPhone
-
Restoring all content from a backup
-
Restoring purchased and deleted items
-
Selling or giving iPhone to another user
-
Erase iPhone
-
Installing and removing configuration profiles
-
-
-
Important Safety Information
-
Important operating information
-
Additional Software and Service Information
-
Federal Communications Agency (FCC) Compliance Statement
-
Innovation, Science and Economic Development Canada (ISED) Compliance Statement
-
Information about ultra-wideband
-
Class 1 Laser Information
-
Apple and the Environment
-
Disposal and recycling
-
-
Copyright
You can set the Photos app to appear less frequently, or completely prevent certain people, places, days, and holidays from showing up in Memories, Photo Collections, and the Photos widget.
Reduce or prevent a person from being shown in Photos
-
Open the photo of the person you want to show less frequently.
-
Tap , tap the thumbnail of the person at the bottom of the photo, then tap Rarely shown.
-
Select Show this person less often or Never show this person, then tap Verify.
Reduce how often certain content is shown in memories
-
Tap the button at the top of the memory.
-
Tap Show less often, then tap one of the following depending on the memory.
-
less often show a person
-
Show this place less than
-
Show this celebration less than
-
Show this day less than
-
Show such days less than
if the option is chosen to show people to show people ”, select the person whose photo you want to show less frequently, then tap Next.
Choose either Show This Person Less Often or Never Show This Person, then tap Verify.
To turn off all memories with holiday events in your country or locality, go to Settings > Photos, then turn off Holiday Events.
-
In order to show a certain person again after the frequency has been reduced, you need to reset the memory settings. Go to Settings > Photos, tap Reset Suggested, then tap Reset to confirm.
See also View memories in Photos on iPhonePersonalize memories in Photos on iPhone
Maximum number of characters:
250
Do not include personal information in the comments.
Maximum number of characters: 250.
Thank you for your feedback.
Show of collections of Russian designers at the Fashion Capital festival in GUM – Moscow City News Agency
SearchAgency of urban news “Moscow”
BackPhoto
20. 06 20:25
Tags:
Impressions
, GUM
, Moscow
, Fashion Week
-
Showing collections of Russian designers at the Fashion Capital festival in GUM.
-
Showing collections of Russian designers at the Fashion Capital festival in GUM.
-
Showing collections of Russian designers at the Fashion Capital festival in GUM.
-
Showing collections of Russian designers at the Fashion Capital festival in GUM.
-
Showing collections of Russian designers at the Fashion Capital festival in GUM.
-
Showing collections of Russian designers at the Fashion Capital festival in GUM.
-
Showing collections of Russian designers at the Fashion Capital festival in GUM.
-
Showing collections of Russian designers at the Fashion Capital festival in GUM.
-
Showing collections of Russian designers at the Fashion Capital festival in GUM.
-
Showing collections of Russian designers at the Fashion Capital festival in GUM.
-
Showing collections of Russian designers at the Fashion Capital festival in GUM.
-
Showing collections of Russian designers at the Fashion Capital festival in GUM.
-
Showing collections of Russian designers at the Fashion Capital festival in GUM.
-
Showing collections of Russian designers at the Fashion Capital festival in GUM.
-
Showing collections of Russian designers at the Fashion Capital festival in GUM.
-
Showing collections of Russian designers at the Fashion Capital festival in GUM.
-
Showing collections of Russian designers at the Fashion Capital festival in GUM.
-
Showing collections of Russian designers at the Fashion Capital festival in GUM.
-
Showing collections of Russian designers at the Fashion Capital festival in GUM.
-
Showing collections of Russian designers at the Fashion Capital festival in GUM.
-
Showing collections of Russian designers at the Fashion Capital festival in GUM.
-
Showing collections of Russian designers at the Fashion Capital festival in GUM.
Show of Russian designers’ collections at the Fashion Capital festival in GUM.
Heading:
Society
Photographers:
Andrey Nikerichev
Link to the material: https://www.mskagency.ru/materials/3221255
Please enter the name of your media/organization.
Or just introduce yourself if you are a private person:
OK
D0 Bf D0 Be D0 Ba D0 B0 D0 B7 Photo
D0 Bf D0 Be D0 Ba D0 B0 D0 B7 Photo – Free & Royalty Free Stock Photos by Dreamstime
RESET Apply
Filter search results
Sort by
relevance – decrease
sales – decrease
upload date – since last
Content type
All
Photos
illustrations
Videos
Audio
License
Image orientation
Color composition
People
Number of people
Gender
Age group
Ethnicity
Reset all filters
We accept inquiries , contact our authors. Something is wrong? Contact us
Search in the categories
Abstraction
Aerial,
Safety,
Blur,
Fun,
Study,
teamwork,
Competition,
Love,
Mastery,
World,
mobile phones,
Danger,
Planetarium,
Help,
Holidays,
Religion,
Luxury,
Strength,
Sport,
textures,
Uniqueness,
An effort,
Success,
backgrounds,
Flowers,
Purity
Business
Team,
computers,
People,
metaphors
Still life,
items,
Industry,
Travel,
Communication/Communications,
Transport,
Finance
Animals
Rodents,
Wildlife,
Pets,
mammals,
Sea life,
Insects,
Birds,
reptiles and amphibians,
Farm
Art/architecture
Architecture,
In room,
details, elements,
House,
Attractions,
Historical Buildings,
places of work,
night scenes,
Open air,
Ruins and antiquities,
modern buildings
People
Activity,
Children,
Women,
cosmetics and makeup,
Men,
naked,
couples,
teenagers,
Elderly people,
portraits,
workers,
variety,
Families,
Body parts,
Emotions
Items
Other,
Sounds and music
Toys,
isolates,
Tools,
Still life,
Clothes and accessories,
household items,
Retro,
Sport,
Electronics
Nature
Water,
waterfalls,
Geology and minerals,
The mountains,
details, elements,
The woods,
sea and ocean,
Clouds and sky
lakes and rivers,
landscapes,
fields and meadows,
Products,
desert,
plants and trees,
Vegetation,
seasons,
Tropics,
Fruits and vegetables,
flowers and gardens,
sunrise and sunset
Industry
Army,
Architecture,
Bank,
Cargo transportation,
food and drink,
computers,
The medicine,
Oil and gas,
Education,
Environment,
Production,
Travel,
Entertainment,
Communication/Communications,
Agriculture,
Sport,
Insurance,
Construction,
Transport,
Energy,
jurisprudence
Travel
Asia,
America,
Antarctic,
Africa,
Money,
Europe,
picturesque places,
Art/architecture,
Cruise,
Resort,
Kitchen,
Oceania,
Tropics,
Flags
Editorial
Attractions,
Celebrities,
commercial,
People,
weather/environment,
Politics,
Developments,
Sport
Technology
Other,
computers,
The science,
Retro,
Connection,
Telecommunication,
Electronics
holidays
Cinco de Mayo,
Diwali,
halloween,
Hanukkah,
Mardi Gras,
Thanksgiving
Mothers Day,
father’s day,
Valentine’s Day,
Other,
New Year,
Easter,
Chinese New Year,
Ramadan,
Christmas
Latest images
How to shoot on the iPhone | Articles | Photo, video, optics
Have you ever entered your iPhone’s camera settings? If so, then they probably went into a stupor – what do all these terms mean and how to use it?
In this guide, we will understand all the features to get the most out of our camera and learn how to shoot like a pro with iPhone!
This is what the Camera section looks like in iOS 14. 8.1 9 settings0003
Go to Settings, then open the Camera section. Here we are met by such a menu.
Well, shall we go in order?
Here we can choose between High Performance and Most Compatible Camera Capture.
High performance capture saves space by reducing file size and saving them in HEIF format for photos and HEVC for video.
The most compatible format does not compress files and saves them in JPEG/H.264 (still/video) format.
In most cases, you won’t notice a difference between the two. But, if you are photographing something with a lot of detail, such as hair, pets, or paintings, a high-performance photo will look grainy at very close magnifications.
By default, the iPhone camera is set to High Performance Capture.
How to decide?
If detail is important to you, shoot in the Most Compatible Format.
If you want to save space on your phone, select High Efficiency Format.
Please note that 4K at 60fps and 1080p at 240fps require High Efficiency support.
The next item on the list is Video recording. Here you can pay attention to several important points.
Resolution
How to choose the resolution?
The numbers 1080 and 720 in 1080p and 720p indicate the screen’s vertical resolution or height in pixels. The more pixels in an image, the clearer it will be.
So a screen resolution of 1920×1080 (two million pixels when multiplied) will be twice as sharp as a screen resolution of 1280×720 (less than one million pixels).
Meanwhile, the “p” in 1080p and 720p stands for progressive scan (or non-interlaced), a format for displaying, storing or transmitting moving images that has been used on computer screens since the early 21st century. This format can be contrasted with traditional interlaced.
4K is the highest video resolution on the iPhone, but this file will take up the most space: it will be about 4 times heavier than if recorded at 720p.
Frames per second *
* in English “frames per second” – fps (frames per second)
When we record video, not only the resolution is important, but also the number of frames per second.
What is the difference between 24, 30 and 60 fps?
In short, the more frames per second, the smoother the video.
- 24 fps
For a long time, 24 fps was the standard frequency. When they started making movies, they used this frequency, and over time, the picture from the film acquired its own characteristic style. At this frequency, what is happening in the frame looks very moving and realistic, as if for real.
This is the frame rate at which most feature-length films are made today.
- 30 frames per second
30 frames per second is six frames more than 24 frames. This means that the device needs to process 25% more of the captured image in the same amount of time. Due to the increase in the number of frames, the picture seems to be smoother.
This is the most common frame rate on TV and the Internet. It is used for live broadcasts – sports events and concerts, as well as for soap operas. Many apps like Instagram use 30 frames per second.
- 60 fps
If you shoot video at 60 fps, it will be slowed down to 24 or 30 fps in post-processing to create a smooth slow motion effect.
If you try to do the opposite, i.e. shoot video at 30 fps and bring it up to 60 fps, it will look like choppy slow motion because you won’t get enough extra frames.
If you try to convert 30 fps video to 60 fps video, you will miss extra frames
Since this frequency gives the video a slow-motion effect, it is used to make the picture more cinematic, to highlight dramatic moments in the film, and to work with the slow-mo effect – slow motion. Also, this frequency is widely used in some HDTVs and in some games.
How to decide?
Depends on your needs and possibilities.
720p, 1080p and 4K are in ascending order of quality. The higher the quality and the number of frames per second, the more space the file will take up.
Lower frame rate looks more fluid, higher frame rate looks smoother. However, it is important to remember that a higher frame rate does not always guarantee better video quality.
– 720p HD, 30 fps/ s – Takes up the least amount of space, but the quality is the lowest; This frequency is often used today on the Internet, including on Instagram; – 1080p HD 60fps – takes up even more space due to frame rate; slow motion effect – the picture will look smoother; – 4K, 24 fps – takes up more memory than 1080p; cinema effect – the picture looks more mobile, like real life; – 4K, 30 fps – a smoother picture than 24 fps + this frequency is often used today on the Internet, including on Instagram; – 4K, 60 fps – takes up the most space, but 4K gives high quality, and 60 fps makes the picture dramatic and smoothest.
If you want a cinematic effect that is characterized by movement and realism, then choose 24 fps. If you want to add drama and depth, choose 60 fps.
It is worth noting that 1080p at 30 fps is set in the iPhone camera settings by default and, in general, is not easy – it is a balance between quality, smoothness and file weight.
Also, in general, it’s not easy for our eyes to distinguish between 1080p and 4K from a comfortable viewing distance. Of course, cinemas require the maximum, but since most of the video is currently viewed on phones, tablets or laptops, this may be overkill for you too.
We recommend using 4K resolution at 30 frames per second. If you have enough memory on your phone to choose the best quality and if you don’t need a dramatic or cinematic effect, this resolution is perfect for you.
And finally, if you just want to capture memories and still save memory on your phone – choose 720p, 30 fps.
PAL
What is PAL video format?
Phase Alternating Line or PAL is a video format standard used on television in most of Europe, as well as in Africa and Australia.
Alternatives to PAL are NTSC, used mainly in the USA, Canada, Korea, Japan, etc., and SECAM, used in France, Russia, Poland, and other countries.
Why do we need PAL format when shooting video on iPhone?
In short. Let’s say you’ve made a video and it’s supposed to be shown on TV in Australia. If you shot a video in artificial lighting conditions, then the PAL format will help to avoid flickering lights.
The fact is that in the US, the frequency of alternating current supplied to homes is 60 Hz. Therefore, there is no flicker when recording video at 30 or 60 frames per second under artificial lighting.
But in most countries, the frequency of the supplied current is 50 Hz. As a result, in video, when shooting at 30 or 60 frames per second under artificial lighting (for example, lamplight), we can see flickering.
If you pay attention, when you turn on the PAL format, you will have 1080p and 4K formats at 25 fps. This helps to avoid flickering.
Auto Frequency (low light)
This function is helpful when you shoot in low light.
When shooting video in a dimly lit room, the phone automatically reduces the frame rate to 24 fps to improve image quality.
Locking camera modes
Sometimes cameras can switch between themselves, which looks like a small glitch when recording video. This function helps to avoid automatic switching.
We return to the menu of the Camera section and access the settings for slow motion video. Everything is simple here.
720p HD, 240 fps default is
We have already figured out that 1080p is better in quality than 720p due to the larger number of pixels.
Videos recorded at 120 or 240 fps are then slowed down to 24 fps, so remember that the higher the frame rate, the slower the motion will be. Some math: 120 is 4 times slower, and 240 is 8 times slower.
Stereo sound is a layered and three-dimensional sound. When we watch a video with stereo sound, it seems that it comes from several directions at once.
Stereo videos are more immersive because they sound bigger and better.
Stereo audio means that the video has two separate audio channels. When you watch a video with stereo sound on an iPhone, you can hear it coming from two places: from the speaker at the top of the screen and from the bottom of the smartphone.
When should you not use stereo sound?
If you are filming a video of someone speaking directly to the camera from a fixed position. And also, if you most often watch the captured videos in one earphone, for example, because you do not want to lose vigilance in transport or when driving.
What’s the matter?
The stereo signal is transmitted on two different channels and the data may differ in each channel. An alternative to stereo sound is mono sound. It enters the center and carries the same information in each channel.
If you have one person speaking in your fixed point video and their speech is the main focus of the video, it’s best to turn off the stereo sound. Although in most cases the stereo sound is imperceptible, sometimes the separation of the audio is strongly felt.
Camera mode
If you enable this feature, the Camera app will save the last mode you shot in, be it Video or Portrait, instead of automatically resetting to Photo mode.
Creative
This feature saves filter, aspect ratio, lighting, or depth of field settings after you close the camera application.
Exposure compensation
This function saves your exposure setting and an indicator appears in the upper left corner to remind you of the current changes. Click on it and a slider will appear in front of you, with which you can adjust the exposure.
Live Photo
You can turn off Live Photo temporarily when taking a picture, but the Camera app turns it back on automatically.
Click the slider next to Live Photo under Preserve Settings to disable Live Photo permanently.
If you enable this function, the volume buttons can be used to take a series of photos. To do this, you need to press and hold either of the two buttons and you can take many photos without unnecessary movements.
If disabled, holding down one of the volume buttons starts recording video.
Turn this feature on and access the Camera app. If you point the main camera at any QR code, a notification will appear – click on it and you will be able to follow the link that is linked to this QR code.
Grid
Turn Grid on to make it easier to use the rule of thirds.
Grid off left, right on
The Rule of Thirds is a composition principle that divides an image into thirds (horizontally and vertically) so that we get nine parts – nine rectangles. According to this rule, the picture will be more harmonious and well-composed if we place important parts of the composition along the lines or at their intersection.
Front camera mirrored
When you take a photo with the front camera, the final photo is a mirror image of what you originally saw on the phone screen.
If you prefer to see the final image as what you normally see in a mirror reflection, enable this function.
But keep in mind that other people who see you and your face in a non-mirror image may find these selfies a little weird because they are just not used to seeing you upside down.
Out-of-frame display
When you enable this function, you can see what is outside the frame when you take a photo. This is useful when it is important to capture certain details.
On the left, the Out-of-Frame function is off, on the right, on
Faster shutter capture
Of course, we want everything to work as quickly as possible. What’s the catch? To take a lot of shots quickly, iPhone may reduce the quality of each photo. Thus, you prioritize speed over quality.
If you disable this feature, your iPhone will take better quality pictures, just not as fast as before.
Smart HDR
HDR or High Dynamic Range – extended dynamic range. When you shoot in HDR mode, instead of one photo, the camera takes three: an overexposed photo, an underexposed photo, and another one with a normal exposure.
The best parts of each shot together create an image with greater depth of field and more vivid colors.
However, these pictures take up more memory on your phone.
12 Useful Google Photos Features Every User Should Know
September 27, 2018Technologies
From smart keyword search to uploading all your photos in one archive.
Share
0
1. Create an animation
Google Photos is the best way to create a simple animation from several images. Sometimes the service does this automatically, offering you options for your creativity, but you can also create a GIF yourself.
To do this, you just need to go to the “Assistant”, select the animation creation from above and mark the necessary photos. You can use from two to 50 images. The finished GIF file is automatically saved to Google Photos.
2. Create collages
This function is also found in the Assistant menu. In collages, you can use from two to nine pictures, which will be automatically glued together and distributed over different areas of the image.
3. Quick photo editing
Google Photos, of course, will not replace a serious photo editor, but it still has the basic image editing tools. Various filters, cropping, rotation, as well as brightness, saturation and detail settings are available to users.
To access these functions, you need to open the photo and click on the icon with the sliders located below. You can also use standard smartphone tools for editing. You can go to them by selecting the appropriate item in the image menu at the top.
4. Slide show
To view a whole bunch of photos, for example from a vacation, the slide show mode is perfect. When turned on, pictures are automatically changed after a few seconds. This feature will be especially useful in the case of the web version of Google Photos, which allows you to turn your PC screen into a photo frame.
The slide show mode is activated from the menu of any photo, just click on the three dots in the upper right corner and select the desired item. This is true both for the web version of the service and for the mobile application.
5. Scanning printed photos
Through the side menu of the Google Photos mobile client, you can access the Photo Scanner application, which allows you to scan printed photos and create digital copies of them. This automatically crops, corrects, removes glare and rotates the photo to the correct position.
Received photos are automatically saved to Google Photos, where they can be easily shared with other users.
Download
Price: Free
Download
Price: Free
there is constant access to the Internet. The mobile application of the service even has a special function “Free up space”.
It allows you to delete from the gadget all the pictures that have already been uploaded to the cloud. Beforehand, Google Photos will evaluate their number and total weight, asking for confirmation of deletion.
7. Turning off tips
Google Photos can automatically apply filters to your photos, create movies and animations, and remind you of what that day was like a year ago. The results of such a creative can be saved or deleted, and if necessary, such tips can be discarded.
To do this, open the side menu of the service, go to “Settings” and click on the “Assistant Hints” item. There you can choose which recommendations to keep and which to remove.
8. Smart Search
Through the use of artificial intelligence, Google Photos can recognize what is in the uploaded pictures. For example, it can be food, a document, a sunset, mountains, a building, and so on. You can quickly find the right frame among thousands of other photos by specifying in the search what is captured on it.
Similarly, the service will be able to sort photos by events and cities. This will already allow you to go to the pictures taken on last year’s vacation or on some of the past holidays.
9. Google Drive Sync
Google Drive photos and videos can be viewed and edited in the Google Photos app. To do this, you need to enable synchronization in the settings. You can do this in any of the services.
In Google Photos, the desired switch is at the bottom of the main settings. In the “Google Drive” settings, which open after clicking on the gear, you need to check the box next to the “Create a folder for Google Photos” item.
10. Automatic download of folders with images
Many images on your smartphone are automatically saved in separate folders, especially pictures from instant messengers and simple downloads. By default, all of them do not fall into Google Photos, but this is easy to fix.
In the service settings in the “Startup and synchronization” section there is an item “Folders on the device”. There, for each folder where there are at least some images, a switch is available. It is he who allows you to start the automatic download of all the pictures contained in them.
11. Uploading all photos in one archive
All photos from Google Photos can be downloaded to any device in one large archive. There is a separate Google Takeout web service for this. With it, you can download all the data related to you from all Google services. If necessary, you can limit yourself to only photos.
To do this, go to the special page of the service, click on the “Deselect” button and activate the switch only opposite “Google Photos”. It remains to click “Next” at the bottom of the page, select the archive format, size and method of obtaining. It can be uploaded to the cloud storage or sent to you via a link.
12. Send a photo to anyone
Google Photos has a very convenient sharing function that allows you to share a photo using any other application, email or even SMS.
You can also create a direct link to a photo or shared album to share. All these features are available by clicking on the “Share” button.
Google Photos →
Download
Price: Free
Download
Price: Free
Read also 🧐
- 5 iPhone Photos Features That Many Don’t Know About
- 14 Best Photo Editing Apps for Android
- 17 best photo editors for different platforms
what to do if your intimate photos or videos are leaked online? Psychologist and lawyer explain
Society
Today it became known that Artyom Dziuba was required to pay $5 million to prevent the scandalous video with his participation from appearing on the Internet. The football player refused the extortionist, information about which is now being studied in the central office of the FSB. Sobaka.ru talked with a psychologist and a lawyer about how to respond to blackmail, what punishment an attacker can suffer, and what to do if intimate materials still get into the network.
Elena Bolyubakh, Head of the Crisis Center for Women INGO: “The Crisis Center for Women is increasingly approached about such blackmail: if earlier it was a few a year, now it is dozens. A person at this moment needs the help of a crisis psychologist, we provide it.
If you are being blackmailed, the most important thing is not to follow the blackmailer’s lead. The blackmail usually escalates and you will remain trapped. Here you need to exhale and think about what will happen if everyone sees these photos or videos. We see that basically people are not hated, but supported. What happens if colleagues at work find out? If these are adults, the wow effect will last a maximum of a day. Often people are afraid of the discomfort of relatives. But if this content does not contain anything criminal, then parents can definitely live with it. We now live openly and, unfortunately, what was intimate can become public.
If your former partner posted some erotic content with your participation, this characterizes him from a negative side, not you. People in a relationship having sex, using different practices, masturbating and filming it is completely normal. There is nothing wrong with having fun in any legal way.
Artyom Dziuba’s video scandal: how the football player was supported by Ksenia Sobchak, Svetlana Loboda, Ilya Varlamov and many others unpleasant. Be prepared, you may not watch or distribute them. Yes, it’s me, and there’s nothing wrong with that. This is my private life, this was not done to offend anyone, I have the right to do those things that give me pleasure and remain within the law. No need to justify or apologize. Masturbation is a normal process for a person, you didn’t beat anyone.
In the case of Dzyuba, the posted video itself attracted much less attention than the consequences. People started posting support after the decision to suspend him from gaming. Even our rather conservative society consolidated and declared that nothing terrible had happened.
A huge number of people after the video with Dziuba think about which of their exes has some kind of similar video. And here it is worth talking about the fact that the bodily, sexual should become more normal and discussed. It is still not customary for us to talk about sex even with our partners, let alone with other people. This must and will change.”
Diana Ramazanova, lawyer at the Crisis Center for Women INGO : “As practice shows, blackmail with intimate photos and their further publication on the net is usually the result of stalking. Often the victim is harassed before, and the publication becomes a consequence of the fact that the person tried to break off the relationship.
First of all, you need to understand whether the publication corresponds to reality. If the material, in simple terms, is “fabricated”, then its distribution will be considered slander and fall under Article 128.1 of the Criminal Code of the Russian Federation. To hold a person liable, you need to write a statement to the police and report slander, and be sure to indicate that his actions undermine your reputation in the eyes of others.
But even if these are your photos, these actions violate several articles of the Criminal Code at once: violation of privacy, namely the illegal collection or dissemination of information about private life that constitutes his personal or family secret (Article 137 of the Criminal Code of the Russian Federation), violation of secrecy correspondence, telephone conversations and messages (Article 138 of the Criminal Code of the Russian Federation). And here it should be noted that the listed articles concern not only personal photographs, but screenshots of correspondence, as well as the disclosure of any information that was entrusted to the accused.
If photos or videos are of an intimate nature, then their distribution is a trafficking in pornographic materials. In fact, this article rarely covers this act, but it may well be leverage if the person is still threatening you with publication. In addition, you have every right to file a complaint under this article, the police are obliged to accept it and call the suspect for explanations. This can affect him morally, harm him when applying for a job in a company with a meticulous security service.
If the stalker threatens to release personal information, it is possible to take screenshots of your conversations and not delete them so that they can be authenticated. It is also worth writing a statement and asking to bring the blackmailer to justice, just this crime will be considered unfinished. By the way, if a partner demands property, money or any actions in exchange for non-proliferation, then this will already be considered extortion (Article 163 of the Criminal Code of the Russian Federation). It is worth remembering that distribution is not only publication in the media or social networks, but also mailing to personal messages.
If you found information about yourself on the Internet, you can write to search engines that provide a link to these publications, as well as to the copyright holders of sites or publics where the materials are posted. In accordance with Federal Law No. 149-FZ of July 27, 2006 “On Information, Information Technologies and Information Protection”, they must be deleted upon such request.
There is also the possibility of applying civil law. You can go to court with a civil lawsuit to recognize a violation of a personal non-property right to privacy, as well as demand compensation for moral damage and compensation for losses incurred from the distributor.
On my own behalf, I would like to add that if you are threatened with the distribution of pictures or videos, it is best to be proactive and publish, for example, a post on personal pages on social networks, where you can honestly talk about the current situation. Do not be afraid to ask for help, contact crisis centers for advice – for example, we have legal Saturdays when you can consult with a lawyer anonymously over the phone. We also provide free assistance with filing statements to the police and the court. There are funds and centers that can provide free legal support in court and investigating authorities. And remember: you should not be ashamed, but those who do this to you.
Victoria Kochina, co-founder and lead psychologist at Resurs Studio : “If a man threatens to post your photos online, you should let him know that you will go to the police – this can stop him. But if the pictures have already appeared on the Internet, then it is better to immediately go to a psychologist if possible – this is a very traumatic situation for a girl. We do not accept this, but in civilized countries such situations should always be accompanied by a specialist. After all, the result can be distrust of all men, difficulty in building the following relationships.
Contacting the police or a psychologist can be difficult: the girl may feel guilty, afraid of being judged. There is strong social pressure on women, they supposedly must be impeccable, and any manifestation of sexuality is interpreted as easy accessibility.
The victim should get out of the affected area as soon as possible and remove all traumatic factors: close social networks, do not communicate with those people who do not provide support, let alone condemn.