Build your own wet room: Wet Room: How to Build a Wet Room
Wet Room: How to Build a Wet Room
When it comes to bathroom upgrades, options abound. Now more than ever, it seems people are turning to the sort of renovations that make their shower and bath areas feel as spacious and spa-like as possible. And one increasingly popular option for achieving these spa vibes is by transitioning your traditional bathroom space into a wet room.
This May Also Interest You: What’s a Wet Room?
Read on to learn more about this burgeoning trend and to find out if it might be the right fit for you and your next bathroom renovation.
What Is a Wet Room, Anyway?
A wet room is a completely waterproof bathroom space with no separation between the shower area and the rest of the bathroom. Wet rooms are single level in that there are no steps, trays or raised portions at all. Because they utilize space more effectively, adding a wet room can make your bathroom appear larger. If tranquility and spaciousness are what you’re after, transforming an outdated bathroom into a wet room is the perfect way to maximize your space.
Wet Room Bathrooms: The Benefits
Once you start scrolling through images of wet rooms online, it might start to feel like adding one to your home is more fantasy than reality. After all, their super sleek, elegant appearance looks like something out of your favorite magazine.
But what if adding a wet room wasn’t nearly as difficult as you thought? What if installing a wet room was a smart and sensible upgrade that can be as useful as it is luxurious? The fact is that adding a wet room bathroom to your home offers a number of advantages:
Space Maximization
One of the most enticing reasons to install a wet room is its inherent space efficiency. Because everything in a wet room is waterproof, the need for a shower screen or enclosure becomes obsolete. Without the need for a separate shower area, the entire bathroom becomes an open area that appears larger than it actually is. Do you have a small bathroom with an awkward layout that makes mobility difficult? An open-plan wet room might just be your best bet.
As you lay out your new bathroom, be sure to remember that these rooms are designed in such a way that everything can get wet. So you’ll want to be sure to site your toilet and sink in such a way that they don’t get sprayed by your shower. If there’s not enough room to do so, a simple partition between the shower and toilet/sink space can do the job nicely — and using one made from glass will still keep the open feel of the room.
Easier to Clean
As an added bonus, wet rooms are easier to clean than conventional bathrooms. Think about it: There are no shower trays or screens to contend with and, with fully tiled walls and floors, a wet room cleaning routine is super simple. If you opt to install a wall-mounted toilet or sink to further open your floor space, cleaning gets even easier.
What’s more, when installed properly, your wet room floor will protect your subfloor better than standard bathroom flooring. Because the floor of a wet room is as waterproofed, or “tanked,” as a conventional shower pan, wet room floors prevent water from infiltrating your subfloors and are actually more protected against mold and mildew than a normal bathroom would be.
Safer and More Accessible
One of the best reasons for installing a wet room bathroom is its functional, accessible design. Whether or not you have any handicapped or elderly members of your family, a doorless, curbless shower area is just safer in general. If you’re concerned that a fully tiled floor might be a slip hazard, you can easily avoid installing polished tile and opt for a non-slip option like natural stone or porcelain.
Speaking of safety, be sure to plan your drain correctly. A popular option in wet room bathrooms is drains that run from one wall to another and funnel water to a central point. Such a drain system can act as something of a gutter that can ensure that water stays on one side while the other side stays dry.
Adds to the Value of Your Home
Open floor plans are in, and they’re here to stay. Sleek design and open spaces are timeless qualities that are both stylish and functional. Secondly, a bathroom without a shower alcove or a bathroom stall feels and looks larger, so increasing the functional space in a room is always a plus when it comes to adding value to your home.
More Related Articles:
- How Much Does a Shower Remodel Cost?
- How to Tile a Shower in 7 Steps
- Making It Rain: How Much Does It Cost to Install a Shower?
- How Do You Install a Shower? Follow This Guide
- How to Remove a Bathtub in 4 Simple Steps
Installing a Wet Room
If you can’t already tell, adding a wet room shower area to your house is a gift that keeps on giving. That said, the idea of ripping apart your bathroom can feel like a pretty daunting and even scary task. And let’s be clear: Unless you’re an advanced DIYer or all-around remodeling expert, installing a wet room is a job that’s best left to the professionals. Ensuring that everything is graded and waterproofed properly is a necessary aspect of a wet room installation, and a pro will be able to make sure there aren’t any water leaks in your new space.
But still, how do you begin designing your new wet room? Whether you’re in the process of a new build or remodeling your existing bathroom, there are crucial aspects to a wet room bathroom design that it pays to stay aware of. Here are some considerations to keep in mind while you’re in the design phase:
1. Examine Your Bathroom Floor
Before you dive into designing a wet room, you first need to examine your bathroom floor to determine how complex the install will be. In fact, it’s generally accepted that the floor type dictates every aspect of the installation process.
Consider the two most popular floor types: timber and concrete. Timber flooring is perhaps the most popular type of flooring and, if you are planning on installing a wet room upstairs, you are most certainly working with timber flooring. In timber floors, joists run parallel to support plywood subflooring. To install a wet room onto a timber floor, you’ll first need to have a floor former installed onto your subfloor. Floor formers have built-in gradients that work to channel water into the drain. On the other hand, if you are installing a wet room onto a concrete subfloor, you’ll need to first install a drain screed to enable the water to channel away from the shower area and safely exit into a wastewater pipe.
2. ‘Tank’ the Wet Room
One of the key benefits of a wet room bathroom is that the entire floor area, as well as the lower section of each wall, is properly waterproofed — “tanked”— to prevent water from damaging the structural elements of your home. The waterproofing process can be time-consuming and can account for a hefty portion of your project’s budget.
To properly waterproof your wet room area, the entire floor section (including the lower section of the walls) will need to be primed and then have a membrane applied that will need to be set or cured. You can choose to use a liquid membrane like Jackoboard Wet Room Waterproofing Tanking Kit that’s painted on with a roller, or a physical membrane such as Impey TileSafe, which is laid onto the floor before tiling.
3. Choose Flooring and Wall Coverings
Once the room has been properly waterproofed, the surface areas are ready to be applied. Tile is by far the most popular choice for surface areas in a wet room, and for good reason. Tile is a sturdy, aesthetically pleasing option that is both easy to maintain and can stand the test of time. However, when choosing tile, it’s important to go for a material that’s not inherently slippery, like ceramic tile. Although they need to be sealed after installation to prevent damage and staining, natural stone tiles are one of the most popular choices for surface areas in a wet room due to their rustic, hard-wearing finish, but also because they’re less slippery than other types of tile.
In addition to tile flooring, vinyl and rubber flooring are other popular choices for a wet room bathroom area. Because of their durability, cost-effectiveness and the wide variety of available patterns, colors and textures, vinyl and rubber flooring remain good waterproof options for your new wet room, particularly if tile is out of your budget.
In terms of wall tile, you can really let creativity be your guide. Keep in mind that porcelain is less porous than ceramic, so it might be a good choice for keeping moisture away from the back of the tiles. Glass tiles are also a popular and waterproof option.
4. Vent It
One other thing to keep in mind when planning your wet room: Be sure to have good ventilation. This can be as simple as a standard vent fan, but it’s critical that you include one in your planning because wet rooms tend to get moisture over a larger surface area. If that moisture doesn’t have a place to vent, mold and mildew growth can occur.
Wet Rooms: Worth the Work
Whether you want to add value to your home, increase accessibility or simply update your space, adding a wet room may be the way to go. And doing so might be less complicated than you think.
How to Build a Walk in Shower or Wetroom
Building a wet room or walk in shower, turning a bathroom or toilet into a wet room and keeping a wet room waterproof. In this handy guide we run you through all you need to know about how to build a walk in shower or wetroom including how to correctly prepare the room, how to lay a walk in shower tray on both concrete and timber floors and then how to tank and tile your wet room so that it stays waterproof.
Complete install of a modern wetroom
Wet Rooms on the Ground Floor
For years wetrooms and shower rooms were limited to ground floors and had to be sited on a concrete, or at least screeded, base.
With new technologies, particularly around ways to manage the expansion and contraction of all materials used in modern house construction, it is possible to put a wetroom anywhere in the home, including the loft and providing the work is done properly it does not matter if it is a wooden floor in the room you wish to use.
Preparation for Wet Rooms
The first thing to understand about a conventional wet room is that it will only ever be as waterproof as the surface used to line it. This surface, be it porcelain tiles, ceramic tiles, tile backer boards, liquid rubber membranes or some other kind of latex or vinyl waterproof covering, will not remain waterproof if the surface it is stuck (or otherwise fixed) to is not completely sound.
The first step therefore, when creating a wet room or shower room is to make sure that the floor is not loose in any way and the walls are a) not loose and prone to excessive movement and b) have not got a flaky surface. Surfaces must also be entirely free from dust, debris and grease.
Different Ways to Construct a Wetroom
Although all of the possible ways to complete your project we mention on this page are great ways of achieving your dream, they can all be very easily spoiled by lack of preparation.
As you will read from our ceramic tiling project, or even see on the DIY Doctor YouTube channel, when tiling a bathroom under normal situations, it is not necessary to tank the walls or provide any kind of tile backing board.
The tiles themselves, if laid properly, will give you a waterproof surface. However; when constructing a wetroom the tiles (although they should still be laid properly) are more for form than function. There is simply too much water in a wet room to depend on the tile grout proving a completely waterproof area for very long.
To construct a great wet room or shower room the floor is the most vulnerable area.
Gravity will ensure that all water heads downwards and if your wet room floor has not been properly prepared and treated, you may have problems.
Take a look at the diagram below and the text afterwards will explain how this type of wet room can be achieved with both a concrete floor and a timber floor.
How to tank the walls and floor of a wetroom or shower room
Wetroom Formed on a Concrete Floor
The hardest thing about forming a wetroom floor when working on a concrete base such as a ground floor slab, is installing the drain pipe which takes the waste water away.
Usually this is achieved by using a concrete breaker to dig a channel through the floor, with a large hole at the point where the waste outlet will sit.
Using a concrete breaker to dig a drainage channel in a concrete floor
The channel needs to go directly towards an outside wall to avoid digging up any other floors in other rooms. Once outside the building the drain can be laid to an existing manhole.
The top of the new drain should be laid flush with the finished level of the concrete floor so any tanking can overlap the drain ensuring the water runs straight into the drain and cannot seep between the edge of the floor and the upstanding drain pipe.
The pipe should also be trapped in the normal way to avoid foul gas running back into the wetroom. In a concrete floor it is usual to see a horizontal waste traps as shown in the image below
Fitting a wet room floor grid, grill or floor plate
Leading down, directly into the trap, sits the floor grid or outlet plate. This sits on top of the tanking and directs the water into the trap while holding hairs and other debris for cleaning. Should any water seep under the grid, it will of course go directly into the trap.
The pipe should also be trapped in the normal way to avoid foul gas running back into the wetroom.
In a concrete floor it is usual to see a horizontal waste traps as shown in the image below.
The drains should be laid in accordance with Building Regulation instructions and any alterations to existing drain runs or access chambers, manholes etc…. should be notified to the Building Control Department of your local council.
Fitting a horizontal waste trap to a wet room floor
The channel housing the drain is then concreted over and a fall is constructed into the floor by using a self levelling floor compound, thickened slightly with sharp sand.
There is no need for a steep slope to the floor. Water will find its way to the lowest level at any angle of fall. A fall of 10mm over 2m is plenty.
Some wet room installers use a thicker bed of adhesive under the floor tiles to create the fall on the floor. We do not suggest that is a good idea as it means that the adhesive is not of a uniform thickness. Any cement or adhesive compound which varies in thickness stands a good chance of cracking at the thinnest point. This could lead to movement in the floor which cannot end well!
The floor plate (see above) is positioned so the pipe goes down into the trap. The tanking is applied over the plate as are the tiles. A grid (or sometimes a channel) is then fitted into the top of the floor plate.
How to put a wetroom shower tray into a timber or wooden floor
To put a wetroom into a room with a timber floor, it is first necessary to take up the existing floorboards. The lowest point of the floor needs to be chosen and then the joists around that low point need to be raised a little (the same amount of fall as with the concrete floor applies) using strips of timber caled firring pieces. If you measure these timbers, your local joinery shop will cut them for you.
Making sure the joists are absolutely solid (strengthening timbers (called noggins) can be placed in-between the joists if necessary) the plywood (minimum 25mm thickness is recommended here) must be screwed down to the joists and noggins at a minimum of 300mm centres.
The screw heads must be countersunk under the surface of the plywood (see our project on countersinking screw holes) so the tanking, which is glued to the plywood, cannot be pierced.
The drain pipe must run between the joists unless it has to be notched or drilled through them as it runs at 90 degrees to them. Do try to avoid this but if you do have to drill or notch joists please read our project on notching floor joists to ensure you do not cut too much of the joist.
Running Pipework Through a Timber Floor
The pipework can then be put through the wall to run (via a boss clamp) into an existing soil and vent pipe if one is available. We have a project on how to fit a new soil and vent pipe which also includes how to connect into one.
Tiling on a Timber Floor
Once tanked, by whichever system you choose, you can tile over the tanking to finish off your wetroom and enjoy.
Use a flexible adhesive and waterproof grout to complete your tiling and pay a great deal of attention to the joints.
Clearly if the tile joints leak it does not mean, with the tanking underneath, that your floor will leak, but without solid joints your tiles may become loose which will make all your hard work look a mess.
All project content written and produced by Mike Edwards, founder of DIY Doctor and industry expert in building technology.
Wet room ideas – stylish designs for bathrooms big and small
Real Homes is supported by its audience. When you purchase through links on our site, we may earn an affiliate commission. Here’s why you can trust us.
(Image credit: Devon & Devon)
Join our newsletter
Get the best home decor ideas, DIY advice and project inspiration straight to your inbox!
Thank you for signing up to Realhomes. You will receive a verification email shortly.
There was a problem. Please refresh the page and try again.
By submitting your information you agree to the Terms & Conditions and Privacy Policy and are aged 16 or over.
The most sought after wet room ideas go hand in hand with beautiful and functional design also. Sure to add an element of luxury to a space and even increase your home’s value, there are many benefits to including one.
The perfect solution to small bathroom spaces that seem to lack potential, wet rooms are also a more accessible option for family members who need a space that better meets their mobility needs. Getting the design features right from the onset, such as waterproofing, lighting and layout, is crucial for success.
What is the difference between a wet room and a walk in shower?
Wet rooms are completely open plan spaces. You might see a glass shower screen or two but the layout will be configured so that water can flow freely towards the drain rather than within a shower tray as you’ll see in walk in showers.
People are often torn between lovely walk in shower ideas and wet rooms, but both come with different pros and cons. Colleen Shaut, director of project development at Case Architects & Remodelers says that the pros of wet room designs are ‘You get the luxury of a freestanding tub and a separate shower; Water is isolated to one area so that you don’t have to worry about water all over the bathroom; Wet rooms help a space look and feel bigger; They are easy to clean.’ And, the main con is ‘Everything gets wet.’ Plus, if you have children slippery tiles may be a little dangerous.
(Image credit: Colleen Shaut designed, photos by Stacy Zarin Goldberg)
Larry Greene, President of Case Design/Remodeling Indy adds ‘While one of the wet room’s primary purposes is to be utilitarian, that shouldn’t come at the expense of a great design. Wet rooms have been gaining traction in recent years because of their versatility. Equally suitable for smaller (wet rooms generally take up less space than traditional bathrooms) and larger spaces, a wet room can be a great option for most homes. The open floor plan of a wet room makes it a preferred choice for all inclusive designs. Both small children and people with limited mobility will find a wet room easier to use than a traditional bathroom.’
(Image credit: Colleen Shaut designed, photos by Stacy Zarin Goldberg)
Wet rooms will still give you the opportunity to bring your favorite bathroom ideas to life also. Greene adds ‘A popular design idea is to include a tub and a shower in the same space. While this is a personal preference, one thing to keep in mind is the somewhat challenging plumbing that comes with such designs. Another consideration is the waterproofing of the entire wet room. Using good quality materials and choosing the right type of furniture both come at a higher cost. When it comes to wet rooms, it’s important to use the professional help of interior designers or architects in order to avoid mistakes.’
Are wet rooms a good idea?
(Image credit: Philip Lauterbach)
Shaut says ‘Yes. And particularly in tight spaces where you want the look and feel of a luxurious spa, but don’t have the space to have separate tub and shower. Wet rooms are popular in Europe where space is at a premium.’
Are wet room rooms expensive?
Good wet room ideas tend to be around 20 to 30 per cent more expensive than an equivalent non-wet room bathroom remodel cost, assuming that there are no major structural alterations needed to boost the floor strength and reroute drainage points. Saying that, a wet room can add 20% more value to your home compared to a regular bathroom reno. Depending on specifications chosen and the size of your space, budget around £7,000 for a basic design and up to £40,000 or more for a large or luxurious wet room in the UK. U.S. costs start at about $20,000.
The fundamentals of wet room flooring
(Image credit: Devon & Devon)
In building terms, the absolute fundamental issues when planning bathroom remodel ideas like wet rooms revolve around floor construction, floor and ceiling heights and falls – the slopes needed to drain water away. Since a wet room needs to have drainage to the floor, keeping a streamlined look, you must be able to include a slope to a plug hole, trap and drain below the lowest point in the space.
Like any bathroom, access to water, drainage points and power are essential, but there are planning points to remember specific to wet rooms, too. Most are to do with ensuring water tightness. Ask yourself how is the drained waste water going to get to the nearest drainage point in a wet room? Working up from there, ensure that the floor finish is stable, which involves stiffening the floor sub-structure to ensure no leakage.
Then, think about the slopes to drain to a particular point and invest in a floor covering that will ensure no water permeates. Manufactured board systems, such as those supplied by Wedi, which come with specialist waterproof membranes, and pre-sloped panels that sit below the floor finish, such as Impey Aqua-Dec, are ideal.
Ensure good drainage in a wet room
(Image credit: Chris Snook )
A drainpipe, usually 10cm in diameter, needs a slope on it to ensure proper drainage in a wet room, so if the joists run in the same direction as where you want to run your drain, the pipe can be fitted between joists within the existing depth of the floor.
However, if you need to run your pipes across the direction of the joists, they will go beneath them, which would mean below the ceiling of the floor underneath and may require a new lowered false ceiling, or above the joists, requiring raising the floor.
Waste pipes need to be beneath the floor, so as long as the issues of floor structure and construction are sorted, pipes will be concealed as a matter of course. Speak to a structural engineer and an architect or designer regarding the building’s structure and best arrangement of the space.
Choosing sanitaryware for a wet room
Look for sanitaryware with smaller dimensions in your wet room, but don’t go so small that the item is hard to use. You can get very small sinks which take up barely any space and work well for a quick hand-wash in a downstairs loo, but will not be easy to wash your face at.
For the shower area, go no smaller than 80cm x 80cm – less than that leads to a claustrophobic showering experience. If you’re using glass screens in your design for a luxury bathroom look, make sure there is something, such as a motif, border, or frosting, on the glass, to ensure it is visible.
When thinking of the best type of toilet, consider that a compact wall-hung loo with a concealed cistern removes visual clutter and helps to ensure as much of the floor as possible is visible.
Wet room layouts
(Image credit: Matik Boutique)
The best wet room ideas are complete with a seamless layout. Always plan your toilet’s location with the aim of keeping it dry. Even a wet room needs careful screening to ensure key areas remain practical. A sheet of glass to separate a shower area from a loo tends to work best, and you should always aim to create space between wet and dry areas.
This brings us onto bathroom storage ideas suitable for the space, either keep yours protected by a glass door or create built-in storage for items that can get wet.
Wet room tile ideas that pop
(Image credit: Chris Snook)
Clearly in a wet room, the floor will get wet, so choosing the best types of floor tiles that will not be too slippery is vital to ensure safety. Many tile manufacturers will specify certain styles as being suitable for wet areas. And with so many different styles and wet room ideas around, thankfully there are also a large number of stunning resin, porcelain and ceramic tiles to choose from – many of which are treated to handle water – to match the look you want to create, and your wet room needs too. A good idea is to choose a floor tile covering that has a gentle texture, giving some grip under foot.
Large format tiles can work well in a small wet room. They lead to fewer lines of grout which can create a grid-like pattern that makes the space feel smaller. That said, small patches of mosaic tiling (perhaps to provide splashback to a sink or feature) can be very effective.
(Image credit: Impey)
If the floor level of the wet room cannot match the room it is entered from, consider what sort of a join will be used and how this works practically. If a step up or down is required, it is best to have one 10cm step, or higher, instead of multiple steps measuring between 3 and 4cm, which could pose a trip hazard.
The water-tightness of where the floor meets the walls of the room needs to be carefully thought through, too, as if the junction of wall and floor moves, you could have disastrous leaks. A good solution is to carry the floor covering up the walls, particularly in shower areas.
Ventilating a wet room
(Image credit: Aqata)
Ventilation is very important when planning out wet room ideas and design. And, a statutory requirement in a bathroom without an window that can open. Aim to site an extraction system in a location that is both inconspicuous and requires the shortest route for a duct to the outside.
Lighting a wet room
(Image credit: Matki)
A flexible bathroom lighting ideas will ensure the wet room is bright enough for tasks such as shaving and putting on make-up, but can have a relaxing ambience for showering.
Downlights can provide the room with good overall light, while task lighting around mirrors will make precision tasks easy. Wet room lighting must be suitable for the zone of the room it’s in, determined by its proximity to a water source, so make sure you have a thorough understanding on bathroom lighting zones and always work with a registered electrician.
Heating a wet room
Underfloor heating is ideal for a wet room, especially where space is tight. You can extend an existing radiator system to add an underfloor heating circuit, with the pipes laid between the timber joists, and insulation beneath.
Electric underfloor heating mats are easier to install as they do not increase the floor level significantly. They are inexpensive to buy, but will cost more to run than a water-based system. In a large wet room, you may need additional heating, so be sure to find the best radiator or heated towel rail to suit your space.
Dressing wet room windows
Natural light is a must to ensure that your wet room stays bright and spacious feeling. If you are so lucky to have windows in a large or small wet room, it’s vital that the types of window treatments you choose can stand up to the humid atmosphere of the space. Shutters are smart, and will regulate light and privacy effectively. Window likely to get splashed? Choose a shutter that’s specially made to tolerate water without warping. Roman shades are another lovely option and if you prefer blinds, louvred versions are also neat and effective, or try coated fabric blinds made to cope with the condensation in the room.
How should you decorate a wet room?
While a light, bright palette will help reflect light and make the wet room feel larger, avoid going overboard with white which can make the room feel cold or clinical, and consider warmer, earthy tile colors.
Patterned wall tiles or colorful accessories will also bring warmth and interest to the space. The odd house plant looks great in a wet room and will thrive well in the warm, humid environment. ‘Accessorize the space with waterproof décor and plants, such as succulents, and even try adding a teak tray to lay across the tub.’ Adds Shaut.
Demister mirrors will help make the wet room feel bigger. If you can, sit them flush with any tiling to create the illusion of depth, or choose mirrored wall cabinets to stash away bathroom bottles neatly.
Do you need planning permission for a wet room?
In the UK, A new wet room probably won’t need planning permission, but installing a new loo, shower or basin and changing electrics near a shower are subject to building regulations.
If you are replacing existing plumbing work, it is not subject to building regulations approval, unless is it is near to, or involves electrics (such as an electric shower).
Wet Room Construction Details | Building a Wet Room
» Wet Room Construction Details
How to Build a Wet Room
Building a wet room can be more complex than renovating or building a standard bathroom. Wet rooms have a number of crucial elements that need to be factored into their construction to ensure they not only look good, but function efficiently and most importantly, do not leak.
Read on to find out the aspects of wet room construction that should be considered when planning an installation.
Wet Room Construction: 4 Things to Consider
From deciding on where to build the wet room, to understanding the implications of flooring type, there are many aspects to consider when constructing a wet room.
1) Wet Room Location
Where to place a wet room in a new build is an important consideration of planning and design. Wet rooms are no longer constrained to a solid floor. They can be constructed anywhere – including onto timber floors – thanks to the advances in the design of wet room drainage and waterproofing methods. With effective waterproofing systems, a wet room can be installed throughout residential properties, including family bathrooms, bedroom en-suites and even loft conversions.
2) Build Up Process
Another factor to be considered when constructing a wet room is the floor build up. Wet rooms can be constructed on both timber and solid floors, but the method of installing the wet floor, and the elements used to create the gradients (falls) on each substrate, will vary.
3) Creating Gradients
Creating a gradient in a wet room is one of the three most important components of wet room construction, and is vital in order to guide water down the drain efficiently. The minimum recommended fall is 12mm, and the slope needs to be formed into the floor itself.
There are several ways of doing this depending on the flooring type you are working with.
4) The Differences Between Wooden and Solid Floors
The type of flooring beneath it will have a significant impact on how to build a wet room. Read on to discover the differences between wet room construction on a wooden floor, compared to a solid floor.
How To Build A Wet Room On A Wooden Floor
Wet room wooden floor build up
Timber floor wet room installation will require the removal of the floorboards before anything else is installed. Following its removal, a floor former or ‘dec’ can be fitted, and the drainage systems and waterproofing membranes can be installed.
Wet room wooden floor structural rigidity
Installing a wet room on an upper timber floor, or converting an upstairs bathroom into a wet room, may involve minor structural modifications. This is to ensure it is properly supported, and it is a relatively simple and straight forward process. Whilst planning permission is not necessary, wet rooms need to comply to Building Regulations for bathrooms in general.
To ensure that a wet room built on a timber floor using a floor former or ‘dec’ is structurally secure, the following should be consider:
- a subfloor within the wooden joist spaces will need to be constructed using plywood
- A minimum of 18mm ply should be installed between the joists, finishing flush with the top of the joists
- the 22mm floor former should then be installed above the ply lining
- the whole area must be waterproofed
By following these steps, you will ensure that the wet room is structurally sound.
Wet room wooden floor gradients
The floorboards will need to be taken up, supported with ply lining and a floor former with built-in gradients installed. The floor formers are lightweight but they are efficiently designed to carry the weight of the tiles. They have one or two way falls built in, which slope to a linear drain positioned in the floor, or next to the wall. A four-way fall can be achieved with the use of a square drain, offset or in the centre of the former.
See Our Wet Room Drainage Systems for Timber Floors
Installing A Wet Room On A Solid Floor
Wet room solid floor build up
In a new wet room
In a new build, the wet room drainage systems are installed into the floor prior to the screed being laid. This is to create the required gradient needed for the wet room floor.
In a renovated wet room
A retro-fit wet room will require the old screed to be removed in the designated shower area to allow the new drainage system and screed to be installed with the required drainage falls. It is also possible to remove the screed within the shower area to allow the drainage outlet to be fitted, self-levelling latex to be poured, and a floor former installed on top. This will form the wet room gradient.
Wet room solid floor gradients
A new concrete floor can be laid to fall, which allows for the height of the drain. If the wet room is being installed retrospectively, the existing floor will need to be broken into, in order to install the drainage systems.
See Our Wet room Drainage Systems for Solid & Concrete Floors
Drainage & Waterproofing – All Flooring Types
Drainage grill aesthetics in a wet room
It’s advisable to establish the style of wet room drain required at the beginning of the project. This will help determine which system should be installed. Taking into account the desired position of the grill within the shower area will also narrow down the options that are available.
The two main styles of drainage grills are:
Linear grill
This is a contemporary rectangular grill that can be positioned anywhere within the shower area, including up against the wall. The grill comes in different styles:
- stainless steel (available in a variety of finishes)
- Stone-Infill Grill – which is inlaid with your chosen tile to co-ordinate with the wet room
The linear grill can be used on timber or solid floors and is ideally suited to contemporary large format tiles.
Square grill
This is a traditional square drain that is best suited to wet rooms on a timber floor construction. The drain is ideal for use with mosaic tiles.
- Linear Floor Grill against the wall
- Stainless steel Linear Floor Grill
- Stone-Infill Grill against the wall
- Slotted stainless steel square grill
- Solid stainless steel square grill
- Stone-infill grill
Explore Our Wetroom Drainage Products
Discover CCL Wetrooms’ range of wetroom drains for solid and timber floors, from our Linear Screed Drain to our Solo 4 Drain.
Wet Room Drainage
Drainage is a key element in the construction of a wet room and the style of drainage used will depend on the following:
- Floor build up
- Flow rate of the shower* (litres per minute, l/m)
- Style of drainage grill
- Type of tiles required
All wet room drains contain a trap and a vertical or horizontal waste pipe attachment. It’s important to choose one that will cope with your water pressure and the desired flow rate for the shower. Once the drain is installed and the waste pipe has been connected to the soil pipe, the floor former is fitted on top before being sealed and waterproofed.
* The l/m is determined by the type/style of shower head chosen and your water pressure. It is vital to ensure that the correct number of traps have been installed at this stage to cope with the flow rate (l/m), as additional traps cannot be added later.
Please remember that other sanitary-ware products in the bathroom do not share the wet room waste pipe. Always ensure that the wet room waste pipe runs independently into the soil pipe.
At CCL Wetrooms we’re experts in wet room drainage. We offer a range of innovative drainage systems, such as our market leading shallow linear screed drain. Take a look at our products page for more information.
CCL Wetrooms Products
Waterproofing
Waterproofing, also known as ‘tanking’ is a vital part of wet room construction and mustn’t be overlooked. It can be effectively carried out through the application of an impermeable waterproof membrane that is designed for use across the whole shower floor area prior to the application of tiles. It is recommended that the membrane is installed across the whole bathroom floor (where appropriate) or at a minimum of 1 metre beyond the shower area.
The membrane is ideal for fast track construction and can be walked on and tiled on immediately – unlike liquid membranes that have to be left for 24 hours to dry. The floor membrane should be used in conjunction with a flexible wall membrane on the walls to ensure water cannot penetrate through any gaps.
A correctly installed waterproof membrane will last for the lifetime of the tiles. Tiles should then be laid using a high quality, rapid set flexible tile adhesive on a solid bed.
Explore Our Wetroom Waterproofing Products
Find out more about the types of waterproofing solutions that can be used in wetrooms. All of our products are expertly manufactured to ensure highly effective waterproofing.
Wet Room Tiling (to British Standard BS5385)
Tiles are one of the most popular options for wet room flooring. They look good, are easy to keep clean, and offer plenty of scope for design in a wet room.
Textured tiles can help to ensure maximum safety while using a wet room. Natural stone tiles, mosaics, sandblasted or flame finishes are good options because they provide more friction and a secure feeling underfoot.
At CCL Wetrooms, we offer a comprehensive wet room design service (and an optional installation service through our sister company Wetrooms UK) that can be tailored to your project and encompasses all stages of the build. If you’d like to find out more about how we can help you design a beautifully functional wet room, contact us today.
Wet room ideas: 16 stunning wet room bathroom designs
Homes & Gardens is supported by its audience. When you purchase through links on our site, we may earn an affiliate commission. Here’s why you can trust us.
(Image credit: Richstone Properties / Mandarin Stone / l Drummonds / Darren Chung)
Wet room ideas open up the opportunity for contemporary creative design, without the need to squeeze in a shower enclosure or raised shower tray.
A wet room can be a real luxury at home, even when the space you have to work with is limited. Try thinking along the lines of colorful floor-to-ceiling tiles, built-in seating and sleek, concealed pipework.
A true wet room without any panels provides you with more room to move, and an open-layout is easier to keep clean than a regular shower.
However, wet rooms are a big project to take on when it comes to bathroom ideas. The tanking process to ensure your room is completely watertight can be a significant upheaval, not to mention costly, too.
You may want to weigh this up against the longevity of the space, as a wet room’s seamless design makes it a great option for accessibility and future-proofing your home for years to come.
Wet room ideas
Wet rooms have become an increasingly popular choice for shower-lovers because they are the perfect solution for small bathrooms when you don’t have the space for both a bath tub and a separate shower.
The key difference between a shower and a wet room is the fact that while both may have shower screens, wet rooms are completely open spaces without the stand-in tray you will normally get in a shower. The floor is at one level and water is allowed to flow freely to a drain.
A wet room can provide a spacious showering area and the high-end look of a luxurious spa hotel because the look tends to be very streamlined. Wet rooms are also level entry, so easily accessible to all, not to mention hygienic and easy to clean. Done well, a wet room is incredibly desirable and can boost your home’s value, too.
There are a number of things to consider when planning a wet room or walk-in shower – from suitable flooring to drainage points – so that you can achieve the best results.
1. Ensure the space you intend to use is fully tanked
(Image credit: Sarah Hogan)
It goes without saying that a wet room needs to be waterproof. Luckily builders are a lot savvier about how to achieve fully tanked spaces nowadays and wet room tanking systems and products are readily available.
‘In particular, hidden tray systems, which fit under the floor tiles and take care of drainage gradients and watertightness have proved a real game-changer,’ says Nicholas Cunild, MD of luxury shower brand Matki . ‘Low-level shower trays that fit flush with the tiles are also popular and can help define the shower room in a bigger room. Wet room installation is not for novices, it’s important to find a tanking specialist or builder with verifiable experience. ‘
‘
2. Consider underfloor heating to keep the space dry
(Image credit: Mandarin Stone)
‘It’s important to take extra steps with regards to heat, ventilation and drying than you would in a regular bathroom,’ continues Nicholas Cunild. ‘You may be lucky enough to live in a hot climate which naturally gives a warmer bathroom. But if you live in a colder climate and you exit a wet room onto carpeted rooms – add kids, dogs and all the rest – it is a recipe for waterlogged, messy floors everywhere.
‘A screen will help contain major puddles, but underfloor heating and heated towel rails will also speed up the drying process and help prevent slip hazards. Mechanical ventilation is a must and will help clear steam quickly – look for models with intelligent humidity sensors that automatically boost when required.’ You can also pair this with a beautiful, easy-to-wash bathroom rug idea.
3. Consider different surfaces ideas, not just tiles
(Image credit: Base Interior)
Tiling from floor-to-ceiling is practical but can feel cold and uninviting in large volumes. Nicholas points out the importance of exploiting other options.
‘We’ve noted a rise in polished plaster – both traditional Tadelakt and more modern Microcement – in wet room designs and the results are stunning,’ he says.
Built up in layers, the finish is waterproof and seamless, so there’s no grubby grout to tackle.
4. Pick the right sanitaryware
(Image credit: Future / Mark Bolton )
‘If you are embracing the full wet room in a large bathroom look and omitting any sort of enclosure or screen, it is fundamental to think about your choice of sanitaryware, as it is likely that it will get wet from the spray of the shower or the condensation in the room,’ advises Rebecca Milnes, designer at CP Hart .
‘Opt for ceramics that are flush to the wall and are ideally wall-mounted. A wall-hung toilet is a brilliant choice in a wet room, as there are no areas for water to pool and it makes cleaning easier.’
Though a bathroom that has been tanked doesn’t necessarily need a shower panel, you may want to add one to prevent towels or toilet rolls getting wet. Opt for a fluted or frosted finish to maintain a level of privacy if your wet room forms part of the main bathroom.
‘In order to create a true wet room, a watertight environment must be created by tanking both the floor and walls of the room to thoroughly protect it from leaks. First a watertight membrane is laid, then the room will need to be tiled throughout with a gentle gradient in the main a shower area so the water flows away easily into the waste.’
5. Choose the right size sanitaryware to enhance the sense of space
(Image credit: Matki)
It’s important to choose sanitaryware that is slightly smaller than the average in size so that it can make the room look bigger. A wall-hung toilet with a concealed cistern, is not just easier to keep clean, but being able to see the floor gives the illusion of a bigger room. Wall-hung bathroom vanity ideas will also help reduce visual clutter and use the bathroom space more effectively.
6. Play with the illusion of space
(Image credit: Future / Jonathan Gooch)
Using matching tiles or composite panels on both floors and walls is a good idea for wet rooms and small bathrooms as it will accentuate the sense of space.
Create areas of bathroom color, and even patterns using mosaics or tiles in a variety of formats, to give definition to your shower space, or mix shapes, sizes and shades for a unique look.
‘Add glossy finishes and sleek chrome fittings and use matching shower tile ideas or composite panels on both floors and walls to accentuate the sense of space. Create areas of color and even patterns using mosaics or tiles in a variety of formats to give definition to your shower space, or mix shapes, sizes and shades for a unique look.’
Make sure the floor tiles you want have an appropriate non-slip bathroom flooring rating for wet areas – look out for raised, textured finishes or anti-slip properties in your search.
‘Good-quality porcelain tiles are perfect for use in wet rooms and walk-in showers,’ says Jo Oliver, Director at Stone & Ceramic Warehouse . ‘Firstly, they are impervious to water, making them an ideal solution for everyday use. They also won’t be damaged by detergents or any of the other chemicals we frequently expose our shower surfaces to. ‘
‘
(Image credit: Max Kim Bee)
While it’s easiest to install a small wet room in a new-build or extension, any bathroom, upstairs or down, can be fully tanked for wet room use.
There are certain situations where a wet room comes into its own. ‘Wet rooms are particularly effective in small or awkward scenarios, like rooms with sloped ceilings or strange layouts, as you can maximize the showering area without the restrictions of standard shower tray sizes,’ says Nicholas Cunild.
Issues like the direction of floor joists can be problematic but not insurmountable. ‘In some cases, you may need to accept a step up into the room, in order to achieve the necessary gradients for efficient water drainage. If it’s done by a good professional, it will be unnoticeable.’
8. Fake a wet room
(Image credit: Future / Darren Chung)
If you are not able to create a true wet room, the latest ultra-low profile shower trays are a clever alternative.
A frameless shower enclosure will give any bathroom a modern, seamless feel and create a contained area for showering without the need for a separate cubicle.
Paired with a low-profile shower tray, these walk-in shower ideas with frameless, clear glass panels help to make even the smallest of spaces feel less claustrophobic and therefore a more calming showering experience.
Don’t forget to allow for adequate drainage at the planning stage. Your shower floor ideas may need to be fitted at a sloped angle away from any doors so water can drain away easily. A sunken shower tray that can be installed flush to the rest of the floor.
9. Bring in pattern to help zone the shower area
(Image credit: Bert & May/ Fired Earth)
Many wet room designs lean towards a minimalist look but it can also be a great opportunity to introduce color and pattern into the space.
Even in an open plan space you can use a showstopping tile on the shower walls and floor to zone the shower area. If you are feeling even braver you can contrast the tiles you use on the floor and walls for even more impact.
10. Find the right tile
(Image credit: Future / Artisan of Devizes)
Bright and colorful wet rooms make for an invigorating shower experience. Ideal if you’re not naturally a morning person. Smaller bathroom tile ideas like mosaics are a great choice for wet rooms, as they’re easy to lay in a slope towards the drainage hole.
Alternatively, a mix of metro and patterned tiles create a cool and contemporary appearance.
Maintain a seamless look by incorporating a recessed shelf within the shower – a great shower storage idea to keep essential bottles without encroaching on the rest of the space.
11. Enhance the floor factor
(Image credit: Future / Jonathan Gooch)
Shower floor ideas are one of the most important factors when planning and developing a wet room.
Most bathroom flooring types can accommodate the pipes needed for drainage in a wet room – even concrete. But in some instances, the flooring will need to be taken up before tiling takes place to ensure the drainage pipes can be positioned with the necessary slope for the water to drain away.
Tiles are the best type of flooring for a wet room. Damla Turgut, founder of Otto Tiles & Design , advises: ‘The most suitable types of tiles for a wet room floor are porcelain or natural stone such as marble, terrazzo, encaustic cement or mosaic tiles. Because of their construction and high-shine finish, we would not recommend the use of ceramic tiles on a wet room floor, they are however suitable for wet room walls as are the very on-trend zellige tiles.’
12. Turn a loft space into a wet room
(Image credit: Future / Davide Lovatti)
There are so many advantage to having a wet room.
You can create a more impressive shower room design in an average-sized bathroom simply by removing the bath and freeing up the space needed for a walk-in shower. For instance, if you have a loft space, consider installing a wet room here.
You probably will need a special extractor fan in your wet room. The build-up of moisture and condensation is greater in a wet room than in a traditional bathroom. Fans operated by light switches alone often aren’t effective enough. A good fan needs to be wired into the room (still coming on with the light switch) but with a separate cut-off switch, which is outside the room. Humidity-tracking extractor fans are best for wet rooms as they work continuously and incrementally with automatic extraction for however much steam is in the room.
13. Create a spa-like sanctuary
(Image credit: Future / Mark Luscombe-Whyte)
Real estate agents are quick to point out that a family home without a bath will be less saleable, but there are creative wet room ideas with baths you can explore.
If space allows, the bathroom can be turned into a spa-like sanctuary with a bath, vanity unit and smaller wet room-style cubicle.
‘Wet rooms give an added level of luxury, allowing a continuous floor finish making a space feel seamless and bigger,’ says Gemma Holsgrove, Associate Director at interior design agency Sims Hilditch . ‘With cleverly positioned fittings it can certainly feel well thought through. ‘
‘
A wet room design can also work alongside a bath, as Sally Cutchie of BC Designs explains. ‘Choosing to have a wet room can actually be hugely beneficial when wanting a bath to sit in the same space,’ she says.
‘As a wet room is fully waterproof it doesn’t need a shower enclosure fitting,’ she adds. ‘This can free up a lot of extra space for the all-important bath.’
If your bathroom is on the small side, then use the same material to clad your whole space. A strong stone, like marble, is a stylish option.
14. Take a seat
(Image credit: Fameed Khalique)
Add built-in seating to your wet room for a sauna-like experience. Complete the look with a large rainfall showerhead, then simply sit back and relax.
A wood look can offer a holistic spa bathroom experience, but you’ll need to ensure any timber is treated so that it’s suitable for a wet area. Or you can mimic the look with tiles. Just make sure they have a non-slip treatment and are comfortable to sit on.
15. Let the light in
(Image credit: Future / Jonathan Gooch)
If you are creating a new space for your wet room, you will need to think about light sources during planning. A huge skylight like this creates the illusion of showering outdoors. So if you’ve been inspired by trips to tropical climes such as Bali or Thailand, this could be a practical way to recreate that magic.
The best bathroom lighting ideas feature at least two lighting circuits – one for overhead lighting and another for adjustable mood and task lighting. Where you place these will depend on any natural light sources, too.
16. Install a space to rest and recharge
(Image credit: Future / Mark Bolton)
When considering how to choose a shower for your wet room, Paul Bailey, Senior Category Manager at GROHE , says: ‘Features such as steam, sound and chromotherapy through built-in lighting modules are increasing in popularity, due to growing demand for spa and wellness inspired bathroom spaces. ‘
‘
Wet rooms are considered a practical and luxurious addition to a home. However, they can be costly. Nick Cryer of Berkeley Place says: ‘Wet room installations are more specialist, more time consuming and more expensive. All the materials and kit is very readily available, however, we recommend only experts are employed to complete the installation.’
Are wet rooms a good idea?
There are lots of benefits to having a wet room – from being able to utilise a small or awkward space where a bath or standard shower enclosure cannot fit, to future-proofing your home.
Estate agents are quick to point out that a family home without a bath will be less saleable. But there are creative options you can explore. For instance, if you have a large master bedroom, consider installing a freestanding, statement tub here for a dash of hotel chic.
‘Investing time and money into creating a wet room and properly tanking it can also be incredibly useful when it comes to busy family bath times,’ says Paul Bailey, Senior Category Manager at GROHE UK.
The main drawback is the investment and upheaval a wet room project brings, mainly due to the fact that all wet room ideas require proper tanking.
‘One other point worth noting is that wet rooms can get quite cold, because there’s no enclosure to keep the steam in,’ adds Yousef Mansuri, head of design at C.P. Hart.
How small can a wet room be?
While wet rooms are not limited to incremental sizing, most bathroom designers would recommend that the showering section of a wet room measures a minimum 800 x 800mm.
When planning a shower design for a small bathroom, there are a few aspects which may determine the space required. Will pipework be exposed or concealed? Do you need to install a glass panel to prevent other areas of the room from getting wet?
Don’t forget that adequate ventilation must also be installed in line with building regulations to prevent mould and damp spots.
Get the right layout for a wet room
There’s no denying that plumbing can limit the layout of a wet room. Basins, baths and showers only have to take away water but, if placed 12ft from an outside wall, the drainage will have to slope gently downwards for quite a long way, avoiding joists, which may not be running in a helpful direction. The sooner an architect or plumber raises a few floorboards, the sooner you’ll know your options.
‘In a wet room, the shower area is flush with the floor level and the drain is fitted into the fully tiled floor. Originally wet rooms were completely open without any glass partition. However, a simple fixed glass panel creating a walk-in shower area is a much more practical choice and has become the most popular trend,’ advises Rebecca Milnes, designer at CP Hart .
‘Wet room systems are not limited to incremental sizing, like shower trays often are, so they are a great solution for awkward or tight spaces.
‘In small rooms it is possible to turn the whole area into a walk-in shower. However, it is best to be mindful of the items in the bathroom that need to be kept dry, such as towels and toilet rolls.
‘One of the first things to consider when planning a wet room is where to position the drain. Ideally the drain should be as far away from the bathroom door as possible, to minimise any risk of water escaping the room.
‘If you have a wooden sub-floor, the way your joists run is crucial to where your drain can be positioned. You’ll also need to think about which way the gradient fall towards the waste will run, to avoid any tricky wedging effects.’
What’s the difference between a wet room and a walk-in shower?
‘A true wet room is a fully waterproofed space without a fixed shower door or tray, and usually has an open tiled shower area,’ explains Nicholas Cunild, managing director of Matki.
A walk-in shower, on the other hand, is an area in a bathroom or shower room with a low-level shower tray and glass surrounds. While completely watertight, you may still wish to include a glass panel in a wet room to contain the water spray.
Is a wet room expensive?
There’s no doubt that a wet room is an investment. The tanking process to ensure the room is completely waterproof can be costly and takes time. All wet room ideas involve tiling the space from floor to ceiling carefully while ensuring proper drainage.
Concealing pipework can also be an investment, though this can often allow recessed shelving and storage to be created as an additional benefit.
You can find out how much it costs to install a wet room in our guide.
What kind of costs are involved in a wet room?
It is never cheap to re-do a bathroom. In a family bathroom with two basins, a WC, a bath and a shower, quality items will easily add up to £5,000.
Installation adds a further £3,000 or so and, with cabinets and storage, good quality mirrors, tiles and lighting, it generally adds up to between £10,000 and £15,000.
(Image credit: Future / Davide Lovatti)
The build-up of moisture and condensation is greater in a wet room than in a traditional bathroom. Fans operated by light switches alone often aren’t effective enough.
A good fan needs to be wired into the room (still coming on with the light switch) but with a separate cut-off switch, which is outside the room. Humidity-tracking extractor fans are best for wet rooms as they work continuously and incrementally, with automatic extraction for how much steam is in the room.
Pick the right wet room flooring
‘When deciding which wet room system to go for, think about what your sub-floor is made of. There are systems for both solid and wooden floors. If you have a concrete floor, it can be quite invasive to channel in a waste and create the gradient fall required for drainage,’ advises Rebecca Milnes of CP Hart.
‘Forgoing a shower tray in favour of a wet room allows the floor tiles to run through to the shower area, which adds visual space to a room. However, not all surfaces are safe to use in a wet room setting and it is crucial to know what the slip rating of the material is. I’d recommend using a material with a structured, textured finish to give extra grip in wet areas. Mosaics are also a great choice for wet areas, as the grout lines between the tiles give appropriate grip.
‘In cases where a step-up to the wet area is needed, the step should be at least 10cm high, as anything lower can be easily overlooked by those not familiar with the room and can become a trip hazard. Adding under-plinth lighting can highlight the step and add ambiance to the room.’
Tanking a wet room
‘Tanking is essential in a wet room,’ says Rebecca Milnes. ‘This is a multi-step process which entails several layers of waterproofing to ensure an excellent seal – much like a swimming pool.
‘The two main approaches for tanking a wet room are using a self-adhesive bitumen-based waterproof membrane, or applying a paint-on liquid wall membrane. It is always best to speak to your supplier about the best system for your project.’
Jennifer is the Digital Editor at Homes & Gardens. Having worked in the interiors industry for a number of years, spanning many publications, she now hones her digital prowess on the ‘best interiors website’ in the world. Multi-skilled, Jennifer has worked in PR and marketing, and the occasional dabble in the social media, commercial and e-commerce space. Over the years, she has written about every area of the home, from compiling design houses from some of the best interior designers in the world to sourcing celebrity homes, reviewing appliances and even the odd news story or two.
How to install a wet room
How to guides
Posted by Adam Chard in
How to guides
| 4 years ago
12 min read
One of the best ways to add value to your property is to install a stylish wet room bathroom. In this blog post, we’ll discover how it’s done.
If you don’t already know, a wet room is a fully waterproofed bathroom, offering level access showering and producing a clean, contemporary look. A shower tray with drain is normally incorporated into the floor and tiled over.
You may think a wet room is out of your price range, but we argue not. With our high quality wet room installation kits, made right here in the UK, you can create your very own wet room in just a matter of days, rather than weeks.
You don’t need a huge space to create a stunning wet room like this
Below, you’ll find a video and instructions on how to install one of our wet room kits, with shower tray and waterproof flooring, which will get you well on your way to creating a beautiful and fully-functioning wet room.
Before you do anything
Always unpack your wet room pack immediately after delivery. Check for any damage or faults as it’s better to find them now, rather than during installation.
Always turn off your water at the mains before attempting any DIY in the bathroom.
Tools you’ll need:
- Circular saw
- Electric drill
- Hard point saw
- Notched trowel
- Paint brushes
- Pencil
- Silicone sealant gun
- Spirit level
- Standard screwdrivers
- Tape measure
Check you have the following:
Supplied with wet room tray waste & installation kit:
- 2 x internal wall corners
- Fix-KST fixing adhesive
- PRO-Seal pre mix tape sealer
- Waterproof tape
- Wet room shower tray waste and trap
- Wood floor primer
See what’s in the box:
 youtube.com/embed/dlcnh-TYA64?rel=0″ frameborder=”0″ allowfullscreen=”” webkitallowfullscreen=”” mozallowfullscreen=””>
Will need to buy separately:
- Silicone sealant
- Tiles
- Tile grout & adhesive
- Waterproof floor kit
- Wet room shower tray
- Wood battens
- Wood screws
- Shower & valve (if required)
- Glass panel(s) (if required)
Time to complete:
- 3–5 days (depending on the size of your room)
How much does it cost to install a wet room?
To find out the latest typical costs that a tradesperson might charge to fit a wet room, check out our guide to bathroom installation costs.
Fitting your wet room shower tray and floor
At Victoria Plum, you’ll find our wet room shower tray kits are made from high quality materials for a 100% waterproof seal and anti-bacterial protection.
Please follow this video, with step-by-step instructions below:
 youtube.com/embed/vnuufEYCID8?rel=0″ frameborder=”0″ allowfullscreen=”” webkitallowfullscreen=”” mozallowfullscreen=””>
The instructions below are for fitting your wet room shower tray, waste and flooring only.
Here’s how to install a wet room
-
Measure the entire floor area and plan the layout of your new wet room on a piece of paper.
-
Decide now if any of the waterproof boards need to be cut and if they do, cut them now using a hard point saw. Lay the entire pack out across the floor area to check the fit.
-
Carefully remove the waterproof boards and store somewhere safe.
-
Mark the shower tray position onto the floor and position of the waste hole in the wet room shower tray.
-
Using the nails or screws holding the existing flooring down as a guide, establish where the joists are.
-
Mark the centre line of the first joist outside the shower area as you will need to remove the floor up to this line.

-
Carefully remove the wet room shower tray and store somewhere safe.
-
Set your circular saw blade to the depth of the floorboards. It may be necessary to increase the depth slightly if it doesn’t go right through the floorboards.
-
Using the circular saw, cut along the lines you have marked and remove the flooring and all nails and screws.
-
Make sure that the remaining floorboards or sheets in the rest of the room are fully secured down and as level and flat as possible.
-
Spread solvent weld adhesive around the inside of the drain connector.
-
Push the shower drain base onto the shower drain connector with a twisting action.
-
Spread solvent weld adhesive around the inside of the opposite end of the shower drain connector and then slide onto the waste pipe with a twisting action.
-
Once the solvent weld has set, pour water down the drain to check that the waste isn’t blocked and that there aren’t any leaks.


Handy hint: Make sure all pipes and drainage parts are clean at all times using solvent waste pipe cleaner.
-
All exposed joists will now need a batten running along the inside of the joist to accommodate the new plywood low level floor.
-
Cut some timber batten (approximately 20mm x 50mm) to length and screw at approximately 150mm intervals to the inside of all joists 18mm below the top of the joists.
-
Cut some 18mm plywood to fit between the joists on top of the battens previously fitted.
-
Measure the shower drain base position on the plywood then mark and cut using a jigsaw, so that the drain base and connector will be exposed through the new floor.
-
If you are left with a gap between the wet room shower tray and the flooring, make use of any of the discarded floor boards to make up the gap.
-
Lay the wet room shower tray into position and check it lines up with the shower base.
Remove the tray and store aside for the moment. -
Paint the entire floor area (including the new plywood) with wood floor primer. Leave to dry for at least 30 minutes.
-
Spread Fix-KST adhesive onto the shower tray floor area and drag your notched adhesive trowel across the surface to leave just the right amount of adhesive on the floor.
-
Place the wet room shower tray into position and bed down into the adhesive. Check that the shower tray is level in both directions.
-
Place the internal bowl into the shower drain base, then lock the internal dome into position.
-
Apply a thin bead of silicone around the drain base top and the outer ring of the shower tray.
-
Screw the drain top securely then allow the silicone to cure.
-
Spread Fix-KST onto the floor area, then use your notched trowel to leave just the right amount of adhesive on the floor.
-
Place the first waterproof board into position and bed down onto the adhesive cement.
 Remove the tray and store aside for the moment.
Handy hint: If the floor immediately outside of the shower area is likely to get wet, it is a good idea to angle the boards slightly so that the water will run towards the tray and drain.
-
Repeat for the remaining boards, mixing more Fix-KST as required. Leave to set for approximately 3 – 4 hours depending on room temperature.
-
Along all joints fit the fixing plates at approximately 300mm centres. Place the centre hole of the fixing plates directly over the join line and screw to the floor.
-
Place the waterproof internal corners into position then mark around them with a pencil.
-
Using Pro-SEAL pre-mix tape sealer and a paintbrush, apply a thin layer of adhesive slightly overlapping the pencil marks.
-
Place the internal corner firmly into the tape sealer, then apply a further thin layer of tape sealer over the top.
-
Apply a thin layer of Pro-SEAL tape sealer to one edge of the floor and adjoining wall approximately 60mm wide on each.
Repeat for any remaining walls. -
Apply a thin layer of Pro-SEAL tape sealer over all board joints and fixing plates.
-
Place the waterproof tape strips firmly into the tape sealer then apply a further thin layer of tape sealer over the top.
-
Place the shower drain top upside down and mark around it with a pencil.
-
Set aside the drain top then mark a line from each of the 4 corners of the square to each corresponding corner of the wet room shower tray. These lines act as tiling guidance for the tray falls and also the “tile up to point” for the shower drain top.
-
Finish the tray in your choice of tile using an S1 flexible cement-based tile adhesive.
-
If you are using tiles larger than 100mm, it is necessary to cut the tiles along the same lines previously marked, in order to maintain the slope.
-
Measure from the top of the finished tile to the top of the shower drain top.
-
Now mark the same distance as previously measured on the shower drain top.
-
Use a hard point saw to cut the excess from the bottom of the shower drain top.
-
Refit the O ring onto the lowest indent remaining on the shower drain top.
-
Ease the drain top into place, then fill the gap around the edges of the shower drain top and the start of the tile with the same grout you used on your tiles.
-
Place the shower drain finishing grate into position. Leave to dry for at least 24 hours before using your shower.
 Repeat for any remaining walls.
Congratulations, you’ve now fitted your new wet room shower tray, waste and flooring.
We would also recommend waterproofing your walls using our waterproof wall kit.
Whilst DIY can be a good way to save time and money, you should always hire a qualified professional to plumb and install your products. The instructions above are simply a guide to fitting a wet room and shouldn’t be used to attempt full plumbing and installation.
Great wet room ideas & advice
Click on any of the links below to discover more wet room inspiration and advice:
- 4 great wet room ideas
- Walk in shower enclosure and wet room ideas
- Planning a wetroom
Posted by Adam Chard in
How to guides
| 4 years ago
A born & raised West Countryman, now living on the Yorkshire Coast, for over 8 years Adam has been bringing home interior ideas to life at Victoria Plum. Adam’s favourite interior styles have been shaped by both urban and natural influences.
Transfer of the wet zone in the apartment. All features in 2022.
Relocation of wet areas, as well as other types of repair work on the redevelopment and / or reorganization of the apartment, must comply with the current building and sanitary standards for multi-apartment buildings, providing comfortable living conditions and safe living for all residents of the house.
Therefore, the first thing to do at the stage of redevelopment planning is to find out how, according to the current legislation, it is possible and how not to carry out the transfer of a wet spot in an apartment building. And the second – how and where to issue permits for the legal implementation of such redevelopment.
You can find answers to all these questions in our article.
Premises with wet processes
However, before moving on to the essence of the issue under consideration, let’s determine which rooms in the apartment belong to wet zones.
Real estate wet spot: what is it?
A wet zone or a wet point is a room with high humidity (because there is a source of water), in which floor waterproofing is mandatory. These include: bathrooms, latrines, toilets, showers and shared bathrooms.
Is the kitchen a wet area or not?
FAQ: Is the kitchen a wet area? No, the kitchen area is not considered a wet spot. If you need detailed information on how to legally carry out a kitchen relocation in an apartment, go here.
Redevelopment with transfer of wet spots
Before the owner, who has set himself such a task, there will be two sides of the issue: technical and legal. We’ll take it apart from both sides. And let’s start with a review of the technical nuances of this procedure.
Is it possible to move the wet area in the apartment?
From a technical point of view, such a redevelopment is not so difficult. First of all, when transferring a bathroom, it is necessary to bring under the place of the future restroom communication, in simple words – a drain riser and cold water for draining. A drain riser with a diameter of 100 mm is allowed under a slope of 2 mm, and with a diameter of 50 mm – under a slope of 3 mm. Cold water can be supplied using any available materials, be it metal, polypropylene or metal-plastic.
Of course, no one wants to enjoy the sight of open pipes in their apartment, and therefore the desire to somehow hide them in the wall is understandable. In this case, you can arrange a plumbing box, but a mandatory item in this case will be the installation of an inspection hatch on it, with the help of which access to those pipes will be provided.
This scheme works only if the bathroom is planned to move at a distance of no more than 5 meters. Otherwise, it would not make sense to implement such a project due to the fact that the natural slope of the drain pipe will raise the toilet bowl to a height unacceptable by the layout of an average apartment, and a half-meter podium will turn your toilet into a throne room.
But even in this situation there is a solution: a forced sewage system. If you do not go into the nuances, then it is a pump with a grinder.
The forced sewage system has two significant advantages: the discharge takes place through pipes of smaller diameter (20 and 32 mm) and can be carried out not only horizontally, but also vertically up to seven meters high. Currently, there are many models of forced sewage systems with different designs and from different manufacturers.
However, the technical side is not the only thing that should worry you. In addition, there are a number of sanitary and construction rules that must be followed when moving a wet zone to the territory of a former kitchen or a corridor in an apartment.
Wet areas in the room and kitchen
According to SP 54.13330.2016, it is strictly forbidden to place wet areas above living rooms and kitchens (including kitchen-dining rooms and kitchen niches).
Basically, apartment buildings are built in such a way that one riser on all floors of the apartment has the same layout. That is, toilets are above toilets, bathrooms are above bathrooms, kitchens are above kitchens, rooms are above rooms.
During the redevelopment, the location of the premises in the apartment where renovation work is being carried out relative to other apartments will be changed. It is not prohibited by law to change the planning solution of an apartment, but at the same time it is impossible to worsen the living conditions of neighbors.
If, for example, a toilet is moved to a part of the area of the living room of your apartment, then it will be above the living room of the apartment located on the floor below. And clause 9.22 of SP 54. 13330.2016 prohibits doing this, so this option for redevelopment of the apartment cannot be agreed upon.
The same applies to moving the toilet to part of the kitchen area. The existing rules do not allow the location of wet spots directly above the kitchens.
Therefore, in most apartments it is impossible to coordinate the redevelopment with the transfer of wet areas to the territory of the room or kitchen. However, there are several exceptions that allow this event to be carried out without violating the above-mentioned norms:
- The apartment in which the transfer of the wet spot is planned is located on the first floor – below the first floor there are most often non-residential technical premises.
- The apartment is located above the first floor, but under it there is a non-residential area of some organization.
- A two-level apartment is being redesigned, and in this type of living quarters it is allowed to place a toilet directly above the kitchen.
- A similar redevelopment was agreed and carried out at the neighbors from below.

Let’s briefly comment on the listed exceptions, in which the wet spots in the apartment can be moved/expanded to the area of the kitchen or living room.
The owner’s apartment is located on the first floor of a residential building. In this case, there are no obstacles in coordinating the redevelopment project, since there can be no residential premises below. And even if there is a basement under this apartment, this will not affect the approval process in any way.
The floor below is completely occupied by non-residential premises. As a rule, this applies to apartments on the second floor. Or when the first floor was originally non-residential. Or when the ground floor apartment was transferred to a non-residential fund to be converted into a shop, boutique, service center, etc.
In this case, it will be necessary to additionally attach to the set of documents submitted for consideration any document proving that a non-residential premises is located below. There is no clear regulation on the form. This can be like a certificate from the management company that there is a non-residential premises under your apartment on the ground floor, a BTI certificate, photographs of the facade with a clear link between your apartment and the premises on the lower floor, etc.
Under the area of expansion / transfer of a bathroom or a bathroom to a kitchen or a room, there is a non-residential premises of apartment , for example, a dressing room, pantry or corridor. This option is possible if the owner of the apartment below has completed and officially agreed on the redevelopment of the transfer or increase in the area of the above premises at the expense of the kitchen / room.
That is, in this case, we are not located above the area of the kitchen / room, but above the area of another room, which, before the redevelopment was agreed, belonged to the kitchen / room of the neighbors below.
Second floor of a duplex apartment. In practice, such a case is extremely rare. However, it is also an exception in which the owner has the right to place his wet area above his own kitchen.
If the bathroom (toilet) in the apartment on the floor below has already been enlarged by part of the kitchen (room) area. In practice, we have not seen such a case, but theoretically it is possible. Here, again, there must be non-residential premises under your neighbor’s apartment below, otherwise he would not be able to agree on this redevelopment. And then, within the same boundaries as that of a neighbor, you can transfer or enlarge the bathroom at the expense of the kitchen (living room).
This option looks something like this.
Suppose there is an apartment on the first floor. The owner can safely enlarge the bathroom at the expense of the kitchen. He did and agreed. Further, the owner on the second floor can make exactly the same extension, and so on. We also note that if any of the owners, for example, on the fourth floor does not want to do such a redevelopment, then on the fifth floor the homeowner will no longer be able to agree on this, despite the fact that on the first, second and third it has already been agreed.
Redevelopment project with the transfer of the wet area to the kitchen.
Comments on the approved redevelopment project. The apartment is located on the second floor. During the redevelopment, the kitchen (4) was moved to room (3). This became possible because the neighbors downstairs also have a kitchen in this place. And a bathroom (6) with a toilet (5) in the form of a combined bathroom (4) was transferred to the former kitchen. Such redevelopment became possible because below, under the new bathroom, there is not an apartment, but a landing.
Transfer of the wet spot to the hallway
If there are serious restrictions when moving the premises of the wet areas to the living room and kitchen, which have already been mentioned, then the transfer of the wet area to the hallway or closet / closet / dressing room is almost always possible to agree, although carrying out such redevelopment also has some nuances.
As already mentioned, SP 54.13330.2016 prohibits the location of bathrooms and toilets above living rooms and kitchens.
Therefore, if a neighbor living in the apartment below officially made a redevelopment with the extension of the room (kitchen) to the corridor, then this fact will make it impossible to agree on the transfer of the toilet or bathroom to the corridor in your apartment, since your toilet / bathroom in this case will be above the extended part of the neighbor’s room (kitchen), which would be a violation of current regulations.
If the downstairs neighbor did not make redevelopment with the addition of the corridor or part of its area to the kitchen or living quarters, then you can agree on expanding the wet zone through the corridor or arranging the wet zone in the corridor by moving it in your apartment.
Redevelopment project with the transfer of the wet spot (toilet) to the corridor.
Comments on the redevelopment. In this case, the toilet (6) was moved to the corridor (8). As a result, the passage to the kitchen (5) was blocked. To create a new entrance in the load-bearing wall between the kitchen and the room (4), a doorway was cut out and reinforced with metal structures. The former toilet room was combined with an adjacent bathroom (7) and thus arranged a combined bathroom (7).
Relocation of the wet area to a closet with access from a hallway, hallway or hallway is a permitted renovation measure. But if the entrance to the pantry leads from the kitchen or room, then the transfer of the toilet or bathroom to the pantry is carried out according to the same rules as the transfer of a wet point to the room or kitchen.
An example of moving a toilet to a storage area.
Comments on redevelopment. The toilet (2) in the apartment was moved to the storage room (7), the entrance to which was originally arranged from the corridor (6). As a result, a combined bathroom (7) with an entrance from the bedroom (5) was arranged on the site of the pantry and part of the corridor area. It turned out to be possible to arrange an entrance to the bathroom from the living room, because the apartment has one more combined bathroom (8) with an entrance from the corridor (10).
In general, the transfer or extension of the wet zone due to a corridor, a pantry or a built-in wardrobe does not cause problems in coordination. To agree on this redevelopment, design documentation is required as part of the redevelopment project and a technical report. In general, such work can be coordinated both by the owner independently and with the help of an organization that specializes in redevelopment design.
Can the wet zone be reduced?
Since usually in residential buildings wet spots are rooms that have a small area, the goals of redevelopment, as a rule, are:
- bathroom combination;
- extension of wet areas to adjoining premises.

But in rare cases, the owners ask if it is possible to reduce the wet zone in the apartment?
Redevelopment of the wet zone in the apartment, when it is required to reduce its area, is allowed, but only the norms mentioned above must be observed. That is, it is of fundamental importance how the area freed from the bathroom or bathroom will be used in the future.
An increase due to the wet zone of the corridor, pantry or utility rooms is quite feasible. But using a wet point to expand a room or kitchen is allowed only on the top floor, because in other cases the kitchen / room will be under the wet zone of the neighbors from above, which will not be agreed upon.
What must not be done when moving wet areas?
Speaking about prohibitions when moving a toilet, it is worth noting that when carrying out this type of redevelopment, it is prohibited:
- Use a balcony or loggia to accommodate a room equipped with a toilet. It is forbidden to transfer a bathroom, as well as a bathroom, to a balcony (loggia), regardless of which building and on which floor the re-planned apartment is located.
- Arrange the floor in the toilet / bathroom without waterproofing, drawing up acts for hidden work. That is, floors in wet rooms must be lined with waterproofing material .
- Attach plumbing and plumbing fixtures to walls and partitions that separate the toilet from living rooms.
- Violate the requirements of the Code of Rules “Floors” (SP 29.13330.2011), according to which the floor in the toilet and bathroom must be 15-20 mm lower than in the adjacent corridor, or separated by a threshold also 15-20 mm high.

Continuation of the topic of prohibitions in our article “Do’s and Don’ts when redevelopment of an apartment”, for reading which you need to click the link.
Coordination of wet areas in an apartment
As for the process of coordinating a redevelopment with the transfer of wet areas, it differs little from other types of apartment renovations. You can learn more about the procedure by clicking on this link. In short, you will need:
- BTI documents for an apartment;
- redevelopment project;
- technical opinion on the possibility of redevelopment;
- title documents.
It should be added that in some cases an atypical set of documents is required. All the details about the documents for redevelopment here.
Our organization has all SRO approvals. If necessary, we are ready to develop a project for the redevelopment of wet points.
In the event that it is required to legalize the redevelopment of the wet zone, carried out without approval, you will need a floor plan with an explication before the redevelopment and a technical opinion on the admissibility of the repair measures carried out, which you can also order from us.
You can entrust us with the preparation of project documents for independent approval of redevelopment with the supervisory authority. Or order a full range of services from us – design and approval of turnkey redevelopment. We work in Moscow and Moscow region. We provide free consultations on redevelopment issues by phone, e-mail or online on our website. Write, call – we will be happy to help.
Relocation of the wet zone in the apartment. All norms!
Changing the area and / or moving the wet areas of bathtubs and toilets is one of the most common measures during renovation work in an apartment. Redevelopment allows you to make the apartment more comfortable and give it individual features.
Contents of the article
Wet zone in the apartment – what is it?
There is no strict definition of which places in an apartment should be classified as wet areas. According to established practice, we are talking about rooms in which, according to SNiP, there should be floor waterproofing that protects the lower floors from possible leaks.
In a residential building apartment, waterproofing is required in the bathroom, bathroom, shower room and toilet.
Wet areas often include the kitchen and laundry. These rooms are not as “wet” as a bathroom, and when laying floors in them, laying a waterproofing layer is not necessary, although it is highly recommended.
Wet point relocation
When remodeling an apartment, a combined bathroom, toilet, bath or shower is often moved to a new location or arranged in addition to existing sanitary facilities.
It is not uncommon for a wet zone to be moved when redevelopment of new buildings with free planning and in studios, where the boundaries of these premises are marked only on paper or laid out from blocks in one row.
In these cases, special attention must be paid to the laying of utilities, as there are a number of restrictions on the installation of pipelines and installation of ventilation.
The transfer of the wet zone, if the dwelling is located below, can only be carried out on a non-residential area. This rule equally applies not only to the bathroom, but also to the kitchen.
Expansion of the wet zone due to the corridor
Most often, during repair work, a bathroom or bathroom is enlarged due to an adjacent non-residential (auxiliary) room – a corridor, a pantry, a dressing room or a dark room.
Expansion of the combined bathroom in the photo:
Current regulations (SP 54.13330.2016) do not allow the placement of sanitary facilities above the living rooms and kitchens of neighbors. An exception is two-level apartments, where, according to the law, it is possible to place a bathroom above your own kitchen.
It is also forbidden to enlarge the kitchen by placing it above the living rooms. And it is possible to expand the kitchen space due to the area of the bathroom only on the top floor.
The exit from the bathroom should not be into the living room or kitchen. There is also an exception to this rule – it is allowed to leave the combined bathroom in the bedroom if it is not the only one in the apartment.
Waterproofing of wet areas
The current regulations provide for the mandatory presence of hydro-sound insulation of the bathroom premises, as well as the installation of an overflow dam.
To protect the apartment from the spread of water, the floor level in the bathroom is either made below the level of the corridor, or separated by a threshold more than 1.5 cm high (according to clause 4.8 of SP 29.13330.2011, updated version of SNiP 2.03.13-88)
Technical requirements for waterproofing are set out in SP 71.13330.2017 “Insulating and finishing coatings” (updated version of SNiP 3.04.01-87). Modern combined materials provide both waterproofing and soundproofing floors.
Examples of waterproofing of wet points:
Coordination of the wet zone in the apartment
Increase in the size of the bathroom, displacement and installation of additional plumbing equipment require mandatory coordination (pp-508 ZhK RF).
Coordination of repair work is carried out by the supervisory authorities exercising control in the field of redevelopment, on the basis of documentation, including a project and a technical report.
An example of a redevelopment project with an increase and combination of a bathroom:
This project includes combining a bathroom (5) and a toilet (6) into a combined bathroom with its increase over the entire width of the corridor (7). The entrance to the kitchen (4) is moved.
It is possible to legalize the work performed on the basis of a technical opinion on their admissibility and safety.
In Moscow, the approval of the planned and completed repairs with the displacement of the wet zone, as well as other redevelopment works, is carried out by the Moscow Housing Inspectorate, and in the Moscow Region by local administrative authorities.
If the whole house is one large non-residential building, and in them wet areas can be moved anywhere.
The specifics of coordinating the redevelopment of wet areas is that measures for their waterproofing and soundproofing must be formalized by an act of hidden work from a contractor with SRO approval.
Consequences of moving a wet point in an apartment
Unauthorized enlargement or relocation of rooms belonging to the wet zones of baths and lavatories, most often does not go unnoticed by neighbors or employees of the management company. If an uncoordinated redevelopment or transfer of a wet point is found, in addition to a fine, it leads to the need to fulfill the order of the supervisory authority to restore the original state of the apartment or legalize the work performed in the prescribed manner. In case of failure to comply with the order, the law provides for legal proceedings against the owner of the apartment.
In case of preliminary approval of repair work, the stage of development of project documentation allows you to avoid activities that cannot be agreed upon later.
Waterproofing of wet areas
Waterproofing of wet areas, which include bathrooms and toilets, serves to prevent water from a sudden leak from penetrating to the lower floors within a specified time.
For example, when expanding these premises, the floors on the attached area do not protect against water in any way. Another option is the dismantling of bathrooms or partitions between the bathroom and the toilet: water seeps into poorly sealed grooves in place of the former partitions.
That is, if an unauthorized redevelopment of a bathroom or toilet was carried out in your apartment, then with a high probability it can be said that the installation of waterproofing of wet areas in the bathrooms was carried out incorrectly, or even completely absent.
Suppose you have combined a bathroom and a bathroom, and in addition you want to attach a part of the corridor to it and move the plumbing. According to all the rules, the first thing you had to do was prepare the relevant documents, order a redevelopment project from a specialized organization, and only then proceed with waterproofing wet rooms. But this is not always the case. And if you decide to do the work at your own peril and risk, inviting a team to redevelop the bathroom according to an ad in the newspaper, then the consequences of such work can be the most unpleasant for both you and your neighbors.
When redevelopment is legally agreed upon, laying waterproofing of floors in bathrooms refers to the so-called hidden works, and the correctness of its implementation is controlled by drawing up a certificate of examination of hidden works and field supervision. To be more precise, paragraph 4 of Appendix 7 of PPM 508 refers to works requiring activation, waterproofing of toilets, bathrooms, balconies and showers.
Checking the waterproofing of wet areas and its quality is carried out as follows: a layer of water about 5 cm thick is poured into the bathroom and left for 2 hours. If during this time no leaks were found on the floor below, then the waterproofing of the bathroom was done correctly.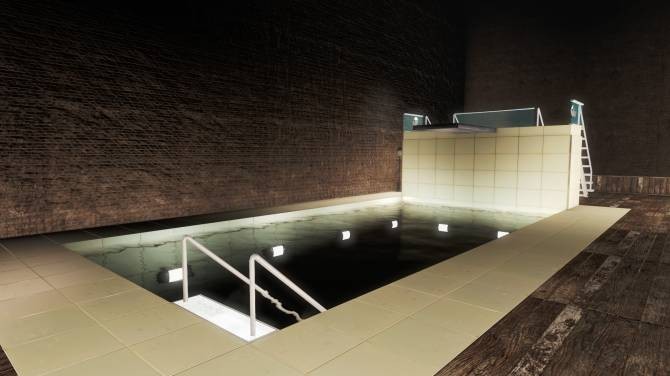
However, in self-planned renovations, hired builders usually don’t bother laying, much less checking waterproofing layers. And, as a rule, they do not have the right to draw up acts (for this you need to have an SRO permit). Therefore, even with a small accident, the water does not remain in your bathroom on the floor, but immediately “leaves” to the neighbors on the lower floor. For those who are planning to carry out redevelopment on their own, it will be useful to know that in most cases it is the occurrence of an emergency that causes the housing inspectorate to find out about your redevelopment.
Subsequently, you will not only pay a fine, but you will also have to repair the consequences of leaks in your neighbors’ apartment. And, of course, if the work was carried out in violation of building codes, then there can be no question of coordinating redevelopment “backdating”, and all expensive repairs will have to be redone.
Therefore, in order to avoid possible troubles, especially if the work is related to the laying of waterproofing of wet areas, it is best to take care of obtaining permits in advance and coordinate the redevelopment in advance with the Housing Inspectorate.

What is the wet palette used for?
Wet Palette is a cheat game for miniature painting.
Clear and simple is one of the very few tools that will immediately improve your painting skills. This keeps your paints hydrated and flowing. This allows you to use paints and have them available within days, ready for your next paint session. This helps with various methods such as wet mixing.
What is a wet palette? A wet palette usually consists of a small container with some form of sponge or paper towel underneath. This will be covered with paper that allows water to pass through and water-based paint is placed on top.
Using water-permeable paper means your acrylic on top will stay wet for longer, keeping it fresh and ready to use. This keeps the paint from drying out quickly, perfect for miniature painting.
This also increases the ink flow and ensures that it stays in use.
For those who paint frequently, there are numerous benefits to using a wet palette. When you load paint onto a wet palette, it will suck some water through the paper, causing the paint to sprout slightly.
For those who regularly use acrylic, you know how quickly it thickens and dries and how important it is to keep the paint thin enough for smooth application.
By using a wet palette at the beginning of your project, you will have a better base of start formation and can work to improve consistency. For many paints, this is the only thinning you will need to do. Of course, this added layer of moisture can also keep your paint wet and healthy for much longer.
When you use a dry palette, you will have to use paint that day, but a wet palette can last days. We’ll discuss next how best to store your paints in a wet palette, but they’re great for creating blends that you want to last.
If you find the perfect mix of paint shades but don’t have time to finish painting a miniature in this seat, a wet palette is a great storage option.
In many cases, if your paint has been sitting in the palette for some time, it can be stirred or stirred to dampen it. While this may not always bring it back to life, it can help rejuvenate some paint.
To learn more about wet palette ins and outs and how they can work for you, watch the video below.
When to use a wet palette?
In many cases, a basic dry palette will work for your painting. However, when you paint your miniatures, there are certain precautions you need to take to ensure that you get the results you were hoping for.
For example, if you’re hoping to just iron a piece, a wet palette is a great option for you.
Using a wet palette to store or mix paint is a great way to get smooth color transitions. The ability to thin mix can give your paint a softer look that a dry palette just can’t achieve.
Using a dry palette offers less flexibility than using a wet palette, but most serious artists use a combination of the two.
Another important time to use a damp palette is if it is abnormally hot in the area. If you are painting outdoors or in a very hot climate, your paint may dry out before you have time to finish your piece.
Having an added layer of moisture underneath your paints can help keep them working.
We’ll go into details about buying a wet palette versus your own, but either way, you’ll need to replace the paper regularly.
You will use the article to mix your paints or hold them, which needs to be replaced often for proper use. However, not all documents will work for this process. You need something that can go through the water without falling apart.
Avoid paper such as wax paper and tracing paper. Oriental paper is not porous, so it prevents the passage of moisture. So, not going to help in keeping your paints wet. The tracing paper allows water, but it is brittle and can fall apart over time.
Best Wet Palette Paper Option:
- Baking Parchment – Can be very easy to find in most supermarkets and shops and is also readily available online (get it on Amazon). Reynolds is a commonly used brand of parchment that refuses to be used in wet palettes. This is an excellent paper for passing over the proper amount of water and yet remaining durable.
- Mud Paper – This can also be found relatively easily around most supermarkets and can be used in a wet palette. It’s also a super inexpensive option and relatively durable.
- sta-wet acrylic paper – Sold for commercial wet palettes, this paper was designed to be used while PA inting. However, many artists don’t use this style of paper and find it doesn’t work well for them.
If you purchase your wet palette from STA-WUT, this might be a good choice for you.
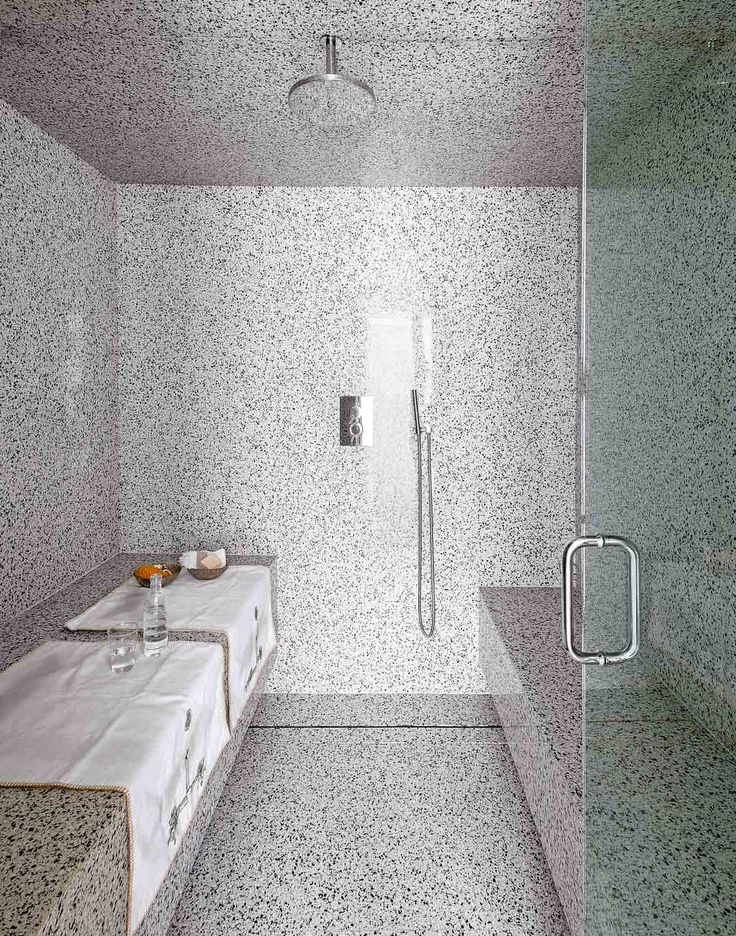 This is an excellent paper for passing over the proper amount of water and yet remaining durable.
 This is a tough question to answer because different paints, papers, palettes, sponges, etc. can affect the overall life of the paint. However, for many paint at least a few days will close the lid properly.
It also depends on how long you leave the palette while you are using the paints; This may cause it to dry out.
To extend the life of your paint a little further, put your palette in the refrigerator. Moisture from the refrigerator and a sponge will keep the paint good for closer to a week.
You can buy a wet palette at most Craft and Paint Stores for about $15 and they are easily found online for that price.
On the other hand, you can make your own palette for $6 or even less since you may have materials lying around your house.
To make your own wet palette, you must follow these steps:
1. Choose a container that is sealed and plastic.
There are several cheap storage containers that can be used, or you can even recycle the container you already have around your house. Amazon has disposable food containers for only a few dollars that work surprisingly well.
2. Decide if you want to use a sponge or paper towels at the bottom of your container. Both work well, but the sponge can hold moisture for longer and can be reused over a long period of time.
- If you choose a sponge, you’ll want to trim it to fit perfectly in the container so it doesn’t bunch up at the bottom. You can find quality sponges for around $1 and just cut it off. You don’t want this to be too thick, as this will fill the container completely and leave little room for paint.
- If you choose not to use a sponge, you can use several paper towels stacked on top of each other. They can be folded to a thicker size and then trimmed to fit the container.
 You can find quality sponges for around $1 and just cut it off. You don’t want this to be too thick, as this will fill the container completely and leave little room for paint.
 Simply place depending on what material you decide to use to keep moisture in the bottom of the container.
3. Next you choose the paper you want to use and cut it to fit the top of the sponge.
As we discussed, there are several options out there, but basic parchment paper is great and super cheap. You will get parchment paper to match the size of the container and place it on top of the sponge inside.
4. Time to add water.
Now that you have the basic sponge and paper container setup, you’ll want to add your water and let the sponge soak it up.
- Some soak parchment paper before placing it on top of the sponge, making it easier to smooth on top of the sponge. However, this is up to preference and you can pour water over the top of the parchment paper wetting it and sponge.
 However, this is up to preference and you can pour water over the top of the parchment paper wetting it and sponge.
 Now your DIY wet palette is ready to use and you can start adding paint on top. To watch someone make a DIY wet palette from start to finish, check out this video.
Maintaining Your Palette Wet
To maintain your wet palette, you will take proper care of it and wash the container regularly. You’ll want to rip out the sponge and clean the container regularly with hot, soapy water.
Rotate the sponge correctly and place it back in the container, changing the paper as needed.
Some even boil the sponge regularly to ensure they remove any impurities. It also reduces the chance of any mold. To further protect the palette, you can use distilled water inside.
Buying a Wet Palette
Of course, if you’re not the DIY type, it’s easy enough to order a wet palette. The most notable choice is the STA Wet Palette, which sells for about $10 online and at most craft stores.
You can store your paint for days or even weeks with this palette, which you can purchase on Amazon.
Small bathroom design and layout
Author Maria Reading 10 min Views 147 Published by
Content of the article
- Wrap your closet in bold print
- Approach your storage strategically
- Add large tile panels to the back wall
- Use mirrors and reflective surfaces on the back wall
- Buy storage space in awkward corners
- light sources
- Define a shower room in a niche
- Replace the cubicle with a floor in wet rooms
- Use a screen to zone the comfort showers
- Buy custom loft style bathroom furniture
- Zone out the bedroom with bathtub flooring
- Liven up the layout with a shower wall
Compact toilets and small bathrooms don’t have to compromise on style or function – we have living proof… Small bathroom design and layout is what we will be covering in this article.
Design ideas for small bathrooms are something we are very good at. From cozy urban restrooms and understairs changing rooms, the need for social and private housing calls for careful design of toilets, showers and bathing areas.
So we’ve rounded up our favorite small bathroom ideas for you. From interior design tips to fool the eye, to corner furniture that can be squeezed into the most sophisticated of spaces, and mirrors that seem to magically enlarge a space, these viable options can help you reinvent your closet.
One of the most important things to consider when choosing a family bathroom is the layout. If you get it right from the start, it will mean that you have a bathroom that is suitable for the whole family.
Don’t think about how you currently use your bathroom, think about how you would like to use it in the future and use that as a starting point. If your layout isn’t quite right, consider how you could make small but effective changes.
Another thing to think about is how you can use your bathroom, which can change over time. Just because you don’t need a bath or shower right now doesn’t mean you won’t in the future, so think carefully about what you might need to protect your bathroom in the future.
While a family bathroom may require a variety of bathroom products, it’s usually critical that a bath be on this list. Freestanding bathtubs are suitable for the whole family, and if space is tight, smaller versions are available, including bathtubs that are 1400mm long.
Save space with a shower over the bath
If you’re arguing with your partner about whether you should have a shower or bath in your own bathroom, it’s entirely possible to have both. In this gray and white color scheme, a ring-shaped shower bar has been installed above the bathtub to offer a two-in-one wash solution.
As you can see, adding a character does not waste valuable space. The colorful shower curtain and chandelier don’t fit into the floor plan. Instead, they give the place a strong personality and height.
Use a very small tub
If the shower over tub solution doesn’t work for you, use every square inch by investing in a roll-top tub in the bedroom.
Cozy and intimate, this small bathtub means you can soak in while your loved ones shower next door. The perfect romantic bedroom idea for the couples we fell head over heels in love with.
Wrap your dressing room in vibrant print
The dressing room is perfect for a quick make-up check before guests arrive, and is also a convenient place for the salesman and others to pee without having to go into your family’s main bathroom.
But if you want your small bathroom to stand out, consider investing in eye-catching wallpapers. Now – don’t worry about the advice that saturated prints can visually reduce the space. Anyway, prominent motifs can create a cozy and intimate scheme, and we think you’ll agree that this Leopard Walk wallpaper from Cole and Sons is wild.
While some camps say a light and airy scheme should be used to maximize space, there is also the notion that a dark design can hide how tiny your toilet really is.
Be strategic with your storage space
Organizing a small bathroom can make it difficult to store all your toiletries and cosmetics. Throw in partner grooming supplies and bath amenities and it can all get a little chaotic.
That’s why it’s important to find the right storage solutions to create a clutter-free space that’s still family-friendly and functional.
In a small room, it’s important to make use of valuable wall space, and with a large collection of modular shelving such as mirrored cabinets, sliding door wardrobes and open shelving, there’s a style to suit any scheme. Add accessories like hooks, organizers and rods to make your bathroom accessories stand out.
Add Large Tiled Back Wall Panels
If you’re looking for tips and tricks on how to make your bathroom look bigger, the good news is you don’t need super-expensive lighting, a CGI studio, or having to remodel your home. . Luckily, large bathroom tiles can create a beautiful backdrop and give the illusion that your bathroom is wider than it really is.
Large format replica marble tiles are currently a major player in bathroom trends, and with good reason.
They provide a smooth finish as their size results in far fewer seams, ideal for limiting mold growth. Also the myth that large format tiles should only be used in large rooms. In fact, small spaces are ideal for them, as oversized tiles can deceive the eye into thinking the room is much larger than it really is, so they are perfect for bathrooms or small showers. Large formats and panels reduce the number of seams, providing a smooth, easy-to-clean surface with less room for mold to form.
The lighter backdrop of the central pink freestanding tub also creates a whimsical airiness in this area.
Use mirrors and reflective surfaces on the back wall
Mirrors can be used instead of windows if your bathroom does not have this feature to create the illusion of space by reflecting light. Ideally, you’ll want a large mirror, but it shouldn’t be so big that it dominates the space. You can always buy a medium sized mirror and consider using a border or patterned mirrored wall tile to increase your bathroom’s reflectivity. You can even go further and opt for an illuminated bathroom mirror to help enhance the illusion of more light and space in your bathroom.
As a design trick, place small bathroom mirrors “facing” the window so they reflect the outside space, letting in the outside.
Buy storage space in awkward corners
Corner washbasins are perfect for a walk-in closet and can be paired with a corner toilet to make efficient use of space. If you have a fairly spacious walk-in closet, then a closely connected closet should fit comfortably. If you prefer to keep everything compact, then our compact wall-mounted toilets and wall-mounted toilets are perfect.
If you have clutter items like bottles of household cleaner, consider adding a dressing table to your dressing room. There are many thin models that are suitable for small spaces.
Boost your mirrors with multiple light sources
If you’re brave enough to choose a dark bathroom scheme, you’ll need to be careful with your small bathroom’s lighting so you can use the space virtually day in and day out. This design by Dunelm pairs a wall sconce with hanging pendants and sits next to a reflective mirror to provide ample task lighting in this small bathroom.
The brass finish of the mirror frame and lights is more than just a glamorous touch.
Designate a shower room in a niche
You may have heard the saying, “One person’s trash is another’s treasure,” and this is exactly the approach that many of us apply to niches. While some homeowners see this as a hindrance, others see it as an opportunity.
So you can only imagine our eyes when we saw this small shower design in the bathroom. Pumice stone wall panels are one way to create a small spa-style bathroom.
Replace a cabin with a floor in wet areas
When designing a small bathroom, you can protect your cozy space by eliminating bulky tubs and cramped cubicles. Instead, you should want to create a wet room that allows you to use the entire floor plan. This chalky dark blue wall effect is the perfect balance of modernity and elegance.
Use a screen to zone comfort showers
In addition to preventing water from splashing everywhere, the shower panel can act as a divider to separate areas of your small bathroom.
The divider also means that you have the option (if you wish) to create two spaces with different decorations. For example, on the left is a modern white scheme with a small overhead bathroom (clever!), while on the right is a biophilic but slightly industrial concrete jungle with no clutter.
Buy Bespoke Loft Bathroom Furniture
If you want to make the most of a relatively small space, you might want to build the entire design around the shower. Curved shower enclosures are a great solution for non-traditional spaces, but for those looking for a modern edge, walk-in shower enclosures have a wide range of uses and fixtures.
Sloped ceilings in most lofts offer both challenges and opportunities when it comes to storage. Installing bespoke cabinetry to complement the flow of a room can be effective but expensive, while judicious use of items such as a toilet and sink can offer practical solutions that look fantastic no matter the design or size of the room in which they are.
Zone the bedroom with a bathtub flooring
If you have a small bathroom layout that only has room for a shower, but you are lucky enough to have a large bedroom, create a bathing nook in your boudoir.
Creating a separate space couldn’t be easier. By using a waterproof bathroom floor contrasting with carpet or laminate, you can create a beautiful bathing backdrop. We love this trendy design featuring geometric gray and white tiles, a large bathtub, a striking black faucet and a gorgeous bathroom vanity.
Liven up the layout with a shower wall
When it comes to bathroom paint ideas for small bathrooms, interior experts often tell us to go for pale and neutral hues to play it safe.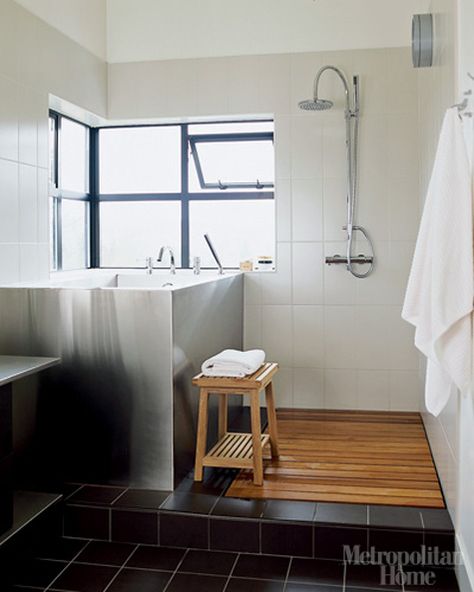
But, if you’re looking to add some interest and femininity, a floral shower wall can add a whimsical twist to your small bathroom and draw attention to the back of the room so you and your guests can immerse themselves in it. and the breadth of your bathroom.
This tile design is perfect for tenants who are afraid of commitment. If you get bored with the motif, you can remove the patterned plates and replace them with plain plates.
Photo by shawnanggg on Unsplash
Bookmark
Platforms in Sims 4 – how to create, design and use effectively
1. How to build a platform?
Platforms are in the Build tab, in the section with walls.
platforms in Sims 4
Please note that in the same section on the right in the vertical row, another subsection has appeared, which we will consider later in this review.
In the section with walls there are ready-made platforms of various shapes.
Types of platforms in Sims 4
But you can build your own. Among all the tools we already know for creating walls, rooms, basements and terraces, there is now another one that allows you to create platforms. It works according to the already familiar principle – put the cursor, stretch it, release it.
Platforms in Sims 4
The length and width of the platform changes in the same way as in any room – using the side arrows. If you drag the vertical arrow in the center, a foundation will appear under the platform.
Platforms in Sims 4
There are now two new arrows to adjust the height and depth of the platforms.
Platforms of different heights in Sims 4
Press the “up” arrow – raise the platform, press the “down” arrow – lower it. Everything is as simple as possible: one click is equal to one level.
Platforms of different heights in The Sims 4
2. How do platforms interact with existing building tools?
If you put the platform in the room close to the wall, then the part of the wall that is in contact with it will disappear, and it will have to be rebuilt.
Platforms and walls in The Sims 4
An important point: the walls are placed along the platform, but the fences are already on the platform itself.
Platforms and fences in The Sims 4
At the same time, columns can be both ways. If the column is placed on the edge of the platform, it will stretch along it. If the cell retreats deeper, then the column will adjust to the new height formed between the platform and the ceiling.
Platforms and columns in The Sims 4
the roof, alas, denies its existence.
Sims 4 platforms and roof
Platforms also don’t interact much with pools and fountains. They cannot be placed on a platform, and a platform cannot be placed in the middle without a room to support it from below. The maximum that can be done is to place the platform right next to the pool or fountain.
The pool ladder and springboard, like the roofs, ignore the presence of platforms, but if you enter the code bb.moveobjects and use the Ctrl + 9 combination, then these items will become functional.
Platforms and pools in The Sims 4
True, visual bugs are possible here with the Sim hanging in the air after jumping off a trampoline or descending from a ladder.
Platforms and pools in Sims 4
But the stairs are placed both to the platform and on it.
Platforms and stairs in The Sims 4
Windows are installed by default at least platform level.
Platforms and windows in The Sims 4
But when using the bb.moveobjects code, they can be omitted. True, the result will not be very pretty. So it doesn’t apply in all cases.
Platforms and windows in The Sims 4
The situation is the same with doors – they automatically align to the highest plane.
In this case, the platform raised or lowered one level is read for the Sim as one step and is not a problem when moving.
Platforms and doors in The Sims 4
However, if the level of the platform is changed to two or more, you should take care of the stairs, otherwise the Sim will not be able to move normally.
Platforms and doors in The Sims 4
3. Valid Height
Walls have three heights in the game. In the table below, you can clearly see what is the maximum height threshold for a platform with different walls, as well as at what level of the raised platform it will be comfortable for an adult and a child.
| Wall height | Number of lifts platform to ceiling |
Maximum allowed platform height | 5 | 50003
However, oddly enough, in the apartments of San Myshuno and Evergreen Harbor, a platform or an entire floor can be lowered down, but only 2 levels. Whatever the height of the platform, it is not considered a separate room if it does not have full walls. So, if you create several levels within the same room, Sims will be able to completely calmly communicate with each other, watch TV, dance, smell cooked food, vividly experience a feeling of resentment or closeness to another Sim, and so on and so forth. However, if you try to save a room with platforms to the library, they will already be considered separate rooms, which can be somewhat inconvenient, because. stairs will be lost. 4. Design and decor of the platform If everything is clear with the floor of the platform – it is also painted with flooring, then questions may arise with its sides. There are two options here: 1. Together with the advent of platforms, the developers have also expanded the number of partitions, so there is a suitable level for any platform height. Platforms and Partitions in The Sims 4 Partitions are placed along the perimeter of the wall and painted with a suitable wall covering. In this case, the ladder will not fit closely, and it will be possible to install it with an indent of one cell, which may not always be convenient. Platforms and partitions in The Sims 4 Also, two visual bugs will not be out of place here. In the screenshot above, you can see that the wall in the area of the platform is kind of highlighted, while the area around it is, on the contrary, darkened. Unfortunately, at the moment this cannot be changed by any number of light sources. The partitions set the shadow around the platform, and it doesn’t matter what height they are, but only the partition that corresponds to the height of the platform illuminates the wall. 2. In addition to the platforms, there are also curbs in the game. They are located in a new subsection of the walls. Borders in The Sims 4 There are 26 types in total, and each has its own repainting options. Only a few of them are shown here. Borders in The Sims 4 Borders differ not only in color and texture, but also in the presence, however strange it may sound, of the borders themselves. Borders in The Sims 4 With a border, the platform looks no less interesting and, importantly, in this case there are no problems with lighting, and the stairs can be placed both close and indented into the cage. Borders and platforms in The Sims 4 5. The practical use of platforms Having dealt with the technical aspects, it’s time to move on to the creative moments. Sims 4 Komorebi Platforms Example The Sims 4 Komorebi Platforms Example
The Sims 4 Komorebi Platforms Example The Sims 4 Komorebi Platforms Example Exteriors also have something interesting. For example, rooftops. Yes, yes, now, thanks to the platforms, our modern-style houses can become closer to reality. Flat roofs will no longer be so flat and can have several levels. Now you can say goodbye to unnecessary tricks in trying to visually increase their height. Platforms and flat roofs in The Sims 4 Platforms and flat roofs in The Sims 4 Stairs are the same story. Complex stairs and platforms in Sims 4 With the most obvious and obvious options for using platforms sorted out, now it’s time to move on to a small selection of ideas created specifically for this review. Let’s start simple – from the stage. Sims 4 theater platforms Previously, to build a stage, you had to sacrifice a foundation. Remember our tutorial on creating different levels of rooms in The Sims 4? It is still relevant in some cases, but still this method was not always convenient and introduced a number of limitations. Platforms when building a stage in The Sims 4 And not only the stage. If you continue to develop this idea further, then in this way you can make a podium for a variety of purposes and scenarios. Sims 4 podium building platforms Sims 4 podium building platforms Or a pedestal for a statue. Platforms for the construction of a pedestal for a statue in The Sims 4 Also good decorative flower beds come out of the platforms. This is very helpful if the debug beds from the base game don’t suit your size, shape, or border color. Platforms for creating decorative flower beds in The Sims 4 In creating your own fireplaces or, for example, entire altars, platforms can also play a role. Platforms for building decorative fireplaces in The Sims 4 Platforms for building altars in The Sims 4 Now, if a clawfoot bathtub is not enough for you, you can always put it on a raised platform. Sims 4 Bathtub Platforms Add niches by creating imitation cabinets with shelves for storage. Sims 4 Bathroom Platforms Visually separate the shower from the rest of the room by raising or lowering the wet area by one step. Sims 4 Bathroom Platforms For those who dreamed of low beds and mattresses on bare floors, this option is now available. Sims 4 Bedroom Decorating Platforms Sims 4 Bedroom Decorating Platforms It’s not difficult to repeat this maneuver.
Sims 4 bedroom decks Sims 4 Bedroom Decorating Platforms With this simple trick, you can decorate many things in a new way. For example, create a new shop or plant it in flower beds. Sims 4 interior platform ideas Sims 4 interior platform ideas By the way! If you are now wondering how these banquette backs were made, then I recommend watching this tutorial: Sims 4 Building Tricks with T. By zoning space with the help of platforms, you can create a secluded sleeping place in the room. Sims 4 Interior Platform Ideas Sims 4 Interior Platform Ideas Or share one room between two owners. The Sims 4 Floating Interior Ideas And the smallest apartment in San Myshuno, home to future great writer Salim Benali, can be turned into a two-level loft while still technically staying within one floor. Sims 4 interior platform ideas Sims 4 interior platform ideas Well, if you have long dreamed of a multi-level house with passages and galleries, know that this is now also feasible. Sims 4 split level house ideas Sims 4 split level house ideas Same as the kids bedroom house. Sims 4 9 Interior Platform Ideas0003 Sims 4 Interior Float Ideas Playing with different levels of Floats to create a cozy patio with pool Ideas for using platforms in the interior of The Sims 4 or the cinema hall. And to illuminate the steps, use the “Illuminated Stairs” from the addition “The Sims 4 Get Famous”. Sims 4 Interior Platform Ideas Stairs! Where without them? With the help of platforms, you can create a flight of stairs on the floor. Sims 4 Interior Platform Ideas Or your own stairs. Ideas for using platforms in the interior in The Sims 4 Purely theoretically, the platform tool can also be used to create a spiral staircase, which will never be brought into the game. Sims 4 Spiral Staircase Platform Ideas Secondly, the Sims sometimes get hung up or fall into the stairs a bit on the stairs. You can partially avoid this if you make more steps. Partially. Ideas for using platforms for a spiral staircase in The Sims 4 And thirdly, no border for painting steps will completely hide sharp corners. And some of them will highlight these corners even more and will stick out even through the walls. The Sims 4 Spiral Stair Platform Ideas Well, that concludes our review. I tried to disassemble the new building tool as broadly as possible, however, the examples given in the review are only a small part of how platforms can be used. Transfer of the wet zone in the apartment. All aspects.2. Legalized redevelopment of the bathroom.
1. Transfer of wet areas in the apartment – all the nuances and features.1.1. Enlargement of the bathroom due to the corridor.Transfer of the wet zone in the apartment – permission (clause 1.6). Such work during the redevelopment of an apartment, such as an increase in the wet zone due to a corridor or other non-residential premises, is not prohibited by existing regulations.
1.2. Expansion of the bathroom due to the kitchen or room.
According to them, any wet zone inside the apartment (expanded or arranged additionally) should not be located (even partially) above the living quarters of the apartment, which is located on the floor below. Since the officials automatically consider that the layout of the apartment below completely coincides with the layout of your apartment, you, therefore, cannot climb into the living rooms and kitchens with wet areas when repairing an apartment. Even when performing appropriate waterproofing in the floor of such premises. Of course, from the point of view of logic, it is not entirely clear why it is possible to transfer wet areas in an apartment to non-residential rooms, but not to residential ones. Transfer of a bathroom or its extension to a living area can only be done if there is no other apartment below you, but there are offices, shops, basements, and so on. 1.3. Re-planning of a bathroom – coordination under the project.Redevelopment of a bathroom with an extension due to the corridor – permission (clause 1.9). Any change in the location of the partitions of a bathroom or toilet is considered a redevelopment of wet areas and requires the appropriate permission for the redevelopment of the project. This requirement is given in paragraph 2.2.1 of App. No. 1 to the Post-tion of the Government of Moscow No. 508. The redevelopment project must be ordered from the design bureau, which has the necessary SRO approval (permit) for its implementation. 1.4. Waterproofing of wet areas.
Of course, it is extremely rare for any of the owners to fulfill these requirements so as not to stumble over the threshold or floor step. Video comment: The exit device from the wet zone to the room or kitchen is now legal, since SanPiN, which previously prohibited this, was canceled from 03/01/2021. 1.5. Redevelopment of the bathroom in the apartment – the location of the entrance.
True, it’s probably not very pleasant to eat in the kitchen when someone enters it directly from the bathroom. I’m not talking about smells. But it already depends on the wishes of the owners. From a legal point of view, the main thing is that it is allowed. At the end of the article, we will come up with several coordinated redevelopments of bathrooms and wet areas. We also advise you to read the article on the design of redevelopment. 2. Legalized redevelopment of the bathroom2.1. Redevelopment – expansion of the bathroom.Before renovation. After renovation. These photos show a fairly typical redevelopment of bathrooms. Both bathrooms were expanded due to the corridor. At the same time, the entrance to the kitchen was provided from the room. Thus, it was possible to obtain quite spacious bathrooms by modern standards due to the less usable area of the corridor. 2.2. Remodeling of a bathroom in a panel house.Before redevelopment. After redevelopment. Above is another redevelopment of an apartment with an impact on the bathroom in a panel house of the KOPE series. Here, too, the wet zones were expanded with a corridor, and the entrance to the kitchen was made from the living quarters. 2.3. Redevelopment of a bathroom in Khrushchev.Before conversion. After conversion. In Khrushchev, the most common type of impact on wet areas is to increase the bathroom due to the corridor leading to the kitchen. In Khrushchev, unlike panel houses, the wall between the kitchen and the living room is almost always non-bearing, and therefore it can be completely dismantled. True, if the stove is gas, then sliding doors must be installed in place of this partition. 2.4. Relocation of a bathroom.Before redevelopment. After redevelopment. In this case, the bathroom was moved to the corridor. More precisely, we can say that due to the area of the corridor, a second guest bathroom was arranged, while in the dimensions of the former wet areas it was possible to make one large one. 2.
| |
|---|---|---|---|---|---|


 Where and how can this new tool be applied?
  Desperate builders, who previously had to accurately calculate the area to accommodate their chic and unusual stairs with the help of a foundation and a shovel, can now breathe a sigh of relief. This tool opens up many opportunities for them to fly their fancy without preliminary dancing with a tambourine, and as a result, the stairs are a little more compact, which is especially important in small areas.
  For example, the inability to build a stage above the first floor. Now there is no such problem, you can place your stage on any floor with a clear conscience.
 Here is one way how to do it:
  O.O.L.
 However, this option has some disadvantages that can not be hidden or beaten in every idea. First, it turns out to be quite bulky. But all of us, in the past series of The Sims game, appreciate and love the spiral staircase, including for its compactness.
  So share your options and finds, they can always be discussed in our creators room.
  It is necessary to carry out such work after obtaining the appropriate permit for repairs.
  After all, if you flood the corridor below the neighbor, and not the room, then it will not be easier for him. But, unfortunately, we have such laws, and in order to agree on redevelopment, they must be followed.
 However, recently the inspectors of the Housing Inspection began to find fault and pay attention to this much more often, and therefore we recommend that you still install the threshold. In practice, we had a case when the owner of the apartment, after dismantling the threshold, had a water leak in the bathroom. She leaked out of it into the next room, so I had to redo my repair and the repair of the neighbors below in much larger volumes than if it had stopped due to the threshold within the bathroom. The owner himself admitted to us that now he regrets that he did not leave this threshold. Another way to prevent the occurrence of such situations is to install a water leakage control system that shuts off its supply in the event of a leak. Now they have become quite affordable.
  1104 of December 29, 2017. No. 1572 dated 12/17/2018 and No. 1335 dated 08/19/2020.
 There was enough space in the corridor to complete the bathrooms, although not very spacious, but still separate.