Planning an extension to your home: A Step-by-Step Guide to Planning Your Home Extension
Thinking of Extending Your Home? A Builder Shares 10 Things You Should Know
Posted Monday, January 23, 2017 in:
Guest NerdObsessed WithBefore & After
In my job I continually meet people who say they have always thought about extending their home – but for some reason or other they hesitate to take the first step. Often they find it daunting because a) they presume that getting a quote for such a big project will be a nightmare in itself and/or b) they presume it will be out of their budget anyway. Or c) they’ve heard an extending horror story from friends and now they’re having reservations.
With close friends of mine now wanting to jump on the home extension train, I thought it would be timely to do an informative post on what you need to know about extending a home – and to get the lowdown from a reputable builder who’s done it many a time.
BEFORE
AFTER: A Floreat character home Exactus renovated.
I asked husband-and-wife team Ralph and Sandra Brewer of Exactus Homes if they would do this with me and they were more than happy to oblige. Ralph is the owner and director; Sandra is their marketing manager. I met these guys years ago while I was writing stories on houses for the paper and have always admired their high standards and their lovely houses.
So let’s bust some common myths about extending a house.
1. Don’t be put off the by the idea because you find the prospect of getting quotes daunting – some builders can give you ballpark figures.
As a freelance writer and blogger, sometimes it is tricky for me just to quote for a blog post that requires a slightly more complicated brief than usual. So I completely understand why some people find it baffling that a builder can give a quote for something as big as a home addition! How can somehow just pop over to your house, listen to what you want to do to it and give you a rough figure for something so BIG?
Well, there are experienced builders who will be happy to give you a rough idea of costs at first – you can then get a more detailed estimate later (this one usually at a fee, as it requires a fair bit of work). Ralph says it never hurts to ask – you may even be surprised to find out what is achievable for your budget. “Many people are reluctant to contact a home extension and renovation builder because they don’t know what their renovation will cost,” he says. “We understand that it’s nearly impossible for a prospective client to understand the costs of renovating, so we are here to help you.”
Exactus have actually created a guide to their typical costs of renovating based on houses they’ve renovated in Perth’s western suburbs, including Floreat, City Beach and Doubleview.
A COSTING CASE STUDY
Not all builders’ quoting and costing processes operate the same way, but here’s an example from Ralph’s team. Ralph says they recently quoted to extend a 1975 house in Perth (not the one pictured). It had three bedrooms and one bathroom and would be an extensive renovation project. The owners’ design brief asked for numerous things. They wanted a larger bedroom for their main suite, a luxurious bathroom that would take them into old age, extensive robes to the bedroom, and to replace the old glass sliding door in the living room with stackable sliding doors to bring the outside in. The plan was to extend the back of the home.
Ralph says his process is to first give the client an approximate cost estimate for what they want to achieve before going any further. “This enables them to determine if it’s in the ballpark,” he says. “It also enables them to assess the subsequent value of their home for their future equity.”
Once the client was happy with the approximate cost estimate, Exactus drew up a Preparation of Plans agreement, which requires payment of a small fee deducted from the cost of the home extension project when it proceeds. The fee covers the cost of the Exactus team’s work designing plans, includes some pre-construction costs and requires a bit of back-and-forth to make sure the plan is what the clients want and fits within their budget.
They then give a detailed costing of the building project and specific costs – everything from concrete works to water-proofing – in the home extension quote. The total cost of this project was $106,077 + GST.
2. It will probably take longer than you initially think.
I work as a contractor/freelancer and I have lots of friends who are also freelance or run their own small business, so I know I’m not the only one who this happens to. There have been times where I have quoted for a job, only to get a reply going, “Great! Can you write it tonight and send it to me by first thing tomorrow morning?” Um, I’m afraid I can’t.
It is funny how so many people imagine you will have a clear work schedule ready to begin and complete a project at the drop of a hat. Just like freelancers and contractors, most builders generally require some time to schedule your project into their calendar. But not only will they need to make time to slot in your project, there are other things that also need time to be sorted out when it comes to extending or renovating a house, says Ralph.
“Sadly for people who contact us in November, hoping to have their renovation done by Christmas, it’s usually bad news,” he tells me. “There’s quite a bit of planning that goes in to a home extension or major renovation. Firstly, you need to get an idea of what it will cost for what you want to achieve. This is something we give all prospective clients in our building process. Once you are happy with the approximate cost, our draftsperson or architect will draw up your plans.”
Plans are also often needed from engineers and other specialists as well. “Estimating a home extension takes a few weeks too, as actual quotes are sought from the myriad of trades that are involved in the project,” says Ralph. “Then if council permission is required, it will add time for their review and approval. Only then can a building project get underway – our clients agree, building feels like the fastest part of the process!”
BEFORE: This City Beach home received an Exactus extension.
AFTER. All house photos from Exactus Homes.
3. It is best to be upfront about your budget and limitations with your builder.
Exactus Homes marketing manager Sandra Brewer says it is beneficial to all parties involved when home owners are open, rather than restrictive, about their finances and budget limits. “Whilst you might have reservations about sharing your finances with a builder, it works to your advantage if you are willing to discuss your budget,” he says. “After all, we are here to work with you to get the most value for your money. It’s sensible to have a limit, and then the home improvement can be designed to fit the financial budget you’ve set.”
Ralph, Sandra and the Exactus team.
4. A builder or designer might come up with a new design to extend your house that you hadn’t even thought about.
You might have lived in your house for years and have an idea of how you’d like your home addition to be laid out. Maybe you’ve even done some drawings and sketched out a few extra rooms. But I often find many people are pleasantly surprised when they get in a fresh pair of eyes in the form of a visit from an architect, designer or builder. Often a fresh pair of eyes can envision new plans you would never even have thought about.
Ralph says there are endless ways to design a home extension. “In fact, when we first visit clients and listen their ideas, we will often suggest an approach they’ve never thought of before,” he says. “For example, we had a client’s home on a corner block in Wembley Downs. We suggested moving their driveway from one street to the other, effectively gaining them over 50sqm of living space on the valuable northern side of the home. They were stunned – they had no idea their driveway could be repositioned.”
5. Be prepared that it can take a long time for council to approve your plans.
I have lost track of the number of home owners I have interviewed, even home owners who are designers and builders themselves, who have decided to extend or renovate with a deadline in mind, such as before a baby arrives – only to find that the house is nowhere near finished when the deadline comes up or the baby arrives. (That was kind of like Mr Nerd and I).
Kitchen reno in progress! The new brick wall on the right marks our new walk-in pantry/scullery, and the 70s arches are gone – along with my old oven and stove. Mr Nerd spent hours drilling off the old plaster. Now we await the IKEA kitchen installer to come out and do a final measure, then we book in a benchtop installer and hunt for new splashback tiles. I am sooo looking forward to the last of the brick dust and alphabetising my spices ???? #renovating #kitchen #IKEA #home #makeover #bricks #scullery #igers #woodgrain #70s #interiordesign #crapshack
A photo posted by House Nerd | Maya Anderson (@housenerd) onMar 7, 2015 at 4:12pm PST
These days there are more regulations than ever when it comes to renovating and extending houses (especially if you are working on a heritage-listed home, or planning a renovation or extension that deviates from the norm in your street).
Local councils are heavily invested in any changes that happen in their local community and Ralph says there are many rules that home renovators have to comply with. “A lot of the rules relate to impact on the neighbouring houses,” he says. “You might be surprised to know that where you once had a window positioned in your existing home is no longer allowed in a new renovation. The only solution is to work within the guidelines and to choose a builder who has experience in dealing with your local Council Planning department and the Residential Codes.”
6. You are making an investment – so try not to feel too guilty about the cost!
You are building an asset when you renovate or extend, says Ralph. “Most of the money we spend on lifestyle accoutrements depreciates quickly,” he says. “For example, a new car is a lovely thing to have, but it will quickly lose value. A holiday is a great experience, but you are really just left with memories (and maybe a credit card debt!). A well-designed home extension is one of the few expenditures you can make that will give your lifestyle AND assets a real boost. It’s not money wasted, it’s money well spent. We can safely say we’ve never had a client regret their home extension project.”
7. Why would I renovate or extend when it seems like I could build a whole brand new house for the same amount? There are reasons.
If you have ever flicked through the weekend paper you would have noticed ads for new homes that can be built for about $160-250,000 (and sometimes less). Meanwhile, quotes to do an extensive addition and renovation to a house can easily come to $250,000.
So it’s natural that people often question, ‘Why would I renovate or extend my home when I can just bulldoze it and build a whole new, four bedroom, two bathroom house for the same amount?’
There are arguments for both scenarios and it is up to you to decide which one is right for you. But the main reason project homes are relatively affordable is because they are building hundreds (sometimes thousands) of the same home, so materials and fittings can be bought in bulk. A renovation or extension is bespoke. They also tend to be more difficult to do (unlike a cleared block, builders have to work around existing restrictions, the house may be hiding problems, and so on).
I do agree that in many cases, say if a house is in really bad condition, demolition is the right way to go, but as you guys can probably tell from my blog, I personally have a soft spot for renovations – I love being wowed by a great before-and-after. Some of the pros of renovating or extending rather than demolishing include that you get an original, one-of-a-kind home, you often can keep the character of the older home, and many older homes have lovely features and history that are often a shame to lose. A lot of 1960s, 70s and 80s homes are really solid and have great bones.
8. You’ll need to decide whether or not you’ll live in the home during the work.
When I was growing up, we lived in our 1950s house through two big extensions, one a rear extension and one a second storey, and it was probably a pain for our parents but we thought every little thing about it was so exciting.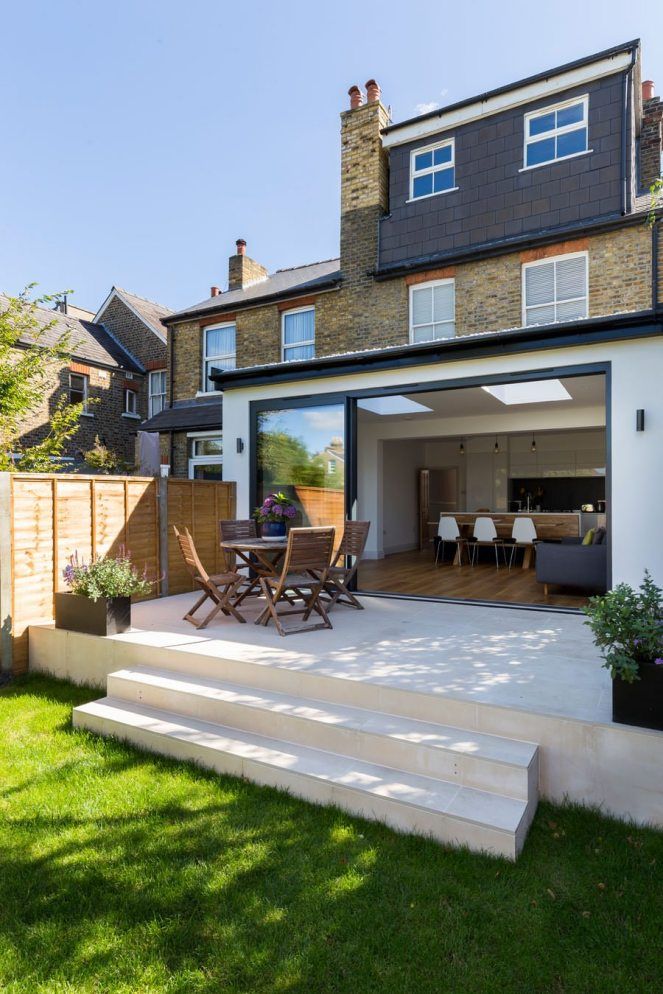 (Heaven was a big pile of builders’ sand dumped on the verge that we were told not to play with and so of course did). My dad told me how one day my sisters and I were playing in the front garden (probably being nuisances) and one of the builders was walking up the house with a ladder on his shoulder whistling. Dad warned him to be careful that he didn’t take out one of the children. “Why? Just make another one,” the builder said cheerfully (and rather brutally) and sauntered back into the house.
Living in a renovation – especially when there are kids in the house – can be hard for both parties, the home owners and the builders. I know many people who have lived in a renovation and survived, but I also know many people who say they would never, ever do it again!
I personally definitely won’t forget living in our house while we renovated the kitchen, created a walk-in pantry and knocked out our 70s arches – while I was pregnant and hormonal too! (You can read my diary of an IKEA kitchen renovation here).
The biggest and most obvious reason to stay put in your home through a renovation is to save time and money that would be spent on renting, says Sandra.
“Having to find an appropriate property, move your possessions, deal with rent inspections; it’s enough to put anyone off even before you factor in the cost of a decent rental property in Perth!” she says. “Of course, there is the alternative of moving in with family. But in some cases this can be more annoying and stressful than living through the renovation in the first place.”
There are pros and cons. “If your renovation timeline is hard to estimate, you’ll be happy you stayed in your home,” she says. “There would be nothing worse than getting kicked out of a rental property only weeks before your own home renovation is completed. By living-in, you get to see your project come to life and admire the daily progress. This can make the process more exciting as you get to be more directly involved and learn things along the way. ”
”
The cons? “If you are a clean freak, there is no question that your nerves will be put to the test,” says Sandra. “Some aspects of cleanliness in construction can be managed, like throwing rubbish away and leaving a tidy, contained worksite. Exactus works hard to ensure we are as tidy as possible, cleaning up as we go. However, other by-products of renovating are harder to control, like sand and dust making its way into living areas.
“Another downside to living onsite is the inevitable noise of drilling, banging, sawing, etc. that is often encountered daily. As building hours are restricted to between 7am and 7pm, and with most builders being considerate of the routines of live-in renovators, the impact of noise can be minimised. However, if you spend a lot of time at home with children or working from home, then you may find noise to be a big drawback.”
Nala and I are at home; excitedly awaiting the designer from @ikeaperth coming to measure and quote for our new kitchen to get it done in time before the baby arrives (I hope!) #renovating #home #nala #housenerd #kitchen #interiordesign #bump #sevenmonths
A photo posted by House Nerd | Maya Anderson (@housenerd) onMar 2, 2015 at 11:22pm PST
Access to some kind of kitchen and bathroom are also fairly essential. “Unless you don’t mind showering in the sprinklers and eating vegemite sandwiches for dinner throughout the duration of your renovation!” says Sandra. “And with different tradesman coming and going from your home at any given time, you’ll also have to say goodbye to your privacy for a little while.”
9. You may well get addicted to the renovation process.
I have met many people who seriously get addicted to renovating. No sooner than the furniture has been put back and the pictures hung than they want to do it all over again… and again! Sandra says there are really enjoyable aspects to renovating and extending your home. “There’s decisions to be made about colours, tiles, finishes, fixtures, appliances and décor,” she says. “For those of us who love browsing through home magazines or pinning away on Pinterest, it can be an exciting time to make your own home selections!”
You can check out House Nerd on Pinterest here.
“If the thought of choosing every aspect of your home interior design fills you with fear, it’s a great opportunity to involve an interior designer for a bit of guidance. At Exactus we can introduce you to a design consultant to do a bit of the running around and make recommendations for you.”
10. A well-designed renovation and extension will be worth the upheaval and stress – and improve your day-to-day life.
I am all for embracing what you have and trying to like the home you have – especially if your current circumstances mean you can’t change what you have (ie: you’re living in a rental, your financial situation is tricky, etc).
That said, I know how much an improved (more organised, more functional, more attractive) home can make you happier and feel more calm. Like when we finally renovated our floors. I cannot tell you HOW much nicer it is coming home to nice floors after living with ugly flooring for years. Sometimes you don’t realise how much an unsightly or poorly-designed room or home feature drags your energy down until you fix it. But then I also know what a quandary it can be to go “If we do this, that’s going to cost x. Will it be worth it?”
When we renovated our old 70s laundry we planned it bearing in mind that the room would one day double up as a baby bath area and change table. Benchtop for a change area, shelves for nappies, a semi-industrial look that we could layer over time and a big tub for the baby. We also bought a @dorfaustralia Vixen mixer which has been the BEST thing for baby baths because of the extendable hose – so practical and easy for quickly rinsing off a grubby baby or cooling him off in the summer. We liked it so much we later bought the same mixer in sexy matt black for our kitchen reno. So when @dorfaustralia asked me earlier this year if I would like to collaborate with them I was stoked as I already knew and loved this brand. Right now on House Nerd I’m featuring 10 tips for achieving gorgeous industrial style in your home with an interview with Dorf collaborator and industrial designer Yu Guang. Stay cool in the heat guys, just like Little Nerd ??????????????? #renovation #home #pocketofmyhome #laundry #baby #eightmonths #dorf #yuguang #industrial #bath #blogger #igers #interiors #housenerd
A photo posted by House Nerd | Maya Anderson (@housenerd) onFeb 16, 2016 at 10:54pm PST
I think almost all of the time – yes. Our our own renovating efforts (like our laundry, above) have been stressful, but the payoff has always been more than worth it. Your day-to-day life will be improved with a better-designed, more functional home and it is beneficial to remind yourself of this when you’re in the planning stage (or ankle-deep in nasty brick dust!) “The benefits of extending a home can often be overlooked when in the nitty-gritty of budget planning and getting building quotes,” says Ralph. “Doing a renovation or home extension gives enormous benefits for everyday living, making each day happier and enjoyable for everyone.
“Just imagine a beautiful new kitchen space, with room for everything and everyone, designer benchtops to admire and a place for the family to congregate.
“Or storage room for everything (including unsightly school bags out of the way), brand-new bathrooms that always look clean, windows and doors that open and shut smoothly, that lovely new home smell! You’ll forget the pain.
“Any major home extension is going to require a bit of inconvenience. Whether you move out or live through the renovations, you’ll experience a bit of pain, even if it is just a sandpit for a backyard (for a while) or dust from tile cutting. But once it’s done, all the little irritations will be forgotten and your new lifestyle begins!” Maya x
Thank you to Exactus Homes for doing this story with me! You can see visit Exactus Homes at their website here, or follow them on Facebook, Pinterest or YouTube.
Enjoyed this advice? You can keep up-to-date on our other advice stories and check out inspiring home renovations by following House Nerd on Facebook, Instagram @housenerd, Pinterest, Twitter @HouseNerd_ or Bloglovin.
Tweet
Home extensions 101: What you need to know about extending your property
Thinking of adding a home extension to expand your lifestyle?
With property prices still at a premium and the cost of moving by no means small change, more of us are choosing to add a room rather than sell and move. If you are still undecided you may want to weigh up the pros and cons of staying put and renovating or selling up.
The big advantage of renovating and adding a home extension is that you get to stay in an area you have grown to love. Practical aspects such as keeping the kids in the same school and having access to local amenities you are familiar with also count for a lot.
You also get to design the extension to suit your lifestyle and needs, and add specific features or fittings you really want.
Why extend your home?
It’s pretty obvious when you need to extend your home if it is bursting at the seams. This often happens when you start to have a family, or add to the family – so one child becomes two, or three or even four. You may not want your kids to share a bedroom – or they may simply dislike each other intensely and refuse to share.
You may also be living in an older home which only has one bathroom and are sick of the morning queue and bickering that comes with this unfortunate state of affairs.
Besides these obvious push factors, you could also be motivated to:
- Convert some or all of your home to an open plan layout
- Reconfigure the internal floor plan to maximise space
- Increase available storage
- Introduce more natural light
- Move your living areas to the rear
If you have decided to stay put then one of the first questions you need to answer is how much your house extension projects are going to cost?
Factors that impact the cost of a house extension
The first thing to know when it comes to house extension costs per m2 is that bathrooms are the most expensive to build followed by kitchens, living areas and bedrooms. Why? Bathrooms have a lot of plumbing and electrical work, besides all the fittings and fixtures you come to expect in a modern bathroom.
If you are looking for a cost effective way of extending your home, into another bedroom or living space, then a garage conversion is probably the best way to achieve this. A builder can work with the existing structure and convert this space into a practical addition to you home, giving you valuable new living space.
Before we start looking at actual costs, which should be taken as a guide, let’s first go over all the factors that will determine the final cost of your home extension project, specifically:
- The size of your home
- If you are adding another floor
- The type and quality of materials you choose
- The appliances and fittings you choose
- The cost of permits and red tape
- The cost of external professional advice, such as a land surveyor and/or engineer
In addition, other practical considerations you – and your builder – need to think about include:
- Site access, including available parking and truck access for the builder
- The aspect of your site site – flat, slight fall or steep
- How much demolition work is required
- If any excavation is required
- If you need to budget for hazardous material removal, specifically asbestos
Now let’s look at some numbers.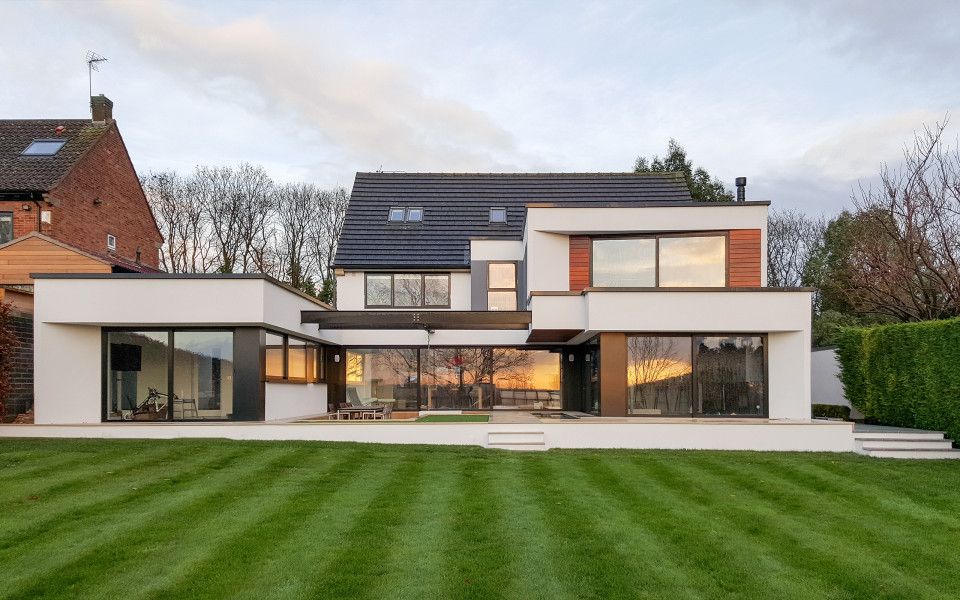
How much does a house extension cost?
According to assessment experts and design architects Archicentre Australia, an extension to an existing building could cost from $1,900 to $3,600 per square metre.
“According to Archicentre Australia, an extension to an existing building could cost from $1,900 to $3,600 per square metre”
This ballpark figure assumes, ‘good access to your site and no major structural upgrades’, and the wide range can partly be explained by the scale of your project, the materials you choose and the individual builder you hire.
In terms of materials, it is important to know that a timber frame extension is cheaper than a brick veneer extension, while double brick is the most expensive option.
If you are adding a wet area as part of your extension then you need to add the following to the above building costs:
- Bathroom/en-suite: $12,000 – $28,000
- Kitchen: $15,000 – $40,000
- Laundry: $6,000 – $15,000
If you are adding a second floor extension to your home – which includes stairs, any structural work to the existing structure and roof – then you need to budget for a lot more; as much as double the quoted costs above.
However, Archicentre also points out that, ‘larger works can achieve a more economical price per square metre’, which sounds counterintuitive but is often the case.
In terms of specific fees for professionals, you may also need to budget for a land surveyor, a soil report and a structural engineer. And in case anything unforeseen happens – like discovering asbestos in your ceiling, it is wise to add a 10 – 20 percent buffer to your budget.
How much extra value can a house extension add to a property?
It is difficult to put a dollar figure for how much extra value your extension could add to the value of your property. If you are adding a bedroom to your home in an area where this is a feature buyers appreciate, you are likely to realise a significant return on your investment – as much as $150,000.
Keep in mind, however, when planning a home extension it pays to know the market and what buyers are willing to pay more for.
“When planning a home extension it pays to know the market and what buyers are willing to pay more for.
“
 “
“In the UK, research by mortgage provider Nationwide found that, ‘an extension creating a double bedroom and ensuite can add up to 23 per cent to the value of a property, an extra bathroom up to 6 per cent, and an additional double bedroom can add 12 per cent’.
What permissions and approvals will you need for a home extension?
If you are undertaking any structural renovations, such as building a home extension you will need permissions and approvals from your local council before your project can go ahead.
The cost of these varies, depending on the local council, so be sure to research this beforehand and include it in your budget. Permissions, approvals and permits for your home extension may include:
- Demolition permit
- Development application (DA)
- Building permit
- Town planning approval
In most cases, your architect and/or builder will take care of this, but you still need to know what is required and what these could cost. With regard to permissions, councils are particularly concerned with projects that:
- Significantly alter the appearance of a property
- Impose on the privacy of neighbours
- Alter a heritage listed building
Some building works can be undertaken through a simpler approval process called a complying development, which can be issued within 10 days and can help speed up the process.
In NSW, certain types of granny flats fall into this category. And if your project only involves internal works, you are unlikely to require planning approval, but be sure to check this with your local council when you are in the research phase.
Who will you need to extend your home?
In terms of professionals and tradies you are likely to need for your home extension, an architect or building designer should be your first port of call. They can produce plans and design a functional addition that complements your lifestyle. Architects can also project manage the entire job for you, but at an additional cost.
“In terms of professionals and tradies you are likely to need for your home extension, an architect or building designer should be your first port of call.”
You will also need to hire an experienced builder, preferably one who understands your vision and has a track record of producing quality workmanship.
They will generally hire any subcontractors, like plumbers, electricians and tilers to work on your job, or have these on their staff. Be sure to sign a contract with them, preferably one that a lawyer has drafted or looked over.
With this knowledge you can hopefully begin planning your home extension, and begin the journey to change your lifestyle for the better.
8 Tips for Extending Your Home
Choosing to extend your home is more popular than ever, and can be the perfect way to gain extra space without the upheaval of relocating. Here we discuss some of our key 8 tips for extending your home, which will help you on the path to extension bliss!
1.
 An extension should be part of a ‘whole-house’ solution
An extension should never merely be attached on to your existing house as a bolt-on. It’s crucially important that your extension works with your existing house, and that the solution has been considered as a whole. Spaces should flow together so that there is a clarity of layout between old and new, with the extension enhancing how the existing house works. Extensions crudely ‘tacked’ on to the rear of existing houses are characteristic of many 1970s & 1980s extensions which we are often tasked with removing, in order to rationalise and improve the original house.
It’s also very important to think about the impact on the existing services in your house. For example your heating system may not be able to cope with the additional space, which may necessitate a new system to serve the entire enlarged house. If this is the case it can be a good opportunity for your to consider introducing some renewable technologies to your home, such as an air-source heat pump or solar thermal system. These technologies are also eligible for the Renewable Heat Incentive scheme, which can greatly reduce their payback period.
2. Consider architectural style
Every house is different, and as a result so is every extension that we design. Broadly speaking, there are three routes to consider with regards to style when undertaking the design of an extension to an existing building namely:
Complementary addition
This takes design cues from the profile, massing, bay rhythm, scale and proportion of the existing building, but without replication of details. Quite substantial extensions can be added to some buildings without detracting from the character of the original. The same additions to other buildings would result in imbalanced design or straggling composition. In those cases, a well-designed modern addition that will not read as part of the original building will affect its appearance less radically.
Deferential contrast
This is where the new becomes a modest backdrop against the old. Even if it is large, it doesn’t seek to be visually assertive. It might be achieved by reflective glass, for example.
Assertive contrast
This means affirmation of the new as a more or less equal partner to the old. New and old combined should be of greater lasting value than either on its own.
The approach adopted on any given project will be determined by the existing house. For example when it comes to extending a traditional house which has its own architectural quality, we often consider a deferential contrast approach to be most appropriate. However when extending a more modern house, which perhaps does not possess the character and quality of a historic building, then an assertive contrast approach may be most appropriate.
If your property is located in a conservation area then determining the style of any extension will be partly governed by the Conservation Area policy in place (which you can find on your local authority website).
You may be interested in our Lower Tullochgrue extension project, which is located in the heart of the Cairngorms National Park, and marries a striking contemporary design with a sensitive context.
3. Be realistic with your schedule
Most projects end up taking longer than you would like. Adopting a philosophical approach to this from the outset can put you in a better position to manage the ups and downs of your project, ensuring you don’t set yourself unrealistic expectations, which will only cause additional stress and worry during your build. In many cases dealing with the inevitable issues that arise in a calm and realistic manner can actually decrease the time taken for your project.
4. Keep on good terms with your neighbours
Nobody likes to live next to a building site, and we assure you that your neighbours are not the exception to the rule! Whilst it’s obviously important that the design of your extension doesn’t impinge on your neighbour’s property (they have a legal right to light, and privacy), what is often neglected is the importance of staying on good terms with your neighbours.
You will be asking them to put up with months of living next to a construction site, with deliveries, parking, noise, etc, without any of the benefits once work has finished, so it’s important that you engage with them at an early stage to explain your project, and what measures you will take to minimise disruption for them.
Depending on the location and proximity of your property with regards to its neighbours, the Party Wall Act may be applicable, and it’s best to contact your solicitor to ascertain this, and explain any ramifications to you.
5. Move out if possible
Living in a building site can be very unpleasant (see the Practicalities section in our advice piece on renovating. If finances allow it’s best to move out of your property while major works are carried out. This may seem like an extra expense if you need to find a rental property, but can often be cost neutral as contractors carrying out the works do not have to plan around you or your family, which often decreases the time taken.
If you do intend to remain in your home while you extend make this known to your architect and contractor at as early a point as possible, so that the project can be planned around this to allow you access to facilities such as a temporary kitchen and bathroom.
6. Be decisive
We can all be indecisive from time to time, especially when seeing a built space for the first time. It’s natural to feel the urge to tweak things over the course of a project, but this temptation is often increased when you are extending your home, and are able to see the works regularly. Keep in mind that changes have cost and timescale ramifications. It’s also best to discuss any changes with your architect, as they are best placed to advise you on whether there are any consequences to the revision that you may not be aware of.
7. Don’t forget insurance
When undertaking a major piece of work you will need to discuss the project with your home insurer. Most householder policies allow for simple refurbishment works, but if carrying out any building works you should notify your insurer, who may stipulate that any contractors are appointed using a SBCC /JCT building contract.
8. Remember VAT!
Many people do not realise that VAT is payable in full on the construction works of an extension. Whilst VAT is currently 0% on the construction of a new build property, unless your tradespeople are not VAT registered then it is due at the full 20% on all works to an existing property (unless the house has been uninhabited for 2 years or more, when a reduced rate of VAT may be applicable. You should contact a VAT expert for further advice if you feel that your property is eligible for a reduced rate.
Summary
Whilst extending your home can be stressful, it’s important to keep sight of the value it will bring to not only your property, but also your way of life. If you have an extension project you’d like to discuss with us please get in touch and we’ll be happy to assist.
References:
Richard MacCullagh. 2013. Extending Listed Buildings – Principles and Practice. [ONLINE] Available at: www.buildingconservation.com. [Accessed 7 August 2018]
5 things you need to do when planning a home extension — The Practical Planning Company
Written By Jodie Heginbotham
Do you want to build a home extension in 2021?
Maybe you’ve spent tons of time thinking about it over the Christmas period, or maybe even over the last 12 months as you’ve watched the pandemic unfold. Perhaps you’re sitting in your home right now wondering how you’re going to continue to work, live, eat and sleep within those walls for the foreseeable.
If you know you need more space but don’t know where to start, fear not – that’s what we’re here for! Read on to learn the five things you MUST do right at the very beginning if you want to get your home extension planned, designed and built without a hitch:
-
Set a realistic budget
Set a budget at the beginning – and stick to it! You’re most likely going to need to remortgage to get the money you need to build your extension (unless you’ve got a pot of savings) and it’s important to make sure you’ve budgeted for the repayments. But do remember to factor in a contingency (around 10%) to cover any unexpected costs.
You’ll need to work out how big you can afford to extend before you start on your plans. A good estimate is £1,500 per square metre for ground floor and £1,100 per square metre for upper floors.
Finishing would be on top of this e.g. bathrooms, kitchens, carpet etc. If you’re able to confirm your budget with your designer at the start, it’s going to take less time to get your architectural plans finalised. That way, they’re not going to draw up something you can’t afford, only for you to then have lots of back and forth to get a final result you’re happy with. And there’s no point gaining planning permission for a double storey side extension when you can only afford a single storey – for which you might not have even needed permission in the first place.
-
Write down your requirements
Consider how much space you really need, and what you need it for. It might be possible to extend out by 8m and across the width of your property, but if you’re just looking at a kitchen extension, it might make more sense to stick to something a bit smaller. After all, the bigger you go, the higher the build cost and if you can keep it within permitted development, you save cash AND time.
-
Decide on priorities
What’s worth spending your hard-earned money on? For example, if granite kitchen worktops are a priority for you, saving £15k on the build itself by making the space smaller could come in very handy!
And you might think that having your walls flush (as opposed to using nibs) is what you want but with the difference being around £5-6k, it is something many people reconsider. Again, what’s your priority? Flush walls? Or bi folds? Or the higher-end kitchen you’ve been lusting after? You might need to make some difficult decisions and setting out your needs and wants right at the very beginning can be a huge help.
-
Speak to your neighbours
Communication with neighbours is vital. A simple ‘I’m thinking about having an extension, what do you think?’ at the very beginning goes a long way. It’s important that your neighbours are happy with the proposal as it will make the whole process smoother, when applying for planning permission and during the build.
If you’re going to be building on or near to a boundary then you will most likely need access to your neighbour’s land. So, you need to be able to have a good working relationship with them.When you’ve made a bit of progress with your plans, and depending on the work you’re carrying out, you may be obligated to give notice to your neighbour (or neighbours) in writing under something called The Party Wall Act – find out more here: https://www.partywalls.london/what-is-a-party-wall/.
-
Get a designer on board
If you get a qualified architectural designer or architect on board at the beginning, they’ll be able to check viability on site, taking into account site access, demands on services (electrics, plumbing, heating) and the location of major pipes among many other things. They’ll also look at feasibility of turning your concept into reality. They are masters of utilising space and will know whether the design you want will truly work – and if not, they’ll be able to suggest an alternative.
Many design packages (including ours) will also include management of applications for planning permission and building regulations, taking all the hassle out of the process for you.
Plus, a set of professional architectural drawings and specifications is the best way to communicate with your builder and make sure you’re on the same page. And without plans, you’ll struggle to get an accurate build quote.
 Finishing would be on top of this e.g. bathrooms, kitchens, carpet etc.
 If you’re going to be building on or near to a boundary then you will most likely need access to your neighbour’s land. So, you need to be able to have a good working relationship with them.
If you found the above helpful and you’re ready to get going on your extension plans (and you’re based in the East Midlands), please give our Nottingham team a call on 0115 874 8570 to book in a free design consultation – or hit the button below.
Book a free consultation
Jodie Heginbotham
Top 10 tips to creating a successful house extension | The perfect guide
How to build a successful house extension…
Are you happy with where you live but would like that bit more space? Extending your home is the way forward! Every home is unique to the people who live in them so here are some tips on how to successfully extend your home.
10 – Get all approvals first
This is where the experts come in…depending on the size, shape and scale of your new extension, you may need to apply for planning permission but don’t panic. As each local council is different there is no straightforward rule of thumb for designing extensions which can only mean one thing; find a designer who is willing to go the extra mile and push the boundaries! You will find that most council websites provide a lot of information and design guides which are provided to ensure your local area is complimented by architecture and not destroyed so it’s not a system to be knocked!
Even if your extension does not need Planning Permission it will need Building Regulations Approval which is there to enforce construction standards across the UK. Building regulations safeguard designs by making sure the buildings are built correctly and inspections take place along the way which helps prevent unprofessional procurement and the dreaded ‘cowboy builder’ which is always a good thing!
For more information on Planning Permission and Building Regulations visit – www. planningportal.gov.uk
9 – Talk to your neighbours
Get your neighbours on side! Sometimes it’s your neighbours that can make or break a planning application in the eyes of the council as an objection to your proposal is never an easy hurdle to overcome. A simple chat with them can go a long way so show them what you’re planning and explain the design and give reasons why this is your dream. It will definitely help them understand your proposal more and then hopefully there will be limited or no objections.
8 – Set a budget
This might sound a simple step towards making your dream reality but it’s common to overspend on even the smallest projects. The general rule is to allow for £1,000-£2,000 per square meter and then allow an extra 10-20 percent contingency fund. Even better practice would be to issue the designers drawings to Quantity Surveyor for them to provide an accurate cost.
Also bear in mind that not only do you have the build budget, there will be the designer’s and consultants fees, government VAT and also local authorities fees for the applications too. So, be realistic with your budget as to create the perfect dream home, it is not all about the new build extension alone. Lots of factors collaboratively create a beautiful and functional space.
7- What is the purpose of the extension?
A question most people think they know the answer too, however there tend to be more answers to this question than space and budget will allow so compromise is generally required or a really good designer who will work hard with you to achieve your dream extension! Whether you’re a young couple in the early stages of living together or a family of four whom have lived in the same home for many years, for each person within that home will require a different and varied outcome of the space/s. For one person it may be a tranquil environment to return to after a hard day at the office and for the other it may be a social environment to host friends and have a good old natter. Therefore make sure you consider who will use this space, when it will be used and what it will be used for. Is it an extra bedroom you are looking for or are you craving a bigger, brighter kitchen/dining open plan living space?
6 – Consider the location and setting
Where your home is situated is paramount to the design of your extension. The best extensions out there are those sympathetic to their surroundings or across the spectrum those which contrast their surroundings. From a rural village to a city suburb no one extension is the same so why not use your surroundings as an opportunity to push the boundaries of construction technologies and compliment or contrast your innovative designs. Are you near a babbling brook? Noisy train line? Woodland wildlife? Busy urban street scene?
5 – Research different materials
Material choice is crucial to the design of extensions as it is the material finishes that bring the structure to life. Whether you want your extension to stand out from the crowd or be a subtle improvement, there are many options to choose between with many manufacturers and suppliers of the same product all who offer different services, so be sure to do your homework before entering the minefield!
Timber cladding is a material choice that is becoming more frequently used so if you are looking for a rustic feel to your extension give timber the thumbs up! If you would prefer a clean, crisp finish to a contemporary extension maybe a mix of white render and grey slate would work well with large spans of glazing.
4 – Think outside the box
An extension can be upwards into the loft, outwards as an addition or downwards to a basement therefore no extension is the same so make yours stand out from the crowd and give it the wow factor! Maybe add some quirky details to the design that sets yours aside from the typical extension – whether it is the shape of the extension or a hidden glazing panel where the new meets old. Remember to keep on pushing them boundaries and proving why residential architecture is exciting!
For more innovative ideas click on link – www.busyboo.com/tag/home-extensions/
3 – Landscaping
This, you may ask why it is in the top ten…but…a great architecture designer will take into consideration the surroundings and incorporate it into the proposal because after all, we all love the outdoors! Architecture is complimented by nature so if you have a view use it, if not create one in your outdoor space.
When showing your new extension to friends and family do you really want a tired looking garden or would you rather show off your home as an entirety and be proud to call it all yours?
2 – Choose the right builder
Choosing the right builder is crucial to constructing your dream as with the wrong one your dream will very quickly become a nightmare! So make sure you research builders long and hard, visit previous projects they have done, carry out numerous chats with them (as let’s face you have to be able to work with them!) and take a look on websites for reviews. Some local council panels have set up schemes in their boroughs to assist with this decision and created directories for you with only the local builders who meet the high standards and are recommended by other people in your area so search through them!
1 – Finding the right Designer or Consultant!!
This is the most important part of all (slightly biased I know but it is fundamental!). If you want to stand out from the crowd and have the best extension on your street, choose a designer with a mountain of experience in residential architecture.
You will go through many designers’ websites looking through portfolios of previous work but be sure to notice if the company have won any awards for their work. Awards indicate not only that they are experienced and creative at what they do but also they are highly respected within the industry too which is second to none for you as the client.
To get the most out of your experience with the designer you must be open and honest because your dreams will be made reality in the hands of their interpretations from your brief.
Extending your home can be immensely rewarding and can make a big difference to your lifestyle and with a little insight and some useful advice you will soon be well on your way to living the dream!
Author: Architectural Designer – Hayley Pearse – Find out more about Hayley (click through our team) if you would like to discuss the future of housing or your own development contact us.
Tags
A Beginner’s Guide to Planning a Home Addition – Blog
Does your house seem to be feeling
increasingly smaller? Perhaps your family has spent too much time cramped together
over the past year, there is a new baby on the way, or you simply need some
extra space for the home office or hobbies. If moving isn’t a desirable option,
it is finally time to add more square footage to your house. How do you go
about it? How do you plan a successful home addition?
This article discusses the
steps involved in a home addition, how to make sure you are not in violation of
zoning regulations, what to consider when building an addition, and how to
budget for the project.
Stages Involved in Planning a Home Addition
1. Define your goal(s).
The first process in planning a home addition is clarifying what you want to achieve. You might find the idea for your home addition on the internet or in a magazine. However, you can’t afford to move ahead without pausing to think about how it would play out in real life.
Define the purpose of the home addition. Are you increasing your home’s square footage to increase the value or are you trying to build a private retreat for yourself? It is imperative to specify the size of your home addition as well as the layout and the materials to be used in the design and construction
2. Ask the right questions.
You need to ask the right
questions to get the right answers for your home addition project. To get some
ideas, check out home addition before and after pictures on Pinterest. Here are some questions to ask:
a) How much is it going to cost? You need to research and get a general estimate of how much home additions cost in your area, and then, factor in the specifics of your home and the extension. Prepare a budget for your project.
b) Is it going to be worth it? A rough estimate of the cost of the project will be valuable here, as you will be able to compare the potential benefits to the expense. If your goal is to raise the value of the house, a costly extension project may not prove to be worth the cost. Discuss your home renovation with a local realtor to understand the impact it will have on your home’s overall value.
On the other hand, if your goal is
to improve the standard of living for you and your family, you may be able to
rationalize the project expenses. Many people are willing to take on the
expense if they are planning to stay in their home for the long run.
c) How much will the addition affect the layout of your home? It is critical to consider how the home addition will change the current layout of your home, and the flow. For example, adding a new floor to your home will also require you to build a stairway for access, and you’ll need to find a spot where a stairway makes sense.
d) How much space do you have for a home addition? Find out how much space your current home layout allows for additions. You should also check in with your zoning department to learn more about setbacks in your area. We’ll discuss more about zoning regulations later in this article.
e) Is a home addition really your only option? You may be better off making the best use of your current home layout by repurposing rooms and moving walls rather than adding a completely new structure.
3. Understand the different types of home addition projects.
You have several options when it
comes to choosing and planning a home addition. They include:
- Building an additional floor: This can often be the most effective way
to add extra space to your home and can significantly increase the resale
value. Unfortunately, it is also the most expensive and the costs can easily
run in the range of hundreds of thousands of dollars. Ensure that your home can
handle a second-floor addition by hiring a builder or architect to inspect it.

- Finishing your basement: A common way to create additional space in a
house is to excavate the basement. You can use the extra space to build a
basement apartment, a home office, a home theater, or an entertainment area.
- Turning your porch into a sunroom: If your front porch is a top
relaxation spot for you and your family, you can consider enclosing it and
turning it into a sunroom. Add comfy furniture, heating, and lighting to create
an extra living space.
- Finishing your attic: You can transform your dusty, old attic into
habitable space by making sure at least half of the ceiling reaches seven feet,
and a stairway connects the attic to the rest of the house. Finished attics can
be great guest bedrooms and playrooms.
- Add an extension to the side, front, or back of your home: Side and
back home extensions are pretty common. Front extensions are less common, and
you need to check to see if your district allows for them. You need to work
with an expert in planning home extensions to ensure the design is compatible
with your home layout.
 You need to work
- Building cantilever additions: Cantilevers, also called bump-out
additions or room additions, are micro-extensions of rooms which are supported
by joists and internal structures. They usually vary in size, from as small as
2 feet to as large as 10 feet. Cantilever additions can make up space for
walk-in wardrobe closets, kitchen counters, an eating area in the kitchen, and
a separate master bathroom and shower.
4. Visit your local zoning department.
It is important to
check in with the zoning department to find out what you need permits for.
Taking the time to find out what is allowed and what is not can keep you from
paying very heavy fines. Your home addition project must comply with
established building standards in your municipality. Unpermitted work might
cause problems when it’s time to sell. Although it is not illegal to sell a house with unpermitted work, sellers
are required to disclose any additions or unpermitted renovations to a buyer.
Find out where you’re
legally allowed to build. Zoning laws and building codes vary across municipalities
but your building is generally required to be set back from the property line
at least 20 feet on the front, 5-10 feet on both sides and about 15 feet on the
back. Sometimes, there is a maximum allowable height for houses. This can limit
how high you can build up. Also, having utility lines close to your home can
affect where you can build.
It is critical to
check in with the zoning department as early as possible to obtain the
necessary information. It is possible to get a variance for your addition project,
but they are the exception, not the rule.
5. Collaborate with vetted contractors.
The importance of
collaborating with reputable contractors cannot be overstated. Unless you have
the professional experience and time required, you may find yourself
overwhelmed quickly. Don’t let the cost of hiring a contractor deter you from
doing things right. Keep in mind that you can negotiate costs with your
contractor. You can offer to take on some of the work yourself in exchange for
a reduced price.
You should meet with local contractors to discuss the project, the anticipated timeline, and possible cost-saving strategies. A contractor may be helpful in referring you to an architect or a structural engineer to inspect the project plans.
Working with a contractor with years of experience under his or her belt can save you time, money, and a lot of heartache. Be sure that all costs are spelled out in the working contract to avoid any unforeseen expenses.
6. Create your plan.
You may decide to
work with a ‘design-build contractor’ or an architect in designing your home
addition plans. A design-build contractor is a building contractor who works
without an architectural company, choosing instead to employ an in-house
designer to design the plans. Whoever you choose, look at their past completed
projects to evaluate if they are the right fit for your project.
7. Get your permits.

Obtain (or make sure
your contractor will get) all necessary permits for your home addition project.
Contact your municipality and inquire about the permits required for your
project. If stated in the contract, your contractor can get the permits on your
behalf.
8. Consider moving out, temporarily, or setting start and stop times for the work crew.
Unless you’re
perfectly fine with being assaulted with the constant thrumming of power tools,
you should consider moving out until construction is completed. If you cannot
move out, be sure to establish start and stop times for the construction crew.
This will allow you to plan your day and anticipate potential disturbances.
9. Set a reasonable overage to cover hidden costs.
Hidden costs will
come during a home addition project, such as septic upgrades, costs of
obtaining permits, and an increase in property taxes due to the added square
footage. Allow as much as 10 to 20% of your total projected expenses as overage
to curtail sneaky costs. You might not need it, but it will come handy if
things don’t turn out as planned.
How Much Should I Budget for a Home Addition?
You can carry out
your own research about what your home addition plans may cost before getting
in touch with a contractor. Researching previous projects in your area will
help give you a rough estimate. After getting a rough estimate, you may have to
meet with multiple contractors to find the right fit for your project.
Each home addition
project is different, so the expenses vary too. A second story addition could
cost around $100,000 – $500,000 while a building with a sunroom might cost
about $10,000 – $30,000. Only a professional contractor can give you an
accurate estimate of how much the project expenses will likely be. Factors that
should be put into consideration when drawing up your budget are local zoning
regulations, the size of your project, the design, the home addition design
software or labor, and materials to be used.
You can choose to
finance the addition yourself or investigate options for various loans.
Can I Draw My Own Plans for an Addition?
You might be
wondering if you really need an architect to draw out plans and create a home
addition checklist for your addition.
You can incorporate
real photos while creating a visual for your home renovation project by using
home addition design software like Virtual Architect Ultimate Home Design. These
programs let you create 3D home addition plans and room addition plans quickly
and easily, even if you have no design experience.
And while it might be
possible for you or your builder to construct plans that will be accepted by
the local building department, it is not recommended to forego a licensed
architect on a home addition project.
Architects typically
have a wealth of expertise and knowledge that is rare to come by in designers
and most design-build contractors. A licensed architect will help you make the
best of your home’s space and layout and come up with improvements that your
contractor can bring to life.
Conclusion
In
conclusion, a home addition can be an excellent way to add more living space to
your house. You should be clear on what you want before you start construction.
Build the right team, learn about zoning laws, create a home addition checklist,
and set the right budget for the project. Home additions can be easy to get
right when you take care of the basics.
AUTHOR BIO: Agnes A Gaddis is a freelance writer and blogger from New Jersey. She writes about investing, real estate, mortgages, and marketing. She is a contributing writer for Mashvisor, Rentals.com and Inman news. She’s a big fan of caramel coffee and mystery novels. Get in touch with her on Twitter @Alanagaddis or visit her blog.
Technology of erecting an extension to a house from timber
Life can turn out so that your large family will live in a house made of timber. Adult children will get families and want to stay with their parents, and there it’s not far from grandchildren. So that the housing issue does not spoil the relationship between loving and dear people, there is an excellent solution – to expand the existing living space by making an extension to the house. In this article, we will look at how to do it correctly and profitably.
Fig1. Even adding a regular porch will take time and effort, as it is built to last for many years
Project – the first stage of construction
If you already have your own plot on which the house is built, and there is enough space for other buildings, expand your living space with a new extension won’t be a big deal. And numerous assistants – your relatives – will help you do all the work with your own hands.
The first stage of construction is, of course, the creation of a project.
When designing future extension spaces, pay attention to the following important points:
- Determine the purpose of the space: how will your extension be used? For example, it can be living rooms or a warm garage, workshop or bathroom. The choice of material, the number of windows and much more directly depends on the operating conditions of the extension.
 The choice of material, the number of windows and much more directly depends on the operating conditions of the extension.
 Fig2. As a rule, an extension is built as part of the house: it is cozy in it both on rainy summer days and in winter, with a cup of tea
- Find out how the utility networks run on the site where you plan to build an extension. It is necessary that sewerage, water supply, gas pipelines and other communications are not damaged and can subsequently be freely serviced, repaired, etc.
- Decide on building material. It must be clearly understood that the selected material will affect not only the construction technology, but also the cost and service life of the structure.
- Decide what type of structure – frame or solid (stone, wood) you will build.
Timber extension: starting construction
Regardless of whether you live in a wooden or stone house, if you decide to build an extension to it, then you need to start with the foundation.
Foundation construction
The foundation for an extension made of timber must be made using the same technology as the foundation for the main building (actually, a house made of timber). If you built a house with your own hands, then you know absolutely everything about the construction of its foundation, which means that it will be much easier for you to repeat this experience for an extension.
Please note:
- foundation dimensions;
- foundation depth;
- foundation material and method of its construction (i.e. whether it is monolithic or prefabricated, concrete, reinforced concrete, stone, cinder block, foam block, etc.)
Figure 3. The foundation can be done at any temperature and at any time of the year
Make the foundation for the extension using the same technology as for the house – and you can start building walls.
But it may happen that you do not know anything about the foundation of the main house. What to do in this case? You need to find out the information you need. First, you will have to dig the ground near the house in the place where the extension will be, to the very foundation. Then examine the piece of foundation that has appeared for all the characteristics that were described above. After that, you can start laying the foundation for the extension.
After the new foundation is finished, it needs to stand unloaded for about a month or even more: during this time it will become strong. Careful attention is required at the junction of the new and old foundations.
Fig.4. This is how an extension is erected on a columnar and monolithic-strip base
Construction of walls
The next stage of construction is the erection of the walls of the extension on a new solid foundation. Usually it is not necessary to build all 4 walls, but only two or three are enough – depending on the configuration of the house, to the walls of which the new room will be completed. As a rule, the connection of the walls of the old and new buildings is carried out without much difficulty, since the same building material (wood) is used.
Fig. 5. In this way, using cemented reinforcement, the base of the beam is installed and fastened to the foundation
As fasteners, you can use:
- metal brackets;
- metal plates;
- nails;
- self-tapping screws;
- brackets, etc.
It takes about a year, but sometimes more, for the shrinkage process to complete. The timing depends on several factors:
- outbuilding dimensions;
- percentage of wood moisture;
- the period during which the shrinkage of the old house occurred.
Do not rush to operate the new extension, wait until the shrinkage process is over, as there may be a vertical shift between the house and the new building. How to fix the situation: pull out the staples that are warped, install them again, already straight. Typically, this will only need to be done once.
It is highly desirable to insulate the extension while the shrinkage is in progress. Mineral wool, tow, felt, isover are suitable for this.
To perform the installation of the roof and attic, it is necessary to tie the new and old walls around the entire perimeter with a beam, the cross section of which is smaller than that of the load-bearing walls (size 150 x 150 mm is suitable). The crown is best done with bars without joints. Whether this is possible depends on the size of your building, but even for large structures, you can order timber up to 12 m long. However, this option is very expensive compared to traditional sizes, the most common of which are 2 m, 3 m, 6 m.
Roofing
Roofing common to the entire resulting building is erected according to the traditional technology for a wooden house. Roofing is the next stage, which can be divided into the following processes:
- installation of the truss system (installation of racks, slopes, crossbars), taking into account not to exceed the maximum load parameters of the structure;
- lathing from a bar (another option is a solid flooring from boards), carried out along the rafters;
- gable lining;
- installation of cornices;
- installation of wind elements;
- laying roofing (material – optional).

Fig. 6. It is important that the roof is installed at such an angle that the snow can easily slide off it, otherwise the additional snow load can lead to destruction. Installation of windows and doors is carried out in the annex in the same way as in the house. It is better to use wooden window structures and doors. Now the work on the construction of an extension from a bar to a wooden house is completed!
Work tips
- It is better to work with wood in winter – this will reduce the time required for shrinkage. The reason is that the beam can be exposed to all adverse factors (low and high temperatures, humidity fluctuations, etc.).
- Insulate buildings made of timber from the inside of the walls – this way you save the aesthetics of a wooden house. Proper laying of the sealant will save on thermal insulation (foam up to 50 mm thick).
- Treat all wood parts with special compounds that will protect the building from fire, parasitic insects, moisture, mold.
- To prevent corrosion from harming your home, do not use metal fasteners or keep them to a minimum (galvanized metals are good to choose).

Timber extension to a brick house
Sometimes it may be necessary to build a timber extension to a brick house. What will be the difficulties? First of all, in how buildings from different materials will behave at the junction.
Fig7. An extension to a brick house: wooden supports and glass are originally combined
- A wooden extension cannot be securely and firmly held near a brick house. The hitch (fastener) should be thought out very carefully.
- Wood is much more hygroscopic than brick. In problem areas, the timber must be carefully treated with impregnations.
- Waterproofing between bricks and timber should be of the highest quality and reliable.
- To avoid drafts and freezing at the junction of walls made of timber and brick, install a good and movable seal.

Fig.8. Jute felt or tow is an excellent sealant
In all other respects, the technology for building an extension to a brick house resembles the previous version (with a wooden house). They choose an extension from a bar precisely because it is cheaper than a brick one. Although, in fairness, it should be noted that in a brick house it is better to build an extension also made of bricks.
Preparing lumber
Finally, one cannot but touch upon the issue of purchasing timber for construction. Before purchasing lumber, you need to make sure that its parameters meet the requirements of the project, that is, we are talking about the following characteristics:0003
- bar length and sectional area;
- timber moisture level;
- observance of geometric parameters along the entire length of the beam;
- wood species from which the bar is made.
Do not forget that these are the main characteristics of the timber, on which its price and performance depend. Please check all items carefully before purchasing.
Conclusion
As you can see, it is very easy to build an extension from timber, no matter what material was used to build a residential building. It is only necessary to take into account the basic rules for working with wood: during construction, strictly observe fire safety requirements and give the new building time to shrink. We wish you successful construction of an extension with your own hands. And the video clip posted to this article will help you in such an interesting business and tell you a lot of useful tips.
Timber extension from professionals! Departure, estimate and project!
Publication date: 07/13/2020
Timber extension.
Everything starts from the foundation. What is the foundation of your house?
Band? How deep is it? Width and height? How long did you stay? What defects does it have?
Before planning a log extension, you need to decide what you want. This is not such an easy task as it seems at first glance.
Which premises?
- Kitchen – okay, what size? 3×6 or 4×5 and what shape? Will it be rectangular or square, or maybe you want to attach a bay window?
- Bedroom – it is quite possible to make it on the 2nd floor. Do you have a 1st floor or 2nd floor extension? There are many questions. And what will she look like?
- The bathroom is the perfect addition to your home.
- Or maybe you want to make a children’s room?
- Or play.
- Perhaps a pool and sauna. If you have always dreamed about it, now is the time to start.
- Or do you love balconies? And you have a great view from the 2nd floor.
This is what it might look like at the design stage. Living room))
Or maybe better – it all depends on you! As you decide, so be it.
And we can help you with this!
The best place to start is with an engineer’s visit. And invite several firms or teams. Of course, this is the case if you at least roughly know what you want. If you don’t know, find out))
Don’t think about the budget for now – just throw in different options for your wish list. For this, an A4 squared notebook is best suited. There you can write down and sketch all the options for your future home. Even if now you have not collected the entire amount for the reconstruction of the house, because timber extension – this is the reconstruction – the expansion of the area of the house!
And when everything is ready, find a person or company that inspires confidence and go ahead!
Prepare a list of questions. You will definitely get answers to your questions! It is not a fact that they will coincide with different people, but there is also such a possibility.
When you have an approximate plan and amount, because after leaving, you will be given an estimate for work and materials, then you can proceed to the next stage – design.
Here decide what exactly you need: a complete list of documents: Draft design, Architectural section and Structural section of the project. Or you just want to see externally how the house and layouts will look like.
One of our projects.
I quote in part.
Foundation plan,
Layout of the 1st floor (it is clear that there is also a 2nd floor),
Visualizations.
Design prices HERE!
This is what the house looked like before the project. This is a frame house.
An extension made of timber can be either closed or open. Or maybe a combination. A beam can be planed, profiled and ordinary. For construction, profiled timber with a different groove pattern is now used. It is assembled as a constructor. By the way, you can also order a house kit for your extension from us. After the project, we will make a log for you. This is if you plan to do the assembly yourself or are thinking of hiring a third-party team. Just please note that we do not give a guarantee for assembly by other people! Or we give in the presence of our those. Supervision and shev-assembly from production. But that’s another story))0003
Now let’s move on to the technology of building extension from timber .
The foundation, as I said, needs to be looked at. You can do similar to similar, or you can make a pile-screw foundation to the tape.
|
No. |
What is the foundation of the existing house made of? |
From what it is permissible to make the foundation of an extension |
|
1 |
Tape 1.5 m deep |
Tape of the same depth (both piles and grillage are possible) |
|
2 |
Tape 0. |
Tape of the same depth, piles, grillage |
|
3 |
Rubble / brick |
Tape, piles, grillage |
|
4 |
Block FBS |
Blocks, Tape, piles, grillage |
|
5 |
Pile screw |
Pile screw |
|
6 |
Rostverkovy |
Grill, piles, tape |
 4 m deep
 In a small table, he gave several options. But, I repeat, each reconstruction is unique! Can be done in different ways. Different load, different construction technology. Despite the fact that the beam itself can be folded in various ways.
It is possible to assemble the walls on birch dowels – we usually do just that.
Some “wise men” collect for fittings. It’s not very good. If you still think, you can look at the photo on the Internet, what happens after such an assembly. Nothing good.
There is also a “power” mounting unit. The photo below shows examples and descriptions. How to mount it and in what buildings and places to use it is a separate story.
Everywhere has its own nuances.
Next up is the roof. There are a lot of types of metal tiles. For example, one factory has 3 main metal profiles for the roof and at least 3 coating options for one profile:
1) Glossy 0.5 mm (polyester paint) RAL color,
addition of polyamide),
3) Matt Textured (polyester paint modified with Teflon).
There are also differences in the thickness of the metal, in the drainage system, in the snow retainers, and so on.
Even experienced professionals need to constantly clarify what changes are taking place in production, in coatings, in fasteners and constantly improve their skills.
An ordinary citizen who works in a field far from construction will have to spend a lot of time and effort to understand at least a little about the subject.
Therefore, it is always easier to pay professionals, you will avoid many mistakes, save time and money. This is 1000% fact!
After the foundation, walls, roofing, we mount the floors, insert the windows (don’t forget about the pigtail!), lay the engineering communications, then do the interior and exterior finishing: sanding and painting will do and enjoy the result!
That’s all, contact the professionals and may the force be with you))
You can start with an engineer’s visit to the site and the project.
LATEST PRICES HERE
Stroyka+ team.
photo ideas for building and decorating with your own hands
Author Igor Klimkin Reading 20 min Views 44 Published
Updated
Contents
- Purpose of extension
- Required documentation and approvals
- What is better to make an outbuilding
- Frame annex
- Timber extension
- Extension of foam or gas blocks
- Brick outbuilding
- SIP panels
- Glass extension
- Extension options
- Porch
- Veranda
- Utility room
- Garage
- Living room
- Stages of construction of extension
- Foundation for extension
- How to connect two foundations
- Options for connecting two strip foundations
- Connecting an extension on stilts to a house
- Bottom strap and floor
- Walls
- Roof and truss system
- Single slope
- Gable
- Exterior trim
- Interior decoration
- Insulation of an attached building
- How to save money without sacrificing quality
- Typical errors
- Please note
- Beautiful ideas for inspiration
Annex 9 purpose0009
In order to avoid the transformation of the extension in the future, it is advisable to carefully consider all the details of the structure being built even during planning. First of all, it is important to decide what is the purpose of the do-it-yourself extension to the house.
The first and most common option is an additional room. In fact, building another room according to the scheme will be similar to building a house with a small area. The main thing is not to forget each of the structures of the new building should be properly insulated so that the heating of the room is effective and in the future it is simply to avoid heat loss.
The second option is a bathroom or a kitchen. After looking at the photo of the extension to the house, you probably already understood that in this case the main thing is to bring all the necessary engineering communications in advance before starting the construction of the foundation. It is also necessary to insulate well the places where sewer and water pipes pass through the foundation. An important point: in order to save money, it is better to carry out all the work during construction.
Another popular option for an extension is a veranda. It can be open type or glazed. Most often used for recreation in the summer. Due to the fact that usually the building is not additionally heated, the structure is quite easy in terms of construction. All that is needed is a roof on supports, as well as flooring with walls. When building a veranda, an important point is that it must necessarily be combined in size, materials used for construction and style with the house.
Documentation and Permits Required
When planning a room, it’s important to consider every last detail. When the main building has been standing for more than one year, and the owners decided to arbitrarily add a porch or room without any documentary justification, this is fraught with penalties and, even worse, can cause structures to fail. Therefore, at this stage, you will have to spend a lot of money in order to obtain permission for an extension. The procedure for collecting documentation is one-time and does not require further intervention.
In order to issue an extension in accordance with the current legislation, you will need:
- Obtain written consent from the neighbors.
- Order a study of the soil at the site of the future structure for the reliability and safety of the arrangement.
- Provide a completed construction project.
- Conduct an assessment of the condition of an existing home.
- Obtain confirmation of the legality of the project from electricians, firefighters, utilities, a construction company with an official license.
- Obtain building permits from local architects.
- After the completion of all work, the services that issued the permit must accept the object and allow it to be used.
- Register the erected extension with the tax service, the cadastre.
- Re-conclude new contracts, taking into account the new area with public utilities (electricity, gas, water).
What is better to make an extension
Materials for an extension can be any. They are usually chosen based on the materials of the house itself. It is clear that no one will build a brick veranda next to the frame house – not only the architectural appearance of the building, but also the foundation will be different. Therefore, they choose either similar materials, or something “easier”.
Frame extension
One of the most common extension options. This is due to at least the following advantages:
- low material costs;
- fits any type of foundation;
- the ability to do the work with your own hands;
- short construction time.
It is also important that the frame extension can be placed next to the house from any material, and then sheathed with wood or facade panels (siding) from the outside, which will imitate any texture: brick, natural stone, log, timber, painted board, decorative plaster .
Timber extension
Timber can be considered a universal material for an extension. It is used not only in frame construction as a load-bearing element, it often acts as an “independent” material. From it, you can build not only a closed extension next to a house made of timber, but also open verandas or covered terraces next to brick houses.
The same log woodshed is a traditional extension of a country house or dacha that is heated with firewood.
Of course, the type of building timber depends on the purpose of the outbuilding and the materials of the house. It can be:
- natural moisture timber, naturally dried;
- kiln-dried timber;
- glued laminated timber.
The last option, due to the high cost, is usually chosen for a closed extension if the house is built from a similar material.
Extension from foam or gas blocks
Along with frame technology, construction from foam or gas silicate blocks is considered one of the most common. Usually, structural and heat-insulating aerated concrete blocks of the D500 or D600 brand are used.
Advantages of this material:
- the possibility of using in the construction of self-supporting walls, provided that every 3-4 rows are reinforced;
- with a block thickness of 300-400 mm no additional insulation is needed;
- low weight of the structure does not require a strong foundation;
- large format (compared to ordinary brick) provides ease of laying and high construction speed.
The only drawback is the obligatory cladding. But in this case, you can use any traditional or modern materials – from plaster to facade panels.
The capital extension is constructed from 2 material options: brick or foam block. The first is more expensive and heavier, which means it requires more money and effort. The second is cheaper, lighter, while not inferior to brick in strength: thanks to the listed characteristics, most owners of private houses and cottages often choose foam blocks.
Benefits of block construction:
- Versatile . Like timber, it is suitable for any house – wooden or brick.
- Thermal insulation . Due to the porous structure, the blocks retain heat better: the extension is suitable as a living room.
- Relatively cheap . In comparison with the same brick.
- High speed . The large size of the elements allows you to assemble the extension in the shortest possible time.
 Like timber, it is suitable for any house – wooden or brick.
 Among the disadvantages of foam blocks are:
- Low aesthetic properties . A “bare” structure looks ugly, additional costs are required for exterior decoration.
- The need for a strong strip foundation . Not as powerful as a brick, but more reliable in comparison with frame extensions.
- Limited use of . It is logical to build only capital structures from foam blocks – an additional bedroom, a living room, a summer kitchen. They are not used for an open terrace or porch.
Brick outbuilding
A brick outbuilding next to a brick house is solid and prestigious. If the foundation is made correctly, and it is correctly “tied” to the neighboring base, then, like the main building, the extension will stand for several decades.
In addition to longevity and respectability, brick has other advantages:
- fire safety;
- breathable properties, and the ability to maintain a good microclimate – takes away excess moisture even at high humidity and gives it back when there is a lack;
- good thermal insulation and good heat capacity – the wall does not heat up for a long time in the heat and does not cool down quickly in the cold season.
Disadvantages include:
- high weight of the walls, which requires the construction of a heavy foundation;
- the need to use two types of bricks: ordinary and facing;
- high labor intensity of masonry;
- long construction time;
- is a serious budget.
SIP panels
The frame method may not have such a margin of safety as timber or brick, but it is much more budgetary and faster. A frame-based extension can be erected in a matter of weeks.
Advantages of sip panels:
- High energy efficiency . Sandwich panels are no worse than foam blocks or bricks for the construction of capital structures: they perfectly retain heat.
- Lightweight . The design, together with the finish, weighs relatively little, so it does not require a serious foundation.
- Speed . If a full-fledged house is assembled in a couple of weeks, then 7-10 days will be enough for an extension. By the way, you can work not only in summer, but also in winter.
- Cheap . In addition to the fact that sip panels themselves are inexpensive, they also do not require significant costs in the form of insulation, reduce the cost of insulation, etc.
Of the shortcomings, only the need to protect against fire, rodents, water. In addition, they do not have the most aesthetic appearance and require external cladding with siding or other material.
Glass extension
Panoramic windows, glass doors and sliding systems make it possible to move away from the use of traditional materials in the arrangement of the extension. Tempered glass and triplex are an excellent material with high resistance to impacts and mechanical stress, and metal profiles of entrance doors and panoramic windows can be both “cold” and “warm”.
Extension options
Extensions to the house are different – from a small porch to a full-fledged warm room in which you can equip a living room or even a guest bedroom.
Porch
This engineering addition is being built from the front of the house, framing the entrance group. The porch can be small, including only steps, a small area under a canopy and a railing. Or spacious, combining the entrance area with space for relaxation. In addition to the steps themselves, you can place upholstered furniture or a dining group on it.
Veranda
Veranda can be located from the front – the very case of a large porch with additional zones. Or be placed on one side, acting as an external dining room adjacent to the kitchen or living room. In addition, the veranda can completely go around the house around the perimeter.
Verandas are open and closed. The latter can serve as a summer kitchen or guest bedroom for the warm season. And if they are insulated, then it will be possible to use the space all year round.
Utility room
Dedicated storage space for household items such as garden tools, seasonal supplies, etc. it will also be cheaper if it is adjacent to the wall of the house. The hozblok can be a spacious barn or a small outdoor “closet”.
Garage
Car extension to the house will cost less than a separate garage, so many people choose this option. The main thing is to take into account the equipment of the ventilation system so that exhaust gases and other unpleasant odors do not enter the house.
Living room
Most often, an extension to a house is built due to a lack of square meters and must cover certain tasks. For example, you can equip a living room or bedroom in it, or take out the kitchen – but in this case you will have to bring communications to the annex.
Extension construction steps
The main construction steps are the same for different types of structures. Let’s analyze each of them in more detail.
Foundation for extension
Even a light extension needs a foundation. It will certainly be correct to make the new base identical to the old one. Although, if a cellar or basement is not equipped under the extension, then a strip foundation of a full profile is clearly redundant. There may be other exceptions – for example, for a frame extension next to a brick house, you can lay a pile foundation instead of a strip or slab foundation. In total, there are three types of foundation for an extension:
- tape shallow;
- pile;
- slab shallow.
A pier foundation for an extension is only appropriate when it comes to building a very light structure: a porch or a terrace. Any other extension to an already standing house can behave unpredictably, and in this case it is incorrect to talk about a reliable connection between the two structures.
How to connect two foundations
The foundations of the extension and the house are connected in two ways: rigidly or through an expansion joint. A rigid connection is allowed if the house stands on rocky or non-rocky soil, when the draft of the new building is negligible. And this type of connection is made only for a monolithic tape.
Grills of pile and screw foundations are more difficult to rigidly tie, although it is possible. But most often they don’t do this, since all the same, the walls of light buildings (wooden, frame or gas-block) are connected using the expansion joint technology. Prefabricated strip foundations should not be rigidly connected at all, each base does not have structural rigidity, and rigidly interconnected blocks can become a focus of tension, working to worsen the bearing properties. Slab foundations, which, although they are monolithic, cannot be rigidly connected.
“Floating” base, soft soils, prefabricated loads of houses and outbuildings of different sizes are the main factors that lead to stress and deformation of the junction, and this contributes to the appearance of cracks on the facades of buildings. In these cases, the slab foundation of the extension is made independent, with an expansion joint.
Options for connecting two strip foundations
The geometry of the strip foundation of the extension in relation to the house can be of two types: open or closed loop. And you can link two ribbons in four ways:
- Open loop, hard coupled . Along the junction line in the old foundation, holes are drilled in two rows in a checkerboard pattern for driving connections (bars of reinforcement).
The depth of the holes should be equal to 35 bar diameters. The reinforcement is cut into pieces equal to two values of the drilling depth, clogged and wedged in the holes, an armored belt is tied to them for the extension foundation.
- Closed Loop Rigid Link . Everything is the same as in the previous method, but the foundation of the extension has a completely independent closed contour, and holes for connections are drilled along the entire length of the old foundation in the junction spot.
- Open loop with expansion joint . The foundation for the extension is closed with the ends to the foundation of the house. At the junctions of the new tape to the wall of the old foundation, foam sheets or roofing material (rubemast) folded several times are laid. After stripping, the gap is sealed with a sealant, and a rolled waterproofing is welded on top.
- Closed loop with expansion joint . Everything is the same as in the previous method, but extruded polystyrene foam is laid along the entire abutment spot, and it serves as a formwork for the extension foundation.
Connecting the extension on stilts to the house
There are different options for connecting the extension on stilts and the house, regardless of the foundation on which it stands:
- Piles – Tape . The hanging grillage and the monolithic foundation are not rigidly connected (technically difficult and not necessary), but the wall of the extension and the facade of the house are connected using a “warm” expansion joint.
- Piles – plate . The connection technology is similar to the previous version.
- Piles – Piles . It is possible to rigidly tie grillages under the facades of buildings. Wooden and metal grillages are tied with steel tapes, staples, trimmings of reinforcement.
Reinforced concrete grillages can only be tied if the width of the beam allows drilling holes for reinforcement to a depth equal to 35 bar diameters.
Bottom strapping row and floor
A budgetary way to protect against moisture is to lay sheets of roofing material and coat them with bituminous mastic. Wooden parts are impregnated with antiseptics. For the lower trim, it is allowed to use a beam with dimensions of 15 * 15 cm. Recommended wood species are larch, oak. The first row is laid strictly according to the level. The beam at the joints is not connected. The second should overlap the joints on the first. Both rows are fixed with pins.
An alternative to timber – boards 5 * 15 cm. They are connected with self-tapping screws. The lower harness is laid to the transverse beam (beds). Lags go on top. If the project requires it, then insulation is laid between the lags, and then a draft floor of edged boards. Moisture resistant plywood is used for the finishing floor.
Walls
For a frame structure, part of the walls can be assembled on the ground and then screwed on. Another option is to recruit gradually on the spot. You need to start by installing corner supports from a bar, exposing them at right angles. The distance between the posts is slightly less than the width of the insulation. In places of future window openings, doors put additional supports. The upper strapping is carried out according to the same principle as the lower one. Expensive materials are rarely used for wall cladding of such extensions. Quite enough siding, OSB, lining.
Brick buildings are built gradually. First comes the laying of pillars, then walls. The optimal brick is ceramic. To save money, it is allowed to use white silicate, but then you will have to spend extra money on decorative plaster. Without cladding, the silicate will begin to crumble over time.
It is much cheaper to expand the space with a foam block structure. They are easy to lay and cost less, but additional finishing will also be required.
Roof and rafter system
There are several types. Let’s take a look at two of the most popular.
Shed
It is simpler to build, therefore it is in the greatest demand. If the building is on the side, then its roof is a continuation of the roof of the house. Elements of the rafter system, battens are impregnated with an antiseptic. It is important to consider that the rafters should extend 25 cm beyond the boundaries of the walls so that excess water does not enter the building. Further work order:
- A waterproofing material is laid on top of the finished rafters.
- Sheets of mineral wool, polystyrene or other insulation are placed between the beams. Fix the vapor barrier.
- Now plywood is fixed with self-tapping screws, roofing material is laid (soft, flexible tiles).
- Another option – they make a crate from the boards and fix the slate, corrugated board with special overlapping nails.
When constructing a flat roof, it is important to consider an angle of inclination between 20 and 45 degrees. This is necessary so that precipitation in the form of snow does not accumulate from above, does not create an additional load. If desired, the roofs of the house and the extension can be combined. To do this, the upper row of the roof of the extension is placed under the lower row of the roof of the house, the joints are waterproofed.
Gable
More complex design. It consists of two slopes of the same size, which are combined in a ridge. Gables are installed between the slopes. They can make small windows or even a balcony. Such a roof should be chosen if the owners want to get one more additional room, like an attic or an attic. Gutters are installed on top of the roofing material to drain precipitation. The main disadvantage is the high consumption of materials and the high cost of construction.
External finishing
The main principle of choosing raw materials for finishing is compatibility with the design of the house. Popular options:
- vinyl siding;
- decorative bark beetle plaster;
- artificial stone;
- plastic.
Walls are often plastered as this allows for a wide range of application techniques. It’s inexpensive and not hard to do yourself.
Interior decoration
The design of the room is done according to the taste of the owners. You can fix drywall sheets, wallpaper or paint. Or, for example, sheathe the walls with wooden slats, overlay with artificial or natural stone.
The construction of a secure extension is a well-planned project that requires careful calculations from the owners, a competent approach to each stage of work. But even with a limited budget, it will be possible to make a good garden design for a summer holiday without the help of specialists.
Insulation of the attached building
In order for the frame extension to the house to be habitable, it must be insulated. The best insulation is ordinary mineral wool. It can be cut into the desired squares and laid between the sections of the frame. If the wool is laid in several layers, it is necessary to shift the plates among themselves so that there are no butt joints.
Outside and inside, the insulation is sheathed with a vapor barrier film so that moisture does not collect inside and does not spoil the material. After that, make a decorative finish. From the inside of the extension, frame walls can be sheathed with wood, drywall, chipboard, and outside – with siding, block house, and other decorative materials.
In total, the wall pie looks like this:
- interior decoration;
- vapor barrier;
- insulation;
- wind protection;
- exterior trim.
Floor insulation in the frame extension is done in the same way. Mineral wool is laid in the gap between the lags of the subfloor, and the boards are covered with a layer of waterproofing film. When the insulation is installed, waterproofing is again placed on top of it, and then the floor is sheathed with plywood and the final coating is installed.
If you are planning to add additional space to your house using frame technology, it is extremely important to follow all safety measures. This means that you should not save on personal protective equipment, it is better to purchase a quality tool that will not let you down in a responsible situation. Then the construction will be a successful event.
How to save money without sacrificing quality
High-quality insulation will save on heating costs. If the extension is made of brick or foam blocks, then the extension is insulated from the outside. In this case, a ventilation gap is required. Careful study of the project, the dimensions of building materials, in order to minimize trimming, competent budgeting will help reduce costs by 10-20%. You can save money on the foundation. The cheapest is pile-screw.
Typical errors
When building an extension by inexperienced builders, problems can arise that result from construction errors.
These include:
- Incorrect and insufficient fastening of load-bearing beams, vertical supports of the lower and upper trim, lag.
There may be negative consequences leading to the destruction of the extension.
- Ignoring the antiseptic treatment of lumber at home, hoping that it was carried out by the manufacturer. Illiterate processing of materials will cause wood decay and the appearance of harmful insects in it.
- Illiterate installation of plastic windows and doors, performed independently or by unskilled workers, can cause jamming of the window sashes, the appearance of cracks and drafts. The window can warp, deform, crack.
- The foundations of the old and new houses are connected incorrectly. Insufficient connection between them will lead to negative consequences: the extension may move away from the main house.
- Errors appear during the design and calculation of estimates. Because of the desire to save money, cheap low-quality material is chosen, which can lead to cracks and destruction of the house.
- There are errors when laying the foundation. Lack of knowledge about the depth of groundwater and the level of soil freezing leads to the wrong choice of foundation and its illiterate installation.
Please note
To reduce the weight of this extension, aluminum profile frames can be used instead of wooden supports. And with plexiglass you can glaze the extension. In the extension to the house, it is necessary to make local lighting. To do this, you need to think over and install sockets and an electrical network.
When constructing a water supply system, it is necessary to consider its local shutdown for the winter period.
Beautiful ideas for inspiration
When planning to add an extension and thinking over its design, pay attention to the modern style: smooth, clear lines, a combination of glass, wood and metal, large windows. Such an extension will look futuristic and set the right mood for the entire site.
Using glass is generally a great idea. Look at the photos of glass extensions to the house: they look impressive, they perfectly connect the interior with landscape design. The only negative is that the glass structures are quite cold and can only be used during the warm season (from April-May to September-October).
When designing an extension, you can abandon the roof in favor of … a terrace! By creating an open second floor, you will increase the useful area of \u200b\u200bthe structure being built, you can make the space more functional.
One last piece of advice regarding outbuildings: take the time and effort to figure everything out. A well-defined plan will save you from unnecessary expenses, unforeseen problems and speed up the construction process.
Despite the apparent simplicity of the design, the construction of an extension will require certain knowledge, building skills and a certain set of tools. In addition, in order for the object to be safe and stable, it is necessary to build a reliable foundation and frame. For closed extensions, it is necessary to provide for wall decoration, an entrance door. Considering that the extension is often adjacent to the house, which means that the foundations can be skewed, it is better to entrust the design of such a room to a specialist. This is a guarantee of a well-designed project and quality work performed.
Sources
- http://landshaftadvice.ru/pristrojka-k-domu/
- https://besedkibest.ru/vidy/pristroyka-k-domu/
- https://FurniLux.ru/remont/pristrojka-k-domu-foto.html
- https://dizlandshafta.ru/dizajn/doma/pristrojka-k-domu/
- https://design-homes.ru/zagorodnye-doma/pristrojka-k-domu
- https://Pro-karkas.ru/start/frame-extension/
- https://HouseDerevo.ru/stroitelstvo/pristroyka-k-domu
Wooden extension to turnkey house Samara. Large selection of options in DoMaster.
An extension to a wooden house is a functional construction or structure that complements the main building and has a wide range of uses. It is erected after the completion of the main building, it has a partial independence of the foundation or load-bearing supports.
The extension serves as a way to expand the space, an additional work area, a separate room for work or leisure. Depending on the design and internal filling, the structure acquires a lot of properties and distinctive features.
Before planning the construction of extensions, it is necessary to decide on the material. Depending on the choice, the foundation is being built:
- capital – laid under heavy brick buildings;
- lightweight – can be poured under foam concrete and expanded clay concrete blocks;
- pile – screw piles are installed under any wooden structures.
The modern building market offers a wide variety of materials, and it is not necessary to build an extension from the same building as the main building.
Advantages of building an extension to a house made of wood
When choosing a material, it is better to give preference to lighter and less thermally conductive ones. Wood is the best option. Advantages of wooden structures:
- lack of a solid foundation, ease of attachment to the existing foundation;
- the ability to create complex structures;
- low weight, high strength;
- the ability to carry out installation work in a short time, regardless of the season;
- environmental friendliness and naturalness;
- unique visual qualities, harmonizes well with any materials.
Wood is one of the most suitable materials for building extensions to house .
An annex is an autonomous part of a house attached to the main building. Before starting its construction, it is necessary to develop a project, taking into account:
- the condition of the walls and foundation of the main structure;
- configuration, structural strength, avoid the threat of collapse;
- soil features – rocky, sandy or swampy soil;
- the direction of melting snow from the existing roof, the need to calculate the additional load;
- binding the roof of the extension to the existing truss system;
- additional structural reinforcement depending on the operating load;
- the possibility or impossibility of combining foundations to avoid the appearance of deformation cracks during shrinkage;
- other nuances in the implementation of binding to the house, depending on the material.
For a competent drafting, it is worth contacting specialists. You should not start an extension to the house on your own, without having the appropriate skills. This may lead to adverse consequences.
How to attach a terrace to the house
A terrace is an open area on a solid foundation, attached to the house with additional fences and a roof. More often it is mounted on supports, occasionally on a monolithic foundation. Currently, any extension to a country house is called a terrace.
The terrace serves as a recreation area, additional space for household needs, car parking, kitchen or living room. Technical units can be brought into the extension, insulated if necessary, ventilation holes can be added, and a barbecue area can be equipped.
Construction companies offer their customers a wide range of project documentation. Depending on the purpose, it is possible to attach a terrace:
- light, open on all sides, under a roof, for arranging an outdoor recreation area or parking a car in it;
- summer, glazed with profiled timber elements;
- as an additional living space or kitchen.
Construction of a terrace with professionals
With experience, equipment and qualifications, you can build an extension in a fairly short time. However, for the quality of construction and installation work requires a certain amount of time. Prices for outbuildings vary from company to company. You should not first contact those specialists who offer their services at the lowest possible price – the quality of work may not be the best.
In the estimate documentation, most of the time is laid for the arrangement of the foundation. The quality and guarantee of the entire structure depend on the laying of the foundation. Installation of the structure is carried out quickly at any time of the year. But it should be understood that the terms are very conditional and the construction company may face the following difficulties:
- Weather conditions.
- Forced alterations and improvements. Often, the customer makes changes to the design, for the period of correction of the project documentation, work is stopped;
- Difficulties with the delivery of materials.
Difficulties may arise due to the fault of the supplier or manufacturer. The construction company is directly dependent on the seller.
Given the possibility of foreseen or unforeseen circumstances, construction companies include additional time in the construction period and stipulate them when concluding a contract with the customer.
Construction company “DoMaster” offers its customers unique projects of extensions to a wooden house, ready-made gazebos, bania, and also provides services for the construction of houses and other buildings from logs and profiled timber. Extensive experience and the number of commissioned objects marks the professionalism of the company’s employees.
The advantage of working with the DoMaster construction company is the ability to correctly allocate finances, save time, and get a high-quality, beautiful extension. You can choose according to your wishes extension to the house, the price for which will pleasantly surprise you.
How do I get permission to build an extension to an apartment building?
Documents
Author Dmitry Ivanov Reading 3 min. Views 8.9k. Posted by
Reviewer: Elena Bondarenko, lawyer Updated: 01/27/2022
Many perceive the expansion of living space in an apartment building only through the acquisition of a larger apartment. But according to the law, you can expand thanks to an extension. To do this, you will have to obtain permits so that the work is not invalidated. How to apply for permission to organize an extension to an apartment building?
Article content:
- Which extension is possible?
- Document package
- How to legalize an extension?
- Legal advice
Which extension is possible?
A balcony is usually used as an extension to an apartment building. But not everyone knows that even a small balcony requires obtaining permits. In accordance with Art. 222 of the Civil Code of the Russian Federation, such structures are subject to immediate demolition.
A balcony can only be erected after receiving an official permit from the municipality. To do this, you need to prepare a package of documents and a project.
A package of necessary documents
You will have to collect a package of documents if the object is only planned for construction. But this will have to be done even if you have already built the erected building.
All extensions can be divided into two main types:
| Non-permanent buildings | These are buildings without foundations. Also, these are buildings that can be easily assembled and disassembled without the construction of additional walls. In this case, permission and consent from the neighbors is not required. All you need is an act to reorganize the premises. |
| Permanent buildings | These are objects that can affect the performance and infrastructure of the whole house. These are balconies and verandas, the construction of which requires a mandatory permit. |
If you are planning to build a capital building, you must prepare the following package of documents:
- Permission from all residents of the house.
- Project of the premises.
- Certificate of ownership or extract from the USRR.
- General plan of the premises.
- Official permissions from the Committee of Architecture, Rospotrebnadzor and the Fire Service.
Upon completion of the work, it is necessary to draw up an acceptance certificate, which must contain the signatures of the members of the selection committee.
The selection committee includes the following persons:
- Apartment owner.
- Employee of a design organization.
- Public utility representative.
- Employee of the local administration.
After signing the act, do not forget to order a BTI registration certificate and submit information about the changes to Rosreestr.
How to legalize an extension?
If you have attached a balcony or veranda to an apartment, they must be recognized as non-residential premises. Sometimes citizens build entire living quarters. But these actions are considered illegal . In this case, the building will not be legalized.
After preparing the documents and drawing up the project, you must contact the local government. If the documents are in order, you will be given official permission here.
Please provide full details of the builder on your permit application. It is also necessary to indicate data on the land plot on which the extension is planned. If she goes beyond the site of the house, the building will have to be demolished and a fine will be paid.
Recommendations of lawyers
Thanks to the recommendations of specialists, you will be able to draw up the necessary documents the first time.
Use the following tips:
- The annex must be registered as non-residential property.
- Gather the technical papers before you start the paperwork. The design should not violate the integrity of existing communications.
- The house must be located on a plot that is your property or is the shared property of all apartment owners. If the extension is located on someone else’s plot, you will not receive a permit.
- An extension can be arranged as part of a dwelling, but it is better to arrange it as a separate property.
Thus, you have the opportunity to complete the balcony or veranda to your apartment. It is important that all documents are completed correctly and in a timely manner.
Video story tells how to legalize the extension of the balcony