Mixing floor tile adhesive: How to mix tile adhesive | HowToSpecialist
How to mix tile adhesive | HowToSpecialist
This article is about how to mix ceramic tile adhesive. When you want to tile your kitchen or bathroom you have to prepare first adhesive for gluing the tiles on the floor or on the walls. Generally speaking, mixing ceramic tile adhesive is not a hard task, providing you use the right materials and tools. Consequently, you can mix the adhesive by hand (you can use a margin trowel) or mechanically (you should use a drill machinery with torque control and a mixing palette). In addition, when deciding to install tile in your house, one of the critical decision is to choose the right adhesive, to match the surface type and the tiles.
On one hand, there are mastic adhesives, which are already mixed by the manufacturers. Although mastic adhesives are the oldest ones on the market, they require experience in order to tile in a professional manner. In addition, mastic adhesives are not resistant to water, which makes them a poor option for bathrooms or kitchens. If you don’t have a drill machinery with a mixing paddle, buying a mastic adhesive could be the best solution for your needs.
Nowadays, the most used adhesives are thinset mortars. These adhesives are based on a mixture of cement, sand and additives. They are resistant to moisture and heat and secure properly the floor tiles and the wall tiles into position. If the flooring is made of wood, then you have to choose a special type of thinset, which contains latex adhesives. The best way to mix thinset is to use a drill mixer, if you want to get a professional result. We don’t recommend you to mix the tile adhesive by hand, as the compound will have lumps in the composition. Check out the rest of the tile projects, to learn how to install ceramic tile as a professional.
Made from this plan
In order to mix tile adhesive, you need the following:
Materials
- Water
- Thinset mortar / premixed mastic
Tools
- Safety gloves, glasses
- Drill machinery with mixing palette
- Bucket
Tips
- Read carefully the product label
Time
- 15-20 minutes
How to mix tile adhesive
In order to mix tile adhesive mechanically you need a good drill machinery with torque control and a mixing paddle attachment. On the other hand, for small projects you can mix tile adhesive by using a margin trowel, but you should remember it will take a longer time.
That is why, for surfaces larger than 30 sq feet / 10 m2 it is better to buy or rent a drill machinery. It will get the job done quicker and much better. Especially if you install wall tile on old surfaces, the quality of the thinset adhesive is essential.
Next, after you have the right tools for mixing tile adhesive, you also need a rubber bucket. If the construction bucket is not new, you have to clean it thoroughly before pouring in the water and cement-based adhesive.
Smart tip: If you have no previous experience in working with adhesive and ceramic tiles, you should mix a small quantity of tile adhesive. Consequently pour about 1/4 gallon – 1 liter of water in the bucket, as to prepare a quantity of adhesive for 3 sq feet / 1 m2.
Then, you have to pour adhesive in the bucket until it gets over the top of the water. There is no magic formula to tell you how much tile adhesive to pour in the bucket, you will get it right after you gain some experience. Nevertheless, you have to let the adhesive soak some water for a couple of minutes, before you can start mixing it.
Smart tip: Wear a respiratory mask while you work with the tile adhesive and make sure the room is ventilated, as the powder is toxic.
After you have let the adhesive soak water for a couple of minutes, you should start mixing it, by using the paddle attachment. If you use a drill machinery with torque control, it is better to start by using average speeds.
Smart tip: As to protect the floor from getting dirty with adhesive, you should place the bucket over a large old cloth or newspapers. Ideally, you should mix the tile adhesive outdoor, but you can also do the task in a well-ventilated room.
If you have to mix the tile adhesive by yourself, we recommend you to use your feet to lock the bucket into position while using the drill machinery. As you can see in the image, you have to hold the bucket in place, by using your feet, otherwise the bucket would move continuously and you wouldn’t be able to mix the thin-set.
In order to obtain a proper tile adhesive, you should mix it for a couple of minutes, otherwise it won’t glue the ceramic tiles. Therefore, make sure you mix the tile adhesive thoroughly, by using circular moves, until you get an uniformly compound.
Smart tip: In order to test if the tile adhesive has the right consistency, you could load material on a margin trowel. If the compound slips off the trowel, you have add more powder. Oppositely, if you shake the margin trowel and the adhesive doesn’t move, you have to add more water.
After you have mixed thoroughly the thinset adhesive, you have to leave it for 5 minutes, as to allow the water to penetrate the powder and activate the adhesives. Although, at first glance, it might seem unimportant to you, this aspect is essential for obtaining a good adhesive. Another aspect that you should be aware of is that the thinset will dry out quickly, so you have to be prepared to spread it on the wall/floor and install the ceramic tiles. After you have mixed the tile adhesive, in most of the cases, you can use it within 3 hours.
Smart tip: If the grout will have a light color, you have to use white adhesive. On the contrary, if you will apply a dark grout, you should use the regular gray thinset.
If you want to test the consistency of the tile adhesive, you should load material on a trowel. If the thinset sticks to the trowel and doesn’t fall off, while being able to spread it on the floor, it means it has the right consistency.
Smart Tip: If the adhesive slips off the trowel, you have to add more powder and mix it thoroughly. If you notice lumps or dried particles in the composition, mix it again or add a little more water, until you get a proper consistency.
Thank you for reading our article on how to mix tile adhesive and we recommend you to check out the rest of our projects. Please share our projects with your friends, by using the social media widgets.
How to mix & apply tile adhesive & work out how much adhesive you need
How to guides
Posted by Adam Chard in
How to guides
| 2 years ago
5 min read
If you’re fitting your own tiles, we’ll show you how to mix and apply tile adhesive correctly for a clean and professional finish, as well as showing you how to work out how much adhesive you’ll need.
If you’re comfortable with intermediate DIY tasks, tiling your bathroom or kitchen walls is something you can do yourself. Once you have prepared your wall for tiling, you’ll need to work out how much tile adhesive you’ll need, before mixing and applying it correctly. This will ensure your tiles are applied safely and securely to your wall.
Watch our video below and follow our step-by-step guide to apply the perfect professional finish to your interiors.
What you’ll need
- Bucket
- Adhesive
- Mixing paddle (can be bought from most hardware stores)
- Notched trowel
- Protective equipment (eyewear, facemask, gloves)
- Spacers
- Water
If you’ve chosen ready-mixed adhesive, you won’t need a bucket, mixing paddle or water.
Browse our quality range of tile tools and accessories for many of the items listed above.
Time to complete
- Allow around 15–30 minutes for each square metre.
How to mix and apply tile adhesive
Watch this short video on how to mix and apply tile adhesive.
Here’s how to mix and apply tile adhesive
Before you start mixing, ensure your surfaces are ready for tiling. You can find out how to do this in our expert video wall priming guide.
The manufacturer’s instructions on the tile adhesive packaging will detail which types of tile it can be used with, as well as how much water you need to use when mixing.
If you’ve chosen to use ready-mixed adhesive, please ignore steps 1 to 4.
-
Pour the required amount of water into your bucket first to avoid unmixed powder.

-
Make sure you are wearing appropriate protective clothing, including gloves, eyewear and a face mask. The cement-based powder can cause irritation.
-
Stir the adhesive, making sure you reach into the sides and base of the bucket. A mixing paddle (which can be found in most hardware stores) is essential for this step.
-
Keep mixing until you have a smooth consistency with no more powder or lumps. You are now read to apply the adhesive to your walls.
-
Adhesive can set quickly when spreading onto the wall, so stick with a small area to begin with. This way you won’t waste too much of your mixture.
-
Use a notched trowel to create channels as these create a texture with more grip.
-
Push your tile into the adhesive and give it a slight twist. This will bed it securely onto the wall and reduce the air that can sit between the tile and wall surface.
-
Repeat this with the next tile, using spacers to separate the tiles as you go.
-
Once you’ve tiled your wall and allowed the adhesive to set (check the manufacturer’s instructions for drying times), it’s time for grouting. You can find out how to grout and work out how much grout you’ll need in our handy guide.


Congratulations, you have now mixed and applied your tile adhesive.
Step-by-step images
Pour water into your bucket.
Wear appropriate safety equipment.
Add the adhesive powder.
Mix the adhesive until smooth.
Apply adhesive using a notched trowel.
Fit your tiles.
Repeat separating tiles using a spacer.
How much tile adhesive do I need?
At this stage, you should already know the total area being tiled (in metres squared), which will help you calculate how much tile adhesive you need.
You’ll find the approximate coverage of your adhesive on the product page.
For example, a 20kg bag of Ultra Tile Pro Set wall and floor tile adhesive (powder) will cover approximately 4 to 5 square metres of tiles, at a bed thickness of 3mm (this is how thick the layer of adhesive is). The bed layer can be up to 12mm if needed.
A 10 litre bucket of Ultra Tile Pro Grip ready mixed wall tile adhesive will cover approximately 6 square metres of wall tiles.
You should always add around 10% to the total adhesive figure for any spillages or mishaps.
Shop grouts and adhesives
We stock a range of high quality adhesives and grouts from UltraTile, one of the leading names in tiling. With both ready-mixed and cementitious powder adhesives, you can easily find the right product for your tiling project.
Expert help and advice on tiling
If you’re giving tiling a go yourself and need further help and advice, you’ll find plenty of expert guides, complete with videos and step-by-step instructions, here at VictoriaPlum.com.
Head to our bathroom advice section or simply click on any of the links below.
- How to tile
- How to grout tiles & work out how much grout you need
- Tiles buying guide
- How to replace a damaged tile
- How to remove old grout from tiles
- How to regrout tiles
- How to drill through a tile
- How to clean tiles
- Ask the experts: Should I fit the toilet before or after tiling the floor?
- Ask the experts: Can I tile over old tiles?
Searching for tile inspiration? Why not check out these fabulous blog posts…
- Stylist’s Selection: 9 stylish wall and floor ideas for bathrooms
- 5 exciting and unusual ways to use tiles in your bathroom
- 6 more bathroom tile ideas that’ll capture your imagination
- 5 things to consider when choosing your bathroom tiles
- Small Spaces: Small bathroom tile ideas
- Tiles inspiration gallery
Posted by Adam Chard in
How to guides
| 2 years ago
A born & raised West Countryman, now living on the Yorkshire Coast, for over 8 years Adam has been bringing home interior ideas to life at Victoria Plum. Adam’s favourite interior styles have been shaped by both urban and natural influences.
Mortar Mix: How to Mix Adhesive
Knowing how to mix mortar and adhesive is one of the key elements in every tiling job. Whether it’s tiling a bathroom, kitchen, or outdoor paving slabs, knowing how to tile with the right adhesive and mortar mix is crucial to a successful installation.
We’ve put together some essential tips and tricks to ensure that you are making the best adhesive for the job at hand and why it’s necessary to know how to create the right adhesive for you no matter what brand or type you use.
The Basics of Mortar Mix
While each brand varies from the next, each bag should have instructions printed on them. Things that will vary include the mix ratio of adhesive to water, slake time, pot life*, and open time**. Once you’ve taken note of these things, the following steps should lead to no surprises.
*Pot life means the length of time after mixing a grout or adhesive that you have to use it. After the pot life has been reached, the mixing product should be discarded.
**Open time means the time after application of an adhesive within which it will still bond and secure the tile. This can be influenced by the nature of the substrate (with absorbent substrates reducing open time) and also the ambient conditions where warm, dry conditions reduce the open time.
Additives
Most modern adhesives usually have at least one type of additive added into the mix nowadays, which can change the properties of the final product, such as flexibility, strength, curing times etc. Ensuring that you understand this and how it will affect the adhesive you use is crucial to a successful installation.
Dry cement mix is useless until it’s mixed with water. However, once water is added, the molecules in cement start to expand and grow small crystals. These crystals start to grow around each other and connect together, making cement strong.
However, adding a modifier to the mix helps achieve a more substantial product, especially when tiling. The polymers in the modifiers allow the cement mix to retain water for a longer period of time as the water doesn’t evaporate through the polymers. This allows the polymers to surround the cement crystals, which can then grow into the pores of the tile and substrate, creating a stronger bond.
Tools for Mixing Adhesive
Last but not least, you have to consider the tools you use. Most importantly, you want a mixer with the right paddles. A low rpm is recommended. That way, you won’t incorporate too much air into the mix, and you also want to use spiral paddles, not “egg beater” style paddles, as these will also incorporate too much air into the mix.
Our range of electric mixers have the low rpm you’re after and come with the recommended spiral paddle. Combine this with a rubber bucket or two, and you should be good to go.
One of our first tips is to add the water to the bucket first before adding the dry mix. This way, you avoid the cloud of particles that can occur when you add the water to the dry mix. You can also ensure that everything is mixed together nicely.
Furthermore, creating the mix this way allows you to gauge the consistency and make changes where needed. The consistency you’re looking for is that of peanut butter. Add in a little mixture at a time, mix it and see if it needs more water or more dry mix. Ideally, you want the swirls at the top of the bucket to stay there without disappearing back into the mixture.
Mixing Time
The next tip is to look at the recommended time for mixing. Most brands recommend 5-10 minutes of mixing to ensure each particle is saturated and mixed nicely together. This isn’t a step you want to skip.
Although we know that this is time-consuming, taking away precious time from the job, you might just be looking for the right consistency. We recommend mixing for at least 2 minutes after you’ve got the right consistency to be safe.
Let the Mortar Rest
Another tip is to remember to let the mixture slake once it’s reached the right consistency. This means letting the mixed adhesive sit untouched for 10 minutes. If you skip this step, the mixture won’t perform correctly. It can get stiff and unworkable if you use it straight away, which won’t allow the adhesive to bond or cure correctly with the tile. Slaking also provides the maximum working time once the adhesive is thoroughly mixed.
As we mentioned before, most mixes nowadays have additives in them. These are usually polymers that allow for longer exposure to water. If you don’t slake, these polymers can’t absorb the water completely, so the mixture will have dry polymers, leading to a weaker bond.
Once you’ve reached the right consistency and let the mixture slake, you should then give the adhesive one last mix to ensure all the polymers and additives are evenly distributed. Do not add more powder or water to the mix at this stage! This will only result in installation failure.
Lastly, always have a bucket of water on hand and a wire brush to quickly wash your tools and prevent adhesive mix drying on them.
That’s everything! Now you know how to mix the best adhesive for your work no matter what. Be sure to share these tips with your colleagues and friends.
How to mix mortar for tile installation: the expert’s recipe
One of the key aspects of a successful tile installation is to get the right mortar. Knowing how to mix mortar correctly is important to achieve the strongest bond possible and thus a long-lasting installation. Improper mortar mixing may cause issues to your installation or even lead to a complete failure. Here are some key steps to ensure a proper mix, and why they are necessary, regardless of the brand or type of mortar.
 youtube.com/embed/rC1eFlRoErc?feature=oembed” frameborder=”0″ allow=”accelerometer; autoplay; clipboard-write; encrypted-media; gyroscope; picture-in-picture” allowfullscreen=””/>
How to mix mortar right: before you start
Be familiar with the specific type of mortar you use. While specifics vary between manufacturers, every bag will have instructions printed on it – read them. You should at least know basic things like the mortar mix ratio or amount of water (most want somewhere around 6 quarts of water per 50lb. bag), slake time, pot life (time between mixing and when the mixture is no longer usable), and open time (time between spreading the adhesive and having the tile set). Provided you are aware of those things, there should be no real surprises following the steps below.
To know how to mix mortar properly, you must understand these steps and the basics of how cementitious mortars actually work, on a chemically and microscopic level. Mortars consist of a few basic ingredients: sand, Portland cement, lime and (usually) various chemically manufactured additives which assist in the mortar mix being able to retain water for a longer amount of time. These additives can also provide different properties to the final product like flexibility, strength, faster curing times, etc. Most modern mortars have at least one type of additive.
Understanding the way that cement works and why it needs to be mixed in a certain manner, in different stages, is key to ensure a successful result. Cement cures through a process called hydration. The dry cement molecules are inert – they don’t do anything at all until they are mixed with water. Once water is added to cement the molecules use that water to grow small crystals. The more water available to the molecule, the longer and thicker the crystals grow.
When these cement molecules are all growing crystals next to one another, the crystals will grow around other crystals and interlock. This is how cement gets stronger, and why it gets stronger the longer it exposes to water. In the case of a mortar, the crystals will not only grow around other crystals, they will grow into the pores of the tile and substrate. This is how to achieve the bond.
When a modifier is added to the mix, it helps achieve a stronger bond to the tile than a mortar without modifiers. The more modifiers included in the mortar mix, the stronger the bond, because the polymers allow the mix to retain water for a longer period. When the polymers expose to water, then dispersed evenly into the mix, they surround the cement molecules and allow them access to water for a longer period (the water won’t evaporate through the polymers). This process produces a longer, thicker cement crystal than the mortar you would have without any type of modifier.
Equipment
Wondering how to mix mortar the right way? Well, selecting the right tools for the job is among the first decisions you have to make. The mixing drill and mixing paddle are fundamental. Use a mixer with a low rpm. Most mortar manufacturers recommend a low rpm to ensure a minimum amount of air trapped in the mortar as well as a more consistent mix. You also want to use a spiral-type mixing paddle rather than the ‘egg-beater’ type. This also prevents excess air in the mix. The Rubimix 9N plus has both a low rpm and comes with the proper type of paddle. Combined with the Rubi’s rubber bucket, you have all the equipment needed to properly mix mortar for tile installation.
Initial mortar mix
Start by pouring water into your bucket first. This cuts down on the amount of airborne particles. If you put the powder in first, then add water, you’ll have a large cloud of dry mortar floating around when you begin mixing, and it’s difficult to get all the dry mortar mixed up, it will stick to the sides of the bucket. Add the mortar to the water, mix, add more mortar or water as needed to reach a fairly thick consistency – about the creaminess of thick peanut butter. You want the swirls at the top of the bucket to stand up without slumping or disappearing (see the photo).
Most manufacturers recommend what seems like an excessive amount of time to mix mortar, five or ten minutes. This is a LONG time to mix mortar, but it will help achieve the required blending and saturation of the individual molecules, both cement and additives, in your mix. Most professionals will only mix long enough to get a consistent mix of the powder and water. Ideally, you should stick to the recommended time, but, realistically, it won’t likely happen. Just be aware, and always mix a bit longer than the time you feel may be necessary.
It is completely fine to add more mortar or water at this stage to reach the desired thickness. Do this during the initial mix rather than adding more later in the process. Adding more water or mortar after the slaking stage will considerably weaken the mortar. The mortar should be thick enough to stick to the trowel when you turn it upside down. If it drips off then it’s too thin, you need to add more powder to the mix.
Slaking
The slaking stage is very important! It is a key issue when determining how to mix mortar perfectly. Slaking simply means letting the mixed mortar sit, untouched, for ten minutes or so. It is critical to allowing the chemical makeup of the mortar to work correctly. Not doing so, and using it immediately after the initial mix, will lead to the mortar getting stiff and unworkable (fairly quickly). Then, the mortar won’t bond or cure correctly with the tile. Slaking also provides the maximum working time once the mortar is fully mixed.
Most modern modified mortars have powdered additives (usually polymers of some sort) added to the dry mix. Chemically speaking, these additives, like the cement, get activated through hydration, but they work a bit differently. When adding water to the cement, the mix begins to grow crystals and that’s how mortar gets its strength. The longer the cement exposes to water, the longer the crystals grow. The longer the crystals grow, the stronger the cured product will be.
Once you add water to the additives, however, the molecules in the additives will absorb the water. Think of a molecule of the additive like a cotton ball. The outer layer of the additive will be hydrated, but the inner portion will still be dry. Slaking provides the additive enough time to become completely saturated.
If you do not put the mortar to slake, the mix will have dry polymers. The dry polymers will leach water from the cement and cause it to stiffen up quickly. If the cement does not have sufficient water to continue growing the crystals, the crystal growth and curing process essentially stops. Therefore, not allowing the mortar mix to slake causes it to get stiff quickly, which weakens the mortar and create issues with bonding. Lack of crystal formation in the cement leads to an insufficient bond to the tile and substrate. Allow the additives to dissolve fully to have a proper mortar mix.
Final mortar mix
Once the mortar slakes, move on to get the final mix by distributing the additives evenly into the mortar. This process helps spread the polymers and water throughout the mix to produce a consistent, properly blended mortar during and after the cure time.
Do not add more water or powder to the mix at this stage! Excessive water will only spread out the mix. There is already water between the mortar molecules, separating them from each other. The farther apart the molecules are when the crystals begin to grow, the harder will be to achieve the interlocking crystal formation of the cement, which is where the strength of the mortar comes from. If the crystals cannot fully interlock with one another, the final product will be weaker. By the way, this is also why you don’t want excessive air trapped in the mortar mix.
If properly mixed, the mortar should have standing ridges without slumping when spreading it with the trowel.
So, how to mix mortar the right way? Just remember this:
- Don’t add too much water – this will weaken the mix.
- Mix slowly to trap the minimum amount of air in the mortar mix.
- The mortar should be fairly thick, like thick peanut butter.
- The thickness and consistency of the initial mix should be the same consistency of the final mix.
- Slaking is necessary!
- Do not add more water or mortar mix after the mortar slakes.
- Know the working time of your mortar, pay attention to when it begins to stiffen up.

The right mortar mix is critical to achieve a successful tile installation with the most durable bond. How you can see, it is not that simple to know how to mix mortar correctly. When done properly, it makes a world of difference.
Do you know other pro tips about how to mix mortar for tile installation? Leave your comments below!
[Interested in mixing mortar like a pro? You better get the right tools!]
How To Mix Thinset Mortar For Tile + 6 Beginner Tips
Getting ready to tile for the first time and wondering how to mix thinset mortar for tile? This step-by-step tutorial will walk you through the whole process and give you helpful tips for beginners.
Before you begin your tile project, the first crucial step is mixing your thinset up to the right consistency. The process of how to mix thinset mortar for tile can feel overwhelming to a beginner. So today we’re breaking it all down!
In this article, we’ll cover frequently asked questions about mixing thinset, show you the whole process of how to mix thinset in video and picture format, and lastly share 6 helpful tips for beginners.
If you’ve never mixed thinset mortar before, you’re in the right place! Have no fear. Let’s dive in.
Table of Contents
- FAQs about mixing thinset
- Video tutorial
- Supply list
- Step 1. Measure water
- Step 2. Add thinset
- Step 3. Mix thinset and water
- Step 4. Let thinset slake
- Step 5. Stir one more time
- 6 Beginner Tips
- 1. Use the right thinset
- 2. Water first, thinset 2nd
- 3. No water after mixing
- 4. Read instructions
- 5. Don’t mix whole bag
- 6. No cordless drill
This how to mix thinset mortar for tile tutorial contains affiliate links, but nothing that I wouldn’t recommend wholeheartedly. Read my full disclosure here.
FAQs about mixing thinset
What is thinset?
Thinset, sometimes called “mortar” or “thinset mortar”, is a setting material to attach tile or stone to a surface. This adhesive material is made from Portland cement and fine sand. Some types of thinset also have polymers or other ingredients added to help make the thinset more workable and stronger.
Is there a difference between mortar and thinset?
Great question! It can be pretty confusing because many people use the term thinset and mortar interchangeably. Mortar is a bonding materials to attach tile, stone, bricks and more to another surface. There are several types of mortar used for different applications and thinset is just one type of mortar. So although mortar and thinset are used interchangeably, thinset is really a type of mortar.
Should I use thinset or tile adhesive?
When you are tiling, you can choose either thinset or tile adhesive (also called mastic) for your glue. There are several things to consider when making the decision between thinset or mastic.
Mastic (also called tile adhesive)
Premixed, so you don’t have to worry about getting the right consistency
Easy to use, which makes it great for beginners
Sticky & grabs tile fast, which works great for vertical installations
Use in fairly dry area (like backsplash) that doesn’t not get submerged in water
Not recommended for large format tile (over 15 inches on any side)
Thinset Mortar
Stronger than mastic (all flooring should use mortar)
Can be used in high moisture areas (showers, bathtub, bathroom flooring)
Must be mixed and needs to be the right consistency to work correctly (consistency is like creamy peanut butter)
Must use all mixed mortar immediately
Takes longer to dry than mastic, so easier to adjust crooked tiles, but risk of tile sagging when installed vertically
There are several different types of thinset mortar, which depend on your tile size and tile materials so be sure to read up and choose the right one for your job.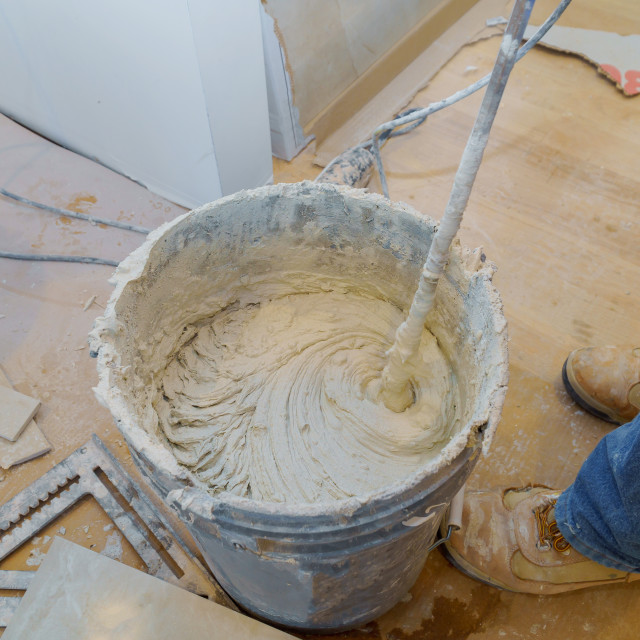
What’s the ratio of water to thinset?
The large format tile thinset that we were using required 6 quarts of water for a 50 lb bag of thinset. This may differ based on the type of thinset that you’re using, so it is very important that you check the instructions on your bag.
How long will thinset last after mixing?
Thinset will start to set up fairly quickly after mixing, so you should only mix up what you can use within 20 minutes or so. The exact length of how long thinset will last after mixing varies based on your conditions, but typical no longer than 1 hour.
Can you add water to thinset when it starts drying out?
When the thinset starts to harden in the bucket after mixing and you haven’t had a chance to use it all, you may be tempted to simply add water to the thinset. But do NOT add water to the thinset after it has been mixed because it won’t be as strong.
Can I mix thinset by hand?
You could probably mix a very small amount thinset by hand, but it will take a long time and not be very fun! It’s much easier to mix thinset with a power drill and mixing attachment.
What is the proper consistency for thinset?
When thinset is mixed properly it should be the consistency of creamy peanut butter.
What happens if you put too much water in thinset?
If thinset has too much water in the mixture, it will be too thin and squish up in between the tiles when they are laid into place. It will also not hold the notched ridges when applied with the trowel. Thinset that has too much water will be runny and droop off of the wall and cause the tiles to sag instead of hold in place.
What happens if you don’t put enough water in thinset?
If thinset doesn’t have enough water it won’t stick to the surface or smooth out to an even layer.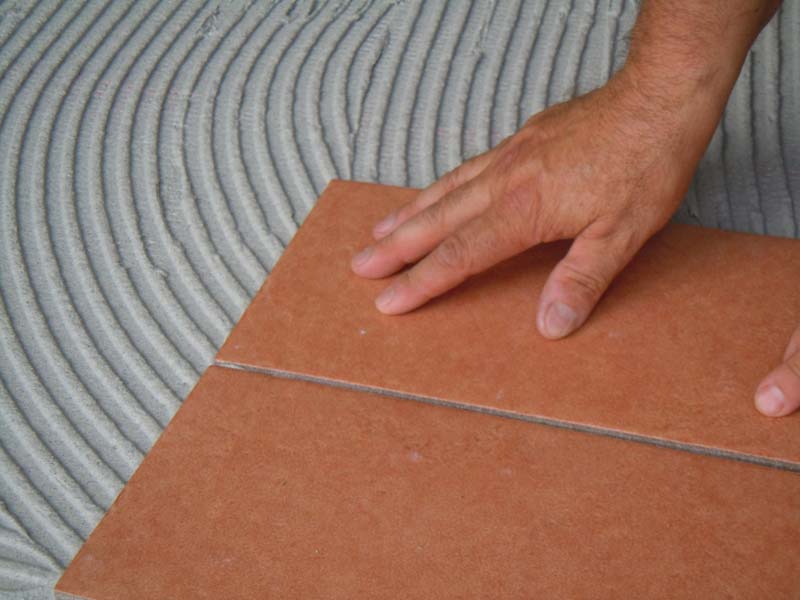 Thinset with not enough water will be harden quickly, be clumpy and won’t hold the tiles into place.
Do you use hot or cold water to mix thinset?
You should always use cool water to mix thinset. Warm water will speed up the chemical reaction of the thinset faster than it needs to be.
What do I do with extra unused mortar?
Unused mortar should be scraped into a spare bucket and allowed to harden. The bucket can be thrown in the trash (or taken directly to the dump). If you want to try to reuse the bucket, you could use a hammer and chisel to break the mortar up and remove from bucket. However, we find this is usually more trouble than it is worth and the buckets are fairly cheap.
Can I mix thinset with a cordless drill?
A cordless drill is not powerful enough mix thinset. You’ll likely burn out the motor on a cordless drill if you use it to mix thinset.
What’s the best drill for mixing mortar?
The best type of drill for mixing thinset is a power drill that plugs in with a variable speed setting. You want to be able to turn the speed down so the drill mixes the mortar slowly.
How To Mix Thinset Mortar for Tile – Video Tutorial
If you love DIY videos, be sure to subscribe to our YouTube channel!
Supplies for mixing thinset
- 5 gallon bucket
- Power drill (plug in, not battery powered)
- Mixing paddle
- Thinset mortar (be sure to get the right kind for your tile & application)
- Water source (outside hose works great)
Step 1. Measure out water and put in bucket.
Because thinset hardens quickly you never want to mix up more than you can use within 20-30 minutes, so never mix up a whole bag of thinset at one time.
The ratio of water to thinset on the back of your bag will likely be for the whole bag of thinset, so you’ll need to do some quick math to figure out how much water to use to make a smaller batch.
For example, our instructions said to use 5-6 quarts of water for the entire 50 lb bag. We decided to mix up roughly half of the bag of thinset so we started with 3 quarts of water in the bucket (6 divided by 2 equals 3). To mix up 1/4 of the bag, we’d use 1.5 quarts (6 divided by 4 is 1.5).
Step 2. Add thinset mortar powder from bag.
Depending on how much thinset you’re planning to mix up at once, pour that amount from the bag into the bucket with the water. It doesn’t have to be exact here, it’s ok to estimate.
Step 3. Mix water and thinset together.
Using a corded 1/2″ drill with a mixing attachment, mix the water and thinset powder together at a low-speed setting. Continue mixing and moving the drill up and down throughout the bucket to get all of the pockets of thinset.
If needed, add more water to get the thinset mixture to a consistency similar to that of creamy peanut butter.
Step 4. Let thinset set (or slake).
Once mixed, let the thinset slake (which is a fancy word for don’t touch it) for 5-10 minutes.
Step 5. Mix one more time after thinset has rested.
Once your timer goes off, the rest is over and it’s time to get to work! Stir it up one more time and it’s ready to use.
Peanut butter like consistency
Feel free to mix again if needed while you’re tiling, but don’t add more water.
The thinset consistency should hold the notched ridges on the surface
6 Beginner Tips Before You Start Mixing Thinset for Tile
Tip 1. Make sure you’re using the right thinset mortar for your tile
There are so many different kinds of thinset depending on your type of tile, method of application, size of tile and more. Read up before you buy to make sure you are using the right thinset for your job.
For our tile entryway, we were using a large format tile (which is anything where one side is more than 15″) so we used a tile made specifically for large format tile.
Tip 2. Water first, thinset 2nd
Always put the water in the bucket first and then add the thinset powder before mixing. If you add the thinset to the bucket first, you may have trouble with clumps of powder getting stuck in the corners of the bucket.
Tip 3. Never add more water after you’ve let mortar set
Mortar hardening up in the bucket before you’re done using it? Don’t even think about adding more water the thinset! The thinset won’t be as strong if you add water after it has been mixed.
Tip 4. Pay close attention to your thinset mortar’s instructions on bag
Every manufacturer and type of thinset will have slightly different instructions, so may close attention to the instructions on your bag – specifically the water/thinset ratio and mixing and rest times.
Tip 5. Never mix a whole bag of thinset at once
Don’t make the rookie mistake of mixing up the whole 50-pound bag of thinset and then only being able to use half of it before it starts hardening up! Only mix up the amount that you can use in 20 minutes or so.
If you’re a beginner, you’ll likely be working a little slower as you get the hang of things. So stay on the conservative side and mix up less than you think you’ll need.
Tip 6. Don’t use a battery operated drill to mix up mortar
If all you have is a battery-operated drill, don’t try to use it to mix up mortar. It will likely very quickly burn out the motor because cordless drills simply aren’t powerful enough to stir thinset.
You’ll need a drill with corded power and it is preferred if it has a variable speed setting so you can mix the thinset at a slower speed. We use this drill to mix mortar and it works great.
There you have it! Everything you need to know about mixing up your first batch of thinset for tile! This first important step of tiling doesn’t have to be overwhelming as a beginner.
Armed with the knowledge you learned in this article and first and foremost always reading and following the manufacturer’s instructions, you’ll be on your way to mixing mortar like a pro!
Do you have any other questions about thinset or tiling?
Let us know in the comments below!
Materials
- Thinset mortar
- Water
Tools
- 5 gallon bucket
- Power drill (plug in, not battery powered)
- Mixing puddle
Instructions
- Measure out water and put in bucket.
- Add thinset mortar powder from bag to the bucket.
- Mix water and thinset together with 1/2″ corded drill and mixing attachment.
- Let thinset set (or slake) for 5-10 minutes.
- Mix one more time after thinset has rested.

Notes
- Tip 1. Make sure you’re using the right thinset mortar for your tile.
- Tip 2. Water first, thinset 2nd
- Tip 3. Never add more water after you’ve let mortar set
- Tip 4. Pay close attention to your thinset mortar’s instructions on bag
- Tip 5. Never mix a whole bag of thinset at once
- Tip 6. Don’t use a battery operated drill to mix up mortar
Chelsea @ Making Manzanita
Chelsea is the founder of Making Manzanita – a DIY and renovation blog – where it’s all about making your house a home you love one DIY at a time. Chelsea and her husband, Logan, have been renovating homes since 2015 and have seen the sweat equity pay off. They enjoy teaching readers how to renovate with confidence. As an influencer, Chelsea has collaborated with brands like The Home Depot, Etsy, Behr Paint, DAP Products, Walmart, Frog-Tape, and Kreg Tools. Making Manzanita has participated in One Room Challenge and was a finalist in the Fall 2019 Jeffrey Court Renovation Challenge.
9 things you should know – Home of Tile
Adhesive is an essential and easy way to bond tiles efficiently. Adhesives provide a better bonding strength than any sand-cement mixture due to their low shrinkage property. The adhesive also accommodates thermal and physical movements due to its flexible properties. Less setting time of tile adhesive allows the tiles to adjust easily within a certain period.
This article will give you information about the appropriate thickness of tile adhesive that must be applied to lay tiles. It will also discuss tiling over linoleum and vinyl adhesive. In addition, this article will discuss proper tiling over old adhesive.
Contents
- 1 Do I need to remove old adhesive before tiling, some helpful tips:
- 1.1 ● Option 1: Use a floor grinder to remove old adhesive:
- 1.2 ● Option 2: Use a self-leveling compound to smooth the surface
- 1.3 ● Option 3: Use a cement backer board to smoothen the surface:
- 2 Floor tiling adhesive thickness, some useful tips:
- 3 Floor tiling over the old adhesive, some helpful tips:
- 4 How much adhesive is needed for tiling, some helpful tips:
- 5 Removing linoleum adhesive from concrete before tiling, some helpful tips:
- 6 Tiling over bitumen adhesive, some helpful tips:
- 7 Tiling over old adhesive, is this possible, or do I need to remove it?
- 8 Tiling over vinyl adhesive on a concrete floor, some helpful tips:
- 9 Wall tiling adhesive thickness, some helpful tips:
Do I need to remove old adhesive before tiling, some helpful tips:
In general, you need to remove the old adhesive before tiling. You need a smooth and level surface to install tiles. Once old tiles are removed, in most cases, the surface is neither smooth nor level. Remove the old adhesive and clean the area before applying the new layer of thin-set.
Tiling over the old thin-set may affect the longevity and durability of the new tiles. As the old thin-set is not perfectly smooth and level, the newly installed tiles will be more prone to damage and eventually break.
● Option 1: Use a floor grinder to remove old adhesive:
To smoothen the surface, you can use a floor grinder. Glide the floor grinder back and forth over until the area becomes even. Once the old surface is level, you can apply the new thin-set and start tiling.
● Option 2: Use a self-leveling compound to smooth the surface
Another method is to use a self-leveling compound to smooth out old thin-set if you only have a small amount remaining after removing the old tiles. This compound will ‘burry’ the uneven spots caused by old adhesive. Always remember to scrape up any loose thin-set first before applying the self-leveling compound.
● Option 3: Use a cement backer board to smoothen the surface:
A third option is to use a cement backer board over the old thin-set to level the surface on the floor. This applies to the case where the old thin-set and floor are extremely uneven. A backer board is screwed to the subfloor with a thin layer of thin-set for support. You must remove the highest levels of buildup and then install the backer board over it. Make sure that if you are installing one in a bathroom or kitchen that the material is water-resistant.
Floor tiling adhesive thickness, some useful tips:
In general, the adhesive thickness should be around 3/64″ (1mm) for wall tiles. For concrete floors 7/32″ (2.5mm), and for timber floors 1/8 ″ (3mm). The thickness also depends on the type of adhesive and the type of tile. A general rule of thumb is that the heavier and bigger the tile, the thicker the adhesive should be.
The thickness of the tiling adhesive depends upon the type of adhesive you are using and the type of surface you are tiling on. Use an appropriate notch trowel to apply adhesive to the surface. You can use a 6mm notch trowel to achieve a 3/64″ (1mm) thick adhesive bed for wall tiling. A 10mm notch trowel can be used for concrete floors to achieve a bed of 7/32″ (2.5mm) thickness. You can use a 12mm notch trowel for timber floors to achieve an adhesive bed to 1/8 ″ (3mm) thickness.
Many types of adhesives are used for tiling. The thickness of the adhesive also depends on the type. The most used tile adhesives:
- Standard set tile adhesive: This adhesive looks like cement and is the most commonly used adhesive. The setting time of this adhesive is shorter, so it is used when setting time is not an important factor to consider.
- Epoxy adhesive: These adhesives consist of organic and synthetic ingredients blended to achieve a quick setting time.
- High grab acrylic wall tile adhesive: These adhesives are used for laying large and heavy tiles on walls.
- Highly flexible acrylic wall tile adhesive: These adhesives are suitable for tiling in showers and bathrooms. They are water-resistant and are used on walls that receive a large amount of water interaction.
- Rapid set flexible adhesive: These adhesives are used where a strong bond and quick setting time is required. Their bonding strength is very high, and they are generally used when tiling over underfloor heating.

Each type of adhesive has its own bonding strength and setting time. The optimal thickness of any of the adhesives is defined by the manufacturer and should be part of the manufacturer’s instructions.
The tile weight is also a factor in the adhesive thickness. A general rule of thumb regarding the tile adhesive thickness is that the heavier and bigger the tile, the thicker the adhesive should be.
Floor tiling over the old adhesive, some helpful tips:
In general, tiles should not be installed over the old adhesive. If the surface is not clean, smooth and level it can compromise the bonding of the thin-set. Ensure that the floor is also free of any loose material.
Old adhesive usually gets partly attached to the tiles when they are removed. The surface left behind is generally uneven and contains old loose adhesive left over. This can compromise the effectiveness of the new thin-set.
Any loose and uneven adhesive must be removed before applying a new layer. You can use a floor grinder. Or, if the old adhesive has adhered well to the floor, you can use a self-leveling compound to create a smooth surface and install tiles over it. You burry the old thin-set and create a smooth and even ground that is needed to lay tiles.
How much adhesive is needed for tiling, some helpful tips:
In general, you need a 50 lb bad of adhesive for a floor of 45 sq ft or a wall of 90 sq ft. The actual amount you need will depend on the adhesive type, the surface, and the size and weight of the tiles. Thicker, larger, and heavier tiles need more adhesive.
Calculate the area you plan to lay tile on before choosing an adhesive. You can choose for a bad of dry adhesive or ready-made. The following table indicates the amount you need for a certain area. But this only gives an indication. The actual amount depends on several factors:
|
Type of Product |
Wall/Floor |
How much you need |
|---|---|---|
|
Tile Adhesive, ready-made |
Floor |
3.5 Gal +/- 60 sq ft. |
|
|
Wall |
3. |
|
Tile Adhesive, bag |
Floor |
50 lb +/- 45 sq ft. |
|
|
Wall |
50 lb +/- 90 sq ft. |
|
Grout, bag |
Floor |
25 lb. joint widths 1/8 in. to 1/2 in, 300 sq ft. |
|
|
Wall |
25 lb. joint widths 1/8 in. to 1/2 in, 500 sq ft. |
|
Grout, pre-mixed |
Floor |
1 Gal, For joints widths 1/16 in. |
|
|
Wall |
1 Gal, For joints widths 1/16 in. to 1/2 in, up to 140 sq ft. |
 5 Gal +/- 120 sq ft.
 to 1/2 in, up to 100 sq ft.
Removing linoleum adhesive from concrete before tiling, some helpful tips:
In general, remove the linoleum adhesive before installing tiles. You can use a floor scraper or a chemical remover for this. Adhesives like linoleum glue often get attached to the substrate after the old floor is removed. This does not give an ideal surface to install the new tile
You will need a floor scraper to remove old linoleum glue. The key is to hold the tool at a suitable angle while scraping to be efficient. Once you have found an angle that works best, stick to it and work in small sections. Use the blade edges to remove small strips of material.
Chemical removers can also be used to remove old adhesives like linoleum glue if the scrapper does not work. These adhesives soften the tough linoleum glue and make it easier to remove. Follow the manufacturer’s instructions while using these chemicals, and you can follow this up by using the floor scraper once again.
Tiling over bitumen adhesive, some helpful tips:
In general, it is not advised to tile directly over bitumen adhesive. You can either remove the bitumen completely or cover it using one of several methods.
Bitumen is commonly used as a protective coating for floors. It is a thick, dark, and sticky material resembling tar. Tiling over a bitumen surface can be problematic due to the deterioration of the bitumen and tile adhesive integrity. You can seal the surface with a suitable primer.
There are several other solutions available that will make your job easier. Instead of removing bitumen by hand, you can use a water-based primer to create a uniform surface. You can also use a backer board that provides a tile-ready surface. Self-leveling compounds can also be used to prepare bitumen surfaces for tiling. A screed of high thickness can also be applied.
The primer creates an insulating layer between the bitumen and the tile adhesive. This helps the adhesive to bond well to the surface. Applying a self-leveling compound over primer helps to achieve an even surface for tiling.
Backer boards can also be installed over a bitumen surface to create a rigid and even surface for tiling. Apply the flexible adhesive over the bitumen surface and screw the board down to the surface. After backer board installation, apply the tile adhesive and lay the tiles.
Another method to prepare the bitumen surface for tiling is to apply a screed concrete of at least 70 mm thickness. The screed acts as an insulation between the tile adhesive and tacky bitumen. Moreover, concrete provides a more rigid and even surface for the tile installation.
Tiling over old adhesive, is this possible, or do I need to remove it?
In general, tiling over old adhesive is not advised. Examine the floor first. It needs to be smooth and level. If this is not the case, remove the old adhesive, or use a method to cover it.
Floors with old adhesive tend to lack preparation for the new adhesive. Tiling over this type of floor can cause movement in the tiles, which may cause the grout and tiles to crack with time. If your old adhesive is not well adhered to the floor, it is recommended to remove the old thin-set first and then install the new tiles.
Tiling over vinyl adhesive on a concrete floor, some helpful tips:
In general, you can tile over vinyl adhesive if it is glued firmly and installed over cement. But it requires a careful evaluation of your floor first. The floor needs to be smooth and level. Fill any tears in the floor before installing new tiles.
Vinyl and linoleum floors may contain asbestos. If this is the case, you must get these materials removed completely by professionals. You can not sand vinyl or linoleum floors with asbestos for proper adherence to the new tiles. Certain types of vinyl floors make poor underlayment for tiles because these floors may shift over time and become unstable. Floors like perimeter bond sheet vinyl or vinyl with a cushioned structure fall into this category.
Luxury vinyl planks are also not suitable for new tile installation. These planks are installed without any adhesive in a floating fashion. If you install tiles on these types of surfaces, the floor under your tile may shift over time, creating cracks in the grout.
While installing the tiles on the vinyl floor, first sand the floor. After sanding, clean the floor thoroughly with a cleaner. Install a suitable backer board for your tile. The 1/4 inch thick cement backer boards are ideal for tile installation. Apply thin-set to adhere the backer boards to the floor, lay the backer boards, and make sure that you leave a 1/4 inch gap between the boards and around the walls. Before installing the tiles, make sure that the adhesive under the backer board is completely dry.
Wall tiling adhesive thickness, some helpful tips:
In general, the adhesive thickness for wall tiles should be around 3/64″ (1mm). Heavier tiles will need more adhesive. Overall, wall tiles need less adhesive than floor tiles.
Floor tiles experience massive amounts of pressure and stress due to the heavy traffic occurring on them. If you apply a thin adhesive bed under floor tiles, the tiles may crack. For this purpose, floor tiles have a thick adhesive bed underneath. This is not the case in wall tiling.
Walls do not experience any weight or pressure; therefore, they require a smaller thickness of adhesive. The thickness of the adhesive for wall tiling should be at least 3/64″ (1mm) or 3/32” (2mm) for larger, heavier tiles. You can achieve an adhesive bed of this thickness with a 6mm or 10mm notch trowel.
How to make your own tile mortar instead of tile adhesive
- Tile mix and its features
- Some nuances
- Structure and composition
- Mortar preparation
- Ready dry mix
- Homemade cement mortar
- Most common errors
- Conclusion
Some of the main elements used in ceramic tiling are the mix and the tile crosses. And it is the mixture that becomes a rather interesting point, since there are a number of its varieties, and in addition, you can use both a regular solution and special adhesive compositions.
Tile mixture and features
When tiling with tiles, the first step is to finish the walls. For these elements, you can use a conventional solution, which is made on the basis of sand and cement, as well as ready-made adhesives.
Ready-made glue can be sold both in the form of a mixture already prepared for use, and in the form of a powdered material, which must be further diluted. Preparation of mixtures is carried out strictly according to the instructions on the package.
Ready dry compositions are cement with the addition of a special modifying agent. Usually found in packages of 5 or 25 kg.
Some nuances
Considering the floor cladding, it should be noted that the layer is thicker than the walls, which exceeds 3 mm. And because what solution is needed for the tile will be determined by some factors.
- First of all, the evenness of the base. Since in the presence of irregularities, it is advisable to use a cement mortar, which will not only serve as glue, but also help smooth out the irregularities. In this case, the thickness of the solution layer can reach 3 cm. In turn, the use of ready-made adhesive mixtures requires a perfectly flat surface.
- The type of tile is also an important factor. Considering, for example, porcelain stoneware, this material has low adhesion, therefore, a mixture for laying tiles of this type should contain special plasticizers that improve this indicator.
- The human factor, or rather, the economic one, also has an impact. Since a self-prepared mixture is cheaper than a ready-made one, therefore, if everything indicates the possibility of using a standard cement mortar, then it is better to use it.
By the way, speaking about the issue of economy, there are also several factors:
- When finishing a cement base, the mortar will be spent somewhat more than when laying on concrete.
- There is also another factor regarding tiles. In particular, glazed will require less solution for itself than unglazed.

Structure and composition
Looking at the ready-made adhesive for laying tiles on the floor, it is almost impossible to fully know the composition, since this is the secret of the manufacturer. A big plus of such mixtures is that they are divided into different types, designed for different operating conditions and surfaces. Thus, we can distinguish:
- Universal adhesive. It is used in standard conditions for flat surfaces.
- Reinforced, which is often used when laying fragile tiles.
- Non-traditional compounds intended, for example, for glass or metal tiles.
At the same time, the standard composition of the cement slurry is known to everyone. It also adds cement and sand in various proportions, depending on the brand of the first element. In particular:
- With cement M300 – 3 parts of sand.
- For M400 – 4 parts of sand.
- For M500 or M600, 5 pieces.

The sand itself is necessarily sifted, which is done to remove debris and clay.
If necessary to increase adhesion, also add standard PVA glue. It is added in a ratio of 1 to 50, where the first value is the proportion of glue, and the second is the proportion of the total amount of the mixture. To put it more clearly, for 10 liters of solution, 200 g of glue is added.
Also, when laying tiles, the tile adhesive does not always meet the requirements for elasticity and water resistance.
In some cases, detergents can be used to improve elasticity. For example, liquid soap, shampoo or diluted powder.
If it is necessary to improve frost resistance, then special additives are used for this, for example, Primer EC-30. It is a universal hardening accelerator, which, accordingly, gives resistance to low temperatures.
Preparation of the mortar
Now it is necessary to consider the preparation of both the finished composition and the one made by yourself.
Ready mix
Let’s start with the ready mix. In this case, the first step is to carefully read the instructions, which are usually located on the package. In some cases, additionally attached.
The main thing is not to pour water into the dry mixture, but to do the opposite . Otherwise, lumps will remain, which will affect the quality. The cooking process itself is as follows:0021
- The required amount of water is poured into the container (the proportions are indicated in the instructions on the packaging).
- After that, the mixture must be slowly stirred with a construction mixer or a drill with a special nozzle.
- Further, very carefully, the composition itself is gradually filled up.
- It is necessary to interfere throughout the backfill.
- The mixing itself is carried out both during preparation and immediately before application.
Water temperature becomes an important factor. It should not be cold, warm or hot. The liquid is used strictly at room temperature. Otherwise, the components of the composition may lose their properties. Directly the temperature in the room during the work should be in the range from 10 to 24 degrees.
At the recommended temperature, the floor tile mix cures fairly quickly, so large mixes are not recommended. It is advisable to prepare as much glue as you can use within 30-40 minutes.
As you know, tiles are often soaked before laying, and the base itself is moistened. When laying on glue, this is not recommended.
Homemade cement mortar
In the case when a self-made mortar is chosen, and not an adhesive for laying tiles on the floor, you need to clearly know how to prepare it, which we will talk about next.
Preparation is as follows:
- The sand is well dried and sieved.
- Next, it is mixed with a small amount of cement in accordance with the proportions that were indicated earlier in the article (depending on the brand).
- The next step is to add water in the right amount. After stirring, you should get a plastic solution that will stay on the trowel without moving out.
- If the solution turned out to be too liquid, then it is necessary to add a little sand and cement, if, on the contrary, it is too dry, then a little water.

Tiles must be soaked before such laying, while the period of stay in water is 8-10 hours. Just soak one tile to begin with, because if you come across poor quality material, then as a result, ugly yellow spots will appear under the enamel, which will ruin the whole look of the room.
If the sample does not lose its appearance after soaking and laying on cement, then the entire tile is soaked. If soaking is not possible, then immediately before laying it is necessary to wipe the back side with a damp cloth.
When laying floor tiles with self-prepared tile adhesive on a concrete base, the job is somewhat simplified. In this case, a sufficient process will be to pour water on the surface, and pour cement through a sieve. Next, the tiles are laid on the resulting “dough”.
The most common mistakes
Quite often, when a quick laying of tiles is planned, a number of mistakes are made when preparing the mortar:
This was a series of mistakes when using cement mortar, now consider the use of ready-made compounds:
- It is strictly forbidden to use cold or hot water.
- Do not pour the mixture first, and then pour water, in which case lumps will form.
- Do not soak tiles or dampen the substrate.
- Cooking containers must be clean and must be cleaned and washed after each mixing.
- It is necessary to stir the composition at a low speed of rotation of the mixer. At a high speed, the mixture will foam, at a low speed, lumps will remain.

And finally, a little advice, if you plan to lay tiles on tiles, what glue to use, our article on this topic will help you decide.
Conclusion
Now you can decide which tile mix to use and how to prepare it. For a more visual study of the topic, we suggest watching several videos.
Rules for the preparation of tile adhesive, determining the proportions of the composition
For those who intend to make tile repairs in the near future, it is important to know how to choose the right material, prepare the mortar and determine the proportions of the composition. Simple tips from the article will tell you how to correctly dilute tile adhesive so that the repair is of high quality.
What is in the adhesive?
In order for the tiles to lay firmly and evenly, it is necessary to choose the right tile adhesive. There are several types of glue that are in great demand among builders today.
- Cement based tile adhesive. To prepare it correctly, you must strictly follow all the recommendations indicated in the instructions on the product packaging.
- Tile adhesive in the form of a paste consists of a ready-made component. This type does not require proportioning, since it is not necessary to dilute the mixture. At the same time, such tile adhesive does not dry out for a long time, which allows you to do the job without haste and accurately.
- Two-component tile adhesive must be thinned immediately before use. This type of glue has good elasticity, which is a big plus. In this case, there is no need to use grout when working.
For novice builders, of course, the easiest way is to use ready-made diluted glue, which is sold in tubes or cans. In addition, it can be used for a long time, if you do not forget to close the lid tightly.
Meanwhile, even in this form, this glue loses quality, especially if you do not follow the rules for storing building materials. Dry powder, from which the glue is diluted, can be stored for many years.
The main thing is to place this building material in a dry place, away from high moisture. Including ready-made glue will cost builders much more than the one that needs to be prepared.
Preparing the necessary materials
When preparing tile adhesive, there are some basic rules to follow.
- All tile adhesive ingredients must be at room temperature;
- However, if the adhesive is prepared in cold conditions, the liquid and composition must also be at a low temperature;
- It is important to use only clean and thoroughly rinsed instruments during work;
- When mixing the solution, only clean water should be used, preferably drinking water, since technical water may contain undesirable impurities that violate the adhesive functions of the solution;
- For safety, wear rubber gloves and a dust mask.

Special tools are required to properly prepare the tile adhesive. If you have to dilute a small amount of liquid, a rectangular trowel for manual mixing of glue is suitable. For large volumes, it is better to use a blade for diluting the composition, which is fixed in a hand drill.
How to thin tile adhesive
Experienced builders know how to thin tile adhesive by eye.
For beginners, the product packaging contains detailed instructions from manufacturers indicating what needs to be done to prepare a quality mixture.
In general, the entire algorithm for preparing tile adhesive comes down to the following steps:
- Five liters of water will require 20 kilograms of dry mix.
- It is necessary to fill the container with the required volume of clean warm water indicated on the packaging of the product.
- After opening the package, carefully pour the dry powder into the liquid in parts, constantly stirring the solution.
- During and after the pouring of the powder, it is necessary to mix the resulting mass thoroughly until the composition becomes homogeneous.
- It is important to ensure that there are no lumps or delaminations in the adhesive.
- After you need to let the solution stand for fifteen minutes and stir the composition again. This will remove the remaining lumps.
- After thorough mixing, the mortar is ready for laying tiles.

The resulting tile adhesive must be slightly damp, but not runny, in order to be comfortable to work with. To understand whether the adhesive has the correct consistency, you need to test it. To do this, a little of the resulting mixture is scooped up with a trowel, after which the trowel is turned over and held in this position.
If the compound does not drip and is kept in the container for a long time, it is ready for use. In the event that the solution is loose and quickly detaches from the container, you need to change the consistency by adding a dry powder and mix the tile adhesive thoroughly.
The resulting consistency will fall flat if there is too much dry powder in the adhesive. You can correct the situation by adding the missing liquid. After that, the solution must be re-mixed.
When working in the summer or in a room with an elevated temperature, a minimum amount of water should be added to the solution so as not to weaken the adhesive quality of the building material. In general, it is recommended to carry out work on laying tiles at a temperature of no more than 10-25 degrees Celsius.
Since the prepared adhesive dries and becomes covered with a film after a while, it should be used as soon as possible, within a few hours, without leaving the work the next day. Dried tile mortar is not suitable. During operation, you need to periodically stir the adhesive composition so that it lasts a longer time.
Rules for leveling the floor before laying ceramic tiles
February 19, 2020
A quality floor tile manufacturer will definitely recommend that the substrate be thoroughly prepared before proceeding with the installation of the corresponding product. If preparatory work is not carried out, the finished coating may crack, peel off, etc. over time.
What should be the base?
To determine the procedure for preparing for laying ceramic tiles, it is necessary to carefully study the SNiP standard “Insulating and finishing coatings”. Here you will read that the concrete floor must have a clean and dry surface, on which traces of paints and varnishes, oil, mastic, soot and soot will not be found. All of the above contributes to a sharp decrease in the level of adhesion. The humidity of the concrete pavement should not exceed 4 percent, which can be ensured by using special primers. If the surface is highly absorbent, it is recommended to treat it with a deep penetration primer.
Floor leveling process
The floor finish must be laid on a solid, dry, and most importantly, level base. Agree, not every concrete coating meets such requirements. Therefore, you will most likely have to work on leveling the floor so that the formed tile layer is beautiful and durable. Leveling can be done with tile adhesive, self-levelling compound, cement-sand screed or dry screed.
- Tile adhesive
Ceramic tile adhesive contains all the necessary components for a perfect leveling, including quartz sand, cement and plasticizers. But there are certain nuances that need to be taken into account.
- Tile adhesive can be used when a “cosmetic” leveling is required in a thin layer, for which it will be necessary to form a solution that resembles liquid sour cream in consistency.
- If a thicker layer of adhesive is required (differences of 5-10 millimeters), then the mixture should be thicker, and the work itself should be carried out in two stages. The first is the pouring and stretching of a layer of 3-6 millimeters, the second is the creation of a finishing layer up to 4 millimeters thick.
- A cheaper type of tile adhesive is available for leveling work than for direct installation of tiles or porcelain tiles. Even such glue will contain water-repellent additives that will make it possible to do without additional waterproofing when leveling the floor in the bathroom, kitchen, balcony, etc.
 Even such glue will contain water-repellent additives that will make it possible to do without additional waterproofing when leveling the floor in the bathroom, kitchen, balcony, etc.
 There are no specific guidelines for using tile adhesive for floor leveling. Each specialist develops his own algorithm and chooses his own version of the leveling mixture, which will be characterized by certain curing times and the possibility of further operation as part of laying ceramic tiles. As a rule, for indoor work, these terms are 5-7 days. As for technology, the main thing here is to produce high-quality preparation of a concrete base. This process involves cleaning the floor from dirt, dust, oil and paint stains. The base should also be checked for loose and exfoliated areas, cracks, pits and cavities. All these shortcomings, before leveling, it is recommended to fill with a repair mixture.
- Self-levelling compounds
The most convenient option, allowing you to create an even layer with a thickness of 2 to 100 millimeters. Such leveling compounds can be divided into basic, universal and finishing. Any type of self-leveling mixture is suitable for leveling, but here everything will depend on the thickness of the required layer. To get the most durable foundation, it is recommended to focus on cement-gypsum or cement-type compositions.
The advantages of self-levelling compounds include the convenience of their use, as well as the high speed of the workflow. Ceramic or porcelain stoneware tiles can be laid on top of such a composition 3-5 days after the leveling work has been carried out. In this case, the brand of self-leveling compound is selected in accordance with the place of application (indoors or outdoors), the application method (manually or using equipment), as well as the required layer thickness. The self-leveling floor must be created in accordance with the instructions, with preliminary cleaning of the concrete surface from the old coating and dirt. If there are weak areas or cracks, they must be cleaned and filled with a repair mixture. After that, it is necessary to apply several layers of primer, dry the surface for a day, and proceed to pouring.
The alignment process is carried out using point beacons. If the leveling layer has a thickness of more than 1 centimeter, it is recommended to use a damper tape. The solution must be mixed in the proportions specified by the manufacturer. The distribution process is carried out using a doctor blade or spatula, after which the poured layer is rolled with a special spiked roller, which seals the coating and rids it of air bubbles. A few days after pouring, the leveled base is ready for laying ceramic tiles.
- Cement-sand mix
Cement-sand mix is one of the most inexpensive all-purpose products for leveling the base, regardless of its type. The mortar contains a large amount of binder, as a result of which you get a very hard floor surface, protected from deformations resulting from high loads. The disadvantage of this method is the long curing time, up to 28 days. This forces many craftsmen to abandon the screed in favor of tile adhesive or self-leveling compounds.
If you want to level the floor with a layer thickness of more than 3 centimeters, a cement-sand screed can be an excellent option. The mixture can form independently. To do this, you need to take 5 parts of sand, part of cement and the required amount of water to form a thick solution. For greater thermal insulation and strength, you can also add reinforcing fiber, screenings, crushed slag, expanded clay or crushed stone. If you don’t want to mess around with proportions, you can purchase a pre-packaged mix that just needs to be mixed with water in the right amounts.
Beacons created with nails or metal profiles must be installed before starting work. Next, the composition is applied to the concrete surface and leveled by the rule. It is recommended to cover the flooded floor with cellophane and, as it hardens, periodically moisten the mixture in order to uniformly solidify and gain strength. Depending on the thickness of the cement-sand screed, the coating will be ready for subsequent work in 14-28 days.
- Dry screed
Dry screed has many advantages. These include the high speed of the laying process, low cost, cleanliness of the installation process, in comparison with the previous version. The overall leveled structure will not be too heavy, which is important for work in multi-storey buildings or in private houses with a dilapidated foundation. Experts say that a dry screed can be formed without specialized tools and experience. In addition, it will be possible to carry out the necessary communications inside the coating, which makes it possible to effectively hide them under the surface of the floor covering. As in the previous version, the expediency of leveling the floor with a dry screed manifests itself only in the presence of significant surface differences, since it becomes possible to achieve serious savings if it is necessary to form a layer of 3 centimeters or more.
Work on leveling the floor with a dry screed is carried out in the following sequence. At the initial stage, the concrete surface must be prepared as described in the previous paragraphs, removing dust, dirt and stains, as well as eliminating weak points. Next, it will be necessary to continue the waterproofing layer, which can be polyethylene with a thickness of 200 microns. Along the perimeter of the plinth (wall) part, the room is finished with a dumping tape, which should grab the film. With the help of the level, T-shaped beacons are placed, which are fastened with self-tapping screws.
Next, a 3 cm (or more) layer of fine-grained slag, perlite or expanded clay is poured over the waterproofing layer. The surface is leveled using a level and a rule, after which it is well compacted. OSB or GVLV sheets with a locking connection are laid on top. Laying should be carried out at a distance of 25 centimeters. Next comes a layer of concrete-contact mixture. When it is completely dry, a thin layer of screed can be poured on top, on top of which ceramic or porcelain tiles will be laid.
Simultaneous leveling with installation of ceramic tiles
This technique involves the use of tile adhesive, which we discussed at the very beginning of the article. But, instead of pouring a layer of glue and waiting for it to dry, the situation with leveling the floor plane at the same time as laying the finishing floor covering will be considered here. Please note that in the first case, we took the cheapest glue that formed the leveling layer. Here it is also recommended to take a high-quality adhesive composition, since tiles will be directly laid on it. The alignment process is carried out as follows.
Prepare the surface in the usual way, cleaning and patching weak and damaged areas. Next, using a level, mark the lowest and highest points on the floor. In the absence of a level, you can use the usual rule with a spirit level. The next step is laying out the ceramic tiles. A solid tile should be laid along the free wall and at the entrance. That is, a narrow undercut row of tiles should not be located along the wall. A control beacon is installed between the lowest and highest marks. Laying should start from the maximum point. For even laying of tiles, the direction must be set with a stretched cord.
Mix the adhesive solution according to the adhesive manufacturer’s instructions. The mortar must be applied to the ceramic tiles with a comb. The thicker the adhesive layer, the more even the coating will be. The first tile is laid with mandatory level control, followed by fixation of a special SVP-clamp (tile leveling system). Repeat the procedure until the complete formation of the finish coat. Tile adhesive is characterized by fast drying. But, in order not to damage the built floor level, it is not recommended to walk on the tiles for two days after laying. When the glue dries, you will have to knock down the clamp guides, and then grout the tile joints.
Which is your preferred option?
When choosing one of the described options for creating a smooth surface for laying ceramic tiles, be guided by your financial capabilities, the time that you can allocate for the curing process, as well as the degree of your own professionalism. The last option can be ignored if, instead of doing the leveling work yourself, you hire a specialist. Finally, we note that the importance of preliminary work on the preparation of a concrete surface should not be underestimated. The integrity of the leveling layer, as well as the durability of the layer of ceramic or porcelain tiles laid on top of it, will depend on it.
How to use tile adhesive instead of cement
Article rating
Loading…
Is it possible to level the floor with tile adhesive and how to do it correctly
Arrangement of floor screed is a mandatory step in surface preparation. A perfectly flat floor is the key to fast, correct, even laying of the floor covering without drops.
One option is to level the floor with tile adhesive. During the repair, for a long time I could not believe how this was possible, but I took a chance and tried it, so I am sharing my experience.
- Is it possible to align the floor
- tile glue alignment with tile glue: technology
- Tile glue instead of a bulk floor
- How much the tile glue is dried up
- videos on the topic
Tile laying on a cement mortar
work itself work itself laying tile material on a cement-sand mortar is not difficult. Lay out the first tile according to the level (laser or manual) in the middle of the room in accordance with the marking scheme made earlier. All other tiles will lie exactly from the central tile in level. Do not overtighten the clamps so that the tile does not burst.
It is imperative to rub (smear) the mortar at the place where the tiles are to be installed so that the mortar adheres better to both the floor and the tiles. Please note that the batch number, direction and grade are always written on the back of the tile. Therefore, it is strongly recommended to sort through the tiles so that the batch numbers match, so that there are no problems with tile swelling in the future. The remains of the cement-sand mortar after laying the tiles are best removed. It is recommended to nail the tile on the side closest to the tile you have already laid so that all the mortar does not fit into the joints of the laid tile material. Next, nail the tile, holding the edge. Do not forget to always check the level in width, length and height so that the tile lies evenly.
Tiles on cement mortar must be laid in such a way that there are no voids under the tile material itself and there is not too much mortar itself, as this can lead to the fact that excess mortar will crawl out through the joints between the laid tiles, or even lift already installed tiles. This will lead to unnecessary work on leveling the already laid tiles, and therefore to significant time costs.
When laying tiles, it is recommended to wet the back of the tiles with water using a spray bottle. Thanks to this, the excess cement mortar will easily come out, and not linger under the tiled material.
It is best to clean the joints with a used floor leveling system. And it is better to do this immediately, until the cement has hardened, otherwise it will be very problematic to remove the mortar from the joints in the future.
If you use the floor leveling system and you plan to lay tiles for more than one day, then be sure to install clamps on all edges of the tile so that the next day, when the cement hardens, you do not have to suffer with the clamp already in the hardened mortar.
Today, the choice of building materials in any store is huge. When planning to make repairs, you do not need to look for friends who can sell imported wallpaper or scarce tiles from under the counter. And cement mixtures no longer need to be mixed by yourself.
However, the question is very often asked on the forums: “Is it possible to plaster with tile adhesive?” As a rule, the reason for such a craving for experiments is banal savings. Firstly, it happens that tile adhesive is an order of magnitude cheaper than a plaster composition from a good manufacturer. And secondly, if you are going to glue ceramic tiles in the bathroom and have already purchased the necessary materials with a margin, then plastering the walls with tile adhesive will help solve the problem of unexpectedly revealed surface irregularities.
Is it possible or not?
Manufacturers of Portland cement-based adhesives (eg Ceresit) sometimes indicate on the packaging that the adhesive can be used as a leveling material. Plastering with tile adhesive, as practice shows, fully justifies itself if the instructions for use are followed (that is, the layer thickness must not be exceeded, it is necessary to wait for drying, it is recommended to apply a primer before and after application).
However, when substituting one material for another, as in the case of using tile adhesive as plaster, one must also be aware of differences in technical characteristics. If we compare, for example, the SK QUARTZ tile adhesive and the universal TsPS M-150 of the same brand, we will see that the compressive strength of the cement-sand mixture is higher. In addition, the dry mix is much cheaper. And by the way, this universal plaster is used just as often instead of tile adhesive.
And if we connect?
The inquisitive mind of folk craftsmen went even further: on the net you can also find questions about mixing the two above-mentioned compositions. According to the experimenters themselves, the resulting material is resistant to cracking and durable. But the exact proportions of adding glue to the plaster are difficult to determine. After all, it is necessary to proceed from the characteristics of a particular adhesive and plaster mixture. Therefore, we do not recommend conducting such tests on the walls of your own home. Especially if you are new to decorating.
Conclusion
Each material is best used for its intended purpose. But if the question arose sharply, is it possible to use tile adhesive instead of plaster, then our answer is – use it safely!
Assortment of tile adhesives
The building materials market is extremely rich in offers in any type of construction, including materials for facing works. No room is complete without ceramic tiles. Somewhere, part of the surface is covered with tiles, somewhere they can tile the entire room in order to be able to maintain sterile cleanliness. Tiles are glued to the main surface.
Adhesives have a set of requirements. The material must be:
- the material must be reliable – so that the tile does not fall off after a while;
- weather resistant – especially if the tiles are glued outdoors;
- easy to use;
- UV, mold, fungus and bacteria resistant;
- fireproof;
- water, moisture and vibration resistant;
- economical.

Adhesives are specialized according to the type of surface on which the tiles will be glued:
- wall;
- gender;
- ceiling;
- foundation;
- plinth;
- roof;
- steps;
- facade.
Adhesives are different for interior and exterior use. There are also universal brands of adhesives.
There are a lot of such offers on the building materials market, it is difficult for an inexperienced person to choose.
Preparation
In order to make a good tile adhesive with your own hands, you need:
- Mix cement and sand in a separate container in a ratio of ¼.
- Pour 1/20 of the total volume of PVA glue into the resulting mixture.
- Mix everything thoroughly.
The adhesive is ready to use. It is very simple to make calculations: 250 g of glue is consumed per 1 kg of cement, where 4 kg of sifted sand is added. The cost of the composition is several times less than the purchased finished composition.
Features of homemade adhesive that can be prepared at home
Standard mortar, which is intended for attaching tiles, has the following composition:
- cement,
- sand,
- water;
- PVA glue.
Sand is the base material. It plays the role of a filler, which must be selected exclusively fine-grained. The diameter of one particle should not exceed 2 mm.
Please note! During the selection of the correct proportions, the material should be measured not in terms of weight, but volume. It is necessary to adhere to the ratio of 1:3. This means that if you take 2 buckets of cement, in accordance with the proportion, you need to take 6 of the same measures of sand.
Due to the fact that the tile mortar has fast hardening properties, it is usually prepared immediately before the tiling stage. Glue, which is made by hand, is used only for three hours.
When cement and sand are already mixed, PVA glue must be added. Pour 0.5 kg of glue into one bucket of solution. When the installation of tiles is carried out in a room where the level of humidity is high, then in this case the solution may increase in volume.
Homemade tile adhesive for bathroom floors
Properly prepared tile adhesive is one that has a thick consistency. You can find out if the mass is ready for use by its uniformity. The solution can be used when it looks like a uniformly mixed mixture.
Uniformity of the slab composition
Additional tips
- In order to understand whether the amount of water in the mortar is sufficient, the following method can be used. Scoop up the solution with a trowel and tilt it, if the mixture slides in one piece, then this indicates not enough water in the solution.
- After the first mixing, check the resulting mortar with a trowel. If the mixture will drain, you need to wait until the solution is infused. Also use less water the next time you mix.
- A good mortar should have an even consistency and adhere to the surface of the trowel. In this case, you can be sure that the ceramic tiles you have laid will be securely adhered to the surface.
 If the mixture will drain, you need to wait until the solution is infused. Also use less water the next time you mix.
 ATTENTION! It is necessary to check the amount of water and add it before the solution was left to infuse. After it has insisted, no more water can be added. In addition, if during operation the solution began to thicken and lumps began to appear in it, in this case water should not be added either. You can try to mix it again, but without adding liquid.
Tools for making glue
If you need to make up to 10 liters of glue, it is best to mix it by hand using a long rectangular trowel. For mixing large volumes, you will need a mortar mixing paddle attached to a hand drill. The paddle should be designed for mixing cement, not paint.
Safety Precautions
Although there is no need to worry about protection from harmful fumes when mixing cement slurries, there is still another problem – dust, which can be protected from with a properly fitted dust respirator. It is also best to wear rubber seals when working with grouts, as the grout is caustic and very difficult to peel off the surface of the skin when it dries. If you think that gloves interfere with your work, and because of them you cannot do it accurately and accurately, then keep a bucket of clean water near you and wash your hands in it from time to time.
Mixing the adhesive
Mixing the cement mortar by hand is a simple process, but requires care.
Pour in the liquid first, and then gradually add the dry mix into it, mixing all the ingredients thoroughly.
After this mixing, about 90% of all lumps are usually broken, so it takes time for the dry mixture to completely moisten. Let the solution stand for about 10 minutes so that the liquid wets the remaining lumps, then they will be easy to break.
- Stir the glue again, this will help to get rid of the remaining lumps.
- The adhesive is now ready for application.
Additional Tips
If you are mixing cement with a paddle, set the rotation speed to no more than 300 rpm and make sure that the paddle is immersed in the mortar, otherwise the mixture will whip and there will be air bubbles in it. The presence of air bubbles reduces the amount of solids in a portion of the adhesive solution and can halve the adhesive power of the adhesive. Once the cement mortar is thoroughly mixed, let it stand for 10 minutes and then mix again before use.
The consistency of the mortar is affected by temperature, humidity and the type of tile that is laid on the mortar. Mortar prepared under warm and dry conditions should be slightly wetter than if mixed under cold weather and high humidity. In addition, unglazed tiles easily absorb moisture from the mortar, therefore, the mortar for laying such tiles must be wetter than for laying glazed tiles, which only slightly absorb moisture from the mortar.
If you have to work in hot environments and you suspect that the mortar you will be using may dry out prematurely, do not add too much water to the mixture as this will weaken the mortar. If the prepared cement mortar begins to set during its application, it should never be diluted with water. Discard the old solution and prepare a new batch.
How to check the quality of the mortar
Ready-to-use cement mortar should be damp enough to spread easily over the tile and substrate, but if it is too wet it will be difficult to work with. To check if the glue has the right consistency, do a very simple test. Use the trowel to scoop up the solution from the bucket and then turn it upside down. If the solution easily separates from the trowel and falls down, then it is too loose. In this case, it is necessary to add dry mixture and mix the solution. If the solution is held for a sufficiently long time on the trowel without sagging, then it is ready for use.
Another test method is to apply the prepared adhesive to a small area of the substrate.
Adhesive too dry
Adhesive prepared correctly
Adhesive too wet, combs not holding shape
When you remove the tile from the base, the entire back of the tile should be covered with adhesive. If the adhesive is properly prepared, of the correct consistency and spread in a sufficient thickness, then the adhesive layer should be evenly distributed between the base and the back of the tile. If the adhesive mixture is too wet, then the combs formed as a result of “combing” the solution will not hold their shape well. If the prepared adhesive is too dry, the correct ridges will form, but the mortar will not be able to sufficiently moisten the tile, so there will be very little solution on its surface.
If only parallel lines and not ridges are visible after applying the adhesive, this means that the consistency of the mortar is correct, but the adhesive layer is not thick enough. In this case, you need to put more glue and “comb” it with a spatula with larger teeth. Conversely, if there is so much glue on the back of the tile that it goes beyond the edges of the tile and can fill the seams between the tiles, this means that the adhesive layer is too thick and needs to be “combed” at a lower angle of the trowel or with a trowel with smaller teeth. From experience, the size of the teeth should be approximately 2/3 of the thickness of the tile to be laid.
We also advise you to see articles
Tile adhesive. Mastics and cement mortars
Gluing tiles: adhesive application technique
Working with mastics.What types of tile adhesive are available? (with pictures)
Choosing the right tile adhesive is just as important as choosing the right tile for your project. The task of the adhesive is to adhere the bottom of the tile to a surface called the installation layer. Over the past few years, there have been significant improvements in adhesives that have made it easier for people to lay tile on their own without having to outsource the job to a professional. Organic mastics and thin mortar are the most common, although latex, acrylic and epoxy are also used.
Organic mastics come pre-mixed and are sufficient for most tile projects.
The first step in choosing a tile adhesive is to consider the type of installation used in the project. The tile installer must decide whether the tile is to be installed inside or outside, on a wall or floor, in a damp or dry place, among others. In addition, the installation program must reflect the type of bed installation to be used: drywall, concrete, plywood or backerboard .
Sanding mortar recommended for ceramic tile floors.
Organic mastics are one of the most popular types of adhesives. They are commonly purchased because they require no stirring and help the wall tile stay in place without slipping. However, those who use them must be careful where the tiles will be laid because this type of adhesive should not be used in areas exposed to heat or for tiles laid outside the home.
Tile adhesive depends on whether the tile is to be placed inside or outside, on the floor or on the wall.
The other most common type is thin grout. It is usually mixed by the tile installer and has better bond strength and greater flexibility than organic mastics. This adhesive is applied to the tile in a thin layer, typically no more than 0.1875 inches (4.76 mm) thick. A wide range of thinner grouts are available, making it easy to find the right one for almost any specific job.
Portland cement, which is commonly used for pouring slabs and paving, can also be used in mortar.
Water-mixed mortar or dry mortar is a thin setting mortar. It is a combination of Portland cement, sand and a water retention agent. This solution is simply mixed with water and is useful as it allows the adhesive to hydrate. It is a favorite among adhesives in the tile industry.
Latex and Acrylic Mortar contain additives that increase adhesion and reduce water absorption and are ideal for wet or dry installations. Epoxy grout is made from sand, cement, resins and hardeners and is more expensive than most other tile adhesives. This is a good option when the installation bed is incompatible with cheaper adhesives. The middle coat grout is applied thicker than the rest at 0.25 inches (6.35 mm), making it a strong option that works best on handmade or uneven-sided tiles.
Following the general rules of tile adhesive and the many questions at the home improvement store should make it easy to choose the right type. It is also important that consumers read the instructions for each adhesive before purchasing.
Tile adhesive is often referred to as “mud” due to its appearance. Cement tile adhesive
and its methodology
Tile Adhesive is a ready mix specially formulated from OPC, selected fine sand and additives to improve its basic properties when laying tiles. High performance tile adhesive can be used to lay tiles on existing tiles, on polished cement, on wood substrates (using a primer), or on other special substrates.
Traditional cement-sand mortar for tiling and its problems
Sand cement is composed of ordinary Portland cement (OPC) and sand. OPC is used for rendering and masonry, while sand is usually river sand, the grain size, purity and quality of which is difficult to control.
Inconvenience of handling
OPC comes in small bags and the sand has to be purchased in huge quantities that take up a lot of storage space.
The OPC and sand need to be moved to another location for mixing as the process is messy and dusty. Before laying on sand-cement tiles, it is necessary to soak in water for at least a day, and this takes a lot of time.
Water Soaked Tile
Labor and Inefficiency
The traditional way of laying sand/cement tiles is to apply the cement/sand mixture in a lump on the back of the tile, so this must be done one tile at a time.
Aesthetic and peeling problem
Without an additive to help retain water, the cement-sand mixture dries quickly, making it difficult to adjust the tiles after installation. This leads to an aesthetic problem with the line of the tile, as well as poor bonding strength, which subsequently causes the tile to peel off. When laying tiles in the traditional way by applying a sand-cement mixture in a lump on the back of the tile, voids form under the tile through which water can seep. This creates a problem with white spots.
In addition, without glue under it, the tile will be fragile.
Limitation of use
Poor bonding strength of sand-cement mix is caused by dirt in sand and undefined mix ratio. In addition, there are restrictions on the use of the mixture for laying the following tiles under the following conditions.
- Low absorbency tiles
- Granito 60 x 60 cm or larger
- Glass mosaic – polished backing
- On existing tiles
- On moving surfaces
- On high pressure and impact areas
Waste material
A thick layer of sand-cement mixture must be used for traditional tile laying in a lump and / or for adjusting the level of the floor to obtain a mechanism for its adhesion .Then there will be more loads on the structure. Also, there will be wastage of material as the mixture dries faster than application.
Ready-to-use tile adhesive
Tile Adhesive is a ready mix specially formulated from OPC, selected fine sand and additives to improve its basic properties when laying tiles.
High performance tile adhesive can be used to lay tiles on existing tiles, on polished cement, on wood substrates (using a primer), or on other special substrates.
Easy to use
Tile adhesive is very easy to use and is ready to use after mixing with water. The packaging of the product makes it easy to transport, ensuring a low level of dust and a clean working environment. The tile does not need to be soaked, just unpack it and lay it down.
Fast
A notched trowel is commonly and effectively used to spread a mixture of tile adhesive over an area of approximately 1 m2. The tiles are then continuously laid on the notched adhesive and quickly aligned to the lines.
Quality of work
The optimum setting time of the tile adhesive makes it easy to adjust the tiles over a period of time. Makes the laying of tiles in a line and gives the final aesthetic look. Applying the tile adhesive with a notched trowel ensures it is fully applied to the back of the tile and reduces many problems such as tile breakage, especially.
on the corner, water seeps, stains or fades. The full contact of the adhesive with the back of the tile and the substrate ensures high bonding strength and long lasting tiling.
Applications
Tile adhesives designed to suit specific applications such as tiling, glass mosaic, large granite (60 x 60 cm), tiling on polished substrates, on dry wall systems, on existing tiles without removing them, outdoor areas, parking lots, industrial areas, swimming pools and much more.
Economic reasons
Laying tiles using tile adhesive with a notched trowel requires less material. The adhesive layer is much thinner than a sand-cement mixture, which reduces the load on the building structure. A bag of 20 kg of tile adhesive can be used for laying tiles on an average area of 4-5 m2. A bag of 25 kg of tile adhesive can be used to lay tiles on an average of 6-7 m2.
The area covered depends on the smoothness of the substrate, the working tools and the skills of the tilers.
![]()
Comparison of tile adhesive and grout
Tile adhesive
Benefits
- Quick and effective
- Easy to use, mixes only with water
- without waiting for moisture to evaporate
- Used on existing tiles, many special substrates such as polished cement, drywall systems, etc.
- Subtle layer
Disadvantages
- higher price for a bag
- must correctly level the base
Sand-cement
Advantages
9000 9000
- Labour-intensive
- Tiles must be impregnated
- Moisture can accumulate under tiles
- Easy to peel off
- Not suitable for low absorbency tiles such as 60 x 60 cm granite or any larger size. How to mix tile adhesive for mixing. On the other hand, for smaller projects, you can mix the tile adhesive with a spatula around the edges, but you must remember that this will take longer.
![]()
That’s why for surfaces over 30 sq. Feet / 10 m2 is better to buy or rent a drilling rig. This will make the job faster and much better. The quality of the thin adhesive is of great importance, especially if you are laying wall tiles on old surfaces.
Then, once you have the right tools for mixing the tile adhesive, you will also need a rubber bucket. If the construction bucket is not new, it must be thoroughly cleaned before pouring water and cement-based adhesive.
Note: If you are inexperienced with adhesive and ceramic tiles, you should mix a small amount of tile adhesive. Therefore, pour approximately 1/4 gallon – 1 liter of water into the bucket to prepare the amount of glue per 3 square meters. Feet / 1 m2.
Then you have to pour the adhesive into the bucket until it goes through the water. There is no magic formula to tell you how much tile adhesive to pour into the bucket, you will get it as soon as you gain experience. However, you must give the glue some water for a couple of minutes before you can start stirring it.
![]()
Note: Wear a respiratory mask when working with tile adhesive and make sure the room is ventilated as the powder is toxic.
After the adhesive has soaked into the water for a few minutes, start mixing with the paddle attachment. If you are using a torque controlled drill, it is best to start at medium speeds.
Note: To protect the floor from adhesive contamination, place the bucket on top of a large old cloth or newspaper. Ideally, you should mix your tile adhesive outdoors, but you can also do this task in a well-ventilated area.
If you need to knead the tile adhesive yourself, we recommend that you use your feet to fix the bucket in position when using the drilling equipment. As you can see in the image, you need to hold the bucket in place using your feet, otherwise the bucket will move continuously , and you will not be able to stir the dilute solution.
It takes a few minutes to stir to get the right tile adhesive, otherwise the tiles will not stick together.
So make sure you thoroughly mix the tile adhesive in a circular motion until you get a homogeneous mixture.
Note: To check if the tile adhesive has the correct consistency, you can load the material onto a spatula. If the mixture slips off the spatula, you have added more powder. Conversely, if you shake the margin trowel and the glue doesn’t move, you’ll have to add more water.
After you have thoroughly mixed the fine adhesive, leave it for 5 minutes to allow the water to penetrate the powder and activate the adhesive. Although at first glance this may seem insignificant to you, this aspect is very important for obtaining a good glue. Another aspect you should be aware of is that the thin set dries quickly, so you should be ready to spread it on the wall/floor and install the ceramic tiles. Once you have mixed the tile adhesive, in most cases you can use it within 3 hours.
Note: If the solution is light in color, use white adhesive.
On the contrary, if you will be applying a dark colored grout, you should use a regular gray thin set.
If you want to check the consistency of the tile adhesive, load the material with a spatula. If the solution sticks to the spatula and does not fall off, while you can spread it on the floor, then it has the right consistency.
Note: If the adhesive slips off the spatula, add more powder and mix thoroughly. If you notice lumps or dried particles in the composition, mix it again or add a little more water until you get the desired consistency.
Tile installation procedure
A successful tile installation guarantees years of trouble free operation and adds value and beauty to your home. In order to correctly install the tile, it is important careful planning. To achieve the best results, follow the following actions:
- Preparation of surface
- Scheme
- Tiles
Ground of the seams 9000 9000
Carefully read all the instructions before the start.
laying tiles. Laying ceramic tiles requires a variety of tools. Before you begin installing tiles, check with your retailer about buying or renting any specialized tools that you may not already have.
Hammer
Spatula
lips large
level
Pistol for seal
Ceramic Installation tool
Flip for a solution
TRACOUS AND BRUSED POLODICAL POLODICALS
Kusachka
(option for floor tiles)
V-notch trowel (adhesive)
Square tooth trowel (thin mortar)
Tile cutter
Tile spacers (optional for floor tiles)
1. Surface preparation
Ceramic tiles can be installed on most structurally sound substrates. Ensure that all surfaces to be tiled are clean, smooth, dry and free from wax, soap suds and grease. Any damaged, loose or uneven areas must be repaired, patched and leveled. Remove any moldings, trims, appliances, etc. that may interfere with installation. Door jambs can be trimmed to allow tiles to slip underneath.
![]()
2. Layout
When cladding walls, bathtubs or shower tiles, first find the center point of the wall. Using a level, draw a plumb line in the center of the wall.
Align the row of loose tiles along the bottom of the wall from the center line, leaving even joints between the tiles.
If your tile has built-in spacer lugs, the tiles can be abutted to automatically leave uniform 1/16″ joints. If this layout leaves small cuts on the walls (less than 1/2 tile), adjust the center plumb line half a tile closer to the side wall.
Now find the lowest point of the floor (or tub) horizontally using a spirit level. Place two tiles here and draw a horizontal line on the wall at the top. With a level, continue the line around all the side walls so they are tiles. This line is the guideline for the first row of tiles to be set higher.
Start tiling in the center of the wall above the horizontal track. Install one half of the back wall at a time. Install the last two rows last.
Trim the bottom tile and lay it on the floor (or bathtub) if it’s uneven. Leave a 1/8″ gap above the tub to seal around the tub.
Repeat the above process for the side walls. Mark the outer lines of the tiles on the walls that will not be fully covered by the tiles to distribute the adhesive.
Leave the tile where you plan to install ceramic accessories (soap dish, towel warmer, etc.). If necessary, process the edges of the walls with trim parts.
Floor plan
When laying tiles on the floor, first mark the center points of all four walls. Draw lines with chalk between the center points of opposite walls. The lines will intersect in the center of the room. Make sure the lines form perfect squares and adjust if necessary.
Lay out the row of loose tiles along the center lines in both directions, leaving room for even joints between the tiles (use tile spacers).
If this layout leaves small cuts (less than 1/2 tile) on the walls, adjust the centerline by placing a new chalk line half a tile closer to the wall.
Repeat this process along the other center line, adjusting if necessary.
Now divide the room into smaller grids by adding additional chalk lines parallel to the center lines. To match the exact dimensions of these gratings, lay out approximately 2″ x 3″ tiles, starting in the center of the room along the center lines. Use tile spacers or leave even seams between tiles. Measure this grid and use the dimensions of each smaller grid throughout the room.
Start tiling in the center of the room. Install one quarter of the room, one quarter at a time. Complete each grid before moving on to the next. Lastly, cut and lay tiles around the perimeter of each grid. Leave a 1/4 inch gap between tiles and walls.
Do not walk on fresh tiles for approximately 24 hours until they have cured.
Worktop plan
Lay tiles from front to back when laying countertops. Start with the opposite cut, then lay the full tiles on the first row working backwards so that all cuts are made on the back row against the wall.
Special decorative items are available for use around built-in sinks, appliances, etc. if needed.
If necessary, make parallel chalk lines on the media to keep rows straight.
To cover the backrest, align the seams with the top tiles. Start with full tiles at the counter, working so that all cuts are made in the top row under the cabinets. Use nose trims on flat walls or sides. For protection, tile countertops must have a reverse tile splash that is at least four inches high.
3. Installing the tiles
Variety of shades and textures is an essential characteristic of ceramic tiles. For a mixed effect, mix tiles from several cartons as you lay them.
The ceilings in front of the walls are tiled.
The walls in front of the floor are tiled.
Tiled tops in front of aprons.
Adhesives
It is important to use the correct adhesive for the particular substrate (surface) to ensure proper bonding. Before laying the tiles, choose the right adhesive.
![]()
Once you have selected the correct adhesive or mortar, read all instructions and precautions on the package before use. Mix the thin kit or mortar according to package directions. Mix just enough to use within 30 minutes. Pre-mixed wall tile adhesives can be applied directly from the can without stirring.
Determine the correct type of trowel (V-shaped or square) and the correct size (notch depth) for the type of tile to be laid. See Recommendations in the installation material package.
Applying adhesive
Apply a 1/4 inch thick layer of adhesive to the surface of one section of grate, using the flat side of the spatula. Do not cover recommendations. When finished, immediately use the notched side of the trowel to apply glue to the raised ridges while holding the trowel at a 45 degree angle.
Remove excess adhesive, leaving the installation layer uniform and uneven. Distribute no more area than can be installed in 15 minutes.
Installing tiles
Once you have identified the right adhesive and grout, start laying the tiles.
Start with the first tile in the corner of the grid and work outward. Lay the tiles one at a time, rotating slightly. Do not push tiles back in place. Insert tile spacers as each tile is laid, or leave even seams between tiles. Continue until all tiles in the grid have been set. When the mesh is fully installed, tap the tile with a rubber mallet or mallet and block of wood to ensure a good grip and a level surface.
Remove excess adhesive from the joints with a spatula and from the tile surface with a damp sponge before proceeding to the next grid.
Each grid must be installed correctly and completely within the layout grid lines for a successful overall installation.
Tile to cut
Carefully measure the tile to be cut and mark with a pencil or marker. Too sharp edges can be cleaned with carborundum. Make a straight or diagonal cut with a tile cutter. Make small curved cuts with wire cutters. For best results, chop into small pieces. Make curved cuts along the entire length with a rod saw.
Soap dishes, towel racks, paper holders, etc. should be installed in the places left for them.
Apply room temperature vulcanizing silicone sealant to the back of each accessory. Position over hole and press firmly. Wipe off any excess silicone that may have leaked from the sides. Use a paint tap to hold in place and prevent slipping during curing. After 24 hours, remove the tape and grout around the perimeter of the edge.
4. Grouting
Before grouting, the tiles must be well fixed to prevent the joint from breaking. Specific time on the glue package. As a rule, you should wait about 24 hours before grouting the joints. Remove any spacers used for tuning.
Specify the grout color of your choice. For best results, choose tile color coordinates.
Read all instructions and precautions on the packaging carefully. Mix the grout according to the instructions. Make just enough to use within 30 minutes. Use protective gloves to protect your skin.
Apply the mixed mortar to the tiled surface, pressing the mortar into the joints with a rubber trowel or squeegee.
Tilt the float at a 45 degree angle to facilitate compaction.
Immediately remove excess grout from the surface with the edge of a float. Tilt the float at a 90 degree angle and scrape it diagonally across the tile. Continue the compaction process, then scrape off the excess until you have rubbed for about 30 minutes or until the mixture begins to harden.
Discard hardened grout and start cleaning procedure.
.
How to choose the right tile trowel size: First steps
Before you start laying tiles, you must decide which tile trowel you will use. Here comes the tricky part: what size notch should I use? Should I use a U-notch or square notch trowel? These are common questions you should ask yourself before starting your tiling project.
However, there is no standard trowel size for laying tiles, as it depends on the size and type of tile to be laid. Each type of tile may require a different trowel size. Pay attention to the amount of coating for the tiles.
![]()
In this article, divided into two parts, we will try to solve some questions you may have when placing tiles. Let’s start!
Proper adhesive coverage means a minimum of 85% of total coverage under tiles for installation in dry areas (most floors, fireplace, etc.) and a minimum of 95% total coverage in wet areas (showers, bathtubs, etc.). Added to this requirement is full coverage at all four corners of the tile, but those are the basics.
The type of tile determines the size of the trowel
To get proper coverage, you need to choose the right sized trowel that will provide that amount of coverage under the tile. Test this by placing the tile as usual, then pulling it up and checking the back. There should be no more lines from the trowel and you will see full coverage of the adhesive on both the back of the tile and the base.
How the trowel size is measured
The trowel size and tooth spacing are the basis for measuring the tile trowel size.
This tells you how much adhesive the trowel will leave on the substrate when you spread it. The shape of the trowel’s teeth and the distance between them determines how much adhesive will be squeezed between the tile and the base after the tile is fully laid.
RUBI produces two basic types of tile spatulas: square and U-notched. They are measured in the same way, the first number is the width of the notch (the distance between the teeth), the second number is the depth of the notch.
When using a spatula with 12 mm x 12 mm square notches, 12 mm ridges of adhesive are left on the substrate, spaced 12 mm apart. A tile trowel with only one size (e.g. trowel 12 mm) means that both sizes are the same.
12mm x 12mm square notched tile trowel, size
Using a 6mm x 10mm square notched trowel will leave 6mm wide x 10mm high adhesive ridges on the surface with 6mm gaps between them.
Tile trowel with square teeth 6 mm x 10 mm, size
U-notched trowels usually have only one number.
This is both the width and the depth of the teeth. I use a 10mm spatula with a U-notch and a crescent-shaped notch. When you apply adhesive with a U-notch trowel, semi-circular ridges are left on the surface. The height of the ridges and the distance between them will be the size of a trowel (in this case 10 mm). The width of each comb is twice the width of the spatula – 20 mm.
U-notch tile trowel, 10 mm, size
How much adhesive the trowel will leave under the tile
The size of the trowel determines how much adhesive to apply to the substrate, as well as how thick the adhesive layer should be under the tile. When you using a square notched trowel of the same size (e.g. 12mm x 12mm), the adhesive will be half that size, or 6mm, under the flat tile on the flat backing.
Spatula size determines the amount of adhesive
When you fully lay the tile in the adhesive layer, it distributes the adhesive ridges evenly in the gaps between the trowel lines.
Since the spaces between the ridges are the same size as the ridges themselves, this will bisect the height of the ridges. So a 12mm x 12mm spatula will leave a 6mm thick layer of adhesive under the tile. A 6 mm x 6 mm spatula will leave a 3 mm layer of adhesive under the tile.
Using a U-notch trowel and embedding the tile in adhesive leaves a layer of adhesive under the tile just over 1/3 the size of the trowel teeth. Thus, a 10 mm U-notch trowel leaves a 3 mm adhesive layer under the tile to be laid.
Trowel with 10 mm U-notches leaves a layer of adhesive 3 mm thick
Trowel with U-notch or square notch? What shape to use with a tile trowel
Since a 10mm U-groove trowel and a 6mm square groove trowel leave a 3mm layer of adhesive under the tile, why choose one over the other?
The difference in the shape of the trowel’s teeth determines how easily the tile sinks completely into the adhesive layer. Simply put, it is easier to squeeze the tile into the adhesive layer with a U-notch than with a square notch.
You are destroying rounded ridges, not square ridges.
What size tile to use with a trowel
Square ledges made with a square notched trowel tend to collapse on each side when you lay the tile into the substrate. Pushing the tile into the square ledge pad causes the ridges to fold into
.
How thick should the concrete slab be?
The thickness of the concrete slab depends on the loads and dimensions of the slab. Typically, 6 in. (150 mm) slab thickness is considered for residential and commercial buildings with reinforcement details as per design. The methods used to determine slab thickness vary for different types of slabs. For example, calculating the thickness of a single-sided slab is different and simpler than calculating the thickness of a double-sided slab.
The selection and calculation of slab thickness, including slabs of various types, is an important step in the design process. If a proper slab thickness calculation procedure is followed, the design period will be greatly reduced, in addition to achieving a reliable and economical slab thickness.
![]()
Single Sided Slab Thickness
Single Sided Slab Thickness Based on Deflection , Bend , Shear and Occasionally Fire Requirements .
1. Deflection requirements
Apart from slabs that are heavily loaded, such as slabs bearing several meters of soil, the thickness of the slab is selected based on deflection requirements. The ACI code sets limits on the thickness of the slab. if deflection is not calculated and determined to be acceptable.
Otherwise, the thickness of one-sided slabs must be at least L / 20 for simple supported slabs; L/24 for solid end slabs; L/28 for slabs with both ends continuous; and L/10 for consoles; where L is the span.
These values may be used provided the boards are not supported or attached to partitions or other structures that could be damaged by large deflections.
2. Bending and shear requirements
Determination of plate thickness based on bending and shear requirements is not common.
However, these requirements must be verified in the design, even if the thickness is chosen based on deflection requirements.
The procedure for checking the thickness of the plate for compliance with the requirements of bending is as follows:
- Calculate trial factorized loads based on slab thickness estimated from deflection requirements.
- Calculate moments using suitable methods such as the ACI coefficient method.
- Since slabs rarely require a reinforcement factor of more than 0.01, check that the selected slab thickness corresponds to a reinforcement factor of 0.01. Use Equation 1 to calculate d:
Where:
d: effective slab depth required to withstand moment
Mu: moment calculated from loads
b: slab width, 1 m (12 in) slab strip considered
R: bending resistance (MPa) calculated using the following expression:
Where:
p
fu: steel yield strength, MPa
fc ‘: concrete compressive strength, MPa
The procedure for checking the thickness of the slab for compliance with shear requirements, as follows:
- Calculate the shear strength from loads, Vu
- Calculate the design shear strength of the slab, equation 3.
If all spans are equal, the shear strength occurs on the outer surface of the first inner slab, which is calculated according to equation 4, otherwise – shifts. should be tested on the outer surface of the first inner slab and a typical inner slab, equation 5.
Where:
Vc: shear strength of the slab
b: slab width 1000 mm
d: effective slab depth
Vu: slab shear limit
W: ultimate distributed load up to 1.2 * static load plus 1.6 * variable load
l: floor span
3. Fire resistance requirements
Sometimes slab thickness is controlled by the risk of heat transfer in a fire. For this criterion, the fire resistance of a floor is the number of hours required for the temperature of an unexposed surface to rise by a given amount, typically 121.1°C (250° F).
At 121.1°C (250°F) 76.2 mm (3-1/2 in.) thick plate gives 1 hour fire resistance, 127 mm (5 in.) plate gives 2 hour fire resistance , and the 152.
4 mm (6-1/4 in.) slab provides 3-hour fire resistance. Finally, the slab thickness is usually rounded off to the nearest 10 mm.
Double-sided plate Thickness
As with single-sided plate, the thickness of the double-sided plate must meet deflection and shear requirements.
1. Deflection requirements
Normally the plate thickness is chosen to prevent excessive deflection during service. The ACI code provides a method for calculating the minimum thickness of a double-sided slab that satisfies the deflection.
This method is applicable to various types of double-sided slabs such as flat slab, flat slab, slabs on beams, slabs without internal beams. For details on calculating the minimum slab thickness, click here.
The selected slab thickness must be sufficient to shear both internal and external columns. The ACI code allows thinner slabs to be used if the calculated deflection is within the specified deflection limits.
Adequacy test procedure The thickness of the slab capable of withstanding the shear force is:
- Determine the factor uniform load.
![]()
- Check one-sided scissors
- Check double-sided stamping shift
If the shear strength of the slab is less than the ultimate shear force applied to the slab, appropriate strategies must be considered to resolve the problem. These strategies include:
- Thicken the slab across the entire panel. This can be counterproductive as the weight of the slab can greatly increase the shear force.
- Use the hinged panel to thicken the ceiling adjacent to the column.
- Add transverse reinforcement.
.
See also
- What comes first tile or toilet
- How to clean ceramic tiles after repair
- What is the best tile grout to use in a bathroom
- Underfloor heating for tiles which is better with your own hands
- How to lay tiles on a wall
- What can replace the curb when laying paving slabs
- How to peel sealant off tiles
- On which mixture is laid paving slabs
- How to clean tiles in the kitchen
- How to repair the seams on the tiles in the bathroom with your own hands
- How to choose the right tiles
PCI Lastoflex polymer additive for tile adhesive
PCI Augsburg GmbH has been a recognized manufacturer of construction chemicals for more than 60 years.
For decades, PCI materials have been a leader in the building markets in Europe, in the field of laying tiles.
Material PCI Lastoflex – Additive for increasing the elasticity of tile adhesive.
Application
For external and internal use.
For walls and floors.
For mixing with PCI FT-Klebemoertel and PCI Midiment. By mixing with an additive, the adhesive becomes capable of withstanding deformation.
For mixing with PCI Nanolight White and PCI Carralight when laying glass tiles and mosaics.
To be mixed with PCI Nanoflott and PCI Rapidflott for high demands on deformation loads when laying flooring.
For laying ceramic tiles on large areas and substrates subject to significant temperature fluctuations.
For underfloor heating, balconies, terraces, facades and swimming pools,
For mixing with PCI Fassadenkleber when laying tiles from 30×30 cm.
![]()
Benefits:
Increases resistance to deformation, compensates for temperature fluctuations and stresses of the base.
Improves adhesion on absorbent and non-absorbent mineral substrates.
Improves water and frost resistance, versatile for indoor and outdoor use, for walls and floors
Data Sheet PCI Lastoflex
» Download
PACKAGING Store in a dry and cool place at a temperature not exceeding +30°C. Do not expose to frost
Specifications
Output
Thanks to the addition of PCI Lastoflex, the tile adhesive compensates for temperature fluctuations and substrate stresses.
Work instructions:
Surface preparation:
Minimum age of foundation:
PCI Novoment Z1 and/or PCI Novoment M1 plus: 24 hours
PCI Novoment Z3 and/or PCI Novoment M3 plus : 3 days
Cement poured bases 28 days
Concrete 28 days
The substrate must be dry, solid and capable of bearing the load.
Grease stains, various deposits and dirt must be carefully removed from the surface. The base must comply with DIN 18202. Irregularities on the walls must be leveled beforehand. Indoor floors should be leveled with PCI Periplan self-levelling compound. Highly absorbent cementitious substrates and porous concrete must first be primed with PCI Gisogrund diluted with water in a ratio of 1 : 1. Indoor poured asphalt floors as well as sanded anhydrite or gypsum substrates should be primed with undiluted PCI Gisogrund. When working under time constraints, prime cement and gypsum substrates with PCI Gisogrund Rapid.
How to use:
Shake PCI Lastoflex well before use!
Pour the required amount of PCI Lastoflex into a clean container, add water in the required proportion, or 70% of the required amount of water (see table) and mix.
Then add the tile adhesive used and carefully move it with the special nozzle attached to the electric drill until a homogeneous mass is formed.
Add the remaining 30% of water, if this has not been done, according to the proportion and desired consistency.
After mixing leave the solution to mature for approx. 3 minutes. Then mix again.
Using the flat side of the trowel, apply a thin contact layer to the substrate.
Apply a base coat to the fresh contact layer (apply mortar in one direction if possible). Apply as much mortar as is necessary in order to have time to adjust the location of the tiles. After touching the solution, determine the remaining time for adjustment.
In areas subject to continuous exposure to moisture and water (eg terraces, balconies, facades), lay the tiles using the combined method. In this case, also apply a certain amount of mortar to the back of the tile.
The necessary arrangement and alignment of the tiles is carried out by lightly pressing them and placing them accordingly.
Attention!
Do not apply PCI Lastoflex mortar at substrate temperatures below +5°C and above +25°C, or under strong wind and heat conditions.


 After that, you need to take one tile and press it firmly into the glue, and then lift it up. By looking at the back of the tile, you can determine the consistency of the adhesive, and determine if the adhesive is thick enough.
 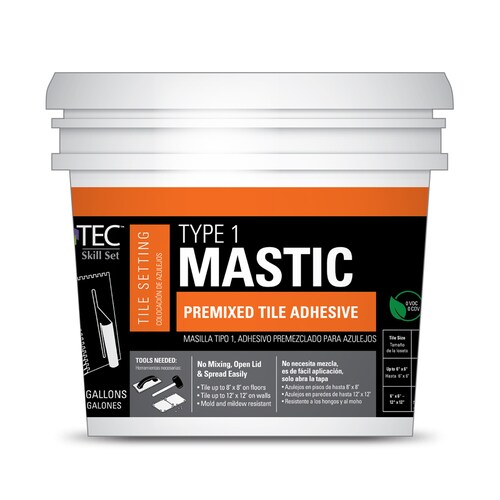 In order to achieve the desired consistency of the adhesive cement mortar, add dry or wet ingredients as needed, but only in very small portions, and check the mortar each time until you achieve the desired consistency.
  Extending shelf life and cleaning

 Each company may have many types of adhesives, and some may have a stronger bond, faster dry time, greater water resistance, and less shrinkage than others.