Remodeling small bathroom on a budget: 7 Inexpensive Bathroom Remodel Ideas
7 Inexpensive Bathroom Remodel Ideas
The average homeowner spends 860 days of their life in the bathroom. Between showering, brushing your teeth and applying makeup, it’s a hard room to avoid. If your bathroom décor isn’t cutting it anymore, follow these seven tips to have a stylish and affordable bathroom makeover.
How Much Does a Bathroom Remodel Cost?
The cost of your bathroom remodel depends on where you’re located and the updates you’re making. For these reasons, the average total cost of a bathroom remodel ranges between $6,000 – $15,000. While you’ll save roughly 65% by avoiding contractor fees, remodeling costs add up fast. Installing new fixtures in your bathroom is far from cheap, and leaves little room in the budget to make other renovations.
“The biggest secret to cutting the costs of a bathroom remodel project is to keep both the plumbing and electrical configurations in their current place and tackle the cosmetics of the space. The typical plumbing charge for a bathroom project is anywhere between $2,500-$4,000 which eats into the budget and forces clients to settle on lower quality materials.
”
Devin Shaffer | Lead Design Expert, Decorilla
How Can I Make My Bathroom Makeover Affordable?
While you’ll save a lot of money by choosing a DIY bathroom remodel, in most cases you’ll spend more than you originally planned. According to HGTV, you should set aside at least 30% of your original budget as a cushion. If you’re not completely gutting the space, there are many inexpensive ways to spruce up your bathroom without breaking the bank. Make the largest impact on the least amount of dollars with these bathroom remodel ideas.
7 Tips for an Inexpensive Bathroom Remodel
1. Shop Around for Affordable Alternatives
While tile is trendy and visually-appealing, it’s expensive and difficult to install. To cut costs, we recommend tiling either your walls or floors, but not both. Your bathroom remodel will be more cost-effective if you’re able to avoid tile completely. We’ll cover alternative options for your walls and floors in tips 2 and 3. When it comes to the finer aspects of your bathroom, like your light fixtures and toilet paper holder, try shopping at garage sales and local thrift stores. Who knows, you might find a refinished pedestal sink or claw-foot bath tub while you’re at it.
2. Use Easy-to-Install Bathroom Flooring
Want to update your bathroom floor without tiling it? Consider using engineered wood, peel-and-stick tile or laminate flooring. Unlike tile, each one is easy to install and can accommodate smaller budgets.
- Engineered wood. Hardwood floors aren’t great for bathrooms, especially since they’re not waterproof. If you want the authentic feel of wood floors in your bathroom, consider using engineered wood. It’s less susceptible to moisture, and can be installed with gorilla glue or a nail gun. Plus, with an average price range of $4 to $7 per square foot, it will keep you on budget.
- Peel-and-stick tile. The visual appeal of tile floors for a fraction of the price? Sold! You can pay as low as 20 cents per square foot for peel-and-stick tile.
 Plus, this easy-to-install bathroom flooring will spare you countless hours of labor. And if you decide to change the pattern later on, it’s less difficult to remove than regular tile.
 - Laminate flooring. Unlike tile, laminate flooring snaps right into place. Measure your bathroom dimensions before installing it so you can easily gauge how many pieces to buy. And with prices ranging from $2 to $3 per square foot, it will be easy on your wallet as well.
 Plus, this easy-to-install bathroom flooring will spare you countless hours of labor. And if you decide to change the pattern later on, it’s less difficult to remove than regular tile.
3. Find Alternative Bathroom Wall Ideas
Your bathroom walls don’t have to be tiled, either. While paint is the most common alternative to tile, you can also opt for fiberglass or acrylic panels. Plus, these options are less expensive and easy to install.
- Paint. While paint might seem boring at first, you can use it to customize your bathroom. Try painting an accent wall or add wainscoting for another pop of color. Plus, it only costs between $1,000 and $2,000 to paint your entire bathroom.
- Fiberglass. Typically used for shower inserts and the wall above your bathtub, fiberglass gives your bathroom a touch of sleekness. There are multiple patterns to choose from, including marble, brick and solid colors. And with an average price range of $611 to $811, you can easily avoid overspending.
- Acrylic panels. Like fiberglass, acrylic panels are commonly used in showers as well. You can install each panel with basic woodworking tools, and it’s 100% waterproof. If you use acrylic panels in your bathroom, expect to pay between $1,100 and $1,360.

“Paint is an easy way to save money while adding style to your bathroom. Choose the perfect color for a bold accent wall or add some drama with a painted ceiling.”
Leslie Eiler | Design Manager, CRD Design Build
4. Choose Your Wall Art Wisely
Your bathroom is a difficult room to decorate. Due to excess moisture in the air, valuable artwork can damage easily. We recommend choosing anything aside from paintings, which are often warped by steam. In general, framed photographs and posters fare well in bathrooms. You can also choose ceramic pieces, like a decorative plate or metal wall art. If you’re remodeling your bathroom on a tight budget, put your family and loved ones on display. Just make sure the frame is completely sealed and has a solid backing before hanging it up.
Photo: Decorilla
5. Redo Your Bathroom Vanity
You can easily spruce up your bathroom by updating your vanity. From choosing new countertops to repainting the wood, there are many ways to tackle this project. Here are a few inexpensive ways to redo your bathroom vanity:
- Replace the hardware. If you’re getting new doorknobs for your bathroom, update the hardware on your vanity as well. Make sure they have the same color and finish.
- Paint it. Use semi-gloss latex paint to change the color of your vanity. As you repaint it, make sure to cover the door, drawers and wood around the mirror. Once you’re finished, apply a shiny topcoat.
- Change the countertop. Marble countertops are far from cheap, but you can get the same result with peel-and-stick alternatives. Plus, it’s waterproof and simple to install.
- Install a new light fixture. No vanity is complete without a fashionable light fixture. Rather than redoing your entire bathroom vanity, change the lighting above it.
- Shop new-to-you. Is your bathroom vanity beyond repair? Get rid of yours and browse for a new one on Craigslist or Facebook Marketplace.
 As you repaint it, make sure to cover the door, drawers and wood around the mirror. Once you’re finished, apply a shiny topcoat.
“Renters and homeowners alike find themselves stuck with unsightly vanities, most of which are constructed in a way that doesn’t allow for easy updates. Surprisingly enough, no matter how unsightly the vanity is, the design dilemma can be solved for under $100 – even for a double vanity. We really love the repurposed look of vintage and antique mirrors for smaller vanities in powder rooms and half baths.
Devin Shaffer | Lead Design Expert, Decorilla
 For larger bathrooms, such as the primary bath in the bedroom suite, having a mirror custom sized (which is as simple as cutting in a glass shop) and hiring a pro to frame and mount the piece is a great vanity update that you can likely keep under $400.”
6. Reorganize Your Bathroom
Sometimes, the easiest way to upgrade your bathroom is to reorganize it. Using space efficiently can make your bathroom feel larger and inviting to guests. Try the following tips to reduce clutter and make the most of your budget bathroom remodel.
- Use baskets. Store lotion, extra toilet paper and other toiletries in a basket on your toilet. This will give you more counterspace.
- Use your bathroom door. Hang towels and your bathrobe behind your door to keep them out of sight.
- Install shelves. Have a bare wall above your toilet or next to your vanity? Install shelves to use that space efficiently. In addition to storing toiletries there, you can put pictures and other decorations on display.
- Use drawer dividers. Keep your bathroom drawers organized and clutter-free with dividers. Designate each section to makeup, tooth brushes, hair ties, etc. The last thing you need is another junk drawer!
- Deep clean your bathroom. Cleaning your bathroom is the best way to get rid of unnecessary clutter. Check out our cleaning checklist to get started.
 In addition to storing toiletries there, you can put pictures and other decorations on display.
7. Focus on the Details
Already content with your walls, floors and vanity? Try updating your bathroom with a new shower curtain or hand towels. We recommend saving this until the end of your bathroom makeover, to ensure the finishing touches match your other design choices. And if you have extra room in your budget, invest in a new mirror or medicine chest. You can even shop for used ones online.
How Can I Save On Other Home Renovations?
Looking for budget-friendly ways to upgrade other parts of your house? Check out the following posts to renovate each room, from your kitchen to your primary bedroom.
- How to Budget for a Home Renovation
- How to Start Remodeling a Kitchen
- Main Bedroom Renovation Ideas
15 Ideas For Bathroom Remodeling
By
Lee Wallender
Lee Wallender
Lee has over two decades of hands-on experience remodeling, fixing, and improving homes, and has been providing home improvement advice for over 12 years.
Learn more about The Spruce’s
Editorial Process
Updated on 02/10/22
Reviewed by
Johnathan Brewer
Reviewed by
Johnathan Brewer
Johnathan Brewer is a home improvement expert with over two decades of professional experience as a licensed general contractor specializing in kitchen and bath. He has been featured on HGTV’s “Super Scapes,” “Curb Appeal the Block,” “Elbow Room,” DIY Network’s “House Crashers,” “This Old House,” and OWN Network’s Emmy award winning show, “Home Made Simple. ” Jonathan is also a member of The Spruce Home Improvement Review Board.
Learn more about The Spruce’s
Review Board
Fact checked by
Jillian Dara
Fact checked by
Jillian Dara
Jillian is a freelance journalist with 10 years of editorial experience in the lifestyle genre. She is a writer and fact checker for TripSavvy, as well as a fact-checker for The Spruce.
Learn more about The Spruce’s
Editorial Process
Lauren Edmonds / Stocksy
Bathroom remodeling, along with kitchen remodeling, takes its toll on homeowners in terms of frustration, unmet timetables, and high costs. While it may not seem possible, but an attractive yet cost-affordable bathroom remodel is absolutely attainable. Popular home remodeling culture often makes it seem like bathroom remodels must cost five figures and that everything must be ripped away and replaced.
But resisting that notion is the first step to controlling spiraling bathroom makeover costs and to bringing everything back down to earth.
Given the staggeringly high cost of bathroom remodeling, it pays to think outside the box and search for smarter and more economical alternatives. After a low-cost and lean bathroom remodel, not only will you have a clean, bright, and functional bathroom, you will have considerably more money in your bank account for remodels or for other things in your life.
Tip
Cheap doesn’t have to mean low-value: Inexpensive upgrades done properly can add value, while poorly completed ones can actually decrease your home’s value.
-
01
of 15Use Lower-Cost Lookalike Materials
Anatoli Igolkin / Getty Images
Retaining and refurbishing your existing materials is always the best option for saving money.
But if you must swap out materials, inexpensive alternatives often can look amazingly like the real thing.
For example, instead of real wood plank flooring, try luxury vinyl flooring. Today’s vinyl flooring looks far better than earlier iterations. Innovations such as luxury vinyl flooring and plank vinyl can even fool the eye from a distance.
High-definition laminate countertops and quartz countertops now vie with granite for the look of authentic natural stone. Faux-stone ceramic and porcelain tile backsplashes can mimic the look of travertine and marble.
-
02
of 15Paint Your Wooden Floor
sl-f / Getty Images
If your bathroom happens to have a wooden floor, you can always cover it over with a more moisture-hardy flooring, such as tile, sheet vinyl, or luxury vinyl plank.
Or you can save time, energy, and money by keeping your wooden floor and painting it with protective enamel. Keep in mind, though, that solid hardwood should not be your first choice for bathroom flooring.
But if you already do have wooden floors, this is one low-cost way to keep them around for as long as possible.
-
03
of 15Refinish Your Tub Instead of Replacing It
ppa5 / Getty Images
Consider total replacement of your bathtub to be your last possible option, at least from a cost-saving standpoint.
Instead, try relining or refinishing. Bathtub and shower refinishing is a prime example of the dictum “Repair and retain rather than remove.” If the problem is mainly cosmetic, such as a yellowed surface and some cracks and nicks, you can refinish your shower or bathtub.
Alternatively, bathtub and shower liners, never a permanent fix, are not as affordable as they seem. Requiring professional installation, liners will carry you through a few years. Bathtub refinishing, instead, is more inexpensive and often looks better.
Click Play to Learn How to Refinish a Bathtub
-
04
of 15Touch Up Your Tub Rather Than Refinishing It
MyrKu / Getty Images
One step down from refinishing the entire tub surface is a tub touch-up.
When your bathtub has nicks, gouges, and peeling paint, but you are not keen on the idea of refinishing the entire surface, you can spot-fix the tub.
Some touch-up products, such as Super Glue White Porcelain Repair, are as easy to apply as squeezing toothpaste out of a tube.
-
05
of 15Refresh Cabinets With New Hardware
poplasen / Getty Images
Buying and installing new bathroom cabinets can get expensive. A far easier and more affordable way to bring life to your existing cabinets is to strip out the old hardware and replace it with fun new hardware.
To make the process even easier, before you buy the new hardware, make sure that its screw alignment matches up with the holes on your existing cabinets. This eliminates the need to drill new holes.
-
06
of 15Install a New Sink Faucet
littleny / Getty Images
As with installing new hardware on cabinets, installing a new sink faucet is one trick designers and do-it-yourselfers alike use to make a sink sparkle without replacing the entire top or vanity.
It helps that sink faucets are simple, easy, and fast to install by yourself. You don’t need to call a plumber. This not only saves on labor costs but it advances the time table. Pick up sink faucet in the morning and you’ll have it running by lunchtime; it’s that easy.
-
07
of 15Install a Pre-Fabricated Shower
KatarzynaBialasiewicz / Getty Images
The most expensive option for a new shower is to hire a pro to build a custom tile shower from scratch. While site-built tile showers and tubs can be gorgeous and unique, consider a prefabricated shower unit, which typically costs a lot less.
If you want to have that tiled shower, fusing a poly shower pan with the tile saves hassle and costs. Building a tiled shower pan takes some time, and it’s usually best left in the hands of qualified tile setters.
-
08
of 15Install Your Own Toilet
Kasipat Phonlamai / EyeEm / Getty Images
Plumbers are worth their weight in gold.
But if you have the strength to carry a toilet, avoid calling in a plumber to switch out the old toilet. Instead, install your toilet by yourself.
Toilet installation involves very few waterline hookups. The hardest part of installing a toilet is physically moving the toilet into place. For that, buy an inexpensive hand truck or enlist the services of a friend.
-
09
of 15Paint Portions of the Interior by Yourself
aydinmutlu / Getty Images
Interior painting can be accomplished by even the least skilled do-it-yourselfer. For whole-house painting, you may want to consider hiring a professional painter, due to the large scale.
But consider how little painting you need to do in bathrooms. The majority of wall space is taken up with mirrors, showers, tile, cabinets, and bathtubs. In the end, you only have a few square feet to paint. In many cases, you can paint this by yourself in a day or two.
Interior painting is a classic example of sweat equity: using free labor (your own) to help increase the value of your home.
Laying flooring, demolishing rooms before contractors arrive, installing outlets, and hanging interior doors are other examples of sweat equity. -
10
of 15Resist the Urge to Move Major Plumbing
DoroO / Getty Images
Save money by leaving the toilet and bathing facilities where they are. There’s no need to move the plumbing when their current locations satisfy your needs. Moving water supply and/or drainage immediately drives up the cost of any remodel project.
-
11
of 15Do Some Plumbing by Yourself
photovs / Getty Images
Intimidated by the idea of doing your own plumbing? Think again.
If you hate calling upon the services of a plumber for remodeling work, stop for a minute and ask yourself what you might be able to do on your own.
With the advent of plastic PEX plumbing pipes and push-in fittings, even the least confident do-it-yourself plumber can tackle light plumbing tasks with relative ease.
If your notion of plumbing work is still rooted in the days of soldering copper pipes with an open flame or working with galvanized pipes, give this idea some serious thought. You just might find out that PEX and push-in fittings are perfect for your needs.
-
12
of 15Install Your Own Bathroom Vanity and Top
David Papazian / Getty Images
Bathroom vanities and tops practically come assembled for you. Because bathrooms are small, it is possible for you to buy nearly or fully assembled bathroom vanity units and vanity tops and have them in place within a couple of hours.
Vanity units come in stock sizes ranging from 24 inches to 60 inches wide. Coordinating counters can be purchased that even have sinks fused into them, eliminating sink installation and caulking woes.
-
13
of 15Migrate Bathroom Materials
Visivasnc / Getty Images
If you have two bathrooms and you remodel one of them, what should you do with all of those materials? Some homeowners have found that it is cost-effective to migrate materials from one bathroom to the other bathroom.
Even materials as trivial as shower curtains, pipes, and picture frames can be moved to the next bathroom.
Not only do you save money because you don’t need to buy new items, but you also save on hauling or dumpster costs. Plus, you get to help the environment by not sending non-biodegradable materials to the landfill.
-
14
of 15Design the Bathroom by Yourself
NeonShot / Getty Images
While bathroom designers are great, they also can break your bathroom remodel budget. Consider designing your bathroom by yourself.
Whole-house remodels, additions, and large kitchens can benefit from the expertise of a qualified designer. But bathrooms in most houses aren’t so complicated.
Spending some time studying bathroom layouts and learning the basic bathroom design guidelines (such as recommendations from the National Kitchen and Bath Association) can give you plenty of ideas to get started.
-
15
of 15Install Wainscot on Lower Half of Walls
YinYang / Getty Images
If a bathroom material still works, fix it up and reuse it.
This is the guiding principle of any surface-level renovation (with the caveat that you never want to cover anything because it needs to be replaced).
For example, there is no better way to cover up the lower portion of walls than with easy-to-install wainscot. Wainscot is a pre-fabricated board that extends as high as 48 inches and eliminates the need to patch wall dings and minor holes; wainscot simply covers it up.
 But if you must swap out materials, inexpensive alternatives often can look amazingly like the real thing.
 But if you already do have wooden floors, this is one low-cost way to keep them around for as long as possible.
 When your bathtub has nicks, gouges, and peeling paint, but you are not keen on the idea of refinishing the entire surface, you can spot-fix the tub.

 But if you have the strength to carry a toilet, avoid calling in a plumber to switch out the old toilet. Instead, install your toilet by yourself.
 Laying flooring, demolishing rooms before contractors arrive, installing outlets, and hanging interior doors are other examples of sweat equity.
 If your notion of plumbing work is still rooted in the days of soldering copper pipes with an open flame or working with galvanized pipes, give this idea some serious thought. You just might find out that PEX and push-in fittings are perfect for your needs.
 Even materials as trivial as shower curtains, pipes, and picture frames can be moved to the next bathroom.
 This is the guiding principle of any surface-level renovation (with the caveat that you never want to cover anything because it needs to be replaced).
12 Bathroom Remodel Ideas on a Budget
Photo: istockphoto.com
Redoing a kitchen is a costly project, but the bathroom comes in a close second. On average, it’ll set you back about $24,000 for a midrange bathroom remodel, according to Remodeling’s 2021 Cost vs. Value Report. These often tiny rooms come with many hidden costs—sinks, vanities, mirrors, lighting, new tub, new toilet, and potential costs involving hiring a plumber or other professionals, for instance.
But a few smart changes can add some oomph to an outdated bathroom without requiring the budget of a complete reno, whether you’re doing a large or small bathroom remodel.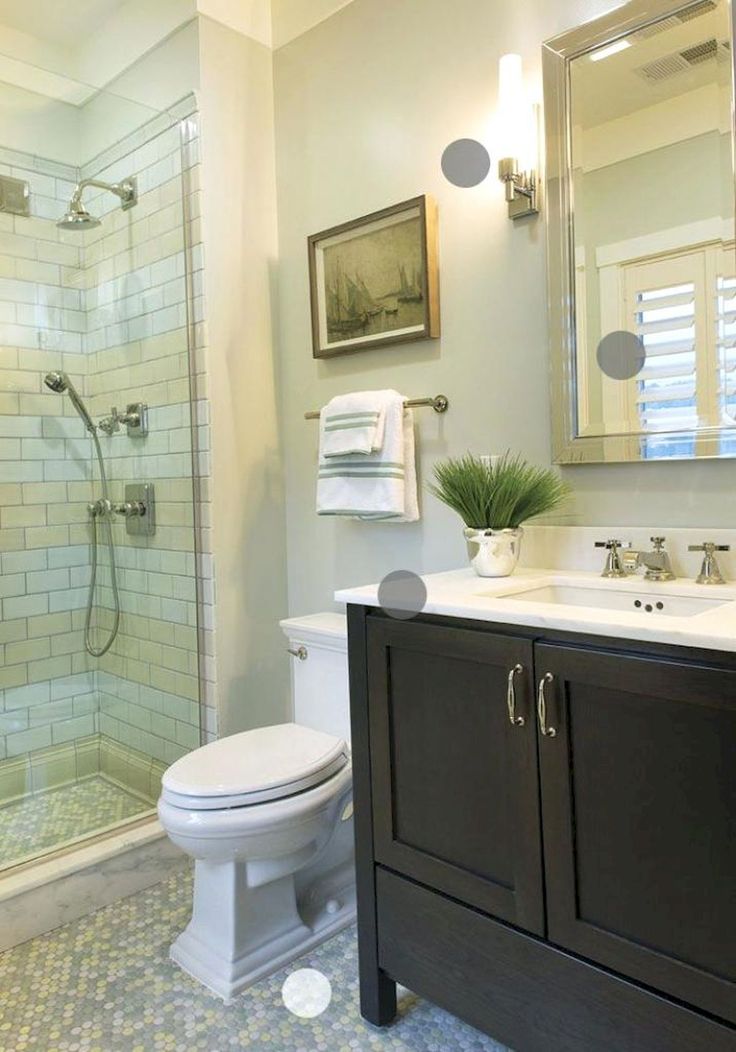 Here are some inexpensive ideas for doing just that.
1. Paint the Walls
istockphoto.com
A fresh coat of paint goes a long way in any room, but especially the bathroom. Whether you pick the same hue to cover up years of built-up dirt and grime or a new shade to brighten up the space, paint gives the bathroom an instant refresh. Consider a neutral or cool white—especially if a bathroom currently has tan or dark walls. Going from dark to light will make the room look bigger, without a huge bathroom remodel cost.
2. Add a Mega Mirror
istockphoto.com
Like a coat of crisp white paint, a mirror creates the optical illusion of a larger space. Adding an ultra-big mirror also offers more than aesthetic benefits. Tiny mirrors make it tough to do tasks that require your reflection, like putting on makeup. An oversized mirror makes doing those things easier, while adding a hint of glam.
3. Refinish the Bathtub
lowes.com
Installing that beautiful vintage clawfoot tub seemed like a good idea at the time, but years of use have turned the pristine soaker into a pockmarked nightmare. Or maybe the color is no longer to your liking. Instead of getting an expensive replacement, refinish the tub to its high-gloss glory with the help of a tub refinishing kit like this highly rated option available at Amazon.
Advertisement
Related: The Big Bathroom Remodeling Design Decision: Tub vs. Shower
4. Sneak in More Storage
amazon.com
Bathrooms never have enough storage for extra toilet paper, cleaning supplies, towels, and linens. Get clutter off the sink and keep the bathroom spotless by adding this top-rated tall storage cabinet available at Amazon that features a small open shelf, two cabinet doors, and a small drawer. It’s also made of mildew-resistant materials, making it perfect for a humid environment.
5. Upgrade Cabinet Hardware
istockphoto.com
Those who already have plenty of storage space might consider changing their cabinet hardware. Replace outdated or damaged hardware and upgrade a shabby space in less than a day. For a hint of luxury without the price tag, swap in trendy hardware pieces like brushed gold pulls or ornate hexagon-shaped knobs. For a cohesive look, make sure to choose hardware that matches your plumbing fixtures.
6. Opt for Affordable Tile
etsy.com
Options like vinyl or laminate are cheaper than stone or tile, so they’re excellent materials for those wanting to upgrade bathroom floors and walls on a budget. Another option is to use peel-and-stick tiles like this highly rated option available at Etsy to cover up old, ugly flooring or plain painted walls. The inexpensive stickers can make a bathroom look completely new.
Related: The Best Peel and Stick Floor Tiles to Upgrade Your Bathroom
7. Add Simple Accents
amazon.com
Add simple, stylish accents while keeping things tidy by storing soap and other toiletries in baskets. Use easy-to-open jars to house things like bath bombs, q-tips, and cotton pads. An easy way to create a spa-like atmosphere on a budget is to buy matching accessories like the ones in this top-rated bamboo set available at Amazon that includes a wastebasket, toothbrush holder, and more.
8. Freshen Window Treatments
istockphoto.com
An old, yellowed window treatment can make an otherwise attractive bathroom look downright dingy. Adding a new set of curtains or shades can revive a dull, lifeless bathroom. Roman shades made with sheer fabric are a good choice for bathrooms with large windows since they let in light without sacrificing privacy—just make sure to pick mildew-resistant fabrics.
Advertisement
9. Change Up the Lighting
homedepot.com
If your old bathroom has lighting that’s the wrong kind of retro, consider switching out the light fixtures for something more on trend. The top-rated Replay 3-Light Fixture available at The Home Depot is a sleek, modern option that will blend in with most bathroom designs. It comes in different mount options and finishes.
10. Turn Old Furniture Into a New Vanity
etsy.com
Don’t throw away that old dresser! Refinish it and use it as a new bathroom vanity instead. Upgrade your bathroom by repurposing old furniture into a shabby, chic vanity. For those not prepared to go the DIY route, consider this unit made of reclaimed wood available at Etsy. The rustic vanity features plenty of storage for various bathroom supplies and knick-knacks.
Related: 25 Tiny Bathrooms We Love
11. Swap Out Faucets
istockphoto.com
Over time faucets can become stained and rusted. And by the time they’re unsightly, they’re probably also out of style. The simple act of swapping out bathroom faucets can make a bathroom look cleaner and more up-to-date, and is particularly great for a shower remodel. It’s a good idea to swap all the fixtures at once—bath faucet, showerhead and handles, and sink faucet—to ensure they all have the same finish.
12. Cover the Countertop with Contact Paper
etsy.com
Another bathroom makeover idea involves covering up peeling or cracking countertops with the help of faux marble contact paper-like film such as this highly rated option available at Etsy. This vinyl wrap won’t last forever, but it’s much more affordable than the ultra-expensive real version. The peel and stick vinyl is easy to apply, waterproof, heat-resistant, and tear-resistant. It takes a bit of trial and error to keep it from bubbling during the application, though.
Advertisement
Budget Small Bathroom Remodel for $300
Bathroom | DIY | Guest House | Home & Garden | Home Remodeling
Love it? Share it!
19905 shares
Do you have an outdated bathroom that could use some love? Our guest house remodel has been a large project, but the bathroom transformation is easily the most impressive part of the project so far! Learn how to complete a budget small bathroom remodel with creativity! Here are five budget friendly ways to update a small bathroom affordably.
One Room Challenge Week 5
If you’ve missed our guest house remodel project, make sure to catch up on the previous posts! I’m participating in the One Room Challenge and we’ve made a lot of progress so far! Make sure to check out the other designers participating in the challenge here.
- Week 1: Before photos. How it all started.
- Week 2: Design Plans
- Week 3: Mantel Update
- Week 4: How to Hide a Mini Split
Budget Small Bathroom Makeover
Let’s take a look at our guest house bathroom before I started the makeover. It’s always good to be reminded of where we’ve started and how far we’ve come!
The all encompassing knotty pine made it feel like a dungeon! Plus, those fancy pink countertops were not my favorite. So let’s break down all of the updates I made during this budget friendly bathroom remodel.
- Update Walls
- Update Countertop
- Update Vanity
- Update Light Fixture
- Replace Hardware
- Replace Mirror
- Replace Faucets
You might look at that list and wonder how I did it all for $300! I love a good budget remodel.
DIY is a huge part of my blog and how we’ve been able to do so much to our home in such a small amount of time. If you can dream it, you can DIY it! Make sure to join my blogging community for members-only freebies like my must have DIY tool list download!
Budget Countertop Makeover
First, I decided to try my hand at updating the pink countertops rather than replacing them.
I used this appliance epoxy to spray the existing countertop and cannot believe the transformation! And, it only cost $4!
I shared this process on Instagram stories and many wanted a full tutorial. It really was very simple.
- Clean the surface thoroughly
- Tape off surrounding areas. This epoxy went EVERYWHERE. So no surface should be left uncovered. If I did it again, I think I would try the roll on version to avoid the mess.
- Apply the appliance epoxy as directed.
Turn on your JavaScript to view content
That’s it!
Do I think it will last forever? No.
However, it was a $4 fix on a countertop that I hated anyway! So even if it hadn’t worked I wouldn’t be out anything other than $4 and a little knock to my ego. 😉
We have since used the sink many times and it has held up so far! I’ll update on the durability once we’ve lived with it longer.
Paint Fixes Everything
Paint really does fix everything. When our painter sprayed the main living space in the guest house I also had him spray the walls in the bathroom.
It made such a huge difference to brighten up this mini bathroom and make it feel less dungeon-like.
Next, I painted the vanity with a $3 sample jar in Old Celadon and LOVE this beautiful color. It really brought some warmth and sophistication to the space without it feeling overwhelming.
Update Mirrors, Hardware & Faucets
Once all of the painting was done, it was time to actually replace some of the jewelry of the bathroom: mirrors, faucets and hardware.
Oh, and did you spy the updated vanity lighting? It is the same light fixture that was already there. I simply removed the globes, took off the many finials it had, and spray painted it brass!
For the hardware, I wanted simple and clean. I love the flat drawer pulls and chunky cabinet knobs for their classic and modern style.
Replacing hardware makes a big difference in updating a vanity. It’s a very affordable way to modernize cabinetry easily.
For the faucets, I went with these affordable brass faucets.
And finally, I replaced the large vanity mirror with two sleek oval mirrors.
Shop The Look
Turn on your JavaScript to view content
Can you even believe it is the same space?
5 Simple Ways to Budget a Small Bathroom Remodel
This budget remodel cost approximately $300. I’ll list my costs below.
The five areas I always encourage others to focus on when budgets are tight are:
- Paint walls & vanity ($3 vanity + $5 walls)
- DIY countertop options ($4 epoxy paint)
- Update Hardware ($27) and Lighting (free paint + $10 bulbs)
- Update Mirrors ($120)
- Update Faucets ($150)
As you can see from my budget makeover, updating the “jewelry” of a bathroom doesn’t have to mean replacing it and buying new. You can do a lot with paint, creativity, and courage!
Creating Cohesive Flow
Since this makeover is part of the One Room Challenge, I wanted to share why I remodeled this room in addition to the main living space of the guest house.
The bathroom is directly off of the main living area behind this pocket door. The majority of the time, the door remains open and visible from the living space. So, I wanted to do a budget makeover so that the outdated bathroom didn’t detract from all the work I’m doing in the other room.
I created a cohesive flow by painting the door the same color as the vanity. I also carried that color to the other side of the room by painting the main entry door.
Drawing those colors throughout the room helps it flow better and feel like one space.
Stay Connected
Thanks so much for stopping by the blog today and staying connected on my guest house remodel project! Can you believe this before and after?!
Stay tuned next week for a major update in the main living area!
One Room Challenge Update
The project is complete! If you missed the 8 week process, catch up with the links below!
- Week 1: Guest House Before Photos
- Week 2: Guest House Design Plans
- Week 3: Mantel Update
- Week 4: How to Hide a Mini Split
- Week 5: Bathroom Remodel for $300
- Weeks 6 & 7: DIY Ceiling Beams
- Week 8: The Big Reveal
Bathroom Remodel on a Budget
Small Bathroom Remodel
We remodeled our small bathroom while staying under a budget and I’m sharing all of our bathroom remodel pictures. Keep reading and watch the video to see some bathroom remodel ideas on a budget. We started with an outdated bathroom that had a cream-colored toilet, cream-colored bathtub, and ugly white tile floors. Our Bathroom Remodel on a Budget turned out gorgeous because of the quality materials and colors we chose. I included a list of everything we used for our bathroom remodel ideas 2021!
What does a typical bathroom remodel cost?
After researching the subject, I learned that a typical bathroom remodels costs $1500 and up depending on the size of your bathroom, the materials you are using, and if you are doing most of the labor yourself.
We hired someone to completely remodel our bathroom and with the cost of the materials and labor, we spent just under $5,000.
How much does it cost to renovate a small bathroom?
As I mentioned above, the cost of a small bathroom renovation depends on many factors. If we did the labor ourselves, we would have spent around $2,000 on materials. We replaced everything but the toilet in our bathroom so the cost for a new tub and new floor was included.
What is the cheapest way to remodel a bathroom?
The cheapest way to remodel a bathroom is to paint everything (the cabinets, the tile, the tub, the walls, etc.)… you’d be surprised what a difference paint can do to a bathroom!
This is what our bathroom looked like before we remodeled it…
- I painted the walls and added sharpie shiplap.
- We added rustic farmhouse shelves for extra storage.
- I added a fun shower curtain.
- We replaced the cream-colored toilet with a white toilet.
- I painted the mirror
- We removed a ceramic towel bar and toilet paper holder that were in the drywall (so we had to re-drywall that area).
- We removed the ceiling light fixture and added a farmhouse sconce (although we never patched the ceiling hole!).

I could’ve gone a step further and stenciled the floors but I left them alone for the 2 years that we had the bathroom like this until we were able to do a full bathroom remodel.
Is Home Depot good for bathroom remodel?
Honestly, the only thing we purchased from Home Depot for this Bathroom remodel was the showerhead, light fixture, bathtub, and faucet.
We purchased the tile and all the materials to tile the tub wall and floor from Floor and Decor. We went with floor and decor because they have a wide selection of beautiful tile and their staff was very helpful to make sure we had everything we needed to complete this project.
Turn on your JavaScript to view content
Bathroom Remodel on a Budget
I decided to go with modern colors for this bathroom remodel. Designing a full bathroom remodel can be stressful so I highly recommend creating a mood board like I did use Canva.
Putting all my ideas and the products I wanted to use gave me an idea of the overall look and style of the bathroom I wanted.
It turned out pretty darn close…
Watch the video below to see a quick Before and After of the bathroom!
The hole in the ceiling is gone and we removed the medicine cabinet that was in the wall by the door.
in this picture:
Free Printable Boho Artwork and Dollar Tree DIY Frames
Get all 30+ prints!
FIND THE FULL TUTORIAL HERE
The “HI” message in the tub wall tile window box is my favorite design! I saw this idea in a magazine (I want to say it was BHG or Martha Living) and I gave the clipping to our handyman to recreate it. I found the perfect tile at Floor and Decor to make it happen! This tile is slightly darker than the marble tile so you have to really look for the message 🙂
We made the window box a double shelf so we had room for extra items. This bathroom is our kid’s bathroom and I imagine when they get older they will have more shower items 😉
The board and batten wall next behind the door was installed by me! A week after our handyman painted this wall, I turned around and added board and batten to it, lol!
You can find a quick video sharing how I added the board and batten in this Instagram Reel video.
The Board and Batten Paint Color is Benjamin Moore Gray. It’s one of my favorite gray/black paint colors and all of our doors are painted in BM Gray.
in this picture:
Wash Your Hands DIY Sign
Download this Free Printable!
SCROLL TO THE IMAGE TO DOWNLOAD
I repurposed the gold hooks that we had on this wall before. The hooks are from Ikea and were iron black. I painted them with gold spray paint and then used Gold Rub-N-Buff on top. The hooks have been holding up really well considering we hang wet towels on them!
I also used the same Golf Rub-N-Buff on the vanity handles.
The Gold Leaf Rub-N-Buff looks great with the other antique gold hardware in the bathroom and really pops against the black vanity and gray wall.
Wrap up about our Small Bathroom Remodel Ideas
I hope you enjoyed touring our new bathroom! We waited a long time to get this bathroom renovated and I’m very happy with the outcome. The hexagon tile floors are gorgeous and match perfectly with the tub wall tile. I highly recommend the marble art ceramic tiles because they are durable and provide a luxurious look of marble (and they are much cheaper!).
Supplies and Sources:
- Bathroom Floor Tile
- Bathtub Wall Tile
- “HI” message tile
- Grout (color Silver)
- Metal Trim (color white)
- Marble Shelf (used in the window ledge and shower window box)
- Bathtub
- Round Gold Mirror (similar mirror)
- Shower Curtain (similar curtain)
- Showerhead
- Bathroom Sink Faucet
- Bathroom Toilet Paper Holder
- Marble Top Vanity
- Gold Towel Ring
- Vanity Light Fixture
- Gold Rub -N- Buff
- Boho Artwork (FREE Printables and Dollar Tree DIYs!)
Watch the video and print the supply list for this bathroom remodel
- Bathroom Floor Tile
- Bathtub Wall Tile
- Bathtub
- Round Gold Mirror (similar mirror)
- Shower Curtain (similar curtain)
- Showerhead
- Bathroom Sink Faucet
- Bathroom Toilet Paper Holder
- Marble Top Vanity
- Gold Towel Ring
- “HI” message tile
- Grout (color Silver)
- Metal Trim (color white)
- Marble Shelf (used in the window ledge and shower window box)
- Vanity Light Fixture
- Gold Rub -N- Buff
- Boho Artwork (FREE Printables and Dollar Tree DIYs!)
Did you make this project?Mention @simplemadepretty or tag #simplemadepretty!
Pin this post with this Bathroom Remodel on a Budget
Here are More Home Improvement Tips You Might Like…
How to pick the right paint colors
Have you ever had trouble picking the right paint colors for your home? Choosing the right paint colors for your home can be overwhelming. There are so many different “whites” and “grays” these days, how can anyone know they are making the right paint color choice?
That’s why I put together the best tips on How to Choose Interior Paint Colors in this post.
Every home is different… the entryway in our first home was much different than the entryway in our second home, and both of those were very different from the entryway in our third home! So I chose a different paint color for each entryway in all three of our homes. Not to mention, from the time that we bought our first home, to the time that we bought our third home, home paint color trends changed drastically. The colors that I used back then are no longer a trendy color and well, I just didn’t like the brown-ish tan that was in our first home, haha.
So if you need help choosing paint colors for the rest of your home, head on over to this post to see my paint-picking tips and what has worked for me in all three of our homes 🙂 My post with how to choose paint colors for your home is one of my most popular posts and readers have benefited from reading it before heading to the store to buy paint that ends up not working out.
I also have some ideas for choosing paint color combinations for bedrooms (with themes!)
Paint Versus Peel & Stick Wallpaper
Peel and stick wallpaper has become very popular recently since not everyone has access to tools to build their own Shiplap walls (thanks Chip and Joanna) or wants to tile an entire wall with subway tile. I love tiling but if I could slap up some wallpaper and call it a day, that would make me, the hubby, and my wallet happy!
You can find peel and stick wallpaper online at Target, Amazon, Home Depot, and more! I’ve linked my favorite peel and stick wallpaper and the ones I’ve used personally below.
✅ This is the peel and stick wallpaper that I use in my home. It is reasonably priced and very good quality!
If you really like the idea of peel and stick wallpaper but have never used it before, I highly recommend reading my tips on using peel and stick wallpaper and checking out the different kinds of wallpaper that’ll instantly update your space!
There are so many different designs and colors and once you get the hang of applying the wallpaper, you will want to put peel and stick wallpaper in the closet, cabinets, bookcases, and more!
In our third home, I used this peel and stick wallpaper in our Entryway, this peel and stick wallpaper in our eating area, and this peel and stick wallpaper as our kitchen backsplash.
Using peel and stick wallpaper has definitely given us the ability to update our home quickly without all the hassle of cutting shiplap, faux wood, or tiling!
If you decide to try peel and stick wallpaper, I highly recommend reading my tips on using peel and stick wallpaper and checking out the different kinds of wallpaper that’ll instantly update your space!
How To Paint Kitchen Cabinets Without Sanding
If you love white farmhouse kitchens and want to paint your kitchen white, then you will love this post that teaches you How To Paint Kitchen Cabinets White Without Sanding! I’ll show you how to paint old kitchen cabinets and answer how much does it cost to paint kitchen cabinets (it’s much cheaper than you think!). I also have lots of pictures of painting kitchen cabinets before and after!
You don’t have to worry about how to paint kitchen cabinets without brush strokes because I have a secret in this post that reveals a step-by-step DIY tutorial with how to paint kitchen cabinets like a pro.
–>> Learn how to Paint Kitchen Cabinets without Sanding here!
Cheap Home Hacks that’ll Increase Value
Renovating a home can come with a high price tag if you’re not budgeting and deciding which updates bring the best return on investment. After selling our updated first home in just 4 years, we bought an even bigger house that needed a lot of updating. We sold our second home after 4 years while doing the much-needed work to produce a profit by following the same strategies we did in our first home.
If you enjoy updating your home, want to increase your home value or just want your home to look better, you should check out thee 10 Cheap Home Hacks That’ll Make Your House Look So Much Better.
Tour Our Homes
Tour our First Home here
Take a Tour of our Second Home here
Tour our Third Home here
Psssssttt…Right now I’m offering FREE access to our Digital Resource Library to all of our newsletter subscribers.:max_bytes(150000):strip_icc()/Bathroompedestalsinks-GettyImages-668760099-59e032b5054ad900118655e5.jpg) Your private access includes dozens of free printable crafts, home decor and organization guides. Hurry up and grab your freebies here! (Access instructions are sent after subscribing).
Your private access includes dozens of free printable crafts, home decor and organization guides. Hurry up and grab your freebies here! (Access instructions are sent after subscribing).
Disclaimer: This post may contain affiliate links or a sponsored post. All opinions are always 100% mine and I don’t partner with any product or company that I don’t use and love. Please see our Full Disclosure for more information.
Small Bathroom Remodel
8 Ways to Save Money on a Bathroom Remodel or Renovation
Remodeling a bathroom is one of the costliest home improvement projects. According to HomeAdvisor, the average bathroom remodel costs around $10,911 as of April 2020. A high-end remodel for a large or master bathroom could run you $25,000 or more.
But if those numbers are too much for your budget, that doesn’t mean you have to live with your dingy, dated bathroom forever. There are ways to refresh a bathroom for considerably less. According to This Old House, homeowners have redone their bathrooms for $6,000, $4,000, $2,000, and even less than $1,000.
I also know from personal experience it’s possible to renovate a bathroom on a budget. In 2011, my husband and I redid our guest bath for less than $900, including a new sink, toilet, vanity, faucets, light fixtures, floor tiles, paint, and accessories. With a bit of ingenuity and effort, other homeowners can do the same.
Ways to Save on a Bathroom Remodel
Our budget bath remodel and those featured on sites like This Old House and Apartment Therapy all have one thing in common: The homeowners looked for ways to save money anywhere they could. We didn’t necessarily use the same techniques, but we all relied on numerous money-saving strategies to get the job done for less.
Motley Fool Stock Advisor recommendations have an average return of 397%. For $79 (or just $1.52 per week), join more than 1 million members and don’t miss their upcoming stock picks. 30 day money-back guarantee. Sign Up Now
The tips that helped us and other homeowners save money on our bathroom renovations fall into several major categories.
1. Plan Ahead
During any remodeling project, one of the costliest things you can do is change your plans halfway through. At best, it delays the project while you return materials and buy new ones. At worst, it requires you to pay contractors to redo work they’ve already done.
Sometimes, in-progress changes are unavoidable, such as when you cut into a wall and discover a leak. But in most cases, you can avoid them by thinking things through carefully before anyone picks up a tool. It’s much cheaper to know in advance you don’t want the toilet to be the first thing guests see when they open the door than figure it out once you’ve already installed it.
That’s why the first step in any bathroom remodel is planning. Before you buy anything or hire anyone, think about what you want from your new bathroom. What is it about the room that doesn’t work for you now, and how can you fix it? List everything you want your remodeled bath to have, and then sort that list into must-haves and nice-to-haves.
Take your time figuring out your wants and needs. If you can’t figure out the best way to accomplish all your goals, you can hire a bathroom designer for a consultation. According to Hunker, this service typically costs $200 to $400, and it can help you avoid mistakes that cost money to fix later.
In addition to thinking about the layout, spend time comparing options for visual elements like tile, plumbing fixtures, and light fixtures. That way, when you’re finally ready to get started, you know exactly where to shop to find what you want at the best price. Buying in a hurry often means paying extra or settling for something that isn’t ideal.
2. Keep the Footprint Unchanged
One of the best ways to save on a bathroom remodel is not to remodel at all. People often use the terms bathroom remodeling and bathroom renovation interchangeably, but they’re not the same thing.
A remodeling job involves making significant changes to the room’s footprint, or its size, shape, and structure. It can include making changes to any or all of these:
- The room’s foundation
- Walls, especially load-bearing walls
- Plumbing lines
- Locations of plumbing fixtures, such as the sink and toilet
- Electrical wiring
Renovation means freshening up the bathroom’s look — tile, wall color, flooring, lighting — while leaving its basic layout unchanged.
Changing the footprint adds time and labor costs to the project. It also usually involves getting building permits, which are a significant expense. The cheapest bathroom redos are usually renovations rather than full remodels.
There are lots of ways to change the look of a bathroom without changing the footprint. You can change the fixtures, walls, flooring, lighting, and accessories without moving anything. You can even make a small bathroom feel larger by adding a lighter paint color, a clear glass shower door, or a skylight to let in more natural light.
If you absolutely have to add square footage to your bathroom or change the arrangement of fixtures, keep the changes to a minimum. That way, you limit the number of labor hours you need from expensive contractors like plumbers.
3. Do the Work Yourself
According to HomeAdvisor, roughly half the cost of bathroom remodeling is labor costs. Homeowners spend an average of $65 per hour paying contractors, including carpenters, plumbers, electricians, drywallers, and floor tilers. Thus, the more of your bathroom remodel you can DIY instead of hiring a contractor, the more you can save.
But DIY is only a money-saver if you have the necessary skills. Some jobs, like moving plumbing lines, are best left to the pros. If you try to do them yourself with no training beyond a five-minute YouTube video, you could cause a flood. The damage that does will cost a lot more than hiring a plumber in the first place.
However, most homeowners can handle at least some of the jobs in a bathroom renovation. Depending on your skill level, you could tackle jobs like:
- Demolition (pulling out old wallboard, flooring, and cabinetry)
- Painting
- Tiling
- Replacing faucets and showerheads
- Adding accessories like towel racks
- Installing bathroom lights
- Installing new plumbing fixtures
Homeowners with a little DIY experience can take on more ambitious DIY projects. For instance, when we couldn’t find a stock vanity cabinet we liked, my husband built one from plywood and beadboard.
A Texas homeowner profiled by This Old House made almost all the materials for his powder room renovation. He poured his own concrete countertops, built new doors and drawer fronts for the vanity, and even welded a new frame for the mirror. Another couple in Missouri built their own cabinetry, made custom light fixtures, and enameled an old bathtub.
4. Reuse Existing Pieces
Doing the work yourself is the primary way to save on labor costs. But when it comes to materials, there are lots of different ways to save. One of the most effective is to refurbish the pieces you already have rather than buying new ones.
With a little work, you can change the look of nearly any piece in a bathroom, such as:
- Bathtubs. One homeowner was able to salvage an old, rust-stained tub by having it cleaned professionally. You can also fix surface damage to porcelain, cast iron, and fiberglass tubs by refinishing them. A DIY tub refinishing kit costs around $80.
- Shower Enclosures. A tiled shower enclosure can look like new if you clean both tile and grout thoroughly. The grout may also need some patching in worn areas. To give it a fresher look, you can stain white grout a darker color. If you have acrylic or fiberglass shower walls, you can patch dented or cracked spots. A repair kit costs under $20.
- Sinks. You can dramatically change the look of a sink by replacing the faucet. If the porcelain is cracked, you can repair it with either a porcelain repair kit or a two-part surface repair epoxy. Both cost less than $15.
- Toilets. Rather than paying $100 or more for a new toilet, give yours a new look by replacing the toilet seat and lid for $30 or less. To add a touch of elegance, opt for a wooden toilet seat or soft-close model that doesn’t slam shut.
- Cabinetry. You can save hundreds of dollars on cabinets by painting or refinishing the pieces you already have. If the doors are too damaged, replace them while keeping the cabinet boxes. According to HomeAdvisor, that typically costs $30 to $100 per door, not counting labor.
- Floors. Like shower enclosures, you can refurbish tile floors by cleaning them thoroughly and replacing or staining the grout. If you have wood floors, you can have them professionally refinished for $3 to $8 per square foot, according to HomeAdvisor.
- Walls. The cheapest way to change the look of your walls is to repaint them in a different color. If you have tile walls you don’t like, you can install new wood panels or beadboard wainscotting over the tile. At around $20 per beadboard panel, that’s cheaper than tearing it out and replacing it, and it lets you switch back to tile later if you want.

5. Use Paint Creatively
Just changing the paint color in your bathroom can make a surprisingly significant difference to its overall look. But you can do a lot more with paint than just roll it over a wall. Creative homeowners have used it for:
- Textured Effects. You can give a wall a textured look by using two different colors. Start by giving the whole wall a base coat in one color. Then use a textured tool, such as a sponge, rag, or comb, to apply the second coat. We used a sponging-off technique in our bathroom to create a look similar to stucco.
- Faux Wallpaper. Paint can give you the look of wallpaper with less money and effort. For instance, you can make your bathroom look larger by painting it with broad, horizontal stripes. Or use a stencil to create a pattern on the wall.
- Faux Tile. You can also use paint and stencils on a wood or concrete floor to create the look of tile for less. Just use sturdy porch paint and three coats of polyurethane to stand up to the humid environment.
- Real Tile. According to Sherman Williams, it’s even possible to paint over real tile. Clean the bathroom wall tile thoroughly, scuff it with sandpaper, and apply a water-based acrylic primer. Top it with a durable latex or urethane paint, and you have “new” tile without the hassle and expense of replacing the old tile.
- Refinishing Fixtures. You can use enamel paint to salvage an old bathtub or spray paint and lacquer to change the finish of a sink faucet.
 Paint can give you the look of wallpaper with less money and effort. For instance, you can make your bathroom look larger by painting it with broad, horizontal stripes. Or use a stencil to create a pattern on the wall.
6. Use Cheaper Materials
There are limits to what you can do with paint. But there are many other ways to substitute cheaper materials for pricier ones and get the look you want for less. To stretch your dollars when renovating a bathroom, splurge on just one or two high-impact items, such as countertops or a clawfoot tub, and choose cheaper alternatives for everything else.
There are cost-effective alternatives for nearly every part of a bathroom remodel.
Walls
Tile costs a lot more than paint or paneling. To keep your costs down, limit your use of tile on the walls as much as possible. Use it only in areas that get wet regularly, such as the tub or shower enclosure.
For the rest of your walls, painted drywall is the cheapest alternative. However, wood panels can create a more interesting look at a lower price than tile.
Flooring
Bathroom flooring options fall into three price ranges. The cheapest options are laminate and vinyl, which can cost $1 or less per square foot. Wood and ceramic tile are midrange alternatives, and stone tile is the priciest flooring of all.
If you crave the look of stone, it’s often possible to get it with a cheaper ceramic. One inexpensive bathroom remodel covered by This Old House includes slate-look ceramic tiles that cost only $85 for the whole room.
Tub and Shower Enclosures
If you can’t refurbish your existing shower walls, the cheapest way to replace them is with large panels of fiberglass or acrylic. These cost as little as $100 each and are quick to install.
However, if you prefer the look of a tiled wall, go for porcelain or ceramic tile rather than pricier glass or stone. You can also save time and money by choosing larger tiles. These require less grouting, so you save on labor costs.
If you’ve fallen in love with a fancy designer tile, search for a cheaper look-alike. Alternatively, use the fancy tile as an accent, filling in most of the wall with a more affordable tile. Not only will you save money, but the expensive tile will stand out more.
As for the front of the tub or shower enclosure, a shower curtain is cheaper than a glass door and easier to install. It’s also easy to clean — just take it down and toss it in the washer. And you can easily swap it out any time you want to change the look of the bathroom.
Tub and Shower Hardware
If you need to replace your bath or shower handles, spout, and showerhead, it’s probably cheapest to buy them as a set. These sets, called trim kits, can cost as little as $100 to $200 each.
However, if the handles are still in good shape, it could be cheaper to keep them and replace the showerhead only. A good showerhead contributes a lot more to a satisfying shower than nice-looking handles. Many top-rated showerheads cost less than $50.
Countertops
A stone countertop for your vanity is cheaper than stone counters for your kitchen since it’s a lot smaller. But other options are much less expensive.
According to HGTV, the most affordable countertop choices are laminate and ceramic or glass tiles. Engineered stone and solid-surface countertops cost more, but they’re still cheaper than granite or marble.
If you really love the look of stone, there are several ways to get it for less:
- Use Tiles. Tile your countertop using marble floor tiles instead of a slab. The DIY’ing Missouri couple used this method, paying just $9 per square foot for their marble tiles. With white grout, the joins are hardly visible.
- Use Remnants. Ask local suppliers if they have any stone left over from a bigger job. These remnants are often cheaper than a whole slab, and you don’t need much to make a vanity top. If you’re using a contractor, you can ask them about remnants as well.
- Try Prefab. If your vanity is a standard size and shape, you can save money by choosing a prefabricated slab. It’s cheaper than having a piece cut to size. But it limits your options for color and edge details.
- Choose a More Affordable Grade. Natural stone slabs come in different grades. A slab with more imperfections costs less, and if the flaws are in the center — where the hole for the sink will go — they won’t even show.
- Keep the Edges Simple. Stone and prefabricated countertop materials are cheapest with a plain beveled or bull-nose edge. You can save by choosing these edge finishes over a fancy ogee or waterfall edge.

Cabinetry
The cheapest type of storage for the bathroom is open shelving. You can create wall-mounted shelves with nothing but a plank of wood and some wall brackets. These can go on any empty wall, including behind the toilet, to use all the space in the room.
If you want to keep your bath supplies behind closed doors, stock cabinets are cheaper than custom cabinetry. You can also compromise between the two by choosing semi-custom, ready-to-assemble cabinets. This product lets you configure size and features to fit your space. But the more options you add, the more it costs.
As for cabinet materials, laminate or thermofoil cabinets are cheap and easy to clean. However, they can warp over time, so they may not save you money in the long run. You can save on wood cabinets by choosing pine, maple, oak, or alder over pricier mahogany, cherry, or walnut. If you prefer darker wood, you can buy cheaper pieces and stain them.
The style of the cabinets also matters. You save the most by choosing flat doors rather than doors with raised panels and drawers rather than pullout cabinets. Shop around to find brands of both cabinets and hardware that give you the look you want at the lowest price.
One inexpensive and trendy option for a vanity cabinet is to repurpose an old dresser. You can find dressers through secondhand sources like garage sales and Craigslist for much less than you’d pay for a store-bought vanity cabinet.
Toilets
Considering they all do the same job, there’s a surprising range in the price of toilets. As a rule, round toilets are cheaper than those with an elongated bowl, and two-piece toilets cost less than one-piece ones. Two-piece toilets take up more room and are a little harder to install, but they’re easier and cheaper to repair if they break.
One type of toilet to avoid is a wall-hung model with the tank recessed into the wall. This design saves space, but it’s harder to install and repair, costing you money.
It’s also worth considering water-saving toilets. These don’t cost significantly more upfront, and they save you money on your water bill over their lifetime.
7. Shop Secondhand
Another way to save on materials for your bathroom renovation is to buy them secondhand. The Missouri couple who created a luxury master bathroom on a $6,000 budget got nearly everything used, including a salvaged clawfoot tub, discarded cabinet doors from a kitchen and bath showroom, a scavenged marble scrap for a countertop, and a yard sale mirror.
Shopping secondhand isn’t as easy as going into a store and putting things in a cart. It pays to start early to ensure you have plenty of time to find what you want. While you’re still in the planning phase of your remodel, start checking secondhand sites for items that match your wish list.
Places to find secondhand materials include
- Reuse Centers. If you have a reuse center in your area, you can find everything you need for your bathroom remodeling project there, from tile to light fixtures. When we redid our bathroom, we hit the Habitat for Humanity ReStore and found Italian ceramic tile for under $3 per square foot and a cultured marble sink and vanity top for $30.
- eBay. You can find nearly anything on eBay, including bath supplies. The Texas homeowner who redid a powder room for $705 bought a sink, faucet, and light fixtures from online auctions for $390 total. Just remember to factor in shipping costs when buying online, especially since bath items can be heavy.
- Craigslist. Check the for-sale section of your local Craigslist site for bath bargains. A quick search of the listings on my local group turned up plumbing fixtures, countertops, cabinetry, light fixtures, and even a ventilation fan.
- Nextdoor. Nextdoor is a social media group designed to help neighbors connect. Members can buy and sell unwanted goods through the Finds section. Listings for bath pieces aren’t that common, but it’s worth a look.
- Freecycle. Through the Freecycle Network, members give away unwanted items to people in their area at no cost. Check your local group for free stuff you could use as part of your bathroom remodel.
- Flea Markets. Check out flea markets for antique pieces for your bath remodel, such as a clawfoot tub or an old-fashioned light fixture. Just don’t buy anything you can’t haul home since there’s no delivery service.
- Antique Stores. Antique stores are another excellent source of vintage furniture and materials. But they’re likely to charge higher prices than other resellers.
- Yard Sales. Shopping at garage sales is a hit-or-miss proposition. You can’t always find what you want, but when you do, the prices are terrific. The Missouri couple with the $6,000 master bath renovation made several affordable finds at yard sales, including a $35 etched glass mirror and a marble slab for just $1.
- Your Own Home. Don’t hesitate to reuse materials left over from other projects in your bathroom renovation. Several homeowners profiled by This Old House reused leftover materials, including paint and beadboard.

 The Missouri couple with the $6,000 master bath renovation made several affordable finds at yard sales, including a $35 etched glass mirror and a marble slab for just $1.
8. Look for Bargains
If you can’t get all the materials for your bathroom secondhand, you can save by finding them on sale. For instance, one couple from New York found a cast-iron bathtub on sale for $350. Most new cast-iron tubs cost $1,000 or more.
The holiday season is an excellent time to find remodeling materials on sale. According to CabinetNow, the best seasonal sales on cabinetry occur on Black Friday and in the weeks before Christmas.
However, shopping sales isn’t the only way to find deals on new materials. One of the best ways to find bargains is to shop around. Comparison-shopping websites and tools can help you find the best prices when shopping online. Other money-saving browser extensions can help you find coupon codes to cut costs still more.
Also, don’t overlook discount sites like Overstock.com. This site offers everything you need for a bathroom renovation, from tubs to tile, at prices well below retail.
If you find reasonable prices for several products in one store, but its prices on other things you need are higher, find out if the store offers a price-match guarantee. If it does, you could get the best prices on everything you need at once without having to visit multiple stores.
Finally, if you buy a lot of materials from one place, ask about volume discounts. Home centers like Home Depot offer discounts on bulk sales. It’s primarily for professional contractors, but it can’t hurt to ask.
Final Word
A bathroom remodel doesn’t have to cost a small fortune. There’s no doubt that some upgrades, like a fully tiled walk-in shower or expanding the square footage of your master bath, can run into the tens of thousands of dollars. But with good planning and a little creativity, you can make your bathroom into a luxurious retreat on a much smaller budget.
Moreover, updating or adding a bathroom to your home is a home improvement project that adds value. According to the 2021 Cost vs. Value Report from industry publication Remodeling magazine, homeowners who remodel their bathrooms recover an average of 55% to 60% of the money when selling the home. And if you can manage to add the same resale value on a smaller budget, you can boost that percentage even more.
Do you have other rooms to redo? Check out our articles on budget kitchen remodels and basement remodels.
90,000 Bathroom repair of the bathroom with your own hands + photo
Content
- Organization of process
- Wall design
- Staining PVC PVC PVC
- Wallpaper
- Blinds with tiles
- 9000
- 9000 9000 9000 9000 ’nuances.
- Conclusion
Do-it-yourself budget bathroom renovation is a feasible task. The right strategy when choosing finishing materials and a clear idea of the progress of work will allow even with a modest budget to transform the bathroom without sacrificing quality.
Organization of the process
Good planning is the first step towards successful completion. Most of the work in the bathroom with a budget repair can be done by hand. Removing old coatings, dismantling plumbing or painting can be done even by a novice master.
But if you don’t have enough experience in wall tiling, you should think about inviting specialists to certain sections of the bathroom renovation. Do not overestimate your strengths and capabilities. Sometimes reworking your own mistakes will cost more than inviting the master initially.
Once the bathroom refurbishment work has been distributed, it is time to select the finishing materials. It is better to refuse well-known imported brands. A significant part of the cost is a fee for the brand, which, with a budget repair option, looks inappropriate. The cheapness of Chinese goods is also not the best option.
Tip! Stop at a domestic manufacturer or an assortment from Poland, Slovenia and Bulgaria.
This applies to both bathroom finishing materials and sanitary ware. The combination of reasonable cost and good quality is a distinctive feature of the products offered.
An important condition for a qualitative result when carrying out budget repairs with your own hands is the observance of the technological process. If any stage of the work is in doubt, listen to the recommendations of experts, improvisation is inappropriate.
Bathroom redevelopment automatically increases the repair estimate by several times, so there is no need to talk about a budget option. Leave your ideas for moving walls or plumbing to another place until better times, when there will be no financial constraints.
The amount of preparatory work to remove the old cladding depends on the choice of new materials. Sometimes this step can be avoided. Mandatory dismantling of plumbing is required if it is planned to replace it.
Wall decoration
Economical bathroom renovation includes several options for wall decoration:
- painting;
- installation of PVC panels;
- wallpapering, including self-adhesive film;
- tiling from the budget segment.
Each method has undoubted advantages and some negative points.
Painting
Wall painting is the leading cost-effective finish due to its ease of execution and low cost. A competent approach when choosing paint and high-quality wall preparation is the beginning of the path to success.
Tip! It is not recommended to completely cover the walls of the room with paint.
A project where the areas near the sink and bathtub are lined with inexpensive tiles or moisture-resistant PVC panels is characterized by greater efficiency.
Moisture resistance and antibacterial properties are a must when buying paint, otherwise it will not be possible to avoid the development of fungus and peeling of the coating in the bathroom. High performance characteristics against the background of budgetary cost are inherent in paints:
- latex;
- acrylic;
- silicone.
The absence of a pungent odor is a definite plus of water-based formulations, and silicone paints perfectly function as a hydro-barrier. It is better to refuse the use of oil mixtures. After a short time after the repair, the walls of the bathroom will be covered with cracks.
4
When renovating a bathroom economically, keep in mind that paints with an attractive glossy effect accentuate any irregularities in the walls and make any imperfections more visible. Therefore, careful alignment of the walls is necessary. The advantage of gloss is the ability to visually enlarge the space of a small bathroom.
Bathroom walls often need to be stripped of old paint during renovations. This can be done in several ways:
- use a drill with a special grinding attachment;
- purchase paint remover, in the process you will need another spatula and scraper;
- use thermal methods, when the old coating is heated with a building hair dryer or burner, and the swollen paint is scraped off with a spatula.

Naturally, at the end of the removal process and before the start of painting, the whole range of measures is carried out: sealing cracks, eliminating protrusions, priming.
In the photo is a bathroom with a budget repair with your own hands:
PVC panels
You can repair the walls of the bathroom with PVC panels. At a cost, this will cost a little more than buying paint, but the method has two distinct advantages:
- The appearance of the bathroom after a budget renovation using PVC panels, in terms of design, is incomparably better.
- Extensive wall surface preparation is not required.
The process of mounting the panels does not contain complicated steps and is available for do-it-yourself. After calculating the need for the material, the formation of the crate is carried out. For these purposes, plastic profiles with clips are used. For economical bathroom renovation, wooden slats are also suitable. Pre-impregnation of the material with antiseptics will protect the slats from high moisture.
Wallpapering
Has the right to exist and the option of renovating a bathroom using wallpaper, the main thing is to choose moisture-resistant products. The work is being carried out at a fast pace, the removal of the old coating is not required in all cases. There are 3 main types of wallpapers designed for use in the bathroom:
- Vinyl with non-woven backing. The price is quite high, the repair will require the purchase of special glue, which is not always advisable in an economy project. But high performance is the basis of popularity among consumers.
- Washable. Compared to vinyl copies, they are less practical, the cost of the product is correspondingly lower.
Notice! When repairing with your own hands, it is advisable to avoid pasting areas of the bathroom that may be exposed to water.
- Self-adhesive film. Incredibly practical material, which is initially equipped with an adhesive layer. A wide range of design solutions can create a wonderful transformation with a bathroom after renovation.
 A wide range of design solutions can create a wonderful transformation with a bathroom after renovation.
 High quality and attractive appearance of the self-adhesive are accompanied by 3 negative points:
- Quite a high cost of the product, which may not fit into the budget repair estimate.
- Bathroom walls require careful preparation, as any flaw under self-adhesive wallpaper will be extremely noticeable.
- Rather complex application process. The painstaking process takes much longer than standard pasting.
The photo below shows an economical repair bath:
Tiling
Budget repair also implies the use of tiles in wall cladding. The main thing is to choose an inexpensive product with decent quality. Advantages of the solution:
- the material is resistant to temperature changes;
- is not afraid of high humidity, withstands prolonged contact with water;
- washes well;
- is resistant to mechanical damage.

The following negative points can become an obstacle to use in the bathroom during budget repairs:
The best option when renovating a bathroom with a budget project is a combination of cladding. The area near the bathtub and sink is tiled, and for those less exposed to water, a simpler and more economical method of coating is chosen.
Ceiling finishing
The amount of work on budget ceiling finishing depends on its initial condition. It is enough to cover a flat surface with water-based paint or whitewash. A simple and quick process can be done by hand. It is recommended to remove a significant curvature or mask the communications of the bathroom with a suspended structure. Rack elements or PVC panels are suitable as a material.
The main advantages of the choice:
- affordable price segment;
- simple veneering procedure;
- does not require perfect preparation of the bathroom ceiling surface;
- successfully mask wires and pipes;
- it is possible to mount built-in lamps.
The result of the budget repair is shown in the photo:
Floor covering
Finishing option depends on the repair estimate and the condition of the old bathroom flooring. Sometimes just refreshing the look of a tile is enough. To do this, you will need to remove the grout and pick up a new one that matches the color of the tile.
Quite easy and cheap to lay linoleum, but this measure will be temporary. The increased level of humidity in the bathroom provokes the development of mold on the linoleum.
Notice! To avoid negative consequences during budget repairs, the purchase of PVC-based linoleum or without a base at all will allow.
Tiles are more practical when renovating a bathroom, even at a budget cost. Facing is carried out without dismantling the old tiles. The cost of labor and time will require a screed. To repair the bathroom floor, choose a tile with a rough texture to avoid slipping and not cause injury.
If you’re on a tight budget, the most economical option would be to purchase a large size rubber mat that maximizes the free space of the bathroom floor. It can be changed much more often than any stationary coating, and a fresh look of the interior at minimal cost will be provided.
The nuances of choosing plumbing
Replacement of plumbing in the case of a budget repair is not always carried out. Sometimes they stop at the option of restoring the bath. There are several ways to update:
- Internal surface treated with two-component polyester enamel. Most budget friendly.
- Restoration with liquid acrylic is characterized by greater durability and cost.
- Sometimes both methods are unacceptable due to the deplorable state of the bath. An acrylic tab will save the situation, the fixation of which is carried out with a sealant.

Each method still involves financial costs, although they will be incomparably lower than the purchase of a new bowl.
If a budget renovation involves the purchase of new plumbing for the bathroom, consider the following options:
- Acrylic container. Located at the bottom of the price segment. Easy installation and easy maintenance are the key advantages of the product for the bathroom. A short service life and instability before mechanical damage are the main negative features.
- Cast iron is more practical. The cost is higher than acrylic counterparts.
- Steel bathtubs in their characteristics are between acrylic and cast iron products.
- If the presence of a bathtub in the bathroom is not important, you can think about installing a shower cabin. But the repair will already go beyond the budget.
 But the repair will already go beyond the budget.
 When replacing washbasins in the bathroom, you can choose between hook or leg fittings. The first option is more budgetary, the second has more aesthetics, as it successfully masks communications. The nuances of choosing plumbing and the preference of a domestic manufacturer were discussed in the first section.
Conclusion
Little things can embellish the interior of a bathroom after a budget renovation. An original curtain, decorative stickers and new accessories will enliven the design of the room. Communications are not left open, they will spoil the result of even the most expensive bathroom renovation. A budget way to quickly hide the functional elements of the decor is to form a plastic box. It will take a little time and costs, but the result will be obvious.
-
Finishing the bathroom with tiles (photo)
-
Do-it-yourself installation of pvc panels in the bathroom
-
Small bath design 3 squares with photos
-
bathroom mirror design
7 Tips for a budget bathroom renovation to make everything look beautiful
Communications
See also
Bathroom renovation selection with before and after photos
your efforts to update will be useless: the old communications will leak, and you will have to change not only the furniture in your own bathroom, but also, possibly, make repairs to the neighbors downstairs.
It is not easy to replace the plumbing in the bathroom on your own, but it is possible, and plumbers must be invited to replace the risers.
The most budgetary way of laying communications is according to the external scheme, without wall chasing. The cheapest material from which sewer and water pipes for cold water and hot water are made is polyvinyl chloride (PVC). They are light in weight and easy to install.
Ceiling
Finishing the bathroom must start from the ceiling. You should first clean it from the old coating, using a spatula or a metal brush to remove old paint. If there was whitewash on the ceiling, a damp cloth and a basin of warm water are enough.
Before painting, it is important to level the surface with a moisture-resistant putty and sand it after drying. The most inexpensive ceiling paint is water-based, but more reliable is acrylic. The area of a typical ceiling is small, so it will take a minimum of funds to repair it.
Walls
The most common way to cover walls in a bathroom is to lay tiles. The process carries a lot of difficulties, ranging from dismantling the old tiles to leveling the walls and laying the new ceramic tiles as accurately as possible.
If desired, the lining can be made by hand, choosing an inexpensive material (try not to save on waterproofing and tile adhesive).
Alternative to ceramics:
- waterproof paint;
- PVC panels;
- lining;
- self-adhesive film.
If the old tile is in an acceptable condition – it has not cracked and does not come off – it can be painted after sanding and priming. This will save energy and money. Sometimes only the grout needs to be replaced.
Floor
The most budgetary way to ennoble the floor is to lay high-quality linoleum. It is waterproof and easy to install. But if the floor tiles are in good condition, you can cover it with a special paint with polymers, and put a rug on top so that the coating does not wear out.
More spectacular and relatively inexpensive options – a floor made of mosaic tiles (you can find cheap ones) or pebbles. The second method will bring uniqueness and natural motifs to the interior. Pebbles are easy to install, but the floor from it turns out to be quite hard, like on a pebble beach. The advantage of this coating is the massage effect.
Plumbing
It is well known that you can’t save money on plumbing, especially on faucets – items are installed for a long time, and replacement entails certain difficulties. Do not try to choose the cheapest products – before buying, carefully study the rating of manufacturers and user reviews on the Internet.
If the bathtub is made of cast iron, contact the restorers – the experts will tell you if it is possible to cover the tank with a special enamel, renovating the coating. Often, restoration is cheaper than buying, transporting and installing a new bowl.
The most affordable baths are made of steel, but they require further improvement: to get rid of the noise of water beating against thin walls, the owners cover the outside of the product with foam. In addition, the steel cools quickly, cooling the water. If you want a bath a little more expensive, but better – give preference to acrylic.
View the bath material comparison.
Furniture
Bedside tables and cabinets made of chipboard are inexpensive, but quickly lose their attractive appearance, swelling from moisture and temperature changes. MDF furniture is most preferable, but in order to save money, you can order only a countertop for the washbasin, closing the bottom of the structure with a fabric curtain. Textiles add coziness to the atmosphere, creating a relaxed atmosphere.
You can cut costs by installing an old wooden chest of drawers instead of a purchased cabinet, painting it or covering it with a protective compound.
Wall cabinets do not have to be made to order: look for a design that is suitable in size in the mass market or an Internet flea market – it will look more interesting than a ready-made set of a cabinet and a washstand. Open shelves are easy to make with your own hands from solid wood.
Decor
Despite the relative affordability of repair, you should not save on decor: it is it that comes to the fore in a neutral and democratic interior design. Avoid synthetic materials for a stylish bathroom:
See also
How to choose a bathroom screen?
- instead of plastic shelves, which will turn yellow and darken very quickly from water, get metal ones – online stores are full of a variety of models, and reviews will help you to navigate the quality.
- instead of a polyethylene curtain, choose a product made of polyester: the material is much stronger, more aesthetic and more pleasant to the touch. The curtain can be washed – it will last longer and pay for the costs.
- instead of plastic baskets, look for budget fabric ones or sew them yourself. Wicker baskets are more expensive, but even they can be made with your own hands from ordinary newspaper tubes. Hide small hygiene items in the container so as not to litter the room.
- Making a bathroom rug is also easy: old T-shirts or towels will do. Such a product will look more original and more expensive than a purchased synthetic rug with bright colors.
 Hide small hygiene items in the container so as not to litter the room.
 An ordinary mirror can easily be turned into a designer mirror by framing it with mosaics, shells, pebbles or ordinary rope.
A neat and tasteful bathroom will look stylish and expensive, even if the renovation is based on affordable materials. But do not forget that if you save money during the repair, the process will require additional skills, effort and time.
Small Bathroom Design 2020
Everything you read about small bathroom design is hardly applicable in a real apartment, and all the photos had nothing to do with your renovation. I prepared 9 adequate applicable tips and 103 photos from ordinary real apartments after renovation and relocation of , not in a perfectly clean room.
- 9 design ideas for small bathrooms
- Trendy tiles for a small bathroom
- Renovation in a small area
- Analysis of real photos
- Realized ideas
- Mistakes
9 small bathroom design ideas
Some things may seem controversial, we’ll figure it out below.
- Find space for a narrow vertical or corner cabinet. Usually all the photos on the Internet are taken in a sterile clean bathroom, which in fact does not exist. Design without order makes no sense and maintaining order without closed storage systems is unrealistic.
- The basic style is minimalism. In a small area, our task is to make it as simple as possible. As a result, it will not work, because high functional load, but it will look good. If you are smart with finishing, there will be a collective farm.
- Light colors are much better than dark ones. I myself love dark colors in the interior, but in a small bathroom and a small kitchen, only light ones, take my word for it.
- If the washbasin is deep and the size allows, use a mirror cabinet with hinged doors. In a small bathroom, there is always not enough storage space.
- Countertop bowl takes up less space. There is a useful plane around the bowl.
- Tiles for a small area do not have to be small. There will be a separate item.
- WC with installation. It takes up less space, does not waste the floor, is easy to clean, looks modern.
- The heated towel rail can be conveniently placed in a niche above the installation. But not in terms of usage. But it does not take up space at all and it is easy to supply and drain water. close to the stand.
- I’m attacking your bath. Most likely you don’t need it. Practice shows that even those who liked to lie in the bath, when they have both a bath and a shower, they hardly use the first one. About the design of a bathroom with a shower.

Now let’s take a look at real photos. If you plan to place a washing machine in the bathroom, read about the design of a bathroom with a washing machine. There is a photo with the machine.
Trendy tiles for a small bathroom
For a small bathroom, the choice of tiles is not critical. Yes, she gets off everything except the ceiling, but at the same time all visible areas are small. The main thing is not to be too smart with tiles and not to take something bright and catchy. The idea is simple:
The interior of a small bathroom is not built on tiles, but they can ruin it.
To imagine what is relevant now, see the photo of the tiles in the bathroom. Equally important is the correct laying of tiles in the bathroom.
There are in a bathroom in a small area: a sink, cabinet, mirror, bathtub, wardrobe, toilet bowl, heated towel rail, door, towels, rug, toothbrushes, pastes, tubes, etc. Everything has its own colors, everything blocks the walls. If you choose a colorful bright tile, you will get porridge in 99% of cases.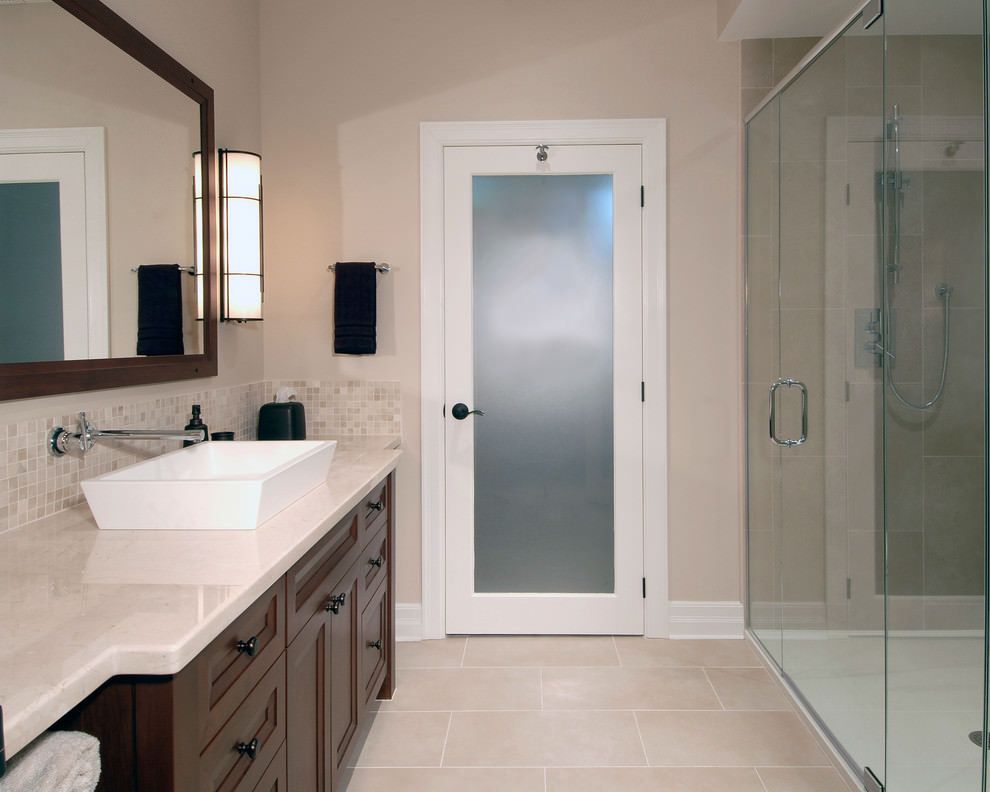 There is not a single item in the photo below, but there are already a whole bunch of flowers. This is how the bathroom can look only after the renovation and before the move.
Choose a light tile. The ideal colors are shades of grey. They do not contrast with the colors of the plumbing, do not narrow the space, and are well suited for the best gray grout. The smaller the area, the more important it is to follow this rule. Read about the design of the bathroom in Khrushchev. Compare from the photo how the design looks in reality in dark and light colors in a small area:
If you really want dark tones, then additional lighting is required – without it, dark walls do not look good.
Glossy tiles are usually a poor choice. But in the interior of a small bathroom – gloss ok . The best semi-matte as usual. If the surface is not flat, but with a texture – good.
for a small bathroom we choose modern design styles, the tiles must match. Imitations of wood, stone, travertine, concrete – approx. Incomprehensible glazed colored tiles that do not imitate any material – not ok. In 2020, natural materials are in fashion in bathrooms.
There is an opinion that tiles in a small bathroom should also be small. In fact, the size of the tile is not so important. If 2 solid ones fit on the wall, it’s fine. The main thing is the correct cladding of its walls. It is strictly forbidden to lay rectangular tiles vertically. This nonsense is broadcast under the sauce of visually enlarging the room and blah blah. No, it’s terrible, you can’t do that.
Never lay rectangular tiles vertically.
You can use spot patchwork on the walls, but there should not be any non-abstract patterns and patterns. Patchwork is also different and for a small bathroom is better suited light cool colors. Use at most on 1 least loaded wall.
and the grout itself is not cheap and it is advisable to take an epoxy grout for it. And if the bathroom is small, then the budget is most likely limited. If you really want to, you can zone some areas with mosaics, but this should be with ideas and with reference to other objects.
You don’t have to worry about floor tiles – there is almost no floor. Its area is already small, part of it is lost under the bathtub and cabinet, the other under the rug. Take porcelain stoneware of a neutral color, grout in color and do not worry. It is better to lay tiles on the floor from the entrance. all other corners will be forced and clippings will not be visible.
Small area repair
Keep it simple. When you actually start using the bathroom, a wild amount of things will appear and any complex design idea will be part of the salad.
Every centimeter counts, and manufacturers allow for tolerances of several millimeters. Solidity is important in design – the smaller the gaps, the better both the appearance and practicality. If your plan includes back-to-back joints, take a tape measure and personally measure all items before buying. This also applies to tiles from different collections.
Try to hide and make everything monolithic. If you say 1 word, base small bathroom designs – neatness .
The bathtub for a small bathroom is rectangular as standard, but there are corner versions that take up even less space. The smallest corner bath 140×90 i.e. shorter than regular cast iron.
Take a matte stretch ceiling. The cheapest option with an acceptable appearance and maximum practicality.
If you have money, then it is ideal to take a mixer built into the wall. Firstly, it does not take up space, and secondly, it does not have the problems of conventional mixers – it does not collect water stains around itself, it does not get dirty from splashes that constantly fall on it.
Analysis of real photos
Photo first, analysis below.
Realized ideas
Bathroom less than three meters without a toilet. There is enough storage space thanks to the large narrow cabinet to the left of the sink. It is in the correct color (white gloss). Due to the color it does not look bulky, although it is very roomy. The bathtub has a folding glass curtain and a bar for a shower head – you can take a shower even while standing and not fill the bathtub. The colors of the tiles are beige and gray, the grout is the correct gray. Part 1 of the wall is accented with a non-navyaschev pattern – it is permissible on 1 wall. Hanging cabinet – convenient to clean, does not occupy the floor.
The eye estimates the area of the room by the free floor. In a small bathroom, hanging a cabinet is important.
An example of a modern classic small bathroom design. A glass for a toothbrush and a soap dispenser are raised from the washbasin. This is important because when they stand on the washbasin, there are constant circles of dirt around them. Glossy tiles in the form of bricks have taken root in all styles, it is unrealistic to spoil the interior. Again, a white glossy cabinet and wardrobe. On the floor, wood-effect porcelain stoneware that does not match in style or color. If the area was larger, it would look bad. But in a small bathroom it is not striking. There are no gaps between the cabinet, cabinet and door trim. The latter is often forgotten and miscalculated.
Enough flowers. Inexpensive neutral finish – background. The colors are added with towel and artificial grass. Therefore, it is important to leave the neutral finish in the small bathroom . Too high concentration of objects with their own colors.
2 examples where modern bathroom design ideas are implemented in a very small area. Light colors, neat chiselled accents and overall airiness = a beautiful bathroom.
Errors
If a photo is included in the errors section, it does not mean that the design of the bathroom there is bad, errors can be pinpoint due to the features of a small area.
A good example of small bathroom design: wood effect tiles in the wet area, decorative plaster on the rest of the walls. Mistakes 2. An ordinary toilet bowl and not an installation. As a result, it does not look modern, it takes up space, a box is visible hiding the sewerage outlet from the shower, toilet paper and other items lie almost on the floor. Installing a hanging toilet would hide all communications and organize a normal storage system above the installation.
Slatted plastic ceiling in the bathroom – the last century. Tension costs the same pennies, but it would have looked normal.
Just a reminder of the benefits of light colors in a small area. Very cool tiles and stylish design, but because of the small dimensions, the bathroom looks cramped.
Visually, the size of this bathroom is reduced to the border of white tiles. For zoning, there are enough differences in color for a couple of tones. There is no need to use such contrasting finishing materials in a small bathroom.
Outdoor storage areas look beautiful only in photos in design projects. In reality, they always create a mess and spoil the interior. Circled on the left is a white grout that has already turned black. The washing machine should also be closed with the same door as on the left.
Wrong choice of tiles (glossy glazed, it’s not clear what), wrong laying (vertical), unprincipled horizontal mosaic borders = design about nothing. New, neat, but does not cause emotions.
Don’t be smart, make enough storage space, choose the right light tiles, use the ideas from point 1, and you’re guaranteed a cool bathroom interior. Read also about the design of the toilet.
Save and share – come in handy!
, glue, sheathe, a bathroom except for tiles cheaply, how to repair inexpensively, economical, cosmetic, photo, design.
A bathroom can be elegantly refurbished, even with the simplest building materials. It is not necessary to purchase elite porcelain stoneware and lay out walls with it up to the ceiling, order stretch ceilings, spend money on arranging underfloor heating with marble, it is enough to have a desire to do repairs, the ability to handle tools and a small fraction of good taste.
Bathroom renovation on a budget
Material content
- 1 What does “budget” mean?
- 2 DIY wall painting
- 2.1 Step 1. Choose the paint for the bathroom
- 2.2 Step 2. Prepare the walls for painting
- 2.3 Step 3. Prepare materials and tools
- 2.4 Step 4. Prepare the workplace
5 2.4 Step 4. Prepare the workplace
5 2.2 Step 5. Start painting
- 2.6 Step 6. Painting technology
- 3 Wall decoration with PVC panels
- 3.1 Step 1. Installing the battens
- 3.2 Step 2. Installing plastic panels
- 3. 3 Video: Finishing the walls in the bathroom in 1 day with plastic panels. Inexpensive repair in the bathroom with your own hands
- 4 wallpaper walls with wallpaper
- 4.1 What wallpapers for pasting the bathroom
- 4.2 Step 1. Preparation of surface
- 4.3 Step Step Algorithm 9000
9000 9000 5 How to repair the bathroom loft-style room
- 5.1 Video: How to save money on bathroom renovation
 3 Video: Finishing the walls in the bathroom in 1 day with plastic panels. Inexpensive repair in the bathroom with your own hands
 What does “budgetary” mean?
Under the word “budget” in the article will be considered options for finishing the most affordable materials:
- paint and varnish;
- PVC panels;
- wallpaper.
In addition, the secret of creating an interior in the loft style will be revealed and it will be proved that brick as a finishing material in the bathroom is not inferior to other materials. After all, “budget repairs” can also be stylish.
Budget bathroom design
Loft style in the bathroom
Vintage bathroom
DIY wall painting
Wall painting is considered one of the easiest and least expensive ways to finish. It is important to choose the right paint and prepare the surface of the walls.
Painted bathroom walls
Bathroom decor
Tip! Design your bathroom. It is not recommended to cover absolutely all surfaces with paint, it is advisable to close the areas near the bathtub and sink with moisture-resistant panels or finish with an apron made of inexpensive ceramic tiles.
Step 1. Choosing a bathroom paint
Bathroom paint should be antibacterial and moisture resistant. Otherwise, the appearance of fungus and peeling of the coating cannot be avoided.
- MOHY -resistant paint
- Moisture -resistant paint for walls and ceilings
- MOHY -resistant painting0765
- Moisture-resistant paint for walls and ceilings matt Tikkurila Luja (Luja Tikkurila)
Latex, silicone, acrylic paints are the most widespread due to their low cost and excellent performance characteristics. At the same time, water-based mixtures do not have an unpleasant pungent odor, and silicone paints can act as a hydrobarrier.
NovaTech Interior Wall and Ceiling Paint
Conventional oil paints lack that merit and crack quickly, so this option is best discarded.
Oil paint
When choosing shades, remember that it is inappropriate to paint small bathrooms in dark colors, as this will visually reduce the space even more. Do not overdo it with the number of bright spots or complex patterns and their number so that the interior does not look vulgar. Soft pastel colors will visually expand the room and fill it with light.
Choose colors from the manufacturer’s catalog
Please note that colors can be matte, glossy and semi-gloss. Of this variety, it is matte enamels that hide small defects on the walls best of all, while drops and streaks are clearly visible on glossy surfaces. However, if you can’t make a choice, consider combining glossy and matte finishes. This technique will make the bathroom modern and stylish without significant costs.
The photo shows a combination of matte and glossy paints
bathroom paint
Step 2. Preparing the walls for painting newspapers, because preparing the walls for painting is the dirtiest and most time-consuming step.
Do not apply new coats of paint over old peeling paint, nothing good will come of it. If you have a drill in your arsenal, get a couple of sanding attachments for it and clean off the old paintwork from the walls. Remember safety precautions. 9No drill? Use paint strippers, a scraper, and a spatula. The method is effective, but it is better to work in a respirator and gloves made of thick rubber.
Remover for old paint
Chemical paint removal
Scraper
If the paint has been applied to the walls for a long time, chemicals will not cope with it. Heat the wall section and scrape off the peeled coating with a narrow spatula.
Removing old paint from the walls with a gas burner
When all the old paint is removed from the walls, it is necessary to repair cracks and potholes, knock down the ledges.
Fill cracks and gouges in the wall
Crack Repair
Step 3: Prepare Materials and Tools
Prepare paint and tools, following manufacturer’s instructions. To apply paint, you will need a roller, brushes, if you have an airbrush – great. Before purchasing, measure the area of the surfaces to be coated, adjust the amount of material, taking into account the volume. For high-quality painting, it is better to apply two layers, keep this in mind at the time of purchase.
Brushes, rollers, ditch
Step 4. Prepare the workplace
Clear the workplace near the walls from unnecessary items, if you are not going to redo the floor coverings, then cover them with film or paper. Carefully protect the tub and sink from dirt.
Protecting surfaces with masking tape
Protecting surfaces when painting walls
Start work from the most inconspicuous corner, in this place you can learn in practice the properties of the paint and, if necessary, dilute it to the optimum consistency. We recommend painting the walls with a roller, and with a brush, treat only hard-to-reach areas, corners and borders of joints of various colors. Panels in the bathroom are still in vogue, if you plan to make them, then mark the height on the wall, draw a horizontal line.
Step 5: Start painting
Apply a deep penetration primer to the wall. It will not only improve the appearance, but also increase the strength of the coating, reduce the likelihood of paint peeling.
Apply primer
Allow primer to dry for 3-6 hours
Apply a second coat of primer over first and wait 24 hours
Pour a batch of paint into a special plastic roller tray. Dip a roller into it, rotate it several times, remove excess paint on a horizontal platform.
Practical advice. To minimize the chance of paint spilling onto the floor, rotate the roller before blowing it out of the tray.
Step 6. Painting procedure
First paint the surface with a brush along the edges
Start painting from top to bottom, this method reduces the likelihood of streaks, they are immediately smeared, the roller “rolls” on them. Paint carefully, do not allow gaps. Don’t be upset if the first layer looks ugly, this is expected. The fact is that on the wall there are areas with old and new plaster, the remains of an unremoved coating, etc. All of them absorb paint in different ways, which is displayed on the outside. The second layer will fix all problems, the finish will be monophonic.
Apply the first coat
How to paint walls with a roller
Paint in small areas, straighten difficult spots with a brush. The paint should smooth out the lint marks on its own. If this does not happen, add a solvent to it. Pay attention so that he is conscientious, read the instructions for use. If in doubt – test the solvent for compatibility with a small amount of material, if the paint has curled – change the solvent.
It is advisable to apply the second layer when the first one is not completely dry, as this increases the adhesion coefficient between them. Checking the readiness of the surface is simple – run your fingertips over it, they should not get dirty, but only “creak” a little.
Paint scheme
Smooth the paint along the ceiling by long horizontal rolling of the roller without loading it with paint. In this case, start working from the top of the wall, the panel is finished last. So you insure against paint getting on already finished areas. Apply masking tape along the border line. Make sure that the paint does not flow under it, paint only with a brush, the direction of movement is in the direction opposite to the adhesive tape. Never stick adhesive tape on paint that is not completely dry, this is very important. If you stick it on a freshly painted surface, then during removal, with a high probability, part of the paint will also be removed with it, you will have to redo everything.
Marking walls for painting
Stick a painter tape
apply paint
Creating lanes
lanes can be horizontal
Original wall decoration
The color transition is achieved by the use of the King
An example
Wall decoration with PVC panels
The cost is slightly more expensive than the first method, but in terms of design indicators it is much better. Yes, and the preparatory work is greatly facilitated, there is no need to remove old coatings, level the walls and close up gaps on them. The crate under the panels can be made of wooden slats or special plastic profiles with clips. We recommend using the second option. The cost of plastic additional elements has almost no effect on the price of repairs, and the work is greatly simplified. In addition, the plastic profile is not afraid of moisture, which is very important for bathrooms. Wooden slats need to be impregnated with antiseptics – an additional loss of time.
Selection of panels for finishing
Calculate the number of panels needed, reserve 5-10%. If you have little experience, and the bathroom has a lot of engineering communications, to close which you need to cut the panels, then take a margin of 10%. At the same time, estimate the number of starting profiles, external and internal corners. They are sold in a standard dyne, they cost a penny, there is no need to save.
Parts for mounting plastic panels
Step 1. Installing the purlin
The panels are arranged vertically, the crate must be made horizontal. The distance between the planks is 50–60 cm. Make markings on the wall, make sure that the lines are parallel. The crate is fixed with dowels, drill holes with a drill with a perforator, use drills with victorious soldering. To prevent the floor from getting dirty with building dust, cover the place near the wall with film or paper. As soon as all the holes are made – immediately remove it. Do not leave cleaning for later, practice shows that no matter how carefully you work, the garbage will surely spread throughout the bathroom.
Make holes a few centimeters deeper than the length of the plastic part of the dowels, otherwise you will not be able to insert them all the way, dust will interfere. First, drill two extreme holes, attach the profile, then fix it in several more places. The horizontal distance between the dowels is 60–70 cm.
The pitch of the battens along the bathroom wall should be 40–50 cm
How to fix the elements in one plane?
- Check the condition of the wall with a plumb bob, paying special attention to the fixing points of plastic profiles or rails.
- Level the two end pieces, recheck their position. If there are large recesses at the place where the profiles are attached, then use linings made of various materials. The dowels must attract the profile over the entire plane; there cannot be a gap between it and the wall at the attachment point.
- Pull ropes between them, two are enough at the ends of profiles or rails.
- Install all other profiles under the rope, use it to control the position of the rails.
Step 2 Installing Plastic Panels
Installing PVC Wall Panels
Panel Installation Diagram
Dimension the wall in at least three places. If they have a spread of no more than a centimeter, then the work is noticeably simplified – all panels can be cut to size at the same time. To do this, you need to find out the shortest, cut all the rest along it. Stack the panels in a stack of 5-10 pieces. cut off on a flat plane and grinder with a disk for metal. A discrepancy of up to one centimeter will be hidden by the ceiling and floor profile. It is installed at the top between the wall and the flow and at the bottom at the junction of the wall and the floor. Put plastic corners on the sides.
Place the first panel, check its position. Everything is fine – fix it with clips. If you have wooden slats, then fasten with staples with a stapler. Both options provide sufficient security for fixing the panels. The first is mounted – install the second, press it against the first until a characteristic click. It indicates that the elements are connected by a lock. According to this algorithm, continue to work until the last plastic panel remains. Insert the ends immediately into the corners.
How to fasten the panels to the clamps
Take the exact dimensions of the last panel, cut it lengthwise. You can cut with a mounting knife or a grinder. If you use a knife, then the operation must be done in two stages. First – cut the top and transverse stiffeners. Second – bend the panel, at the bend on the second side, completely cut off the desired part with a mounting knife.
Finish the rest of the walls in the same way. Practice shows that it is better to make a place near the bathtub from ceramic tiles. It is possible not in the entire wall, but only an apron. The main thing is to close the area, which constantly comes across water during the adoption of water procedures.
Wall paneling
Video: Wall decoration in the bathroom in 1 day with plastic panels. Inexpensive do-it-yourself bathroom renovation
Wallpapering the walls
Wallpaper for the bathroom
Wall decoration with wallpaper
Only waterproof types can be used for wallpapering. This method of finishing has a number of undeniable advantages.
- Low cost allows for an exclusive and reliable coverage with little material loss.
- High technology. Among all the possible ways to finish the walls in the bathroom, wallpapering is the easiest. The work is carried out within a few hours, the room can be used for its intended purpose the very next day.
- It is possible to frequently change the design of the premises. In some cases, re-pasting can be performed without removing the old one – the repair time is significantly reduced, and the amount of construction debris is minimized.

Washable wallpaper
Waterproof wallpaper
The disadvantage is that in terms of physical strength, wallpaper is inferior to traditional materials. But, if you behave carefully and avoid mechanical damage, then the period is calculated for many years. In addition, defects on the wallpaper are easily eliminated, after pasting there will always be a small amount of materials left. Don’t throw it away, keep it “just in case” for repairs.
Which wallpaper to choose for your bathroom
It goes without saying that only water-resistant ones. During the purchase, pay attention to physical strength, and it depends on the material of manufacture.
| Type of wallpaper | Brief performance indicators |
|---|---|
|
Vinyl on non-woven base |
The most modern, can have high indicators of direct mechanical strength Available in a wide range of colors, they can be plain or with various patterns and ornaments, with a structured or smooth front surface. Disadvantages – relatively high price, the need to use special glue. |
|
Washable |
Cheaper segment, inferior to vinyl in terms of performance. It is recommended to use on wall areas that are not exposed to water splashes. |
|
Self-adhesive |
Made from a special polymer film, they have a huge number of design solutions. Disadvantages – relatively high price and complexity of finishing. In addition, they can only be used on perfectly flat surfaces. |
How to glue the wallpaper correctly so that you don’t have to constantly re-glue peeled off areas?
Step 1. Surface preparation
The most important part of the work, of course, apart from the right choice of wallpaper. Wall linearity parameters affect not only the appearance of the wall, which is very important, of course. On an uneven wall, it is even theoretically impossible to glue waterproof wallpaper. And this means that there will definitely be air pockets and other places where the wallpaper is not glued. During the use of the bathroom, these areas constantly increase in size, this continues until the peeling becomes noticeable. Repair will be required, it is quite difficult to perfectly align the wallpaper after repair, and in some cases it is impossible. What are the requirements for the wall surface?
- Roughness must not exceed ± 1 mm. Run your hand along the wall, the palm is severely scratched – a problem. Use a strong steel scraper to cut off all the protrusions.
Sand roughness
- For plastering, use only strong cement-sand mixtures. All the rest, under the influence of moisture, significantly reduce the strength indicators, the glue falls off along with the smallest pieces of the solution, the wallpaper sags.
- Surface must be perfectly dry. There is no air gap between the wall and the wallpaper, there is no natural ventilation at all. A fungus will inevitably appear on a damp wall, and it will certainly destroy the plaster. You will have to make expensive repairs, remove old plaster, impregnate the surface with special chemical compounds (very poisonous, by the way), plaster again and paste over the walls.
- The maximum size of recesses and protrusions cannot exceed a few millimetres. Manufacturers tell the truth that some types of wallpaper hide small bumps. But they do not say anything about the fact that non-glued areas appear in these places with all the negative consequences described above.

Surfaces must always be primed in two coats, this improves adhesion and provides additional protection against moisture penetration.
Wall primer
Calculate the surface area, make a small margin. Each roll of wallpaper indicates the length, width and total area. Use this information when purchasing materials. Do the same when choosing glue.
Step 2: How to apply vinyl wallpaper
Prepare your tools
Pay attention to the manufacturer’s recommendations on which side to apply the adhesive. There are options for spreading on the wallpaper, on the wall or on both surfaces, it all depends on the specific characteristics of the wallpaper.
Preparing the adhesive
Stir thoroughly
Ready-made wallpaper paste
Measure the height and width of the wall, cut the desired number of strips. Stripes, depending on the pattern, can be applied end-to-end or overlap. Cut off with a small margin in length, it will then be removed with a knife, an uneven cut will be buried by ceiling and floor plinths.
Cut off the strip of wallpaper with scissors or a decorative knife
Make sure that the cut is exactly at right angles
Practical advice.
 The most difficult thing to glue wallpaper in the corners of the room. The fact is that they can have slopes, and this has a negative impact on quality. To prevent such consequences, never make junctions of strips at the corners, try to have their middle in these places.
 Next, you need to do this.
- Glue the glued strip to one corner wall, align it strictly vertically.
- Carefully fold the wallpaper, but not all the way into the corner, stick the strip lightly to the second wall.
- Slowly begin to fold the wallpaper towards the corner, keeping an eye on the offset of the second edge, it must always be in a vertical position. The corner of the wall is uneven – not a problem, let there be air pockets in some places, the main thing is that the edge of the wallpaper on the second wall is vertical.
Determining the vertical
Apply a thick layer of glue evenly with a brush
After applying the glue, fold the left edge of the wallpaper strip towards the middle
Read on the wallpaper label how long the glue needs to be left on the wallpaper before sticking to the wall
If you do not follow this nuance, then on the entire adjacent wall the wallpaper strips will be sloping, and this is a big marriage.
Glueing will require a large room, the bathroom, as a rule, does not have such dimensions. Decide where exactly you will prepare the wallpaper. Take measures to prevent contamination of floor coverings, do not allow glue to get on the front surface. When pasting walls with wallpaper, accuracy is one of the important conditions for high-quality work.
Glueing the first wallpaper
Deflated folds and bubbles under wallpaper
Cut excess
Excess glue immediately wipe the
Glue the second clip
Alert
Carefully squeeze air from the wallpaper. You can use rubber spatulas or rollers. But it is best to do the work with clean, dry hands. So you will feel the bumps and be able to eliminate them in a timely manner. It happens that the air pocket is discovered late, several strips of wallpaper have already been pasted. It’s not a problem. Pierce the air bubble in 2-3 places with a needle, after that you can press the wallpaper again, they will take the desired position.
In the inner corners, stick one strip so that it overlaps the corner by 1-2 cm
Stick the wallpaper over the outer vertical edge of the door frame with a small allowance, smooth or cut the allowance immediately
Glue the next strip also over the frame, smooth and cut the rest from the bottom
Without pressing, cover the switch with wallpaper and make a diagonal cut through it. Carefully cut out the edges and press the wallpaper to the wall
After the glue is completely dry, cut off the excess length and attach the skirting boards. Skirting boards are fixed with liquid nails or in other ways, taking into account the material of their manufacture.
Wallpaper in the bathroom
How to renovate a bathroom in a loft style
A rather fashionable style among young people, it is difficult for older people to get used to it. Loft style is a method of repairing various premises, including industrial ones, with minimal financial losses. All structures remain in the same place, construction work on surface finishing is carried out without the use of additional materials. Leave old water and sewer pipes in the same place, you can remove the old paint from them and apply a new one. No need to try to make them match the wall, on the contrary, use contrasting colors that emphasize the placement of pipelines. If problem areas are identified, correct them immediately.
Loft-style bathroom interior
As for the walls, you can remove the old plaster to the brick, fill large depressions with cement-sand mortar, but do not level or rub. Scrub the brickwork with a wire brush, trying to highlight the position of each brick. The older the seam and brick, the better, the more modern the loft will be considered. Everything should be simple and natural, no plastic sheathing, plasterboard and other finishing materials.
Brick wall
Brick goes well with wood
It is recommended to protect the surfaces from the inevitable gradual destruction to cover them with a moisture-resistant varnish. Before varnishing, carefully remove the dust, it is advisable to vacuum the surfaces with a powerful unit. Lacquer use only transparent. Varnish preferably with a pneumatic spray gun. The air jet allows you to process even hard-to-reach areas of the seams, and the strong impact of the varnish drops on the surface increases penetration and adhesion. In addition, repair work is significantly accelerated. And one more plus – old seams can collapse while working with a brush, sand will get into the varnish. This is very noticeable on the front surfaces of the brick.

Lacquer for stone and brick
Professional builders recommend that the area of the wall directly near the bathtub be covered with ceramic tiles, and the rest of the surfaces should be made to look like a loft. This approach will allow you to combine the modern fashionable design of the premises with the preservation of the usual level of amenities. Screen under the bath installation, read the link.
Video: How to save money on bathroom renovations
Budget bathroom renovations – how to do it
Home / Bathroom renovation
Published:
Doing something with your own hands is not only fashionable and pleasant. Such activities can provide some cost savings. A successful combination of cost savings, the pleasure of doing the work yourself, and many other reasons explain the development of DIY technology.
Content
- Time to start repairs in the bathroom
- What do you need to know and be able to inexpensive bathroom repair
- The scale of the bathroom repair
- How to ensure the cheapness of the repair in the bathroom
- finished cladding and economical repair
- ,0005 plumbers
- Economic repair of the bathroom
Time to start renovating the bathroom
The obvious lack of funds for large-scale repairs in the house forces us to carefully consider determining the moment of repair. The desire and need to do everything with one’s own hands must be brought into line with the lifestyle of the family. All repair problems become especially acute when updating the bathroom – one of the key premises of an apartment or house.
The usual variations of this homework are usually linked to the holiday season. It is a little more difficult to make repairs in bathrooms when the whole family is together. Here are some typical complications you need to be prepared for when no one from the family can leave home for a while:
- the need for constant cleaning;
- the need to coordinate each work with household members;
- impossibility to turn off plumbing fixtures for a long time.
Bathroom mosaics can be laid by hand, and how to do it, read our publication.
How to remove silicone sealant from a bath can be found in this article.
What you need to know and be able to do for an inexpensive bathroom renovation
The specifics of the bathroom is its saturation with engineering equipment. This means that the home master must understand the basics of plumbing and sewerage, and besides this:
- understand the operation of ventilation and heating
- understand how electrical wiring is done and how electrical equipment is installed
- have experience in painting, tiling, carpentry, and often plumbing and other work.

In order for a budget bathroom renovation to be economical and efficient, the master must be able to count the costs and analyze them. A developed imagination will help the home craftsman compare options and choose the best, comparing not only the cost, but also the related work and their consequences. We can consider such qualities of a master no less important than the ability to work with his hands.
An amateur specialist must understand that a good economical option for repairing a bathroom is calculated and considered taking into account the present and future needs of the entire apartment.
https://www.youtube.com/watch?v=oZuOeSB-xXU
Scale bathroom renovation
An economical solution must always have certain limits. To make repairs inexpensive and short-lived, an independent home specialist must be able to correctly determine the scope and volume of all work. One of the most important principles of such a strategy is to save everything that can be saved. Refusal of total tiling and attention to color to the smallest detail – and a successful budget solution for a small bathroom has been implemented.
A home craftsman must be able to take risks. For example, do not change old steel water pipes just because they can rust. An experienced craftsman will leave the existing pipes, but will provide for the possibility of quick access to them.
Minimization and optimization of work in the bathroom is the main direction of the efforts of the home master in the implementation of a budget project.
How to make bathroom repairs cheap
To make an economical, budgetary renovation in the bathroom, you need to attack this goal on a wide front. As one of the fundamental measures, it is necessary to develop immunity against the impact of advertising of sanitary ware and materials, which is better replaced by increased competence. Daily self-education on interior technology issues will give very serious results even after a month.
There are several fundamental areas of bathroom renovation, any options for which should obviously reduce the cost of the operation:
- Do not use wet processes – plasters, screeds, tiling with mortar or adhesive.
- Do not touch engineering networks – pipelines, ventilation and electrical wiring.
- Widely use modern claddings from prefabricated piece materials – lining, panels and analogues.
But the main way to make repairs economically is not even in these directions, but in the ability to correctly find your individual option that provides maximum efficiency. This requires the ability to calculate the cost of materials and labor costs. Labor costs are important even when the work is done by hand.
A competent, thoughtful calculation will allow you to do even a budget, but bright and individual work. The conciseness of the finish, for example, can save money on the purchase of an expensive whirlpool bath. A simple and even stingy finish may well make a witty backdrop for expensive plumbing.
Finished claddings and economical repairs
A sure way to save money on repairs in the bathroom is to use ready-made piece synthetic materials in the decoration. There are a lot of advantages, in addition to low cost:
- the use of ready-made piece materials, lining, panels or their analogues can be carried out without surface preparation, even on the old coating;
- installation of finished facings does not cause significant pollution;
- synthetic materials are not afraid of moisture;
- it is not difficult to ensure the exact geometry of the surfaces.
Like most modern building and finishing materials, prefabricated panels or wall paneling do not require as much skill as real plaster. A skilled craftsman can confidently take on such work and, if desired, achieve maximum quality, for example, minimize the loss of bath volume due to the thickness of the finished finish.
A good use for prefabricated claddings can include not only walls, but also ceilings and even floors. The overall quality significantly depends on the little things and details, for example, on the adjunction of the cladding to plumbing fixtures. Well-thought-out adjunctions will provide a high class of such a budget repair.
Sanitary appliances
The choice of low-cost plumbing fixtures also requires some experience. It is important to understand that there are many specially designed inexpensive models intended for mass use. These are the models you need to look for.
First of all, you need to make sure that the plumbing really needs to be replaced. It is possible that a thorough cleaning and replacement of fittings will allow you to leave a completely intact faience toilet bowl and washbasin. Bath restoration technologies can make it possible to save it too. When choosing the cheapest models, you need to be careful, the impossibly low cost is a way to get rid of the product, not to sell it.
Economic bathroom renovation design
When making repairs economically, it is important not to sacrifice the interior for cheapness – a bathroom renovated with visible and even defiant stinginess can make a depressing impression.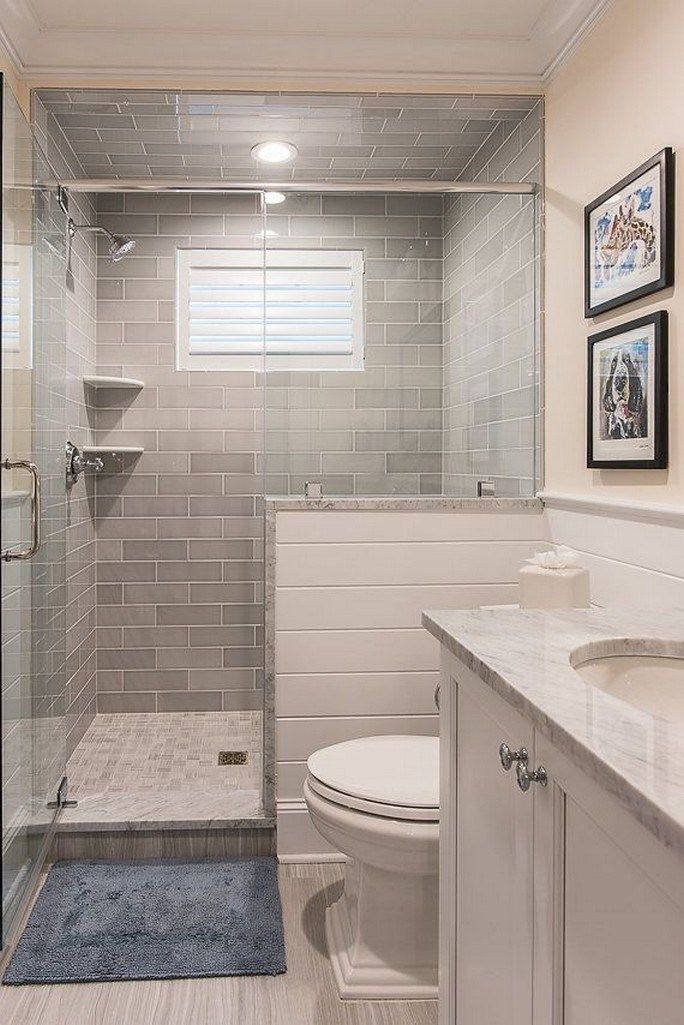
A beautiful and witty design solution can help out. The basis of such a decision is a clear and effective idea. Here are examples of such a fundamental bathroom interior idea:
- bright, cheerful and original color;
- witty and unexpected placement of plumbing fixtures;
- unusual finishes.
A home master – a craftsman must spend time studying analogues, exchanging opinions with others, consulting specialists. It is good to call for help from women – the representatives of the fair half are focused on design, and not on solving technical problems that can completely absorb the attention of the master.
Do-it-yourself design and implementation, done effectively and economically, is not an easy task, but its success is the basis of good mood and progress in other projects.
Did the article help you?
Ask a question
Ask questions, write recommendations in the comments
Read also:
- High-quality bathroom renovation with a guarantee
- Bath screens: types, installation, materials
- Bathroom edging: rules and tips for sealing joints
- Types of materials that can be used to paint bathroom walls
Rating
(No rating yet)
Did you like the article? Share with friends:
Do-it-yourself budget bathroom renovation.
 Bathroom design cheap and beautiful DIY
Contents
- Do-it-yourself budget bathroom renovation. Bathroom design cheap and beautiful with your own hands
- How a woman can make repairs in the bathroom. Budget bathroom renovation
- What does budget renovation mean
- How to choose inexpensive materials
- Stylish cheap renovation
- Budget flooring version
- Budget renovation of a small bathroom. Wall decoration
- Budget renovation of a bathroom without tiles. Bathroom design without tiles on the walls
- Terrazzo
- Concrete
- Natural stone
- Artificial stone
- Painting
- Brick
- DIY bathroom renovation interesting ideas. DIY Bathroom Renovation – The Best Ways to Create a Beautiful Interior! (71 photos)
- Step 1: Calculate the amount of building materials
- Step 2: Remove the old surface
- Step 3: Repair the floor
- Do-it-yourself bathroom renovation in Khrushchev is inexpensive. New bathroom in Khrushchev: how to make a beautiful redevelopment
- Bathroom layout
- with a shower
- Bath, combined with a toilet of
- Color solutions for the bathroom in Khrushchev
- White
- Multi -colored tile
 New bathroom in Khrushchev: how to make a beautiful redevelopment
budget repair of the bathroom with your own hands. DIY bathroom design cheap and beautiful
To equip an aesthetic bathroom, it is not necessary to spend a lot of money on expensive materials. PVC panels and inexpensive tiles are perfect. It is recommended to make a stretch ceiling. This will not only hide the ventilation communications, but also ennoble the interior, align the transitions and joints of the plates.
Refreshing a bathroom is often enough:
- Paint old walls or clean tiles. A new color is always refreshing and immediately changes the look of the room itself.
- Highlight the joining seams of finishing materials with a contrasting color.
- Lay out the floor with decorative stones.
- Refresh the color of the decor, install a mirror, hang hooks, handles with a “zest” in the design.

Thanks to the large selection of decorative materials on the market, any design can be realized. Some examples:
- The simplest design and economical option is PVC panels. This is strength, freedom of choice of colors, ease of installation, easy maintenance.
- Laying ceramic tiles. Durable tiles with various patterns will last for a long time, focusing attention on themselves. The downside is that it is an expensive material. And laying tiles for a beginner is not the easiest option. Therefore, in this case, it is recommended to invest once in the services of specialists laying ceramics so that the floor is perfect.
- Paint. Almost completely forgotten decor of bathrooms. Pretty handy option. Beautiful colors or their overflows will please the eye for many years and will not fade. You can design your own interior and draw pictures. There are disadvantages – it is desirable to make plastic or ceramic inserts in places of possible contact with water. Because the paint (even moisture resistant) will not be able to maintain its original color for a long time with prolonged contact with water (mold, calcified deposits).
- Decorative plaster. The leader in wall decoration. Such processing looks rich, you can create whole pictures. The downside is that if you want to create a complex design, you will need the services of a master.
- Artificial stone. Infrequently in the bathroom there is wall decoration with artificial stone. But, despite this, he is very good in the “bath” business. It can be combined with other materials, which gives the room its own charm. But it should be borne in mind that such a wall is very difficult to repair if necessary in the future.
- Self-adhesive film. A very low price and a variety of patterns now puts this product in the lead among very budget options. It is very easy to maintain, easy to apply to the surface, environmentally friendly. But, corresponding to the low cost, the material is very fragile. It’s worth considering.
 You can design your own interior and draw pictures. There are disadvantages – it is desirable to make plastic or ceramic inserts in places of possible contact with water. Because the paint (even moisture resistant) will not be able to maintain its original color for a long time with prolonged contact with water (mold, calcified deposits).
  It is very easy to maintain, easy to apply to the surface, environmentally friendly. But, corresponding to the low cost, the material is very fragile. It’s worth considering.
 Source: https://interer-stil.ru-land.com/stati/byudzhetnyy-remont-vannoy-svoimi-rukami-otdelka-sten
How a woman can make repairs in the bathroom. Budget bathroom renovation
Cheap bathroom renovations are easy to do yourself and at no extra cost. Mandatory use of expensive porcelain stoneware, laying warm marble floors, ordering stretch ceilings is not acceptable for every family.
What does budget repair mean
The most elite materials are not always an indicator of style and good taste.
The bathroom can be finished cheaply in a loft or minimalist style, while still looking nice and trendy.
The cheapest finishing materials include: wallpaper, PVC panels, paint emulsions and compositions.
Inexpensive trend – brick finish, which is not inferior to ceramic tiles and suitable for the bathroom.
In order not to purchase a large number of tiles and not to cover all the walls with it from floor to ceiling, you can paint them. The antibacterial and moisture-resistant properties of modern paints allow this to be done without sacrificing quality.
Before work, prepare the surface and choose the right paint. Consider the size of the room – dark colors should not be used for small rooms. It is worth choosing light pastel colors that will visually expand the room, make it lighter.
It is recommended to choose colors and draw up a design project in advance. It is not necessary to paint all the walls, lay out the areas near the sink and the bathroom with tiles or cover them with moisture-resistant panels.
There are two more repair options available:
- Finish with PVC panels.
- Cover with wallpaper.
All finishing methods have their own nuances, advantages and disadvantages. First of all, the room should be beautiful, comfortable and functional.
How to choose inexpensive materials
For painting ceilings and walls, it is recommended to buy moisture-resistant paints, when using oil dyes, fungus or cracks subsequently form.
Buy acrylic, latex or silicone paints for an economical option combined with excellent performance. Matte paints Luja Tikkurila or “Optimum” are suitable for the bathroom.
Aqueous emulsions do not have an unpleasant pungent odor, and silicone coatings are a good waterproofing barrier.
A combination of several types of coating will help to avoid high costs – matt and glossy are suitable for the bathroom, semi-gloss emulsions are also used.
PVC paneling will be more expensive than painting. But it will take less time – no need to clean the walls of old coatings, level them or close up gaps.
For this finish you will need a crate, it is made of plastic profiles or wooden slats. It is better to use the first option, because plastic is resistant to moisture, and wooden slats will have to be impregnated with a special moisture-resistant solution.
The simplest and least expensive type of bathroom covering is wallpaper, which must be moisture resistant.
You can paste the wallpaper yourself, spending several hours. They are not as durable as other materials, but they are easy to change and, with careful use, last for years.
The most durable and modern wallpaper for a room is non-woven vinyl. They are more expensive than washable and self-adhesive, but more durable and reliable.
The most affordable option is washable wallpapers, they should not be glued to areas that are exposed to direct moisture.
Stylish cheap renovation
If you decide to make a simple and cheap but stylish renovation, consider the following:
- Do it yourself, do not hire workers.
- Buy inexpensive but quality material.
- Don’t buy wallpaper, paneling, or paint from the first store you find. Monitor prices, call several sellers – the task is to choose the best value for money.

Remember that self-repair requires time and effort, so it should be done for 5-7 years. Before starting, evaluate your design ideas and the allocated budget.
Budget version of the flooring
The bathroom is characterized by poor ventilation and high humidity. Therefore, flooring should be given attention. Finishing material must be resistant to mechanical wear and aggressive damp environment.
The floor is under heavy load, so it is better to lay a tile. Its area is small, it will take a little material. In order to save money, you can purchase goods from last year’s collection.
If you decide not to use tiles, use linoleum. For its laying, it is not necessary to remove the old coating.
Budget renovation of a small bathroom. Wall decoration
Talking about how to renovate a bathroom cheaply, with a budget renovation, you probably will not consider expensive Italian tiles of increased strength with a non-slip coating and the ideal geometry of each product. Here it is also important to take into account the policy of manufacturers, which is similar to the situation with the glue described above. When considering a cheap bathroom renovation, we do not take into account elite tiles made from special grades of clay with all kinds of additives and additives, but look at products of a budget or middle class.
Choosing an inexpensive bathroom tile
In the vast majority of cases, tiles of medium or low price category do not differ in their composition. Inexpensive bathroom decoration from cheap tiles differs only in the appearance of the glaze. Of course, products of the middle category have a wider range of shades and a variety of texture solutions. In this case, when repairing an economy class bathroom, you should not chase after a chic appearance, you can get by with more restrained solutions, but beat them very worthily.
Budget bathroom renovation without tiles. Bathroom design without tiles on the walls
The starting point in creating a bathroom interior without tiles, we have become a mutual sympathy for porcelain stoneware panels, but to completely clad the space with one material means to make it visually flat. Therefore, we began to look for combinations with other cladding options. The main condition is that the finishing materials are combined with each other.
So what we considered in our bathroom:
Terrazzo
Of course, not the most budget option. Given that the mosaic coating is a mixture of small fragments of natural stone, glass and pebbles. But as the main trend of 2020, we couldn’t ignore terrazzo. Here is a beautiful project of a bathroom where the tiles were replaced with terrazzo:
Instead of tiles, it is fashionable and practical to decorate the walls in the bathroom with monochrome terrazzo
Concrete
Not soon, it was tempted by its cheapness and the possibility of coloring over time. But, after a detailed study, it turned out that the concrete in the bathroom eventually deforms from moisture. If installed incorrectly, it begins to dust and become covered with cracks. If concrete instead of tiles does appear in your bathroom, here are the interiors to consider:
The photo shows a concrete-look bathroom with a decorative terrazzo panel
Natural stone
If, like us, you are planning a budget alteration, then natural stone can be replaced with composite marble veneer. Do you have funds for onyx and traventine? Then know that such a bathroom will last more than 100 years) surfaces made of semi-precious minerals are not afraid of any dirt and moisture. But chips and scratches can still form.
Artificial stone
To be honest, this finishing option for our bathroom interested me the most. Well, firstly, a huge selection of patterns and textures of artificial stone. Under marble, under a stone, with a 3D relief. Realistic imitation of metal and concrete, rich choice of shades. And secondly, the practicality and durability of artificial stone panels.
Scroll through our selection of ideas for decorating an accent wall with artificial stone and write in the comments, would you include such decor in the interior?
In the photo of the bathroom instead of tiles, ceramic panels 3D
Painting
The larger the bathroom, the more reasons not to use floor-to-ceiling tiles. Still, tile is the most expensive type of bathroom decoration. We planned to significantly reduce the cost of cladding with the help of good waterproof paint. But as it turned out, it is also expensive.
In the photo of the bathroom, the color is focused on the washbasin.
It is better to choose silicone paint for the bathroom. Such a paint has a complex composition, which, despite free vapor permeability, does not lend itself to hot steam and is able to self-clean itself! Not bad, right?
The photo shows the paint in the bathroom instead of tiles
The photo shows the wall in the bathroom for painting with a transition to tiles
Tip: to visually add a few centimeters to the bathroom, paint the floor plinth in the same color as the wall.
Brick
Yes, bathroom walls are an endless field for decorative solutions. How do you like the idea of \u200b\u200bdecorating with bricks. So, this year the boar tile is no longer relevant. The trend is brick with its natural cracks and roughness. Your bathroom will get every chance to become the most stylish room in the house if you paint the brick wall in the bathroom white, terracotta, black, blue.
The photo shows white brick in the bathroom without tiles
Experts recommend using not real brick in the bathroom (it is too bulky for city apartments), but its plaster imitation. Visually, such casts are no different from antique bricks. And replacing tiles with such material is much more profitable. Gypsum is cheaper, it withstands temperature changes easily.
Do-it-yourself bathroom renovation interesting ideas. DIY Bathroom Renovation – The Best Ways to Create a Beautiful Interior! (71 photos)
To make a quality bathroom renovation, it is not necessary to have large finances. After all, if you want, you can save a lot of money.
For example, you can refuse the services of a designer and come up with the style in which the repair will be done.
You can also save money on the construction team and do everything yourself.
But in order for the process to be established and the result to be achieved, it is necessary to draw up a detailed action plan in advance.
So, you will need:
- Come up with a design;
- Stock up on the necessary materials and tools;
- Make an estimate;
- Calculate the exact dimensions of the bathroom and plumbing fixtures;
When choosing a design, you need to pay attention to the area of the room. Owners of a small area should take into account that a small space is less functional.
Light colors in the interior and large mirrors on the walls will visually enlarge the room.
You can omit the installation of a bathtub and opt for a shower cabin. Thus, there will be more space in the room.
For hygiene products, space-saving hanging cabinets can be hung instead of bulky floor cabinets.
Once you have decided on a design, you need to draw up a plan of action. After all, in order for the process to go on continuously, all actions must be performed sequentially.
Neglect of previous work can significantly affect the final result.
Step 1: Calculate the amount of building materials
This is a very important stage in the repair. An unpleasant moment may be that if the calculation is not correct, there may not be enough tiles, panels or other building materials.
Indeed, during the cutting and laying process, part of the material may be damaged. To avoid such an incident, you should initially purchase building materials with a margin.
Step 2: Remove the old surface
To remove tiles from the walls and tiles from the floor, you need to stock up on a hammer and chisel. However, it will be easier to cope with the work with a puncher or drill. There are two dismantling options: sparing and emergency.
The first is made with a hammer and chisel. First you need to soak the grout, and then carefully separate each tile from the wall or floor.
The second option is much faster, but more “dusty” and “noisy”. To do this, you just need to demolish the coating in layers with a perforator.
Step 3: Repairing the floor
Install the screed first. If the installation of an additional “warm floor” system is not provided, then the height of the screed will be 1-1.5 cm. The height will be 3-4 cm if the floors are further insulated.
There are several types of “warm floor” system: water, film and electric. Any of the systems retains the microclimate in the bathroom well, at the same time it has a low cost and is easy to install.
Do-it-yourself bathroom renovation in Khrushchev is inexpensive. New bathroom in Khrushchev: how to make a beautiful redevelopment
Small-sized apartments, inherited from the Soviet past, cause a lot of trouble for the owners.
For example, the renovation of a bathroom in Khrushchev requires special ingenuity due to the limited space in it and the presence of standard communications. Nevertheless, modern decorative and technical solutions simplify the reconstruction of such a room.
Now everyone can create a cozy bathroom design in Khrushchev, and you can get inspiration just by looking at dozens of ready-made solutions.
Bathroom layout
m when combined with a toilet option and 2 sq. m with separate.
Any repair begins with the removal of the partition between the bathroom, thereby increasing the usable area of the room. It is advisable to leave a separate option only if there are small children in the apartment.
No less problematic is always the question of communications. In standard bathrooms, very often they cannot be moved to another place, and laying additional pipes greatly increases the cost of repairs.
Thus, when planning a design, it is recommended to focus on the established communication outlets without changing their location.
With shower cabin
If you remove the wall between the toilet and the bathroom in Khrushchev, you get a niche into which the shower fits. This type of bathroom layout is becoming more and more popular. Here it is desirable to lay out the walls and floor with tiles, and use tempered glass as a fence.
There is another option – a corner shower.
Both the prefabricated structure and the pallet with guardrail can be used. But the space inside the room will be less than with the first method, and the toilet bowl with the sink will have to be placed on the left and right sides.
Bath combined with a toilet
In order not to waste useful space, it is recommended to combine a bathroom with a toilet in Khrushchev houses. Instead of a shower, you can install a full bath. The standard layout provides for its presence in the allotted space 175/75 cm.
The disadvantage is that there is no space for a washing machine, which, however, is easily solved by placing it under the sink. The option is convenient in that there is no need to redevelop the entire bathroom.
Color solutions for the bathroom in Khrushchev
The visual perception of the room will depend on the right design. For small bathrooms, you should look at solutions such as minimalism or modern.
Soft colors with simple shapes increase the space without overloading it with unnecessary details. Classic design options with decorative elements, a bright palette of colors and wooden furniture are more suitable for large bathrooms.
After the renovation of the bathroom is completed, there will be colorful rugs, towels, bottles and tubes. At the construction stage, these colors should be taken into account.
But within 3 sq. m is allowed to use a maximum of 2 colors. Many will argue that this bathroom design is very boring, however, with a carefully done renovation, even a monotonous design looks great.
White
For the bathroom, colors approaching light are suitable. Usually they are already present due to plumbing and ceiling, therefore, one way or another, they will look advantageous along with other shades.
Benefits:
- When washing in the sink or showering, drops form on all possible surfaces.
